You must be logged in to rate content!
8 minute read
Thottle body / Idle Control Valve - 3.0 Motor
Compliments of joeshmoe @ http://acurazine.com
7-8-2004
I had to do some work to the car a couple weeks ago because my car was idling very funny. These are instructions for how to remove parts of the throttle body assembly. I figured since I went through all this just to change/clean my idle control valve, I’d document it for all you guys and gals. Mods, I’m sure you can decide what to do with this thread for future use.
Just some general info. You will need a socket wrench 3/8” drive should be fine with 8mm (I think), 10mm, 12mm sockets, Phillips and regular head screwdrivers, strong set of small pliers, hacksaw or chisel or dremel tool (all not required but for what I did I needed it), a razor blade, and plenty of light (for you newbs trying to use just a flashlight). I can think of anything else, but I may have forgotten something. Also most of the hose clamps are either screw clamps or need to be removed squeezing them with pliers to loosen, not remove completely.
1)Remove the plastic cover on top of the throttle body and remove the battery and the black plastic battery holder. This will give you more room to work with and your going to have to disconnect the battery anyway to reset the computer so removing the battery helps out.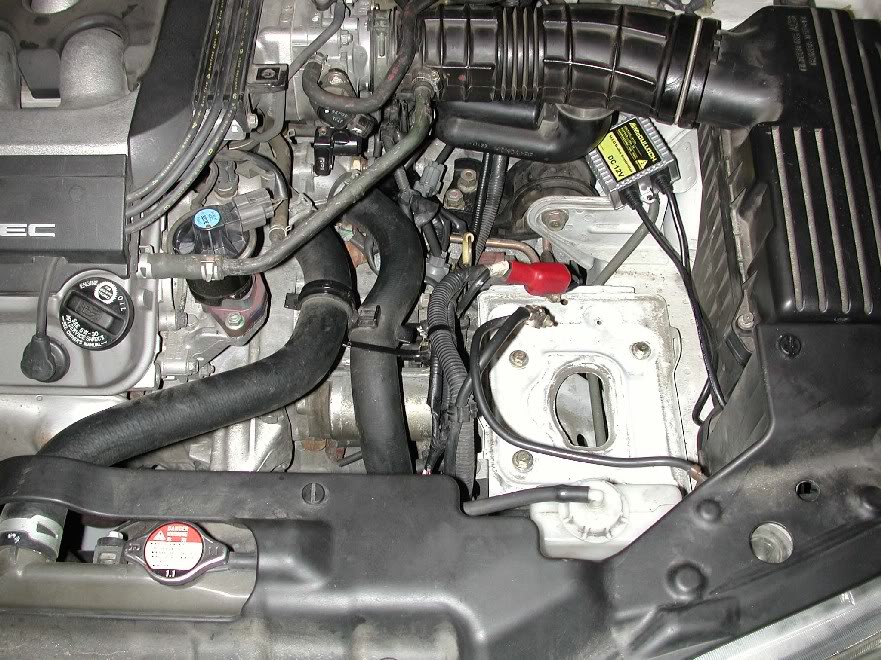
2)Next, remove the intake hose. You have to disconnect these clamp/hose assemblies first. There will be one more air hose connected to the other side of the intake hose which is a pain to remove so I just left it in and propped up the whole thing towards the back of the engine bay, out of the way.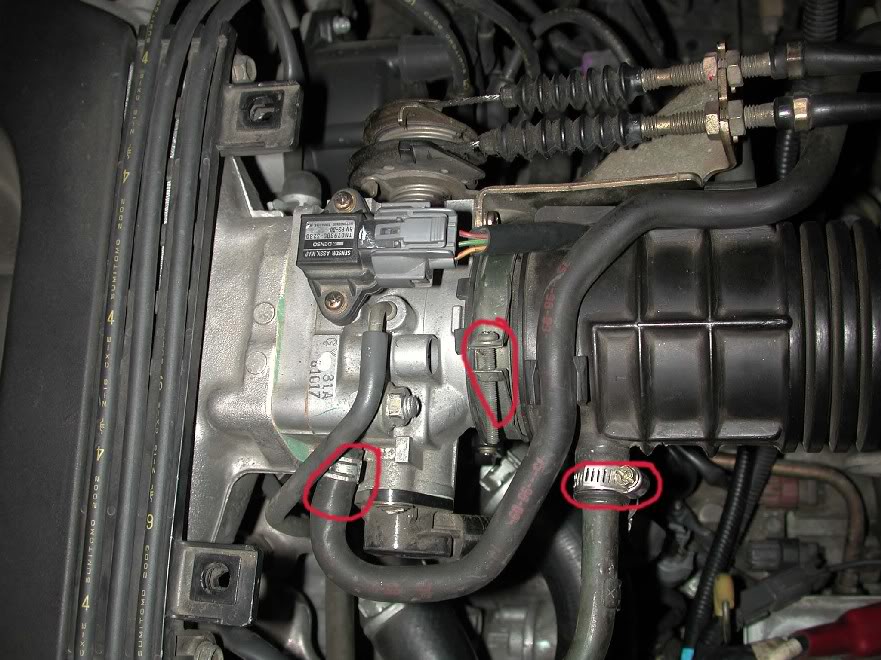
3)Next disconnect the following to remove the throttle body.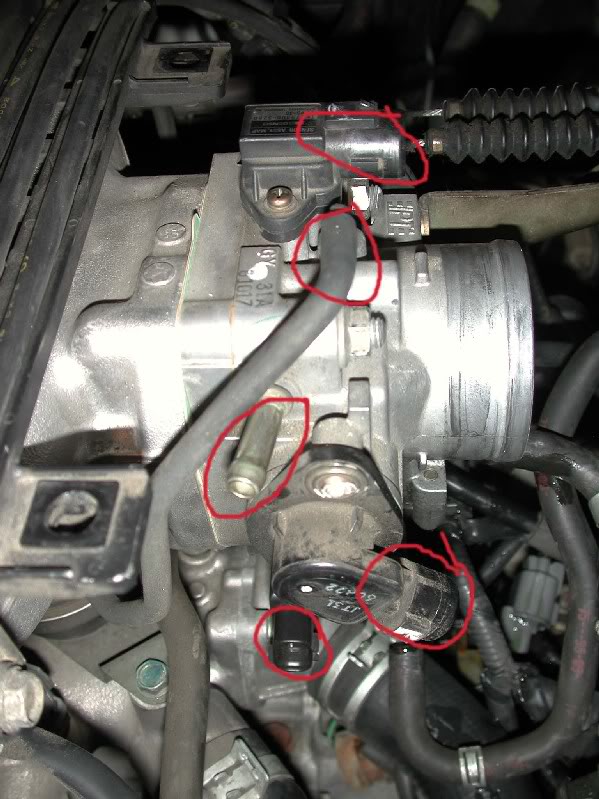
Once all of these connectors and hoses are disconnected, you have to remove the throttle cable assembly. There are two screws to remove circled in red. The opening in the throttle body circled in green is were the ICV gets the air from, just FYI for you.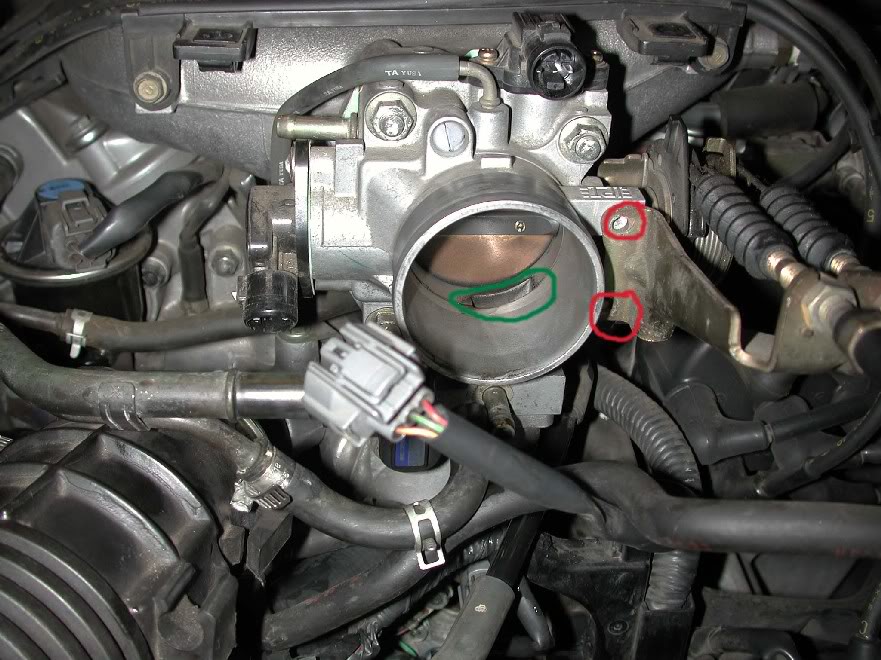
Then disconnect the throttle cables. There are two cables connected to the rear/bottom of the circular spring assembly. All you have to do is compress the spring to give you slack and remove the anchored end of the cable out of the slot were the wire locks into the spring assembly. You can do it with your hand easily. If it seems to stiff, then the spring assembly is not compressed enough.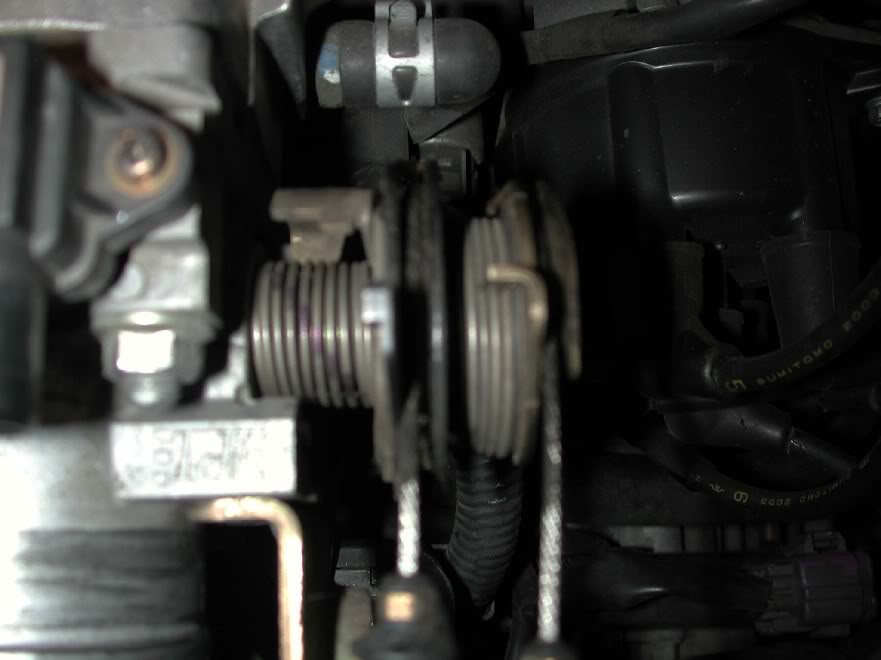
These are the final two hoses that are directly from the ICV at the bottom of the throttle body. They are coolant lines and will leak a small amount of fluid when they are removed. The top one is the input and the bottom is the return FYI. Just place a rag underneath to soaked up the coolant before it drops all over the place.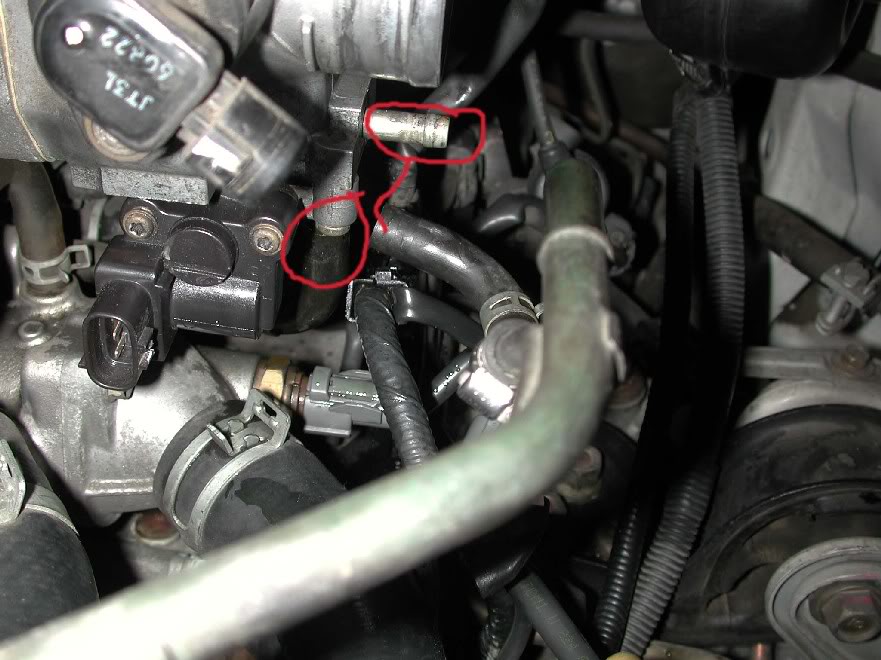
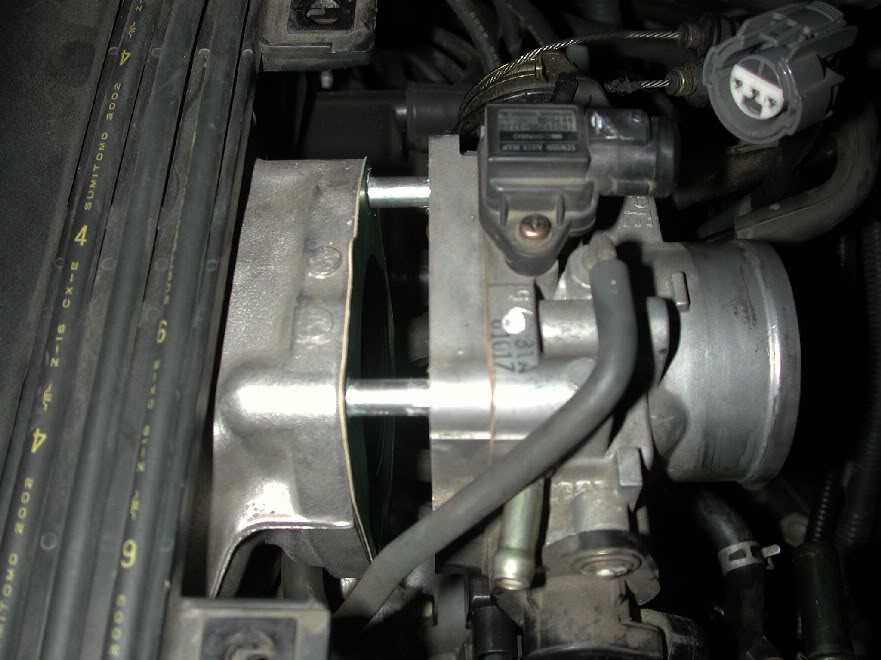
4)Now you can remove the throttle body. There are 4 bolts. The top two are stationary bolts and all you remove are the 12mm nuts and the bottom two you have to remove the entire bolt (go figure Honda engineers? ).
).
5)Flip the throttle body over and you’ll see the ICV and the two screws you need to remove. WARNING: SPRAY THESE SCREWS WITH PENETRATING LUBE. These can be surprising tough to remove and if you strip it, that’s were the headache begins.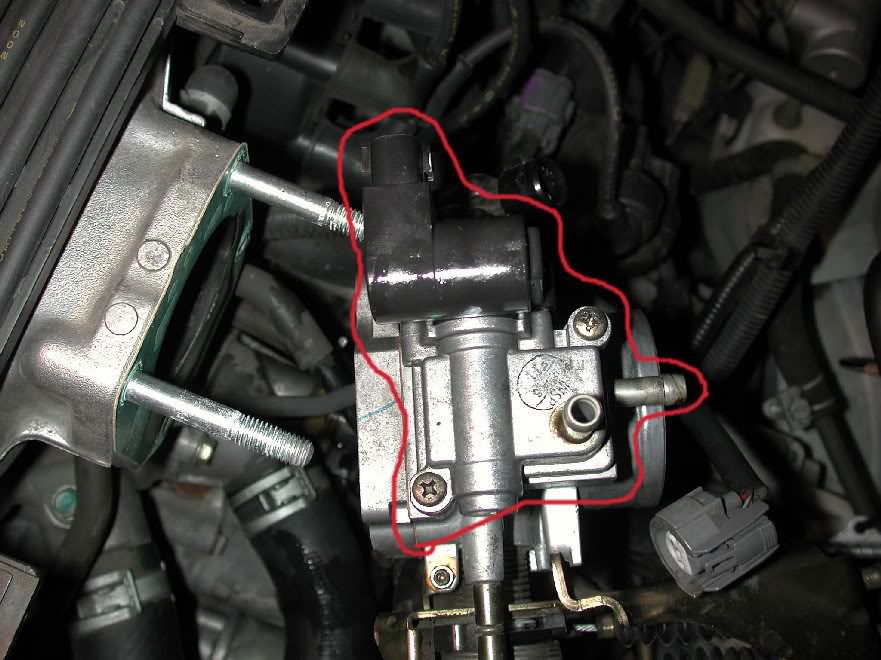
6)Now this is where you can go one of two ways. You can replace the whole ICV by simply using the 2 existing screws to attached the new ICV back to the throttle body, which is what I ended up doing anyway. OR try to clean out the two circled areas where the actual valve is located with some carb cleaner. I did this and put everything back together just come to the conclusion that I needed to replace the whole thing ($100 at the Honda dealer, but $70 for me )
)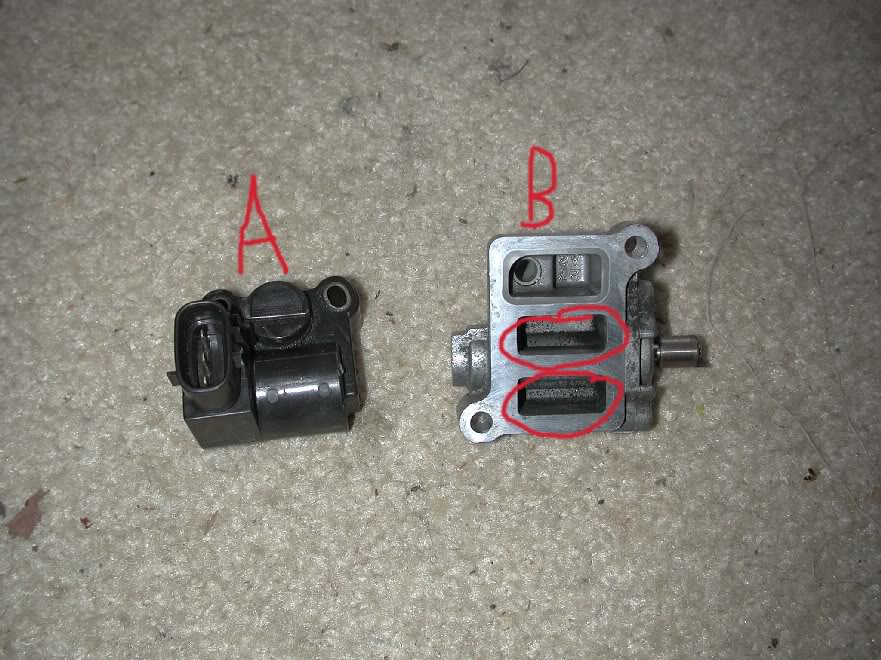
Now the ICV is made up of two parts. What I like to call the electronic part (“A” in the pic) and the mechanical part (“B” in the pic). The mechanical part has a circular valve the spins, opening and closing the 2 red-circled areas. This is controlled by the electrical part, which uses a magnetic power source to spin the valve. Pulling the two pieces apart reveled to me that this piece is magnetic. Applying power, I figured that the electrical part was not working on mine, which is why I had to get a whole new ICV. Some people claim that cleaning out the mechanical part should do the trick. That is only if it is clogged or has a lot of carbon deposits.
This is just so you all can see what the throttle body underside looks like with out the ICV attached.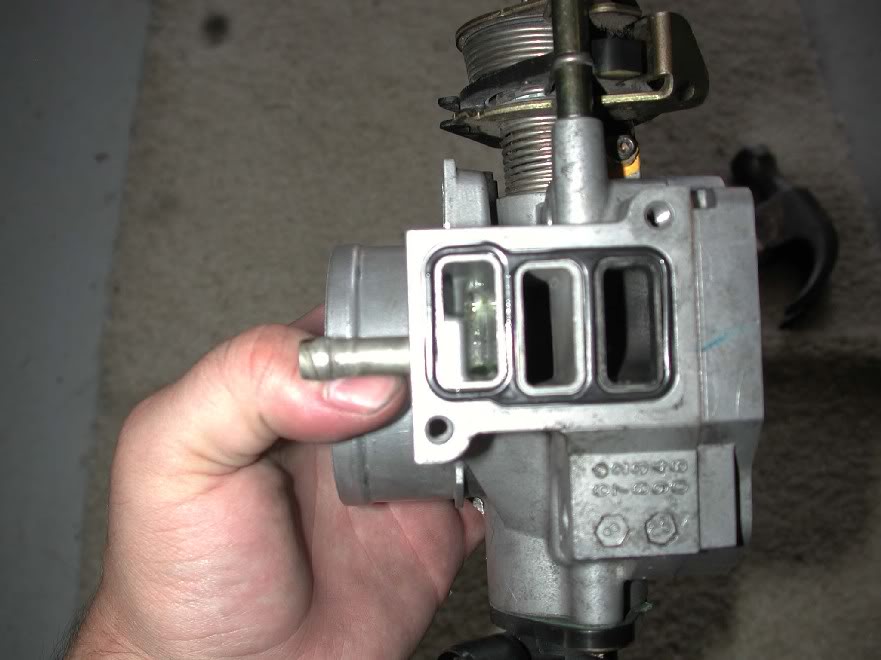
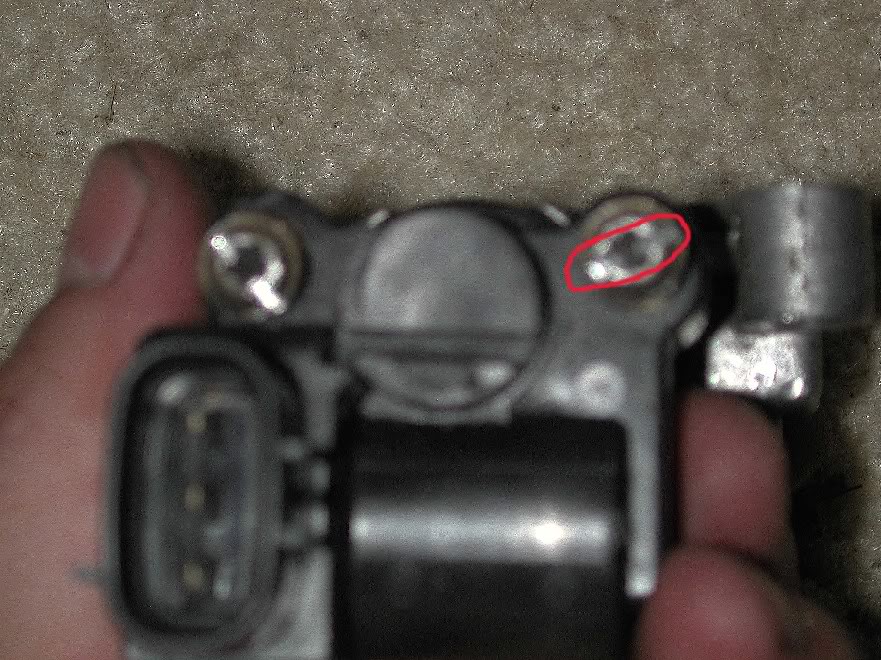
The ICV has two special “Honda” 5-point screws that require a special tool to remove.
WARNING: YOU DO NOT NEED TO REMOVE THE TWO PIECES FOR ANY REPAIR AS YOU CANNOT BUY EACH PART SEPARATELY. I did it just to see what it looked like since I was going to have to get a new one anyway. I used a dremel tool to slice some slots where I could fit a regular head screwdriver to unscrew them (FU Honda )
)
This is the mechanical portion of the valve that is inserted into the electrical part.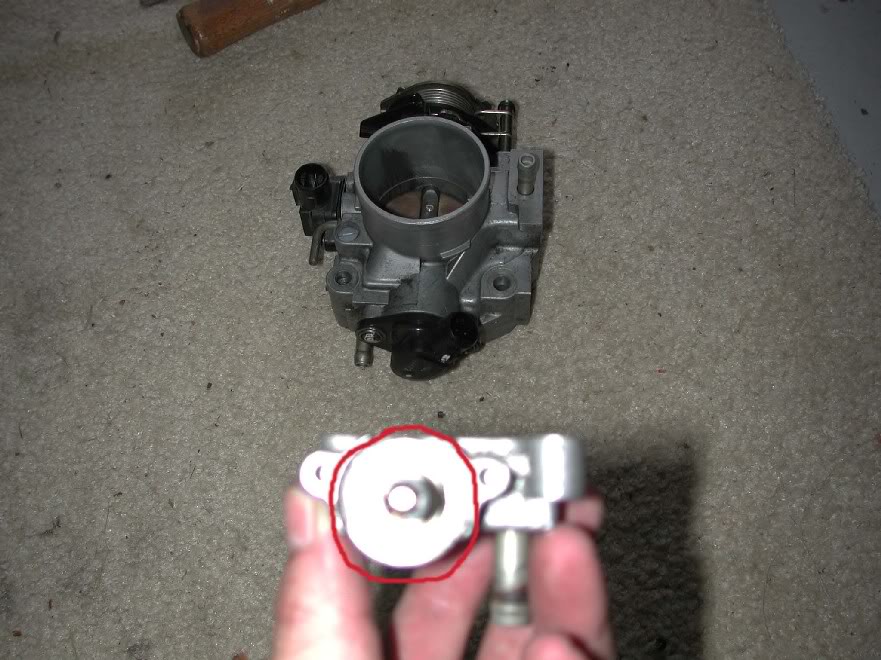
This is the magnetic electrical part of the valve.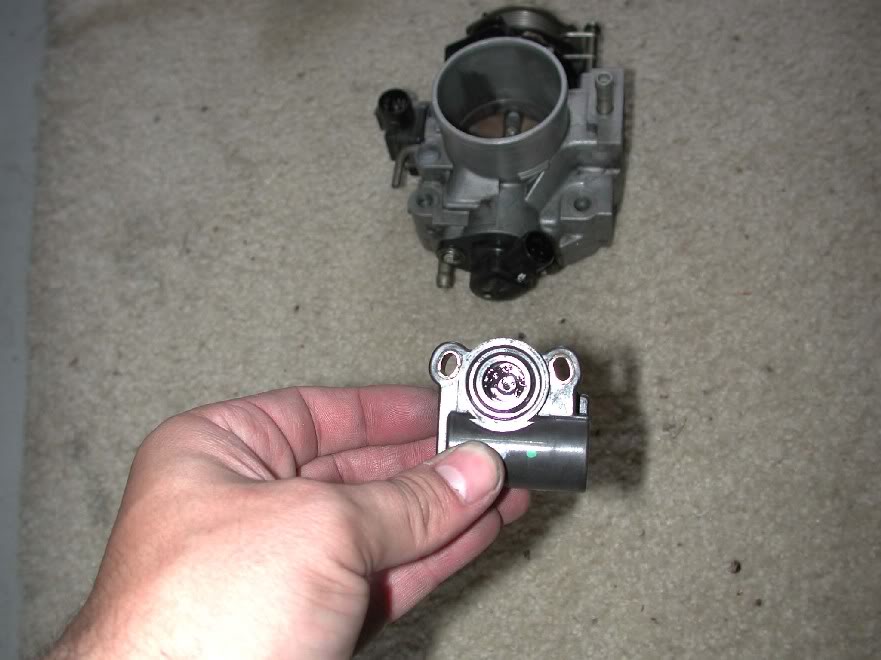
Oh and don’t forget to remove/replace the throttle body gasket (about $1.50) should it break apart when removing the throttle body. This is what you will need the razor blade for, to scrap off the remains of the gasket.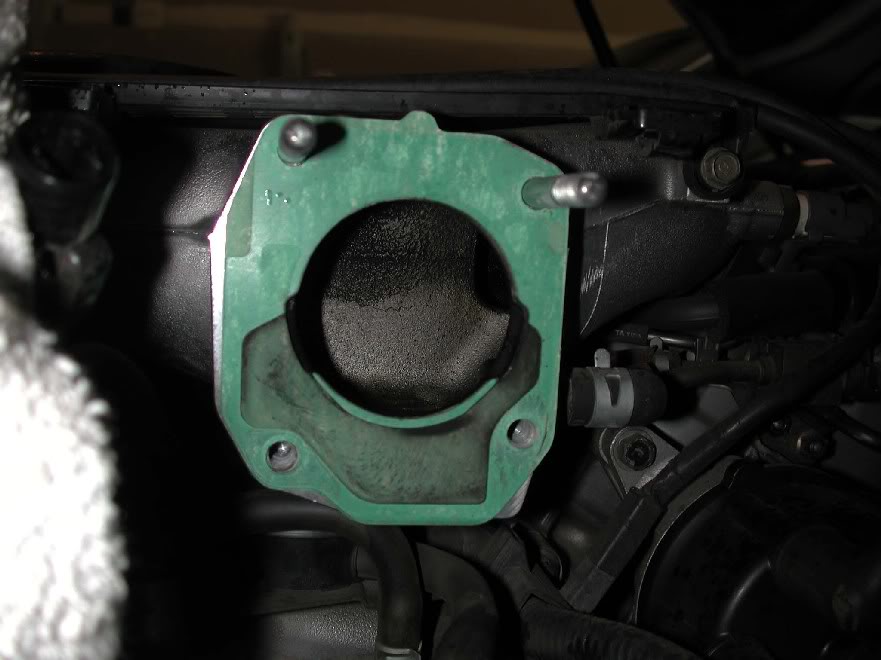
Well that’s all there is to it. When I did it the first time (when I just cleaned out the valve to see if that worked) it took about 1-2 hours since I was making sure I had everything removed and I new exactly how to replace everything I was removing and just generally taking my slow ass time. When I did it again to replace the ICV, it took about 30-40 minutes total.