You must be logged in to rate content!
8 minute read
Radiator and Fan Clutch Replacement – A6
Compliments of hxgaser @ www.audiforums.com
Well, my fan clutch went kaput. (Some of you may remember... I think that was the reason behind my overheating issue going up the Grapevine towards LA.) Anyways, when I was inspecting the cooling system, I noticed some discoloration of radiator core assembly. So here is a diy of the radiator and fan clutch replacement on my C5 A6 with ATQ and automatic transmission. Some of this can be used as a reference to the timing belt change as well.
Tools:
- The usual assortment of sockets, screw drivers and etc.
- Allen keys, including 17mm allen for the transmission filler cap.
- Torx drivers
- Long handled wrench
- Line crimp
- A home made fan clutch tool (Adjustable face spanner will do too)
- A bucket
Parts - Required:
- Radiator
- O-rings for radiator supply and return pipes
- O-rings for transmission cooler lines
- 1 gallon coolant
- 1 gallon distilled water
- 1 liter of transmission fluid
Parts - Optional:
- Radiator air dam gaskets
- Radiator air guide (Driver side air dam was broken when I was inspecting the fan clutch. I just ordered one as a part of the radiator order.)
Overall, you should generally inspect your cooling system components. My reservoir and cap was replaced about 5 months ago. If they weren't I probably would have replaced them as well. In addition, I replaced the reservoir hose on mine since I noticed that the hose was too soft. But I am meticulous aka ****.
Procedure
1. Lift the car and set it on jack stand. Front only will do.
2. Remove the belly pan.
3. Remove the 2 hex head screws on each side of the wheel well. In addition, you need to remove the front half of the torx screws holding the wheel well on the passenger side only. I think there were about 6 to 8 of them.
4. Now get under the car, and remove 3 nuts holding the back of the bumper to the fenders on both side. The driver side is straight forward, but the passenger side requires the wheel well cover to be pulled, and access between the crap. The nuts are labeled no. 10 on the following image.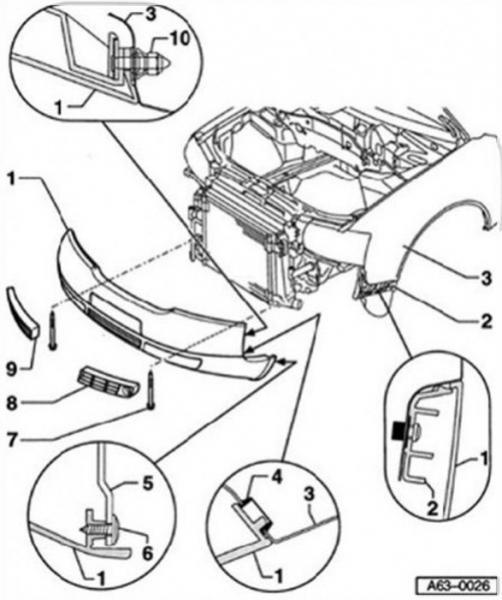
5. When you are down on the driver side, disconnect the washer line connected to the headlight washer. You either have to crimp the line or have a bucket handy to collect the fluid.
6. Pop open the plastic bezels for the fog lights. They can be accessed from top and there is a plastic tab holding the bezel toward the center of the car.
7. Remove 2 allen bolts holding the bumper to the shock absorbers. They are labeled no. 7 on the above picture.
8. Now you can start to pull the bumper out. Spread open each side of the bumper and pull it out. Hold on to the center and pull. One the bumper disconnects, don't pull it all the way out. There are a couple of connectors on each side, one for the fog light and the other for the horn, that need to be disconnected.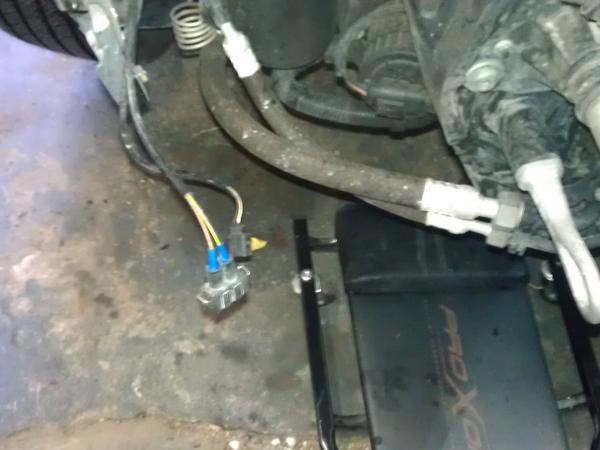
9. Next you drain the coolant. You start by draining at the drain valve. (shown red below) Then you disconnect the lower hose and let it drain all out. Be sure to unscrew the reservoir cap.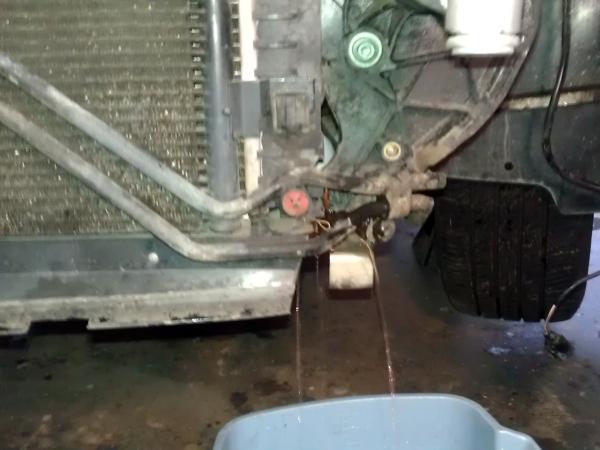
10. Now the fun part of actually taking out the radiator... First, there are 2 plastic air guides. They are merely held with 1 screw each. Then, you unscrew 2 allen head screws for the powersteering cooler line, shown in green arrow below. There is an outside temperature sensor mounted on the bracket as well. You can just pull it out by pressing the plastic holding clips. You swing the cooler line to the driver side. Then you disconnect the AC condenser sensor wiring shown in yellow. Don't unscrew the sensor, just disconnect the wiring. Next, you can undo the 2 plastic connectors holding the AC condenser shown in blue. Each has a plastic pin type inserts that you can pull out on the side. Just bend the tap with a small screw driver. Now you can swing away the condenser by pulling it up and toward the passenger side. The radiator is held by 2 pin type connectors show in red arrow. Basically the same removal procedure as the blue arrow pins.
11. Before you remove the radiator, there are a few more lines to be disconnected. Pull out the upper radiator support hose, as well as the 2 transmission cooler lines on the passenger side. They are pointed out on the picture below. Obviously the picture is taken after the removal. They are held with simple hex head screws. The top line is pretty easy to get to, but the bottom line is tight.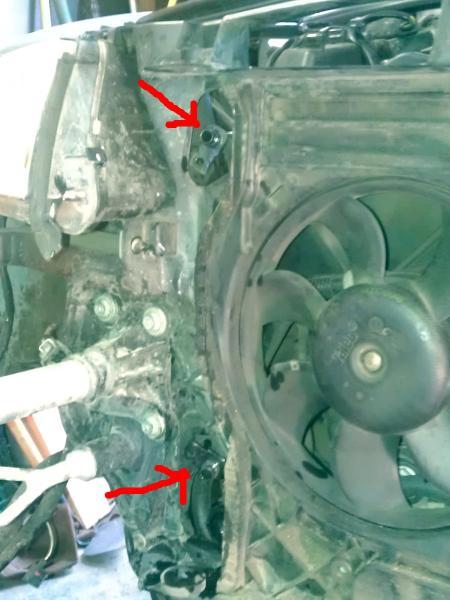
12. Now you can pull the radiator assembly out toward the front. Once you have the radiator out, then transfer all the accessories from the old one to the new one. There are 2 rubber mounted pad on top, 2 rubber air seals, one on the bottom and one on the top, and most importantly, there is an allen head plastic screw plug on the back side of the driver side. Don't ask how I know that. Let's just say that I used more coolant than needed. I think there is a sensor at that location on 2.7T, but on 2.8, this is just a freeze plug if you will.
13. Now to the fan clutch... The fan clutch nut is reverse thread and you need a way of holding the pulley while turning the nut. I had a spanner wrench for my grinder which worked out pretty good for the removal. I just taped it to a rigid conduit and it worked out good.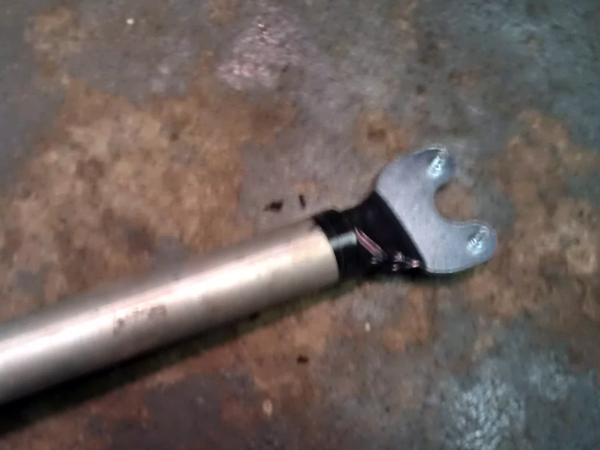
You can buy a specific fan clutch tool, or use an adjustable face spanner as well. Anyways, hold the pulley by using the tool, and place a long handled wrench on the nut. Turn the wrench clockwise. (Righty tighty lefty loosey does not work in this case.) Since my wrench was pretty fat, it was easier for me to remove the plastic fan first before removing the clutch. Just undo 4 allen screws.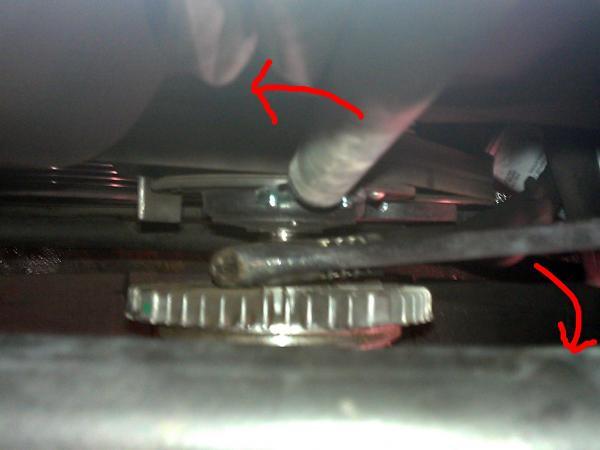
Reinstall the clutch in reverse.
14. Before you install the new radiator, be sure to replace the o-rings on the supply and return lines. Also replace the o-rings for the transmission cooler lines. A light seal of new transmission fluidaround the cooler o-rings will ease the installation.
15. Installation is in reverse. I would install the radiator, AC condenser, and the power steering cooler, then fill the radiator to check for any leaks. I forgot to put the dang plug as mentioned above and lost about 2 liters of fresh coolant.
Anyways, to fill the coolant, remove the plastic cover for the battery/ECU area. Locate the heater core water line. Once you undo the hose clamp, you will notice a bleed hole. Slide the hose until you line up the holes.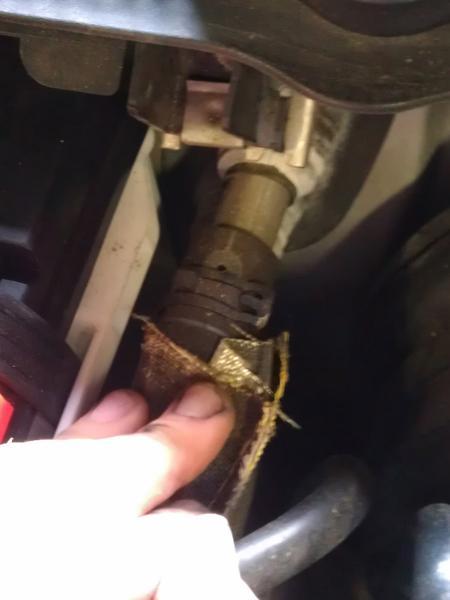
Fill the reservoir with 50/50 coolant and distilled water. Fill it up to the max line. Start the car and turn the heater to the max. The coolant level will drop. Fill it until there is a bit of coolant coming out from the bleed hole. Slide the hose back on and install the hose clamp. You may want to check the coolant level since it my drop after the system burps.
16. Install everything in reverse.
17. Lastly, you will need to top off the transmission fluid. There are numerous posts about that stuff, so I will not go into it in detail.