You must be logged in to rate content!
4 minute read
Eibach Pro-kit Install Part I
Compliments of BestCS @ forum.miata.net
2-7-2009
Pro-Kit Install Part I
Just a few words of advice. Don't try to rush this job especially if you aren't experienced at working on cars. Set aside a few days and take your time. Also, if you're one of those people who ask questions about how to install your Voodoo or change your oil, this job isn't for you.
Starting in the afternoon of Friday, I got the front springs in. Saturday, I had to take out one due to forgeting the plastic gasket on top of the spring hat (the thing that has the three studs). I finished that and started work on the rear. I got the rear assemblies out, got the springs on, and quit leaving Sunday to finish the job.
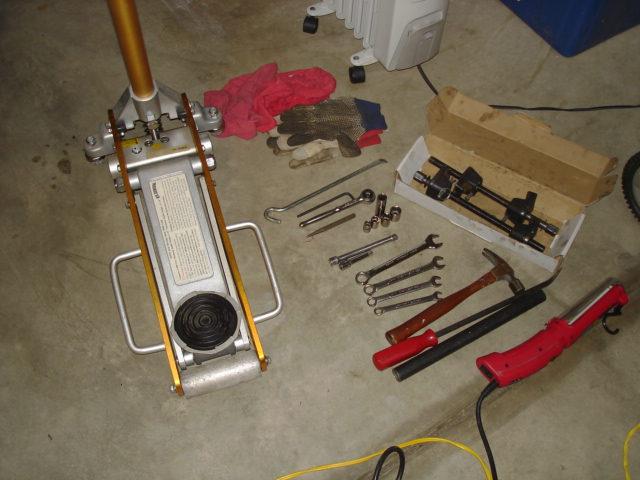
The following is a list of tools for the job:
Floor Jack - you can't do this job without one
Short piece of pipe to fit over the handle on your ratchet for leverage
Pry bar
Hammer - in case you get mad
10, 12, 14 17 mm open end & box wrenches
10, 12, 14, 17 mm sockets also needed are 14 & 17 mm deep sockets. I didn't have a 17 and did without
3/8 ratchet
Punch
5mm Allen Wrench - you must have it or you'll have big problems
Short bar - handle from floor jack
Mechanic's gloves - highly recommended. I had to use some old gardening gloves.
Drop light - absolutely necessary
Car stands - I used ramps. See the pics.
Locktite - I didn't have any except some blue stuff used for R/C model helicopters. I used it.
Beware of sharp edges. In the truck there are very sharp edges on a thin metal plate that has to be removed on the left side of trunk. Also the brakes have a dust shield which also has a sharp edge. I manged to cut myself on both.
Part II will be the front springs and Part III the rear. I also advise you to get a set of the MS Spring Instuctions. These are fine and a good starting place; however, they tell you the order to do things but not really how. I'm going to tell you how to solve the problems you may run into.
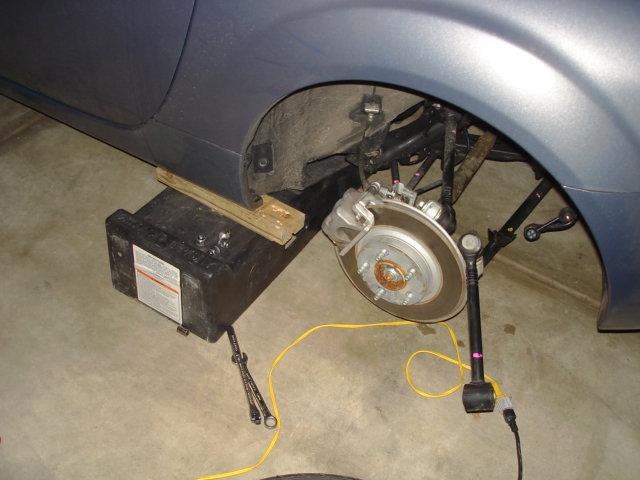
The first pic is of the tools. The other two show you how I used the ramps. On the front, I jacked the car up under the mirror using the pinch weld and a short 2 X 4 with a groove cut in it. I then slid a ramp in under the jacking point letting the car rest on another 2 X 4. It really isn't necessary to have a groove cut in the 2 X 4 plus it adds to the difficulty trying to get the pinch weld in the groove. In the rear, I jacked the car up under the differential and used two ramps with 2 X 4s to support it.
I did the fronts individually starting with the LF. In the rear, I worked on them both going from side-to-side in order.
6-6-2009
Every possible thing that you could possibly want to know is contained in this thread:
http://forum.miata.net/vb/showthread...tarting+spring
Many people have never really noticed, but it is actually impossible to "properly" install the springs the wrong way on the perches. One way the bottom end of the coil won't properly fit on the perch - in other words, it won't fit snuggley up against the shoulder of the perch!
One owner had some so-called mechanics do the job, and the mechanics "made" the spring fit correctly. The result the car looked like it was going up hill on level ground.
6-12-2009
This thread contains every conceivable bit of information to do this job:
http://forum.miata.net/vb/showthread...tarting+spring
For alignment specs:
http://forum.miata.net/vb/showthread...lignment+myths