You must be logged in to rate content!
12 minute(s) of a 15 minute read
9-6-2010
Built and installed my own gt2 mod kit with instructions
Compliments of gearhead @ www.6speedonline.com
9-6-2010
This is how I built my own gt2 slave conversion kit, cost and any tips I found, I would say this mod on a level of 1-10, 10 being most difficult I would rate it a 4 but an 8 in accessibility and messy.
It took me about 7-8 hours by myself on my back with the car on 2 jack stands, with basic hand tools.
Parts needed:
GT2 mod bracket, dgreen78 on this web site sells them ($200.00) worked perfectly
4 allen head mounting bolts M10-1.5x45mm (size-threading x length) ($3.00)
3 small adjustable hose clamps 5/8th diameter ($1.50)
2 metal bolts (plugs) will explain ($0.80)
GT2 slave part number 996 116 237 90 ($125.25)
GT2 master part number 996 423 171 06 ($64.50)
GT2 assist spring part number 996 423 081 13 ($57.75)
Brake fluid reservoir cap part number 996 355 119 01 ($4.00)
GT2 hydraulic hose 996 423 377 90 ($115.25) this is optional build your own for $25-$30 I will explain below.
The evoms instructions for this mod (that can easily be found on this website) were helpful but very vague and missing some helpful points, my additions should help anyone figure this out way faster. But print them out as they will come in handy and all threads I mention in this post as you will need to refer to them.
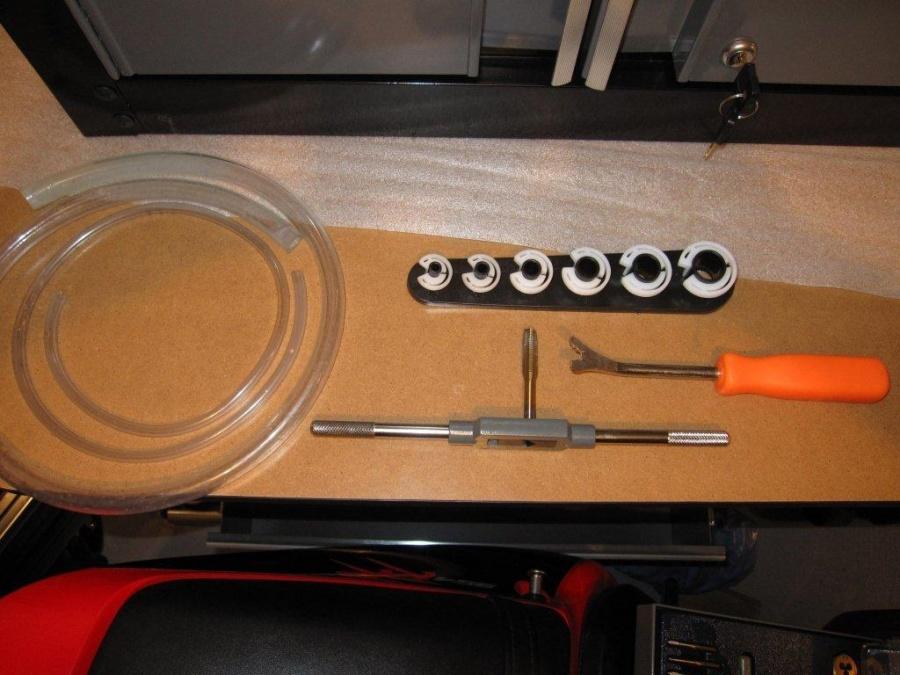
I started with the removal of the power steering pump as it is super messy. Cut and past this into the 996 turbo/Gt2 search this forum tab. "DIY- PS Pump and Reservoir change"(without quotations of course) it was written adam669, thank you for this post is was quite helpful. Buy a fuel a/c line removal tool or use a door panel puller to help in removing the red quick connect couplers on the pump and slave. Pic of tool below
Use the evoms instructions to remove the drive coupler inside the pump after you have it removed the tank and power steering pump (its easy and the instructions from evoms were quite good) that stops the fluid from running to the turbos oem slave. Reinstall back into the car.
Next jack the rear of the car up as high as you feel comfortable (the higher the easier for access) but be careful not to hit the nose of the car on the ground and to put your jack stands in appropriate spots to still allow access to the slave without getting in your way or pinching any lines etc.
Remove the slave following this link to instructions http://www.renntech.org/forums/index.php?/tutorials/article/97-clutch-slave-cylinder-and-accumulator-replacement/
(sorry mods its from another website but I feel this post is good for the community and is necessary for this thread). Thank you jpflip super helpful. My tips for this, use an oil filter strap wrench to remove the accumulator, we all have one for removing standard style oil filters and is way better than destroying a perfectly good wrench to access the top bolt. And use a large ziplock bag around the accumulator when removing it to assist in catching any residual power steering fluid. And don't reinstall the drive shaft or let the coolant hose go back into place yet for space while installing the gt2 slave.
Before you discard the oem slave remove the push rod you will reuse it on the gt2 slave. And keep the most forward line that attached to the green hard line you will reuse part of it.
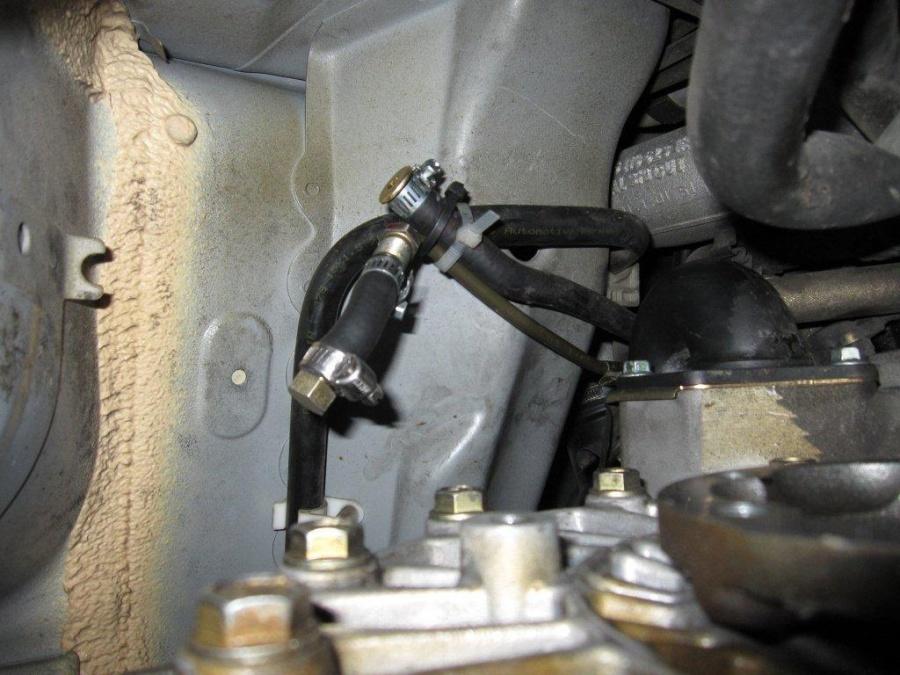
Now for plugging the two most aft lines. Evoms cncs their own threaded plugs as it is impossible to find I tried but it is not necessary to use there method and frankly mine is easier. To find where evoms wants you to connect to you need to follow the two lines way back towards the engine compartment and if you look hard enough you will find it but access is really difficult. Heres my method, the line with the quick connect on it cut the rubber hose at the end of the plastic connector, so as to save as much of the rubber hose as possible and then cut a second piece off about 2 ½ inches long. Take that "second piece"Â and find a two bolts that you can thread into it snugly, (doesn't matter if their metric, standard, smooth, brass or bare metal as long as you can thread it in) I had a bunch of left over bolts from previous projects over the years and just used 2 that I could thread into the rubber hose line. Install one bolt in the cut line under the car and use one small adjustable hose clamp to help it stay their. The "second piece"Â of rubber hose (2 ½ inch) that you cut off install the other bolt and TWO adjustable hose clamps, tighten one hose clamp over the bolt crawl under the car and push it on the hard line over the double flare end tighten other hose clamp to stay in place and ziptie the lines off to the side and out of your way. See pic below.
These two lines are completely dead, as no pressure flows through them because you removed the drive coupler in the power steering pump. All your doing is stopping any residual drips and dirt from getting into the lines.
Ok so now you have removed the power steering pump pulled the drive coupler in it, reinstalled the pump capped the two most aft lines on the oem slave and removed it as well as the accumulator. Your almost there.
Next take the green hard line under the car (most forward line on the oem slave) and connect a rubber hose to it in helping to drain the old pentosin out and to flush the new dot 4 brake fluid through. This line leads directly to your front reservoir. Here is a tip that helped out greatly with this step. Buy a motive power bleeder, their about $65 and really handy for this. Attach it to your front reservoir and pump AIR ONLY through it to evacuate all the old pentosin out then refill the front reservoir with dot 4 brake fluid and push that through AIR ONLY about 4 times to remove any left over pentosin. You could also just pump the clutch about a billion times trust me its money well spent.
Now that the line is clean and dry DO NOT REFILL YOUR FRONT RESERVOIR YET LEAVE IT EMPTY you need to install the new GT2 master and assist spring. Remove your drivers side floor mat and place a towel down to help catch any remaining dot 4 fluid but in my case there was none thanks to the power bleeder. Remove the a/c heater duct (just pulls off) remove the two bolts holding the oem master on and pull the two clips holding on the hoses. The pin holding the push rod on to the clutch pedal is simply held in place with a brass clip remove this also. The assist spring is just clipped in place both at the pedal and at its mount, just pull it out.
Here is a tip the gt2 assist spring has a cotter pin on the back of it which needs to be removed after install, do yourself a favour and get the cotter pin close to coming out before you install it and make sure the eye of it is pointed towards the ground upon install. It makes it easier to get a set of pliers on it to remove the cotter pin. Next install the gt2 masters two rubber lines by simply clicking them on with the clips, reinstall the two bolts and attach to the clutch pedal same way you removed it.
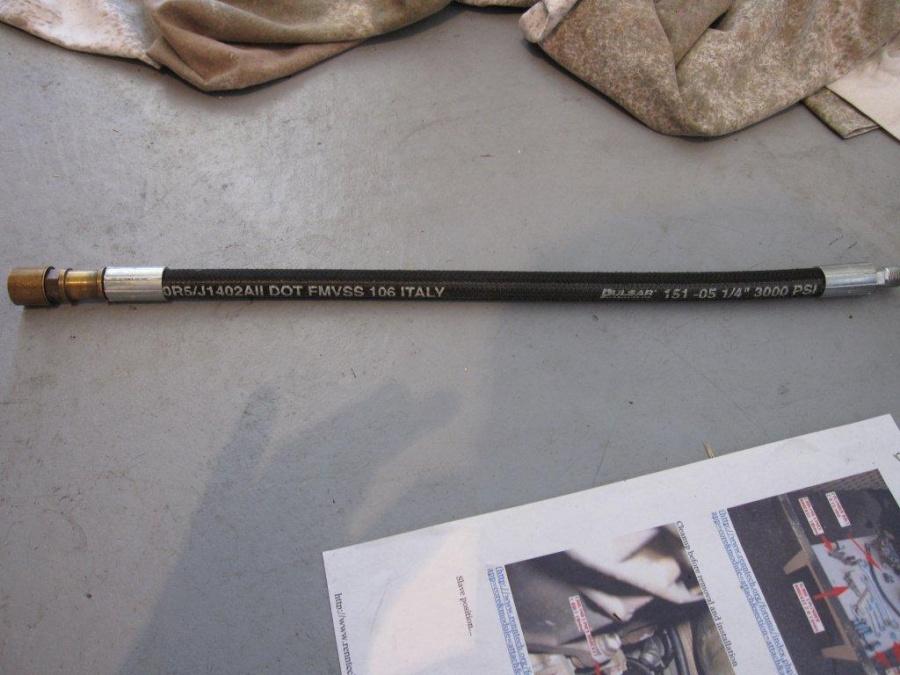
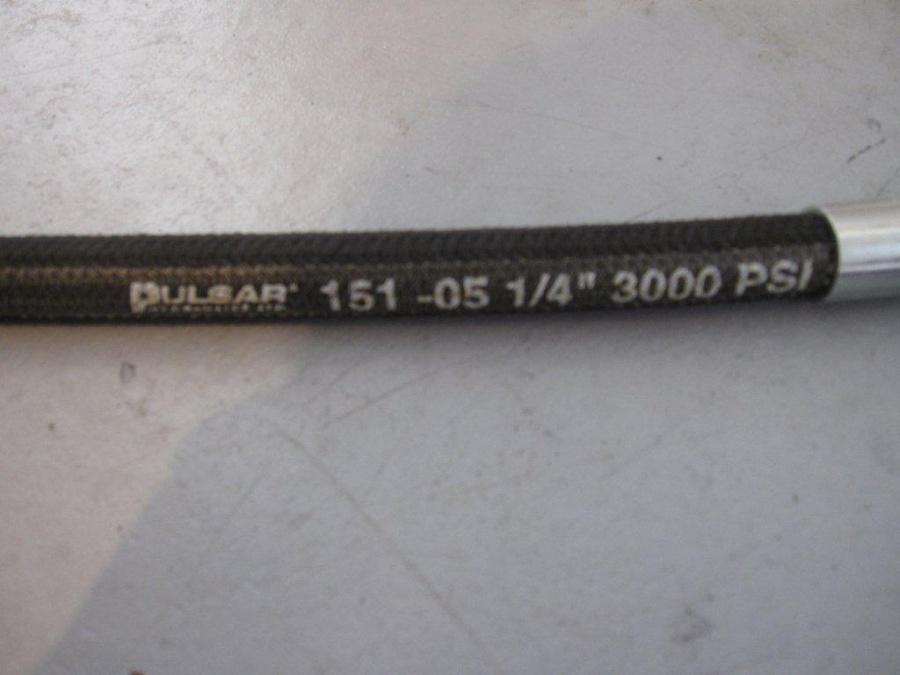
Now to the hydraulic hose that connects the hard green line under the car to the new gt2 slave. If you decide to buy the gt2 hydraulic hose the line is to short and will need to be extended. So build your own for $25 bucks, here's how. Take your old hydraulic line from the oem turbos slave and your new gt2 slave to your local hydraulic shop, tell them you need a 16 inch dot 4 resilient line that's 3/8 inch inner diameter and ½ inch outer diameter the part number is 100r5 #4. If they don't have this you can use 151-05 which is ¼ inch inner 5/8 outer diameter slightly larger but works just fine and both lines can withstand 3000 pounds of pressure . See pic below. Ask them to move the large two piece coupler off the old turbo line (connector on the left side of hose pic) and install on the new 16 inch line, and get them to find a connector that matches the new gt2 slave threading. Total length of hose and connector should be about 20 inches.
You just saved $90 bucks! But if you don't want the hassle of them not having the one connector buy the gt2 hydraulic line and get them to move both connectors to the new 16 inch hose.(remember total length with connectors is around 20 inches)
Next you need to tap the new gt2 slave as they don't come threaded. Use a M 10x1.5 tap and the tip is use a vise to hold the slave still so you thread it straight.
Attach the slave to the bracket with 2 allen head m10-1.5x45mm and attach the new 20 inch hydraulic line to the slave loosen the bleed screw and attach a rubber line to help with bleeding. Remove the gt2 slave push rod (just pull it out) and reuse your old turbos slave push rod as they are two different lengths. You will notice that it doesn't want to really stay in there well but try your best to get it to stay, I found this next step the most trickest but still very doable.
Ok here goes, lay under the car so you can "hug"Â the transmission with both arms, with your head pointed towards the front of the car use your right hand and hold the gt2 bracket with slave and the hydraulic line attached, the bleed screw loosened with bleed helper hose attached and two M10-1.5x45mm allen head mounting bolts to attach the bracket to the transmission. Now here's where it gets tricky, while holding this you need to hold the push rod between your fingers like your holding a cigarette as you push it into the bell housing. Keep it as straight as you can and make sure it goes into the receiver cup on the transmissions through out bearing. (I reached my fingers inside first so I could sense what I was going to hit as you are doing this blind) you will know if you hit it as there will be resistance. Now with your left hand keep pressure on the slave so it doesn't pop out and with your now freed up right hand thread the two bolts onto the transmission to hold the whole thing in place.
Take your time, this step is the most difficult and you do the whole thing blind, and have the possibility of having the push rod fall out of the slave and into the bell housing so be careful.
Got that done, good. Attach the hydraulic hose to the green hard line, go back to the front of the car and add dot 4 fluid to the reservoir, attach the power bleeder and slowly push the fluid through, but not allowing the reservoir to get empty before topping it up. It takes about 4 top ups before you will see the fluid coming out of the bleed screw helper hose. Remember you loosened it before installation of the bracket, now before the front reservoir goes dry quickly take a short 6mm wrench and tighten the bleed screw and remove bleeder helper hose.
Put your new dot 4 brake cap on the reservoir get in the car and pump the clutch to build pressure and to make sure it works. (it will) Top up your front reservoir. Let your coolant hose go into its original position and attach the coolant hose bracket, and reinstall your drive shaft. Jack the car down and enjoy.
The kits sell for $1000 you built your own kit for $481.80 if you build your own hose. Hope this helps, and anybody can do this with these instructions and save a lot of cash in the process. Don't be afraid, go for it I did.
And how about some rep points if you found this informative.
Thanks guys for your posts that made this one possible.
First pic is plugs, second is new hose, third is close up of hose, fourth is helper bleeder hose, tap, a/c fuel line tool for quick connectors or use panel pulley (orange handle) both work
No problem guys, I think it took as long to type up this thread as it took to actually do the mod. If I did this again and knew what I know now I could knock it out in 4-5 hours, faster if I had help instead of doing it alone. Let me know if anyone has anymore questions and highly recommend this mod, it is so much better than the stock clutch feel and I enjoy it at every traffic light change. If you track your car this would be an excellent upgrade you would not be disappointed.