You must be logged in to rate content!
7 minute(s) of a 57 minute read
9-2-2014
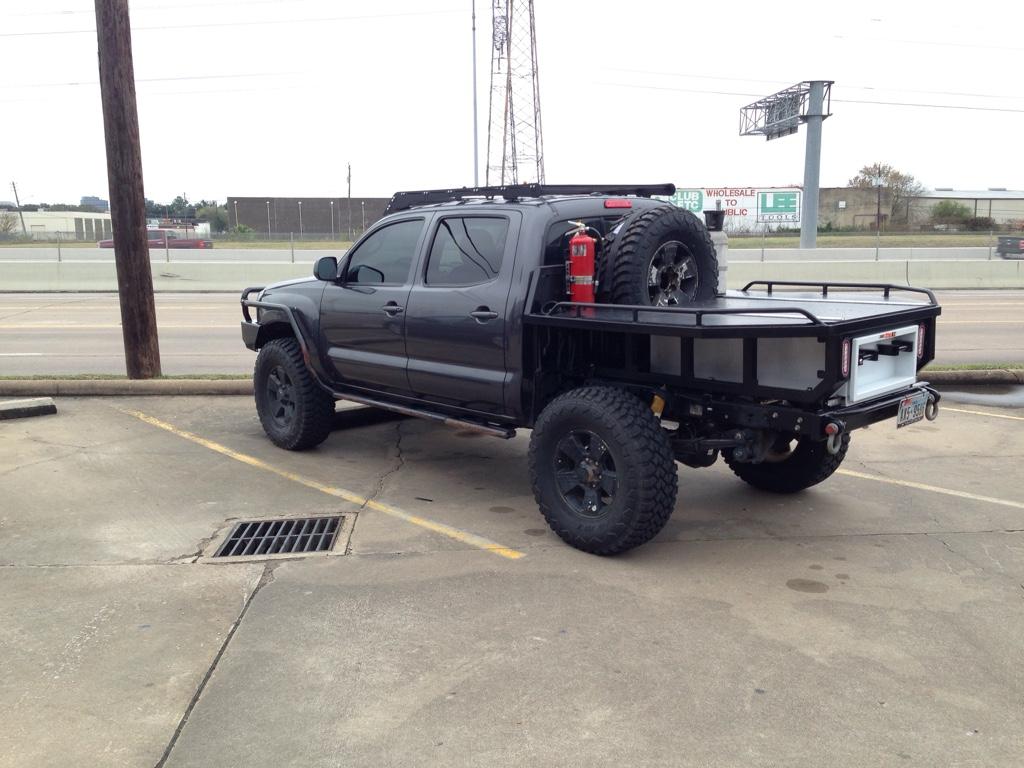
2011 Flatbed Build
Compliments of SMKYTXN @ www.tacomaworld.com
9-2-2014
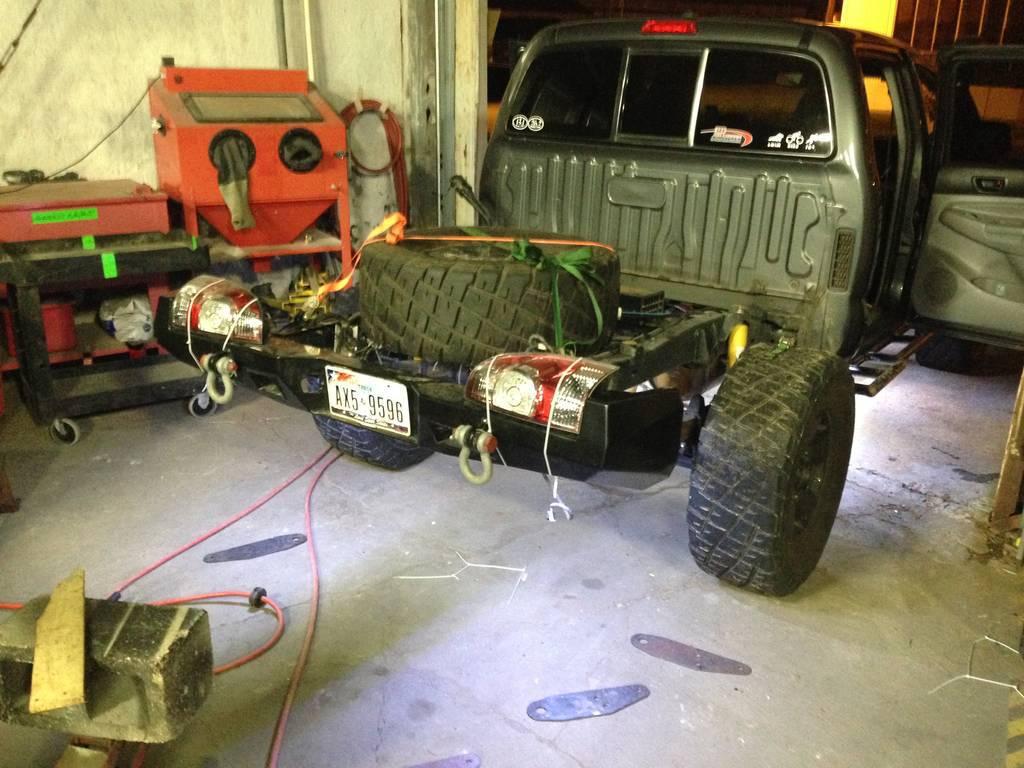
The bed is complete to the point that I was able to permanently mount it on the truck. The list below shows what I have left to complete.
Remaining to-do list:
1. Final welding on bed square tube
2. Build rail on two sides
3. Drill holes and weld in nuts for co2 tank and fire extinguisher
4. Buy UHMW
4. Drill all holes for UHMW deck and weld nuts to back side of angle
5. Mount UHMW sides (thinking panels between the square tube)
6. Finish tail light plate
7. Plate in the headache rack
8. Add reverse light brackets
9. Clean up wiring on frame, including; wire reverse lights, wire stop/turn/tail, reposition all rock lights.
10. Find a spot for the bed 110V outlet (new year activity)
11. Mount the trailer 7pin outlet (overlooked that when building the bumper, and will have to wait till the new year)
12. Tabs for uhmw side panels
13. Drill mounting feet out to 5/8"
14. Buy longer bed bolts (M12x1.25x5")
15. Wire wheel entire bed
16. Paint bed
Current progress picture:
The original start to the thread:
I'm going to build a more usable bed for Smokey. The plan is to place a jobox storall between the frame rails and build a flat deck above that. The bed will house the following:
- Jobox storall
- Up to a 35"x12.5" spare tire behind the cab
- Second battery
- Aux fuel tank next to the jobox
- Aux water tank next to the jobox
- Hi-lift
The bed will bolt down to the factory bed bolt locations. Once it's further along I'll decide if more mounting points are necessary.
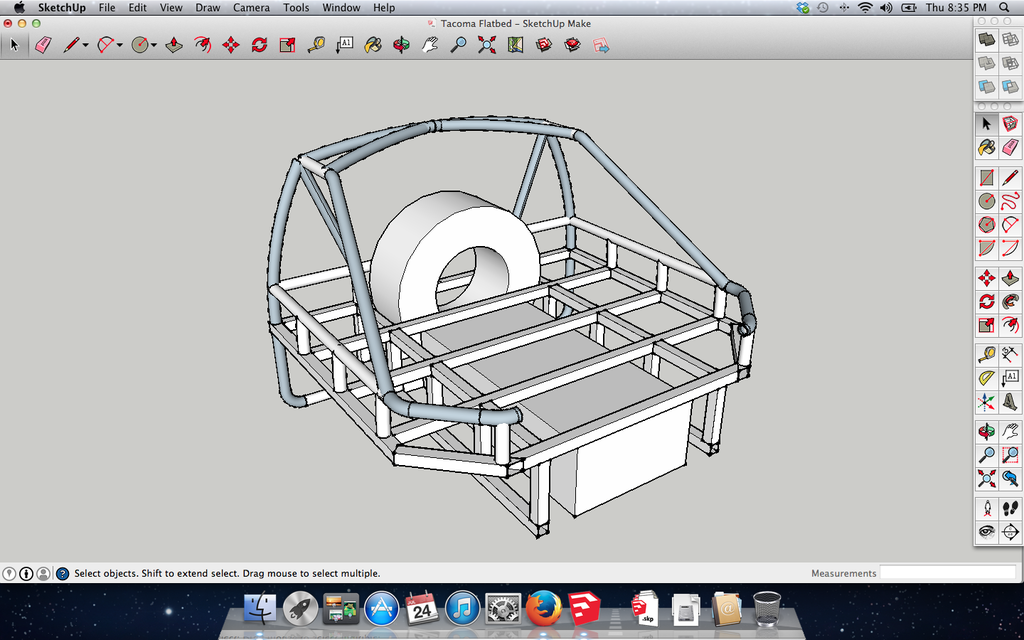
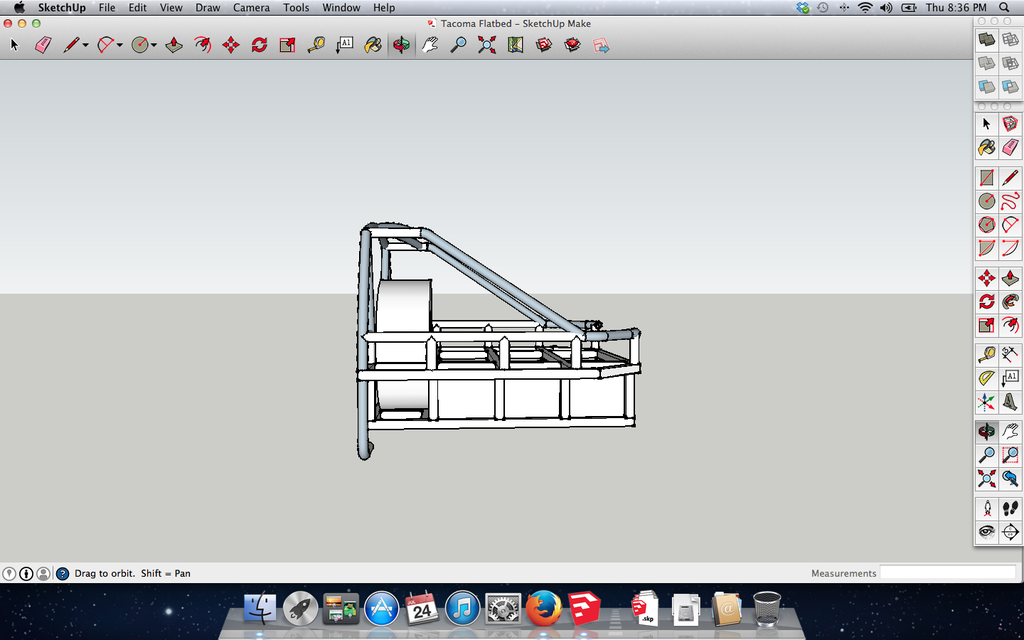
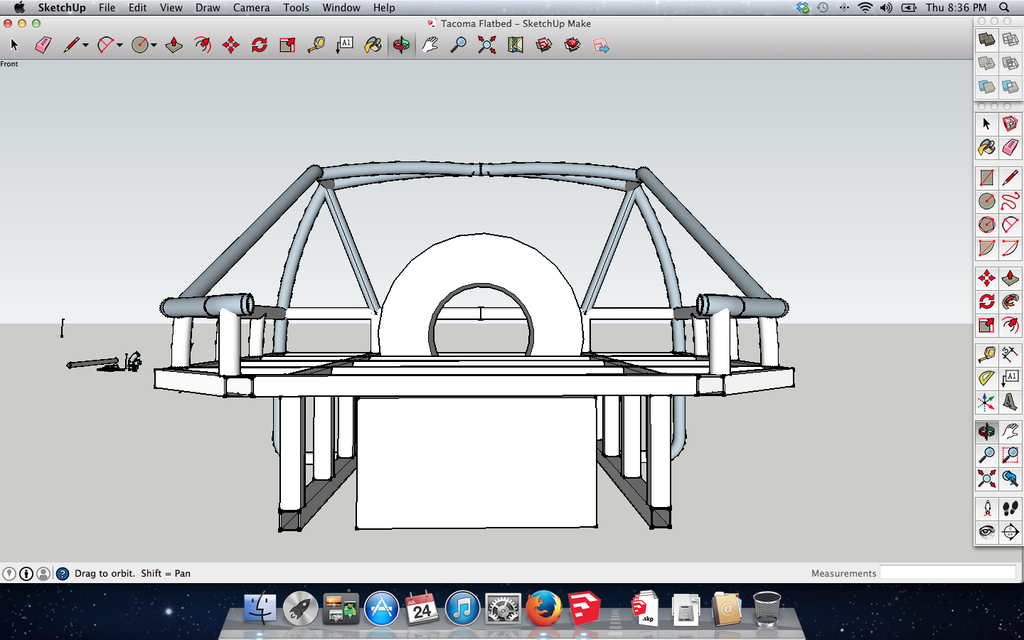
This is the model of the bed that I built in sketchup. This will be used for rough dimensions as it's not 100% accurate, but it's close.
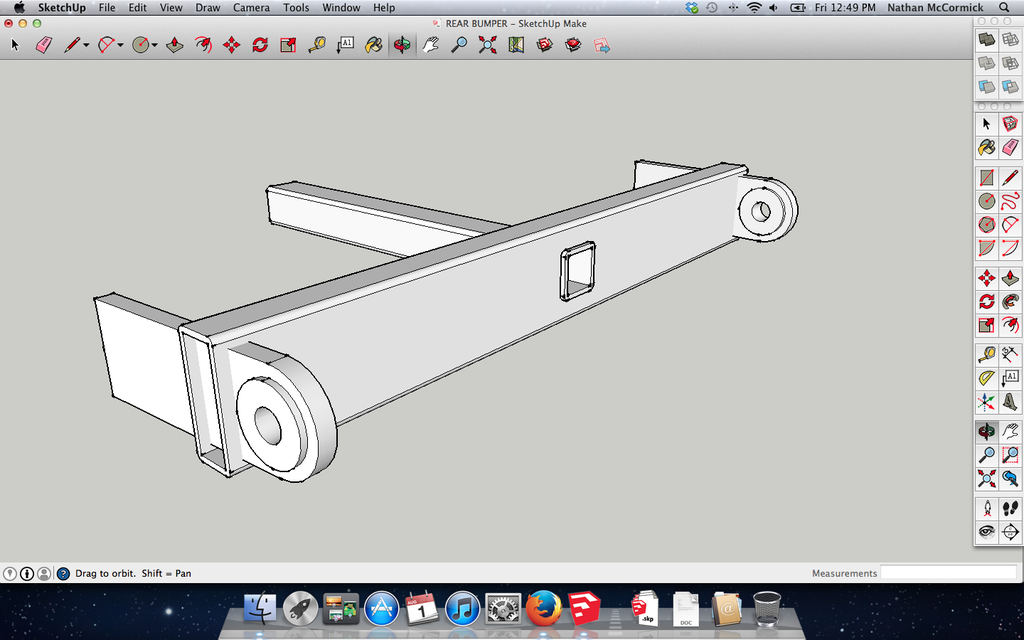
The Bruteforce rear bumper will be taken off and replaced with a very simple rectangular tube bumper. I will gain 4" of vertical clearance with the new bumper vs. the Bruteforce. The rear overhang will also be reduced by 4", not considering the new recovery points.
Wish me luck, we'll see if I can pull this off. ![]()
This is the design I've chosen for the rear bumper. The rectangular tube is 5"x2"x0.25". I had originally designed the recovery points to be 1/2" plate with thicker cheek plates, but I ended up finding a couple of nice 3/4" plate remants at the local steel yard. I'll shear the frame bolts before the frame or the plates let go.
No time like the present to get started. I had high hopes of getting a lot done over the long weekend, but of course that didn't happen.
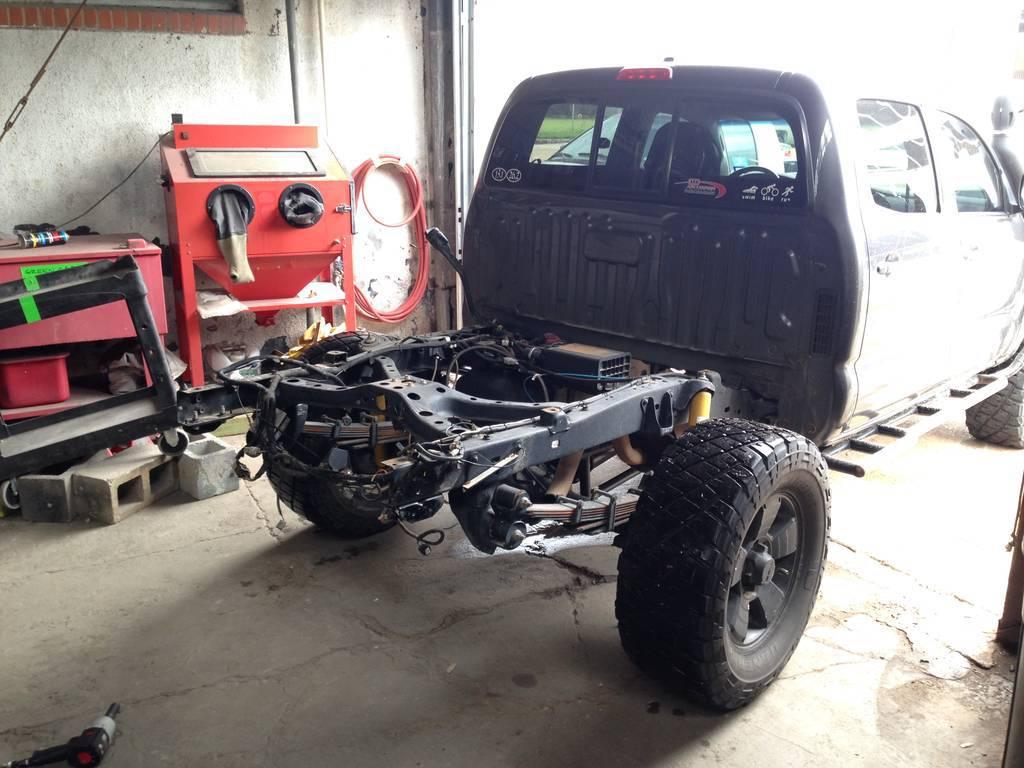
Started the tear down.
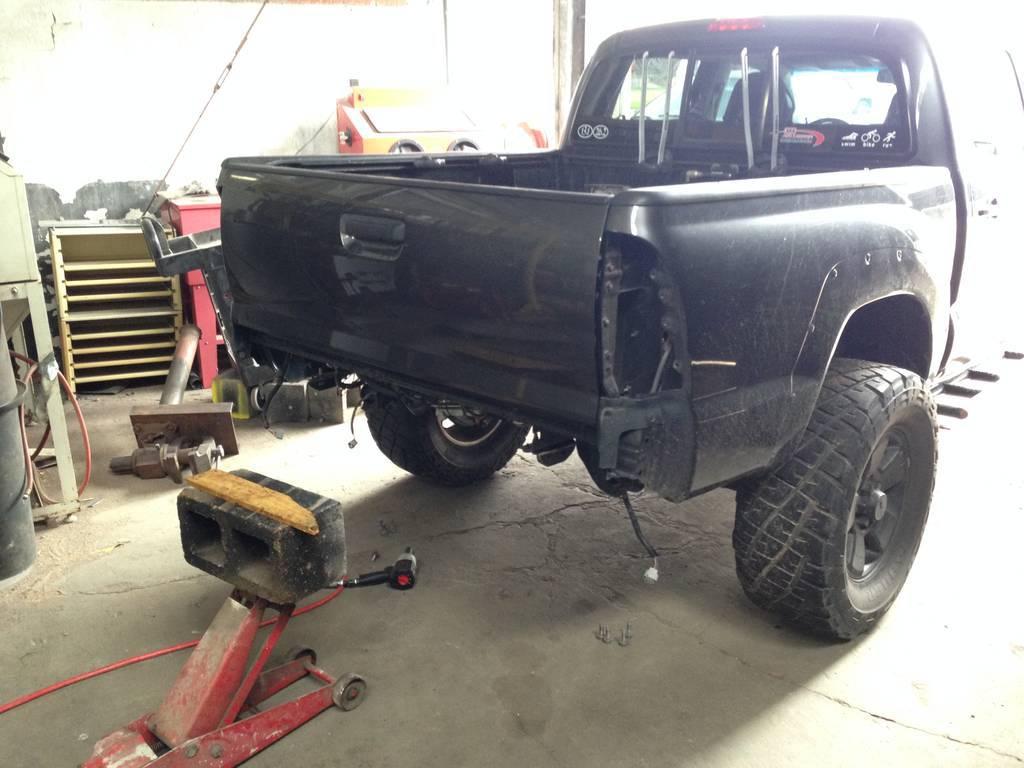
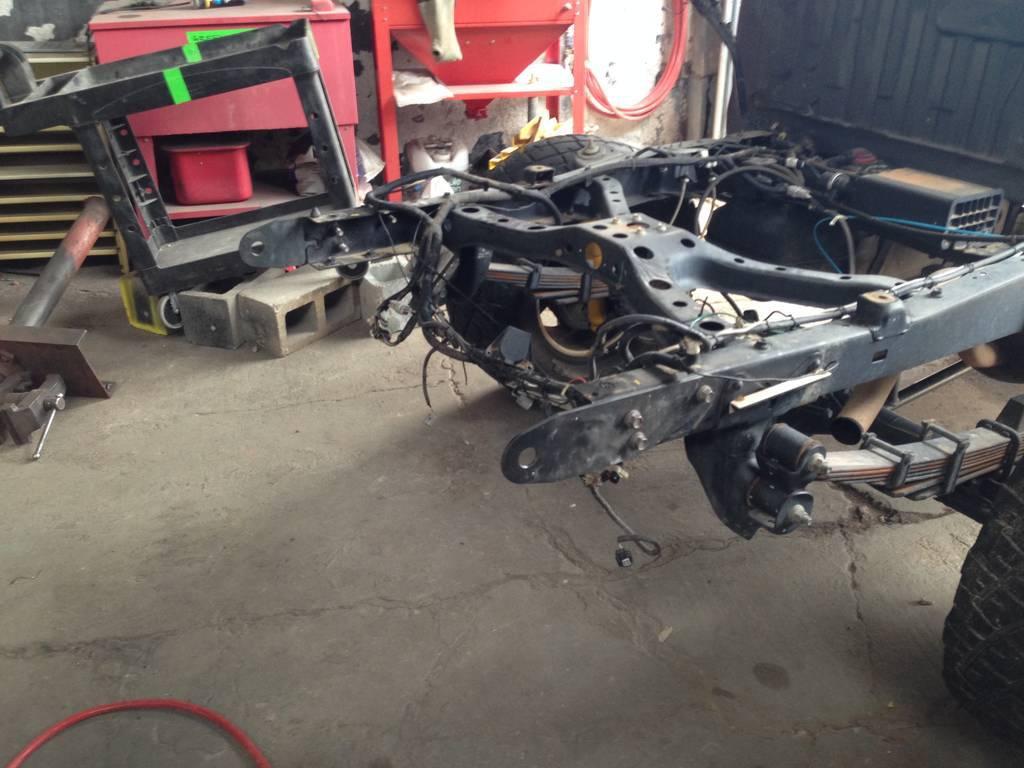
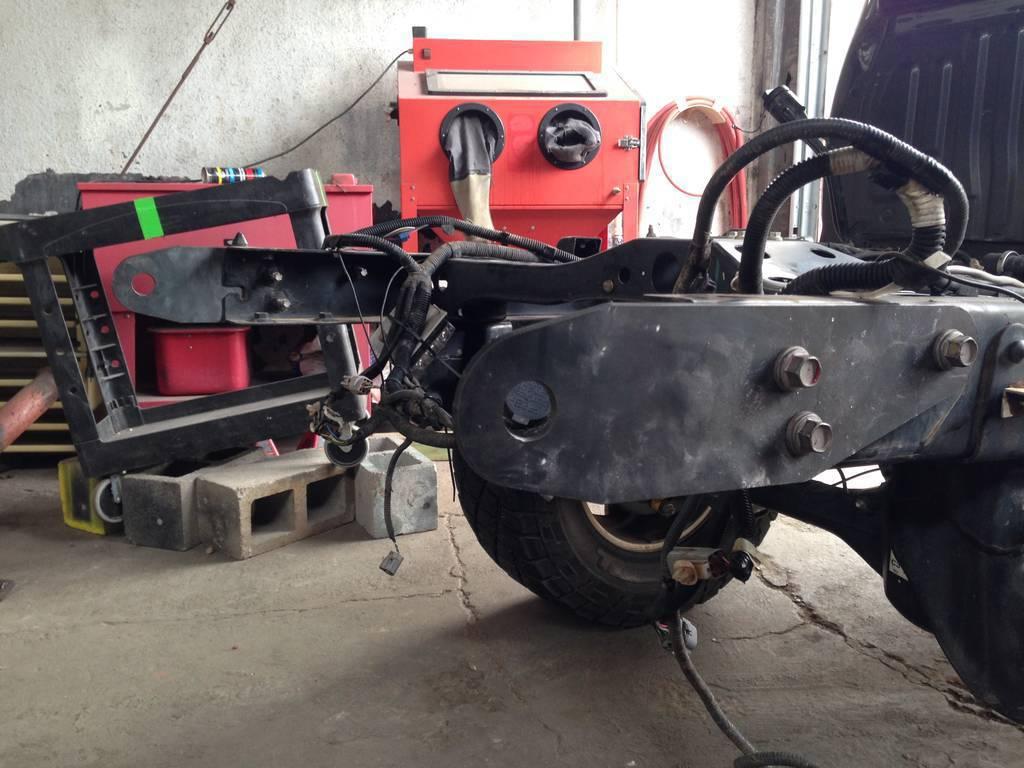
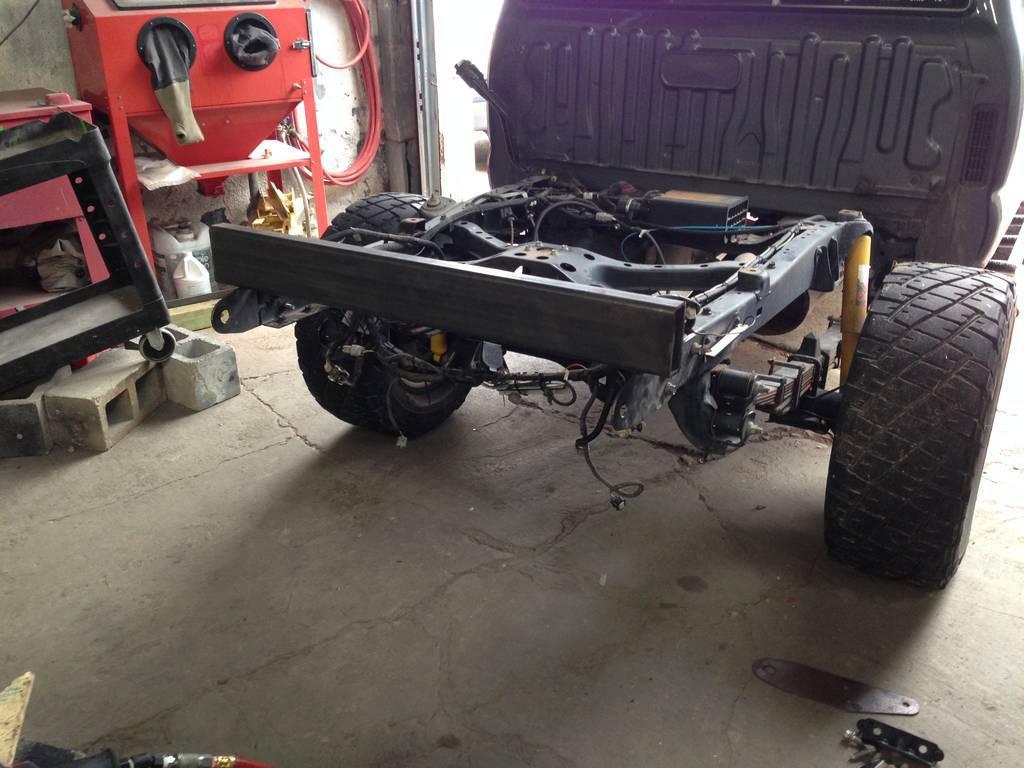
And the beds off...
It's amazing how short the back half of the truck is without the bed on it.
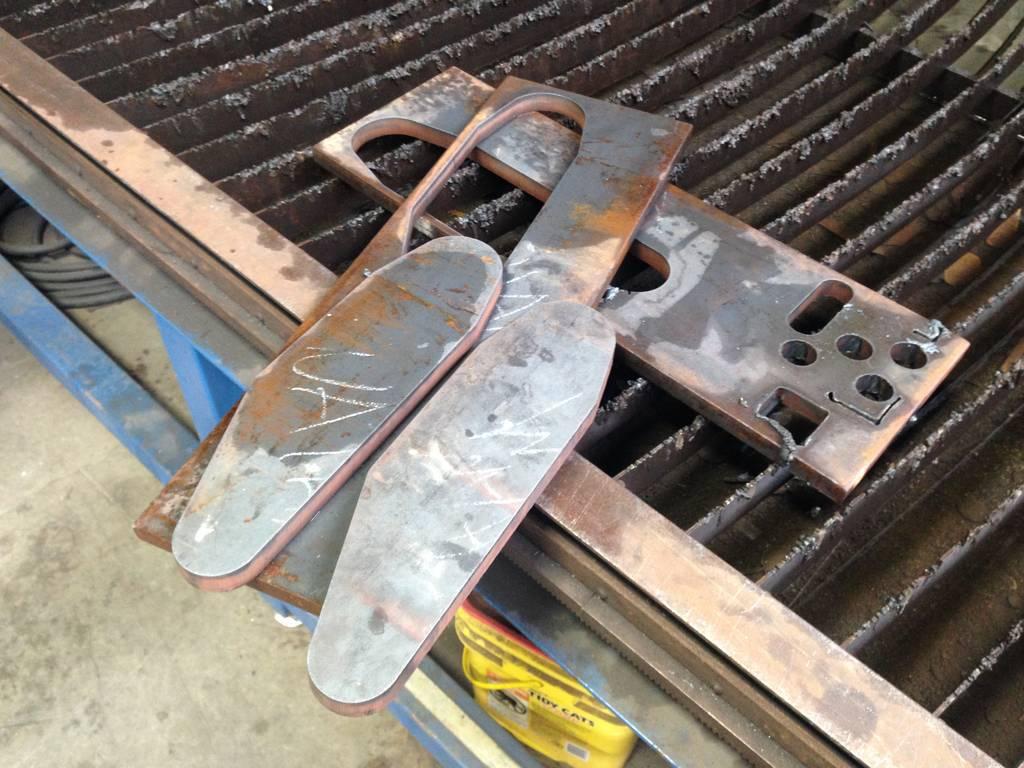
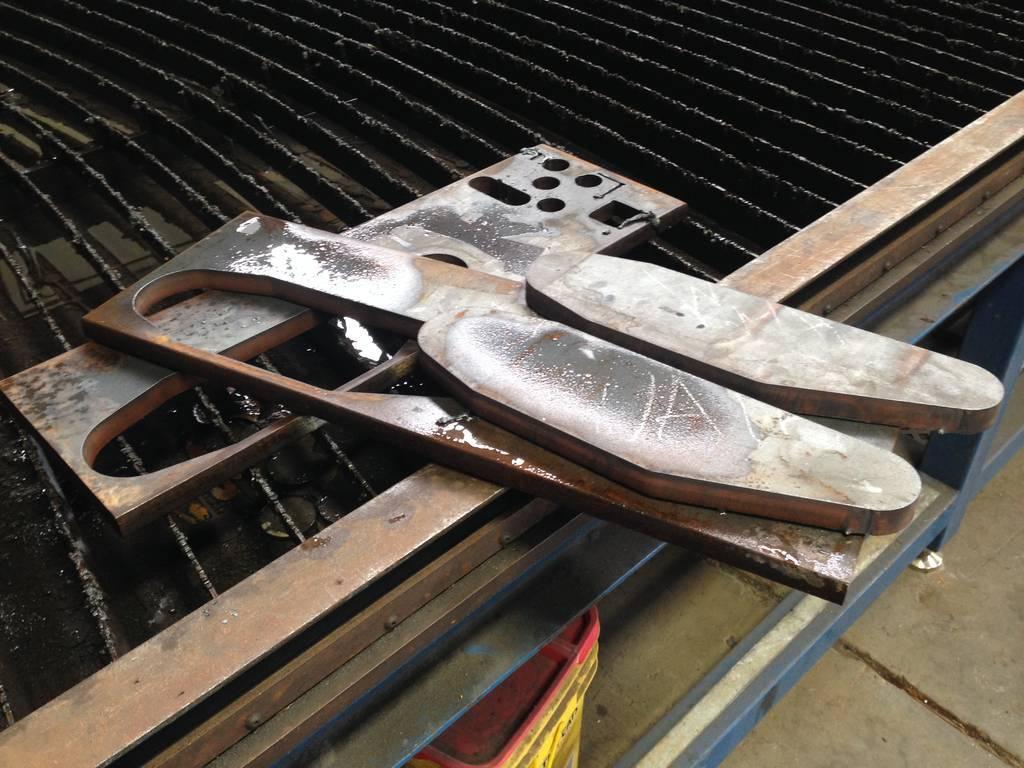
I have access to a CNC plasma table so cutting out the recovery points was a snap, well, it was almost easy. Here are the 1/8" plates I cut to verify that all of my holes lined up.
I also cut the tube for the bumper to length and threw it on the plates to see how it sat. The recovery points will be slotted through the tube.
That's all I was able to accomplish that day so I had to figure out how to make the truck legal to drive since this is my DD. Building this way is kind of tedious, but you do what you have to do.
Legal! ![]()
The spare tire cross member sits higher than I'd like it too as I'm hoping to sink the jobox into the frame slightly, so it will have to go. That's the reason for building the bumper first. That way the frame won't go all silly on my when I cut out the cross member.
I said the cutting out the recovery points was going to be a cake walk, well that didn't happen either. Turns out the table was only wired with a 30 amp breaker and 10ga wire. To run the 85amp tip that would pierce 3/4" I needed 60amp service and 6ga wire. I must have caught the owner of the coop at a good time because he let myself and one of his employee's rewire the machine Sunday.
After a lot of tweaking on the settings we decided that cutting the perimeter of the plates would work, but the small mounting holes would have to be drilled. No big deal, just have to pick up a few high speed bits.
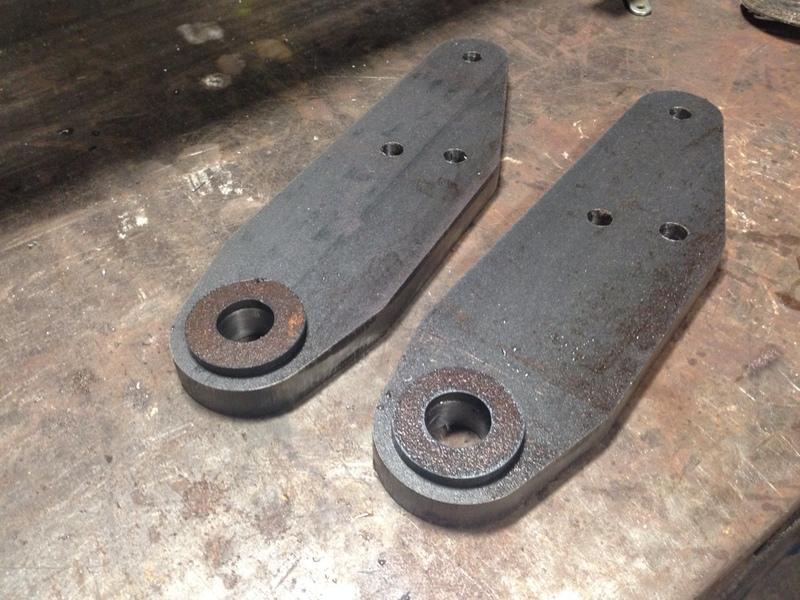
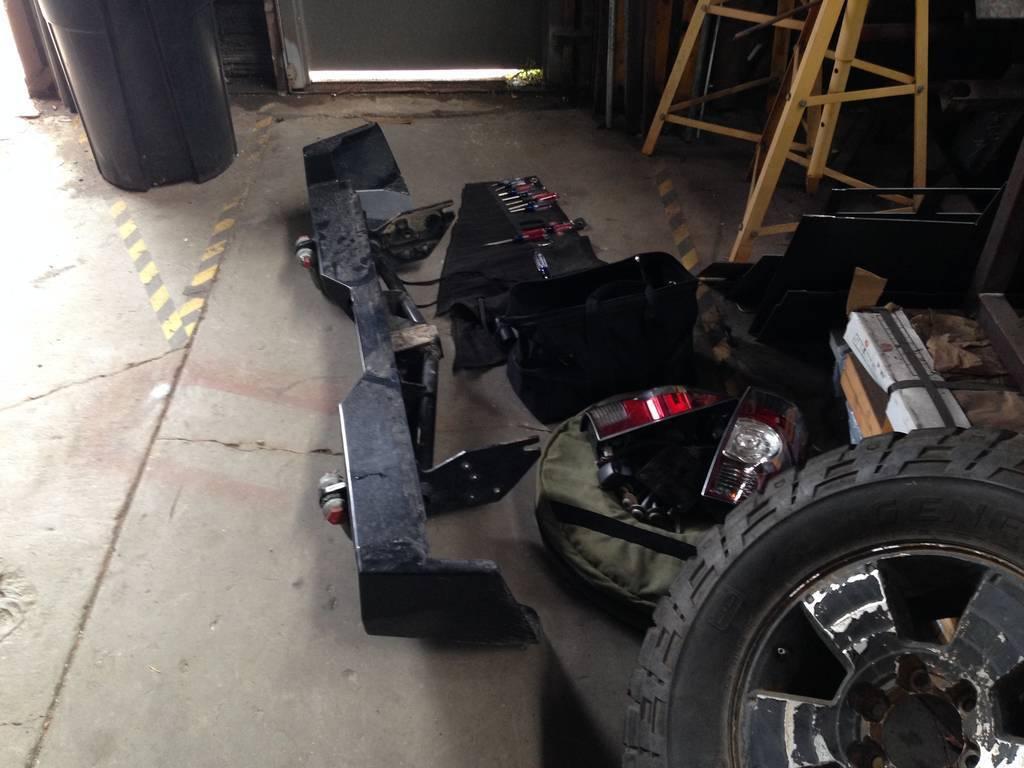
Here are the freshly cut 3/4" recovery points.
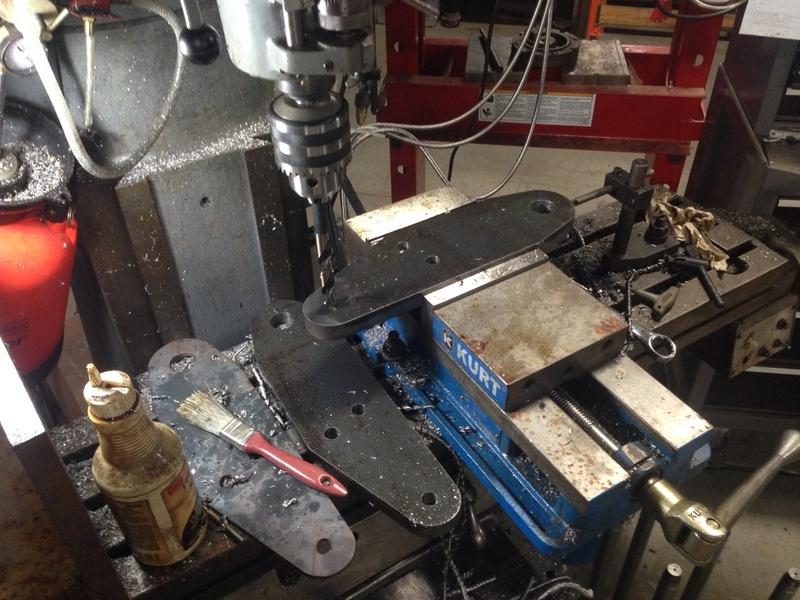
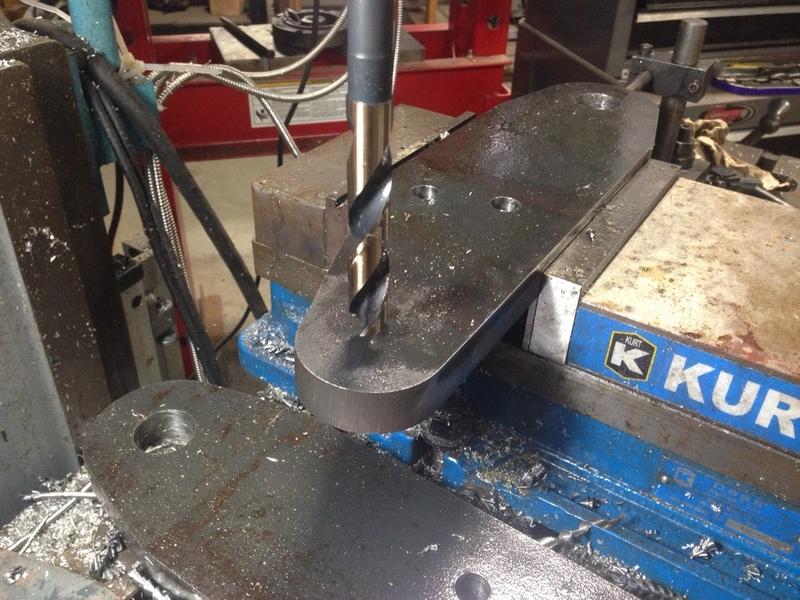
9-16-2014
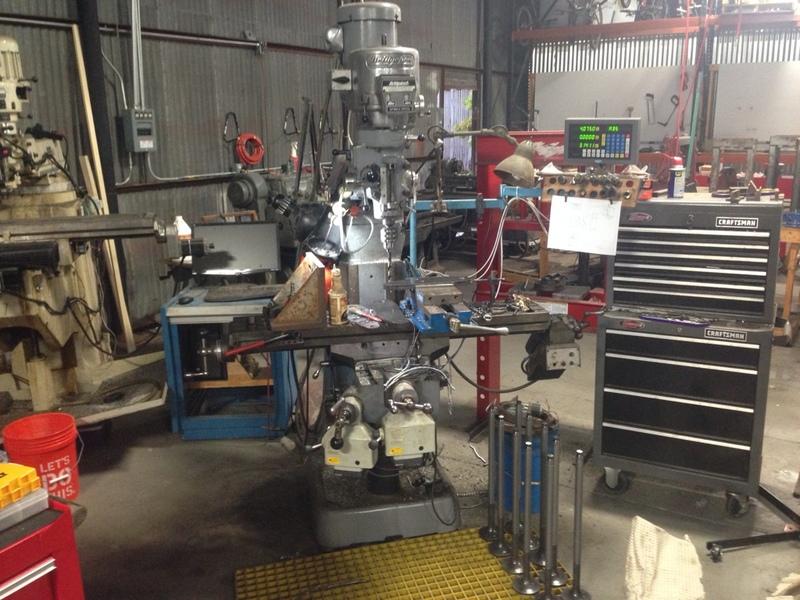
I had one of the guys in the shop give me a quick lesson on how to run this bridgeport mill. I was able to drill the 1-1/8" and 9/16" holes with ease with this bad boy.
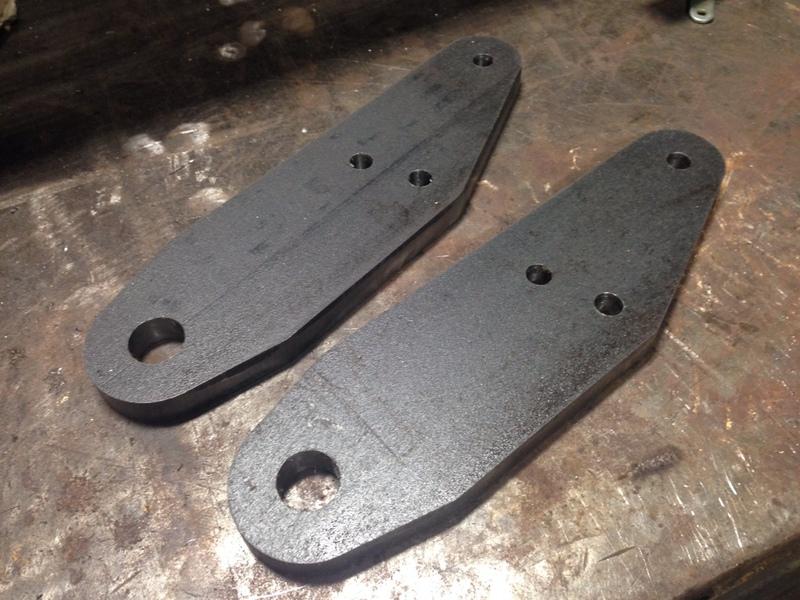
I cut a couple of sample cheek plates as well. I need to try again with my 85amp tip tomorrow to try and get rid of the chamfer that was created with the 45amp tip. If that doesn't work then I'll dive further into the settings and see what I can figure out.