You must be logged in to rate content!
10 minute(s) of a 20 minute read
10-19-2009
ABA/JH Swap
Compliments of Moljinar @ vwvortex.com
10-19-2009
By the pricking of my thumbs, something wicked this way comes!
Cue remix of "Bad to the Bone" and "I am Ironman" mashup...
Now that the mood is set let's look at the easiest and cheapest way to enhance the performance of your A1 whether Cabby or Rabbit.
The ABA/JH hybrid motor swap.
Is that ol' JH is leaking like a sieve and can't outrun the family station wagon any more? Time to swap engines. But it's not as hard to do as you might think.
You must have a modicum of mechanical skills. If you can change your own clutch you can do this swap.
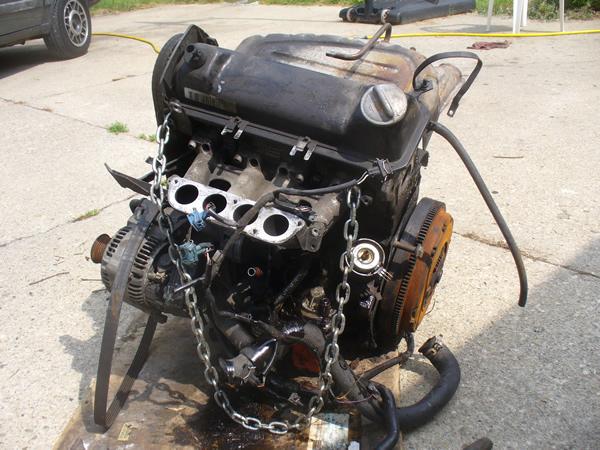
First you need an ABA engine. I got mine from a junkyard for $150, complete
with serpentine belt drives and other bolted on stuff. You WON'T need the fuel injection harness and parts unless you plan to swap over all that stuff but for this swap we won't be doing that. I've seen several $250 ABAs for sale lately with complete harnesses and parts so that's your price range. Detemining the mileage on an ABA is a bit difficult since the A3s these engines were in had electronic odometers which won't be working in the junkyard.
ABA's are 2.0 liter 4 cylinder 8v engines ( 114 hp) found in 1992-present Volkswagen Golf, Volkswagen Jetta, Volkswagen Passat and Volkswagen New Beetles. The heads are crossflow types. meaning the exhaust and intakes are on opposite sides of the head. While you can make that work in an A1 you're asking for more work. Our swap will use the existing JH head (solid lifter or hydraulic doesn't matter) That allows us to not have to do any rewiring, no plumbing changes to the fuel injection regardless of DigiFant or CIS, no relocation of components.
Once you have your engine you'll need to clean it up and verify it's reasonably in good shape. Once that's done I pull the head. Leave the intake and exhaust manifolds on it it still attached. It makes it easier to handle and they won't be needed. Removal of the head is the same as any 8V VW engine. Drain the coolant out first. While you're at it drain the oil. Eventually you'll have this block upside down and all the oil will drain out and make a mess. Trust me on this.
Check out the bores. You should be able to see a light crosshatching and not
much if any carbon build-up on the pistons. Turn the engine upside down and pull the flywheel and pressure plate off. The usual ABA flywheel and clutch is too big to use with your 020 transmission. You won't need it anyway. Now pull off the oil pan. Inspect the pan for frothy brown stuff, shavings, small parts, rodents and sludge. If you want to get really crazy pull the bearing caps and check the crank journals for wear. Or not if you trust the source of your engine. Clean out the oil pan and paint it while it's off.
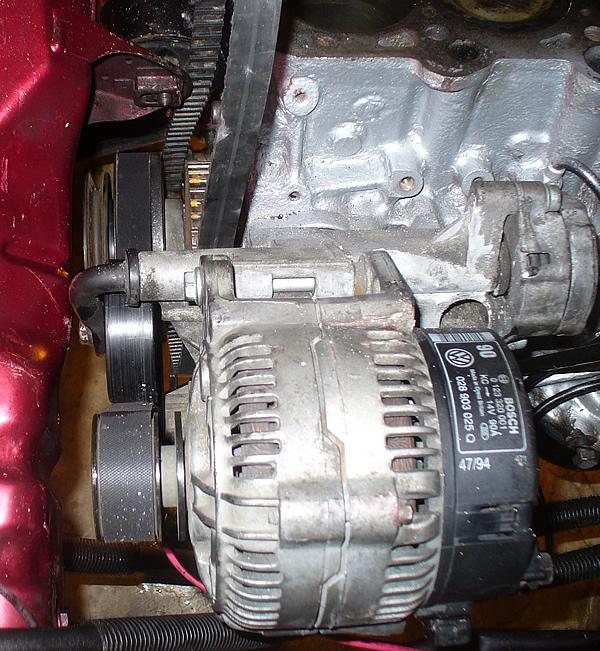
Clean up the engine and paint it. Pull the serp belt brackets off if you are so
inclined. They bolt back on easy enough.
NEW PARTS
You'll need a few things to make this work.
1. 16V head gasket. Only way to make the JH head work on the ABA.
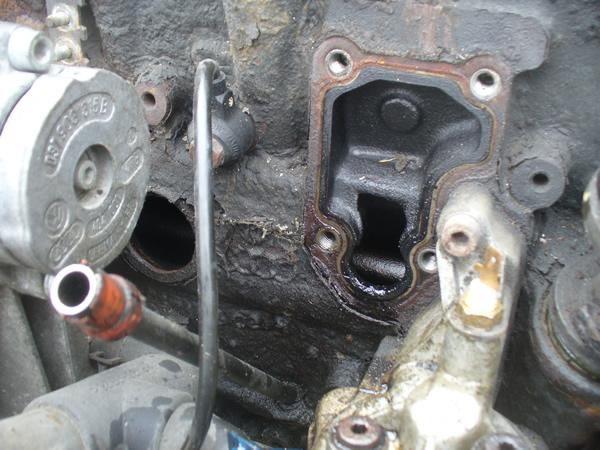
2. Breather block off kit.
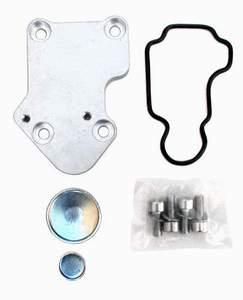
Not actually mandatory but makes life much easier on you later. Make sure you install the freeze plug but you'll need to remove the serp belt bracket to get access. See Techtonics Tuning for the kit.
http://techtonicstuning.com/sh...3.135
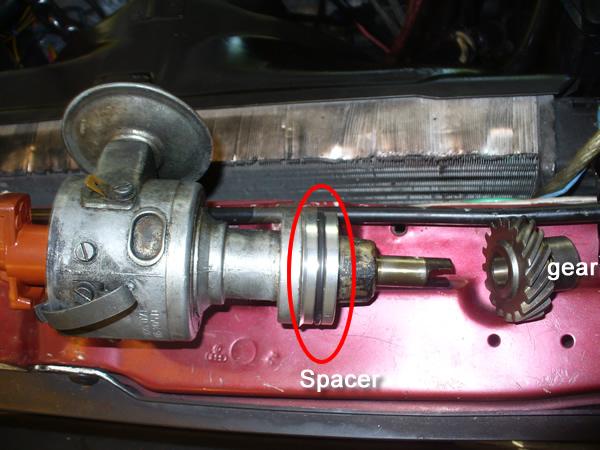
3. Distributor gear and bushing Kit.

http://techtonicstuning.com/sh....146
This is required if you use a distributor from a usual 8V engine. You can also
decide to swap a CIS or Digifant shutter wheel onto the ABA distributor. Here
are some links to study while you make your decision.
4. Knock sensor ECU and harness. See above links for more information. This
combo should give you a compression ratio of 10:1 which will cause
predetonation if the gas is bad and timing isn't right. And it destroys engines
so VW came up with this to solve the problem.
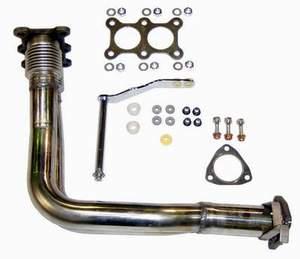
5. Exhaust "solution"
The ABA is 16mm taller than your old block. This causes 2 problems. The
throttle lever may hit on the rain tray and catch/stick. You'll need to bend it
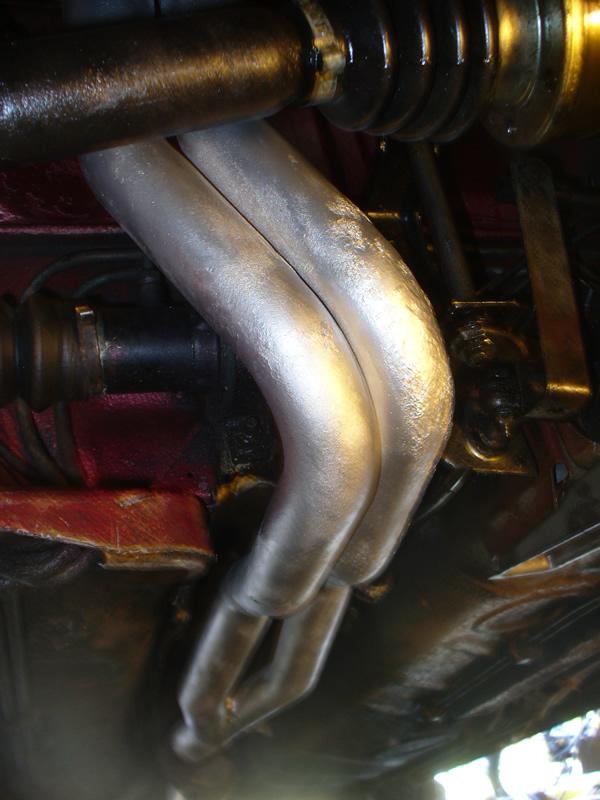
out of the way. The stock A1 exhaust may no longer be able to reach the exhaust manifold without bumping into the body. Solutions are to cut and extend the pipe, put in longer studs and make a 16mm spacer. Most 4 into 1 headers and 4-2-1 headers will clear fine. TT used to make a race downpipe for the dual outlet manifold and it clears fine as well. You could also use the ABA exhaust manifold on your JH head and Techtonic's stainless steel flex downpipe.
Expensive but comes with a short shift kit as well and should last forever.
http://techtonicstuning.com/sh...1.223
6. Serp belt AC delete kit.
http://techtonicstuning.com/sh...0.040
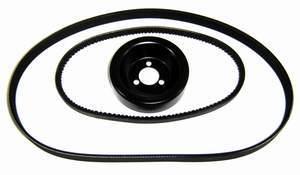
Use this if you don't have/want an AC compressor in the serp belt system. It
uses a VR6 serp belt "pulley' for the water pump. And a shorter serp belt.
That's about it. Simple list.
Pull your JH head off the engine that's still in the car. Again do not remove
the intake and exhaust manifolds unless you really have a need to. Drain the fluids now. It'll make a mess later if you don't. Trust me.
Disconnect everything. Careful with the wiring since it's 25 years old and will
crack on you if bent too far. Pull the engine and transmission out. Separate
the two. Pull the old engine off to the side.
Clean up the engine bay while it's empty. You'll thank yourself later.
Put together the ABA except for the head/manifolds. The upper timing cover will not fit correctly, frankly I got rid of mine. Modify it if you feel the need.
Make sure the serp belt system is together and working. This is a good time to put on a new timing belt. Use clutch, flywheel and pressure plate from original engine. Tip: good time to put in new clutch. While you're at it put in a new 16V pressure plate to handle the new power levels you'll be rocking. What the heck use a lightened flywheel as well it has it's advantage if only to make it easier to remove the oilpan screws. Paint the timing marks now while you have a chance.

Take the oil sensors and temp sensors out of the old block and put them into the proper holes on the ABA. You'll need to reuse the black water pipe that wraps around the engine.
Last time, go around the engine and make sure it's clean, tight, painted and
ready to go. Put the new block in the car. Bolt up the tranny. Now put on the 16V headgasket. It may not fit since the line up pilot stud was too big to fit in
the hole in the gasket. Very carefully drill it out to fit. Deburr it as well.
Once it's on you can put the head on. Once torqued on correctly you can start hooking things up. Feed it water and oil as needed.
Set the static timing. Install the distributor. Time it. If you use the knock
sensor setup make sure it's hooked up correctly.
Since you never replaced the fuel injection system it's ready to go. Once
everything is hooked up you're ready to go!
Notes:
If you choose to use the distributor gear kit you'll need to drill out the pin.
Look at both ends of the pin. One side is obviously split. On that side
centerpunch a hole (and make sure it's centered!) Drill there with a 5/16"
drill bit. If it's a fresh bit it'll go thru with no problem. The shaft is much
harder than the pin and if the drill bits a bit off it'll recenter rather than
drill into the shaft. Hammering out the pin is a major pain, don't bother
trying. Put the bushing on first then the gear. The roll pin in the kit can be
removed later and easily.
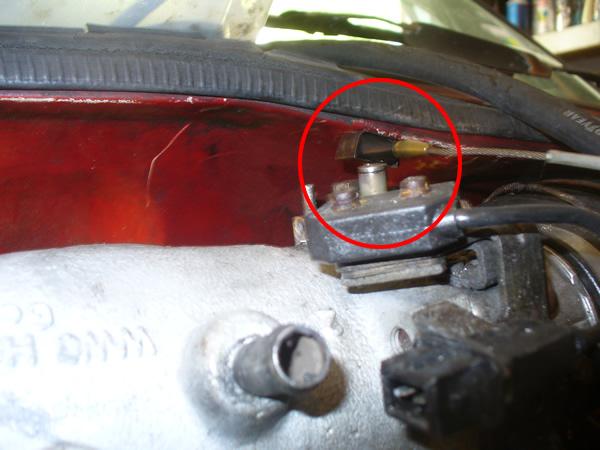
The throttle cable end will bump into the raintray. You must dent this
otherwise the cable will stick or fall off. Neither is good.
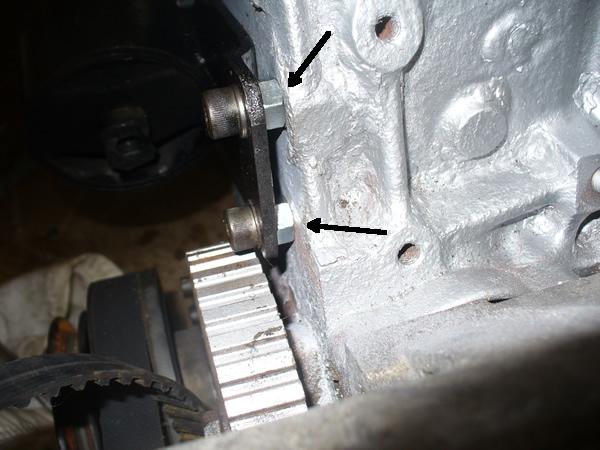
The passenger side motor mount needs t either have the old alternator mount under it or a spacer of some sort. I chose to eliminate the old mount and used 8mm nuts, drilled out, as spacers. Nice and clean.
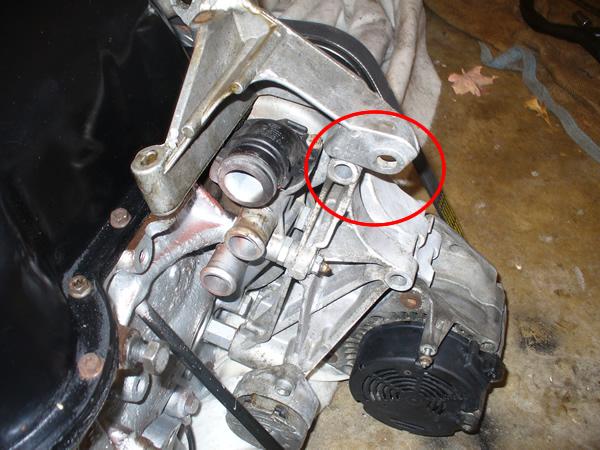
Power steering is a bitch so far. The original brackets won't work and even if they did the pulleys aren't close to lining up. I'm working on a solution but so far PS isn't available.
This is a strong setup. Lots of comfortable torque. Very rev happy.
I'll add more as I think of it.

10-20-2009
Mine misses by about a 1/4 to 1/2 " . I've heard of others having issues but mine clears like a champ. Use as big hammer and flatten the rail there.