You must be logged in to rate content!
16 minute read
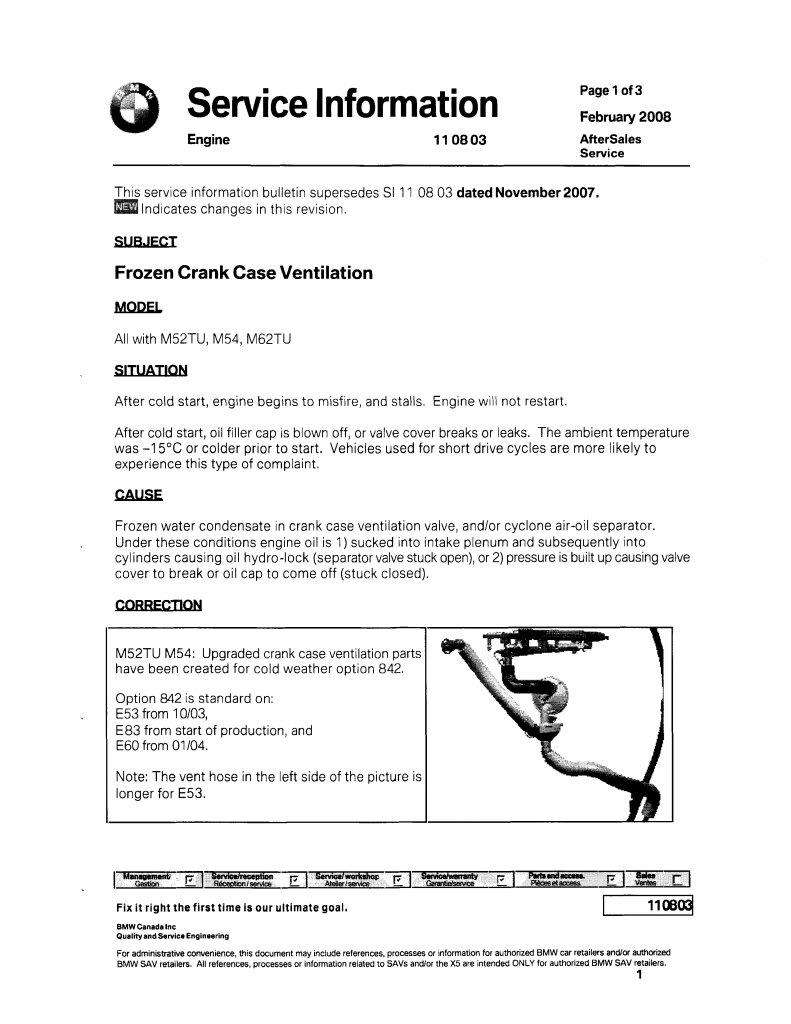
CCV Replacement FYI - M54
Compliments of Jason5driver @ bimmerfest.com
1-8-2010
Well, I replaced my CCV finally...
Let just emphasize..... "finally"...
The job was NOT fun.
The ONE electrical plug in-front of the Vanos was especially hard to take off.
The old CCV hoses were a pain to take off as well.
I tried to disconnect the old hose without breaking them, but finally gave in after a LONG time, and broke the locking rings to the hoses!
I did not have to modify the cold weather CCV.
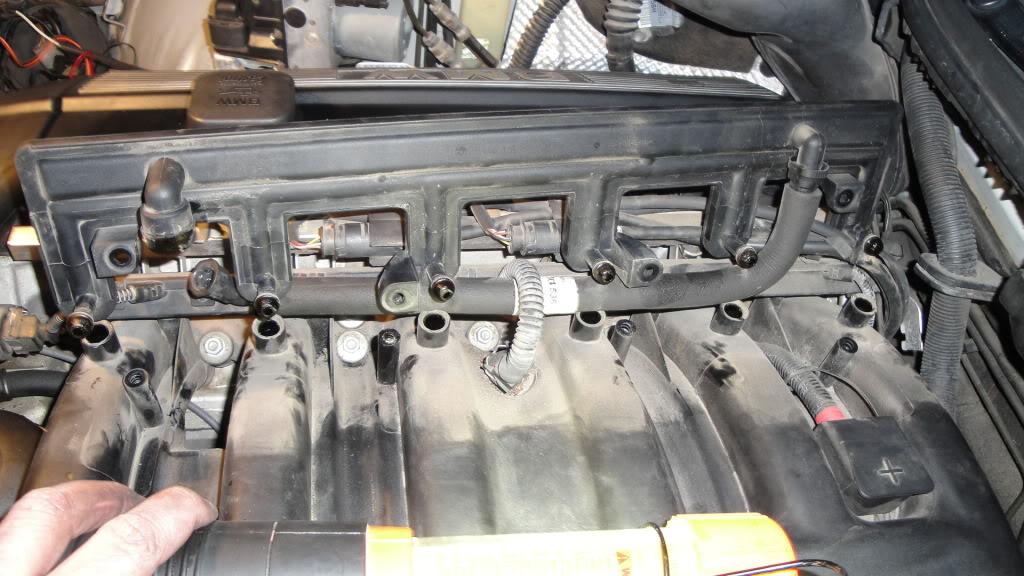
One key thing to do, that will help take off the old hoses, is to take off the air distribution piece on top of the intake manifold (#5 below)!
I highly recommend replacing the Air Distribution piece (#5 below) if you plan on replacing the CCV!
BimmerFiver's thread for replacing the Air Distribution Piece:
Intake Distribution Piece I6 (CCV/Vacuum) with Pics/Star Wars
bimmerfiver
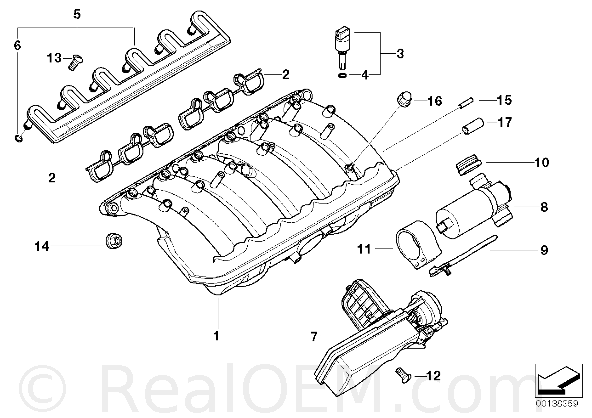
Ref:
http://www.realoem.com/bmw/showparts...79&hg=11&fg=40
That will allow you access to the (2) top hose connections, and let you clean the massive filth under there.
And, I found an easy way to connect the small 'S' hose (#3 below) that connects to the air distribution piece from the CCV.
Ref:
http://www.realoem.com/bmw/showparts...94&hg=11&fg=15
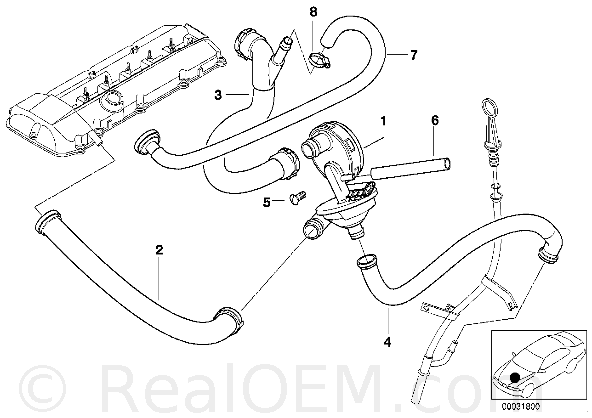
First, you install the cold weather CCV WITH the long hose the goes to the front of the valve cover CONNECTED to the CCV (#2 above).
Then snake the 'S' hose (#3 above) in.
If you buy the cold weather CCV kit, the 'S' hose (#3 above) ,the valve cover hose (#2 above), and #6 above will come with the kit.
Leave #2 connected to the cold weather CCV.
Turn the S hose back so that it is parallel the ground, which then allows you to twist connect to the CCV.
Turn the S hose up towards the air distribution piece connection.
That will lock in the hose.
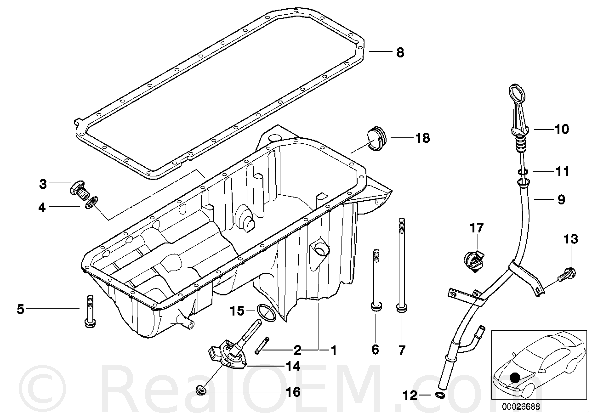
Also, when replacing the O-ring on the dip stick, slide the O-ring on the dip stick first, don't push the ring into the oil pan.
I cleaned everything, so it took a LONG time... 
However, I noticed my old CCV was still in good shape, and so were most of the hoses.
Plus, I have NO mayo build up any where.
I only found a little bit of yellow crud in the valve cover/CCV hose connection.
No build up in the dip stick either!
All was very clean.
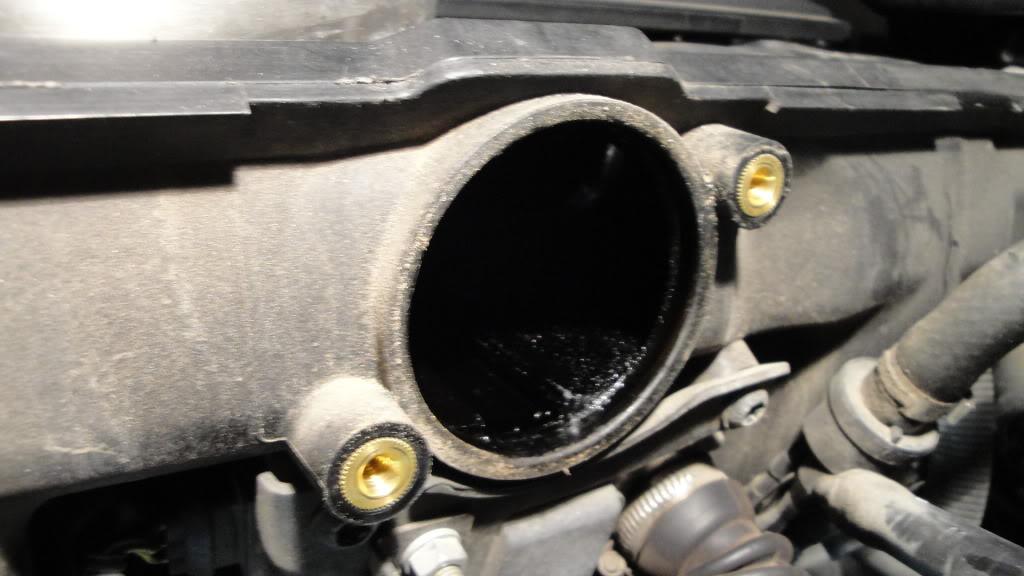
However, I did notice some gritty sand/oil within the intake manifold after I removed the DISA valve...
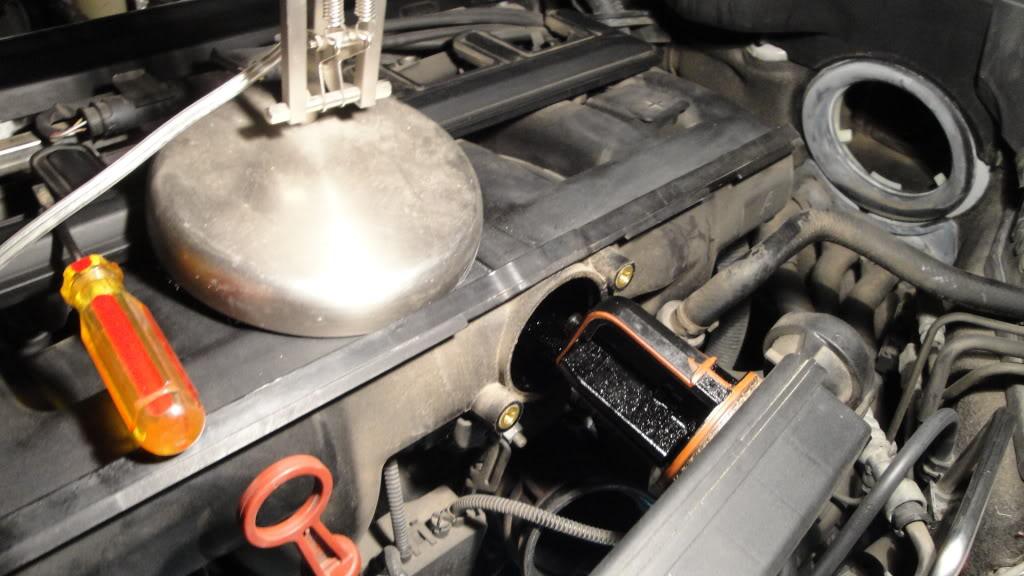
Some pictures:
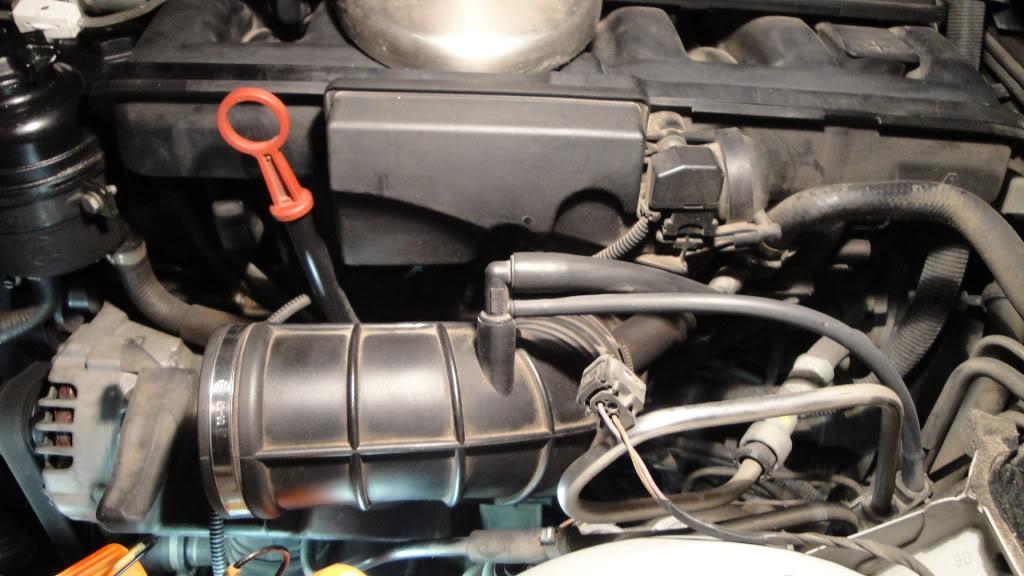
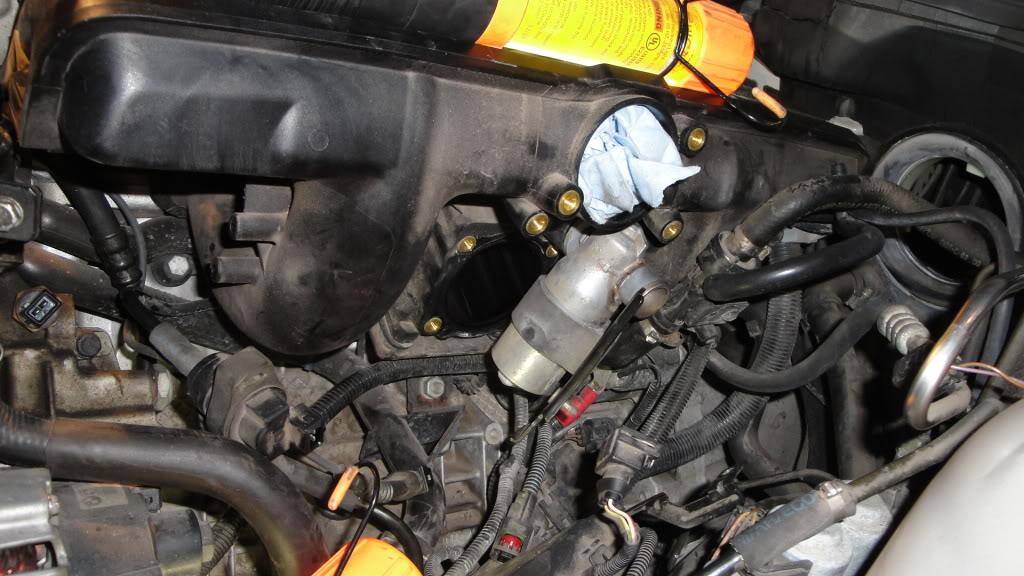
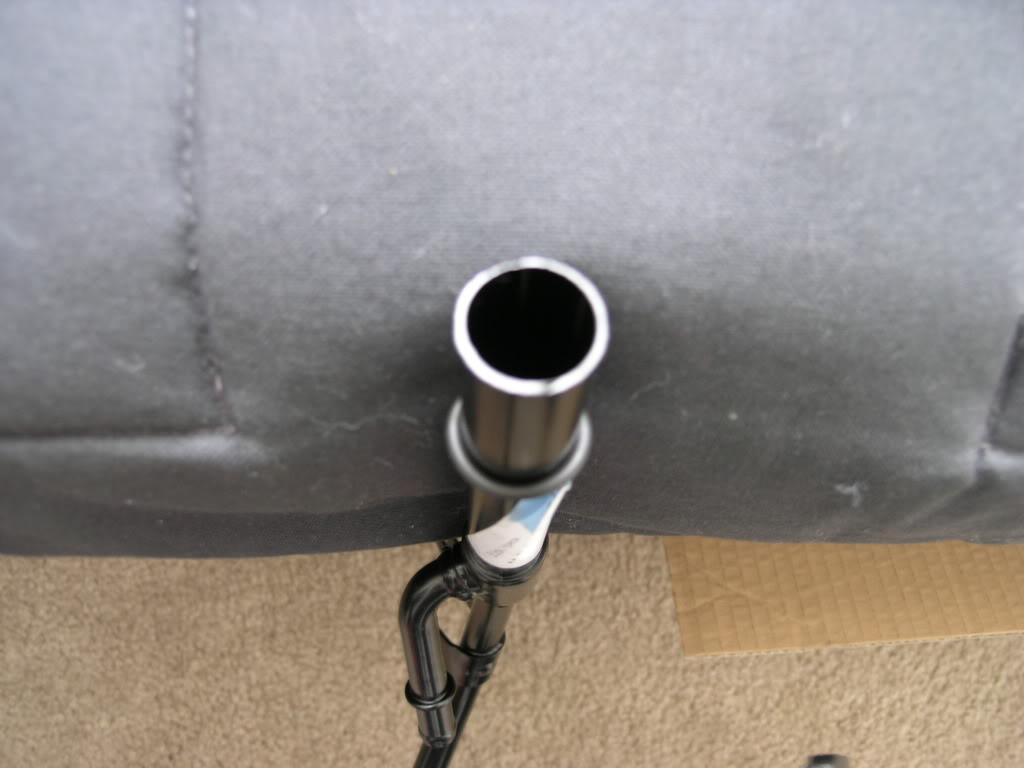
Valve cover CCV hose disconnected:
(Notice a little gunk in the valve cover...)
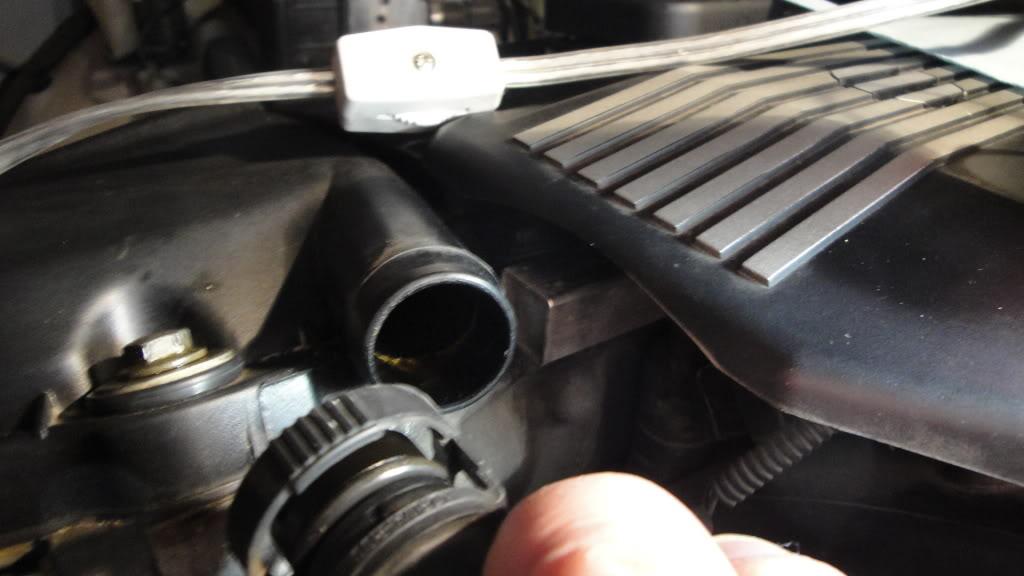
Leaky power steering hose:
Cabin filter drain hose - plugged:
Note: A plugged cabin filter drain hose can cause the compartment with the brake booster to freeze-up, and get contaminated.
Feel free to ask BimmerFiver about this... LOL! 
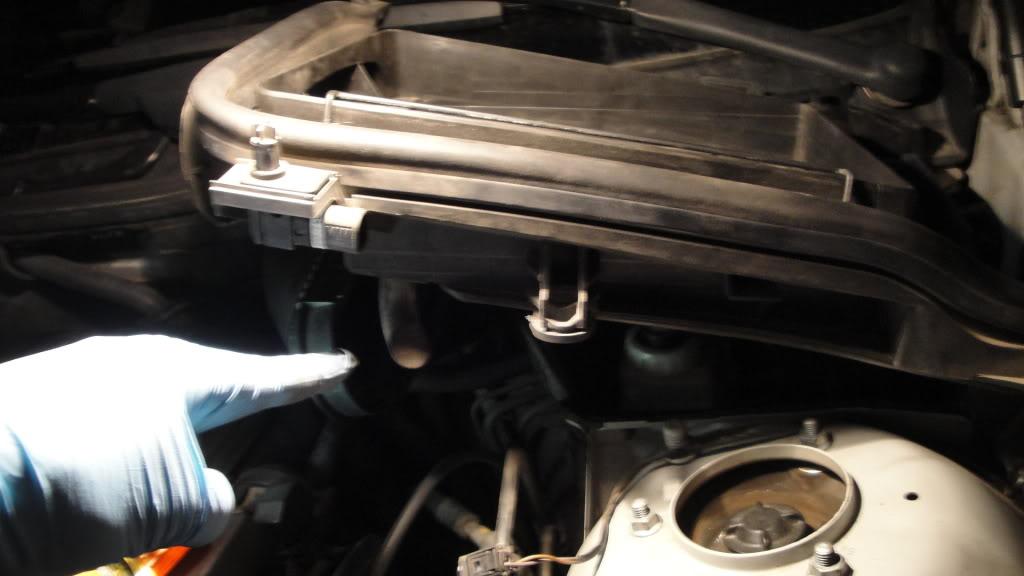

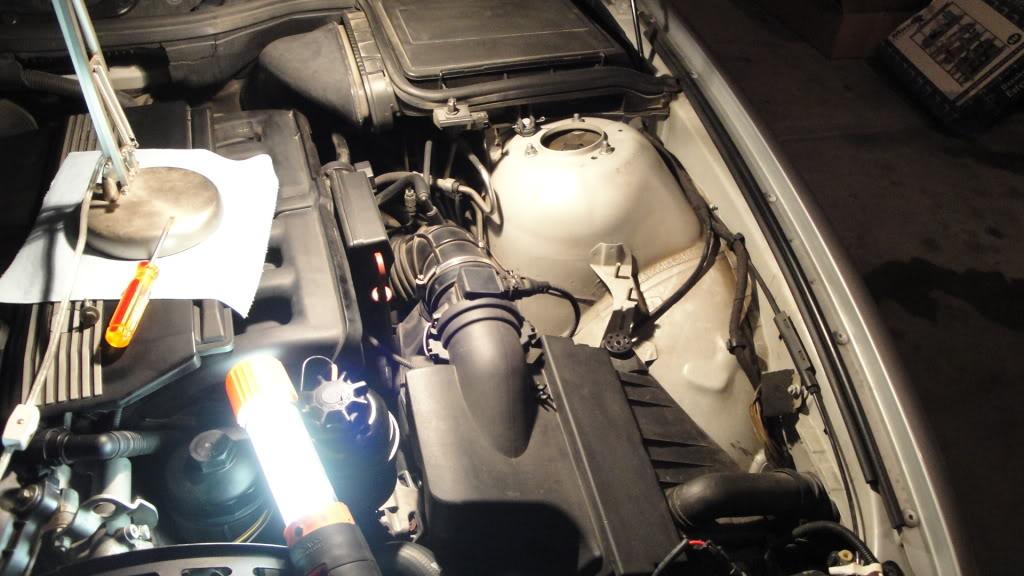
Removing the Disa Valve:
Hole where the Disa Valve was, and where the gritty oil was:
Lifting up the Air Distribution piece:
Throttle body is off.
Just need to pull out the ICV to be cleaned.
The ICV is that silver thing below the blue shop towel.
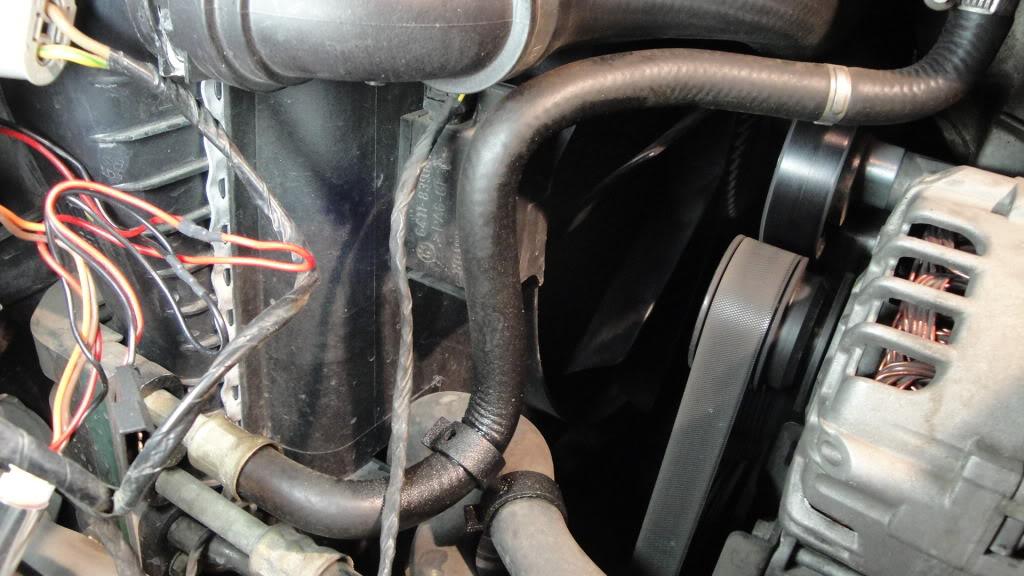
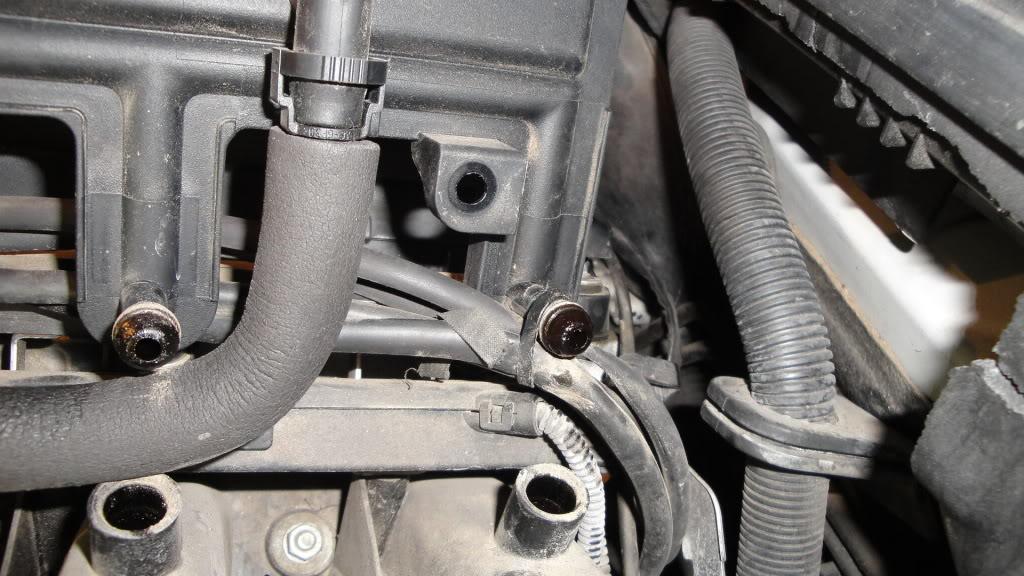
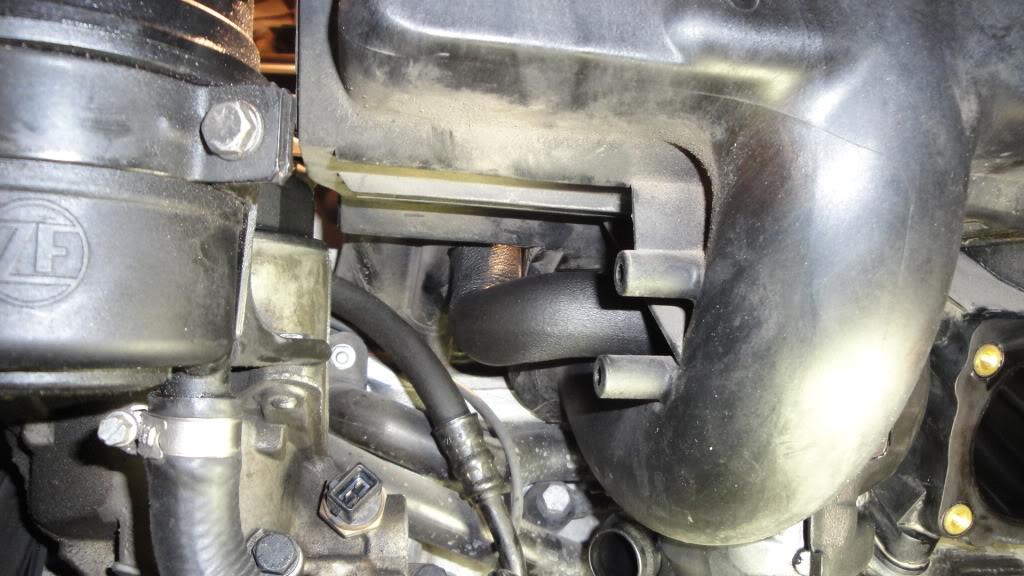
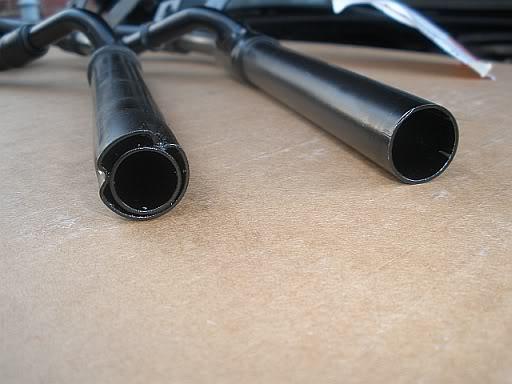
'S' hose pushed back in order to twist connect it to the CCV:

'S' hose under the intake manifold, connecting to the CCV:
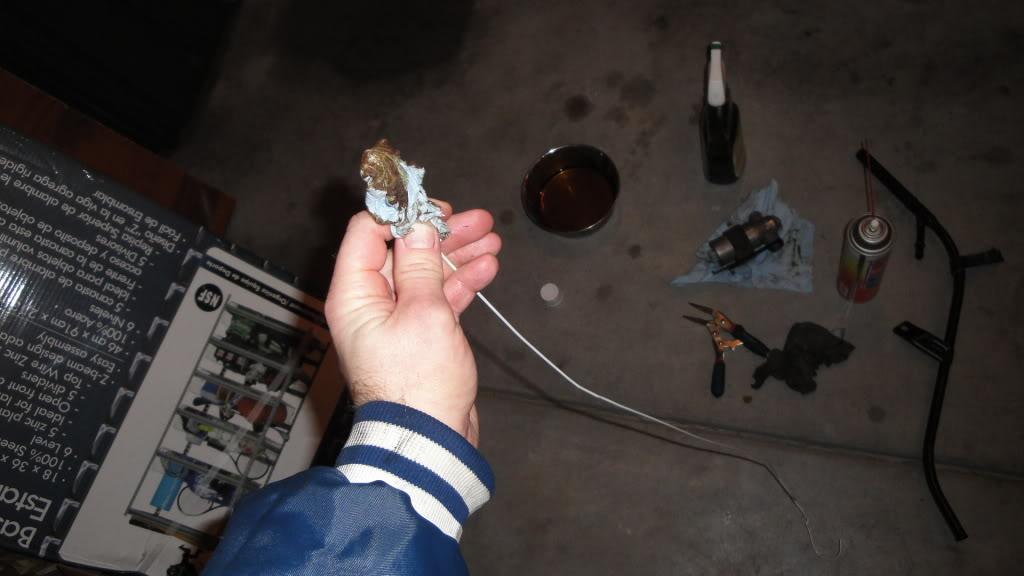
I also unwound a clothes hanger and pushed it through my dipstick tube in order to clean it, similar to cleaning a gun:
I replaced ALL of my air intake elbow hoses too.

Just a couple things I wanted to add, did a cold weather CCV on a 2001 525iT today. The S shaped hose (number 3 in the realoem diagram Jason has posted above) That came with the cold weather CCV was over 1 inch shorter than the factory part once the insulation was removed from the hose and the two compared side by side.
After fighting to secure that hose for what seemed like an eternity I removed the insulation and compared it to the old hose. It was over an inch shorter, which is why it was being such a pain. I blew the old hose out with some MAF cleaner and compressed air and reused it-from there it went together like butter. The S shaped hose is too short in the cold weather CCV kit, BMW probably saves a nickle on plastic and laughs at the techs who have to fight with the thing.
Beyond that everything went smoothly, I didn't cut any hoses or anything, it all came right apart.
I think my original 'S' hose and new cold weather hose were the same.
I test fitted both, in order to confirm how it would connect after I installed the CCV, then connect the hose in a tight space.
IMO, I think your hose was defective.
I think my new #2 hose (real OEM diagram) was shorter than the original...
I had a SERIOUS fight/problem with the #2 hose (real OEM diagram)!
The insulation on the new hose made it VERY difficult to snap into the CCV.
The original has an accordian flex on both ends of the hose, but the new hose only has it on the valve cover end!
So, the alignment of the new hose HAS to be perfect!
It took a VERY long time to connect that hose!
I had to remove the oil filter housing cap in order to gain a little more room.
That is why I recommended leaving that #2 hose connected to the CCV when installing the new CCV.
I just did this on my M52TU touring and most of your pictures look similar.
I replaced the non-cold weather parts with BMW non-cold weather parts (exact same). Originals lasted a long time ... wasn't going to make it complicated and run into an issue where a different version might not fit (as posted by Mark).
I did the oil filter housing gasket at the same time so had a lot of room coming at the CVV job from the front and side.
*FWIW, my "S" hose rotated right in to the CVV in the same process as you describe. Was easy to get together ... though I was certain based on reported DIYs this would be the toughest part ...
Thanks!
Yep, the 'S' hose was the easiest to my surprise.
But, the other #2 hose was my nemisis... LOL!
That, and the electrical plug infront of the vanos that does not have the metal release clip.
This parts list was found on the fest in fudman's M54 write up.
11 61 7 533 400 Pressure Regulating Valve - CCV (insulated)
11 61 1 533 398 Vent Pipe (insulated)
11 61 7 533 399 Connecting line (insulated)
11 61 7 532 629 Vent hose (insulated)
11 61 7 504 536 Return Pipe (insulated)
11 43 1 740 045 O-Ring, Oil Dip Stick Tube to Oil Pan
There is no need to get ALL of that.
Just get the CCV cold weather kit, the (2) additional hoses, and the dip-stick O-ring.
I would also get the air distribution piece too.
In my case, I could hear a hissing sound when accelerating, burning oil, poor performance, and gunky hoses.
You can check the CCV hoses and oil dipstick for goop.
That's always a sign.
And, it is not a matter of 'if' the CCV fails, it's a matter of 'when' it fails.
The CCV a is BAD design/ over-engineered part that WILL fail, even with the new cold-weater CCV.
However, I think driving technique (not drive like an old lady), type of oil/ 5k-7.5k interval changes, and the new oil dipstick tube design can all help to prevent the CCV from failing.
Bimmfiver's example of a failed CCV, and what can happen:
Towed for the 1st time - P1373, P0171, P0174 ( 1 2)
1 2)
bimmerfiver
Another great thread by JackCat559:
For God's Sake There's A Service Bulletin About This ( 1 2)
Jackcat559
3-30-2011
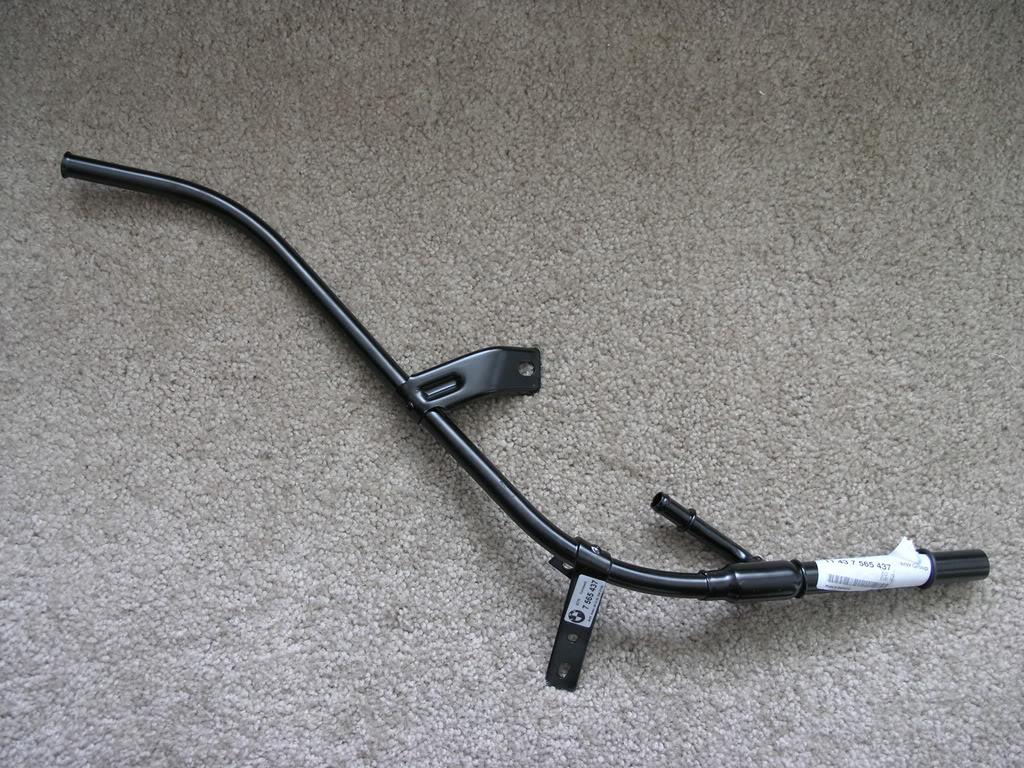
The new type dont have small pipe inside dipstick ( where o-ring #12 ) which was the main issue for yellow crud
now ask how much it cost ... ~200$ what the crappppp
see BMW #11437565437
still not decided to buy it or not ... what guru's say ?
Mark do you have this new Dipstick and if yes how much it costs ?
================================================== =====
================================================== =====
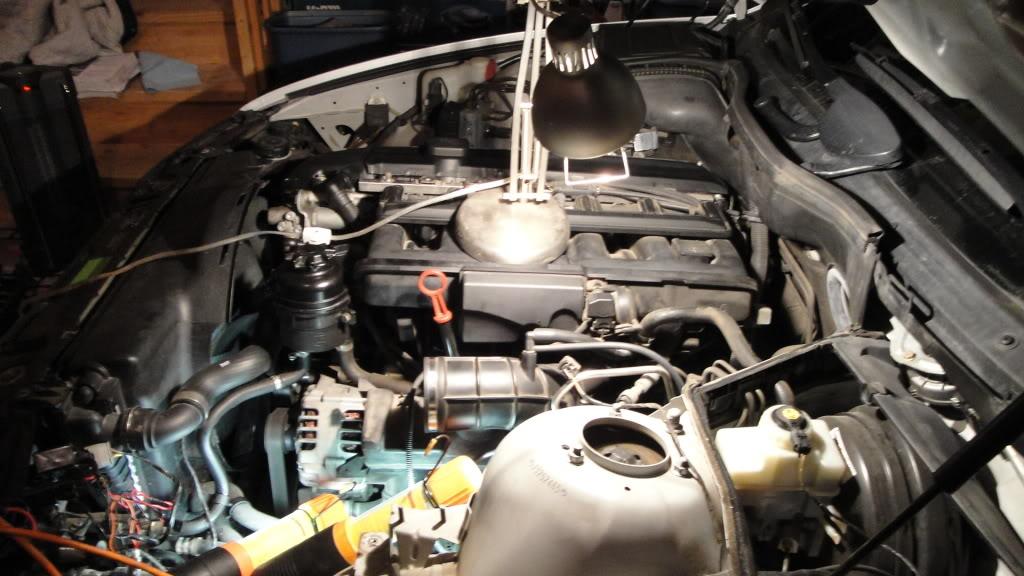
manifold is off
CCV is off
now i have space to work also on oil filter gasket 
 Originally Posted by genuity
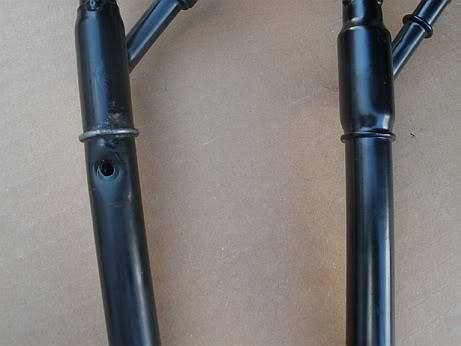
Here is your $200 dipstick (top p/n: 11437565437) versus the original $30 (bottom p/n: 11437531258) comparison. Now you wonder why oil gets sucked into the intake if your CCV is clogged (with the original dipstick guide tube), huh? What kind of retarded engineering is this? 
I just did an overhaul job on my E46 that has an M54. OP, did you replace your starter and vacuum lines? I'd hate to do this job ever again. I went ahead and replaced everything under it--cooling pipes, hoses, and sensors.
Did you clean your intake manifold? It took me about a week or so to clean it. I know it was impossible to get it completely cleaned because of the design--the lobes that come down to form the throttle body opening probably still has a little but of oil grime in but I emptied over a dozen Berryman carb cleaner, a gallon of Purple Power and Simple Green, and about half a liter of Dawn dishwashing soap, and finally several gallons of water with a pressure washer for each of those items I used. Additionally, I also submerged it in baths of those items overnight.
I am REALLY debating getting the new Cold-weather dipstick tube design for $165 from the dealer... unfortunately...
It is like a ripple affect...
Once the dipstick clogs, then everything else starts to clog up...

7-26-2011
I found this awesome thread with some interesting info...!
http://forum.e46fanatics.com/showthr...7#post13417197
10-10-2011
Here is some very good comparisons between the new oil dipstick tube design, and the oil one...
 Originally Posted by mach.schnell
Since water condensation builds up within the CCV system (which is supposed to burn off later - I'm sure you've seen vapor or water dripping out of a tail pipe - which btw means the car was just recently started) there are times when you will temporarily see the "mayo goo" in various places (such as underneath the oil cap). Heat the engine up and all that goes away.
The oil separator (bottom funnel part of the CCV gizmo) is supposed to collect larger droplets of oil from the fumes inside the valve cover. These drops then slide out the bottom, down the hose and into the dipstick tube. But... this means at times you could pull out the dipstick to check your oil level and see the "mayo" or "coffee cream" goo and scream "agghh my headgasket blew!!@#$%" (when it didn't).
To avoid this, the oil separator drained into an outer sleeve of the dipstick guide-tube so the dipstick wouldn't ever get goo on it. So the old design had a tube within a tube. The outer sleeve into which the oil separator drained was very narrow, and mayo goo tended to freeze inside as it slowly oozed down the hose and hit a cold metal dipstick guide tube. Hey, BMW later fixed all that by getting rid of the dipstick altogether.
Just so you know, the dipstick does not go all the way down through the guide tube and out the bottom. Instead the oil goes up into the guide tube when your oil level is correct. In the old tube, the goo would have mixed with the oil way down in the oil pan. With the new design, it looks like goo might ooze down through the nipple and get on the dipstick (when there is goo).
Here you can see how narrow the outer sleve is on the old guide tube at left. I've seen pictures where the ice accumulated right up the hose and into the oil separator itself. (The new design is on the right.)
In addition, the old tube in tube idea required a vent hole:
So if anybody thinks they solved the freezing hydrolock problem by just putting a foam jacket on the CCV, well....
12-15-2011
Just a little update...
I recently talked to one of my local mechanics, and found out what they do to remedy the poorly designed dip-stick tube...
I will make a sketch, and take a picture of what they do/ did for the fix.
The fix makes a LOT of sense, and should prevent any future b
Great details!
Posted by Diggymart on 5/5/20 @ 6:09:32 PM