You must be logged in to rate content!
8 minute read
Cowl & lower windshield strip replaced (E39)
Compliments of Waveho @ bimmerfest.com
8-22-2007
If you've replaced the windshield cover already, you've done about 1/2 the job; check out your lower flashing and you'll likely see some major cracking issues too.
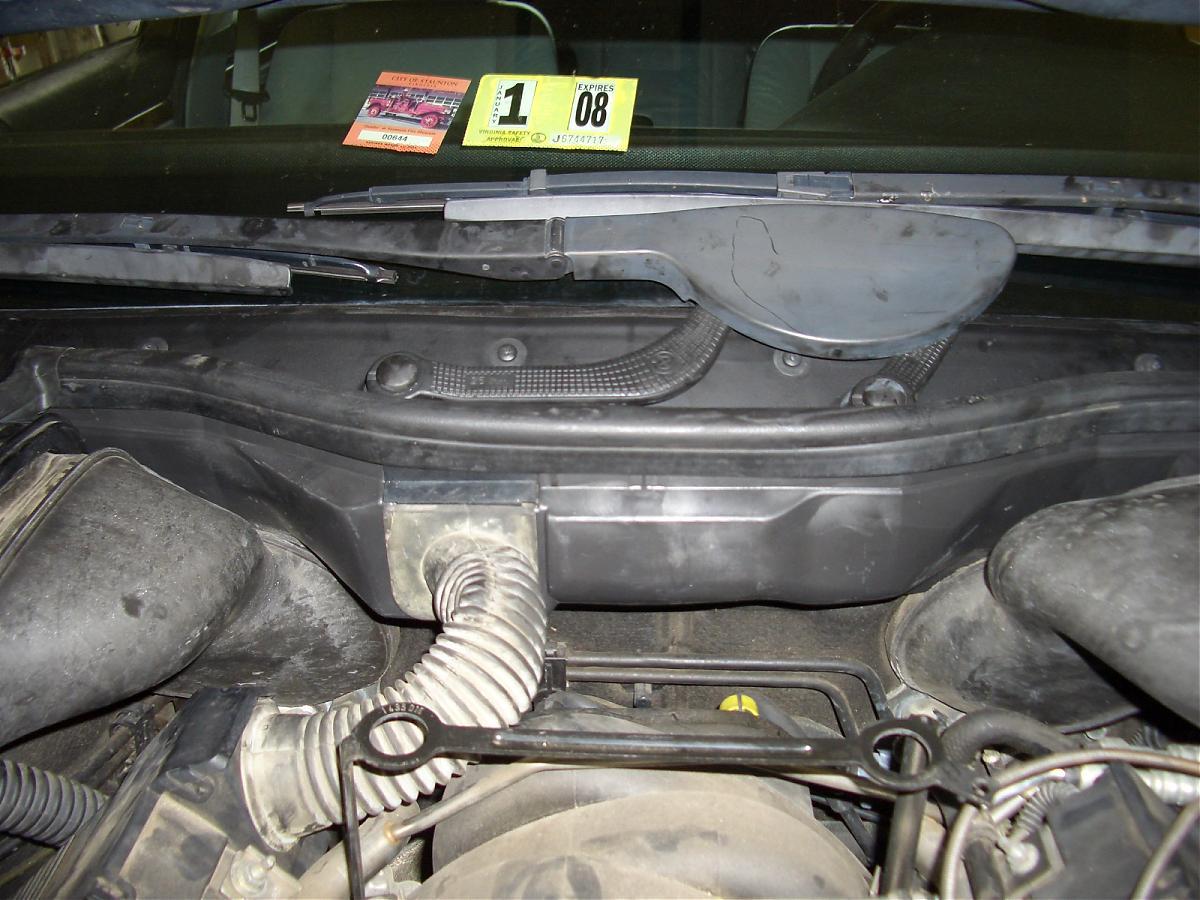
Also, remove your engine cover and see what's left of your cowl--the burning rubber you smell when you turn on your air is likely caused by the deterioaration of this rubber cover which encapsulates the air ducts from your engine compartment leading too your cabin.
For e39 540i:
cowl part #: 51 718 157 446 ($32)
cowl flashing/lower windshield strip part #: 51 718 159 292 ($72)
tools needed: screwdriver (for prying); 13mm socket; 15mm socket; phillips head; rubber mallet and some tool (for removal of the driver's side wiper control arm).
The tools are for the flashing and wiper arm removal; no tools are necessary for the cowl replacement.
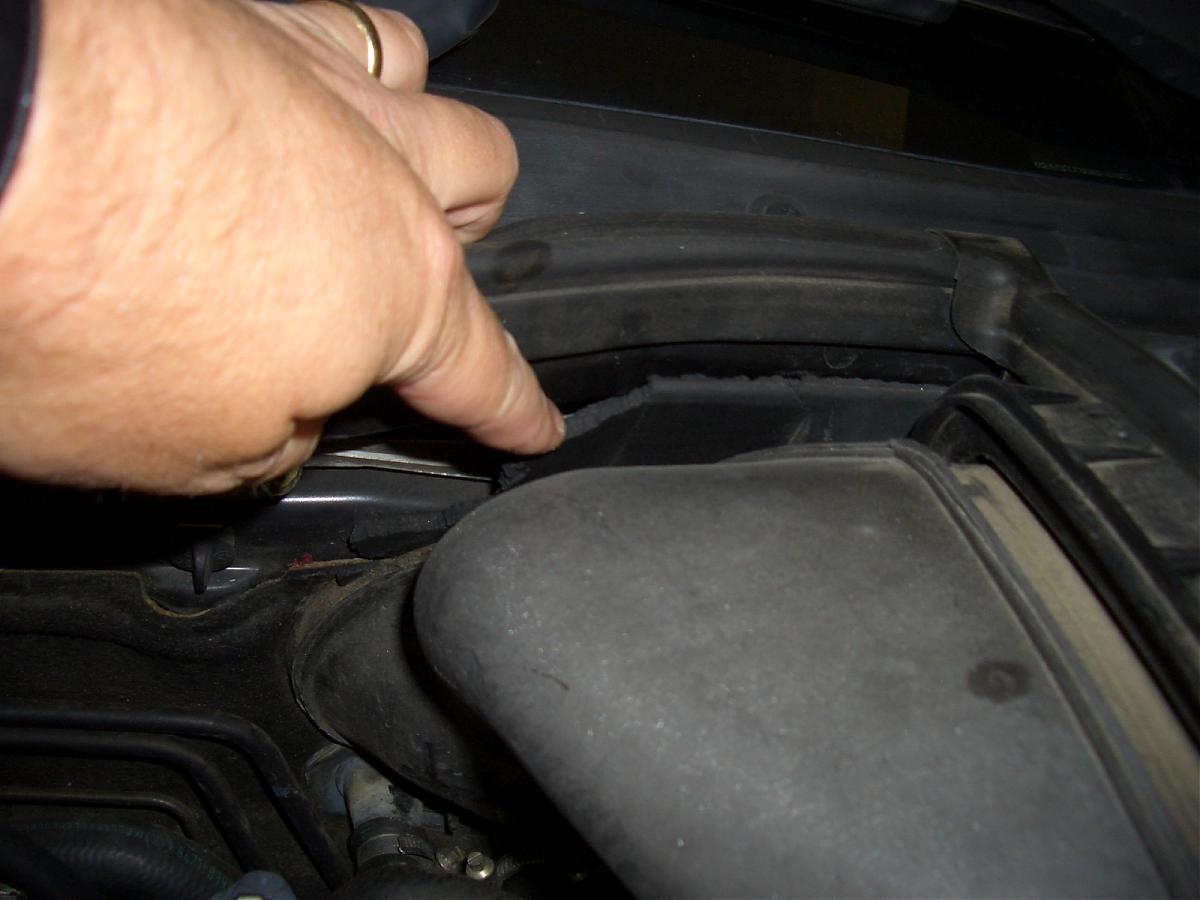
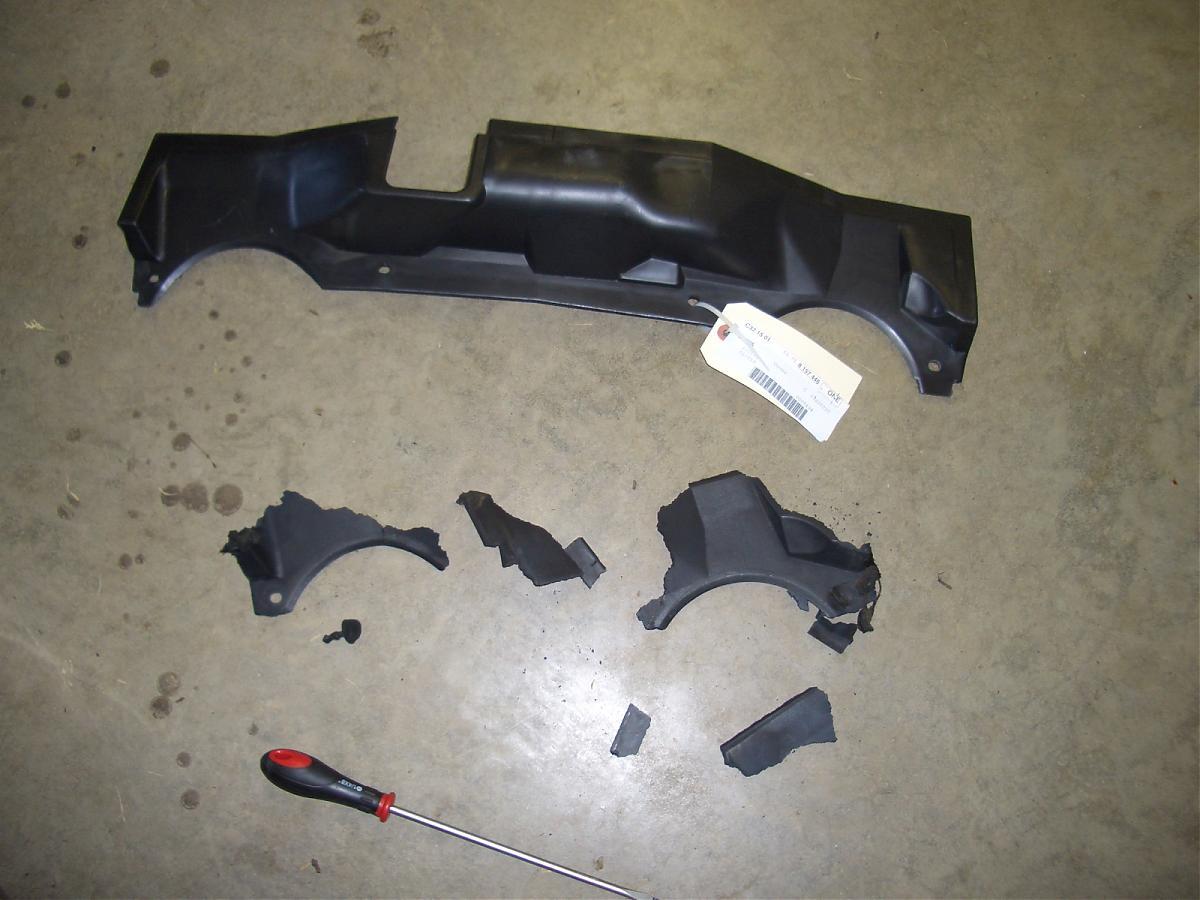
Here are some pics of the compartment where the cowl should be, but in serious disrepair and mostly missing. Compare this pic to the "after" pic of the engine compartment below! Also, I'm pointing to the remaining portion of the cowl in one pic. And in another pic are the new cowl and the stuff I pulled out of the compartment that WAS the old cowl:
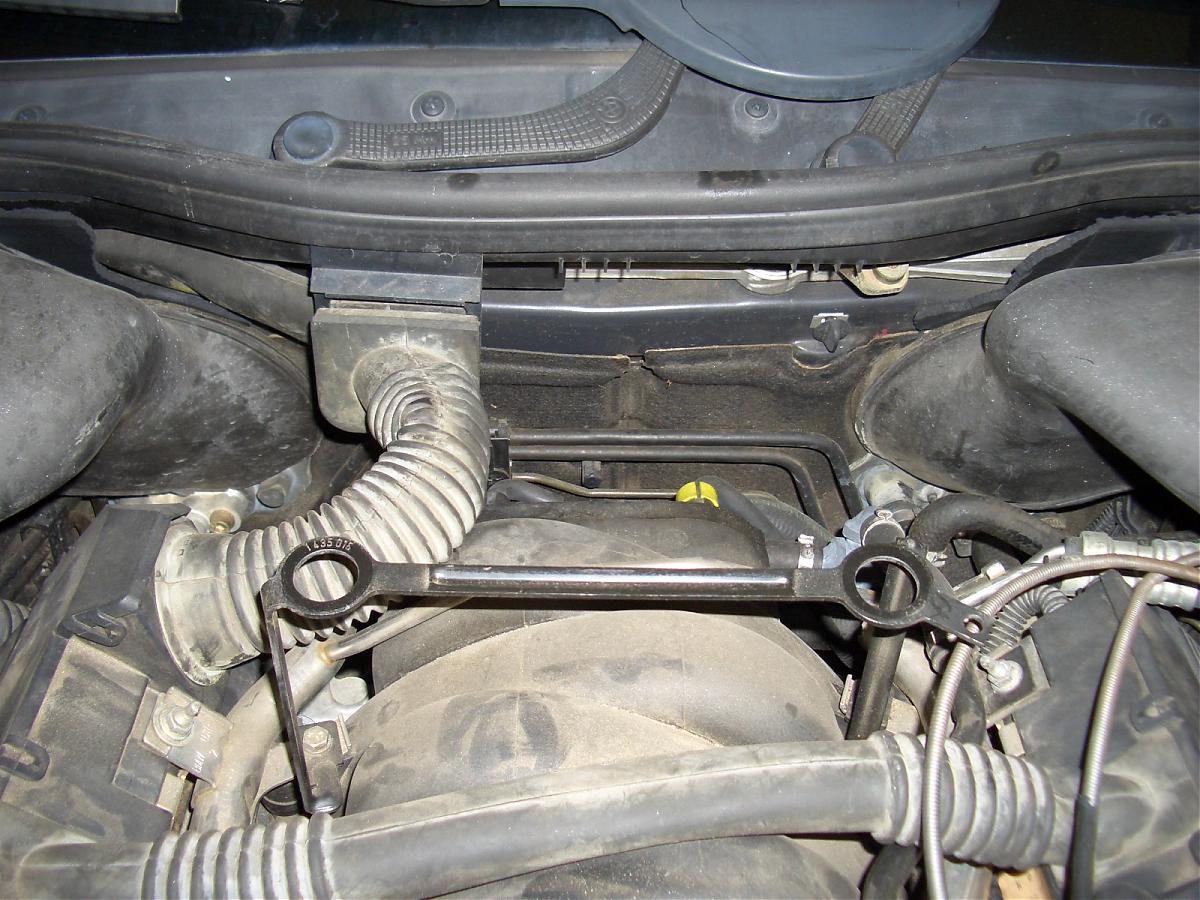
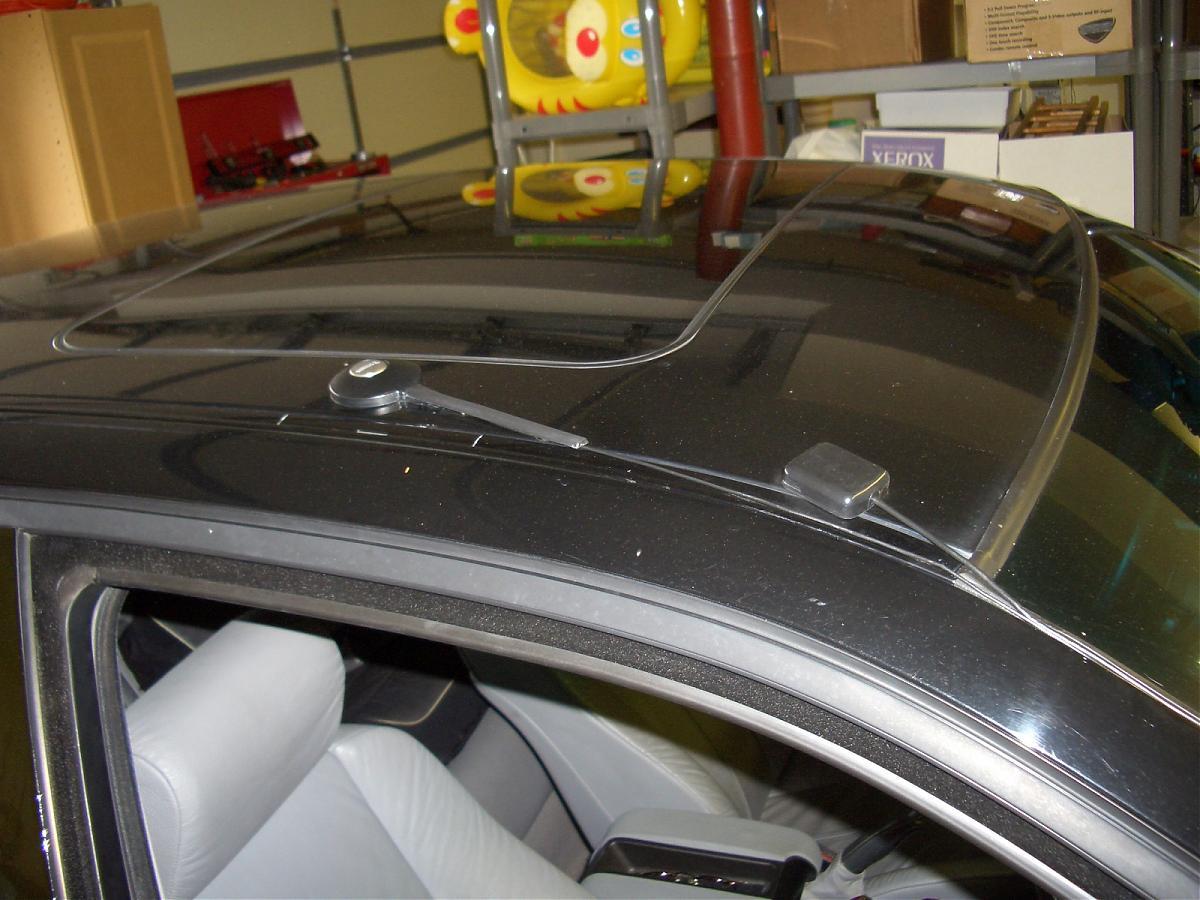
Here is a pic of the engine compartment after the new cowl and lower flashing have been replaced. Note that there was a defect in my flashing as one mounting hole was misplaced; I attached a "dummy" washer and plug with black silicone to seal the hole. Plainly a defect since there was an impression, but no hole, where the hole should have been. No matter, since there are several places where the flashing is secured.
Driver's side wiper arm was a bear to remove--the pressure nut needed to be banged with a tool and rubber mallet and then pried off. It was also difficult to realign the wiper arms properly upon re-installation.
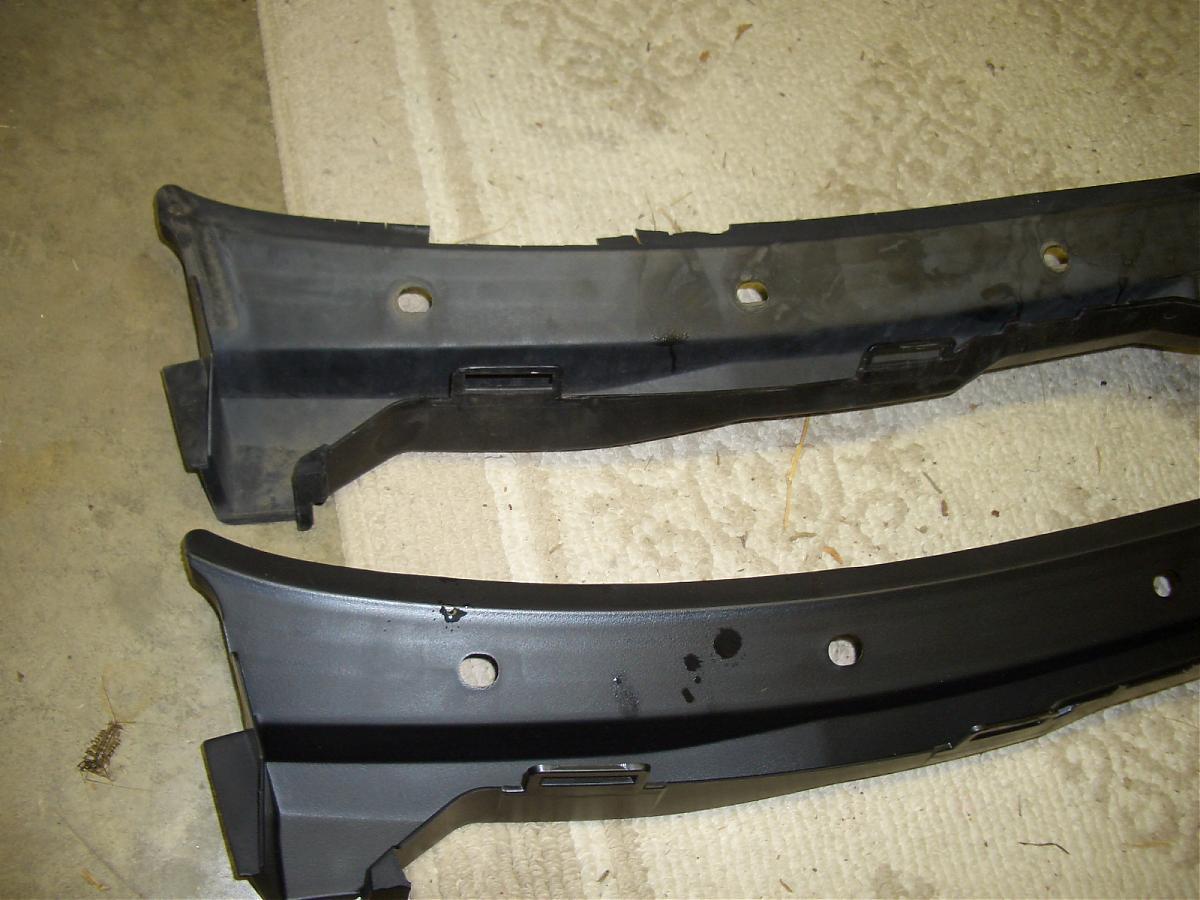
Anyway, here are some "after" pics, and a pic comparing the old cowl flashing to the new one:
I can already tell a difference in the a/c--no more burning rubber smell in the cabin! This job took me about 2 hours due to mostly the wiper arm removal and old lower flashing removal and installation. Installation of the cowl itself involved removing two clips and connecting the hose bracket to the cowl, which merely slides up (the black square thing in the cowl pic).
Anyway, I highly recommend you check out your cowl and flashing situation, especially if you've already gone through the trouble of replacing your upper windshield flashing and you have an older model e39.
Hope I inspired some of you to do this as well; you'll love yourself for it!
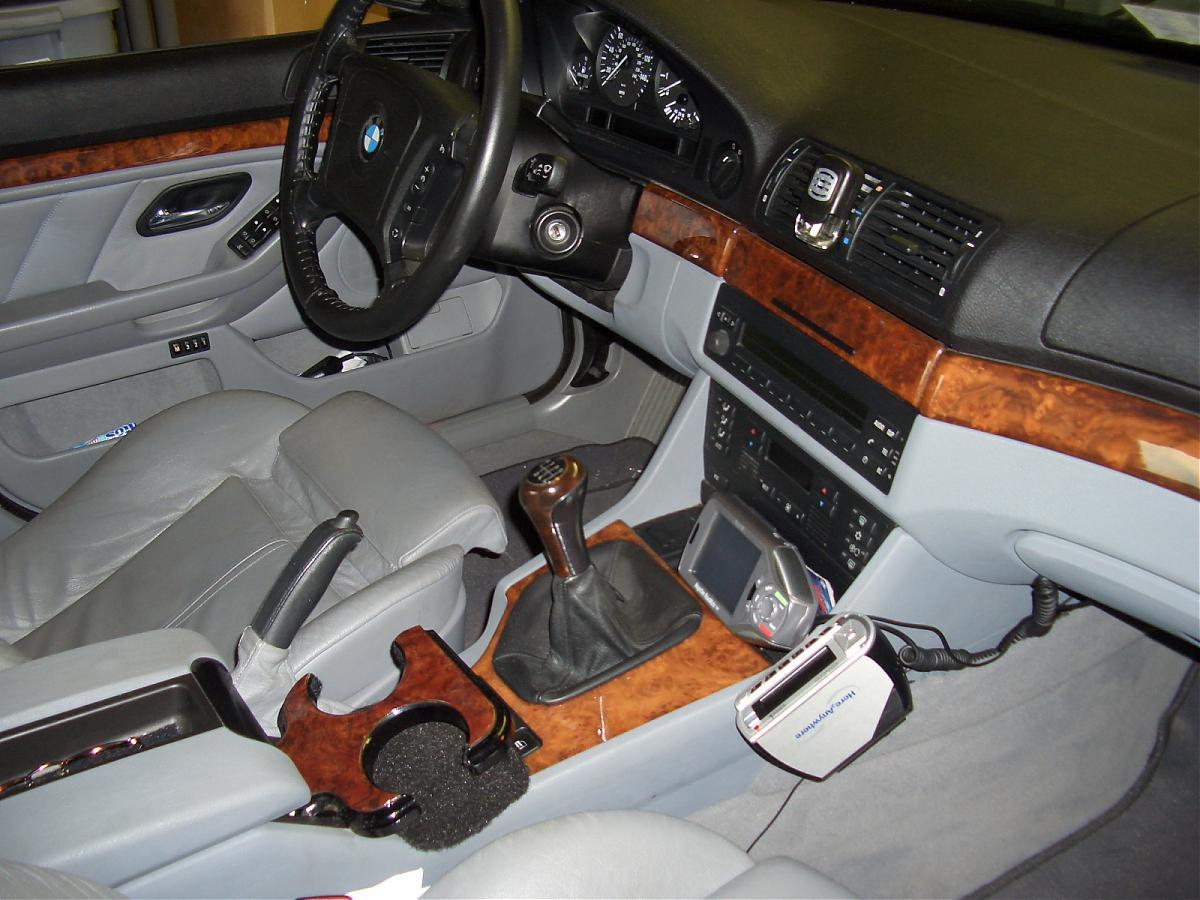
Well, here are some pics of my satelite antennas (SIRIUS and Magellan navigation, respectively) and a corresponding pic of my busy but friendly cockpit, which I merely took since I had my camera handy!
8-28-2007
Glad to help! I think using markers like sticky notes is a good idea. I noticed that the first time I reinstalled the driver's wiper, it looked to be in the proper position, but when I ran the wipers, the arm settled still much too high on the windshield when I cut them off. I had to reposition it by adjusting that damnable pressure nut two more times to get it about right. I don't think there is any other way than trial and error to get it just right, though. Mine still sits just about a 1/2 inch higher than it did previously, but I haven't had the energy to mess with it again yet!
8-29-2007
The cowl part is the smaller piece that covers the area behind the engine between the air manifolds (3rd pic in my first post). The part referred to as cowl flashing is the entire lower plastic and rubber strip that runs along the bottom of the windshield--the longer piece (1st pic in my second post). I only photographed about 1/3 the length of it in order to get a closeup of the condition of the part. Th part numbers for the 528 will differ. I had to special order both parts from the BMW dealership, and got them in about three days.
I ended up dragging the tech out to the car and pointed to the pieces I needed, and he told me what they were called and ordered the parts. I copied the part numbers from the stickers on the packaging.
9-2-2007
Thanks. I also don't know of any damage that may have occurred, but the parts are more than likely there for a pretty good reason. I suspect that water has been getting into areas that it aught not!
One signficant upgrade by doing this, at least for me, has been the great reduction in that ever-present "burning" smell from the blower. The cowl/cover in my case, and in yours, was baked to oblivion, and was probably a good suspect in this odor problem, since that particular part is up against the air piping to the cabin. I don't burn oil or any other fluid, but the smell had persisted, and I think I've found the main culprit in this.
9-7-2007
The replacement parts for both the cover and the lower window flashing I got from the dealer seemed to be of very good quality, and of different material (hard to tell what material it was, though, based on what little was left of the cowl cover!) than the original pieces. I wonder what year BMW began using upgraded material for this? This problem seems to be largely with older e39s.
1-12-2008
I already PM'd The BOSS with further explanation (and he has successfully replaced the lower window moulding as well! Good going--another cleaner e39 on the road!).
But I should add an addendum to this write-up based on a few additional emails I've received. I should have expounded more on removing the main wiper arm. Once you remove the cover of the driver's side arm, remove the top bold. Underneath that is a gold "pressure" bolt that holds the mechanics to the whole shebang together. I don't know of any specialized tool that can assist in removing this bolt. You need a set of heavy duty grips, like large quality pliers, and a rubber mallet. Careful using a metal hammer, but that can be used as well. The bolt is VERY sturdy and can take a lot of punishment. Basically, you need to beat the crap out of the bolt (but carefully, if that makes sense) to loosen it up. Alternate between whacking it with the mallet and jiggling with the pliers. Anti-seize solvent may help. Have patience--it WILL loosen and come off.
Also, a tricky part is replacing the wiper arms in a proper "rest" position after you've installed the new cover. It's a little tricky, and may take between one and three tries to get it right. Put the wipers in the "rest" position and reinstall the wiper bolt including the pressure bolt, but not TOO tight since it is likely you will need to remove and reinstall again. Don't replace the plastic covering quite yet. Once in place, run the wipers and turn off. The wipers will likely rest a bit too high. Remove the bolts, tighten up and try again. After two or three times, they will be back in position. Have some patience and you'll be happy. Enjoy your nicer looking window mouldings!