You must be logged in to rate content!
9 minute read
Replacement of Leaky Power Steering Hoses
Compliments of bgal530 @ bimmerfest.com
9-14-2010
E39 Power Steering Reservoir Hose Replacement
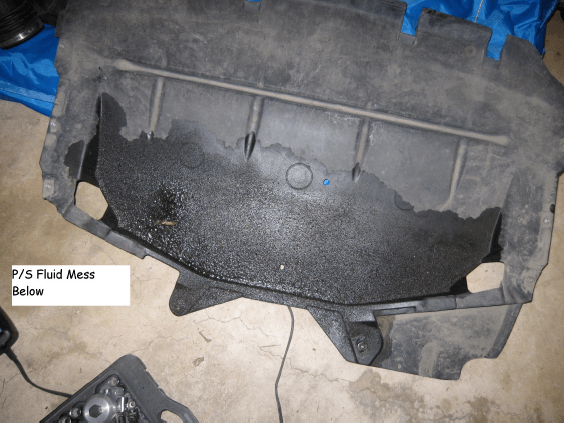
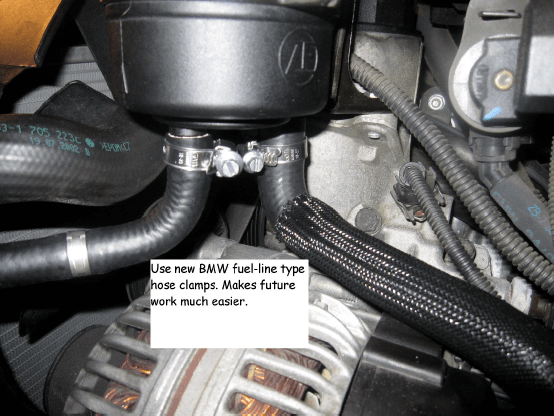
As I was switching over to my summer tires, I noticed some shiny liquid stuff on the lower engine cover. A 5 minute investigation and a quick trip to the internet revealed a very common problem – leaking power steering hoses at the reservoir. Many people simply cut off an inch of hose and attach new hose clamps, which will work just fine, but if you decide to commit, these steps and photos hopefully make it easier:
Work took place on a 2003 530i w/manual transmission, build date of 9/02 at 75k miles. My tell-tale sign was the power steering fluid covering the lower engine cover. Yours may be low level in the reservoir, or a pink fluid on the floor of your garage. Run your fingers underneath the p/s reservoir. If they come out grimy w/power steering fluid, it’s time to get out the wrenches.
Required Consumables (from RealOEM.com):
1.32411095526 Intake Manifold (Hose to P/S Pump)
2.32411094306 Radiator Return Line (Hose to Cooling Coil)
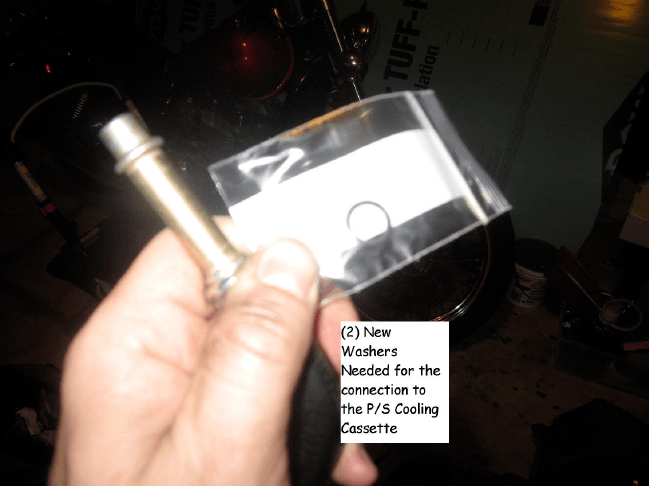
3.17211742636 O-ring for installation to cooling coil (2 required)
4.(2) 6 – 20 mm hose clamps for Intake Manifold Hose
5.(1) 9 – 24 mm hose clamp for Radiator Return Line
6.Lots of rags to mop up power steering fluid
7.Power Steering Fluid – for sedan, use a high-quality ATF per the Bentley Manual. I used Mobil-1 Synthetic ATF. The Tourings, I believe, use Pentosin- DON’T MIX THE PENTOSIN FLUID W/ATF. Nothing good comes of that chemistry experiment.
Accessing the hoses: The first order of business is removing the air filter box.
Keep this picture in mind to remember how the hoses are routed, etc. when you finish.
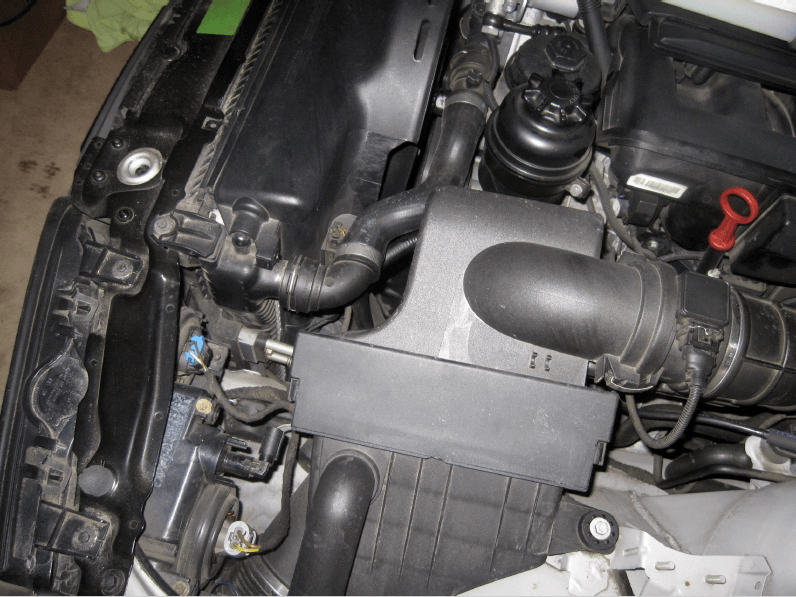
It’s less painful to remove the Air Filter Box, the Mass Airflow Sensor, and the hose between the MAF and the Throttle Body as one unit. Loosen up the hose clamps around the ‘hose’ (near thethrottle body, not the MAF) and down near the driver’s side headlight, remove the bolt that holds the assembly to the fender, and pull out the vacuum hose plugged into the top of the ‘hose’. I broke this plug during my cooling system overhaul, and it set me back all of three dollars (at the dealer, no less). Finally, a cheap part!
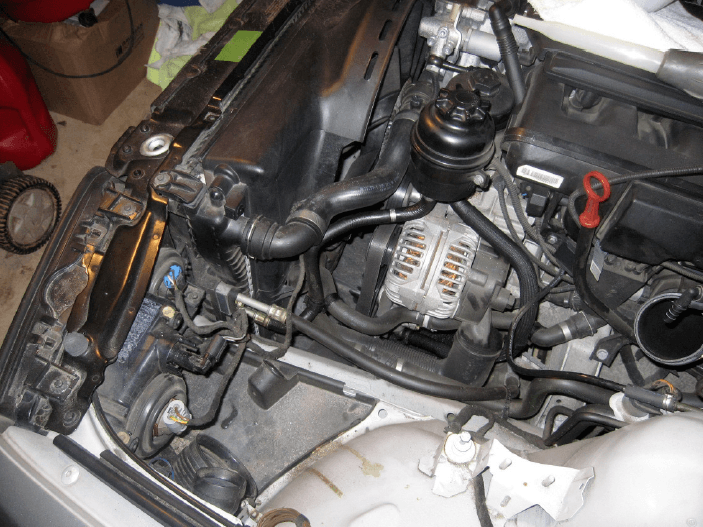
Now that the air filter box, MAF, etc. are out of the way, you have plenty of room to work. In this picture, you don’t see a lint-free rag in the engine intake to the throttle body, but it’s because my bright yellow rags don’t photograph well.
Now is a good time to remove the lower engine cover (if you haven’t already, and get prepared to drain the system through the power steering hose at the base of the p/s pump.
To drain: Looking at the picture, you can see the annoying clamps that come from the factory. Get a good pair of straight cutters and hack this off. Get your oil drain pan ready, and pull the hose off, trying not to get doused in p/s fluid.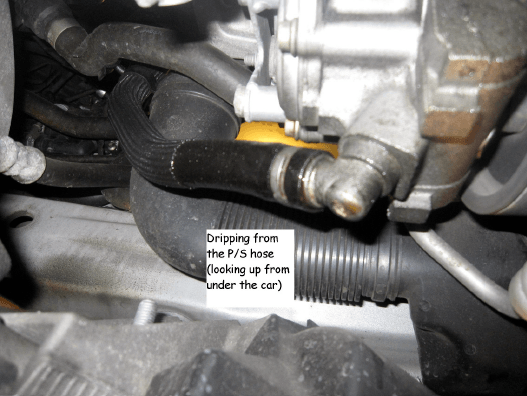
Go ahead and open the cap on the p/s reservoir now so the fluid will flow freely into your drain pan. Once this step is complete and you wipe up the mess, you’re done under the car for a while.
Removal of hoses and power steering reservoir: The next thing I did was remove the power steering hose from the cooling loop. This system is a bit on the fragile side, so use caution. I think I used a 4” extension to get at the bolt in between the two p/s cooling lines. The bolt, the hoses, and the block holding everything in place come out together, so just give the hoses a gentle tug and don’t worry about breaking anything. Throw out the crush washers on the ends of these hoses. You’ll be replacing the lower hose, so free him up so you can pull it out with the p/s reservoir.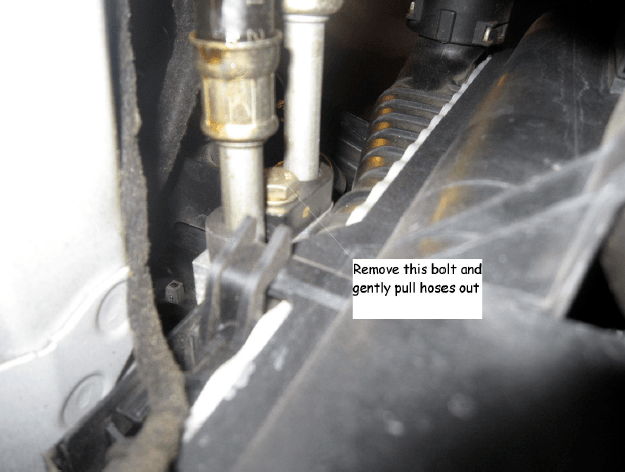
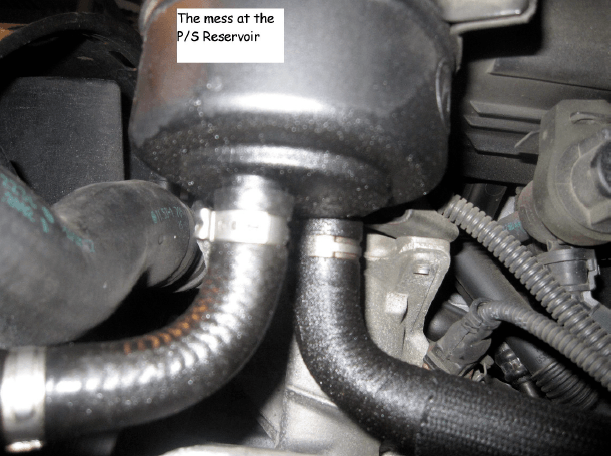
Now you’re at a point where you can remove the power steering reservoir. The power steering reservoir removal is very straightforward. Just remove a few bolts and pull it off the engine. You can now use your straight cutters to remove those factory hose clamps from the hoses, throw the old hoses in the trash, and clean up all the p/s steering fluid off of the reservoir.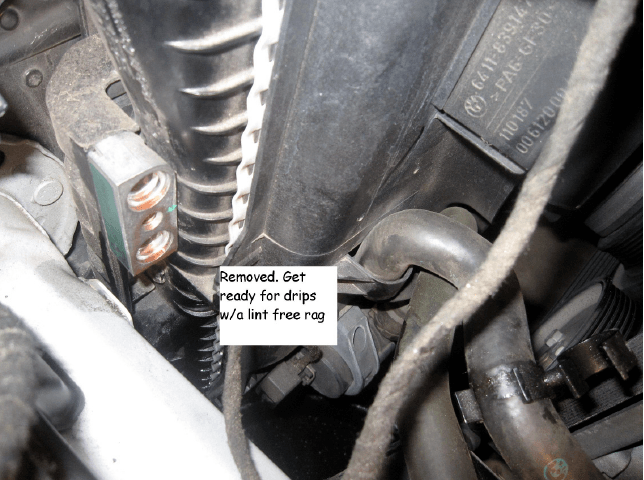
There’s a filter inside the p/s reservoir, and I’ve heard of some people turning the reservoir upside-down and back-flushing p/s fluid through the filter. I’m not that hard-core, but it shouldn’t harm anything.
Putting it back together: The first thing I did was slide my new hose clamps over my new hoses and attached the hoses to the now-clean reservoir. Reinstall the reservoir onto the engine. With the hoses unclamped, wiggle them around until they’re correctly located to meet up with the power steering pump and the cooling coil.
At the cooling coil, INSTALL NEW CRUSH WASHERS, place the two hoses in the retainer block, and tighten the retainer with the one bolt in between the hoses. This assembly is somewhat fragile and I couldn’t find a torque spec, so I went with something more than snug, but less than gorilla. Months later I have no leaks, so I guess it’s OK.
There’s a double-ended clip that attaches to the hose you just installed and the heater hose. Now’s as good a time as any to put that back on.
The power steering pump hose is very simple. Slide the hose clamp on, attach the hose to the power steering pump, and tighten the clamp. At this point, you can go back up to the p/s reservoir, make sure there is no strain on your new hoses, and tighten the two hose clamps.
Almost Miller Time- take a look at your hose routing and double check that everything is tight. It’s easier to do rework now than when the air filter assembly is reinstalled. I used Griot’s engine cleaner to clean up the remaining p/s fluid, but there are other great cleaners out there.
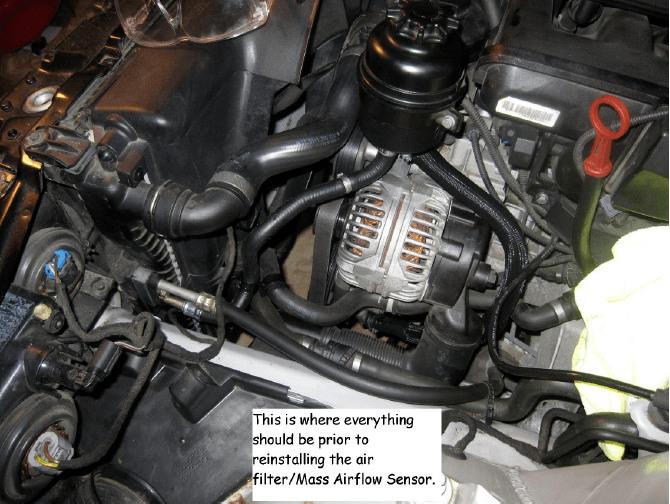
Once you’re sure everything is looking good, it’s time to reinstall the air filter/MAF. Remove your lint-free rag from your now-open intake, put the assembly back on, tighten your two hose clamps, install the bolt, and reattach the vacuum hose fitting.
Filling the system: SLOWLY fill the system with a high quality ATF. Swing the steering wheel right and left. Top off again. Start the car, slowly move the steering wheel from lock-to-lock. Check the fluid and top off. Look for leaks. If everything is looking good, reinstall the lower engine cover, ensure the p/s cap is tight, and then on to the best part (besides the post-maintenance cocktail):
Road test: