You must be logged in to rate content!
6 minute read
Fix Your Sagging E46 Front Bumper In About 10 Minutes Or Less!
Compliments of delmarco @ www.bimmerfest.com
Yes, you are reading correct.
This is not some hocus pocus DIY but technical instructions for realigning, calibrating and fixing a sagged or off frame lower front bumper back to factory new condition
Last summer I went to a local shop and got quoted $750 to realign the bumper with dent removal on the nose section of my hood and light paint touch up on the plastic bumper. And that is a local BMW specialty shop that was recommended to me, so I cannot imagine what the dealership would charge for this basic 10 minutes or less DIY job.
Anyway I got the advice from BodyMan and a few other folks here but like most issues there is no DIY for this awesome secret fix and I'm sure 97% of you will be finding out about this for the first time here.
The only tools needed are a small screwdriver and dull clean butter knife for removing the corner lamps and a 10mm ratchet wrench or driver on preferably a slim low profile ratchet handle.
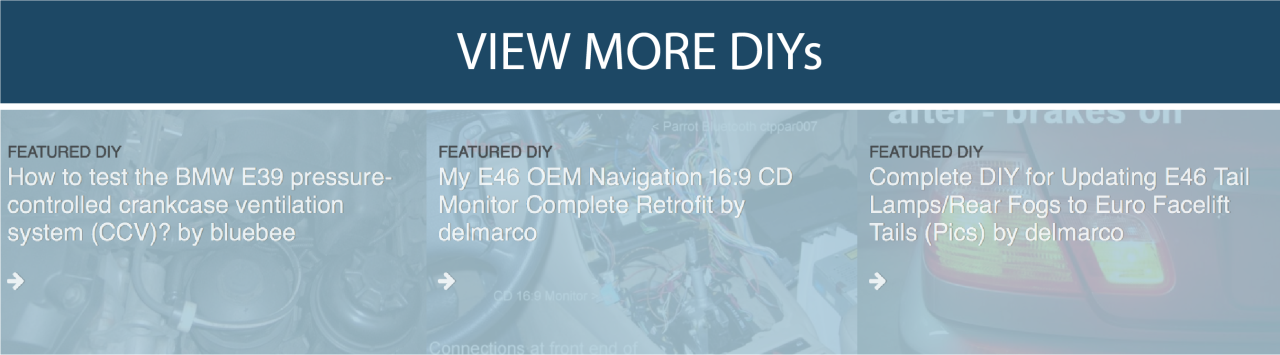
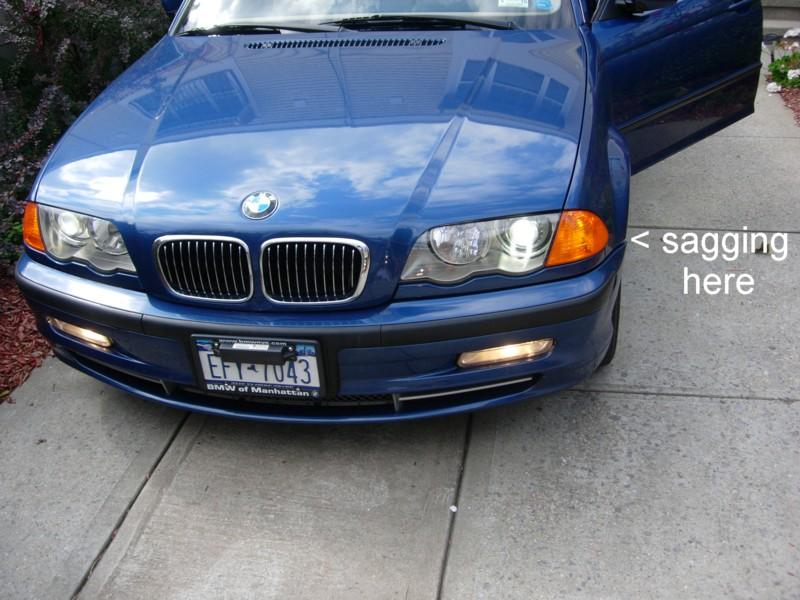
So as you can see in these pictures my bumper was sort of sagging and I noticed it becoming more pronounced since the cold, snowy, salty days of winter has passed.
And here in the picture below is what I want for my car! It is what we all want for our cars!
Notice the almost seamless bumper attachment on this 2003 330xi:
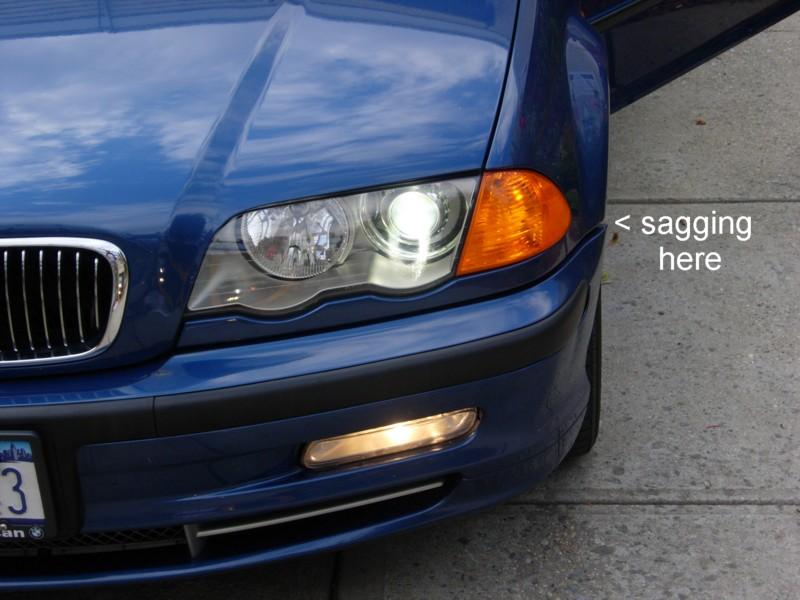
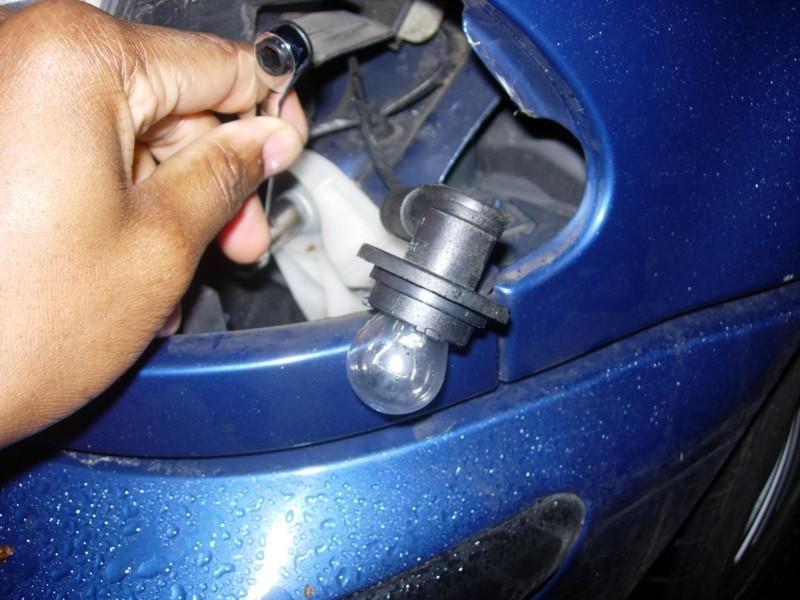
So begin by popping out your corner bulb housing. This picture should explain what to do after you open your hood and find the small access hole above the light housing.
Stick your small screw driver in there and push down on this tab (as shown in picture below) whiles using the butter knife to pry out the housing.

After that removing the housing body from the bulb socket holder (which screws off the housing) to acess what is behind.
This is what you will see:
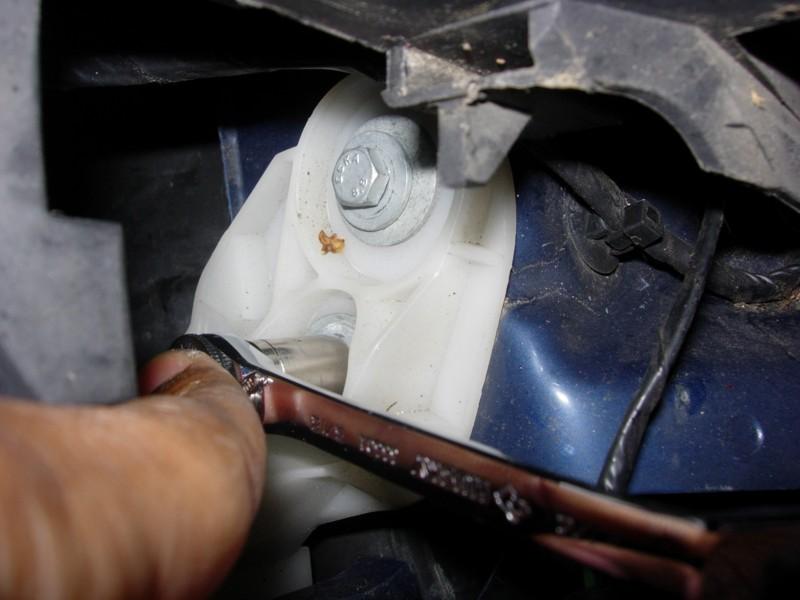
Behind the housing is the bumper bracket which is the white plastic bolted on object.
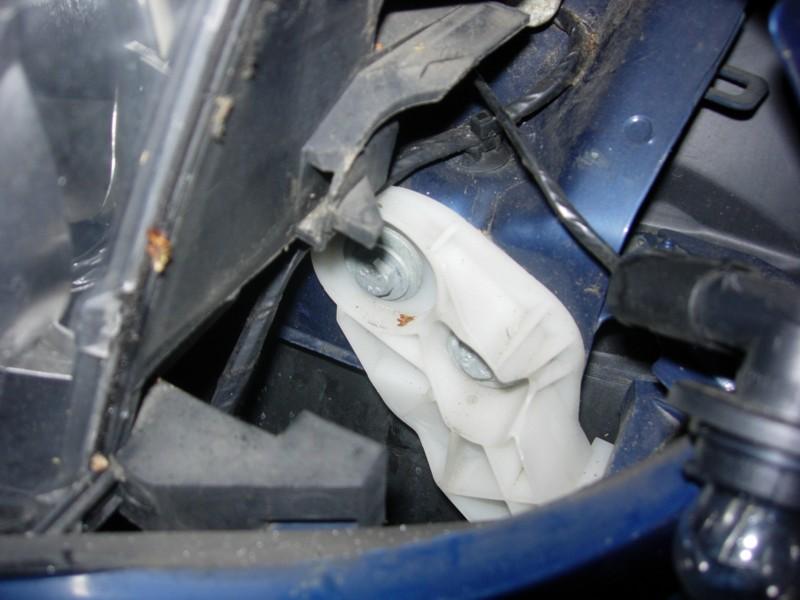
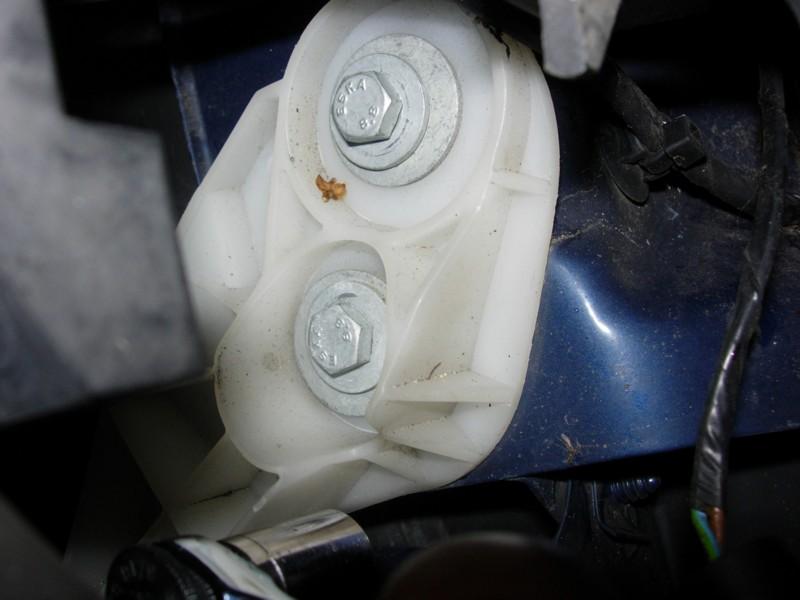
Use your ratchet and 10mm driver to loosen the bolts-DO NOT REMOVE THEM!
Once the bolts are loose the white bracket will also be loose. Chances are your bracket was sagging off the bolts which was causing the bumper to also sag. Realign the bracket at the highest point and make sure the bumper is also pushed back up and aligned neatly.
When done start by tightening the upper bolt then the lower bolt last.
If your bracket is cracked or broken you will have to replace it so expect to find cracked or broken off brackets on cars that have severe sagging or had a front end collision before.
On my car I expected the worse and thought that the brackets would be broken or split, but to the contrary they were in perfect condition.
The bolts on my car for some reason were already loose (or not tight at all) but the brackets were firm and sitting at their highest point possible and were not in themselves sagging or lower than they should've should been.
Still I loosened them even more and tried to lift the bracket and move the bumper up but it didn't work and I realized my bumper was not sagging at all.
It seems the plastic lower bumper is actually warped as if it was punched in at the lower side flank and the upper lip curled out where the space/sag is apparant.
So I most likely need a new bumper or some sort of fancy dent removal for plastic panels.
The reason I'm stating this is because you could also be in the same boat as me. But this 10 minute DIY is an easy way of making sure the brackets are NOT the cause of your sag.
On facelift cars and certain coupes they may be a secondary bracket or slider in which your bumper slides onto. See in the borrowed picture below.

This may be broken and will need replacing if it is. Chances are if the white bracket is broken then this one is too
See this link here for more information on fixing and replacing the secondary bracket/slider.
http://www.e46fanatics.com/features/...php?news_id=44
Parts Numbers for the brackets are different from year to year and the type of E46 you have (coupe, M3, sedan, facelift and non-facelift) so just head over to www.realoem.com and get the part number for your car.
Good Luck.

Nice DIY!
Posted by Diggymart on 10/9/20 @ 2:03:40 AM