You must be logged in to rate content!
3 minute read

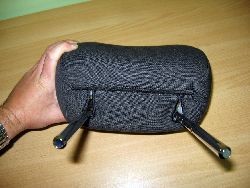
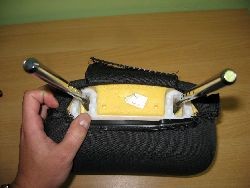
HEADREST COVER
1. Remove the headrests from the car.
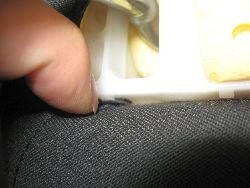
2. Look from below. These are latched with a plastic strip.
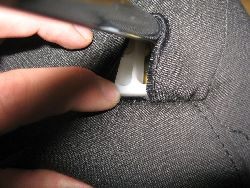
3. Unlatch the strip with a flat screwdriver.
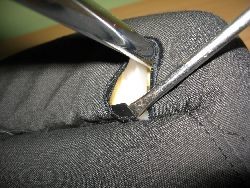
4. This is what you are going for.
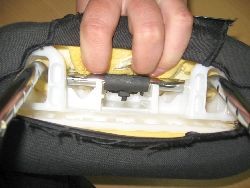
5. Similar but shorter strips secure the sides.
6. Healthy fingernails will suffice to remove them.
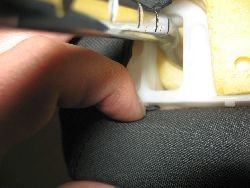
7. Make sure to open up both sides.
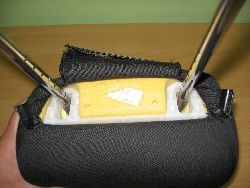
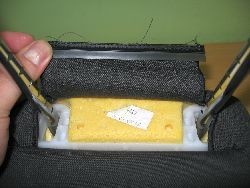
8. Then remove the last, inner, fourth lacing strip.
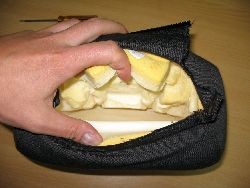
9. This is what you will end up with when properly done.
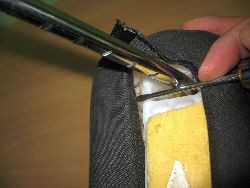
10. .Pull the stock headrest ALONG WITH THE FOAM off the structure. This will require moderate force.
11. Your further steps are thus: removing the cover from the foam (which will now be very flexible and easy to work with since the rigid structure from within had been removed), installing the new cover on the foam and reinserting the structure into the foam now in the new cover.
The plastic strips can be reused, ie. pry or cut them off the stock headrest and install on the RedlineGoods headrests. There is the proper way: glueing the strips to our leather and latching them the same way BMW invented it, or the quick'n dirty way: disregard the strips and spot-glue the leather to the foam or structure as convenient.
We don't make a recommendation either way, it's up to your personal taste and level of involvement with the project. We recommend 3M Super 77 or any other epoxy-based glue. Some of our customers had used Contact Cement or Automotive GOOP with great results.
Useful tip
You have installed a product made out of genuine leather. As you know, to maintain a leather product in good condition, you should take care of it. We suggest occasionally (every 4-6 week for example) applying some leather conditioner/UV protector to keep your leather from drying up in the sun and cracking.
Redline Automotive Accessories Corp. will not be held liable for any labor, incidental or consequential damages of any kind. Proceed at your own risk.