You must be logged in to rate content!
5 minute read
2012 Pop Spare Tire Kit Install
Compliments of tattoogunman @ fiat500owners.com
2-21-2014
Not sure if anyone has posted this up yet or not (couldn't find any threads) and I just finished putting mine on. So here goes and sorry if the pics kinda suck, I'm not used to doing these:
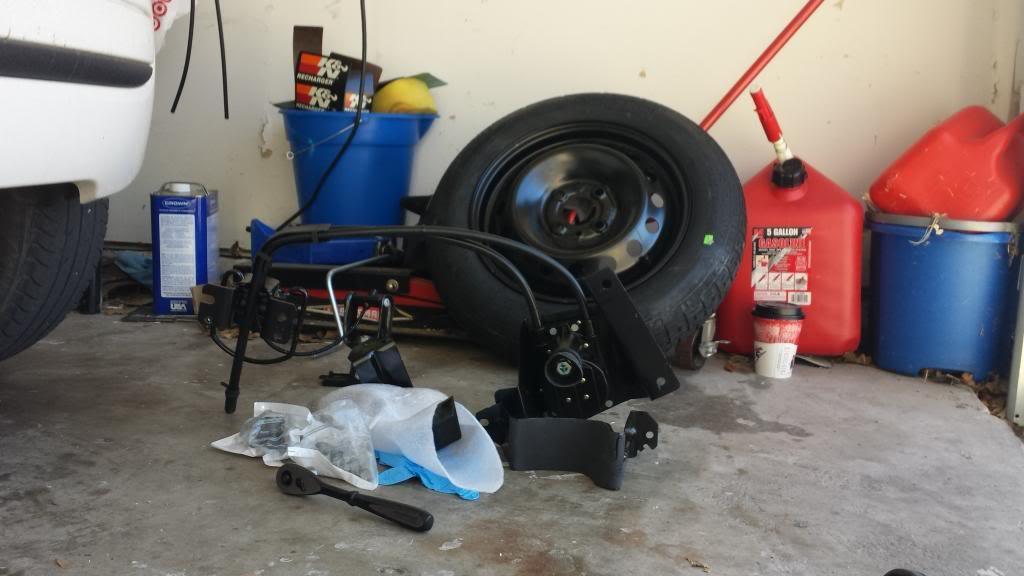
Parts - Spare tire, two brackets, hoist assembly, & bolts
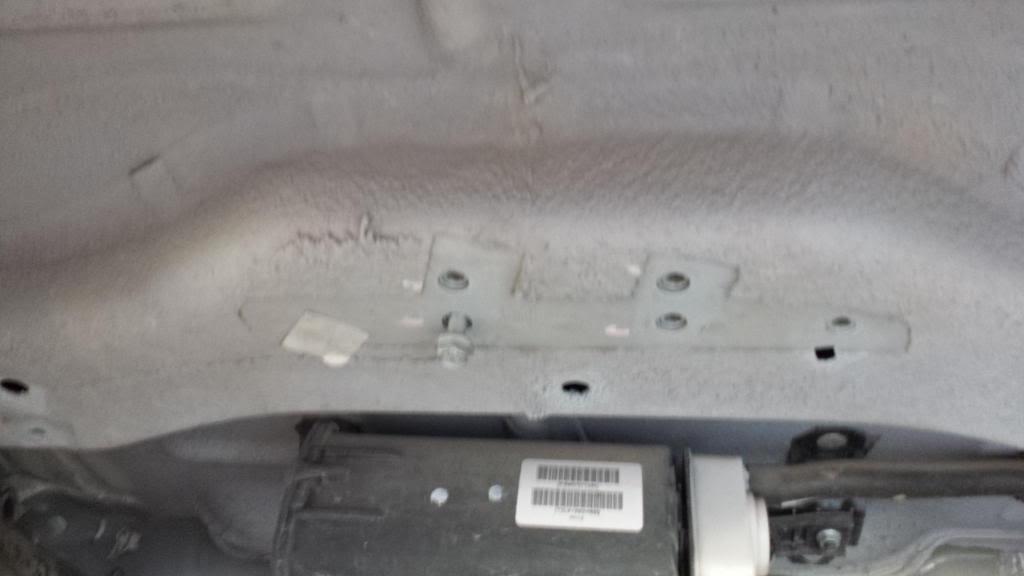
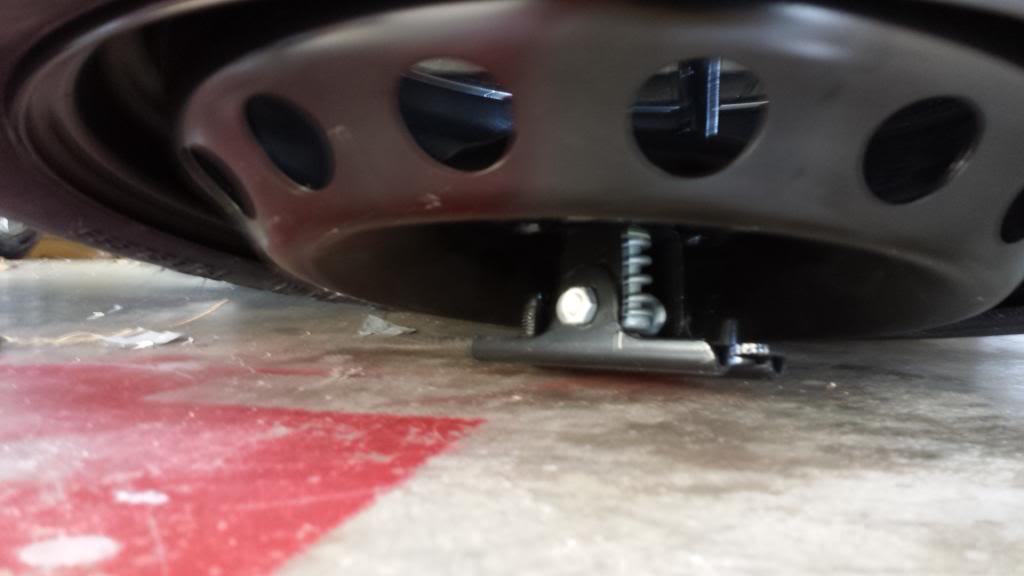
Remove the metal tape squares from underneath the car that cover the mounting holes (pic doesn't show them all and I was test fitting the bolt seen)
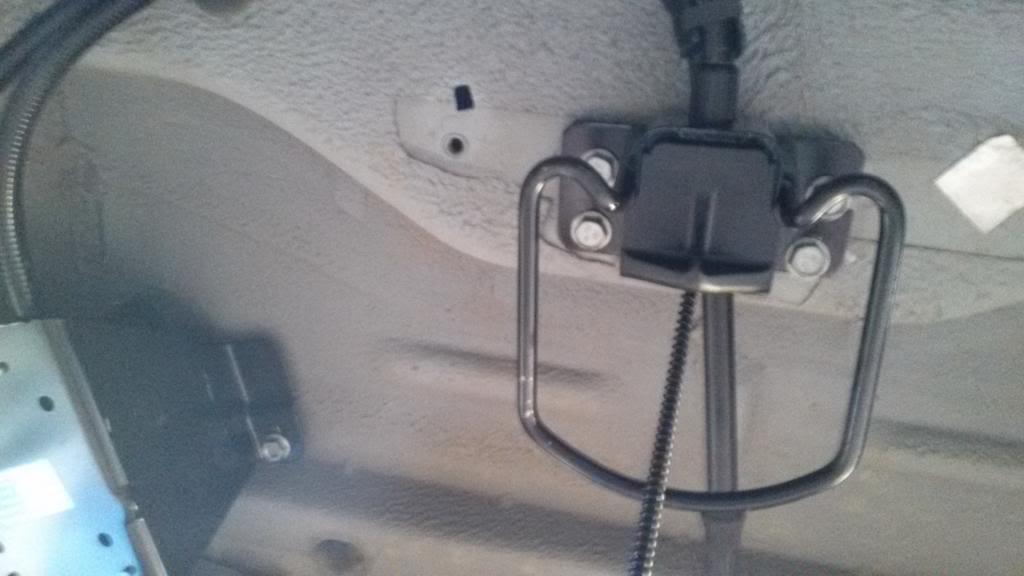
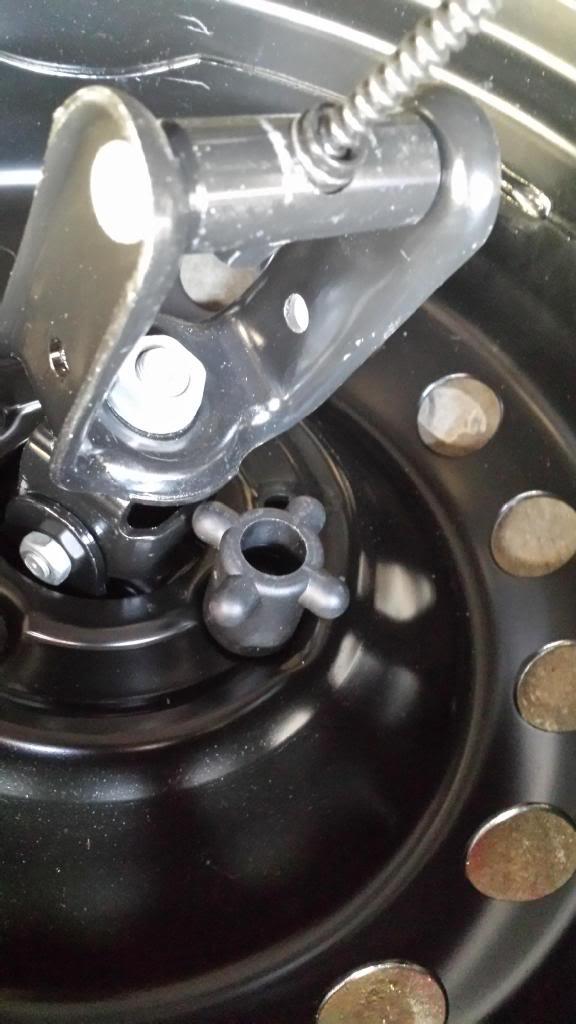
I bolted on the hoist (this contains the mechanism that raises/lowers the tire) part first (if you are facing away from the rear of your car, this is on the left side away from the muffler)
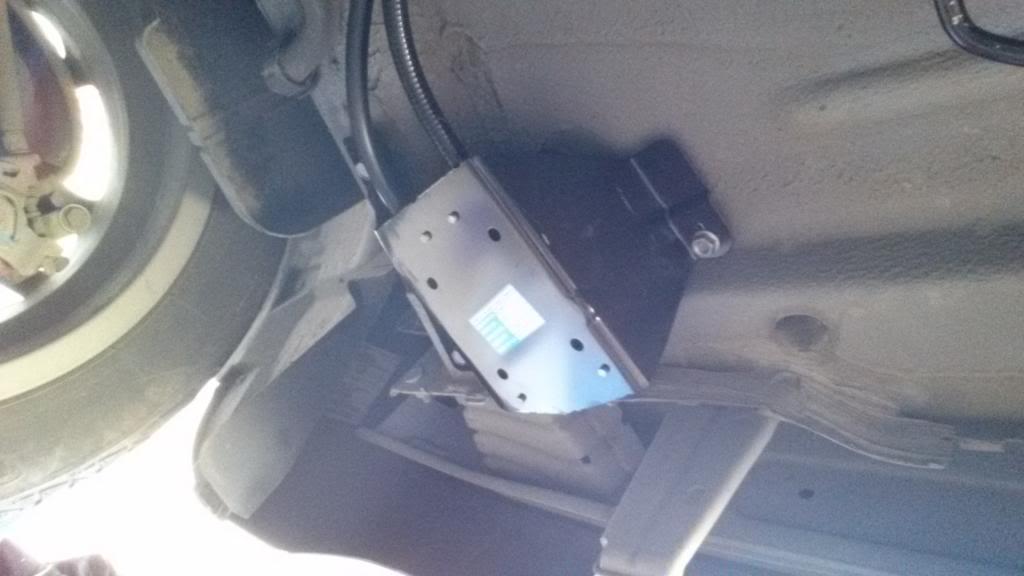
I mounted up this piece next since it's connected to the hoist by a cable - this is the piece that contains the cable that physically lowers the tire up/down and is threaded through the middle of the spare.
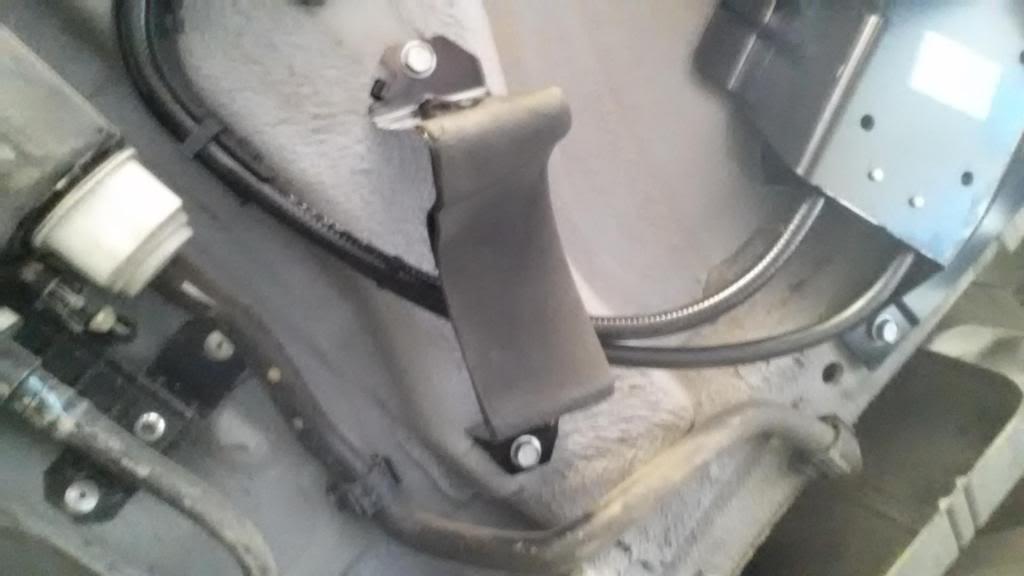
Tire bracket one of two (these have rubber/foam on them and are what cradle the tire when it's hoisted in the up position)
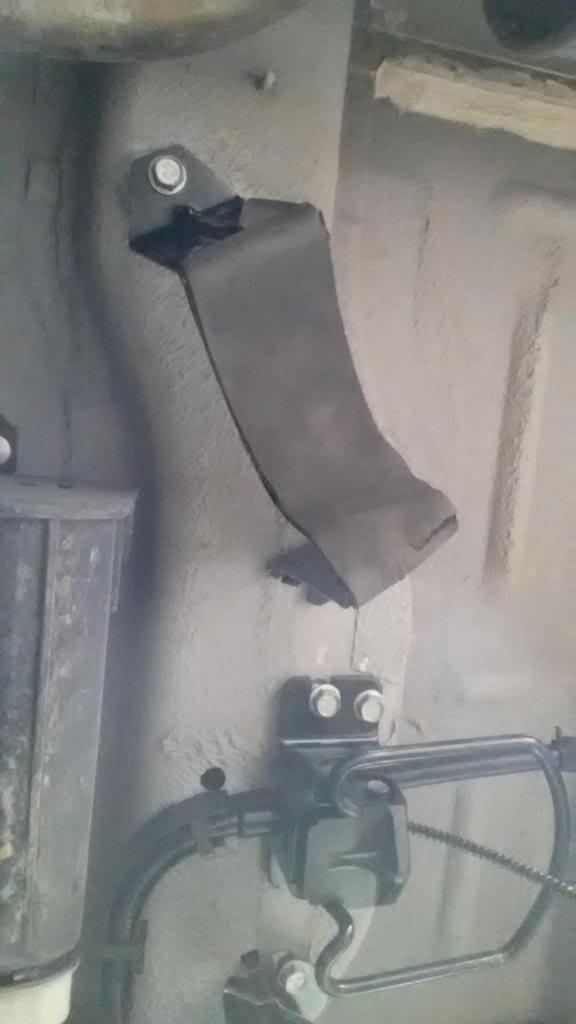
Second tire bracket
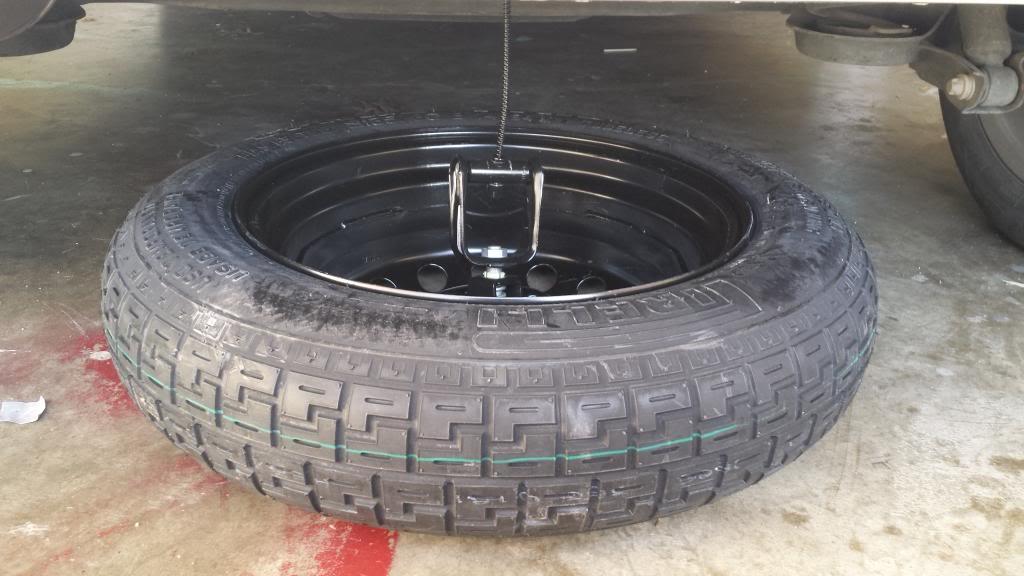
Spare tire test fit
Wheel lock nut in place
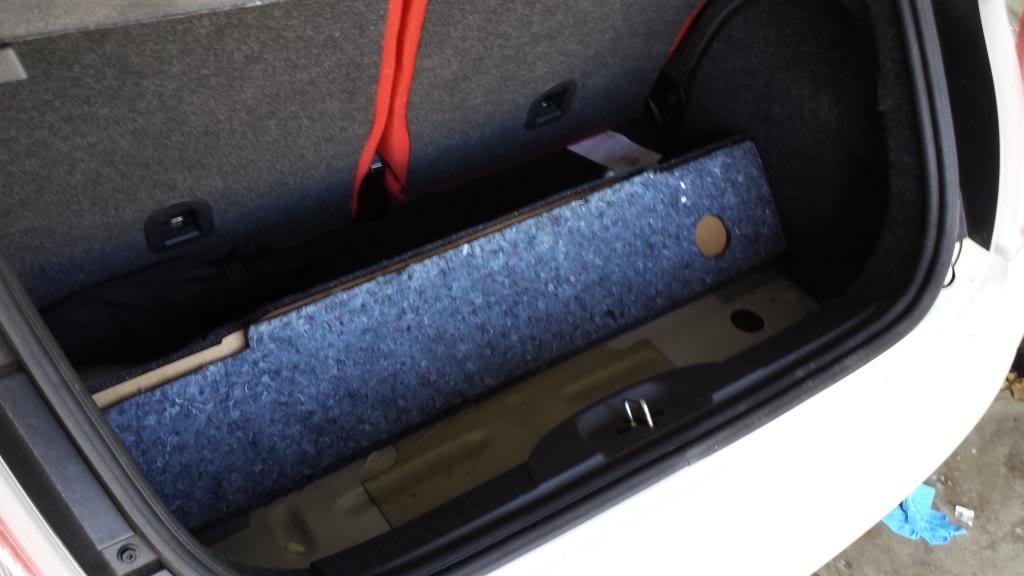
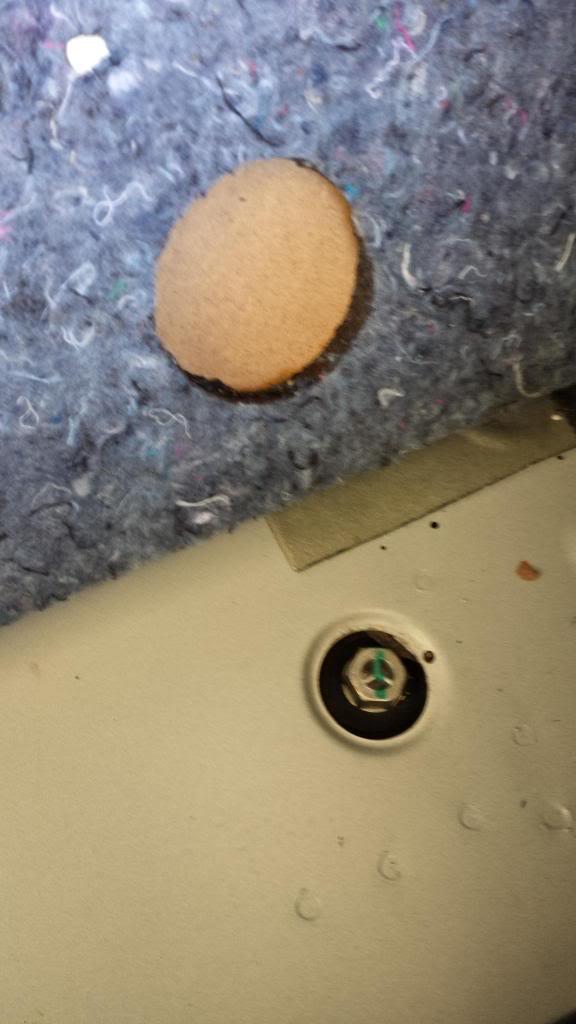
Now, what you see below is the nut that you turn to raise/lower the tire. You lift up the section of carpet in your trunk and then simply pull off the rubber boot that is in place to expose it. The directions call for drilling out the piece of wood seen in the pic (which covers the hole) so that you can raise/lower the tire without having to pull the carpet flap up. I didn't feel like drilling, so I left it in place as I don't think flipping up the carpet flap is that big of a deal. The kit comes with a larger plug to replace the rubber one that is installed from the factory if you opt to drill the wood out.
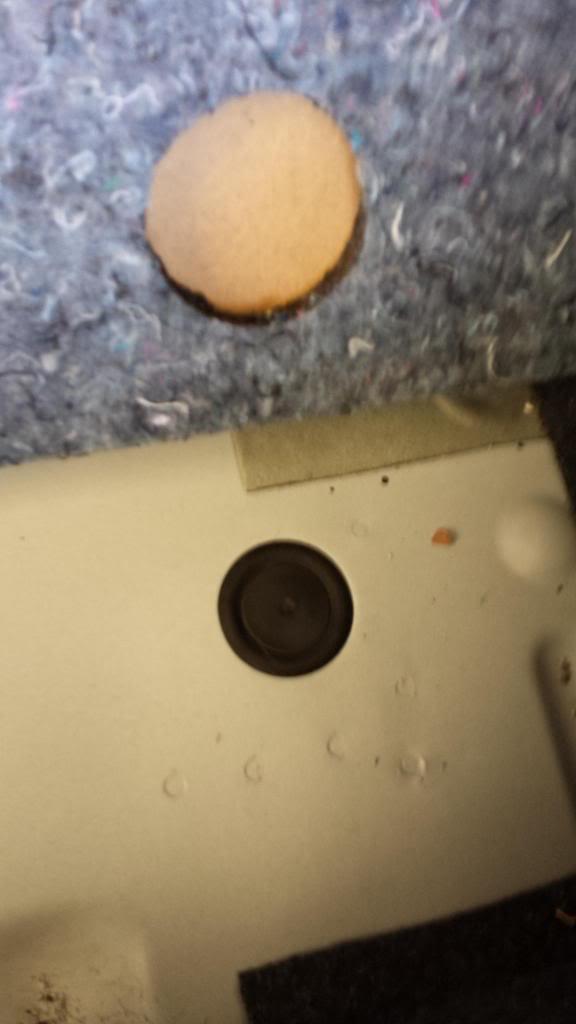
Pic with the stock rubber boot back in place covering the lowering/raising nut
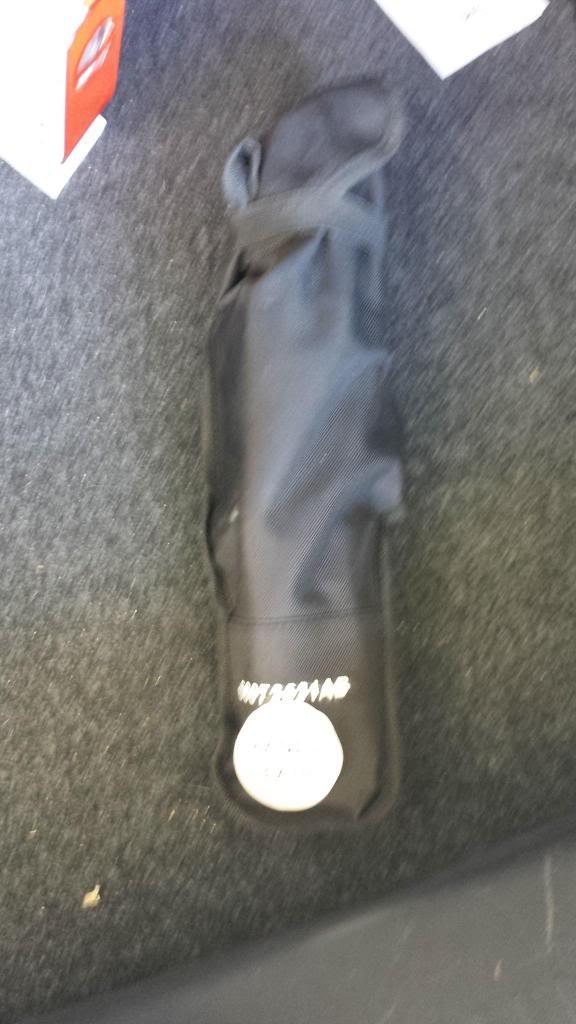
Tool kit that comes with the tire kit - has a jack and the wrench to turn the nut to raise/lower the tire.
Honestly, this couldn't have been easier. If you know how to turn a wrench, you can do this and save yourself the $100 the dealer is charging to do the install (what mine is charging at any rate). Took me around half an hour to do the full install and I didn't have to jack the car up or anything. It would probably be easier with the car jacked up or on a set of ramps, but I had plenty of room to work underneath without it. There were no alignment issues or anything on mine (the dealer said they had seen a few that the holes would not line up 100%). Hope this helps someone out down the road and if you have any questions, let me know.
2-22-2014
Here are a few more pics that I should have added.
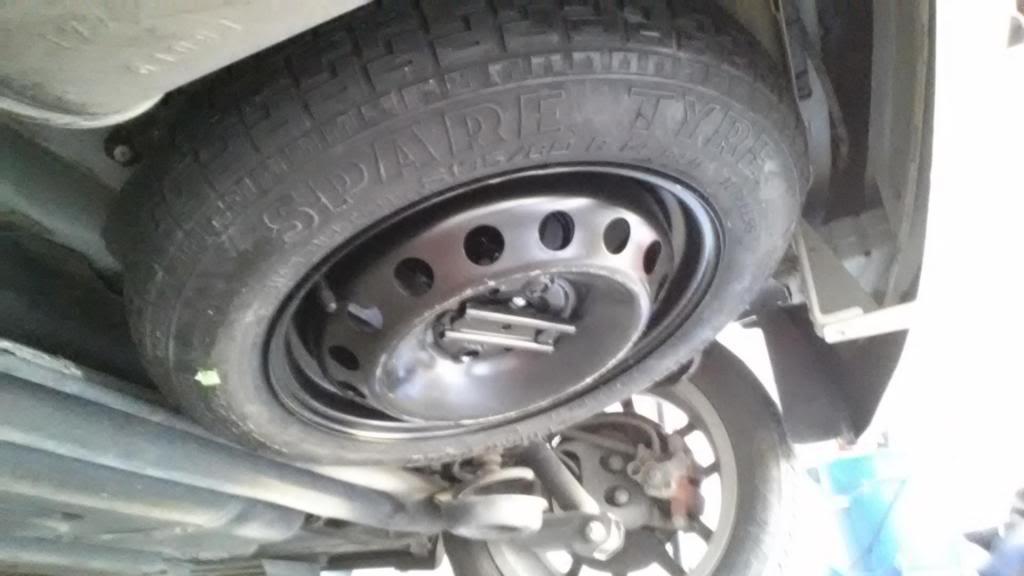
Tire secured in place under the car -
Shot of the trunk with the carpet in place. The flap that you pull up to expose the rubber boot and raise/lower nut is right in the front of the trunk (side where the hatch closes).
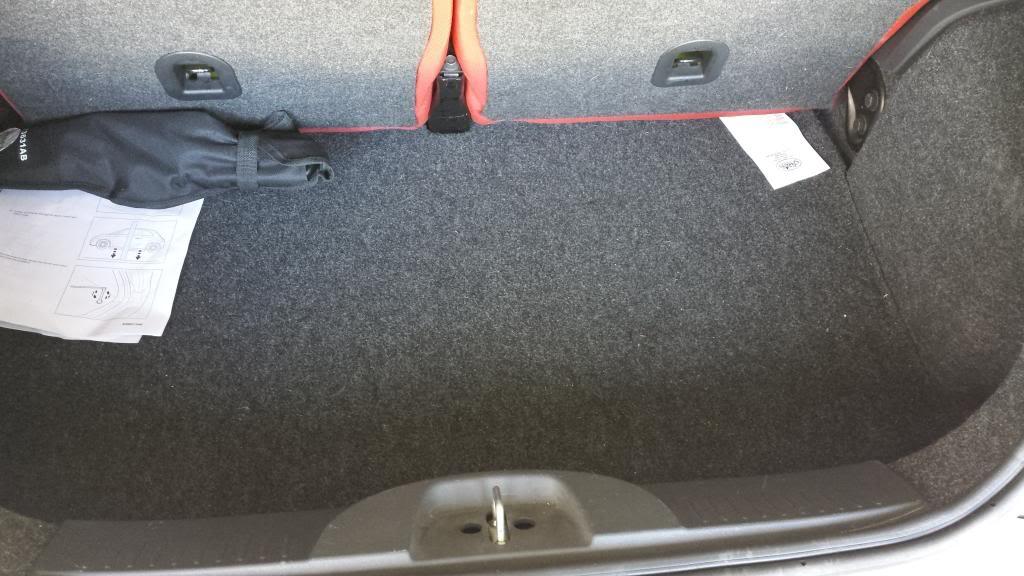
With flap pulled up (you can see the black rubber boot that hides the bolt on the right)