You must be logged in to rate content!
9 minute read

348 alternator removal & rebuild
Compliments of ernie @ ferrarichat.com
3-12-2007
Okay guys, I recently removed and rebuilt the alternator in my 348. F-Chater jm3 rebuilt the alternator in his 355 using updated parts. Here is the thread were he listed the parts he used http://ferrarichat.com/forum/showthr...hlight=transpo
The old Transpo regulator (part #IN220) has a tendancy to go bad, and I think they are a piece of junk. I had the alternator rebuilt a few years ago and the shop that rebuilt it used the standard Transpo parts and they ended up failing on me again. The battery light would also come on when I would get into the upper rpm's. Well since the alternator crapped out on me I wrote down the part numbers that jm3 used on his rebuild and went to the the alternator shop to order them.
Here are the Regitar part numbers:
regulator - #VRH2005-4A
rectifier - #RN-02
Well when I ordered them the supplier to the shop told them that a company named USI made a better regulator than the Regitar. Not that the Regitar was a bad regulator but that the one USI made was just better. So I figured why not and ordered the USI regulator. That way we have two alternatives to choose from over the crappy Tranpso part. I still used the Regitar rectifier though.
Here is the USI part number:
regulator - #00632, 71-30003/SCP
Unit2 electric in Ventura was a big help in getting the parts for me.
Since I had all the stuff I figured you guys would like a how-to on the removal and rebuild, and yes I did take pictures. Oh yeah one more thing, this is for the Nippondenso alternator, so you can use the parts for a 348 or a 355.
Removal Step 1
Total removal time is about 30 minutes. I took me 50 minutes, but that was because I was screwing around with the camera so much, trying to get the best shots for you guys.
Okay now for the rebuild.
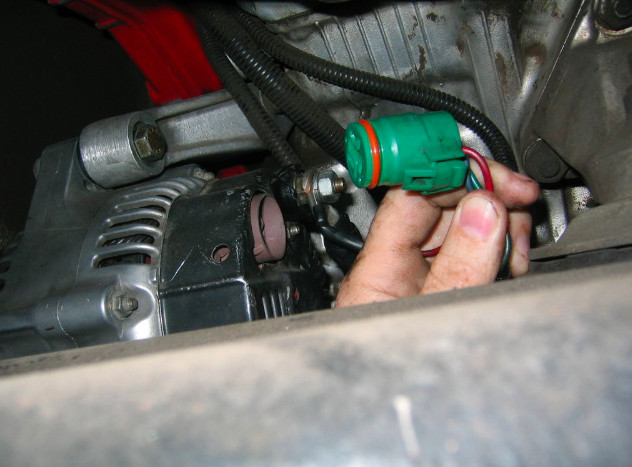
Step 2
Now what you are going to do is remove the connector from the back of the alternator.
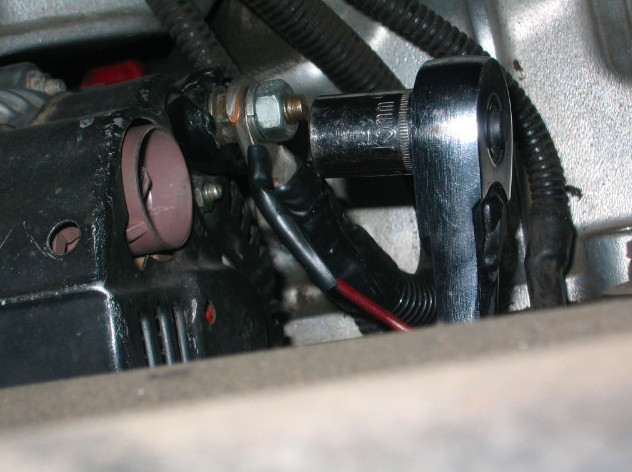
Step 3
Then remove the nut that holds the cable, that runs to the alternator, on to the back of the alternator, and remove the cable.
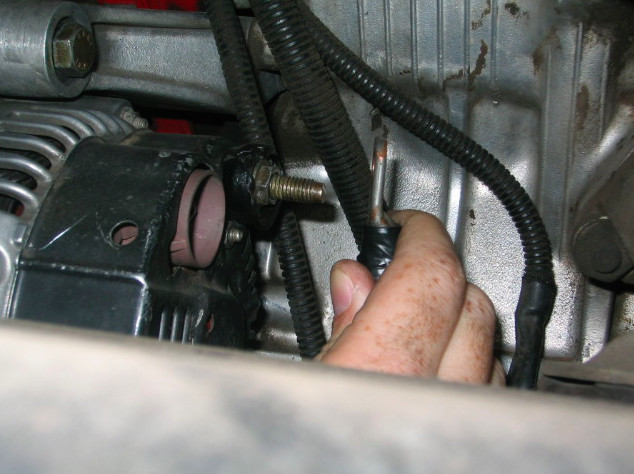
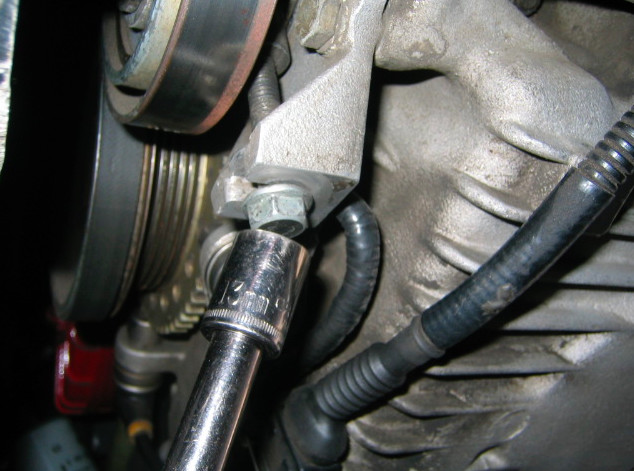
Step 4
Now you are going to loosen the retaining bolt on the front of the alternator belt tensioner bearing.
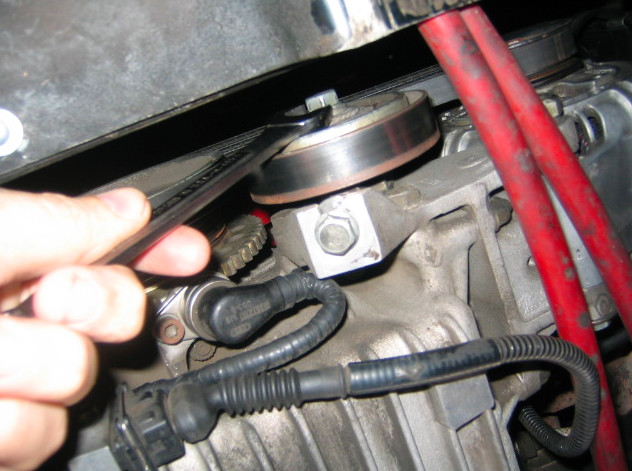
Step 5
Next you will loose the the tension on the alternator belt via the tensioner bolt on the bottom of the bearing bracket.
Step 6
Remove the alternator belt.

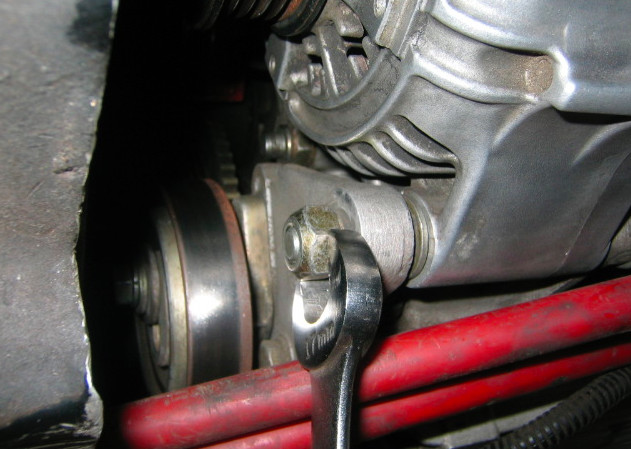
Step 7
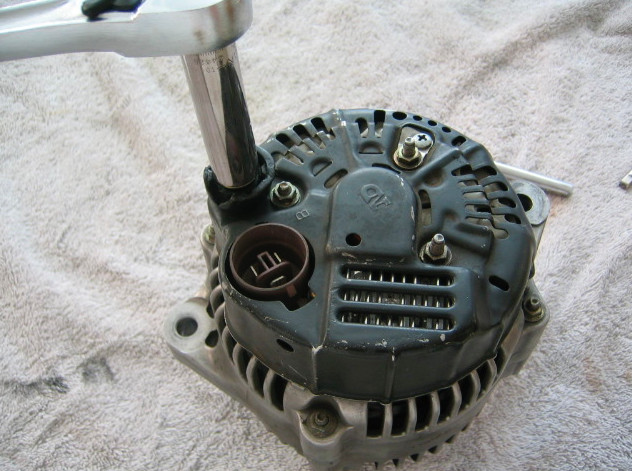
Remove the nuts on the top and bottom retaining bolts, but don't remove them yet.

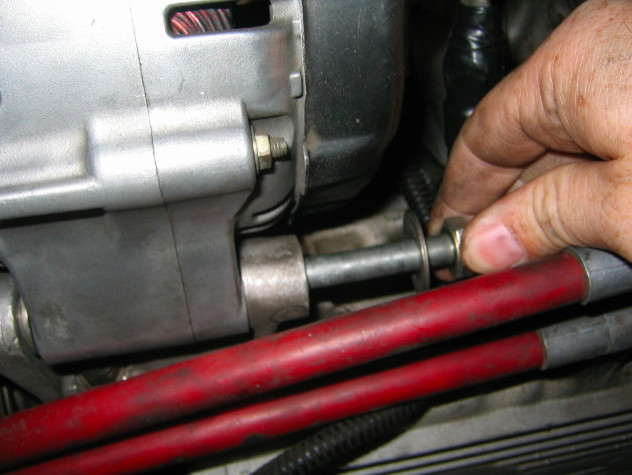
Step 8
Now be sure to support the bottom of the alternator, then remove the bolts. The bolts slide out from the back, towards the engine not the firewall.
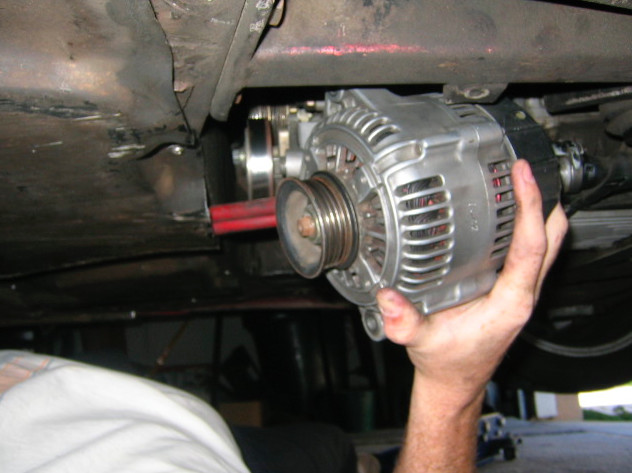
Step 9
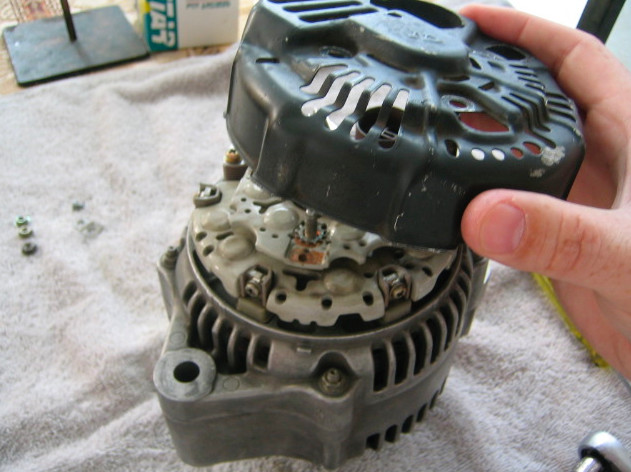
Remove the alternator from the bottom.
Total removal time is about 30 minutes. I took me 50 minutes, but that was because I was screwing around with the camera so much, trying to get the best shots for you guys.
Okay now for the rebuild.
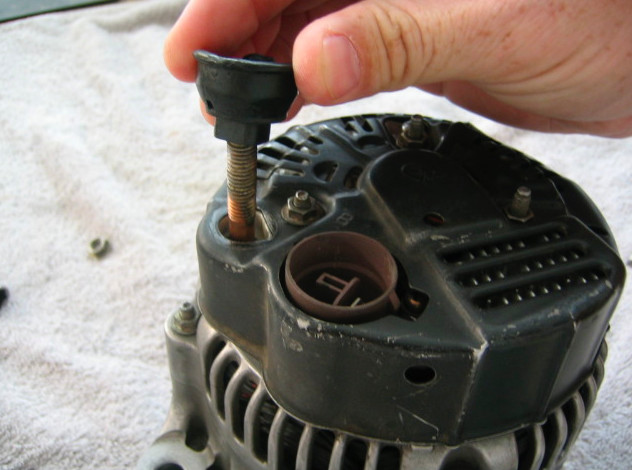
Rebuild Step 1
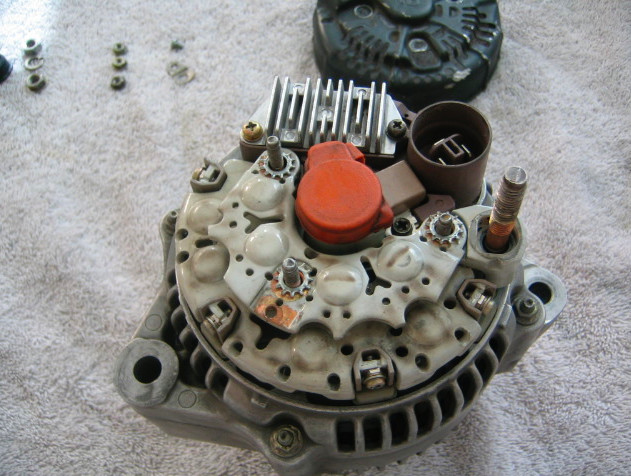
Remove the double nuts that are on the rectifier bolt, and remove the plastic guard.
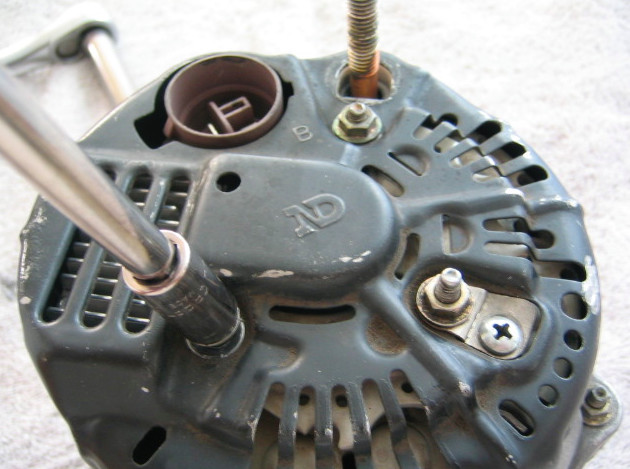
Step 2
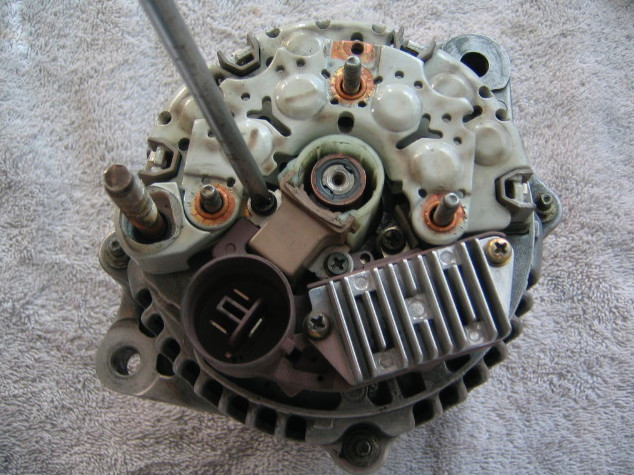
Remove the 3 nuts, and the screw, that hold the cover onto the back of the alternator.
Step 3
Remove the cover, to expose the insides of the alternator, and step it aside. Be careful not to loose the little washers that are on the three bolts, you removed the nuts from earlier.
Step 4
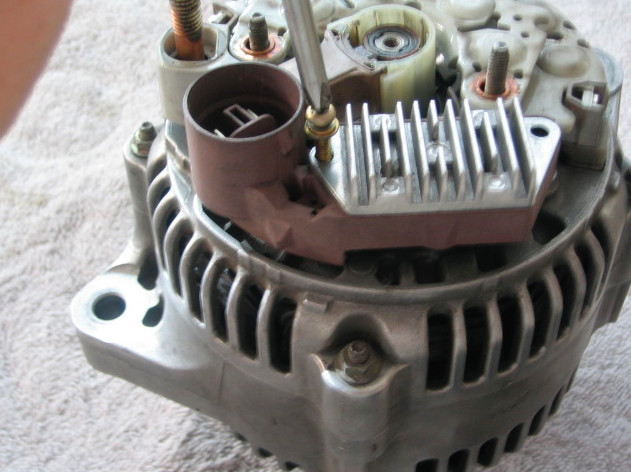
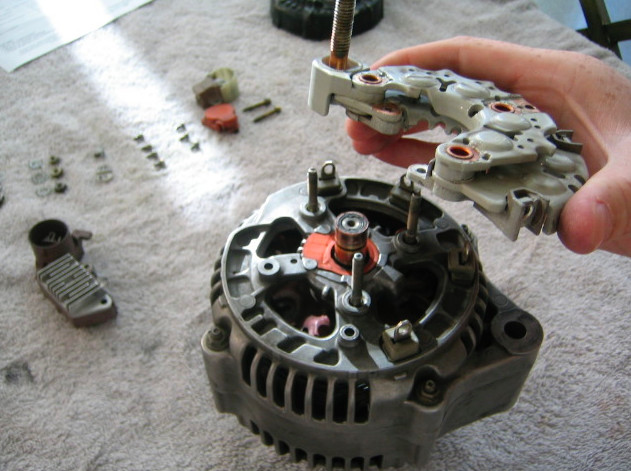
Now remove the four screws that attach the rectifier to the alternator.
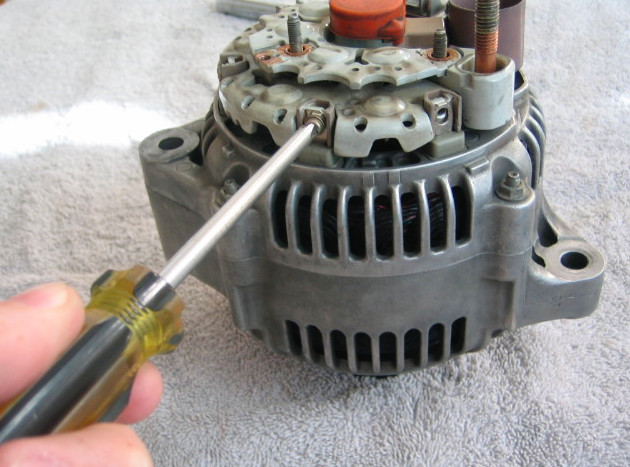
Step 5
Remove the rubber cover for the brushes, and the two screws hold the brushes on.
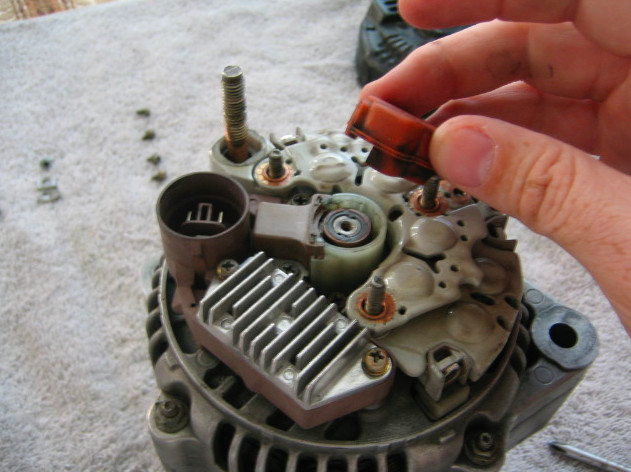
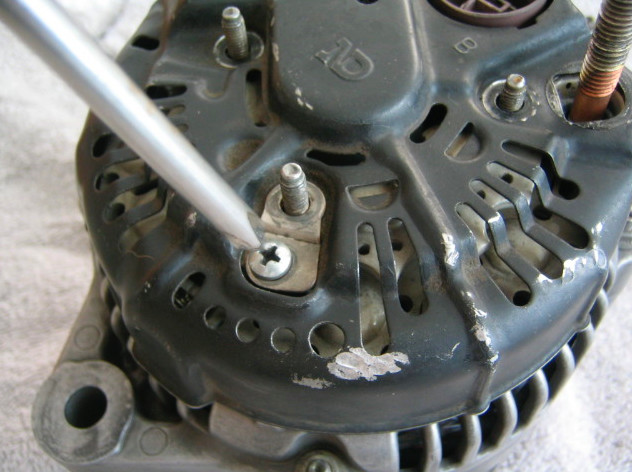
Step 6
Remove the screws holding down the regulator.
Step 7
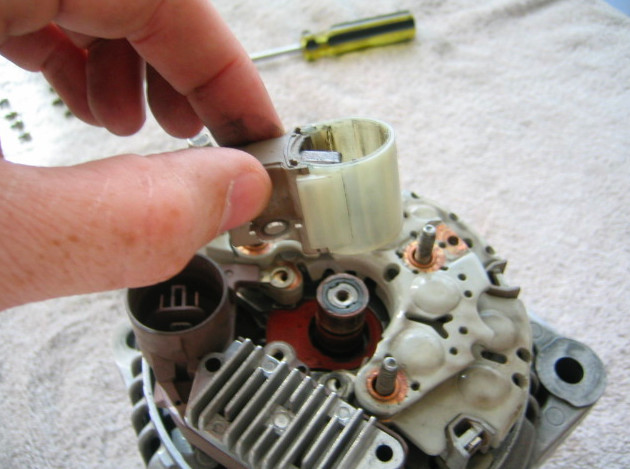
Remove the brushes.
Step 8
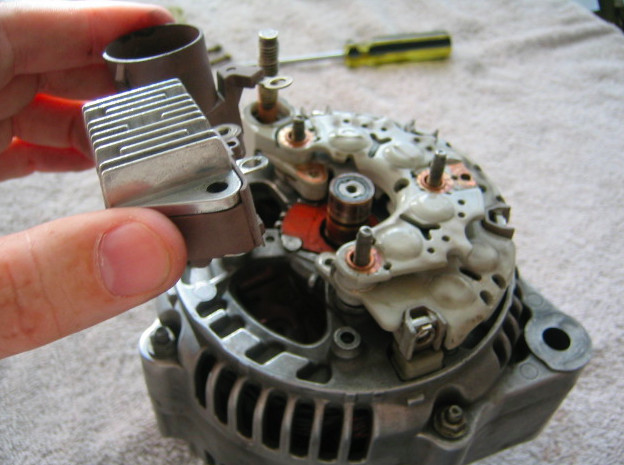
Remove the regulator.
Step 9
Remove the rectifier.
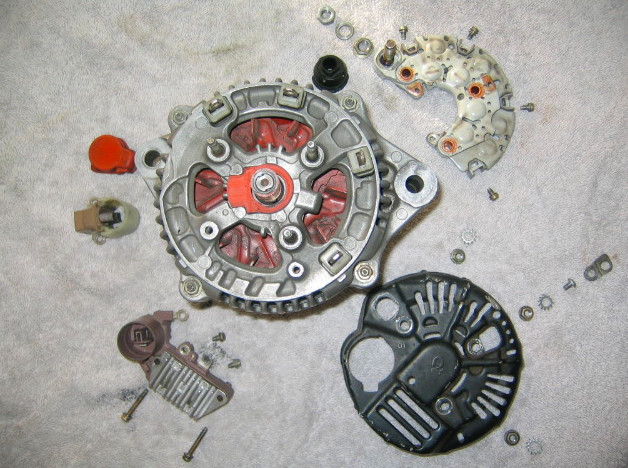
That's pretty much it boys. Here is an exploded picture of the alternator.
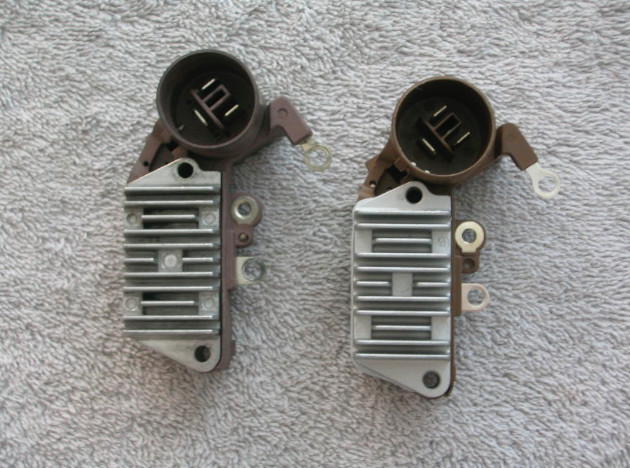
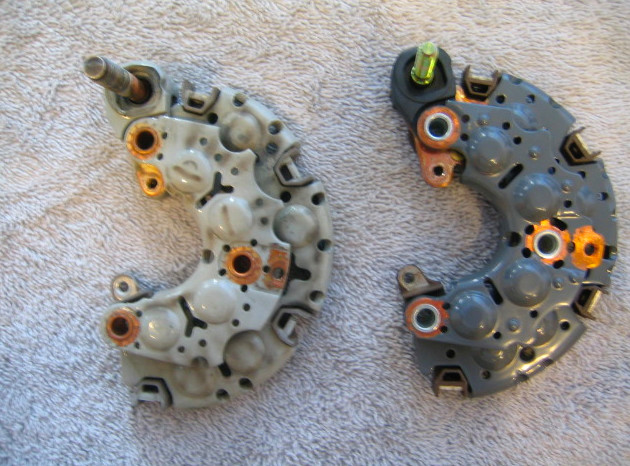
Here is a side by side of the old regulator (Traspo) on the left, and the new regulator (USI) on the right.
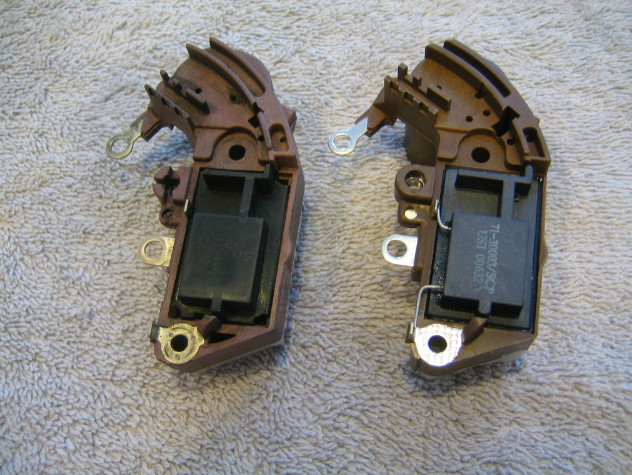
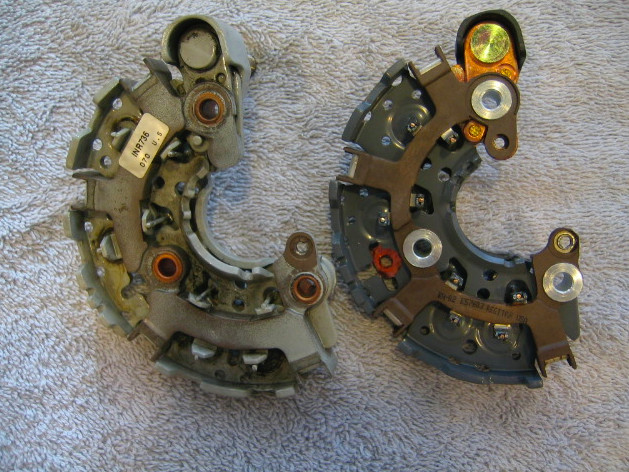
Another side by side with the old rectifier (Transpo) on the left, and the new rectifier (Regitar) on the right.
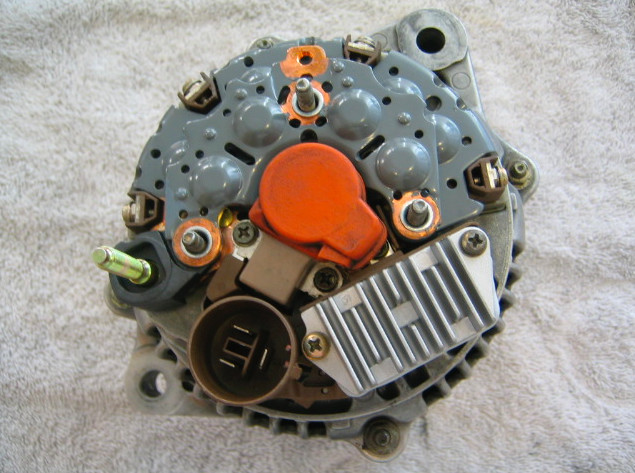
Here it is put back together will all the new goodies inside.
Total time for the rebuild is about 20-45 minutes, depending on how gunked up your old one is, that may need a good cleaning. If it's all clean then your in the 20 minute range, and if it's really dirty then longer. To clean it up just use a good electrical contact cleaner.
Altogether, removal, rebuild, reinstall, and that includes me hoursing around with the doggon camera, in was just over two hours. I could have had it done faster, but I know how you guys love pictures.
Happy Wrenching.
D'Oh!!!!
I almost forgot.
Okay are you ready? The total cost was..............wait for it............wait for it............wait for it......................
$100. That's right boys one hundred bucks, for superior parts. So now you don't have to get hosed $900 for an alternator from the dealer, that is just gonna fail again anyway.
How I found out this was the problem, was because it was know that if you didn't put in a heavy duty regulator, you would get the battery light coming on when you got into the upper rpm range. Plus the old crappy parts left me stranded on the side of the road last year when the regulator decided it wasn't gonna keep the battery charged. It will work okay for a while when it's cold, but once it starts to heat up that is when you get the problems. The other thing is that the techometer will start to act crazy. When I was on the throttle hard the tach would start spinning nuts, and then calm down when the rpm's dropped. So those are some of the signs to watch for.
Another thing I didn't mention. The bolt on the new rectifier is 6mm, and the old one is 8mm. So you can press the old one one, and then press it in the new ow. Also the 6mm bolt, in the Regitart, is a bit shorter that the old bolt. I left the 6mm bolt in and just attached everything to it. It was a bit tight but it did go on. I think what I'm gonna do it talk to the guys at Units again and see if they can order me one with an 8mm bolt on it. Other wise I'll leave it be.

Nice details!
Posted by Diggymart on 4/8/20 @ 5:29:38 PM