You must be logged in to rate content!
7 minute read
348 coil removal
Compliments of ernie @ ferrarichat.com
1-12-2011
He guys, it's your friend neighborhood Stooge.
I have been TRYING to find the source of a misfire/check engine problem I have been having for some time now. Well in an attempt to find the problem I decided to swap the coils from side to side, to see if the problem jumps banks. Which, as my recent luck would have it, it didn't.
Anyway this is more of a noob post, but I figure it may come in handy for someone down the line.
So.........
Here is how you remove the coils from a 348.
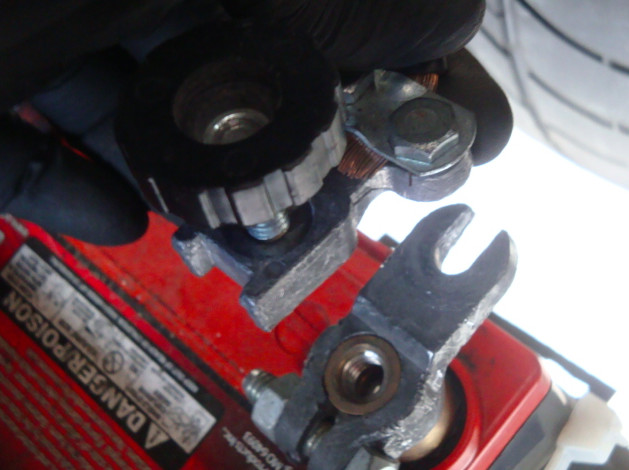
First things first. Disconnect the negative wire from the battery. Since you are dealing with electrical parts you don't want to risk getting shocked. I have a marine quick release on my battery which makes it a snap to disconnect and reconnect.
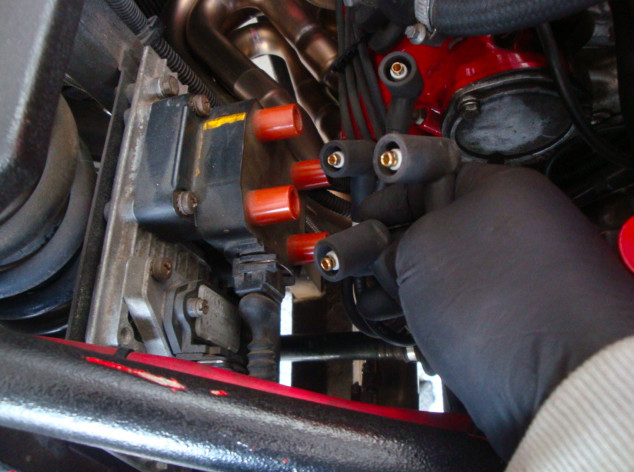
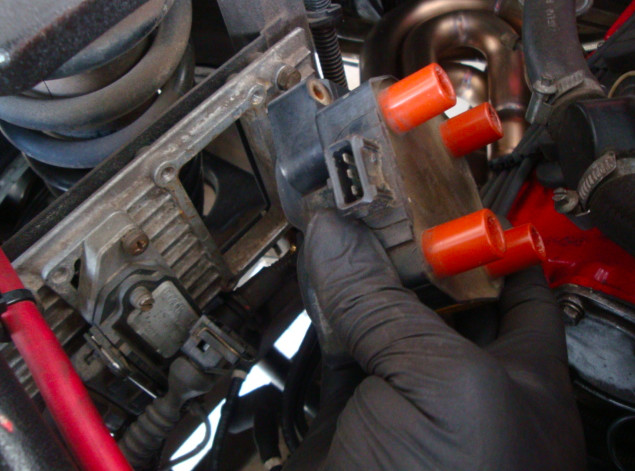
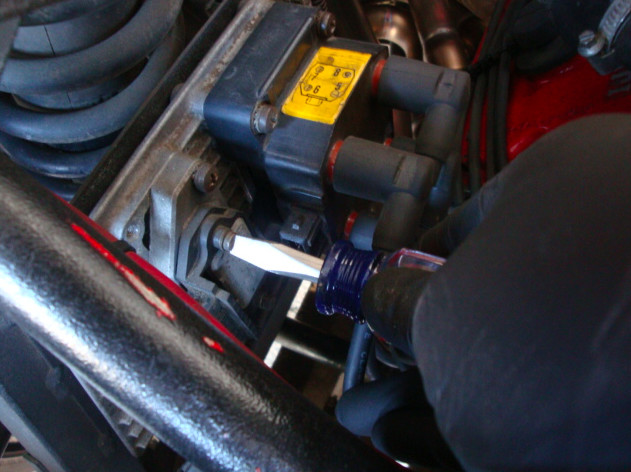
Next you will disconnect the plug wires from the coil.
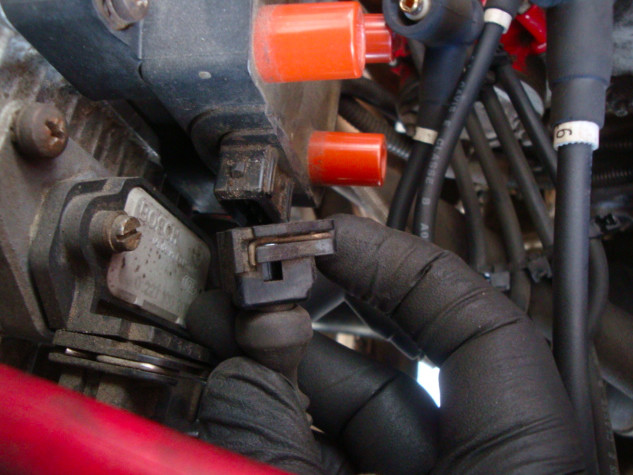
Now disconnect the clip going to the loom from the coil. Actually you should should do this first. But oh well, I did it second. Anyway disconnect it. All you have to do is push in the wire with your finger, hold it down, and then pull it off. Oh yeah and pull from the clip, N O T the wires.
Next unscrew and remove the 4 screws holding the coil to the heat sink. I like to loosen all the screws first, then remove the screws on the bottom followed by the top. It just makes it a little bit easier that way.
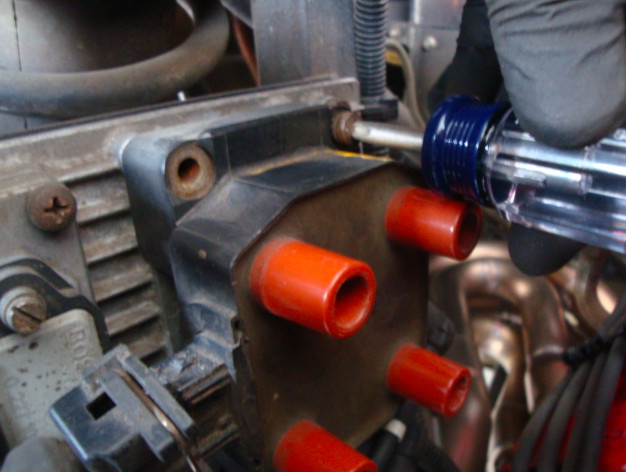
Once all the screws are removed take out the coil.
Voila, that's it guys.
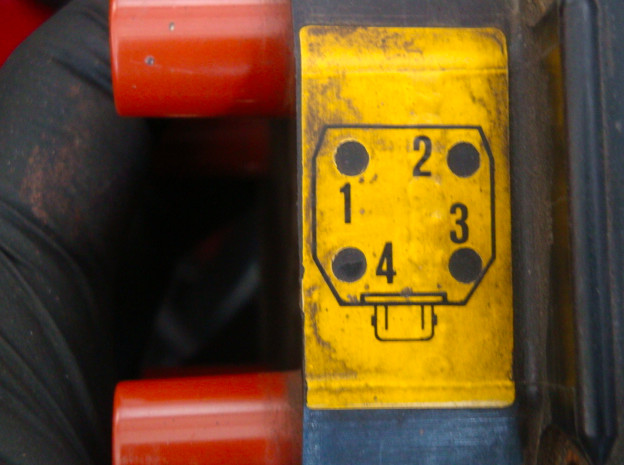
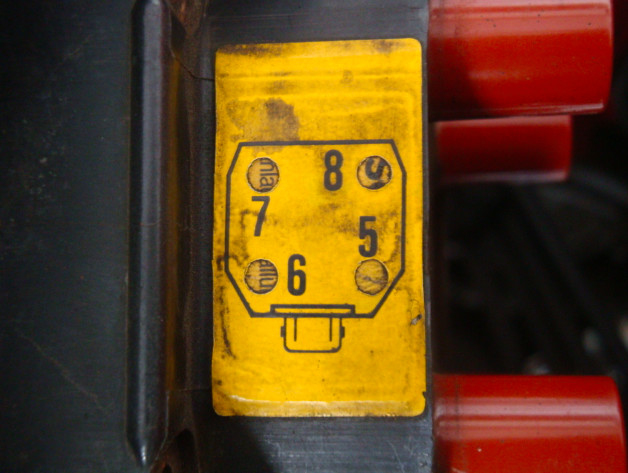
I'm also posting pics of the plug wire order. Because the stickers on our coils are getting a bit old and brittle, and some of them have already come off, or are in bad shape.
So here is the order for the right side (top pic) and left side (bottom pic) coils. I also positioned the coils how they would be facing while installed in the car.
1-27-2011
Never did give you guys the update on the ignition control module (aka: ignitor) swap. The car runs WORSE now. The misfires like a son of a beeotch.
So it's time to get some new ignition control modules.
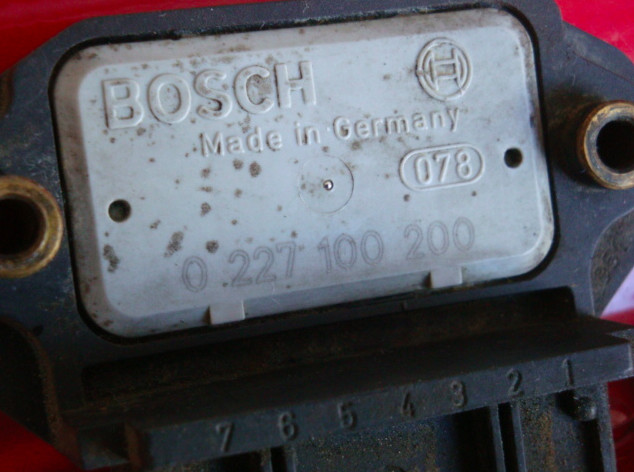
The ignition control module on our 348s, Ferrari calls it the "power module" part number 137511, and as of this posting Ferrari wants $854 each, and we have TWO of these = $1708. What is even worse is that if you live in a tax happy state like California you can tack on 9.75% sales tax in Los Angeles gives you $1704 + $166 tax = $1870 for the pair.
SCREW THAT BS!!!!
Good thing for us comes on a bunch of different cars AND a motorcycle.
The Bosch part number is 0 227 100 200. Here are the other part numbers:
BMW 12-14-1-461-441:
1989 K1 motorcycle
1989 K 100 RS motorcycle
1989 K 1100 LT motorcycle
1989 K 1100 RS
Opel 1208074, 90444650, 90449574
Peugeot-Citroen 594554, 96073612
Porsche 993-602-706-00 :
PORSCHE911 CARRERA 2(1995 - 1998)
PORSCHE911 CARRERA 4(1995 - 1998)
PORSCHE911 CARRERA 4S(1996 - 1998)
PORSCHE911 TARGA(1996 - 1998)
The cheapest I found so far for the Bosch unit was $129 each from RockAuto, a savings of OVER $1400++!!!
Oh......
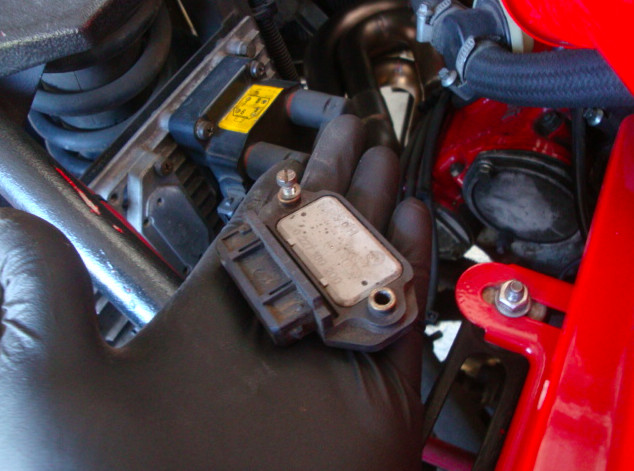
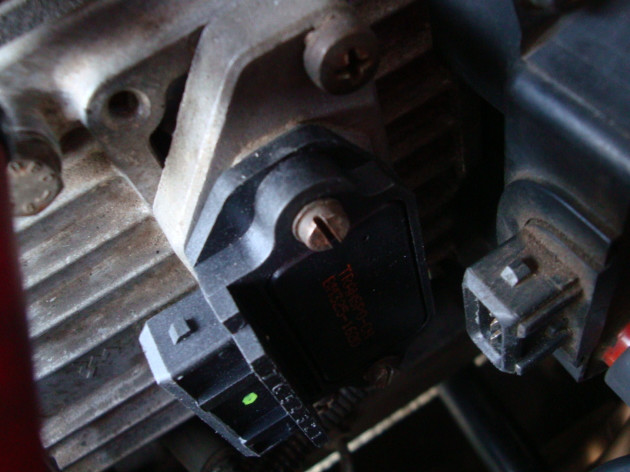
Here is how you remove the ignition control module.
Remove the connector from the ICM, by pressing in the wire clip, and then pulling it off by the clip not the wires. As you can see in the picture I also remove the clip for the coil. You'll need that out of the way to take the icm off.
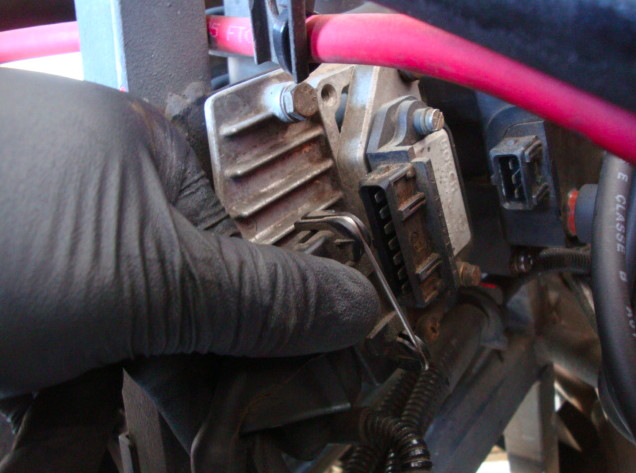
Then remove to 2 screws holding the icm to the heat sink.
Voila.
The ignition control module is out.
1-28-2011
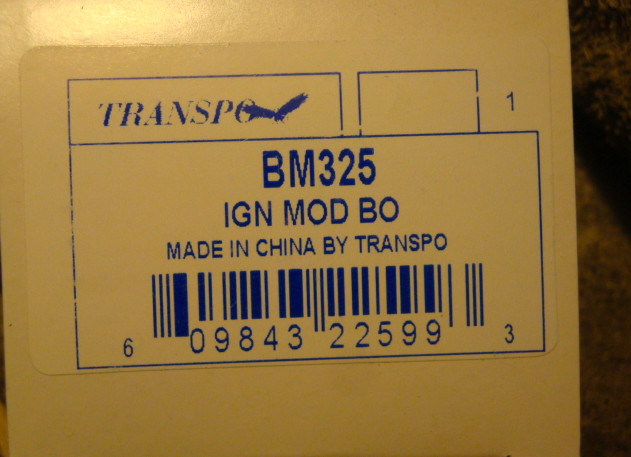
Good news, just finished buy a pair of alternate ICMs. They are made by Transpo, and the part number is BM325. I'll have them in a week or so.
The cost? How does $53.99 each sound.
That is 1/3 LESS than just the sales tax on what Ferrari wants to charge. So I just saved myself getting ripped off for $1760 on the pair, and even if you don't count the sales tax it's still a savings of getting burned for $1600!
I love the internet.
2-5-2011
Well fellas, the Transpo ICM's showed up at the end of the week.
I installed them and took the car for a test run. They are plug and play. The cars sounds much better, and the horrible misfire I was having at idle is much better.
Let's hear it for "cheap Chinese junk".
I'm such a Stooge.
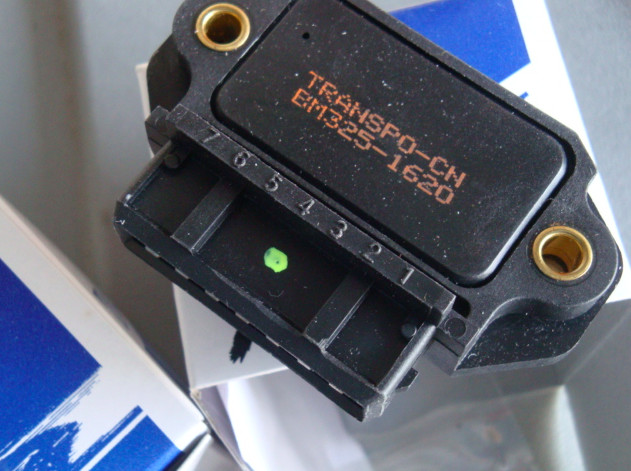
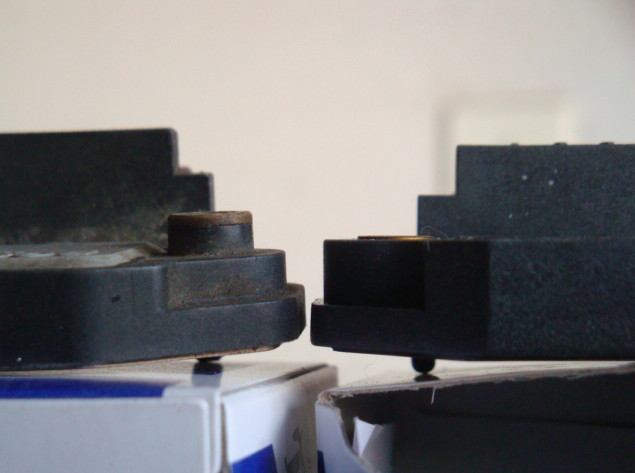
There was a bit of a height difference for the screw holes. The Bosch unit is on the left and the Transpo on the right. You can see that the holes on the Bosch are raised up a bit higher than on the Transpo. But there was no problem installing the Transpo's, the screws went all the way in
Nice build!
Posted by Diggymart on 1/13/20 @ 9:51:21 PM