You must be logged in to rate content!
5 minute read
Change a DOHC 2.3L PCV Valve
Compliments of woofer2609 @ ranger-forums.com
12-22-2010
How to change a PCV valve in b2300 or Ford Ranger. I wrote this up after some misinformation and hope this makes go easier for you!
You will need:
• 7/32” socket
• 1/2 “ socket
• 8mm socket
• socket extensions (12”-28”, whatever you have)
• Jack Stand
• Jack
• 19mm socket for wheel lugs
• Vaseline
• garden hose
• Power Drill
• ¾” spade bit
1. Undo the Neg. lead on the battery. (Do this to avoid engaging the starter motor with the metal socket extensions.)
2. Jack up the drivers side front and place on jack stand. Undo lug nuts (but do not remove!) before jacking up.
3. Take the lug nuts off and remove wheel.
4. Using the 7/32” wrench/ socket, undo the 3 bolts along the edge of the fender flare.
5. Undo the 2 larger (unsure of size) bolts roughly underneath the headlights.
6. Undo the mud flap (if equipped) with an 8mm socket.
7. Remove mud flap.
8. Directly above the wheel will be (one) ½” nut. Remove this.
9. If there are any barbed connections on the inside of the engine compartment, pull them out of the plastic spray guard.
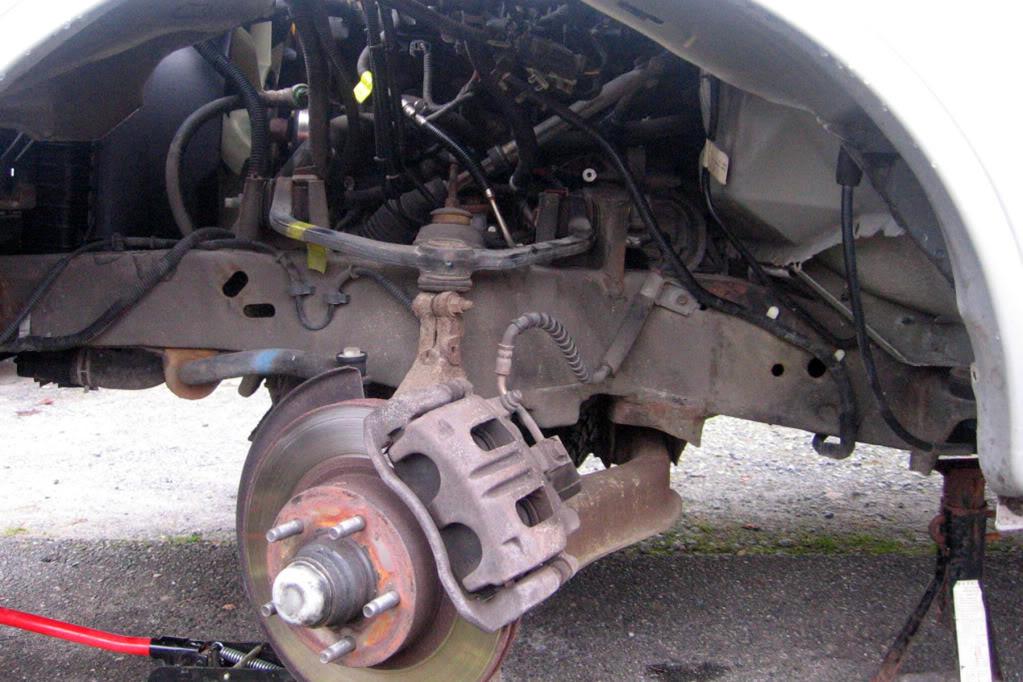
10. The plastic splashguard is now ready for removal. Manipulate it until it comes out, and make sure none of the bolt clips come off in the process. See photo 1.
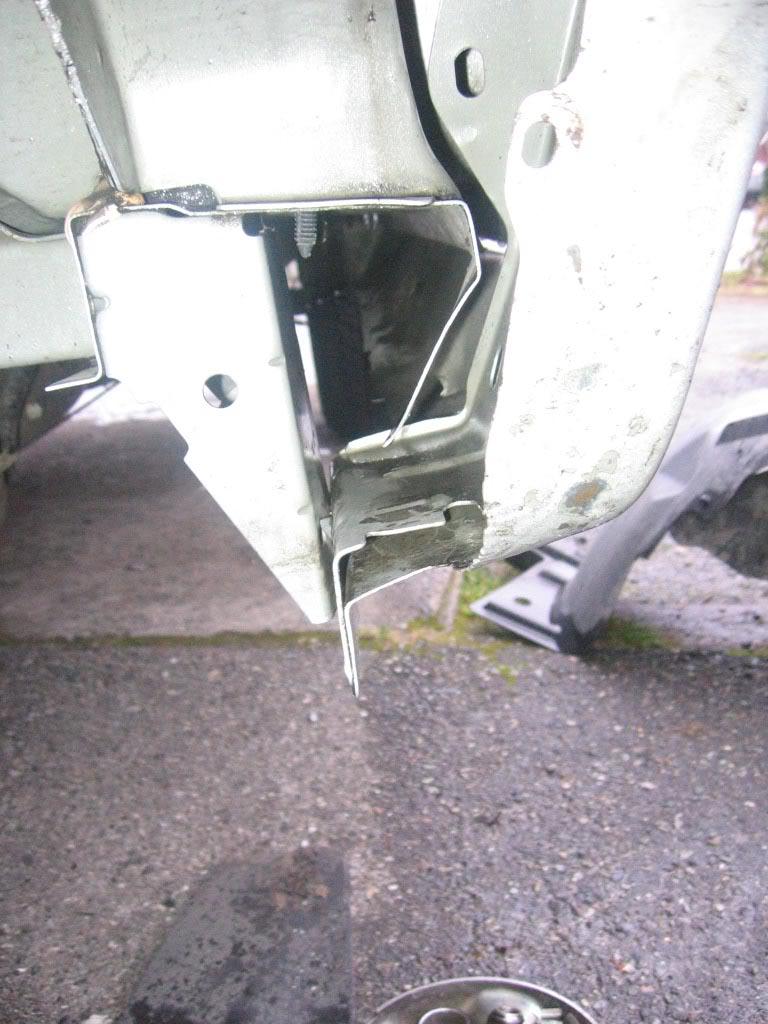
11. You will notice that there is a LOT of sand and crap caught in the recess of the splashguard that juts down at the lowest point of the fender, just above where the mud flap sits. Clean this out. See photo 2 and 3.
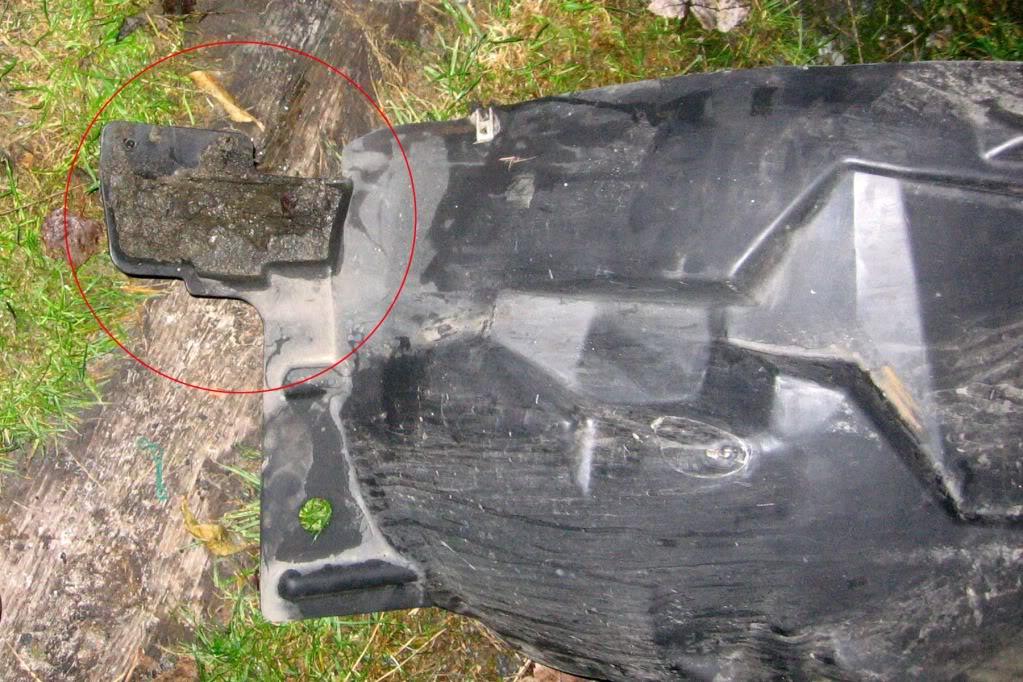
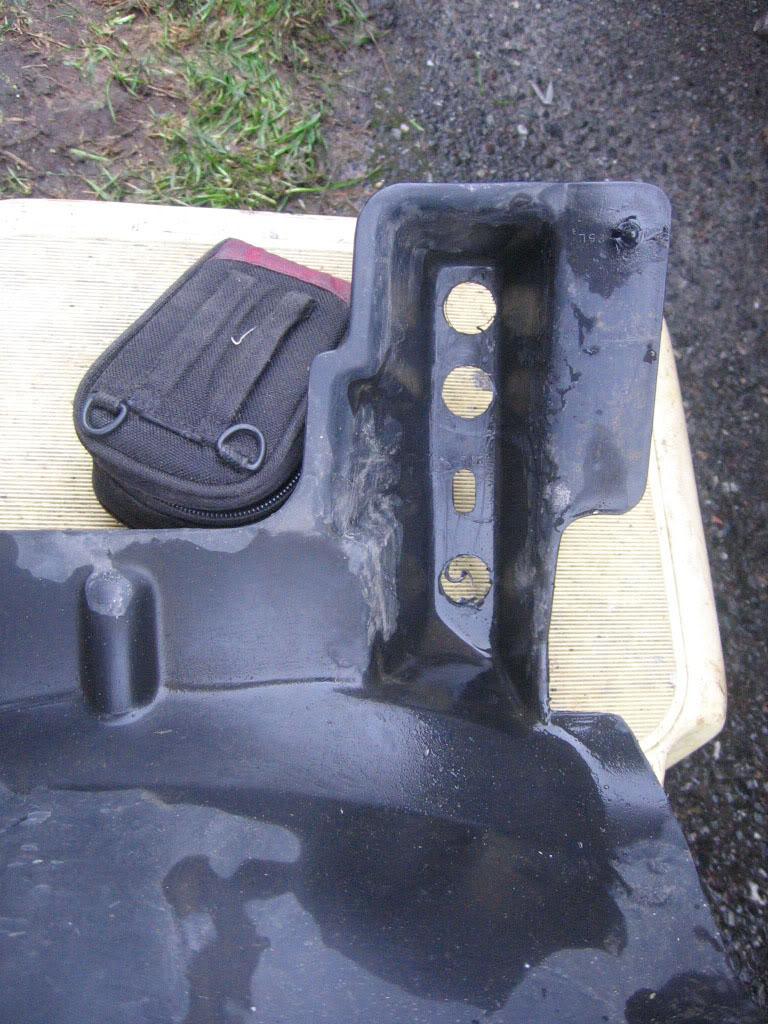
12. Drill 3 - ¾” holes in this recess using the spade bits and power drill. This will help in preventing rust forming at the bottom of the fender. While you are at it, hose out any dirt on the fender bottom. See photo 4.
13. Identify the PCV valve (circled in red). It is hard to see, but look for light grey plastic. It will be attached to the black breather assembly that is attached to the engine block directly behind the steering column. See photo 5.
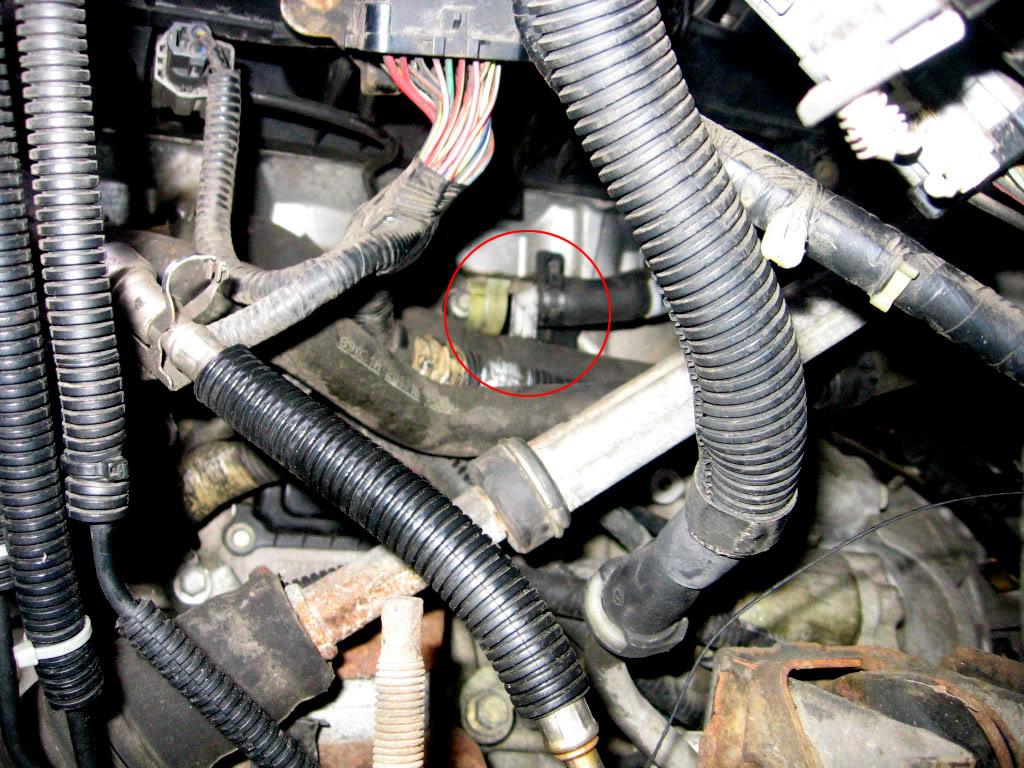
14. Using pliers, or strong fingers, move the hose clamp along the hose towards the firewall, and pull the hose off the PCV valve.
15. DO NOT ATTEMPT TO PULL, PRY, or DISRUPT THE PCV VALVE! As per govt. regulations, most models, especially later years, will have a retention device!
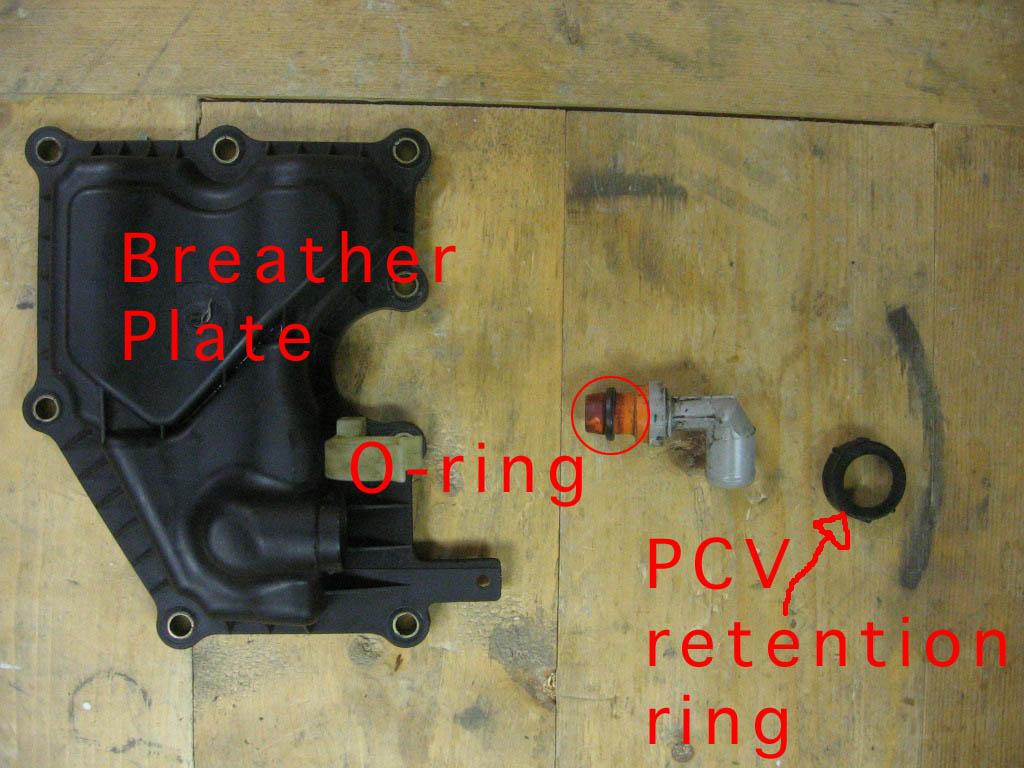
16. Using an 8mm socket attached to extensions, start undoing the first of 8 8mm bolts that hold the breather assembly to the side of the engine block. You may have to move some wiring harnesses and plumbing. Photo 6 is a photo of all the parts.
17. These will be torqued to about 10-15 ft/lbs, and should come out easily.
18. Remove the breather plate from the engine block.
19. Clean the breather assembly, and carefully remove the black cap that retains the PCV valve. You cannot remove the PCV valve without removing this first. Use a pen knife and work carefully. This is a $15 part from Ford. That’s a lot of beer!
20. If you crack this, you can reassemble it with two-part epoxy. Or buy a new one.
21. Now the PCV valve will pull out. Pull it out.
22. Remove the rubber o-ring from the PCV valve, and retain, it is not included with new valves!
23. I personally would replace the valve, regardless of condition, alternately; you can clean with intake manifold cleaner. Seriously. You have done this much work; it’s time for a new valve.
24. Place o-ring on new PCV valve and insert in breather.
25. Place lock ring do-hickey on breather over PCV valve, and snap into place.
26. Manipulate Breather assembly back through maze of wire in wheel well and up against block.
27. Using a diagonal tightening pattern, tighten the 8mm bolts HAND TIGHT! (Using the socket extensions.) They do not need to be more than 15 ft/lbs.
28. Attach the hose to the PCV valve and slide the hose clamp over the PCV valve.
29. Put all hoses and wiring harnesses back into place.
30. Manipulate the splash guard back into place under the wheel well, and attach all bolts that you had to take out. (I would coat the bolts in Vaseline to ease in removal next time.)
31. Put the mud flap back in place and bolt it up.
32. Insert barbed wiring harnesses into the splash guard on the inside of the engine bay.
33. Re-connect the negative battery cable.
34. Re-install front wheel and put on lug nuts. Tighten while holding wheel from spinning.
35. Lower vehicle.
36. Tighten lug nuts.
37. Yeah Baby! Done!
Excellent Guidance, thanks so much! this was a life saver (:>)
Posted by [email protected] on 5/16/21 @ 10:48:19 PM