You must be logged in to rate content!
5 minute read

DIY S2000 Door Card Removal
This Do-It-Yourself guide is intended to guide you through removing the door cards from your S2000.
Tools Required:
Phillips Head Screwdriver
Trim tools (pry tool and a trim tab remover) Razor blade
Step 1: Disconnect battery – any time you will be working with electrical connections (in this case you will be disconnecting the window switch panels and tweeters) it’s a good idea to disconnect the battery and wait 10-15 minutes before beginning work to reduce the chance of damaging electrical components.
Step 2: Remove the door handle – to remove the door handle, begin by using a plastic trim pry tool to pop off the two screw covers located at the top and bottom of the handle as pictured below in Figure 1:
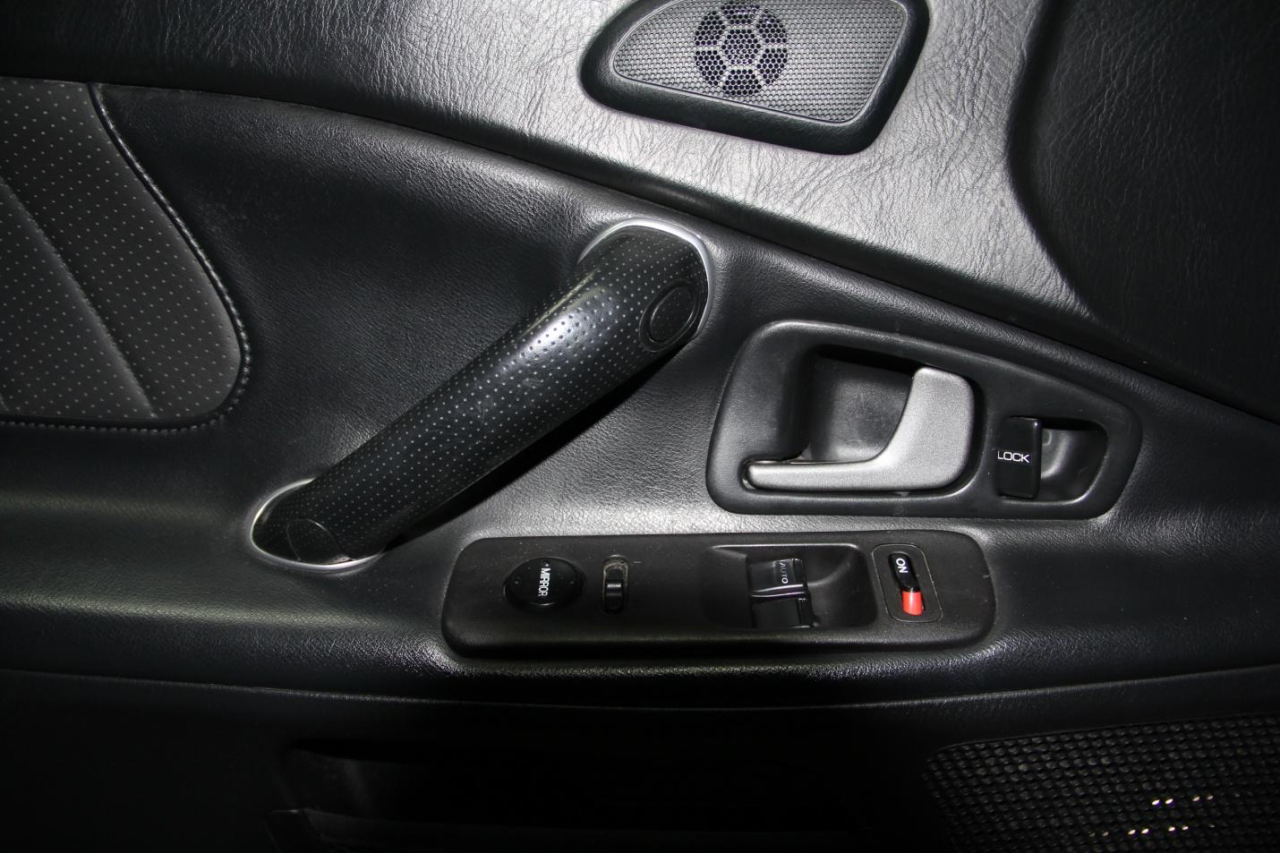
Figure 1
Once removed, use a Phillips screwdriver to remove the two screws located behind the covers, seen below in Figure 2:
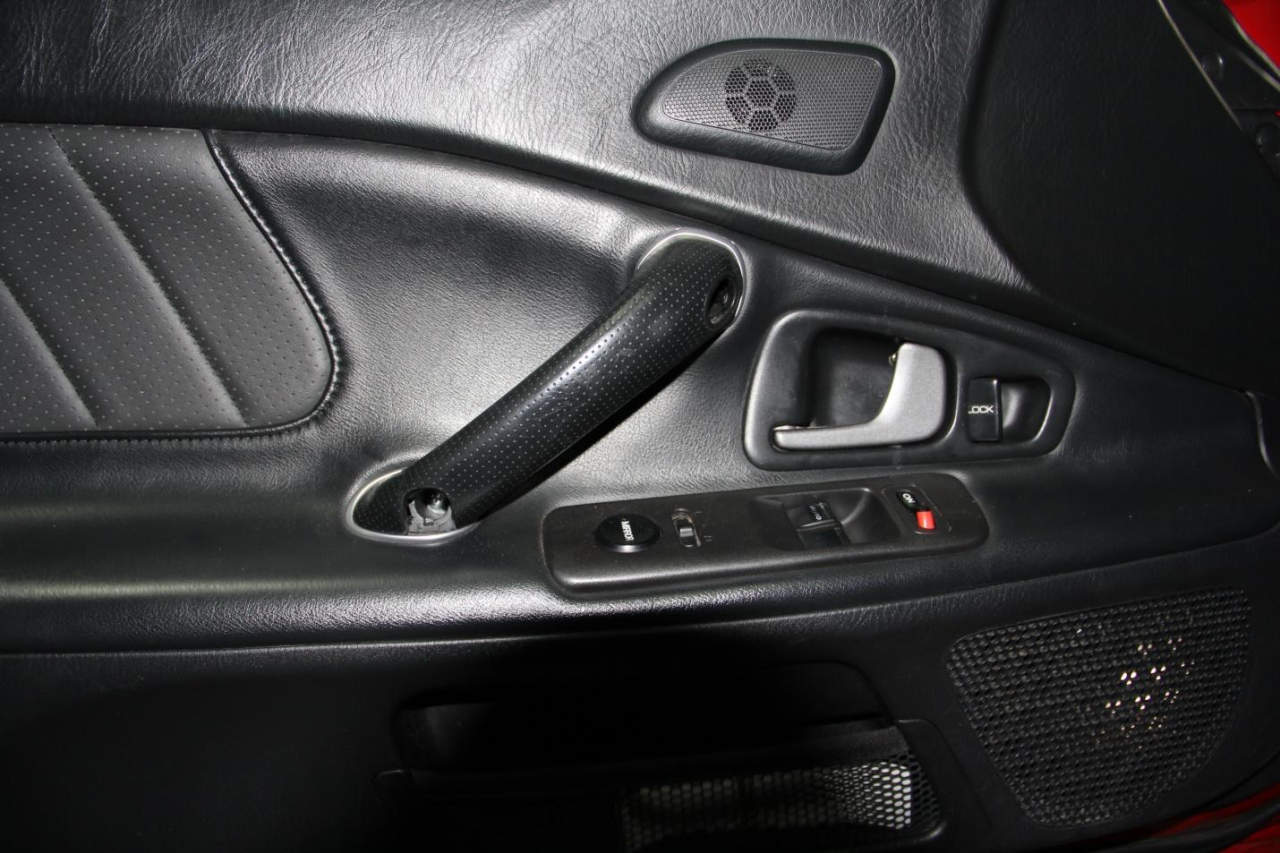
Figure 2
Remove the handle. Take care not to lose the two silver trim rings.
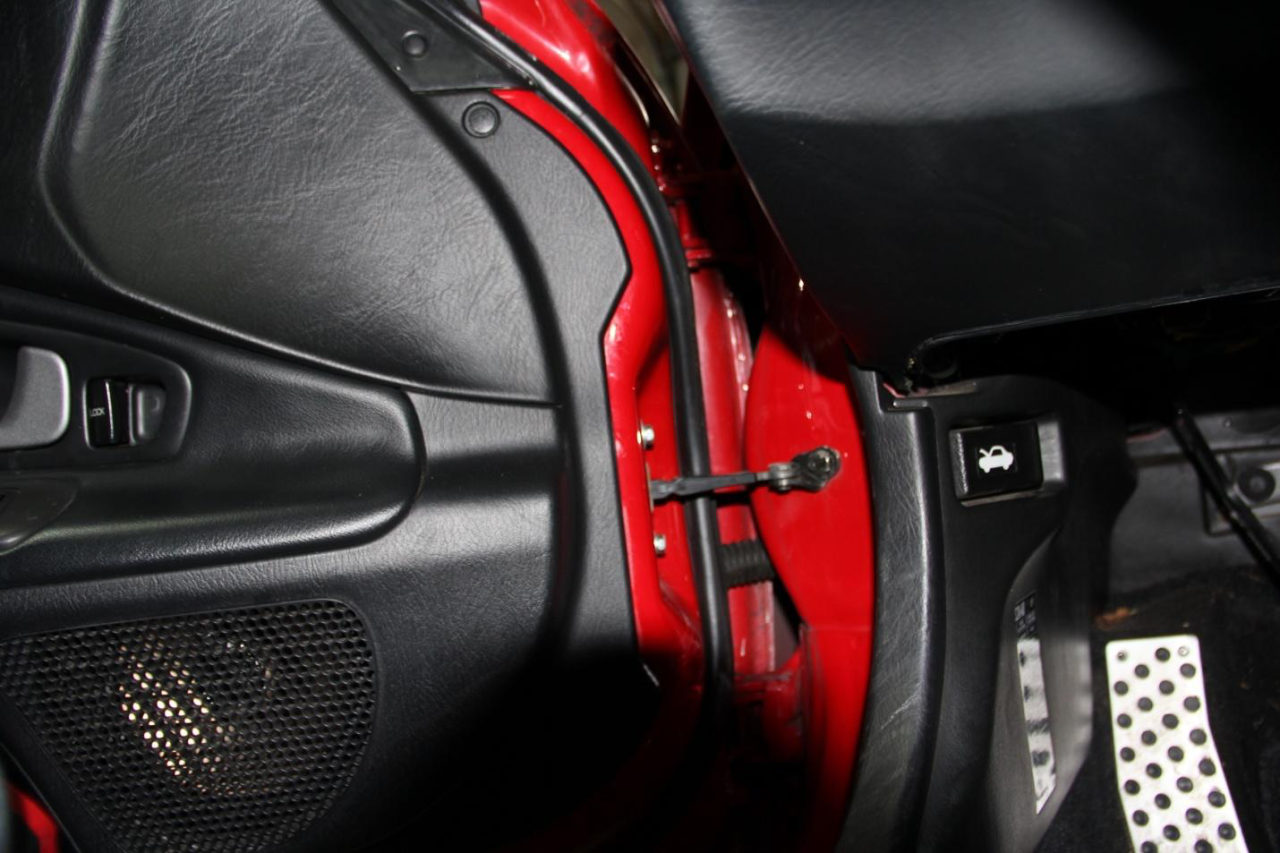
Step 3: Remove the door latch screw and trim – Next we need to remove the door latch trim screw located behind the door latch pictured in Figure 3 below:
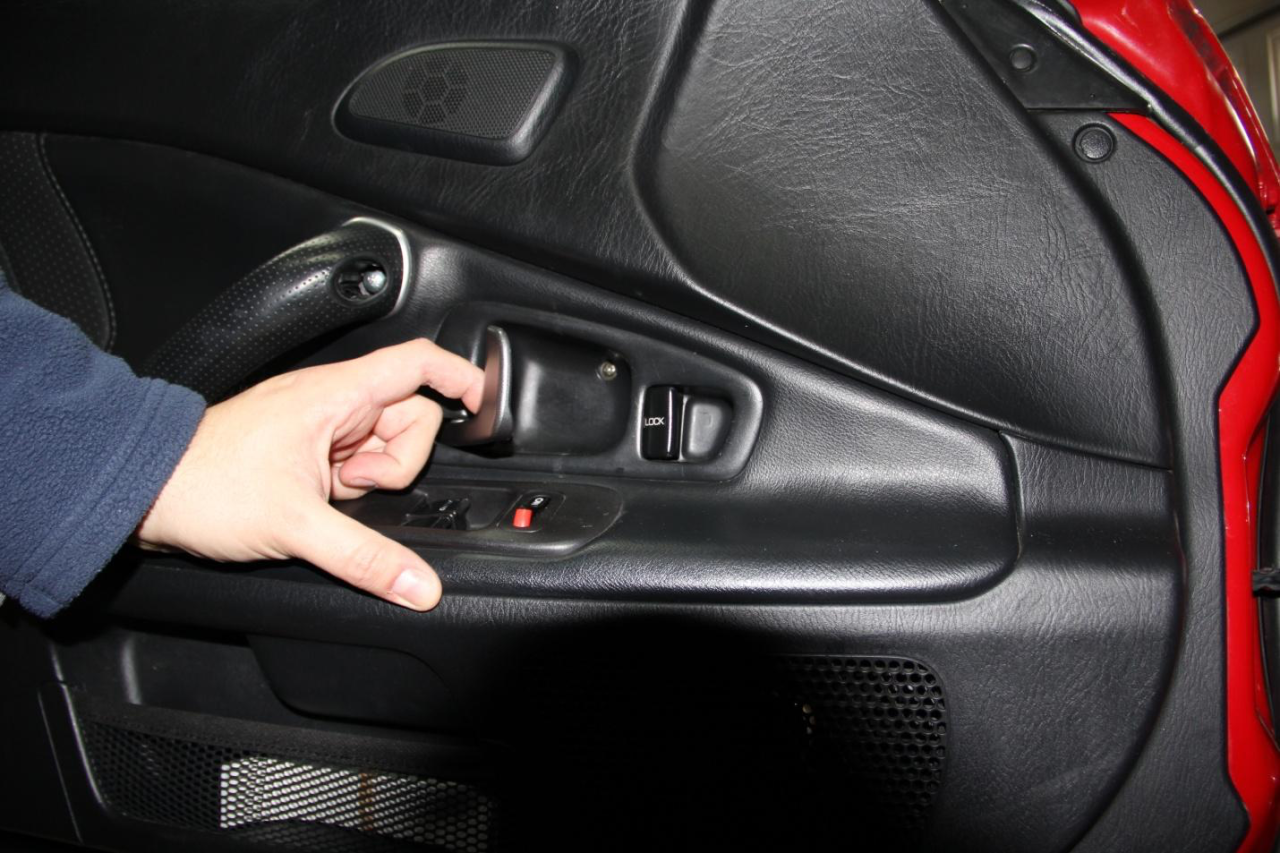
Figure 3
Use your Phillips head driver to remove the screw. Then, carefully pull the plastic trim away from the door panel and rotate it such that you can remove it from the door latch. It helps to keep the latch pulled back in the “open” position while you remove the trim.
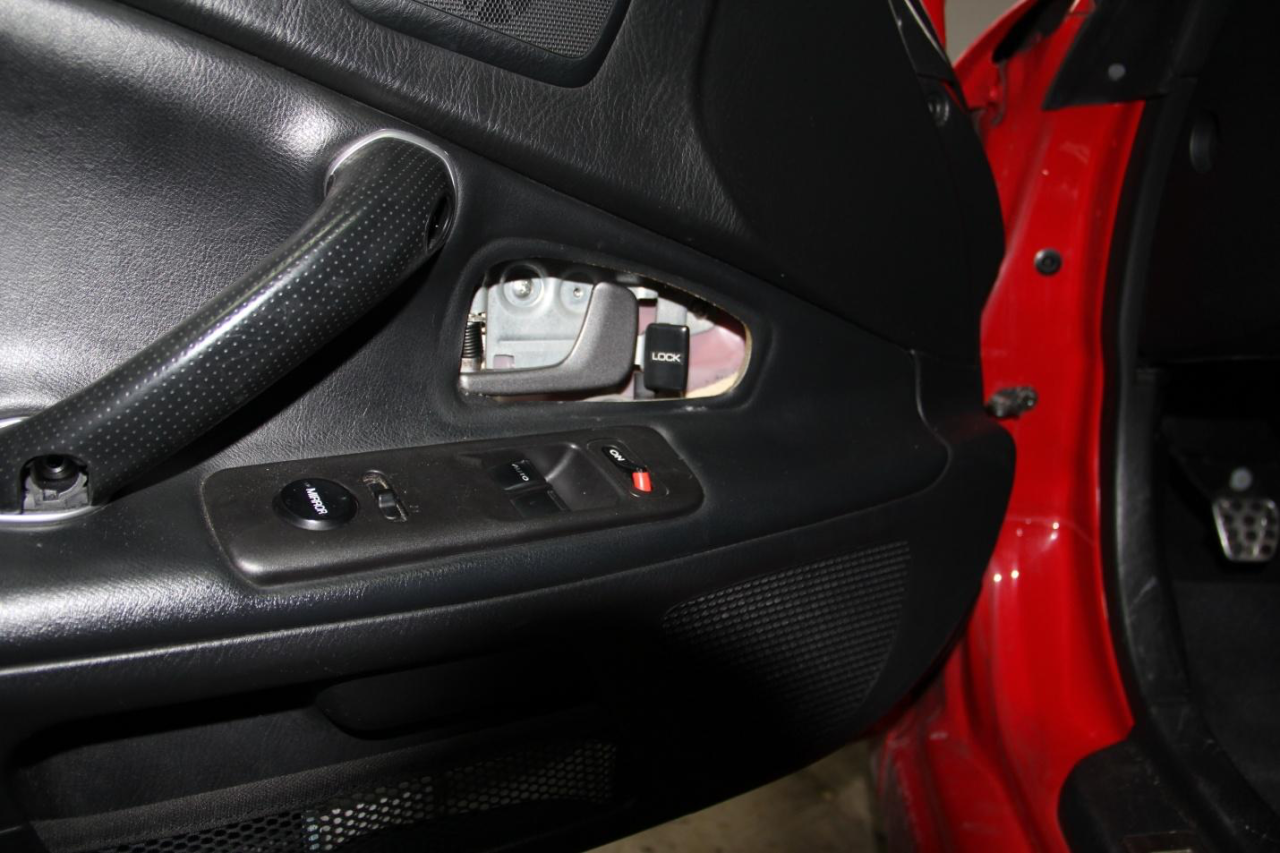
Figure 4
Step 4: Remove the door trim tab – Next you need to remove the single trim tab at the front of the door panel, pictured in Figure 5 below:
Figure 5
Use your trim tab remover (or a flathead screwdriver) to pry the tab off, using caution not to damage the trim.
Step 5: Remove the door panel – With the trim tab and the door handle and latch screws removed, you can now remove the door panel. It hooks over the metal door frame at the top and is secured with five clips on the bottom, front, and rear of the door panel as shown below in Figure 6:
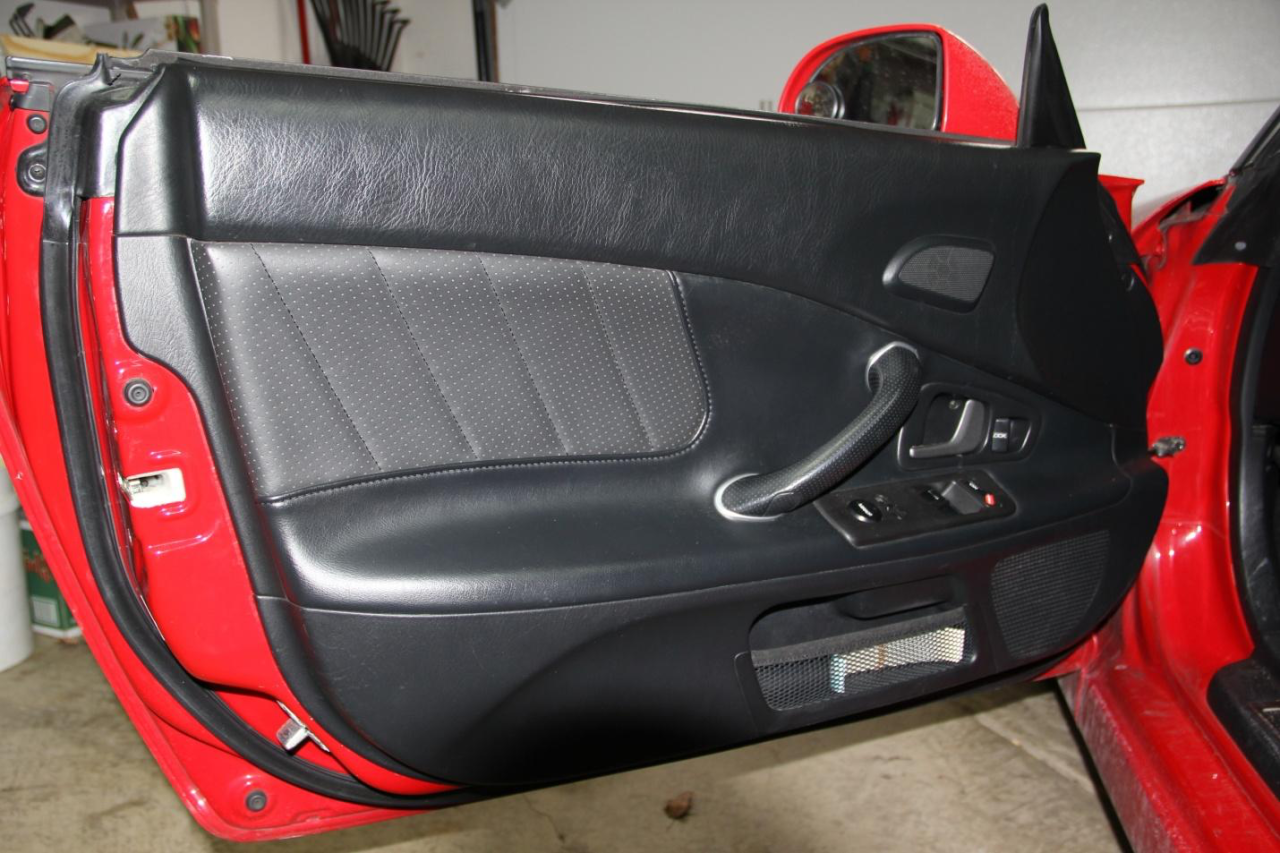
Figure 6
Carefully pry the door panel away from the door frame at these points. You’ll hear a pop as each clip is removed.
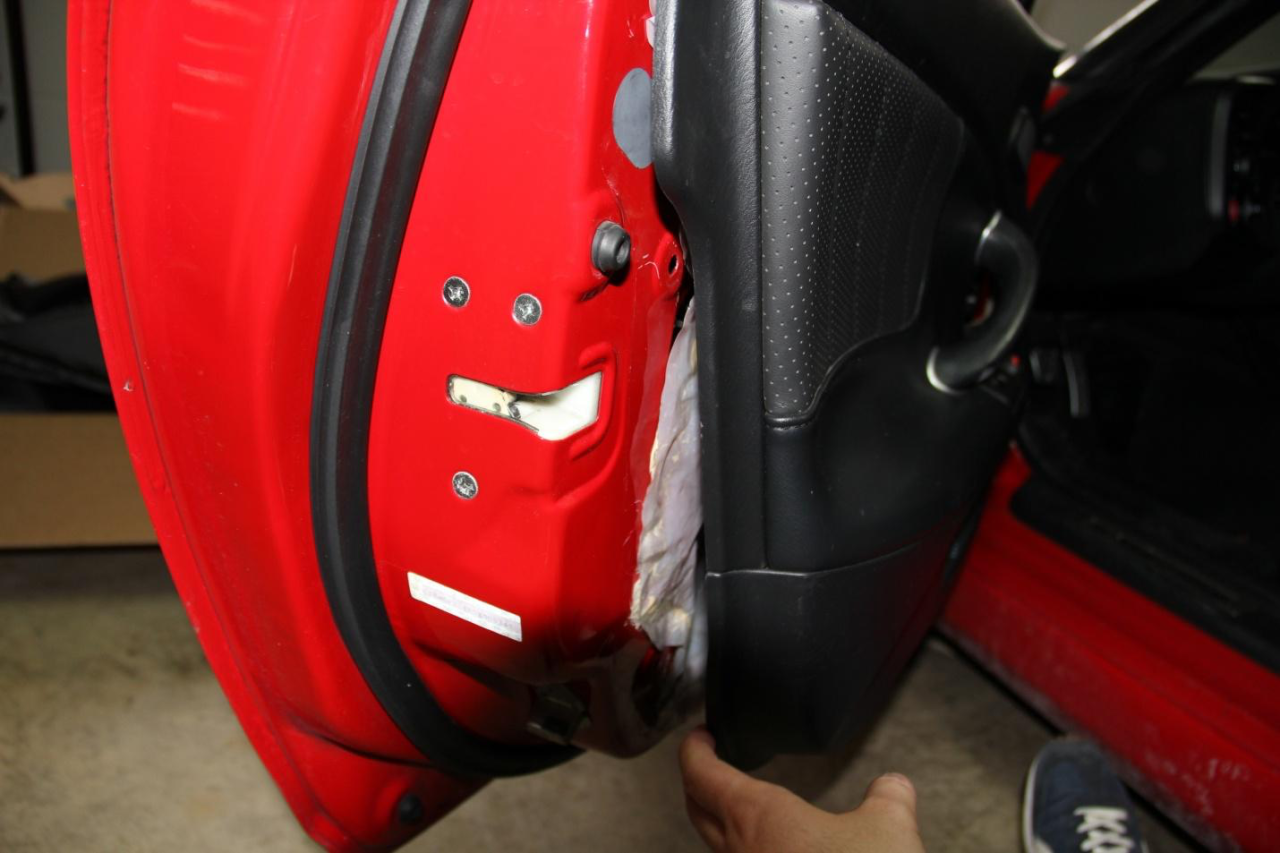
Figure 7
ATTENTION: Take extreme care as you separate the trim panel from the door frame. The panel is still attached to the door via the tweeter and window and mirror control wiring. As you lift the panel trim away you must carefully reach in and disconnect the two wiring connections for the window and mirror controls and disconnect the tweeter as seen in Figure 8. Please note that I have aftermarket tweeters and speakers installed, so your tweeter wiring will look different. It will likely be easier just to remove the tweeter itself from the trim panel.
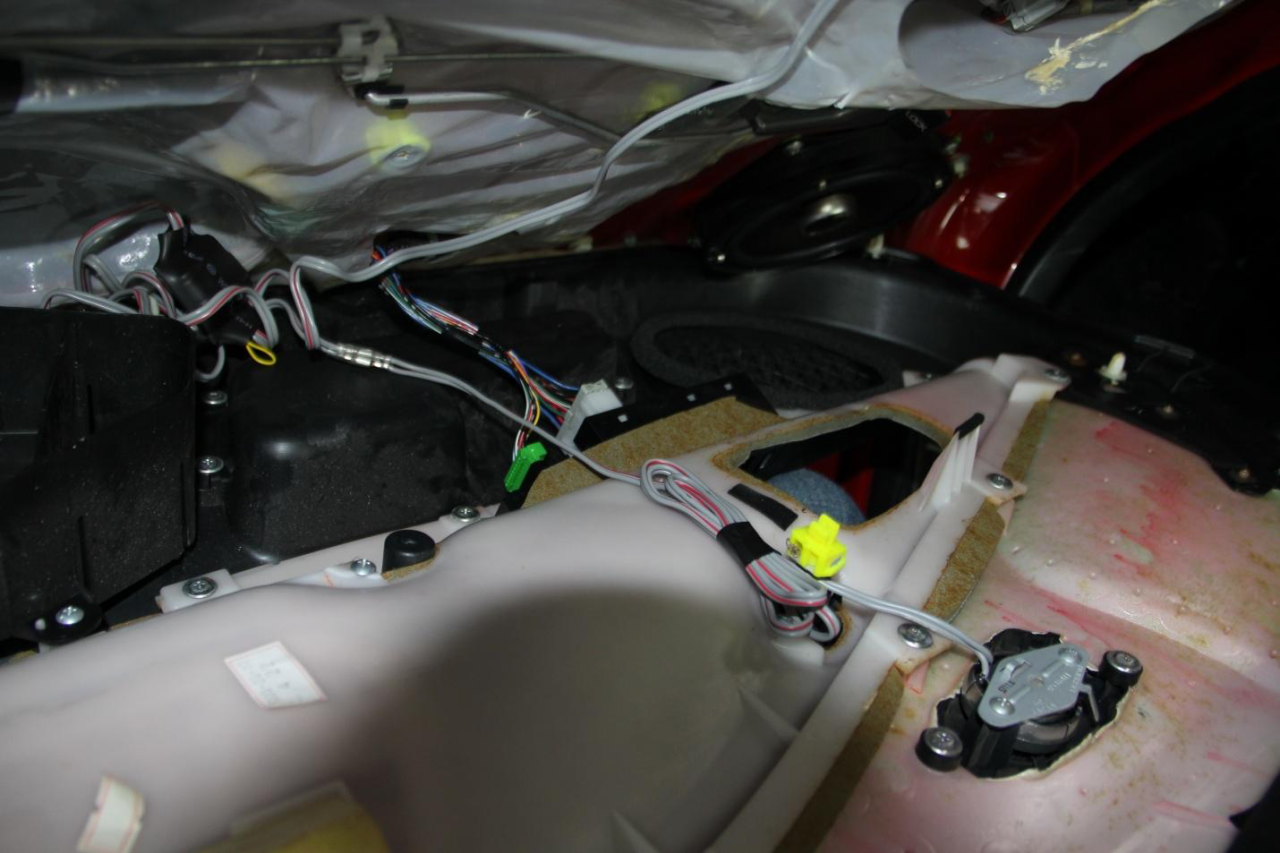
Figure 8
Once you have disconnected the wires you can remove the panel from the door completely.
Step 6: Remove the door card from the door panel - Lay your newly removed door panel face down on a clean work surface. Remove the 17 screws holding the white plastic door card to the panel (Figure 9). Note: You must also remove the 6-sided black plastic support (Figure 10) to access one of the door card screws, and you also must cut the speaker insulation (Figure 11) to separate the door card from the door panel.
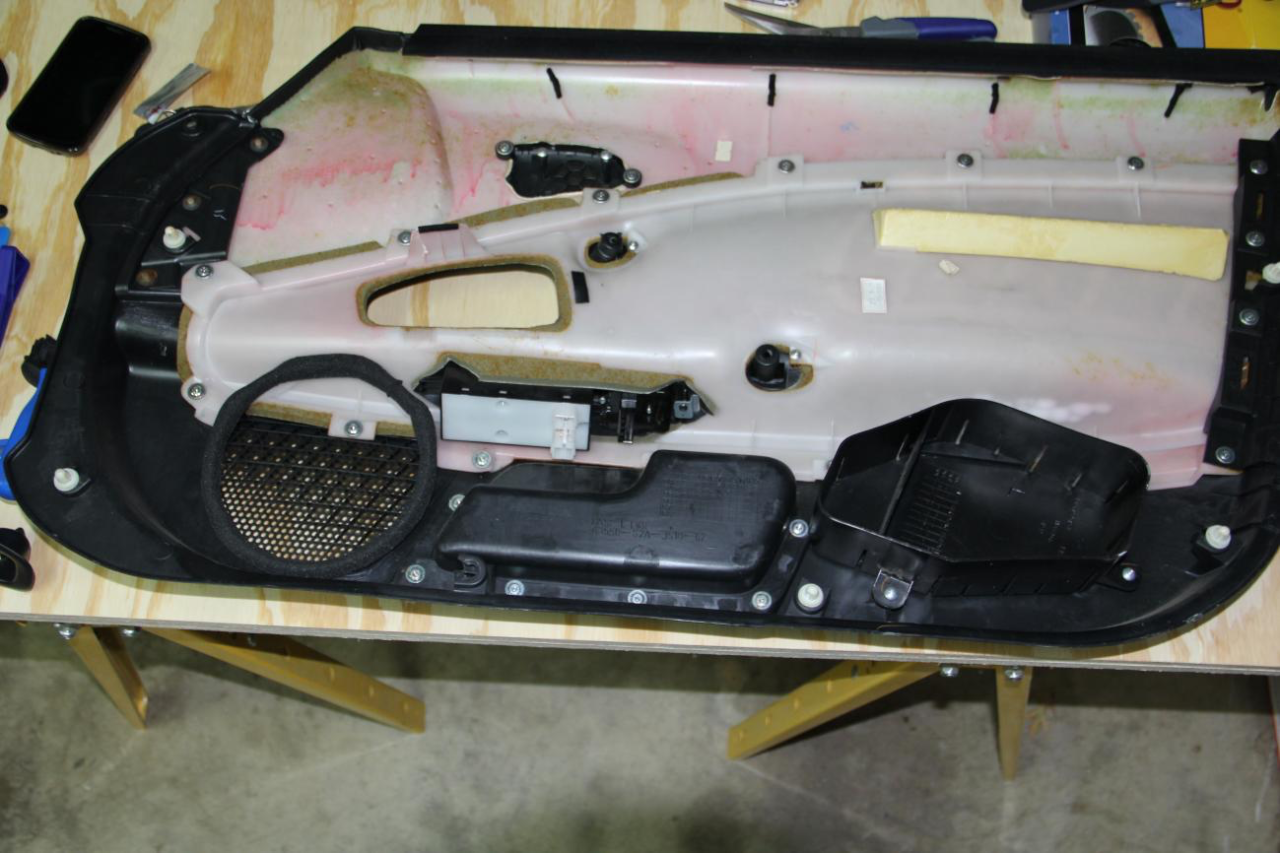
Figure 9 – Not all screws are highlighted.
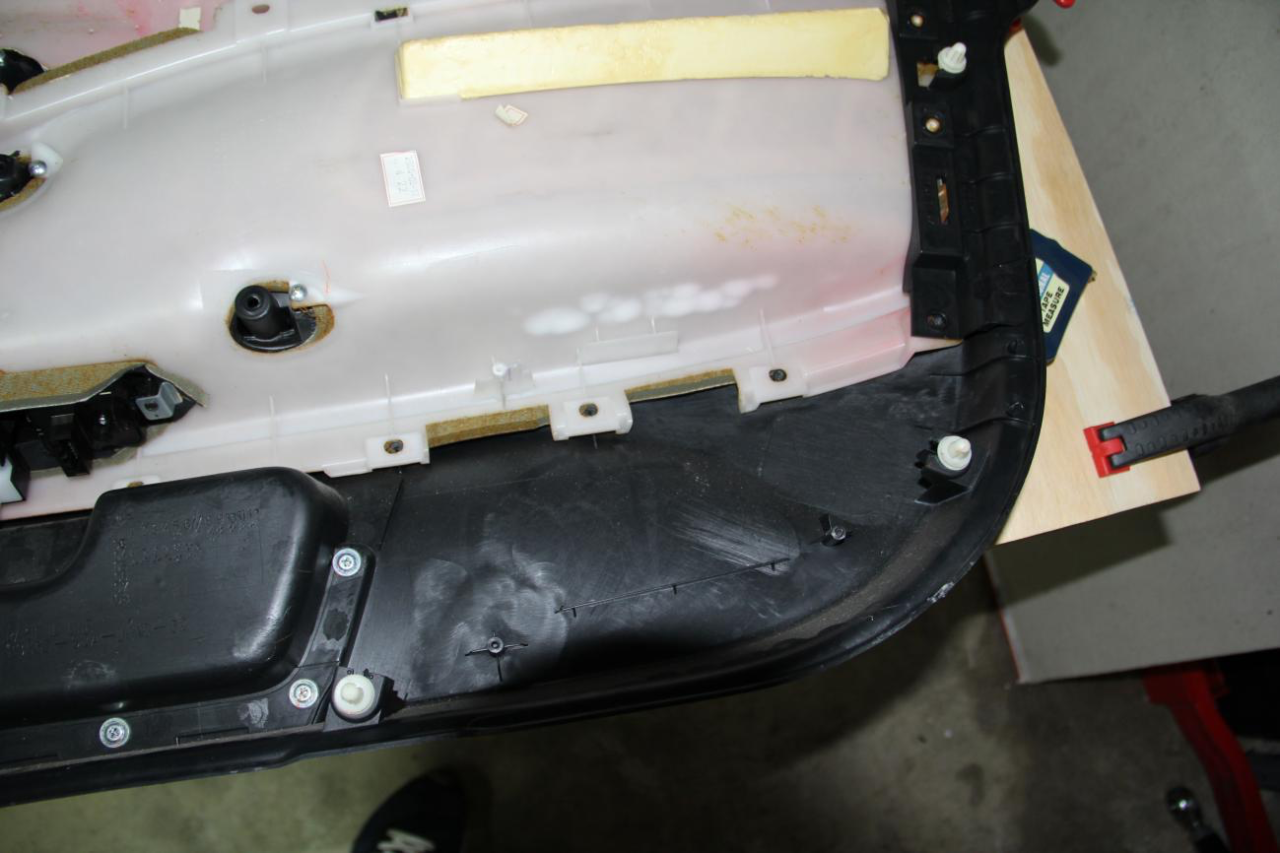
Figure 10 – The 6-sided plastic support must be removed to access one of the door card screws
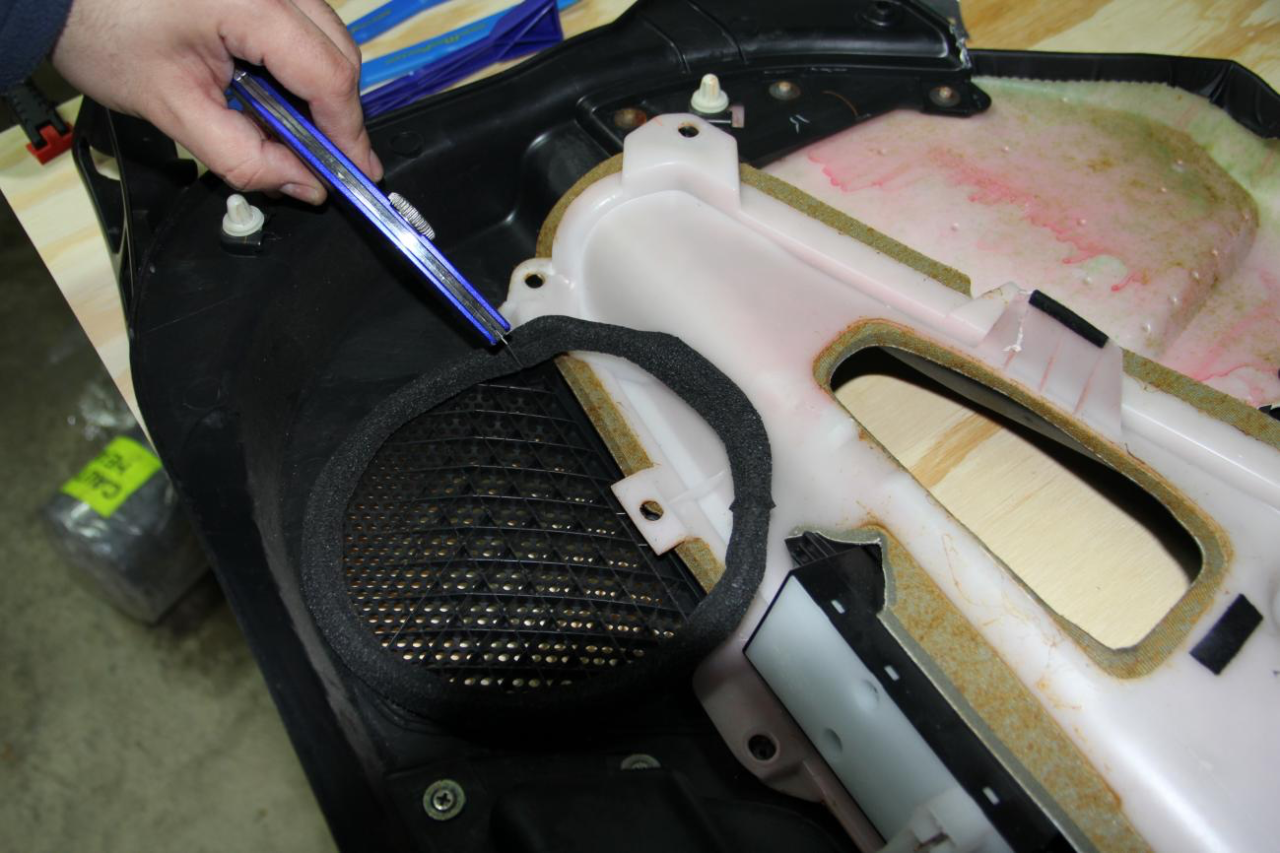
Figure 11 – cut the speaker foam to separate the door card from the panel
Step 7: Remove window controls from the door card – The final step is a simple one... you must remove the door controls from the door card. On the driver side there is one screw clip holding the controls in place. The passenger side just uses tension clips and should pop out easily.
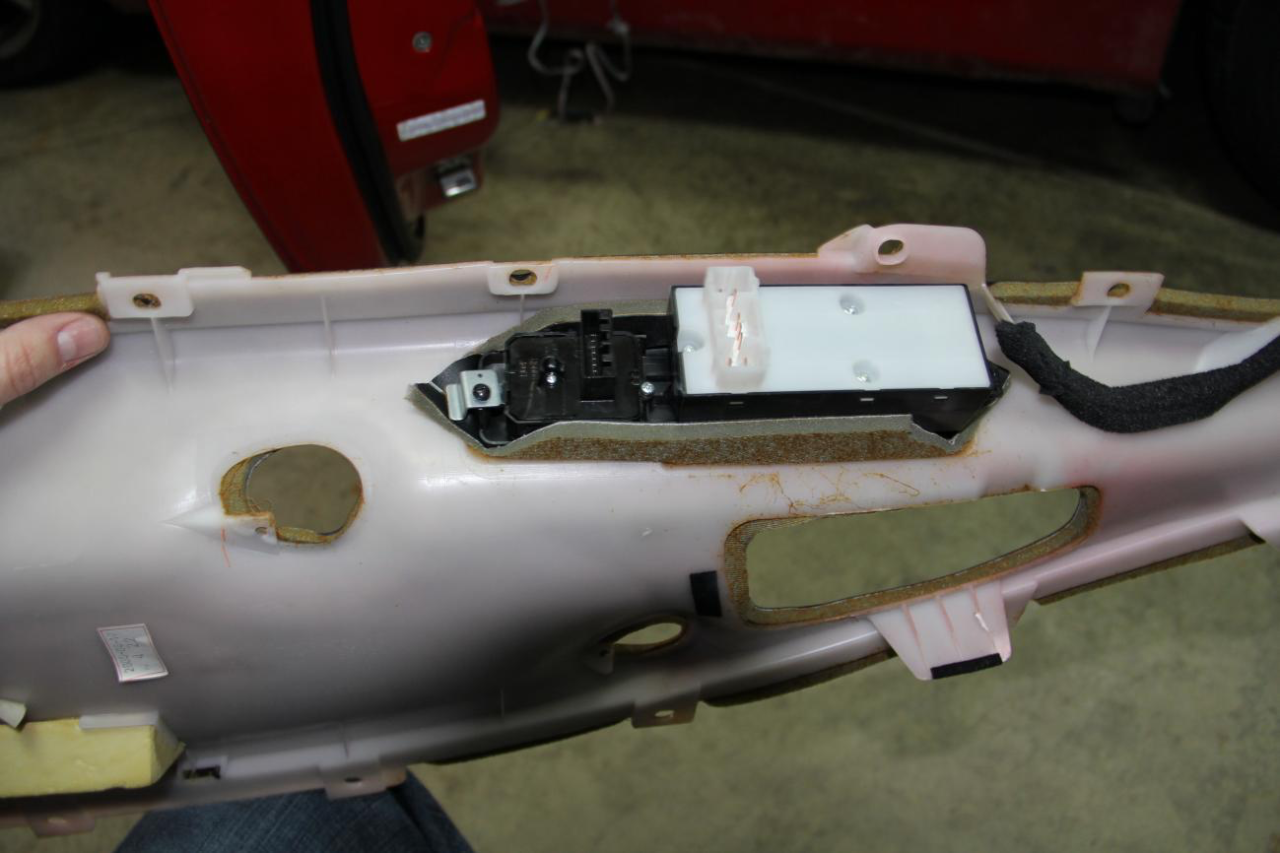
Figure 12 – Driver side retaining clip
Conclusion: You have now successfully uninstalled your S2000 door cards. They can now be cleaned and your new door card fabric can be glued in place. To reinstall, just follow the inverse of the uninstall procedure.