You must be logged in to rate content!
17 minute read

Tiptronic paddle-shift steering wheel install
Compliments of Boston Driver @ audiworld.com
8-19-2005
To celebrate my 8,000th post, here is my write-up for the Tiptronic paddle-shift steering wheel. This was NOT a cheap mod at all, although I got some good bargains on eBay Germany and eBay UK.
Big kudos to Herve for blazing the trail with his button shift steering wheel tech article, ming.moro for showing me his RS6 paddle shift steering wheel, TeddyBGame for helping out with numerous questions that came up during my preparation for this project and SilverBullet LT, who found an error in my wiring connections in my writeup.
DISCLAIMER: If you do this project, you are about to do major electrical work on your car. Exercise care, and make sure you disconnect the battery. You are also going to be removing the airbag, and if you are skiddish about that, don't do this project. However, working properly, it should not pose any problems. Lastly, you MUST have access to a VAG COM cable as one component requires you to not only login to the ESP to recode, but to recalibrate the steering angle sensor for ESP.
NOTE: The paddles ONLY work when the shifter is moved into the Tiptronic mode. When the car is in D, the paddles do nothing. Also, this will NOT work on 2002 and later A6, as the tiptronic wiring changed. I believe in 2002, this mod can be done with simply changing the steering wheel control unit, and wiring to the tip harness, but I have not interpreted those wiring diagrams.
I have included everything I followed to do this project. Please feel free to contact me at [email protected] if you have any questions.
The preview...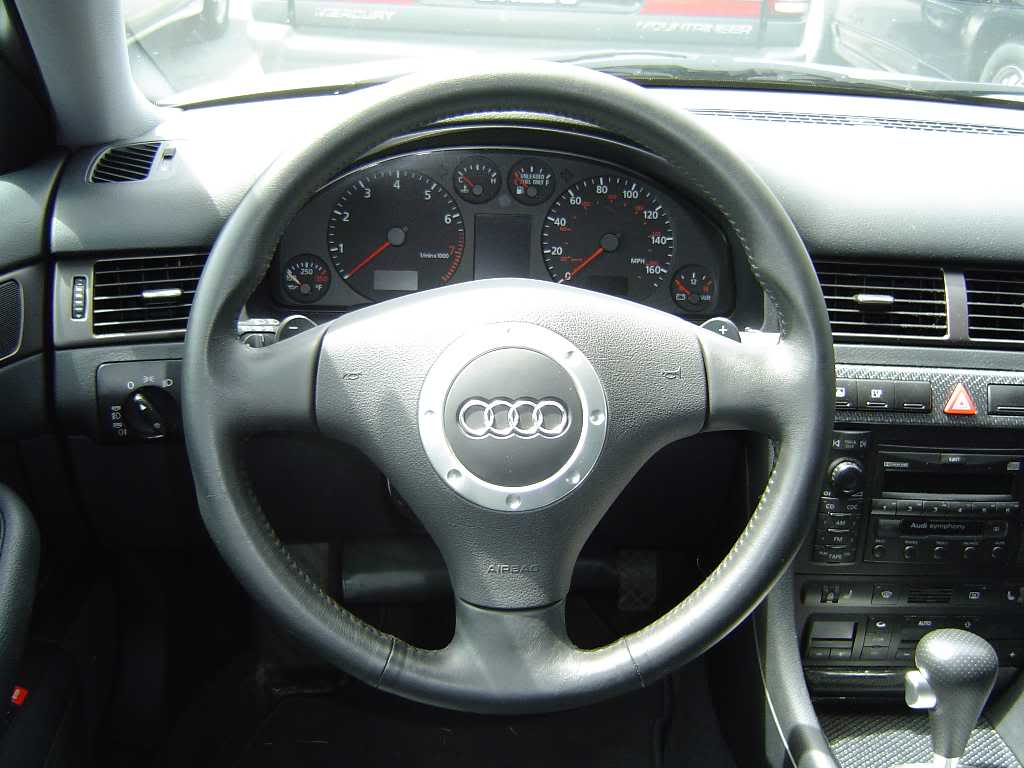
Tools needed
- VAG COM cable
- radio removal keys
- 8mm socket (for various plastic trims)
- 10mm wrench (for battery)
- 13mm socket (for M12 triple-square tool)
- T-30 Torx key (for airbag)
- T-30 Torx driver
- T-25 Torx driver (for plastic trims)
- M12 triple-square bit (for steering wheel bolt)
- Phillips and flat screwdriver (for trims)
- Wire cutter/stripper
- Plastic putty knife (not pictured)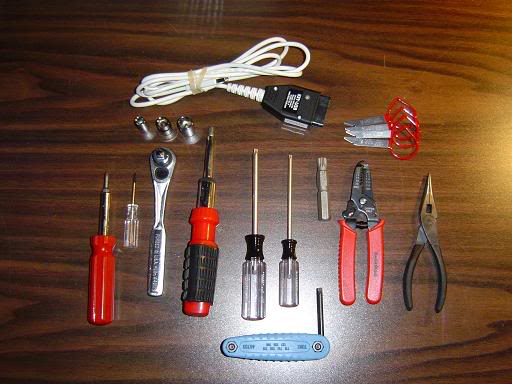
Audi Parts needed
- Steering wheel [8D0 419 091]
- Airbag [8N0 880 201]
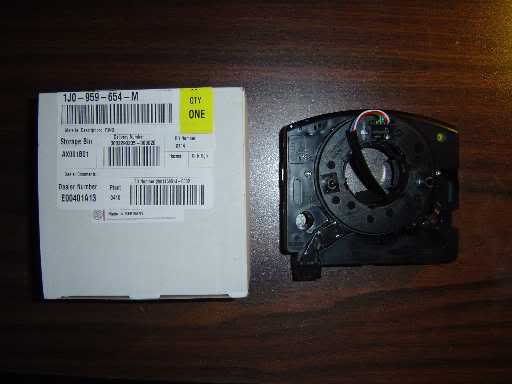
- Self-canceling ring [1J0 959 654 M]
- Wire connector [4B0 973 605]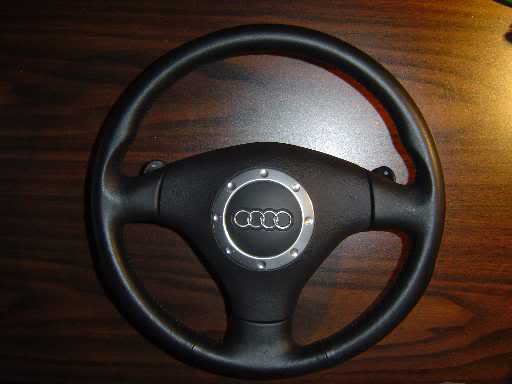
Other materials needed
- 24-gauge wire (different colors if possible)
- 24-gauge button-style wire taps
- Zip ties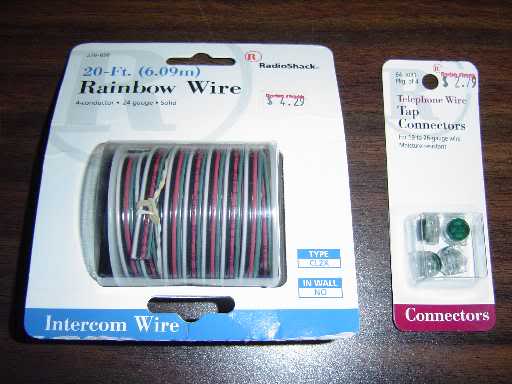
Installation Steps
1. Preparation
2. Remove airbag and old steering wheel
3. Remove self-canceling ring
4. Remove lower dash, shift trim, and center console electronics
5. Run wires from steering wheel to Tiptronic selector
6. Connect wires
7. Fit new self-canceling ring and steering wheel
8. Replace trim and other components
9. Connect the battery
1. Preparation
First, login to VAG COM and record the codes for ESP (If you have ESP). Also, make sure you have your radio security codes handy, since you will be disconnecting the battery. You will need most likely need the radio security code when you power up the car again. Once you have stored the codes, park the car with the front wheels straight and the steering wheel centered. This will make for easier installation of the new steering wheel later. Disconnect the battery using the 10mm socket. I typically only disconnect the negative side of the battery, which kills power to the car.
2. Remove airbag and old steering wheel
From behind the wheel, remove the two T-30 torx bolts that fasten the airbag to the steering wheel. I am sorry that I do not have a picture of the bolts on the old 4-spoke wheel, but here is a good picture of the bolt from the back of the new steering wheel.
These bolts are VERY tight, and there is not much room back there to get good leverage with a Torx driver. I ended up buying a T-30 torx key, which gave me MUCH more leverage to loosen the bolt. Once the airbag is removed, release the wiring harness for the airbag by using a very small flat head screwdriver and flipping up the yellow clip pictured below. If you have the multifunction steering wheel with radio controls, there will also be a black connector on the right side of the airbag that also has to be removed.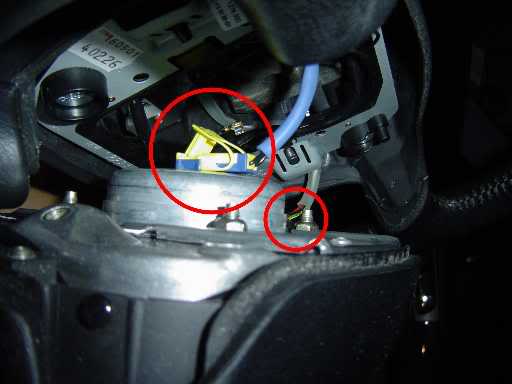
Remove the airbag and carefully set it aside. Using the M12 tool, remove the bolt that secures the steering wheel to the steering column.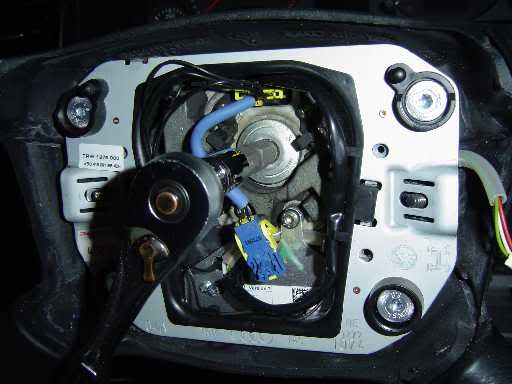
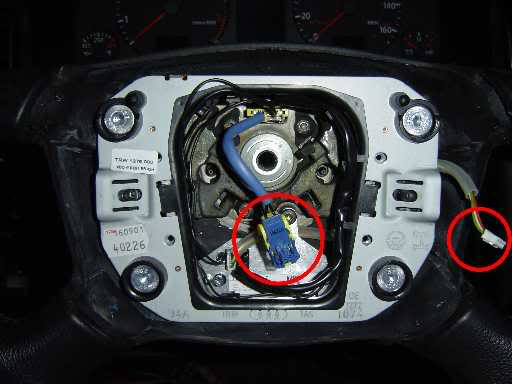
Remove the wire connector that goes from the steering wheel to the self-canceling ring, remove the wheel, and store in a safe place. You may want to fasten the airbag back to the steering wheel at this point for storage (or sale).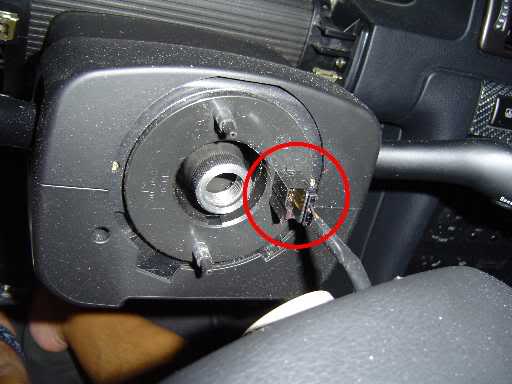
3. Remove self-canceling ring
First, you need to remove the plastic shell of the steering column. You need to remove 2 Phillips-head screws in the front and two from the underside, as well as a T-25 Torx bolt that is located on the bottom under the tilt steering lever (see pictures below, the two screws are in the upper corners of the image, the Torx bolt in the lower part of the image). Lift the upper-half section of the steering column cover by lifting up the end of the trim closest to you and pull outward. Carefully, remove the lower half, being mindful of the opening and gasket for the ignition. This lower trim piece may just dangle, since it does not have to be completely removed.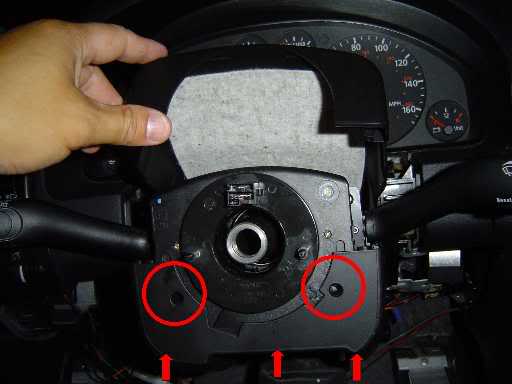
You may now remove the self-canceling ring by releasing the 4 tabs that hold it into place and disconnecting the various wire connectors.
4. Removing lower dash, shifter trim, and center console electronics
Removing the lower dash:
I do not have good pictures of the lower dash panel removal for this post, but there are a few good posts already on this panel removal. However, I will describe it for you. There are five (5) 8mm bolts that secure the lower dash panel. Two bolts are located behind the plastic trim piece just above the steering column (just pull rearward to remove this trim). Two bolts are recessed in the lowest and outermost corners of the panel. One bolt is located on the left side of the dashboard by the fuse box.
Unplug the ODBC connector (the purple plug) and the foot-well light. Unclip this trim panel from its two catches near the floor just above the pedals. You can now free the trim, and it will be much easier to run wires with it out of the way. I left mine dangling because of the cell phone hands-free kit control module that is fastened to the dash panel. I did not feel like disconnecting all of those things.
Removing shift trim:
Lift the shift trim from the rearward edge. Shift the gear selector to 4th (I know, in this picture, mine is in N...regardless, make sure your emergency brake is on!) and lift up and out and towards the rear of the car.
Next, with the gear selector in 4th, pull the button on the left side of the handle out with one hand while pulling the gear **** hard upward with the other hand. If you have never removed this ****, you really feel like you are going to break something. IMPORTANT NOTE: Once the **** is removed, make sure you wedge something in the gap on the lower side of the button before it snaps back in. This button is a PITA to pull back out if it recesses into the **** itself. I used a small scrap of cardboard that I had on hand as a wedge in the gap on the bottom side of the button.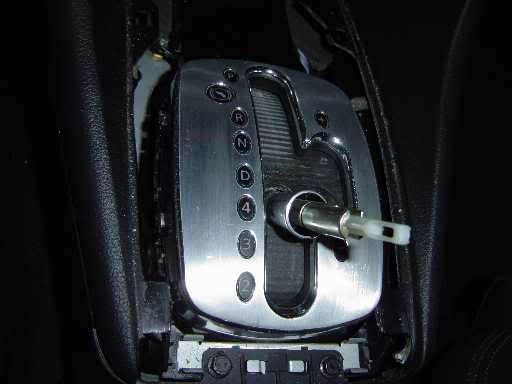
Next, as you can barely see in the picture above, you need to remove the aluminum bezel, which is secured by four tabs, two each on the left and right side. Using the putty knife, GENTLY pry the black tabs to release the bezel. Those black plastic tabs are brittle. Now you can see the shifter circuit board.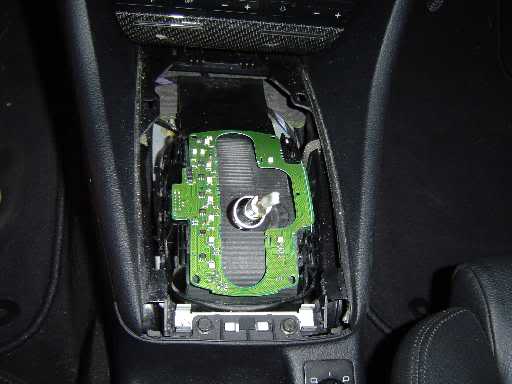
Just lift up the circuit board to gain access to the wire connector underneath.
To remove the wire connector, simply depress the spring clip in the center of the red circle pictured below, and pull the connector plug out of the back of the circuit board.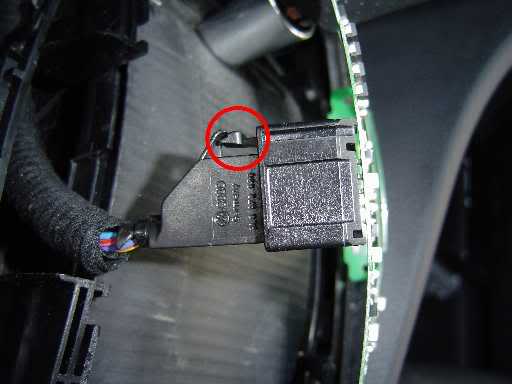
Removing center console electronics:
I had a REALLY hard time fishing the wires from the Tiptronic shifter to the under-dash area, so I removed the radio, climate control unit, and the ashtray to get a good look at the pathway for the wires. First, remove the radio head unit using proper radio removal keys and unplugging the wiring harnesses.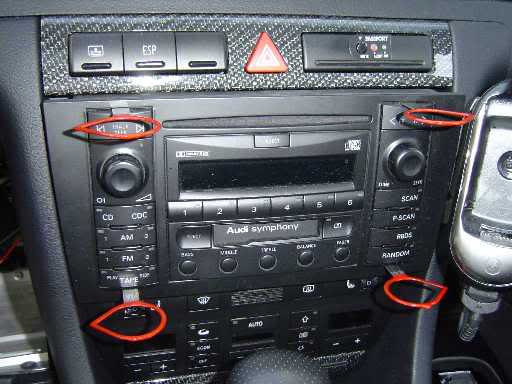
Before you set aside the radio head unit, remove the radio keys by pressing down the spring tabs and pulling out the key. I have heard so many stories of stuck radio keys, and they are stuck because the unit has to be out of the dash to be removed properly.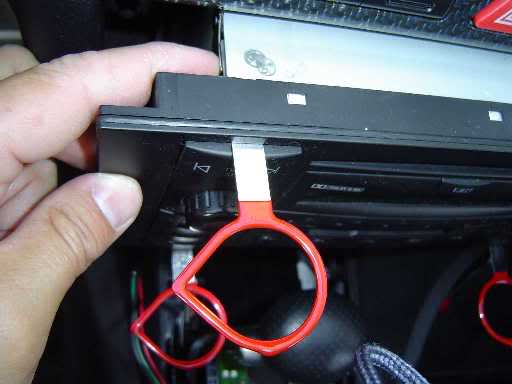
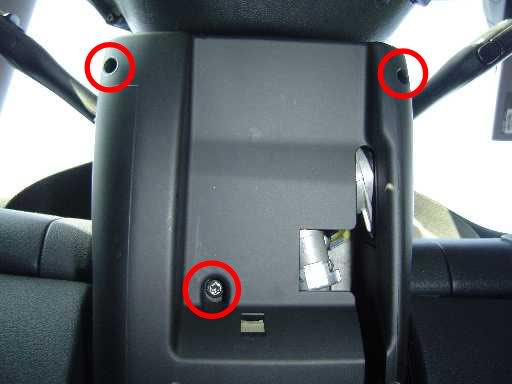
Remove the two bolts in the upper corner of the climate control unit (red circles below). Then, reach in from the top of the unit and push the unit out from behind.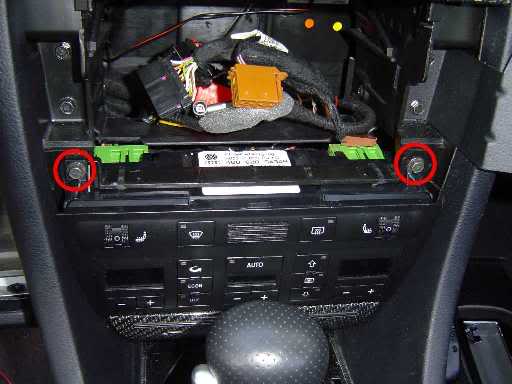
Unplug the multiple wire connectors, and set the unit aside.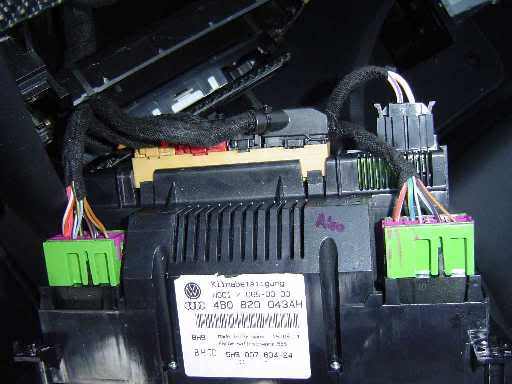
There are two tabs on the top hold of the ashtray the secure the assembly. Simply push down on these tabs (red circles below) push unit out from the rear. The ashtray is a very tight fit. Just keep pushing from the rear, and it will eventually free itself.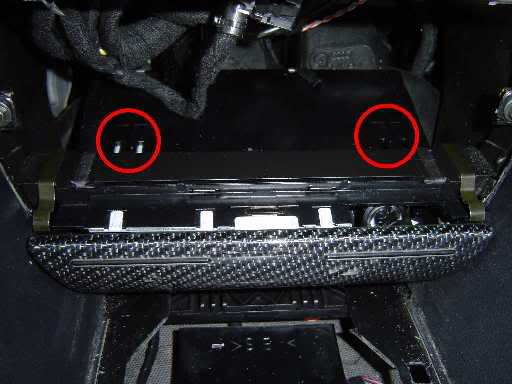
Disconnect the wiring harness from the underside of the ashtray.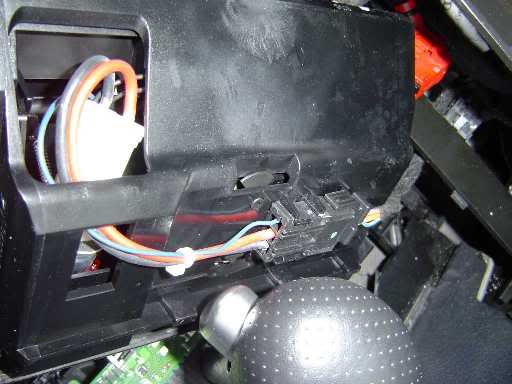
YOU ARE NOW READY FOR INSTALLATION!!!
5. Run wires from steering wheel to Tiptronic selector
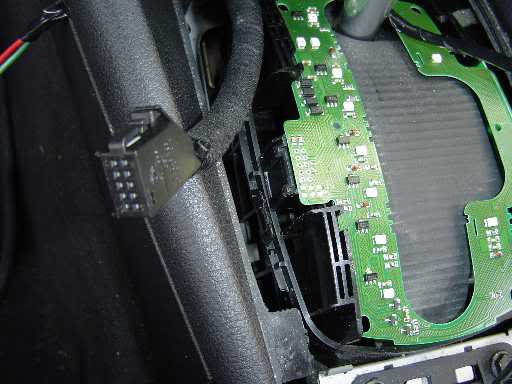
You can see in the picture below the path I ran for the wire, but this picture shows the wrong wire (red, green, and black). I used the wrong gauge wire for my initial install, so I simply used the wrong wire to fish the new wire into the dash later.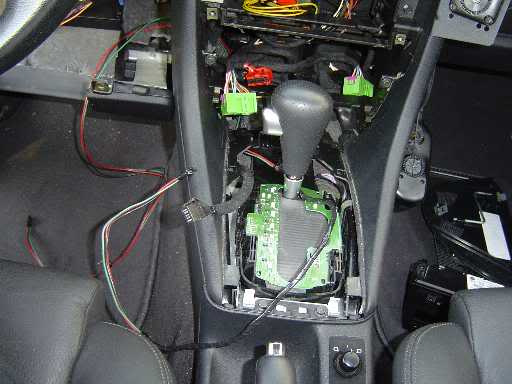
Next, you will need to feed the wire up the steering column. To make sure the new wires don't interfere with anything else, there are a couple of clips under the steering column (red arrows below) that release and then clip back to fasten the wires down.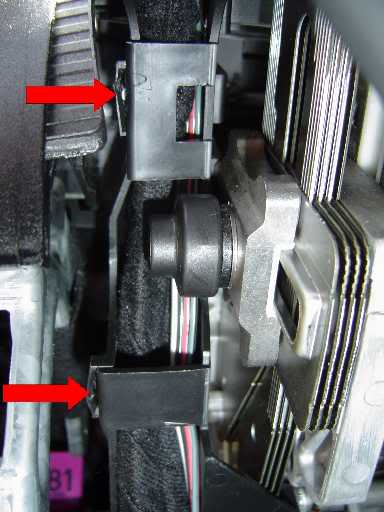
6. Connect wires
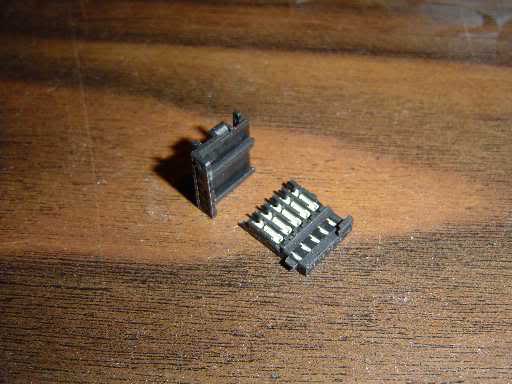
Strip wire ends and hook into wire connector (4B0 973 605), making sure you note which wire is in which numbered position. I used the following wire connections here based on the order they are laid out in the ribbon wire:
Green wire to position 1 on connector
Red wire to position 2 on connector
Black wire to position 3 on connector
White wire (not needed) to nothing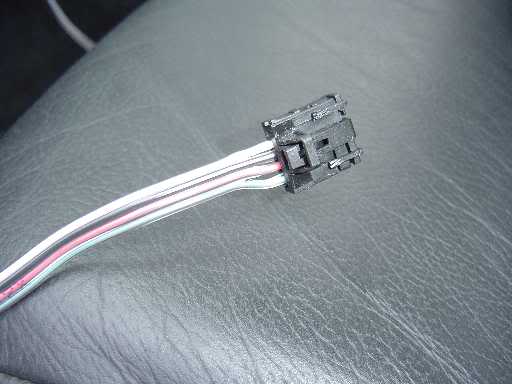
Secure the wiring connector to the other wire connectors for the steering wheel with a zip tie.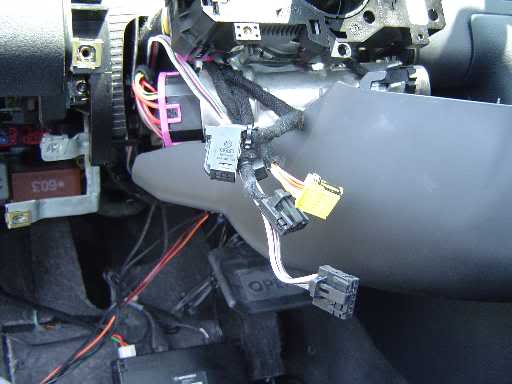
Pull the wire for the Tiptronic shifter out as far as you can. Peel back as much of the cloth tape to expose the plastic tube. This tube has a slit for access to the wires that are contained within the tube. Locate the purple/red, purple/blue, and the purple/yellow wires and pull them out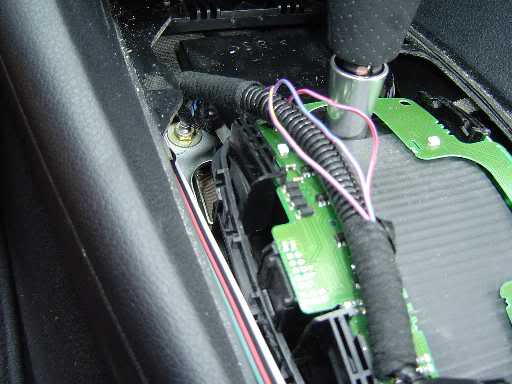
I used the button-style wiretaps from Radio Shack, which are small, and self-sealing, and perfect for this size wire used in this mod. The existing wire slides into a slot on the side of the button, while the new wire is inserted into a hole on the other side of the connector. The new wire does not need the end stripped for this tap.
I made the following connections using the phone wire taps:
Wire 1 (Green) to the purple/red wire in the Tiptronic harness.
Wire 2 (Red) to purple/yellow in the Tiptronic harness
Wire 3 (Black) to the purple/blue wire in the Tiptronic harness
Wire 4 (White) to nothing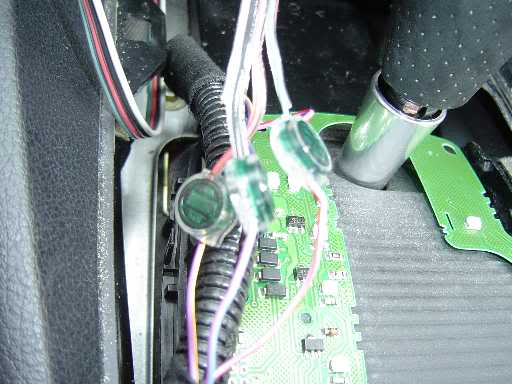
Here is the wiring diagram from the Bentley Manual so you can see what the heck you are tapping into: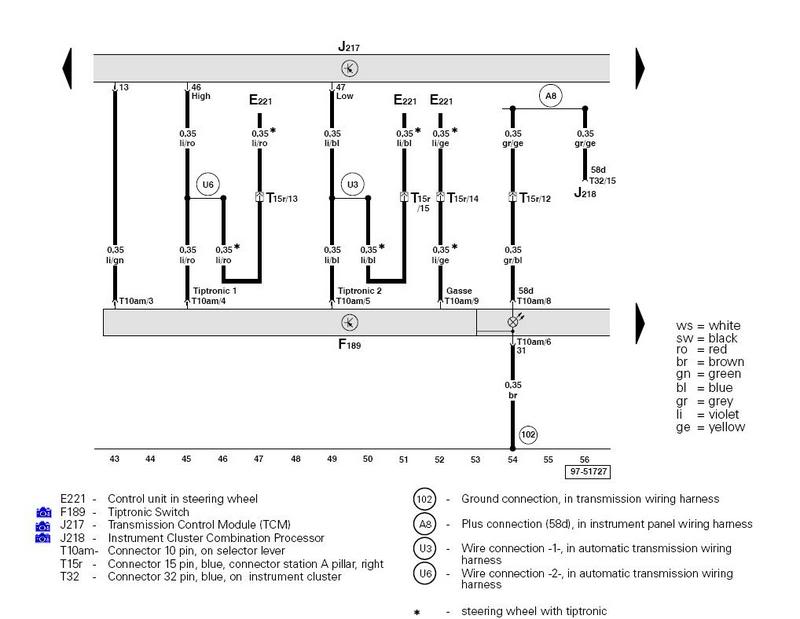
Tuck it all into the console and reconnect the wire for the circuit board.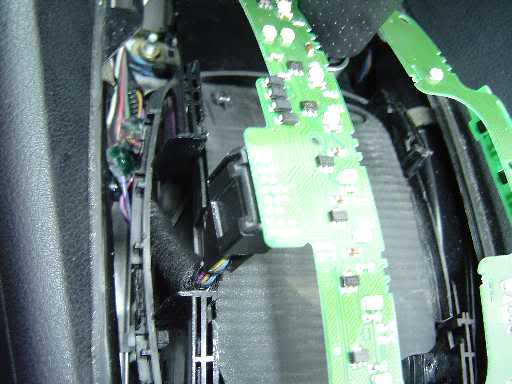
Replace the aluminum shift bezel.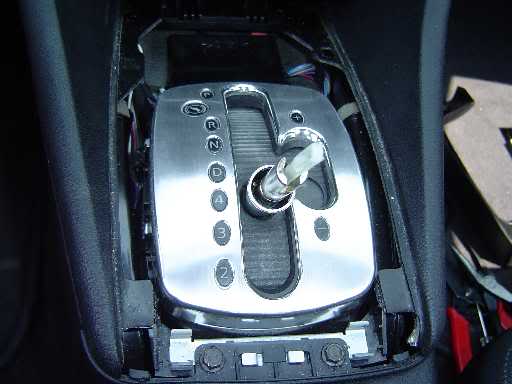
7. Fit new self-canceling ring and steering wheel
Plug I the wiring connectors in the back of the self-canceling ring. The yellow one is the airbag, the middle one is the connector you just made, and the large black one is for ESP. Remove the safety tab.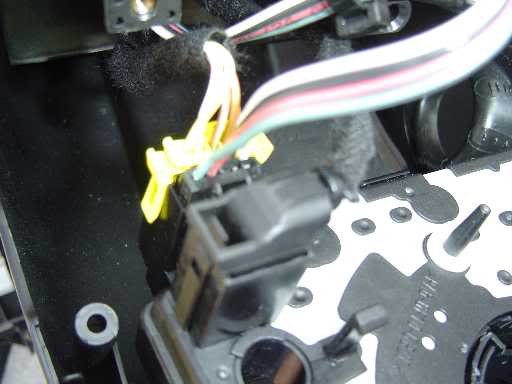
Snap the self-canceling ring onto the steering column.
Reinstall the steering column trim. You must install the lower half first, again, being mindful of the rubber gasket for the ignition switch. Replace the two screws in front and the T-25 Torx bolt from underneath the tilt steering lever.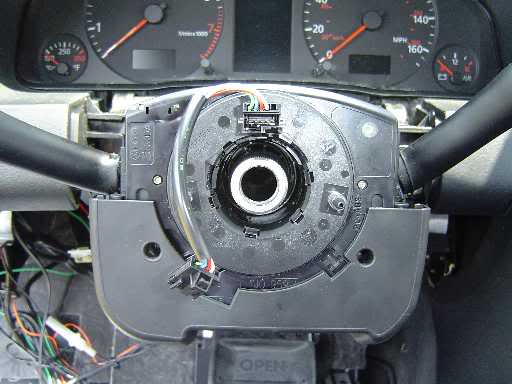
Replace the upper half of the trim which kind of "hinges" from the portion closest to the instrument panel. Then secure with the two long screws from underneath.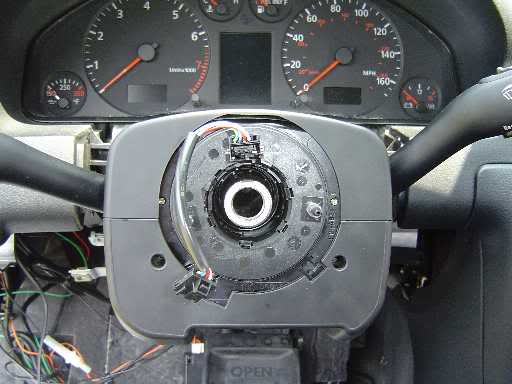
Install the new steering wheel and fasten using the steering wheel bolt.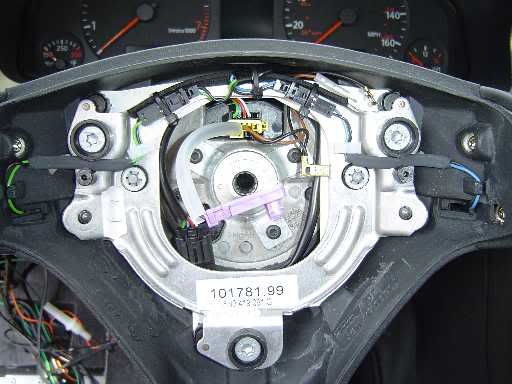
Connect the airbag.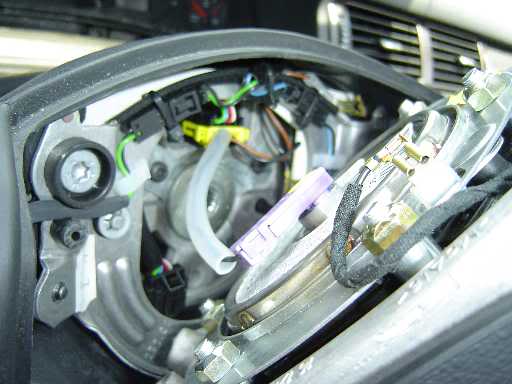
Fasten the airbag to the steering wheel using the two T-30 torx bolts from behind the steering wheel.
8. Replace trim and other components
Reinstall the dash panel, shift trim, shift ****, ashtray, climate control, and radio.
9. Connect the battery.
Turn the car to the "on" position, without starting your car. Let the car rest for at least 3 minutes. Check VAG COM for any codes, start the car, and enjoy!!!
IMPORTANT NOTE ABOUT ESP!!!
Make sure you run a VAG COM check and write down your original ESP code. I had issues with my ESP and ABS because I had my battery plugged back in while several components (including the self-canceling ring) were out of the car. I was working at night for some of this install so I had to have the lights on inside the car. I forgot to record my original ESP soft code, but thanks to my VAG-COM cable, the Bentley Manual, and Andy from Ross-Tech, I was able to re-code the ABS Brakes module (03) and clear the codes.
Although not in the VAG COM instructions, we discovered that the ABS module could ONLY be re-coded after you log in with a shop code other than 00000. If you try to login with the default "ghost" shop code of 00000, then the module cannot take the re-code. Once that was done, I could recalibrate the zero position for the steering angle sensor.
Happy shifting!!!

Lots of detail here!
Posted by Diggymart on 4/18/20 @ 3:48:42 AM