You must be logged in to rate content!
10 minute read
D.I.Y. Air box, by MAZMAN
Compliments of MAZMAN @ www.supraforums.com
4-17-2006
Hey guys,
here is another D.I.Y. item i made, and thought i would share with the supra community.
The turbo heat shield D.I.Y. write up is here: http://www.supraforums.com/forum/sho...d.php?t=326366 for anyone that hasnt seen it yet.
All the specs are in here, and items i used, so anyone with some time/patience/and a few tools, will be able to do it.
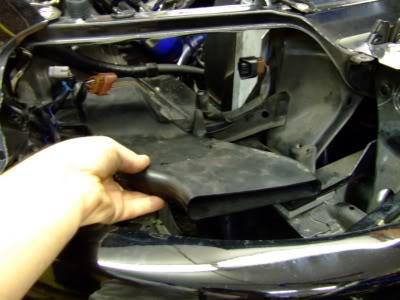
So lets start...
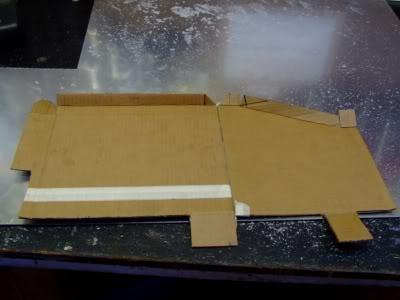
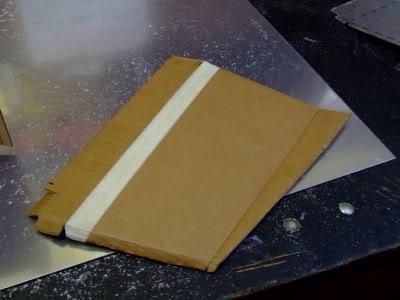
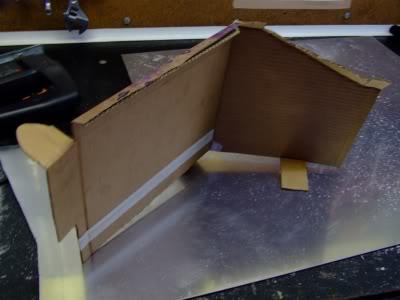
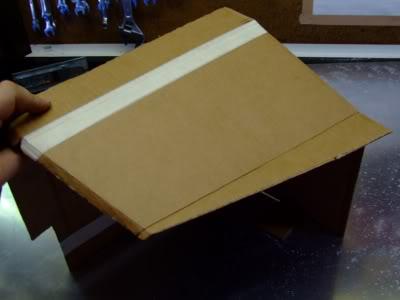
Making the template
Get yourself some cardboard and make a template out of it, use some sticky tape/masking tape if you need to, usually where there are some minor flex.
Bend/cut as required, untill you are hapy with the shape and design of it, Of course, you can copy my dimensions if you have a similar setup.
Once you have cut it all up, and made your template, go and try installing it in your car, see if there are any rough edges you need to fix up, or anymore cutting if required.
Buying aluminium, cutting it up
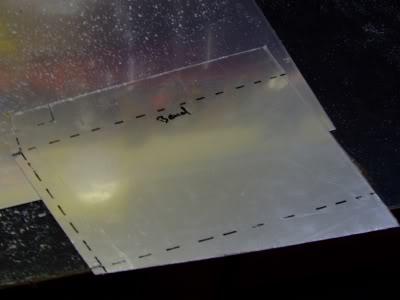
Buy yourself some aluminium, i used a 1.6mm thick aluminium, the most you'd need is 700 x 700mm sheet, i bought myself a little bit more,
and ive got more then enough. If you ask them for off cuts, you'd pay maybe AU$20 for a sheet.Buy two sheets if you think you'll stuff it up, cheap insurance.
I got my stuff from Obrian, near fairfield, on cumberland rd.
Use your cardboard dimensions/measurements, and trace it back on the alloy sheet, double check everything once you've done that.
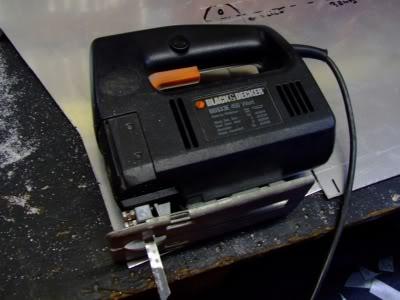
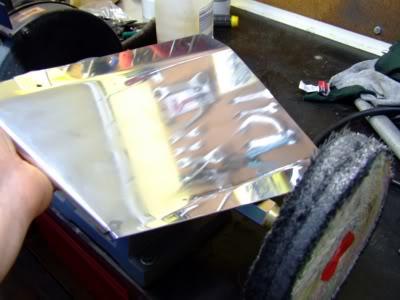
Now cut the sheet with a JIGSAW, take your time and do it slowly, to get it as straight as possible (remember to use safety glasses).

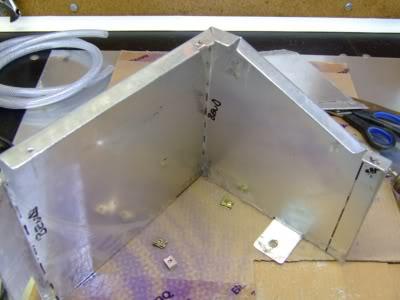
Bending the material
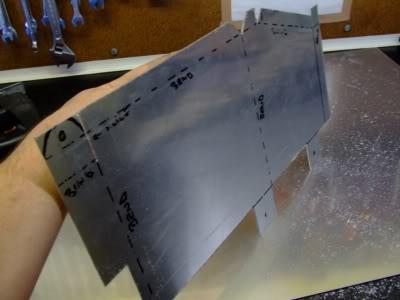
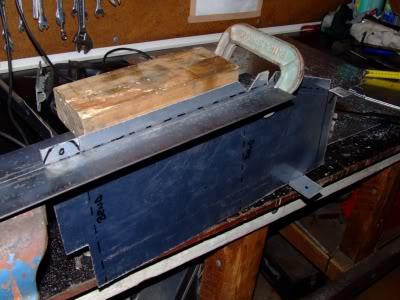
Once you've cut up your box and happy with it, its time to start bending.
I used a bench vise, a strong steel flat bar for support, a few clamps to hold it in place and a piece of wood to hit it with, along with a couple of hammers.
The picture will hopefully give you an idea of how to start.
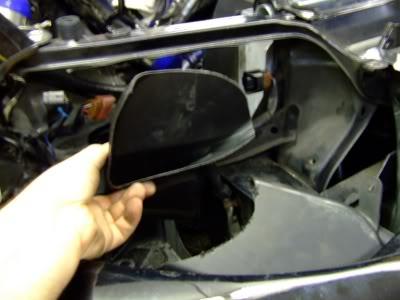
Trying it all out
Now that you have it bent, install it and see how the fitting is.
you will need to bend the bends to your desired angle, as every setup is different, and a single setup such as mine might have more/less room,
so bend the angles a little at a time, my bottom piece left side angle is at 40deg, and top flat lid piece are at 25deg both sides.
Also, drill the holes now where you will mount the top lid, i drilled 3x holes, on each corner. Make sure you line up the top piece perfectly,
before you start drilling.

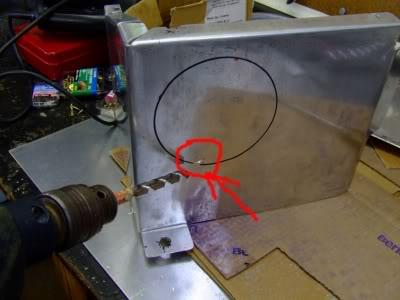
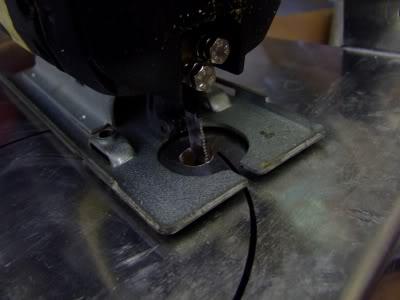
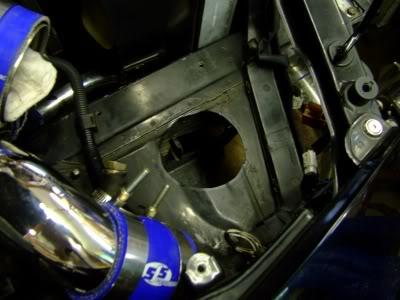
Cutting the intake hole
Now we need to cut the hole for where the intake piping will go through.
Use a big sized drill bit (i used 10mm), to start off with a hole, then use a jigsaw as now you have a starting point.
Go slowly and make sure you mount the piece on a flat bench, otherwise you'll get vibrations and the jigsaw could possibly jump, causing it to damage the item or even injuring yourself.
Once that is done, get a file and go over all the edges and clean it up a bit, nothing worse then a sharp edge.
I filed all the edges to a circle edge, gives that nice smooth profesional look.

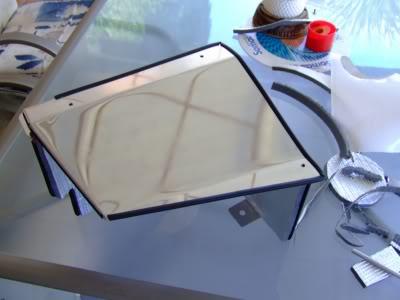
Polishing it all up
If you have the equipment, now is the time to polish those pieces to a bling bling look, if you want to of course.
The end result looks nice.

NOTE : i have updated on how to polish and what to use on 2nd page.
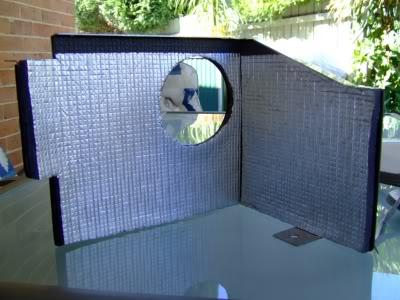
Installing heat wrap/rubber seals.
We are almost there ![]()
I bought some heat wrap with sticky backing from clark rubber, cost of the piece was AU$50 for a metre, ended up only using half,
so cost would be AU$25.
Get some paper and insert it inside the pieces, trace the outline on the paper, use that paper now to trace on the heat wrap,
that way you will get it right the first time.
I did it on both pieces.
I also bough some rubber seals from the same place, and cut it to lengh and used it for the edges, makes it just that little bit nicer ![]()
You can glue it on if you want to, so the rubber seal doesnt come off at some stage, or use silastic(i used silastic on the inside).
And there you have the finished box, all nice and shiny, looks real nice, wouldnt you say? ![]()
Cutting up extra holes for intake
I went and cut my air duct a little bit different, the air duct is taking the air from the front, under the headlight, but i wasnt happy with that,
so i cut it to take the air from underneath, with a bigger opening hole now.
I also cut a 3" hole that will be inside the air box, wich will give me cold air from underneath and from the opening hole from the front bumper bar.
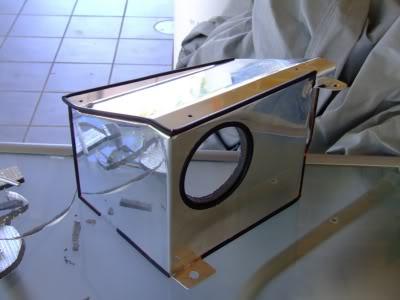
Making it fit
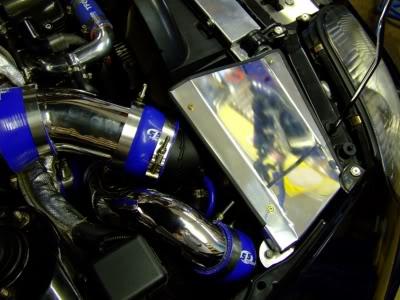
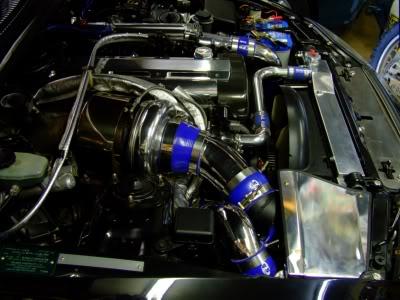
Here is a picture of it all installed without the lid on yet, with the K&N pod and all hooked up.
Some people would be happy with just that, and have the top lid as the bonnet, i myself prefer it to be enclosed properly.
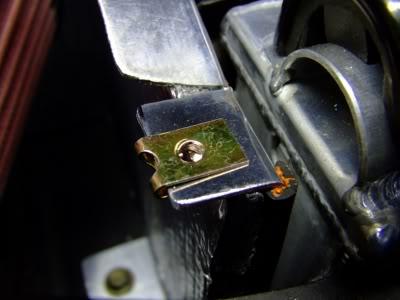
Securing the lid
This is what i use to be able to close my top piece, simple yet effective.
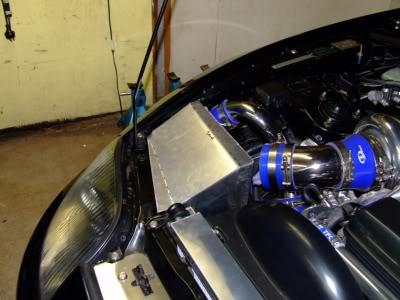
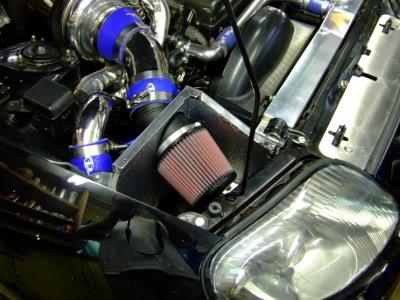
Final product
And here is the final result, all finished and mounted in my car, looks real nice and im happy with the end result and product.
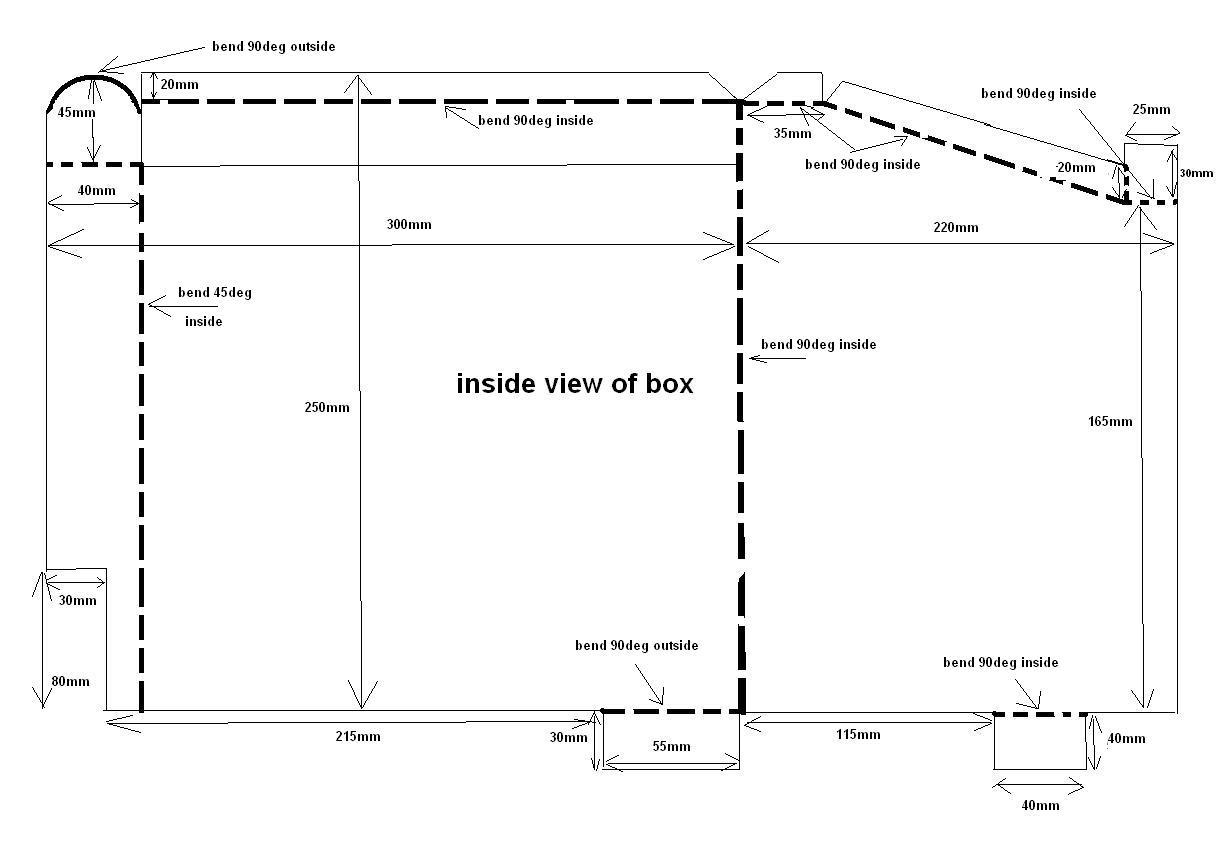
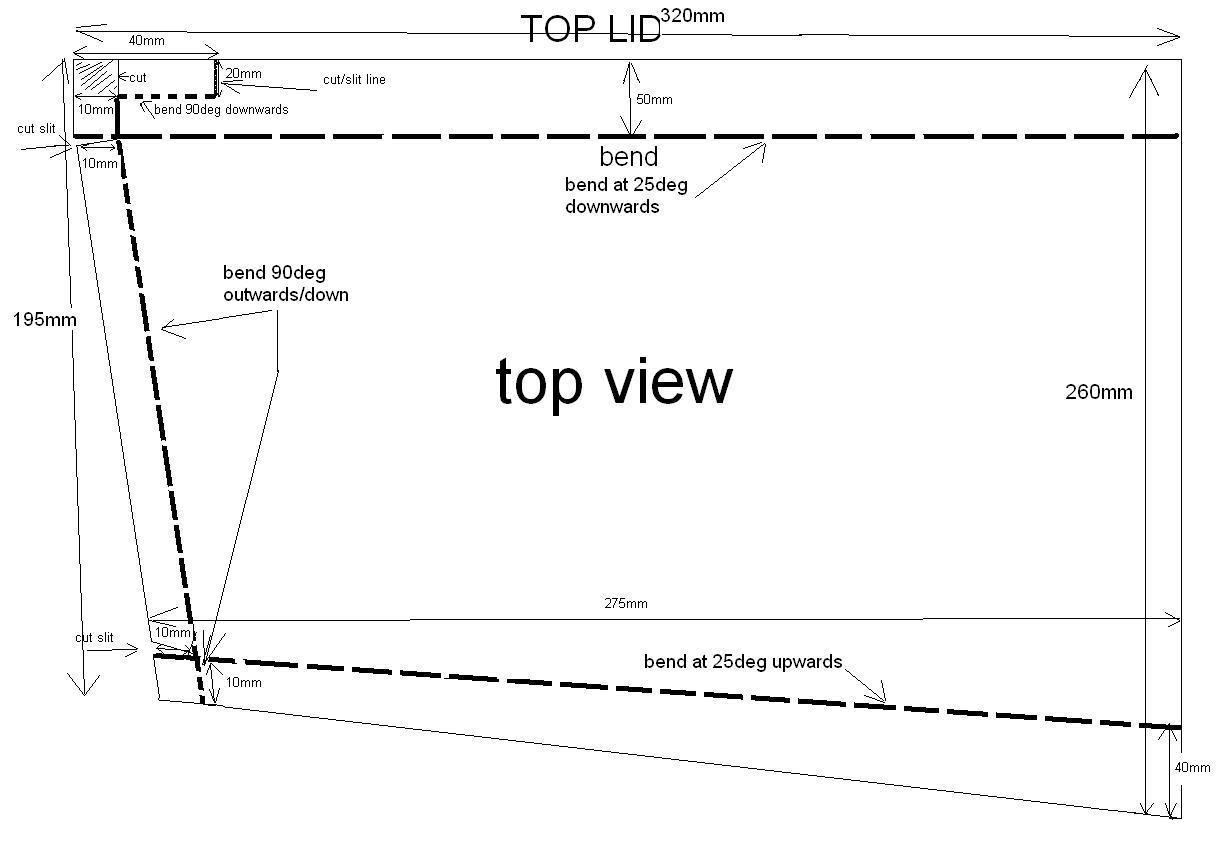
Template dimensions.
NOTE: the dimensions in here fit my purpose, and suits my car, understand that your piping might be different and your intake pipe + air filter may be different size and mounted differently, so take that into consideration and measure it up before you start doing things, you may find you just need a little bit here and a little bit there of trimming or cutting to make it fit.
Hope this gives a few of you guys an idea and a helping start to making your own air box, it took me 2 weekends of doing without being in a major rush.
All the best, and safe cutting guys ![]()