You must be logged in to rate content!
18 minute read
Shortening mk2 Scirocco NA bumpers
Compliments of JonnyPhenomenon @ vwvortex.com
1-10-2010
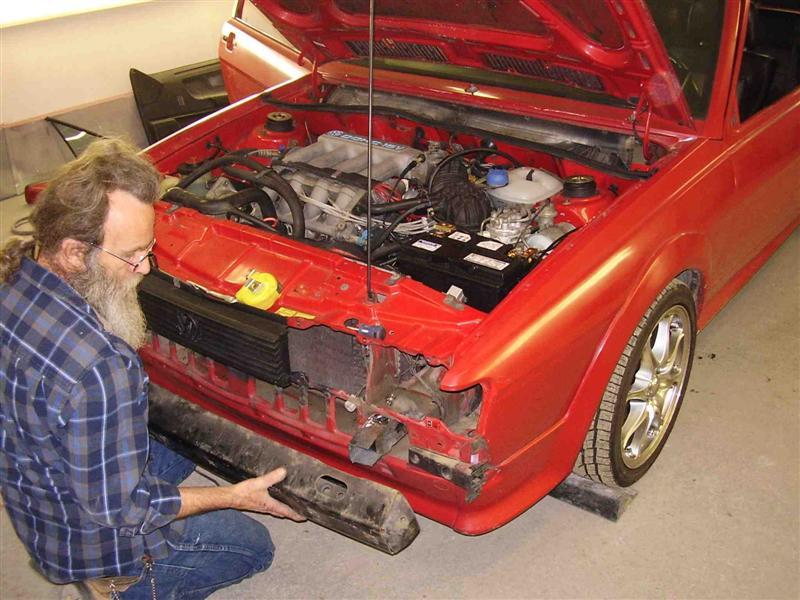
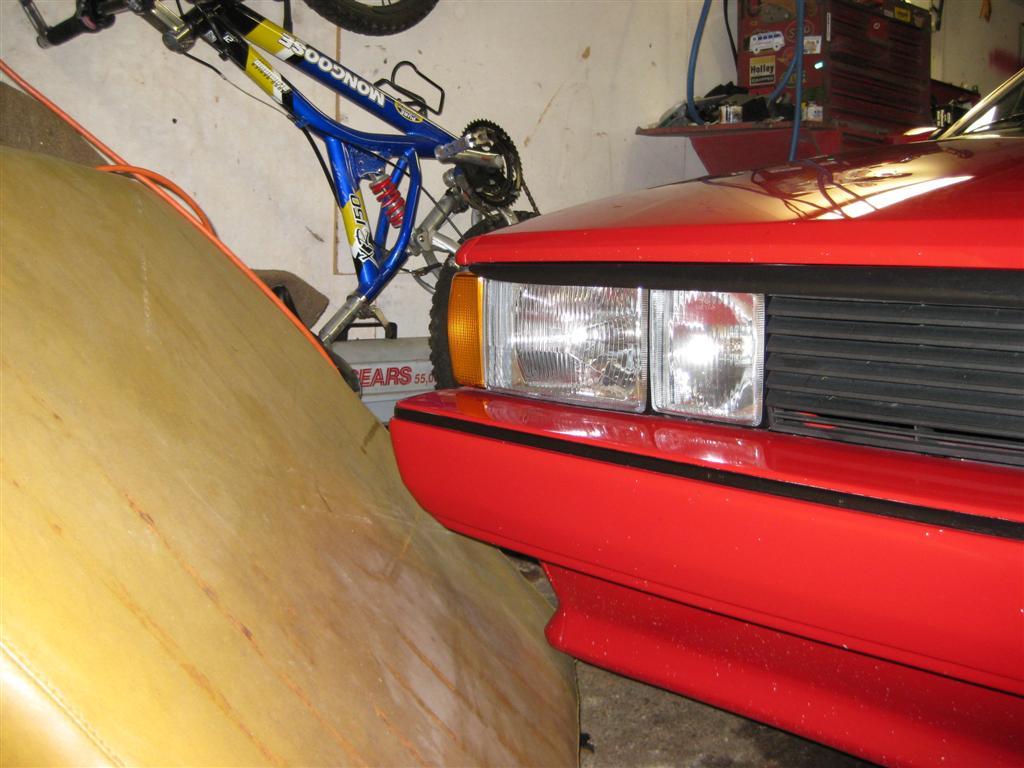
so Ive been asked a few times recently to explain how I turned my NA bumpers into 'almost' Euro bumpers by shortening them and some modifications to the bumper brackets. In this DIY, you will see how I did it.
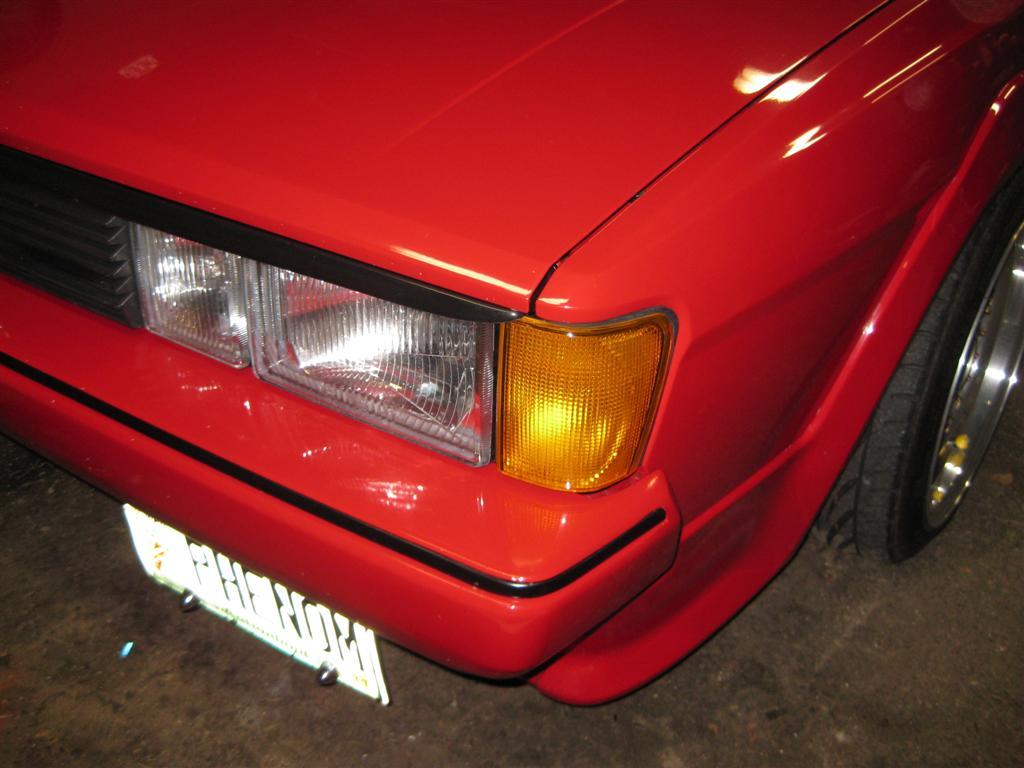
The issue: the NA bumpers are too big. I like to call them "clown shoes" since they look just as ridiculous. The problem with Euro bumpers is they cost too much, and leave the car looking infinished due to the holes left by the scirocco body kit. so if you are going to have to modify the body to make them look good, then you may as well save your money and modify your stock bumpers whiile you are at it.
first things first, you will need NA bumpers with the metal brackets. this diy doesnt cover the hydraulic piston type brackets, so if you dont have a set of these, then source one.
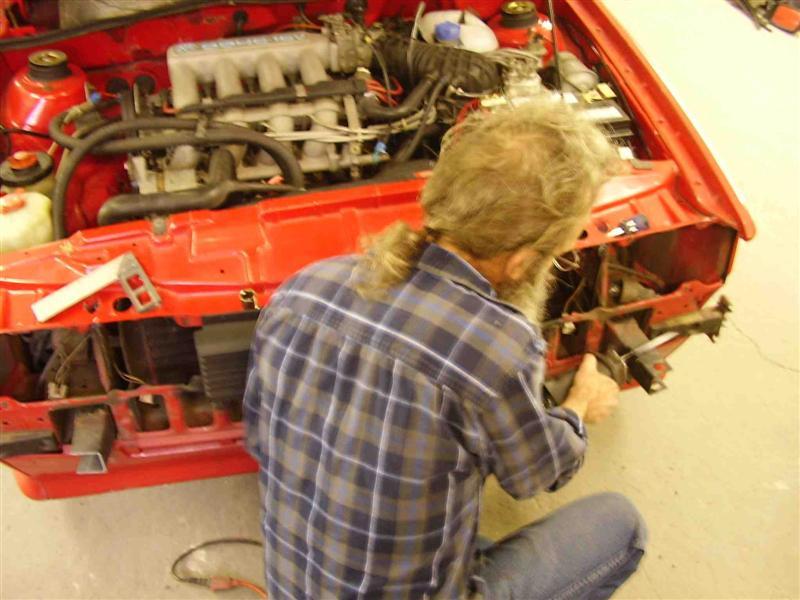
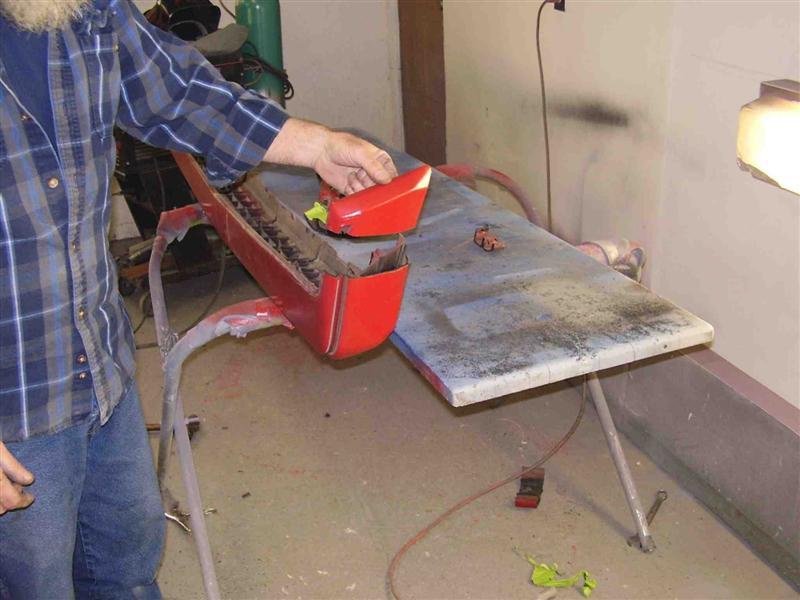
step one: remove the bumpers
four bolts hold each of the bumpers on the rocco. on the front these are accessed from the engine bay, and by removing the front grill. on the rear the bolts are accessed from inside the trunk.
terminology:
the brackets are the parts that bolt the bumper to the car. the rebar is the metal bar that runs the length of the bumper and hods the plastic skin to the brackets.
once you have the bumpers off the car, you remove the skin by pulling out all the "clips" and a screw on either end.
with the skin removed unbolt the brackets from the rebar.
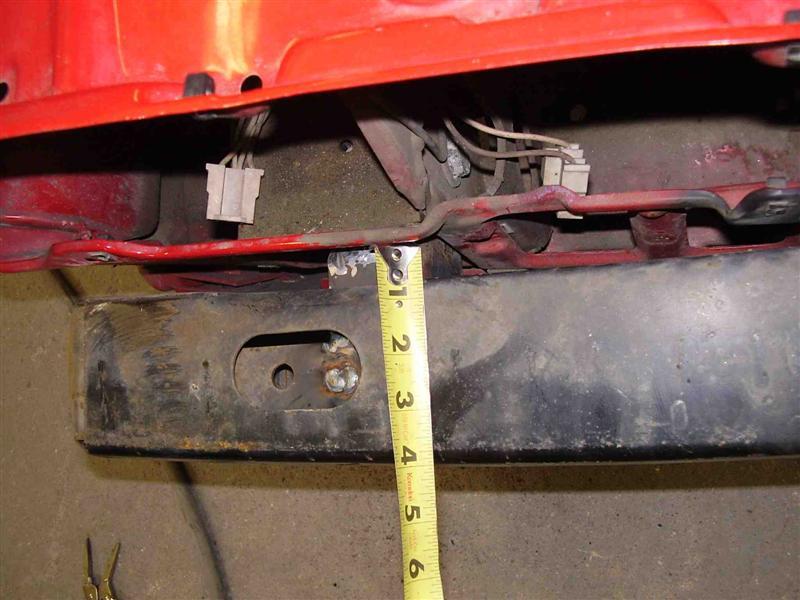
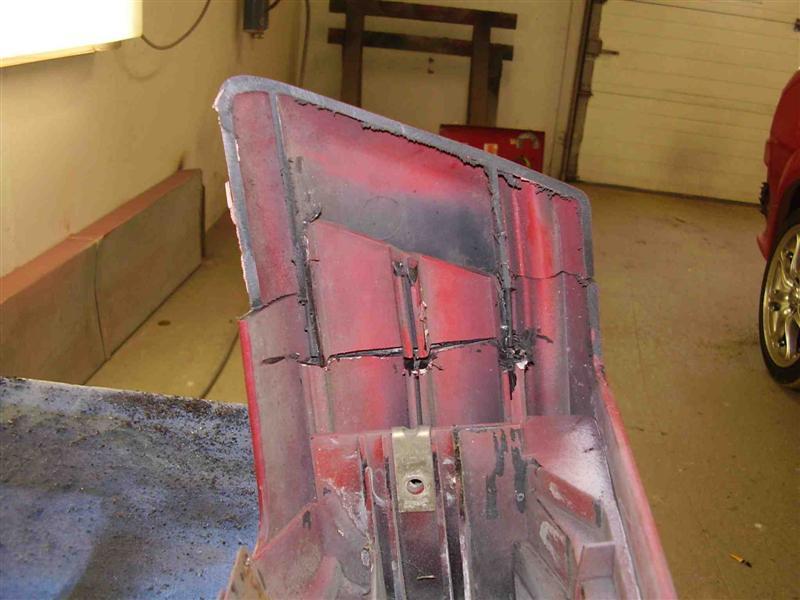
on the front, first hack off the tow hooks, and then reinstall the brackets on oposite sides of the car. (right side bracket goes on the left, and vice versa) Now hack some of the end of the brackets - enough so you can put the rebar back on them and position it so the rebar is .75" from the body. be sure it is straight right to left, and tack it in place. Check the alignment side to side as well as vertical angle before you fully weld the rebar into place.
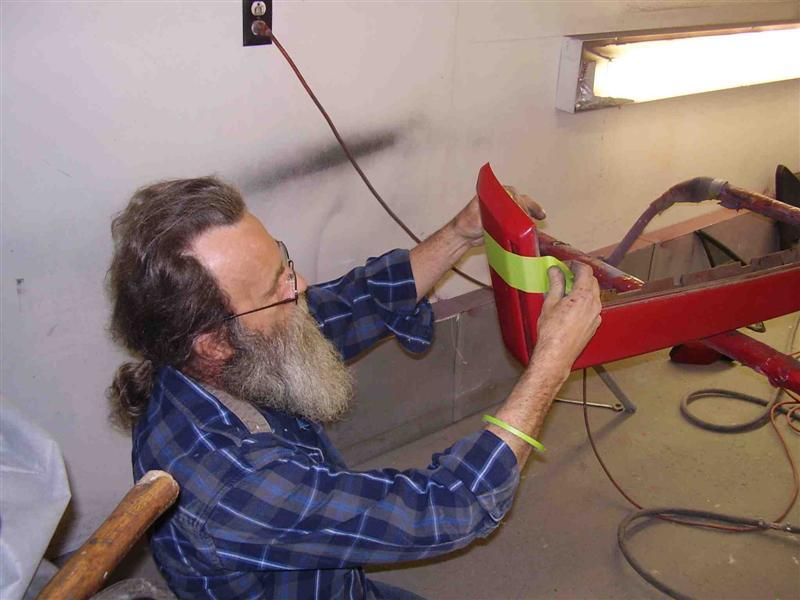
Now you will need to cut the skins to shorten them.
BEFORE YOU CUT, REMOVE THE TRIM PIECE! (obviously) no sense having to cut and weld this, when you can just shorten it on the ends. be careful removing this because its old and can snap.
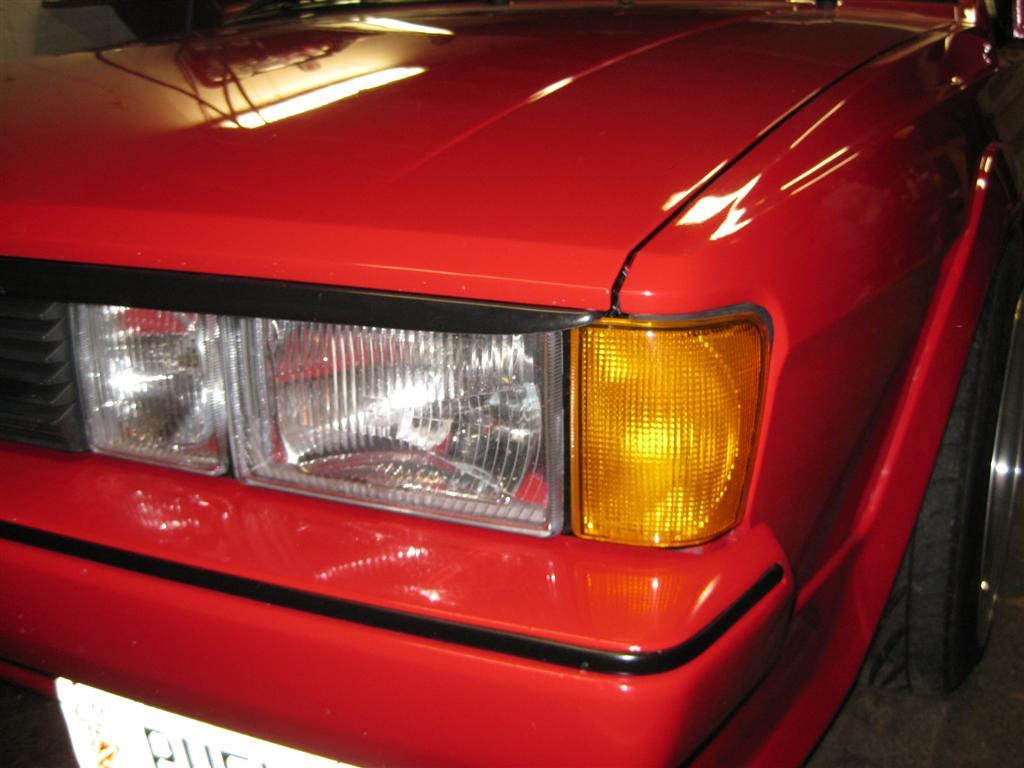
now measure and cut 2.25 inches off the sides of the front skin. (and 2.5 from the rear) we used masking tape to ensure out cuts were just right.
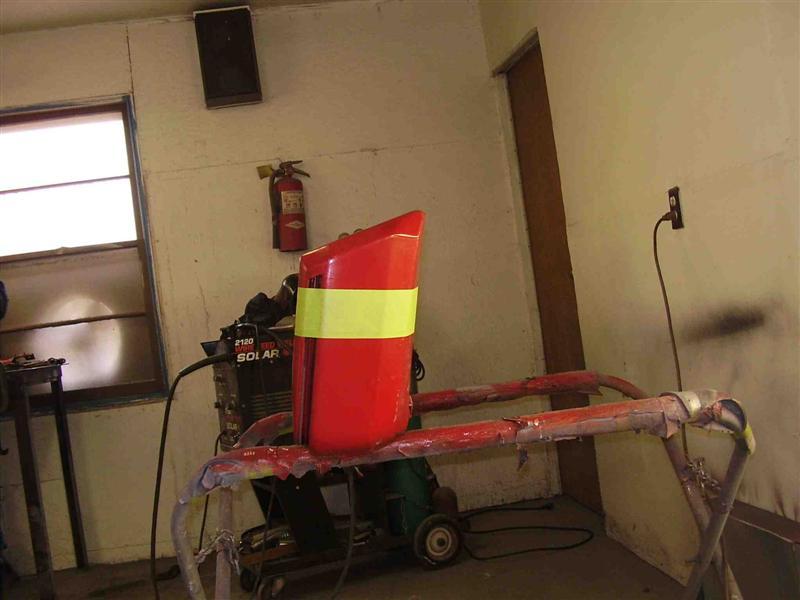

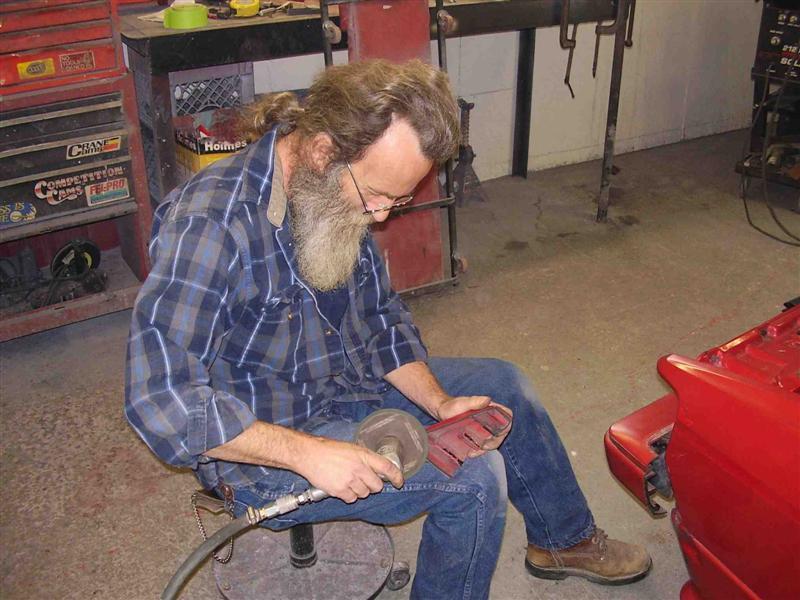
now we had to plastic weld them back together.
tip when plastic welding: use a very powerful iron or hot knife. add tons of extra plastic that you can chop up from the bits of plastic you cut off the bumper. try not to introduce air bubbles and take your time. Ventilation helps here too. heh.
to reinforce the joint, I used part of the inner bumper skin and welded it in place. the result is a very strong bond that will not crack and should be undetectable when the car is finished.
is this any better?

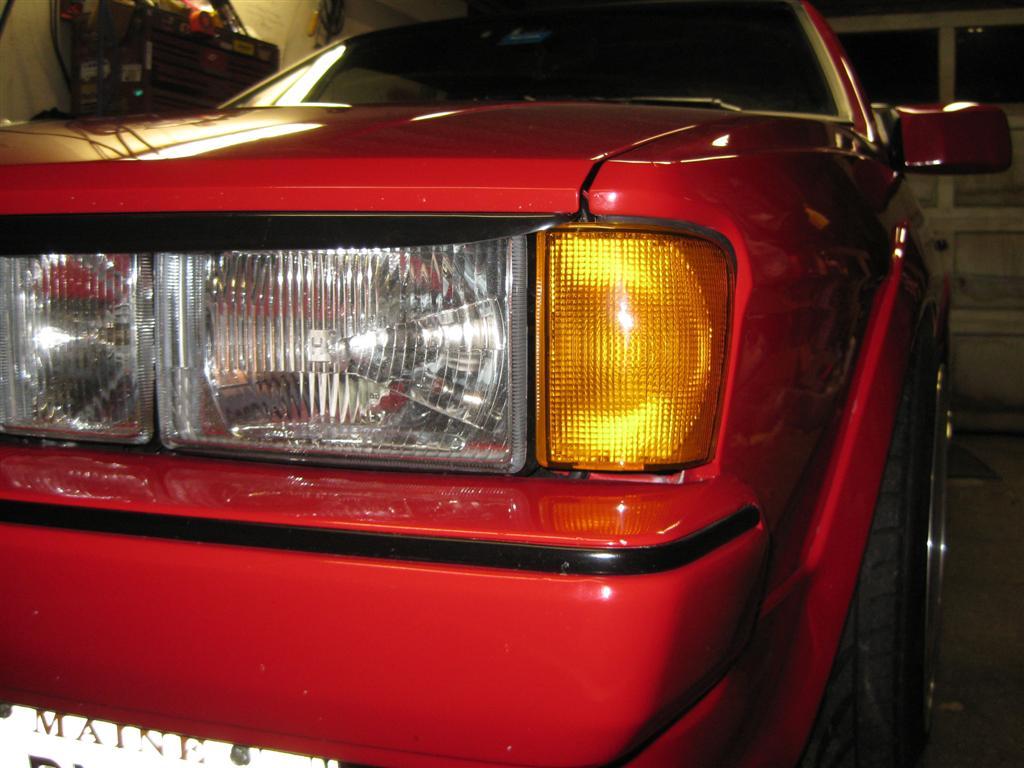
before they were plastic welded on, we had to do a bit of shaping to them to get them to fit right in there new location. the ends of the bumpers were intended to be held in place by brackets and they pushed n the body when they were in there new home. we ground them down and shaped them to fit without rubbing on the body, and that cured the "saggy bumper" issue some people with pulled bumpers have complained about.
once you have the skin welded and shaped, you will want to attach it to the rebar. to do this you will need to drill several holes through the rebar in various placed along the length, on top and bottom. you can also use a bunch of eurethane to glue them together, but screws are smarter. just be sure your screws arent so long that they come straight out the other side of the bumper. use 10-14 screws on each bumper.
note: dont skimp here. I had to take my bumpers off and screw them back on because we thought "just a couple" screws would be enough.
OK, so the rear bumper is slightly different. on here you are going to flip over the rebar as well as the brackets. the rebar is offset vertically quite a bit, so flipping it over makes the bumper sit a lot higher up. - closing the gap that is left by the trim piece being removed. otherwise the operation is the same as the front.
since a picture is worth a thousand words, I will draw a diagram.
look closely to see how the brackets are angled slightly, and how flipping them over lifts the bumper up. by about 3/4".
Phase TWO: Body holes
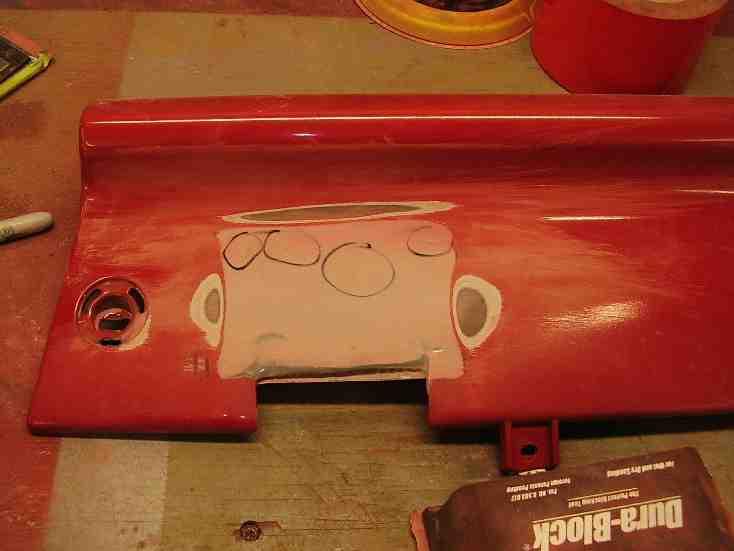
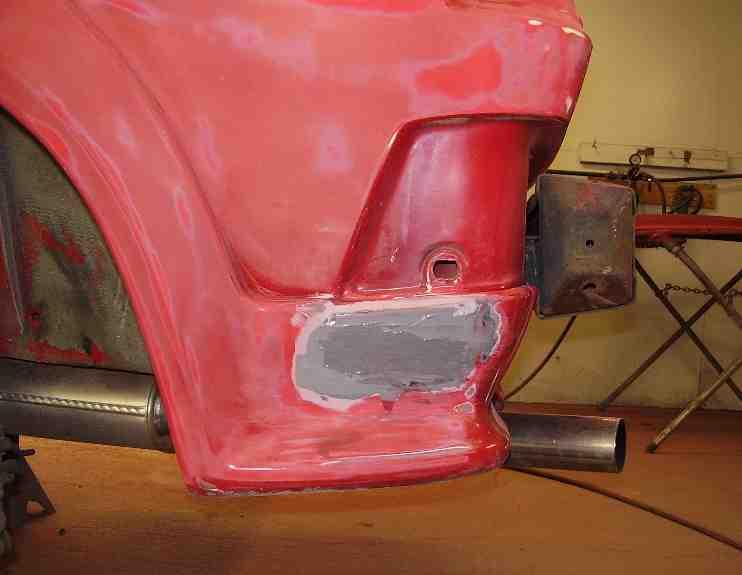
OK so now that we have the bumpers shortened and raised with the tow hooks removed, we now have presented ourselves with new problems. The scirocco has these really ugly tow hook holes in the front and rear valences, as well as holes on the sides where the hold bumpers used to sit.
in this pic I have drawn a line where the bottom of the bumper sits, so you can see how much of the hole is exposed when looking at the car from behind.
you cannot plastic weld the body panels because they are made of a different kind of plastic. the kind that disolves when you get it hot. the bumpers are made of TEO, which takes well to plastic welding.
so I used some cardboard and some 3m flexible plastic parts repairer.
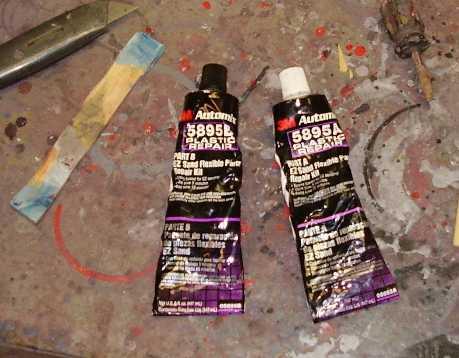
it was espensive, and in retrospect I think bondo would have been just fine since the part doesnt flex once installed.
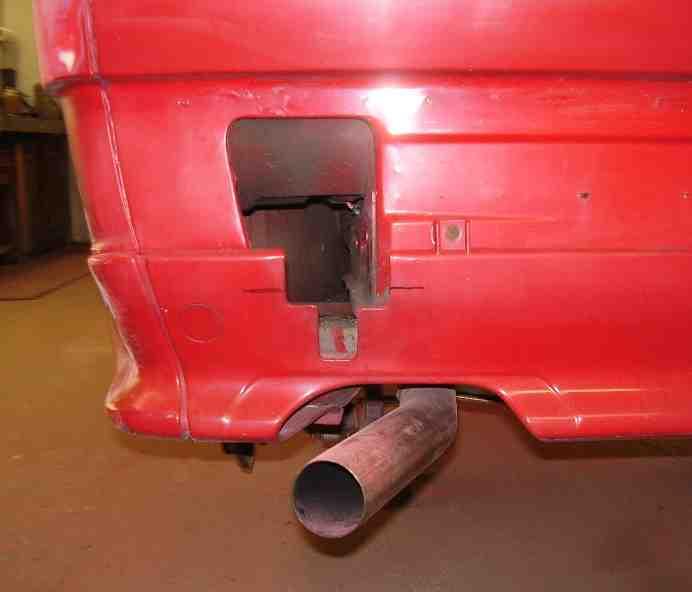
next up, the rear side
notice the big hole
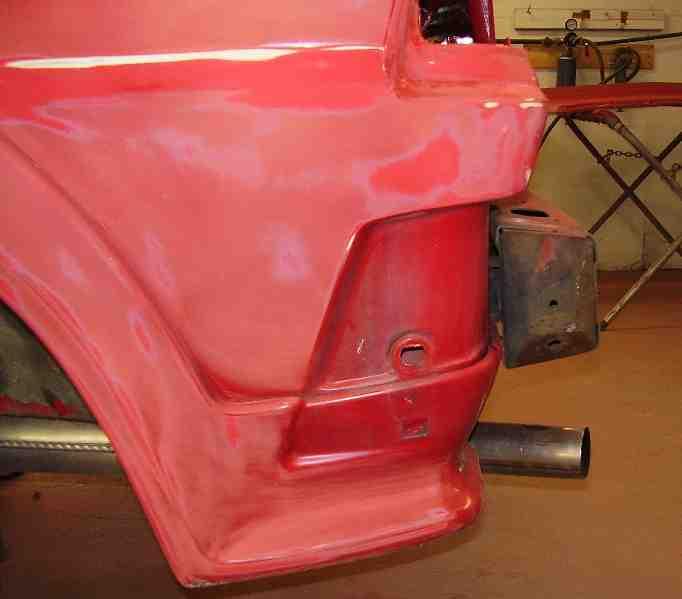
in this picture you can see how much of this ugliness shows up when you raise and tuck your NA bumpers.
you will want to fill this in with bondo. I used some of the flexible part repairer on one side and bondo on the other when I ran out. the bondo worked even better here than the expensive stuff. *lol*
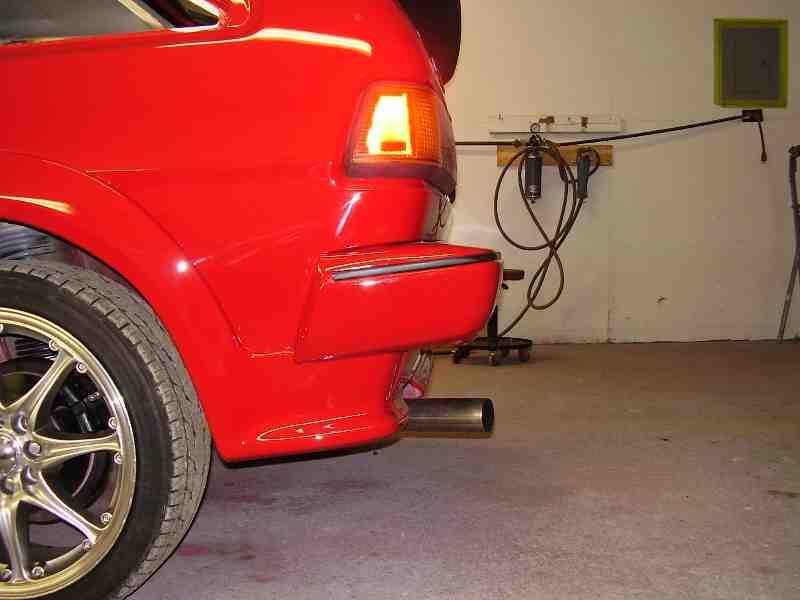
skipping ahead, here it is all done
last step, paint and trim.
once you have your skin all welded up and smooth, you are going to need to paint them, as well as your valences and the rear fender skirts. (since I dont know the first thing about painting, you are on your own here.) as for the trim, once you have a couple more coats of paint and clear on these bumpers, you are going to have trouble getting the trim back in so here is what you do:
the side profile of this molding strip looks like the image on the left. the fork holds onto the bumper keeping it in place. the problem is that with the extra paint this old molding cant squeeze into place, so we fix that by cutting off one side of the fork. reducing the amount of space it takes up in the groove.
once you have cut that off the entire length of the molding, trim each end down by 2.25 or 2.5 inches front or back, and then reinstall it. I used a block of wood and a hammer to pound it into place. I actually did the trimming on one side, installed it, and then trimmed off the excess.
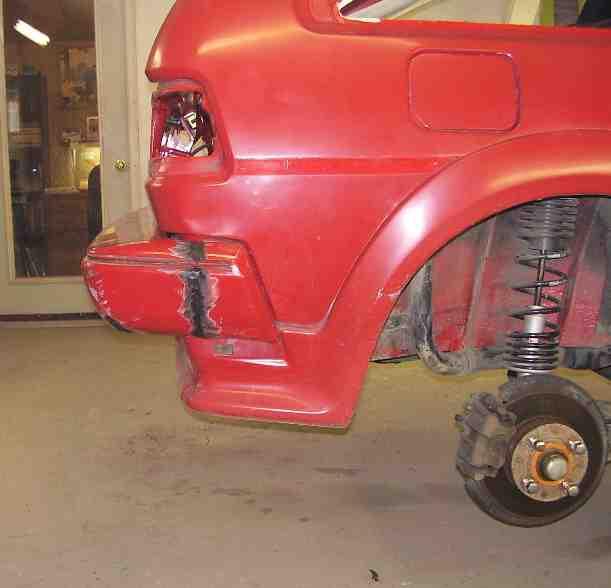
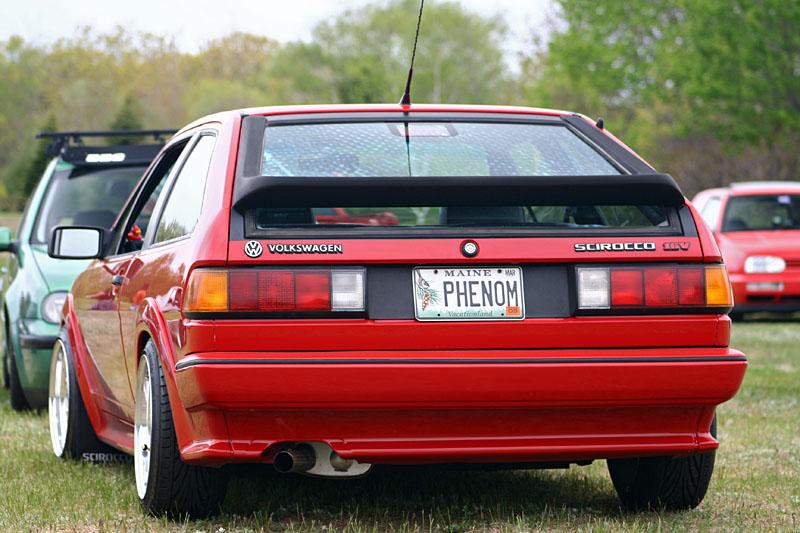
here is another shot from the rear, showing the filled holes and lifted bumper
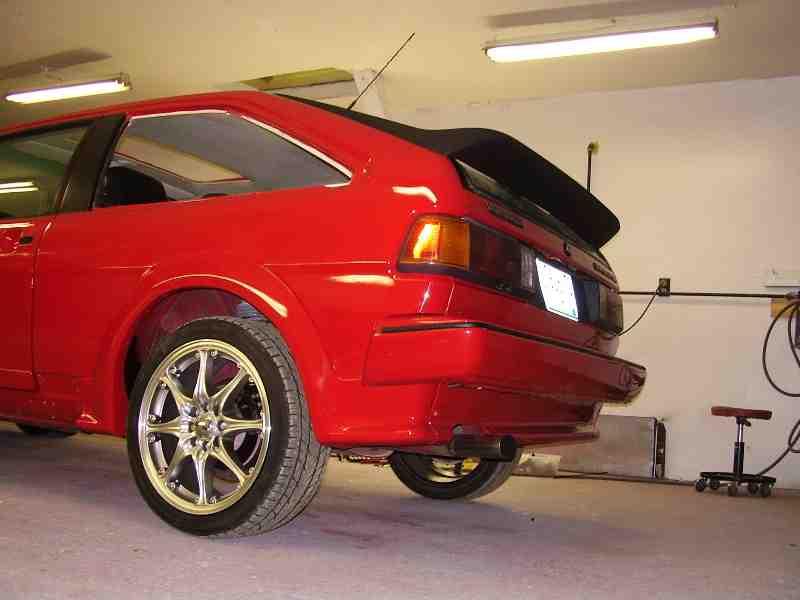
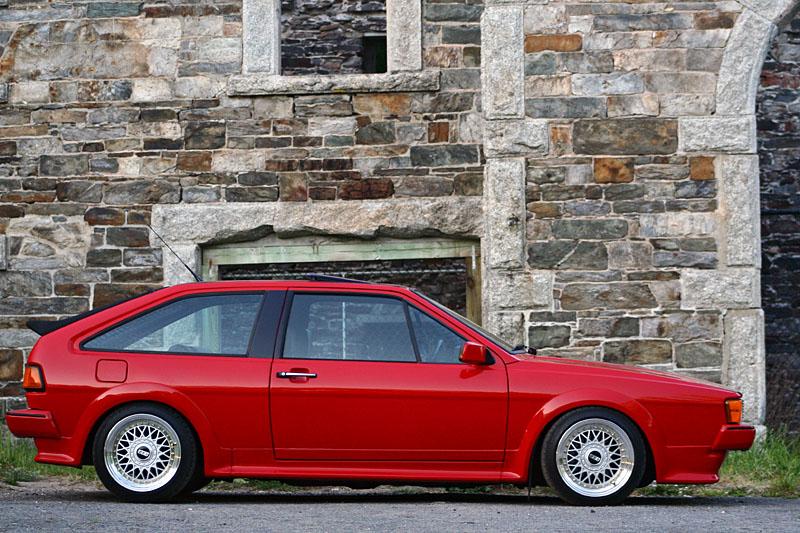
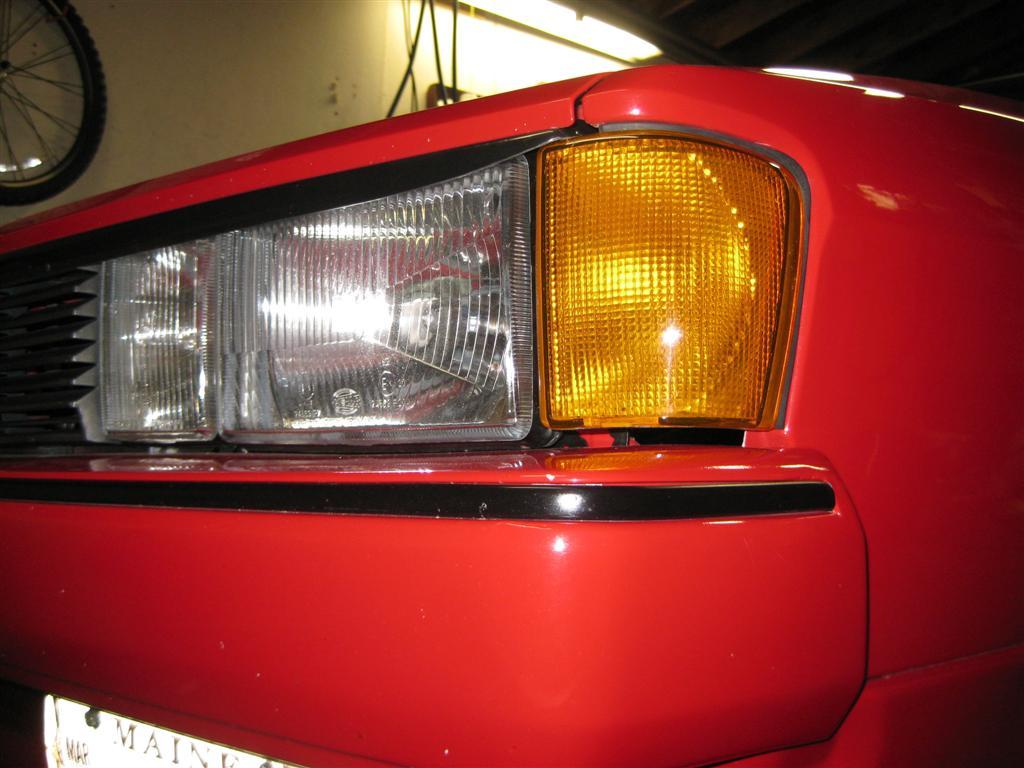
and there you have it. NA bumpers that look like euros and cost you nothing more than the paint.
I think we used the rear axle beam and control arms actually.
it worked out just fine when I blew my stupid crank gear.
Im glad to know someone else is going to tackle this mod finally. I am really excited to see your results.
take pictures!!!!
7-6-2010
Just got an IM with some interest in this thread, so I am bumping it back from the dead.
7-27-2010
something like 2-3 inches I think. enough so the rebar could mount really close to the body.
8-20-2010
I have euro lights as well and I dont have any gaps. I dont have the upper bumper trim either. I think you just arent shortening them enough!
8-22-2010
oooh.. I see now....
well up till a week ago, I had NA turns. I finaly got a decent set of euro turns and polished when up a while back, and finally got around to installing them the other day. I had not noticed the little gap at the bottom there. my bumpers really are wedged right up in there tho so the gap is very slight.
here are some pics of mine... I wouldnt have noticed it if you hadnt pointed it out. p.s. thanks alot jerk!
10-12-2010
Looks great man! I am so happy to see another texer shortening NA bumpers using my method. it really looks friggin fantastic on these cars, and I would even go so far as to say that it looks even better than euro bumpers, but I will probably have to duck from the fruit about to be thrown at me.
I like how your attention to detail took care of the little gaps under the euro turns, judging from your finished product, Im guessing it looks factory too.
and one thing that makes me grin is how it looks like your rear bumper is a little crooked... just like MINE was ![]()
its hard to get that to mount up straight the first time you put it on. mine is still not perfect, but its better than it was.
2-27-2011
Here's the HF ones I'm looking at
http://www.harborfreight.com/plastic...ron-67102.html
http://www.harborfreight.com/plastic...ure-96464.html (yes I have a compressor)
http://www.harborfreight.com/plastic...ent-96712.html
hey Joe, I dont have any real reccomendation to how to do the plastic welding "right", because all I had at te time was an 80 watt soldering iron to work with and a butane powered hot knife. I used scrap bits thaty were left over from where I cut the bumpers for "welding rod" just like onesixv did. stripped off all the paint and then cut it into strips. by using scrap bumper plastic for rod you avoid the risk of using incompatable plastic. after I finished my bumpers I later invested in some harbor frieght welding tools. I got the ultra cheap soldering iron type with the triangle shaped tip, and a pack of assorted welding rods. but after I bought them, I have yet to even test it out.
I cut the strips from the discarded bumper bits once I wire wheeled the original paint off.
The heat gun was used after I tacked a few spots with the iron and I really needed the strength of a uniform weld. The heat gun gets the surrounding area up to temp and I feel that bonds everything a little better. Once that was done, the iron went back to work on the finer filling details.
Expect to lose ALL texture around the welds and the heat gun will slightly alter the texture it comes in close proximity to. There is a spray product that "fixes" lost texture. SEM 39853
It's not exact but it may do the trick.
EDIT: Looks like my old heat gun welder was replaced by this less expensive model.
http://www.eastwood.com/heat-pro-del...t-gun-kit.html
...a very handy tool to have around. You can heat shrink an entire wiring harness in no time!
Onesix, thanks for your contribution to this DIY. as you mentioned that the texture of the bumper will indeed be erased around the weld area. I didnt like the texture so I smoothed the entire bumpers out. now they are glossy smooth throughout.
3-8-2012
I don't mean to hijack this thread or anything, but I just cut my bumpers and made a quick video showing how I welded the plastic covers in case anyone reading this in the future needs extra help.
*snip(
I hope this makes it easier for anyone trying this in the future who may not have known about plastic welding.
-Alex
ALEX! this is awesome! I spent HOURS with a big fat soldering iron welding mine together by hand. I had no idea you could do it that easily with just a heat gun. WOW...
I need to save those pics and videos to my server.
6-24-2012
OK, lots of good questions, lets see if I can field them all.
first, you have to cut off all of the plastic rectangles inside the bumper skin and prepair to drill lots of holes in the "rebar" or Bumper Beam. and screw through it and into the bumper skin.
second, you will need to have the brackets installed in the car and when you attached the rebar, but someone on here did this and they didnt have a welder, so they just drilled and bolted them together.
the gap you speak of should close up if you flip the rebar over in the back. the bumper beam has a smaller metal channel inside of it which is offset to the top. when you flip the whole beam over it is then offset the other way and will raise the whole bumper up. unfortunately you have to hack off all of those plastic things and drill lots of holes for screws in the beam.
Note: the screws are mandatory, I tried to just glue the bumper skin on and failed miserably.
Things are going pretty smoothly on this but I've hit a point where I hope someone can chime in with some input.
Today I was doing a test fit of all the pieces for the rear. My issue is that it doesn't seem I'm able to "tuck" the skin as far up and in as possible. The rebar is pushed all the way up there with a tiny gap between it and the body. I can tell I cut and welded the skin correctly because it lines up with the indentations on the rear quarter panels.
My question: In addition to the screws, are the clips along the inside of the bumper supposed to insert back into the square holes in the rebar? They don't seem to line up with the rebar flipped.
I thought maybe I had to trim them off to push it in further but I didn't see any mention of this.
I took the rebar off and tried fitting everything together off the brackets and that's when I realized the issue with the line-up.
My second question is once I find a welding shop how do I ensure that the brackets "hold their position" on the rebar. Most likely they won't be on the car when I drop them off. Should I just make some lines with a sharpie? I would hate to have it welded on the brackets crooked.
Thanks in advance guys.
6-25-2012
I considered the bolts instead of the welding as someone else had mentioned drilling but if I use the original size those are pretty darn big. Even with carbide bits wouldnt I be at it for hours?
you are most welcome. feel free to ask me anything.
I dont think you really need to use huge bolts, after all, in the event of a collision, keeping the bumper attached to the car will probably be the least of your worries. and besides, I think the stuff is softer than it looks. drill at a slow speed with cutting oil and as much force as you can safely apply and you will be through it in short order.
You know, it would be great if you would post some pics of your project ![]()
Thanks for the advice on the bolts. I'll try some smaller bolts (2 on each bracket, top and bottom).
Hopefully my non-corded drill is up to the task.
Yeah, just one on top and one on bottom per side. You want it to be stable, but that's really all.