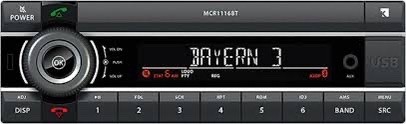
- New Head Unit
- Pig Tail Wiring Harness
- Butt Connectors
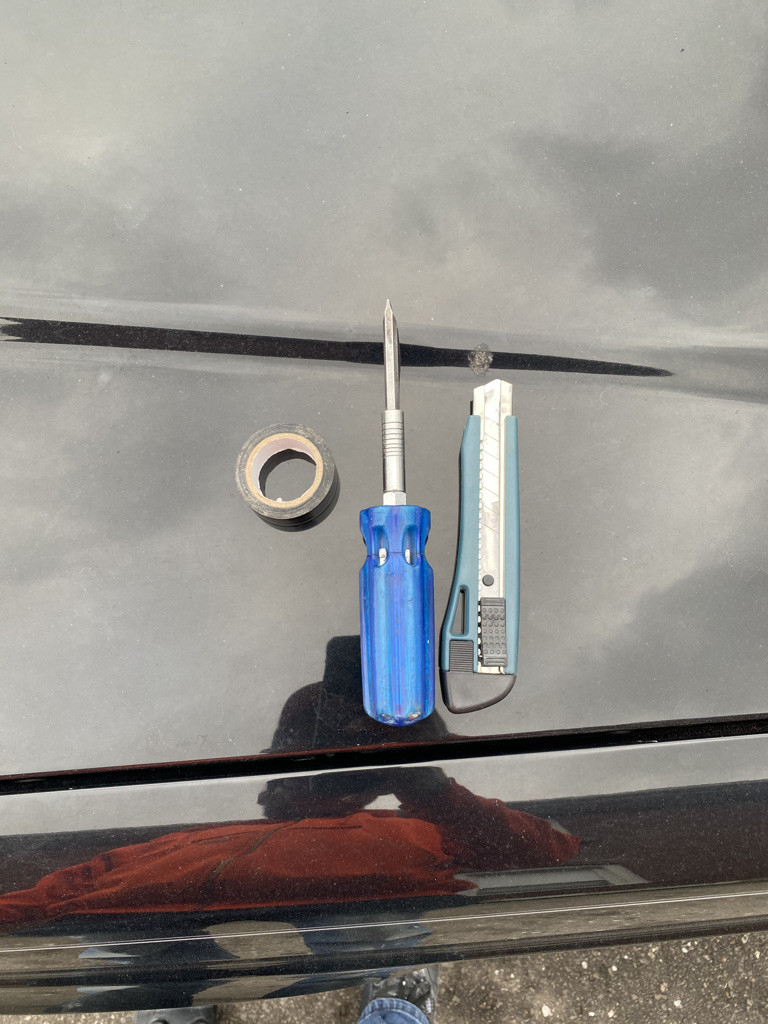
- Tape
- Single DIN Radio Cage
- Wire Stripper
- Crimper
- Pliers
- Screwdriver (Flat and Phillips)
- Knife
- Electrical Tester
- Wiring Diagram
- 10MM Wrench
You must be logged in to rate content!
10 minute read
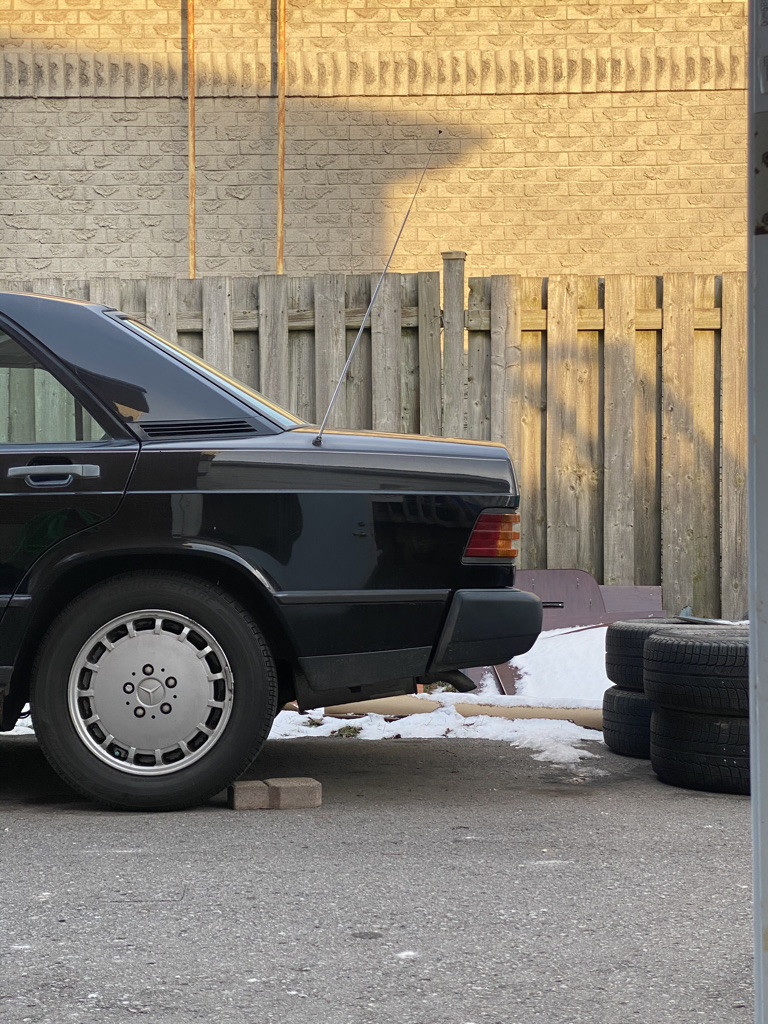
Ok, so here I have a 1987 Mercedes Benz 190D Turbo. Yes, 190D, not E. Taxi spec.
This particular 190 was pretty strangely optioned for a diesel; Turbo, automatic, 4 speaker sound, AC, PS, PW, and a moonroof. Since 1987 however some things have unfortunately failed and thus given me the perfect opportunity to make some DIY's for the Baby Benz!
We are going to start with the Becker radio. In '87 this was a fantastic radio, antenna control, decimal adjustment for radio station on FM, fader options and a tape player! However since its been in my possession the radio has gone downhill. The power antenna had failed and no longer retracts and I was getting key-off feedback through the speakers which is NEVER good and was causing a pretty severe battery drain.
Step one: Research.
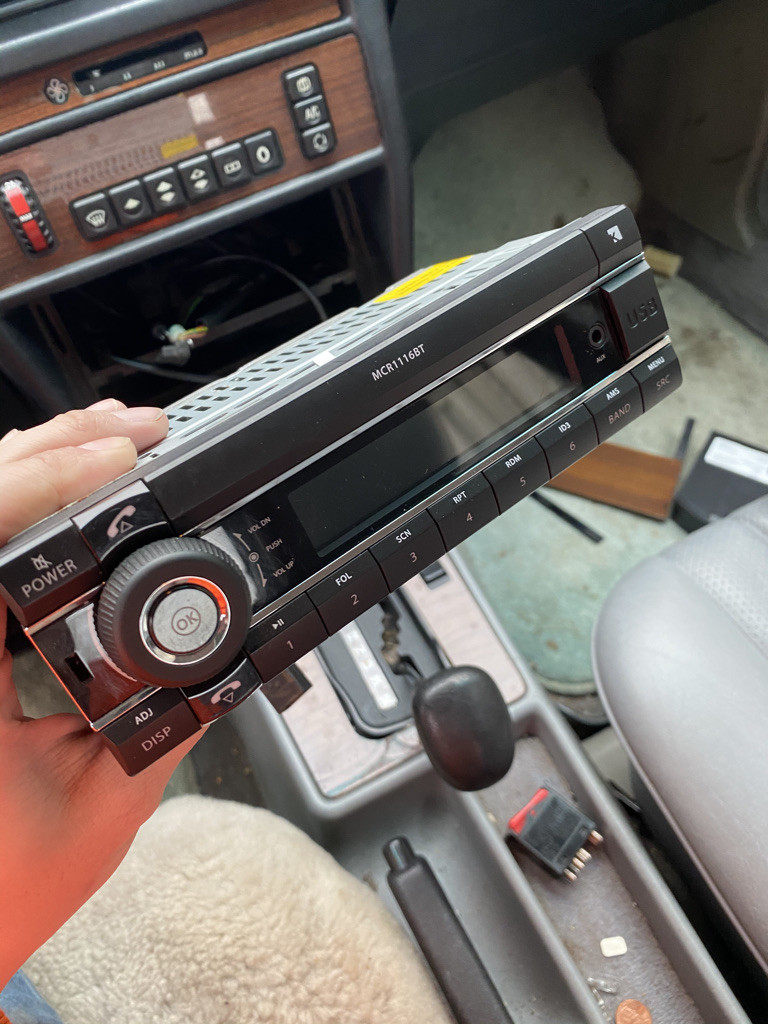
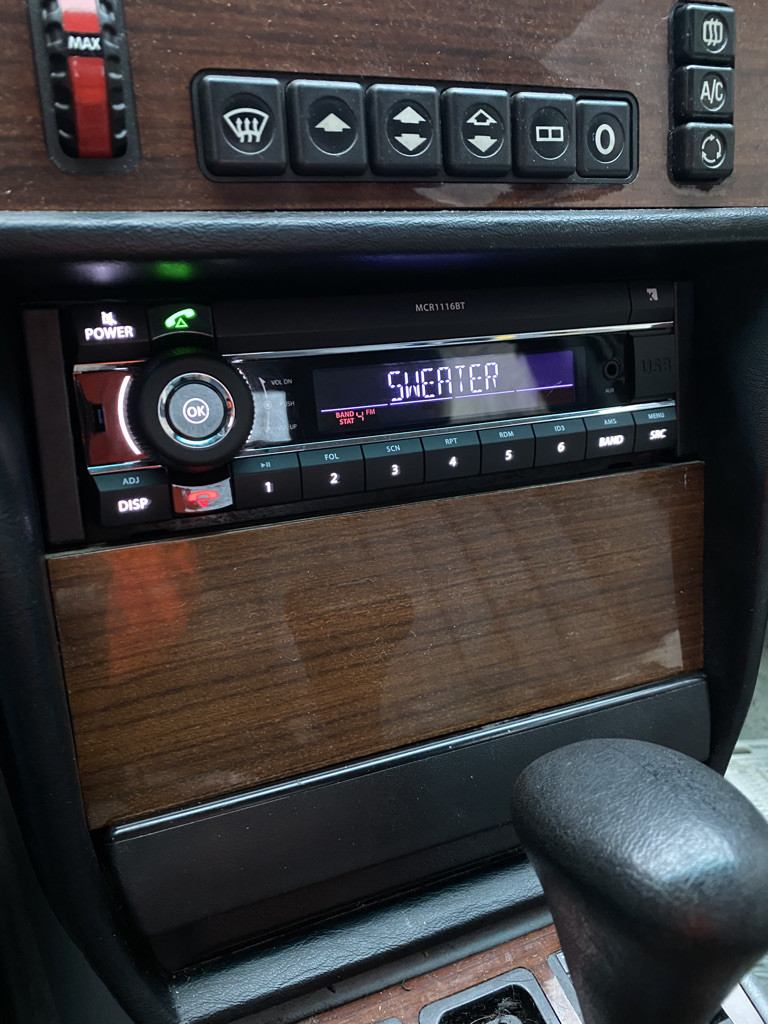
I took the time to research what I was getting into, plug and play wiring harnesses, common issues, wire sizes and even got lucky with sourcing a wiring diagram for the car! I then researched what I wanted to replace the OEM deck with for the most bang for the buck. In this case I went with a Kienzle MCR 1116BT unit from Germany. It's a single DIN deck with standardized connections on the back and had every option I would need; Bluetooth, SD, AUX, FM, USB and RDS (sadly no AM but thats ok) its onboard 4-channel 20W output was perfect for the stock speakers too.
Step two: Prep.
Now I gathered all the tools I thought I would need to do the job, then looked at them and went "Imma need more tools"
For most radio installs I have done a multi-bit, a knife and some black tape is all you need to make it "Work" but this is a Mercedes and we want it to more than just work! We have standards to uphold here!
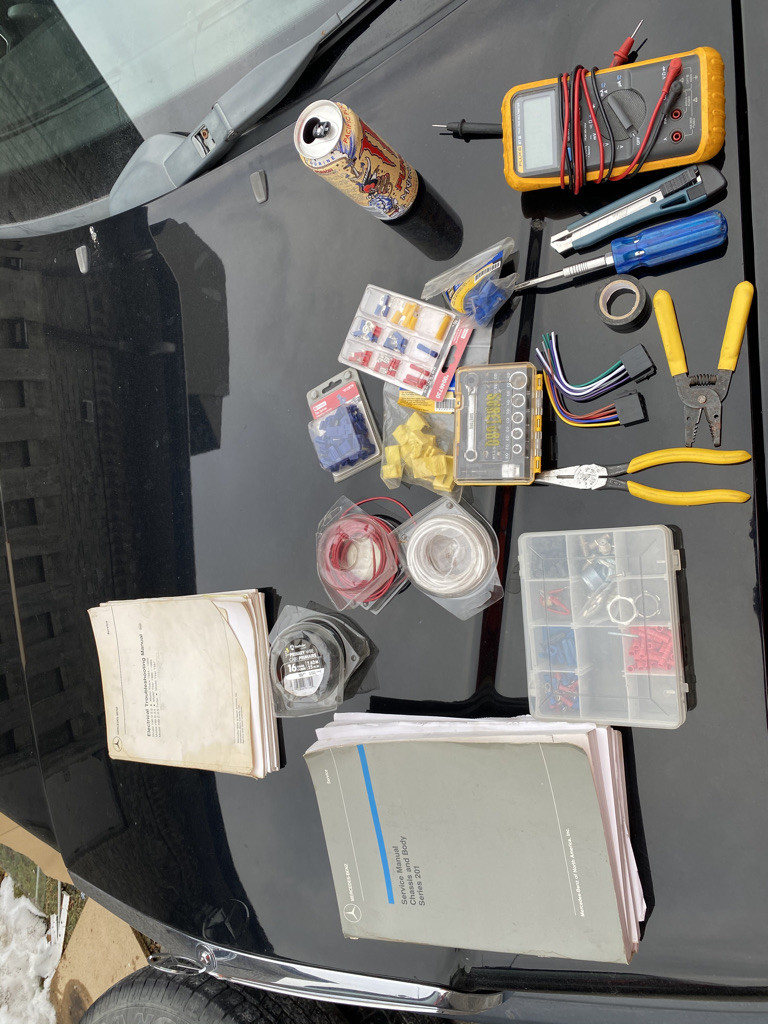
So here we have everything I will be using and then some.
-Harness pigtail for new radio
-New head unit
-Pliers
-Strippers
-Knife
-Multi-bit
-Tape
-Crush and butt-end connectors
-12ga wire in various colours
-Tester
-Ring and spade terminals
-Ratchet set
-Shop manuals
-Monster Pacific Punch (KEY INGREDIANT)
Step three: Removal
So now we have our tools and supplies its time to get down to business. Unhook the negative terminal on the battery under the hood just to save you any issues with arcing wires if something goes wrong along the way (no one likes replacing fuses in old cars) Hop in whichever seat you like working from, I picked drivers, and with the key in the ignition in ACC pop the e-brake on and put the transmission in 2. this will give you room to work and pull stuff apart.
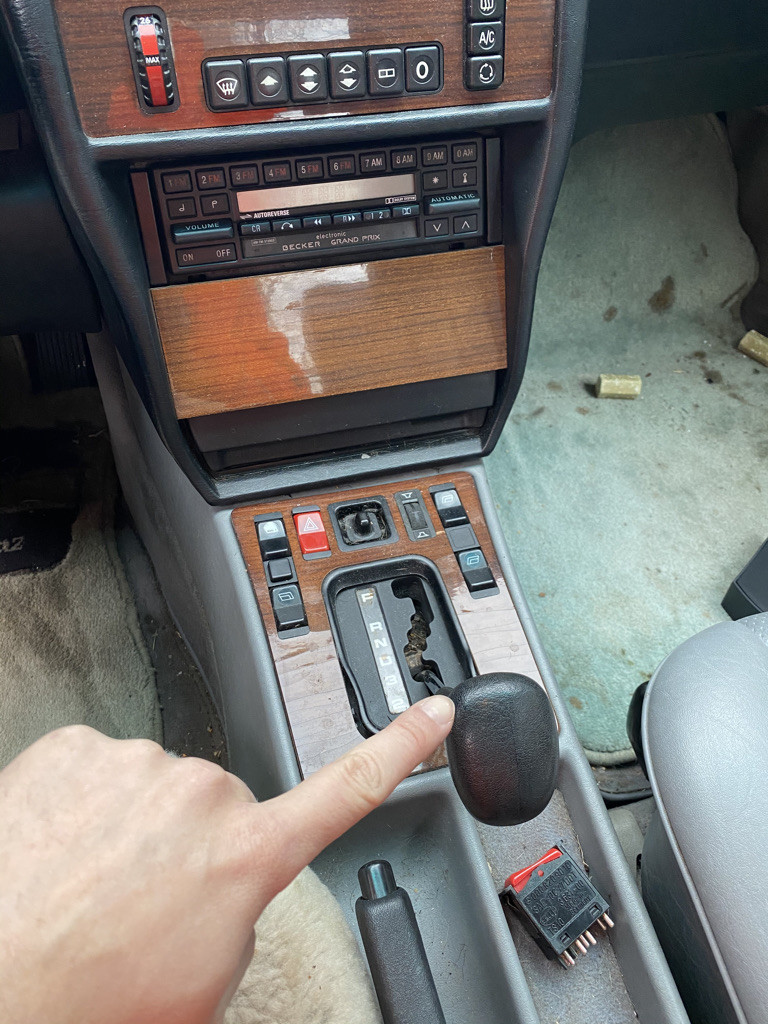
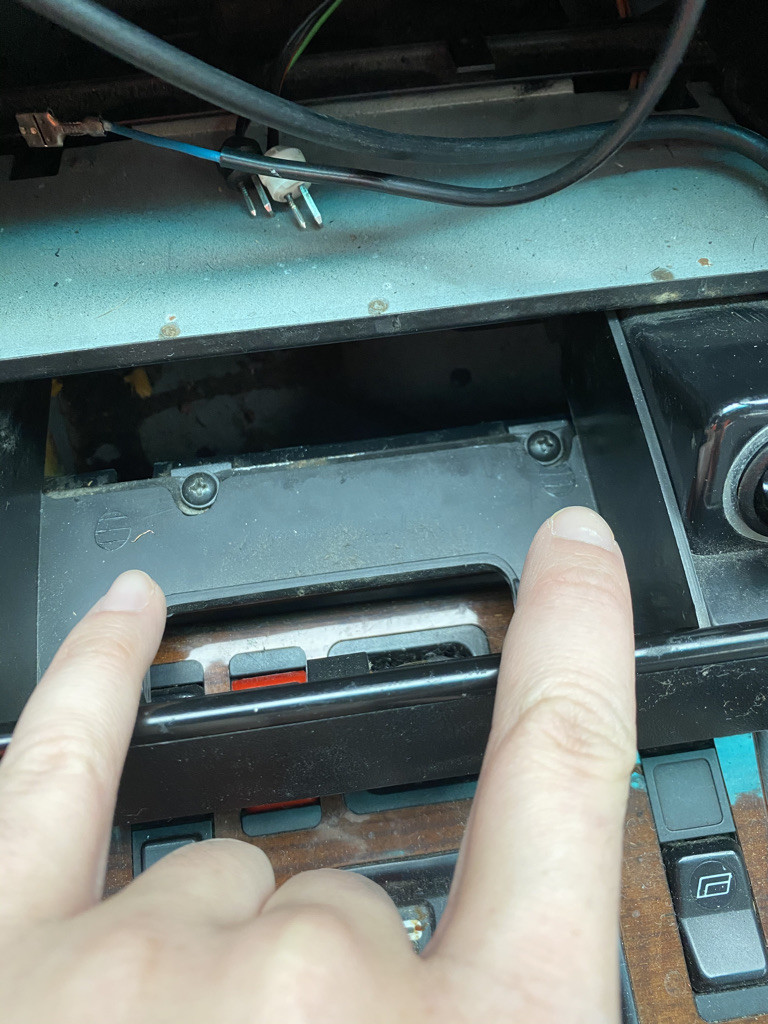
So now in my case I pulled the Zebrano wood panel off gaining access to the radio and by gently pushing from the rear it popped out from the cage with ease. Theres 5 connectors back there; antenna, right speaker, left speaker, main power and a blue female spade wire for antenna I think. disconnect all of them from the radio and make note of whats what. the speakers are important to remember as they are going to mess with you later.
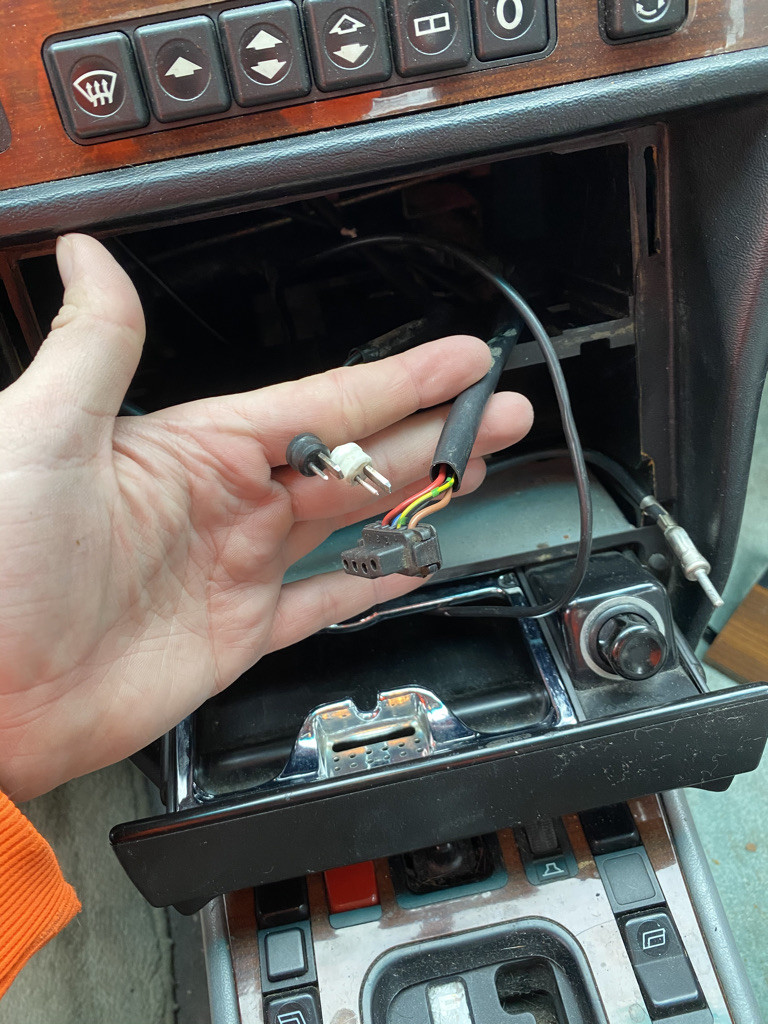
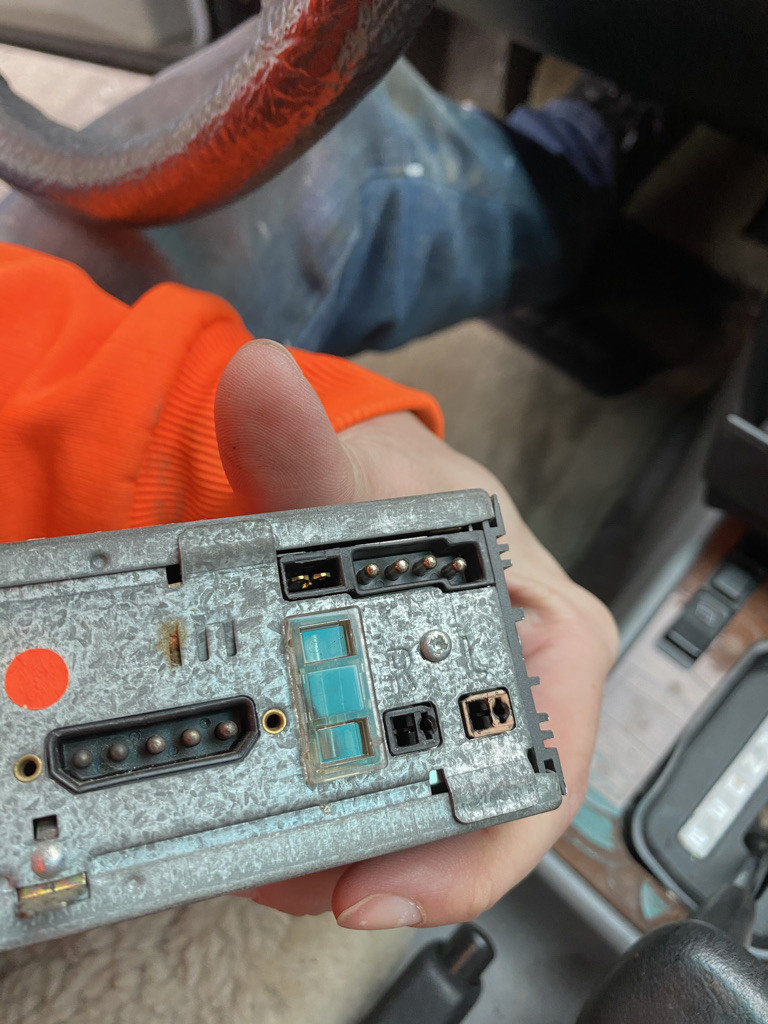
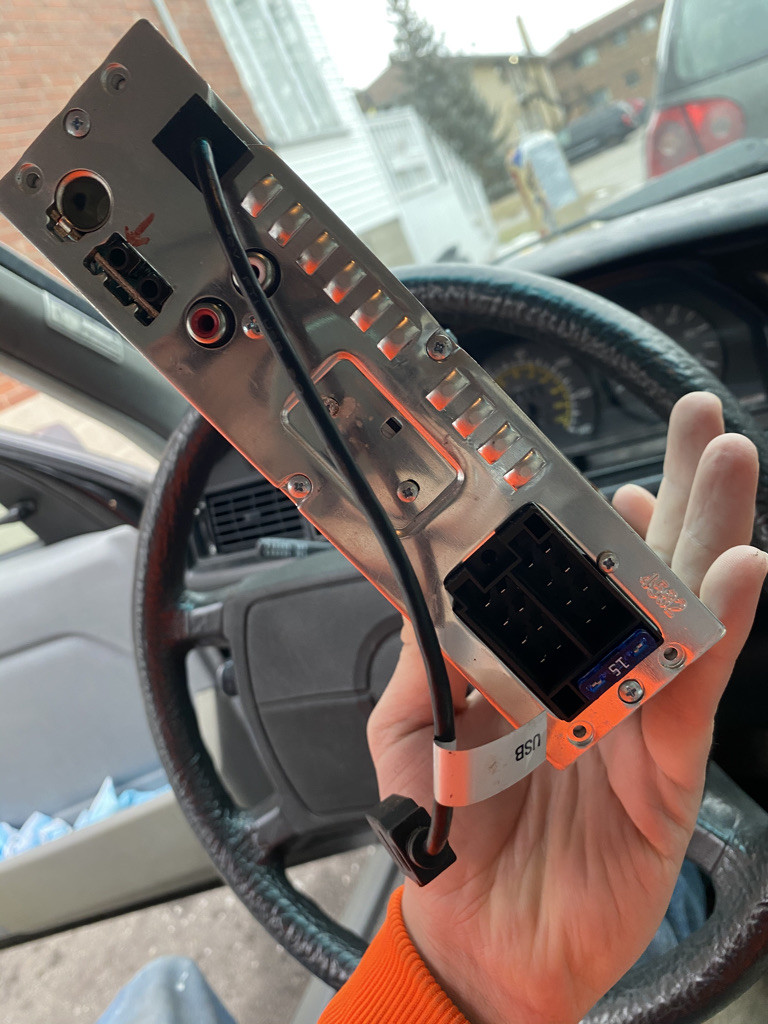
As you can see the back of the Becker is VERY different from the Kienzle and most regular radios which means we have some wiring ahead of us.
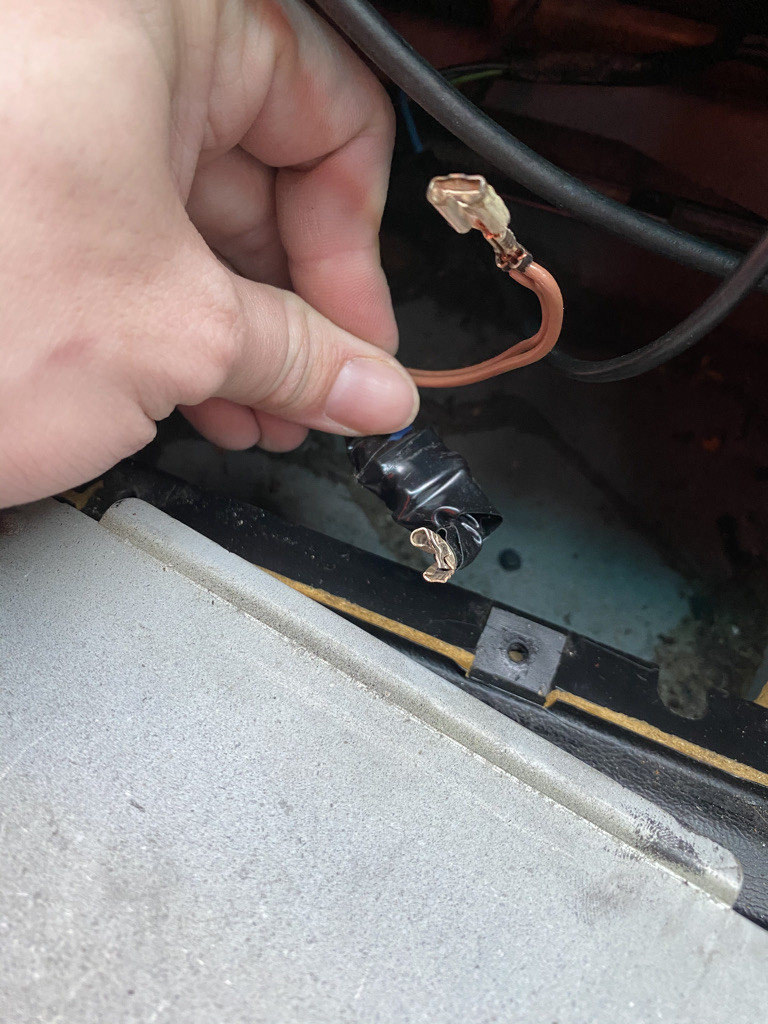
But before we start wiring we have more to take apart to make life easier for us. Remove the ashtray insert and unscrew these two phillips head screws, this will release the whole ashtray assembly where there is a light bulb, a 12V and a ground connection. In my case the ground was damaged and will need to be fixed as well while Im here.
Step four: Wiring.
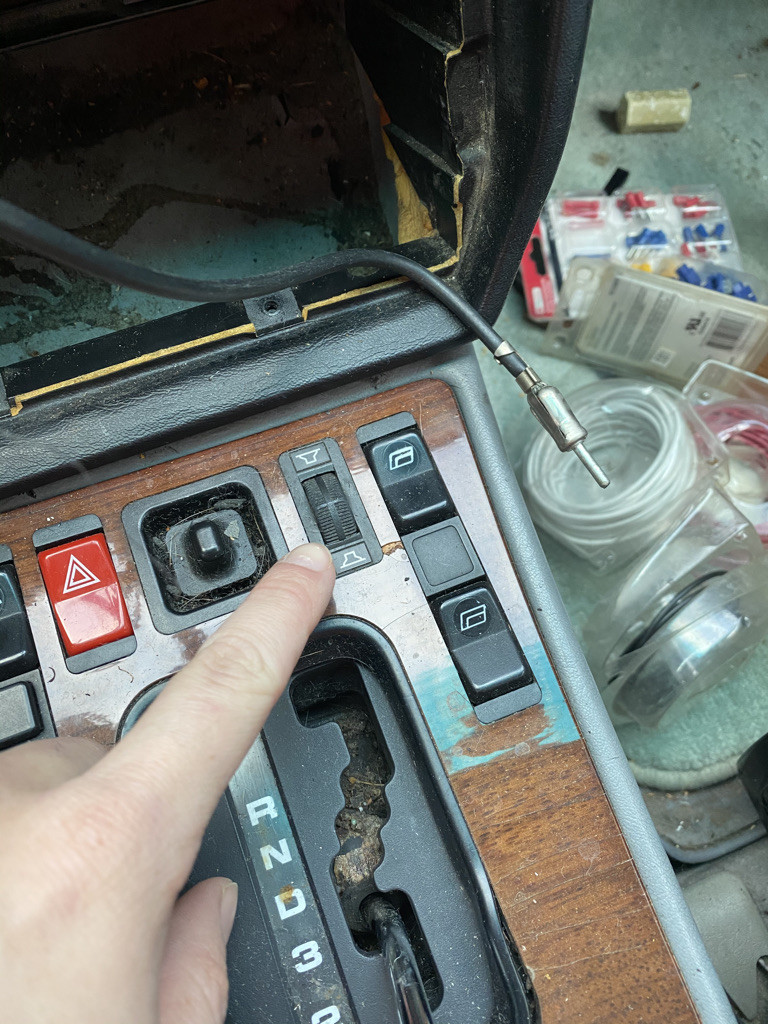
This is where things get f u n k y. In these MB's there is a fader wheel in the console, it lets you choose between all-front speakers, all-rear or power to all 4 for surround sound. Its not wired into the head unit like modern cars and all the speakers run to this fader wheel. Basically the head unit provides two channels and the fader splits it as it pleases. This is annoying because in order to have true 4 channel sound you have to rewire the whole. Dang. Car.
That wasn't happening so first things first! Figure out whats what.
The colour wires are the feed and the solid blacks are grounds. we will be splicing these into the "Left" and "Right" outputs on the new harness.
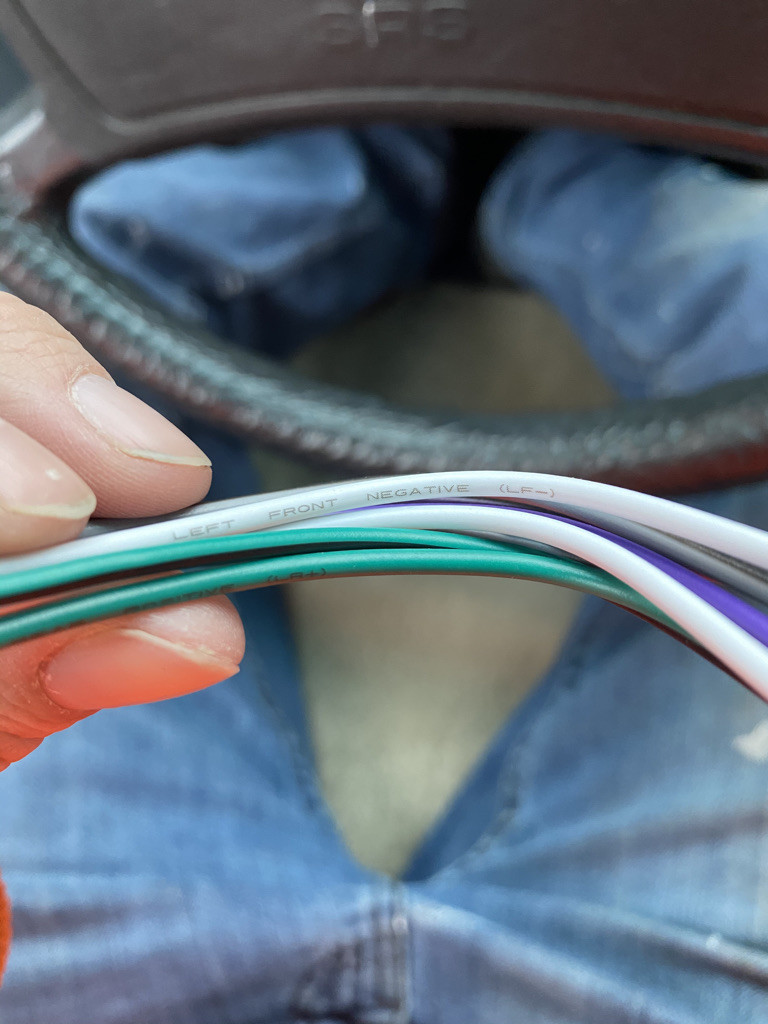
So once you have chosen what channels you want to use in the new harness cut off the old connections one at a time and splice in the positive and negative. Strip about 1/4' to 1/2' of casing away and insert into crushable butt connectors to make the best connection, preferably the ones with heat shrink on them. DO NOT USE WIRE NUTS, MARETTES, JUST TAPE OR ANY OF THAT BS!!! I support the use of solder but its a pain in the ass in the car so I dont suggest it.
I also took this chance to reference what was front and back in the harness for my own knowledge
Once that was complete and the speaker portion was properly attached and tested (you can use a 9V battery to test the speakers by inserting a piece of wire in the new connector positions you used and rubbing them against the polls on the battery) Its time to do the main power harness.
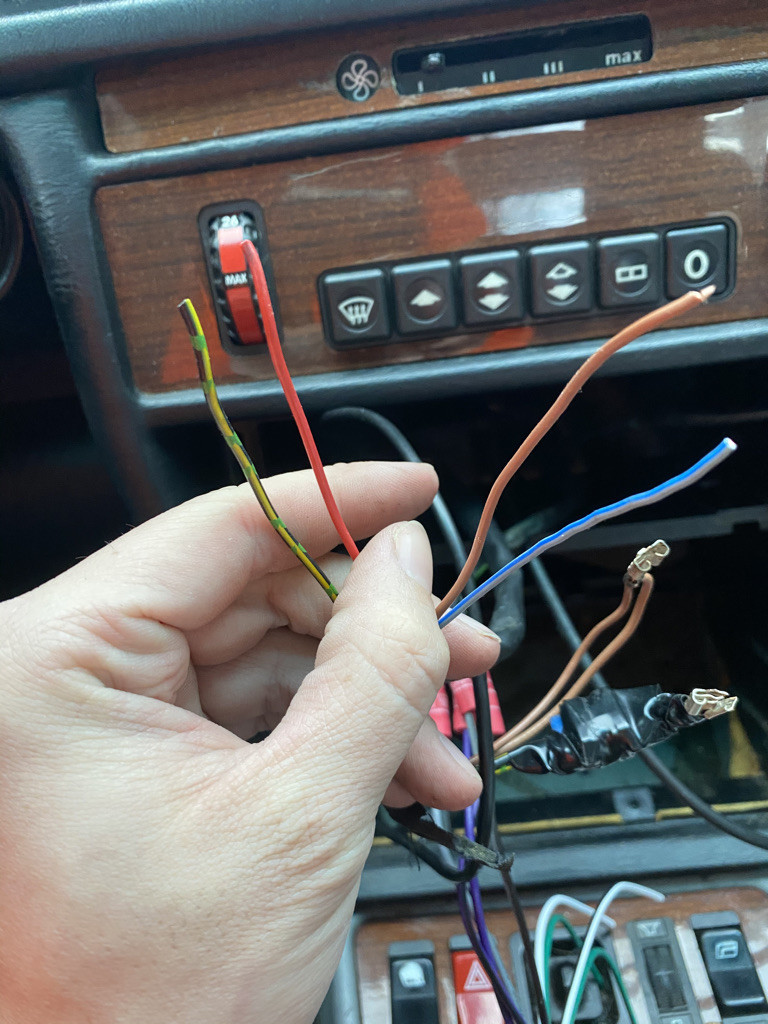
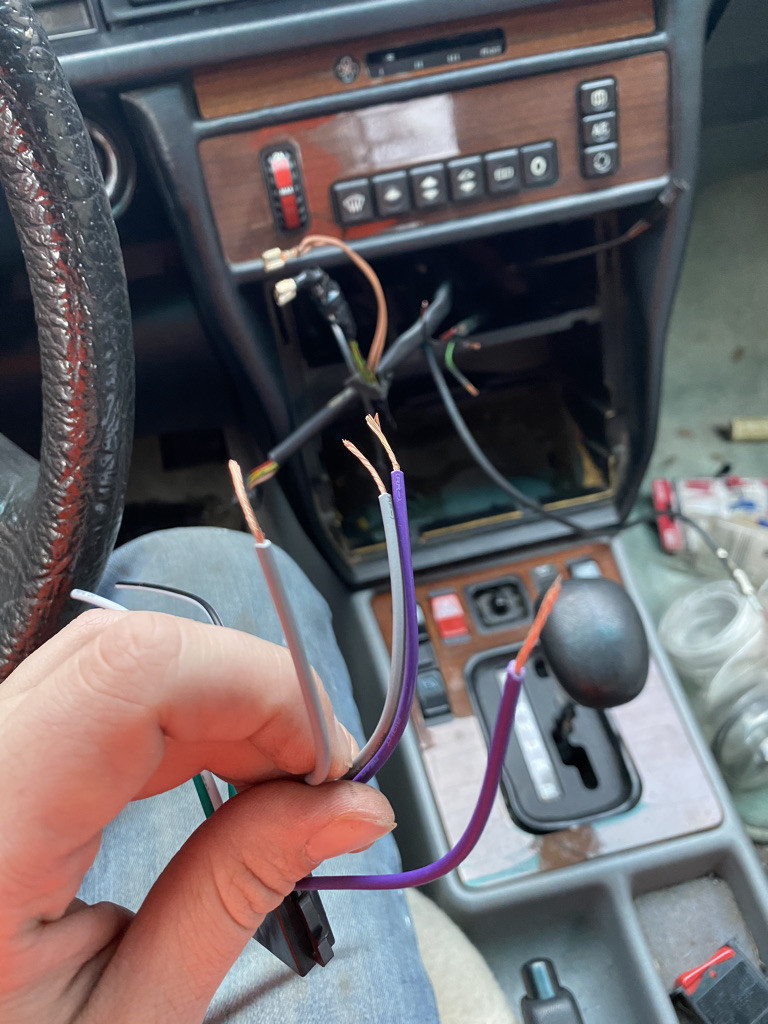
As you can see here I have cut off the MB connector and now need to figure out what does what. Most of the time its
-Red: Constant 12V
-Yellow/Black: Switched 12V
-Brown: Ground
-Grey/Blue: Illumination
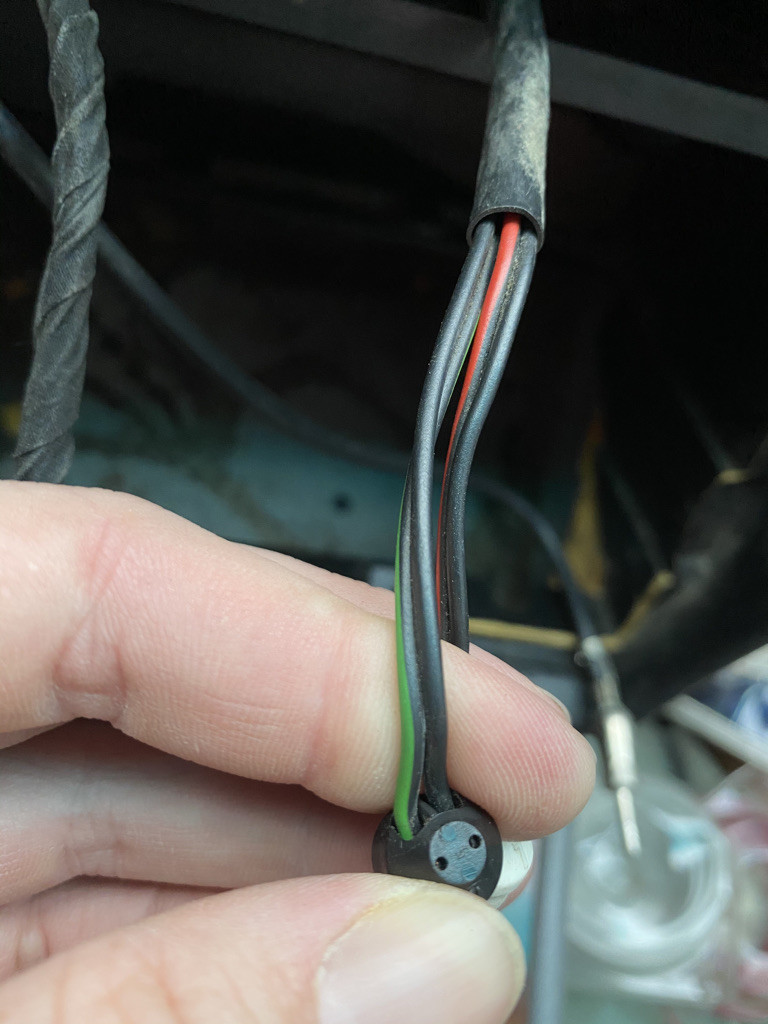
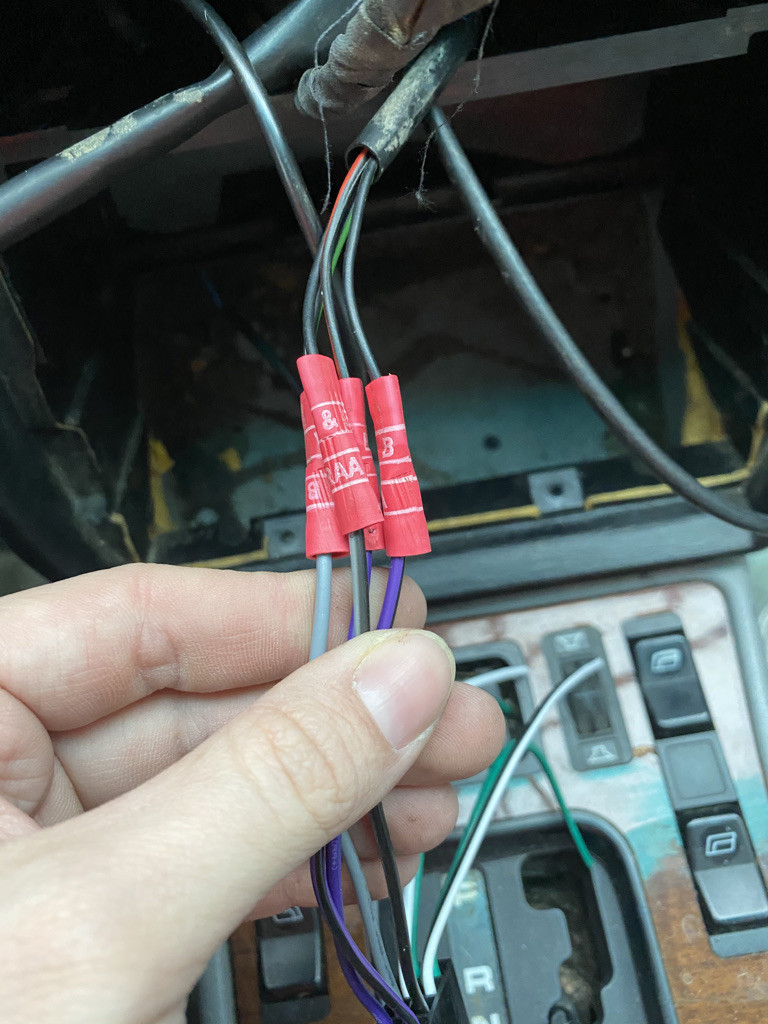
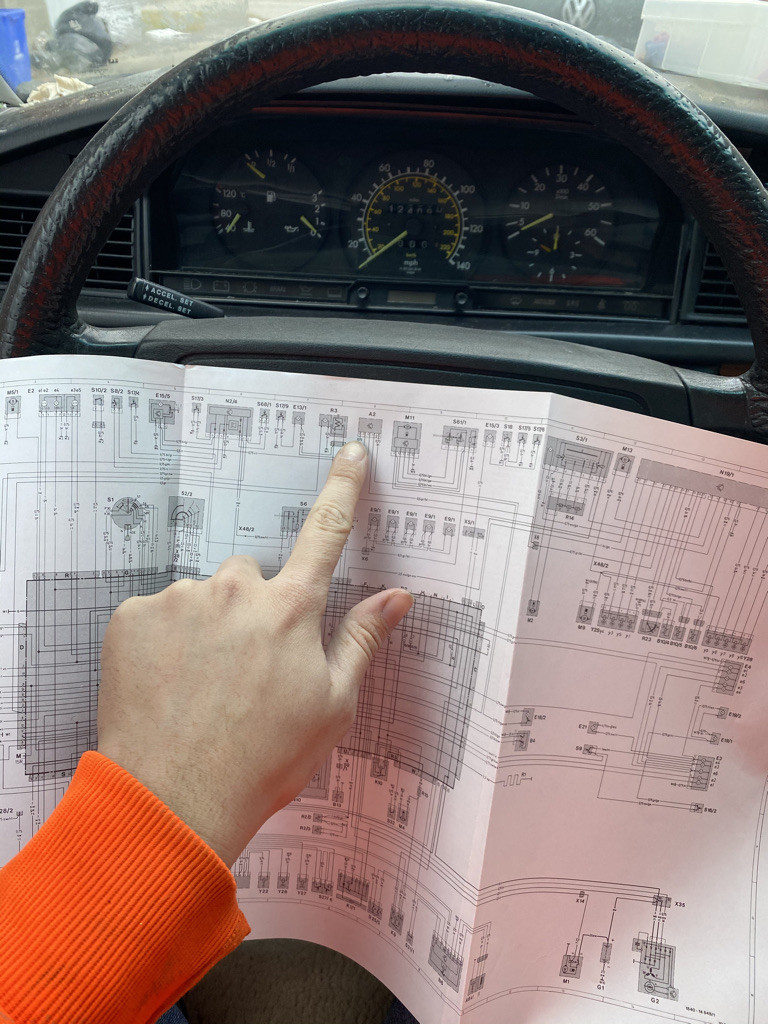
Now knowing this is okay but its always bad to assume so there are two avenues to go from here; Test it live with the tester OR refer to the MB wiring diagram. I had that available to me so I went that route.
After confirming I was right (of course) follow the same procedure as the speakers; Strip the wire, make assured connections, and test. On the new harness illumination ended up being orange and ground ended up being green as is standard moreso in North America. Also, the little blue wire from the beginning ended up being the antenna booster so that also gets spliced into the new harness on a blue wire for "Antenna Power"
Step five: Installation
Now that everything is wired and tested, go re connect the battery and plug in the radio before installing it in the dash. Make sure everything works now before you find out after its all together and have to take a stress nap under the car.
Once its proven it all works, installation is usually reverse of removal! I fixed my ashtray wiring, installed some LED's, organized the wires better and cleaned. The last step in installing this specific head unit was installing the metal securing cage (No one wants their radio shooting out on acceleration) its as easy as inserting the cage and bending out all the tabs to secure it in the dash. Once thats in feed the wires through that you need, connect them to the deck and push the deck in until it clicks. In some cars there will be a trim ring for the new radio but luckily this being a VDO brand radio and thus German it fit perfectly and did not need any extra trim. The Zebrano panel fit back perfect and everything worked as intended PLUS the fader wheel still works like OEM (Good and a bad thing haha)
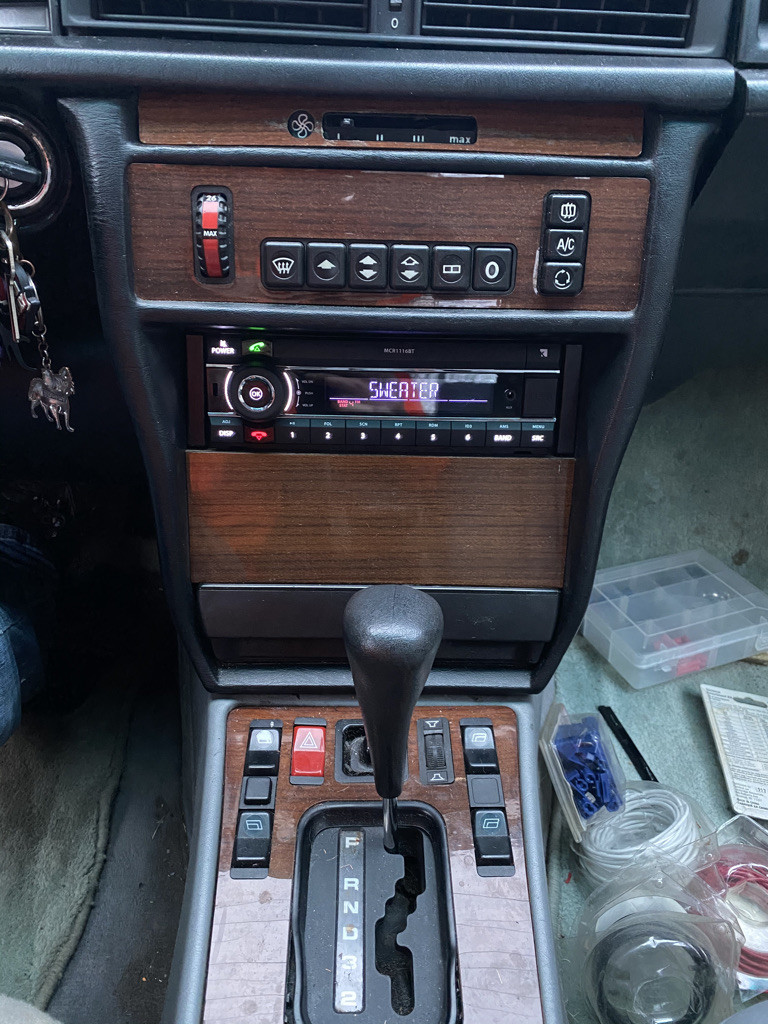
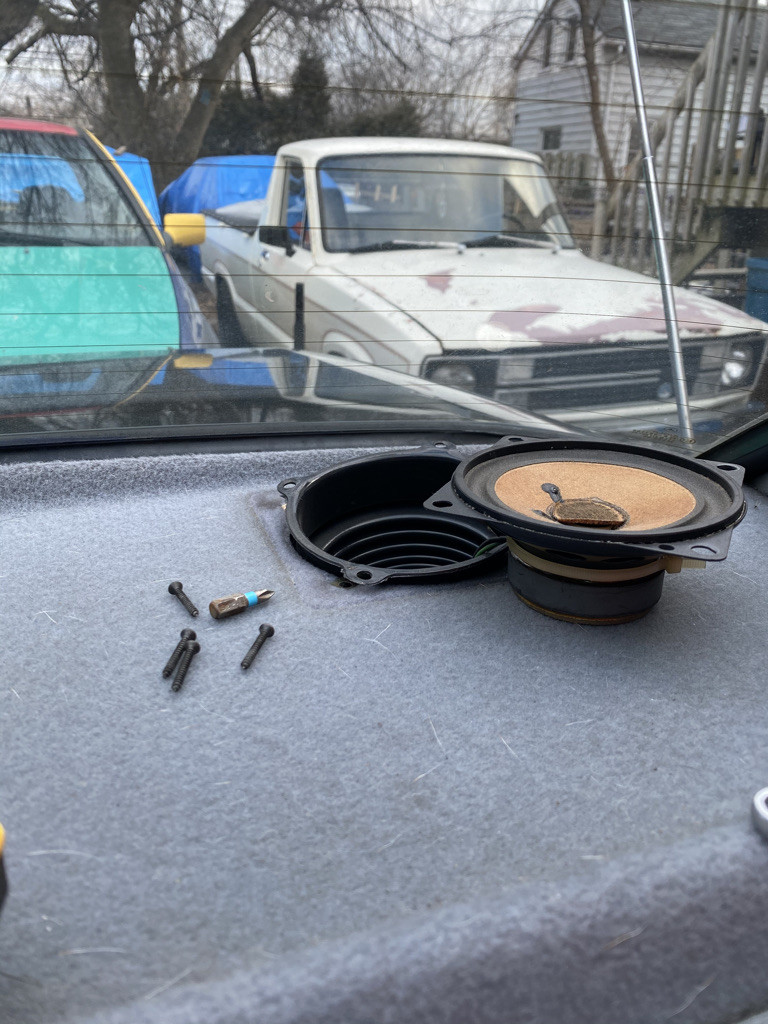
The task seemed daunting but with a little preparation it worked out fantastically! In the summer I will be running new wire to new 4" speakers in the car to remove that fader wheel and get back the true 4-channel 20W surround sound the deck offers but I am happy with the sound out of the OEM 4" paper speakers through 2CH 20W at the moment (I dont drive this in the winter so it doesnt bug me) Now the Baby Benz has full Bluetooth hands-free capability so I can call my day-trade stock broker while I sip my iced coffee in traffic since this thing has no cupholders and listen to Takin' Care of Business on repeat while getting fantastic MPG's
Hope this helped! More MB DIY's to come and hopefully on video this time!
Comments
Nice Mercedes! Its always hard to find a radio that doesn't look out of place in an older car, I think you did a good job. Bluetooth is definitely a nice thing to have in our older cars.
Posted by stevegolf on 1/31/21 @ 5:21:39 PM
Nice details!
Posted by Diggymart on 2/9/21 @ 2:39:16 AM