You must be logged in to rate content!
13 minute read

Wiring an AUX into the Symphony II WITH XM radio
Compliments of Matthewssawyer @ www.audiforums.com
Hey internet people, before I begin, I want to make clear that I am not an electrical engineer or anything like that. I am a biochemist. This is a knowledge-gaining-hobby for me so there may be errors in my phrasing or methodology. But this has been tested and works. So here we go...
I had been thinking on this one for a week or two now and almost gave up hope. Then today, sitting around getting sick of applying for jobs, I had one last thought: the XM radio receiver. Well guess what. You can splice into the Left/Right/Ground wires that come off the XM radio receiver and plug into the back of your Symphony II and play your music through the XM option on the head unit. This mod requires that your head unit allows SAT play back. If your head unit says "No SAT installed" or anything like that, SOL. I will try to keep this a lot shorter than the remote distance range fix DIY, but I believe in being thorough. As always, you do this at your own risk. This mod will require soldering inside your Audi in "tight spaces". If you are not comfortable with a soldering iron, get some quick splice connectors. One drop of solder on your interior will make you hate yourself. Be sure. Alright. Let's begin.
First. Run off to Radio Shack and get yourself some quick connectors if you need them, some quality shielded audio wires if you need them (or just an old pair of headphones), and a closed circuit 1/8th inch STEREO plug. Obviously make sure you have solder, liquid electrical tape, shrink wrap, soldering iron, wire strippers, etc. I personally took an old 6 foot stereo cable that I knew was quality, cut it into two 3 foot sections, and used it for the splicing. To each their own though, that's the fun of DIY.
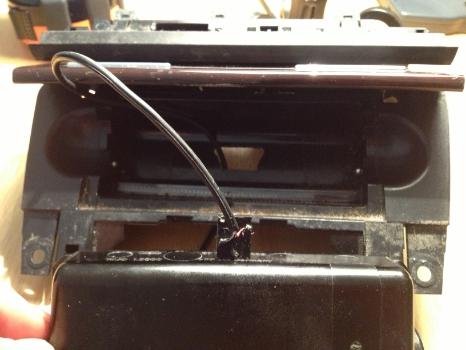
Alright. Remove your radio (If you can't remove your radio, there is another way to do this. I will tag it at the end of this write-up). I made keys from an old hard drive using a Dremel. I do not recommended this unless you too are currently between jobs, enjoy tedious projects that require great attention to detail (OCD?), and need to kill time. Right. Remove the radio. This will show what wires we will be splicing into, back to this later. We now need to decided where to put the 1/8th inch jack.
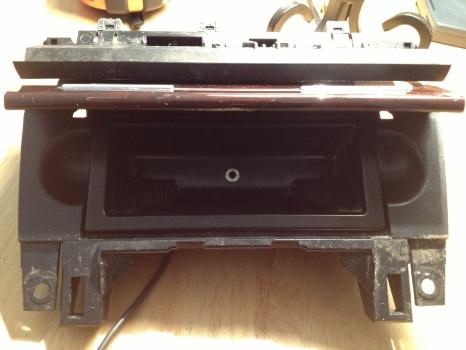
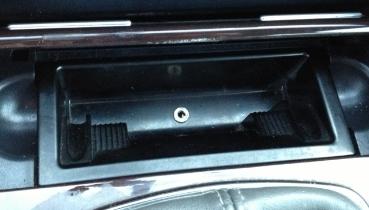
I decided to put mine in the ash tray so it would be out of sight. I am not sure how to remove the ash tray on an automatic, but on the stick just pop up your shift boot (just pull up on it, it's only clipped in), undo the two bolts holding the ash tray in, pull the climate control module (push/pull from the back of it, it slides right out), and shimmy your ash tray out. I drilled a 7/32 inch hole in the center of the actual removable tray and then used a Dremel to (crudely) cut a slot in the ashtray assembly directly below the hole I drilled. I recommend doing this and fitting your jack without the wires on it already. I did it with one set of wires on while my liquid tape dried, it wasn't a hindrance. Just make sure you cut a slot large enough for your jack with 6 wires coming off the back if you decide to put it in your ash tray.
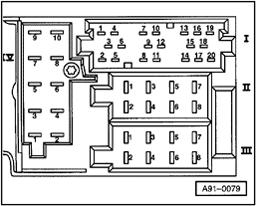
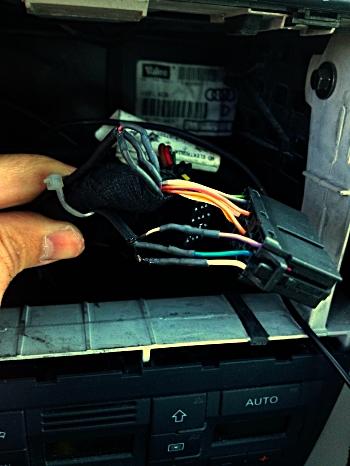
On to splicing. If you have an installed XM radio receiver, there will be a purple, a blue, and a white wire in connector 1 in the following image, specifically pins 18, 19, and 20. There should also be an Orange/purple and an orange/brown in the center cluster (7-12). The orange wires (not visible below) communicate with the computer and head unit letting them know the XM receiver is there and working properly but will not be used in this DIY.
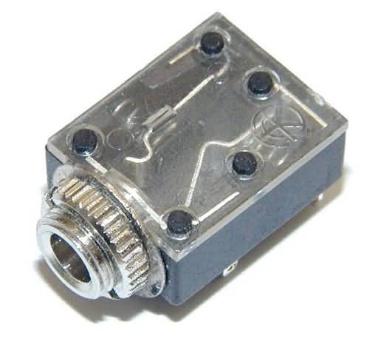
Alright. Now that we know what we are going to splice into, we need to wire up the 1/8th inch receiver we got from Radio Shack or some other electronic parts store. The way these closed circuit audio receivers work is fairly straight forward. You have 5 pins: one ground (1 below), two for left (2/3 below), and two for right (4/5 below). One set of the G L R (1, 2, 5) complete the G L R circuits from your MP3 player to head unit when an 1/8th inch cable is inserted into the jack. The other set of G L R (1, 3, 4) complete the G L R circuits with the previous set of G L R when there is nothing in the jack. This is much clearer when you have the component in hand. Why do we want this? Well, you are going to wire the G L R set that completes a circuit without anything in the jack onto the white, blue, and purple wires coming FROM the XM receiver. The other G L R set (plug occupied circuit) will be wired to the other half of the white, blue, and purple wires that connect to the head unit. In this way, when your MP3 player is plugged in, it cuts off the signal from the XM receiver (opens those circuits) and pipes your MP3 into the head unit (closes those circuits). The head unit can't tell the difference between audio from the XM receiver and audio from your MP3 player so no matter what channel you are set to you hear your music without interference. But here is the really elegant part of this: when you unplug your cable from the jack, it reestablishes the XM circuits seamlessly. You don't lose your XM radio! Great selling point when you try to sell your car.
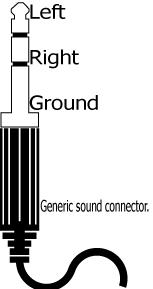
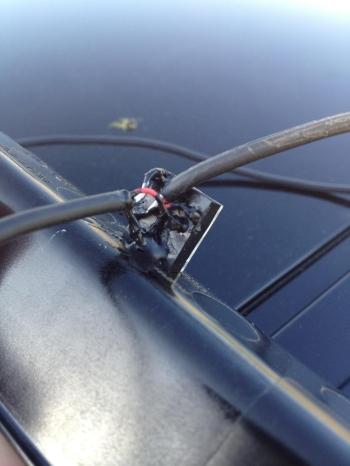
Grab the cables or wires you are going to use for splicing (in my case two 3 ft sections of stereo cable) and strip the insulation. When I soldered onto the wiring harness below, I chose to keep each cable about 2 feet long so I could easily remove the ash tray or radio without worrying about getting snagged. There is plenty of room behind the stereo so why not. This is a personal choice, do what you feel. My cable had a common ground (exposed copper), a white, and a red wire. I designated white as left and red as right. Solder your left wires to pins 2 and 3. Solder your right wires to pins 4 and 5. Solder both grounds to pin 1. Be sure that the wires on 1, 2, 5 are distinct (part of the same cable or group of wires) from the wires on 1, 3, 4. Also be sure that you liquid tape the crap out of the pins. It is pretty tight on the back side of the jack and you want to be certain that no connections can be established between differing circuits on the back of the jack. Unwanted connections = poor or no sound. I soldered one set of L R G onto the back, liquid taped, then soldered the other set so I could be certain there would be no unwanted touching. Bad touch is bad. My phone refused to take better pictures of the finished product and the liquid tape job is messy. But you get the idea.
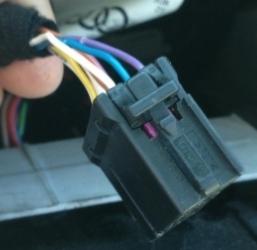
So here comes the in car soldering if you didn't purchase the lower quality quick connects. Cut your blue, white, and purple wires on the back side of the plug shown earlier. Make sure you cut them half way between the back of the plug and the harness wrap so you have room to work... unless you want to undo the harness wrap. I didn't. Strip the insulation from all 6 ends just enough to be able to solder onto your wires from the audio jack. I used some alligator clips on a rod (similar to below) to keep the two wires I was joining in place while I soldered. Huge huge huge help. Be sure to slide some shrink wrap onto the longest section of wire being joined so you can shrink wrap after the joint is made. Solder the wire from pin 3 onto the purple wire coming from your XM receiver. Pin 4 goes with the white wire from the receiver, and pin 1 (the same ground for the wires you just soldered for consistency) joins with the blue wire from the receiver. So for me it was white (left) with purple, red (right) with white, and copper (ground) with blue. Again. Be sure that this set of wires pertains to the 1, 3, 4 pins on the audio jack. If you get these backwards this will not work. Repeat this for the red, white, and ground wires from pins 1, 2, 5 except you will be soldering to the blue, white, and purple wires still attached to the plug. When you're done, it will look like this except possibly not as crude.
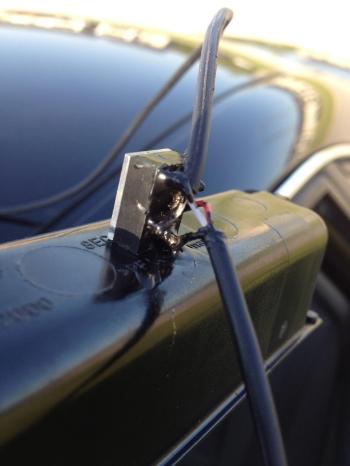
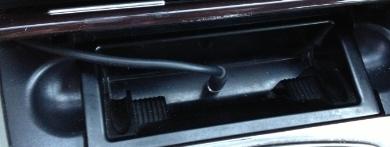
Alright almost done. Test before you reassemble. Plug your stereo up but don't push it all the way back in (don't want to undo the clips again). Press the SAT button, and if you did this correctly, there should be the preview channels there. Now plug your 1/8th inch cable into your MP3 player and your new jack. The SAT audio should cease and when you push play on your MP3 player you should her quality audio. If it works in both instances and the sound quality is up to par, reassemble everything. I chose to run a cable from the ash tray, behind the stereo, and out through the trim because of how I have my iPhone set up when I drive. I made room for the cable to fit between the ashtray and trim while the ashtray is closed, ensuring the lid can actuate. I then snaked the cable up through the trim like below. This way it is really clean for when I am driving. If someone else wants to plug in, I can just pop open the ash tray, unplug mine, and they can plug in with a separate cable I keep in my glove box. Wonderful and simple.
That's it. Sure, the radio won't display what song you are currently playing (wish there was some way to just turn the damn display off!) and you can't control your MP3 player from the stereo, but you now have a solid connection to plug in through instead of an FM transmitter (rubbish) or the tape deck (also rubbish!). This cost me less than $3 because I had everything but the audio jack. Hard to argue with that.
Now for those of you who don't want to or can't remove your radio. You will have a much harder time putting the jack where I did because as far as I know you can't get the ash tray assembly out without removing the climate control module. So what are your options? Well, first off, get creative with where you want the jack. Second, you will need to run much longer wires from your trunk to the front. Yep. Unless you can find the blue, purple, and white wires in the harness under your steering column. If it were me, though, I would just route some wires from the trunk to the front though. Seems easier and safer to me.
OK. So everything will be the same except you will be splicing in at the receiver in your trunk. There are write-ups explaining how to get to your receiver, I prefer this one. You will find the blue, white, and purple wires coming off the receiver. Splice in as above and route your wires (keeping track of which is which!) to the front. This all depends on where you put your 1/8th in jack though. You could mount that in your trunk, plug a 10 ft audio cable into it, and route that to the front of the car for your MP3 player. This route is easier, but you will have to go to the trunk and unplug to enable XM (does anyone use it anymore anyway?). My original though was that you route the two G L R cables from the jack up front to receiver in back and splice in. However you do it, I just wanted to make clear that there is a place to splice in in the trunk if you can't get your radio out. Enjoy that direct connect audio!