You must be logged in to rate content!
12 minute read
"Y"-block intake and carb rebuild on a 68 Lincoln Continental
Compliments of Barry2952
Description:
Installing a Y-block intake and carb rebuild on a 68 Lincoln Continental
Tools Needed:
Screwdrivers
Various Wrenches
Hose Wrench
Container for gasoline and antifreeze
Adhesive
Razor Blade or Wire Brush
Paper Towel
Brake Cleaner
Tap
Abrasive Wheel / Die Grinder
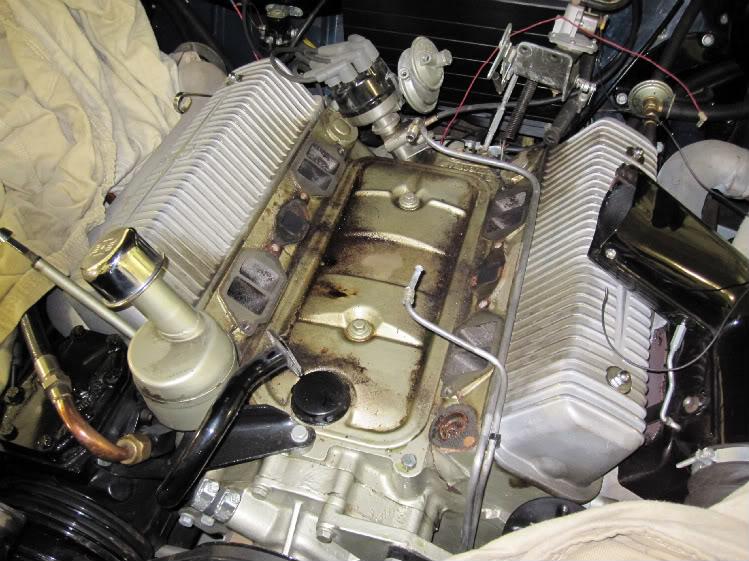
This is why I want to block off the exhaust ports and install an electric choke. This has only 11,000 miles on the engine since it was restored. Who wants to go through this every 5 years for a car that's never driven in the cold.
The carb was engine tested and shipped out by Pony today. Time to get moving on the manifold. This was originally painted gloss black with heat resistant paint.
Removal was fairly simple. First, remove about 2 gallons of anti-freeze. This will bring the water level in the engine below where you're working.

You'll need to remove the manifold vacuum lines. It's much easier to remove the brass distribution block while the manifold is attached to the engine. The air conditioning rpm kick up is removed with two bolts. This will allow you to remove the large vacuum tube that goes to the brake booster.
You can leave the line that feeds the vacuum pump and you can leave the fuel line. You can work around them for this operation. I removed the intake by cracking the seal with a 1/2" open end wrench use as a mini lever between the head and the exhaust port. There's a nice lip there. A little pressure and it popped free. Some uglyness to clean up, but there doesn't appear to be any serious paint damage.
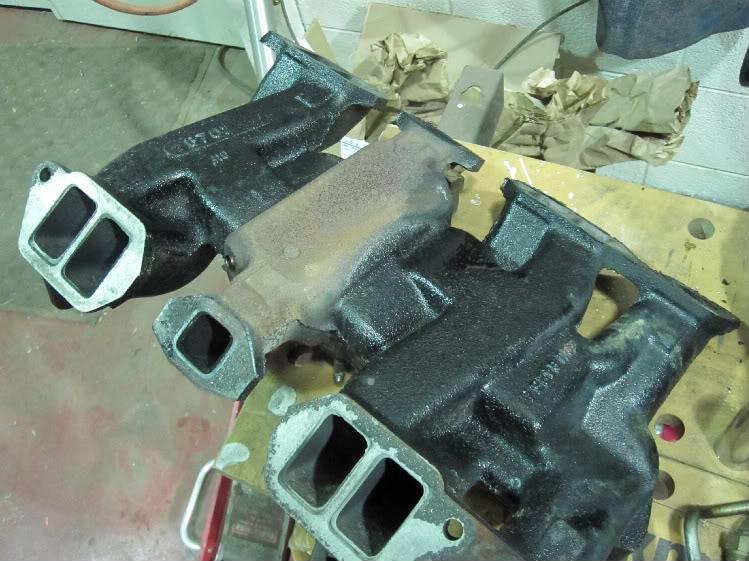
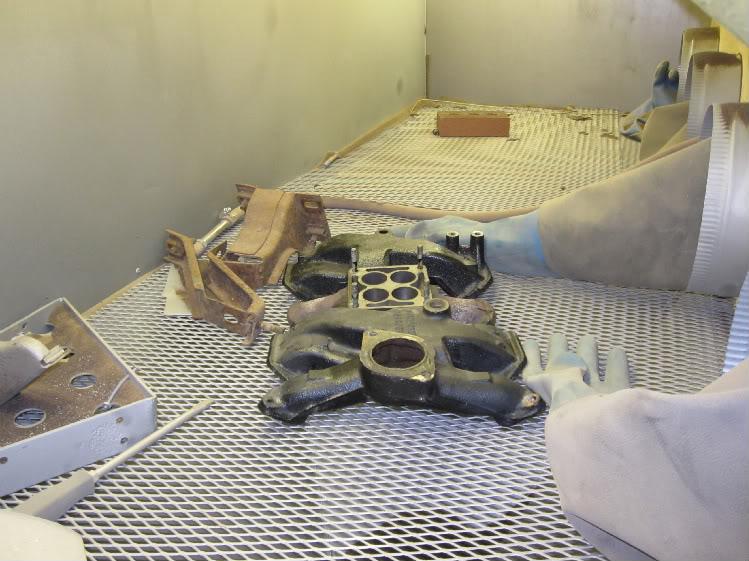
Into the sand-blast booth for 20 minutes and off to the powder-coater.
In the meantime I ordered the replacement gaskets I needed to make my fix permanent.
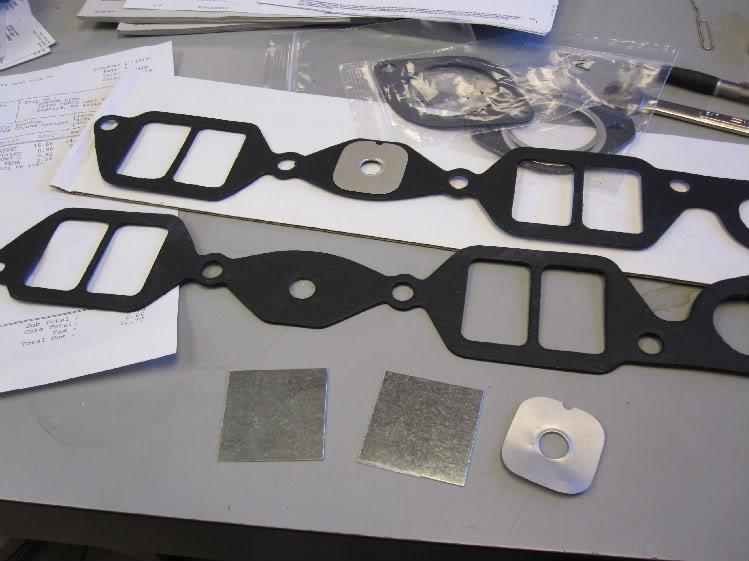
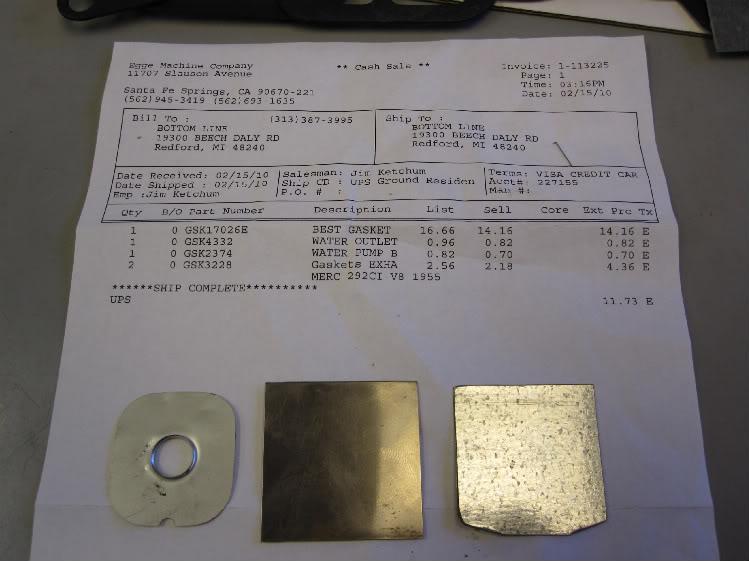
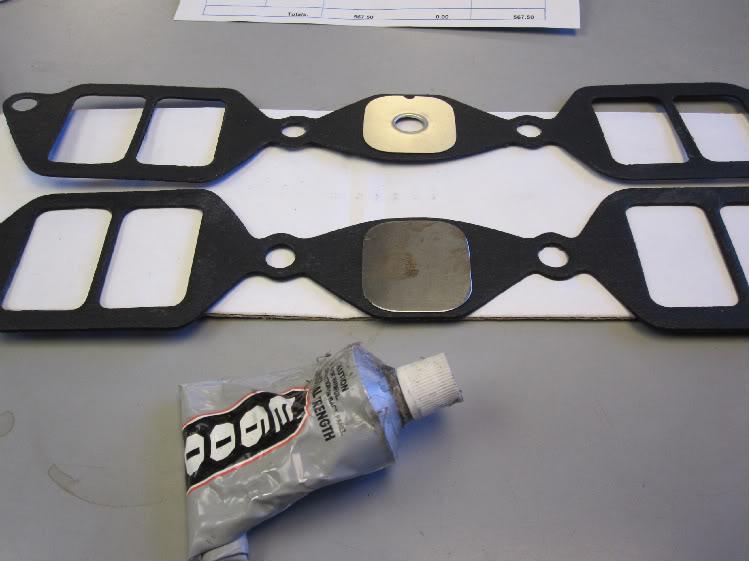
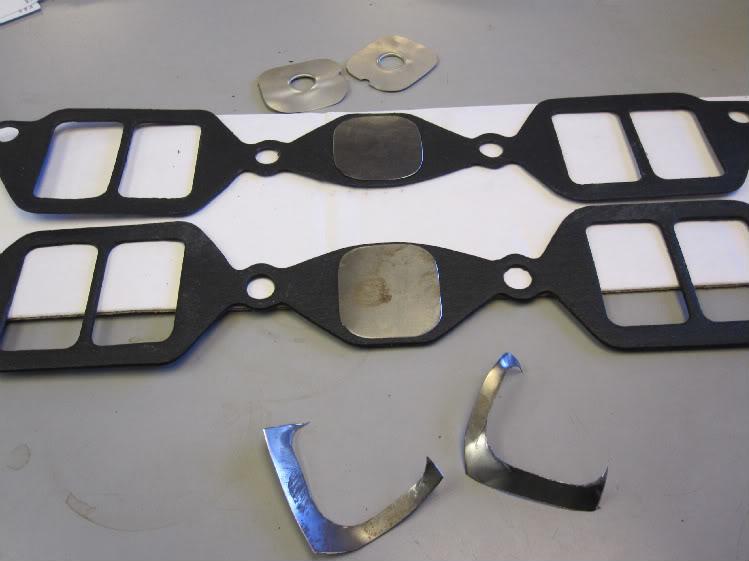
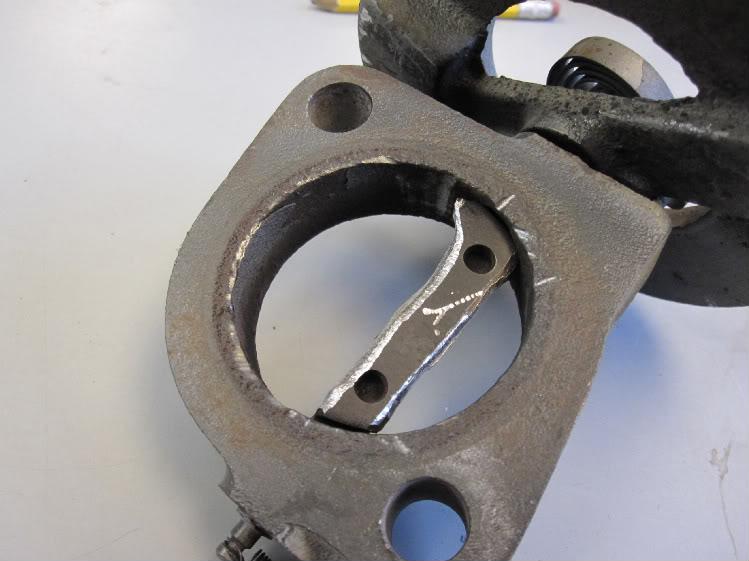
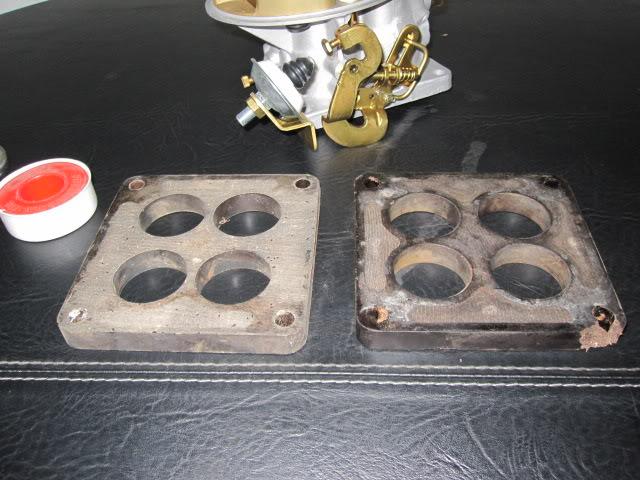
The gaskets I pulled out had the restricted port and didn't protect the paint, as suggested. I popped the metal baffle out and went in search of some metal. The thinnest I found in my shop was some galvanized ductwork that measured .020 and the wafer on the gasket was only .012, almost half the thickness. Called my local fab shop and chopped up some .012 shim steel, perfect for the application. I'll trim them to the same size so the gasket will compress around them.
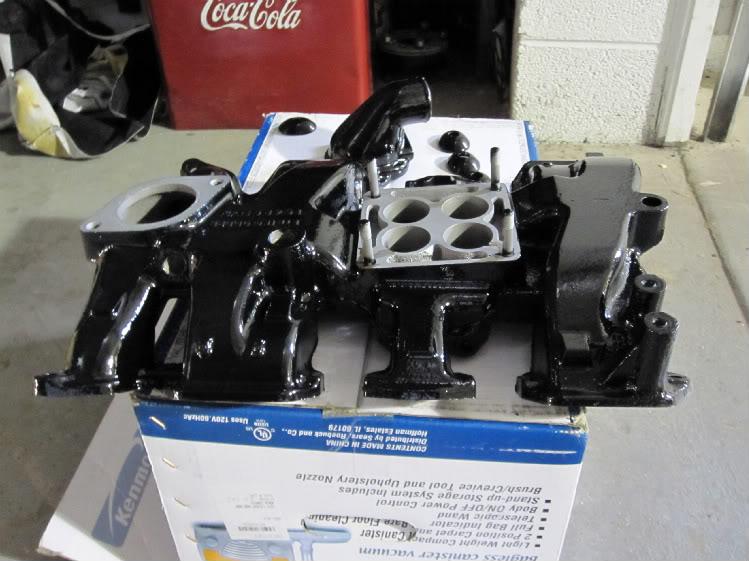
Got the intake manifold, holding clamps and water outlet powder-coated in what they call wet-black, and it looks it.
Trimmed the passage blocks so that they are the exact size and shape as the original. Applied small dabs of adhesive and positioned before taking passage piece loose from other gasket.
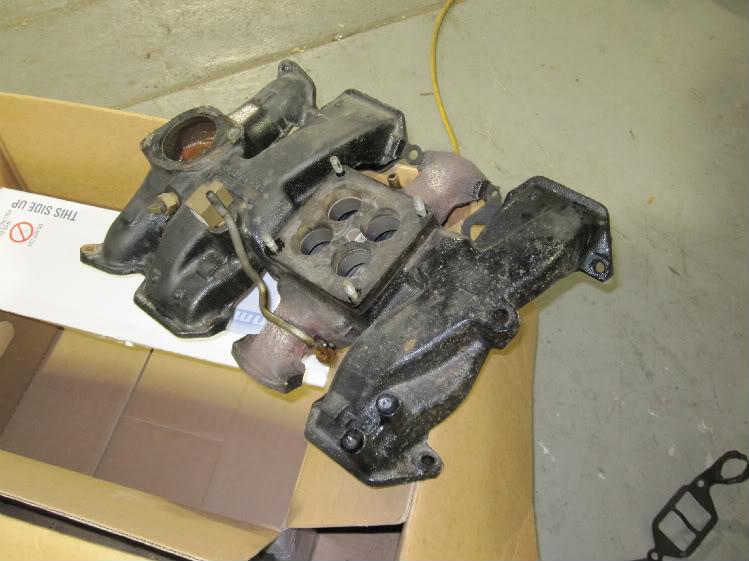
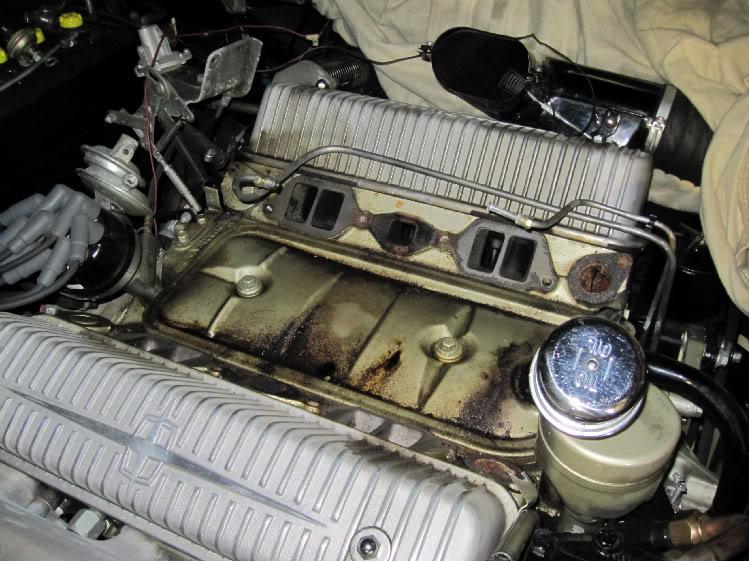
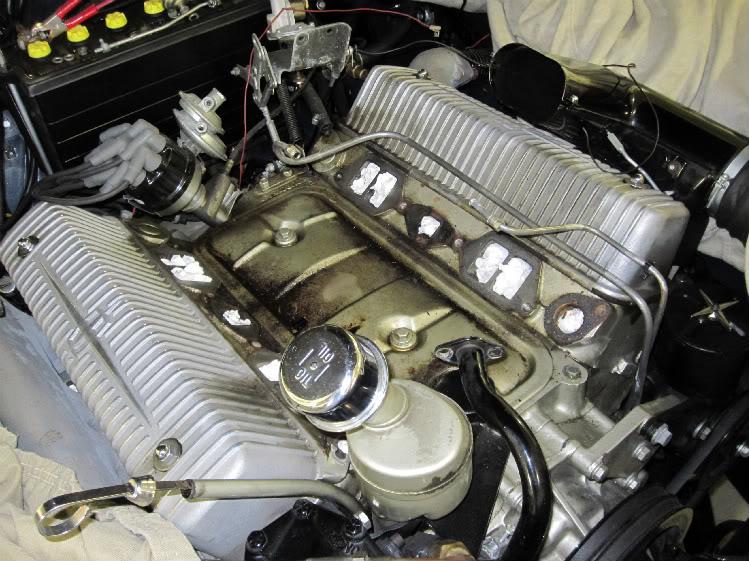
In preparation for reinstalling the intake manifold one must take great care not to drop anything into any of the openings. To me, this seems fairly messy for a car with 11,000 miles on the engine. It appears that the exhaust port leaked a lot on the passenger side, leaving some kind of carbon deposit. Most of the gasket came off easily, except for the water passages.
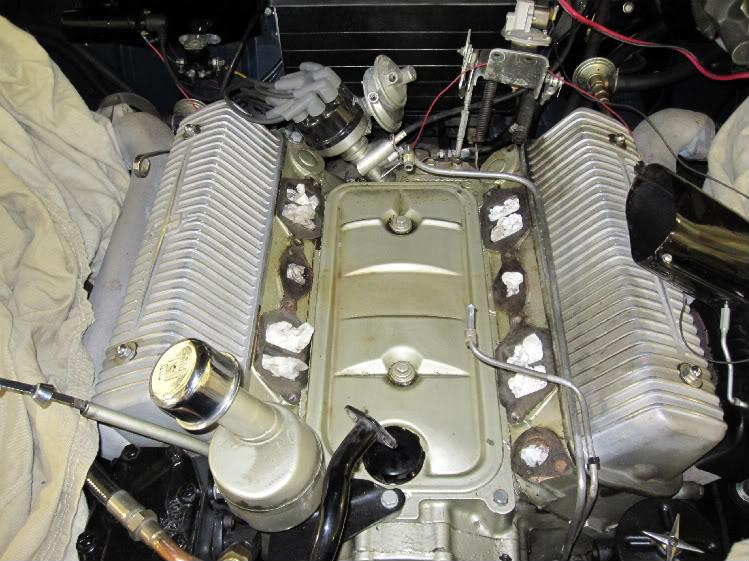
The first step of clean-up is to vacuum up any loose debris. Then stuff a full sheet of paper towel in each opening, except the exhaust. They will require a 1/2 sheet each.
Now you can start scraping away any trace of the old gasket. A razor blade works, but a wire brush in a die grinder works better.
Sop up any loose oils and dirt. I used brake cleaner to get into some of the smaller crevices. I also used it to clean the valve covers. I gave the oily areas a wetting spritz and let the fluid sit for a minute. A second shot rinsed it all away. Don't let it pool on painted surfaces as it will lift the paint. Look at the difference in valve covers.
Before you remove the stuffing, use a tap to chase all the threads in the manifold and heads. Do this dry so that you can vacuum out any chips. While removing the stuffing from the passages, use a vacuum to catch any debris that may have landed on the stuffing. Now you're ready to reinstall the manifold.
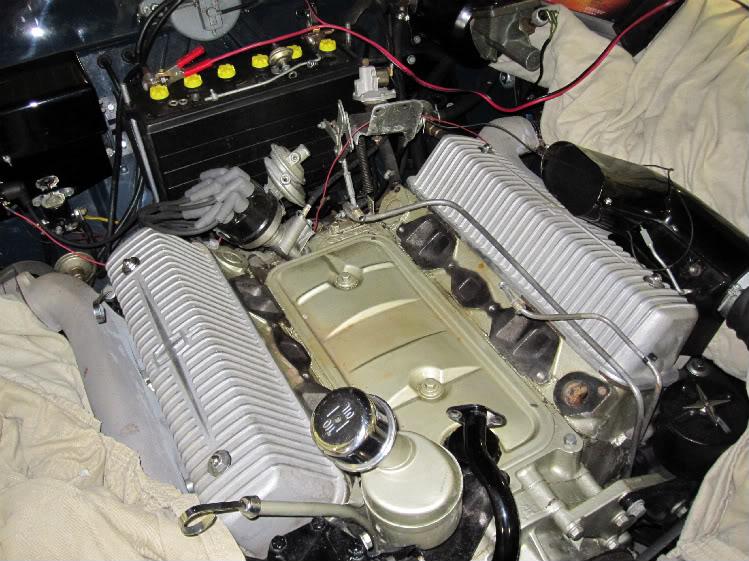
Ready for the carb.
Cut off as much of the flange as I could with an abrasive wheel and trimmed away the rest with a die grinder. Left enough on one side to keep the shaft in place while still allowing it to turn with the bi-metal spring.
New gaskets and you'd never know it had been altered.
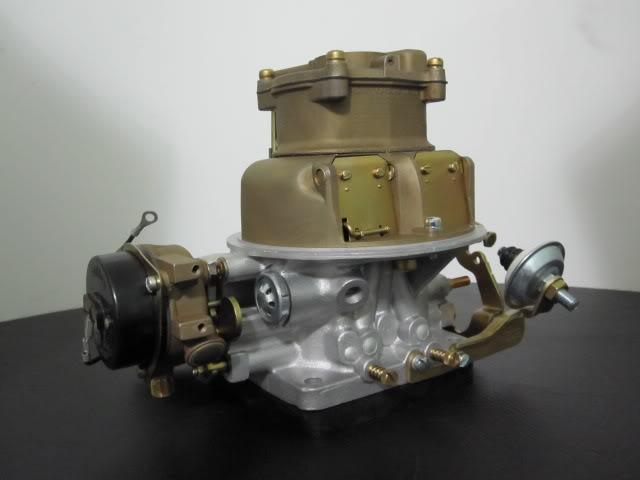
Got the carb back from Pony. It's almost too pretty to use.
The gasket kit they sent along was very complete, even to the extent of supplying a new NAPA fuel filter.
The two carb gaskets have holes in them above the voids. I'm not sure what the holes do as they sit under a perfectly flat surface.
New gasket was a perfect fit.
Went to install the spacer and discovered that mine had a chunk missing. Luckily, I had a spare. I observed that the side that faced the manifold had a slight bulge in the exact shape of the voids. This would interfere with proper tightening of the carb and needed to be sanded flat. I simply put a sheet of 120 grit sandpaper on a flat surface and took off the high spots.
Installed the spacer and second gasket and proceeded to drop the carb onto the studs.
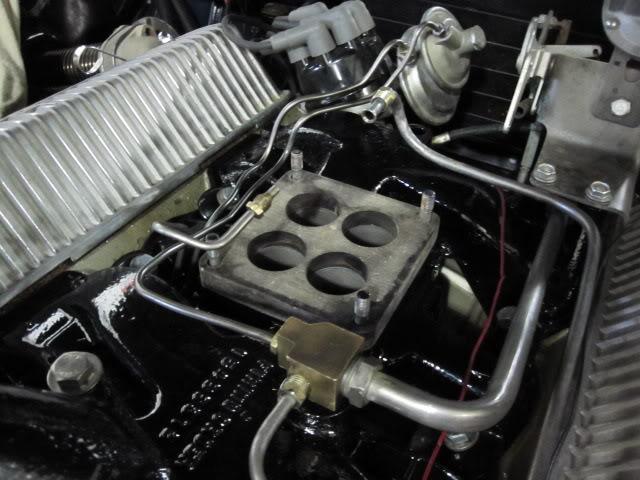
Once bolted down it was a simple matter of hooking up all the tubing. Everything is positioned so that it can only go back together one way. The fuel line should be tightened with two wrenches. The 1/8" line in the front is a compression fitting that should be tightened with a hose wrench.
The linkage was two clips, but required adjustment.
I added a "T" in the manifold vacuum line that feeds the vacuum advance. I cut about 3/4" out of the line and installed a tap for setting the timing. I'll simply cap the barbed fitting for future adjustment. Although, with platinum tip spark plugs and Pertronix instead of points, I'll probably go a long time between tune-ups.
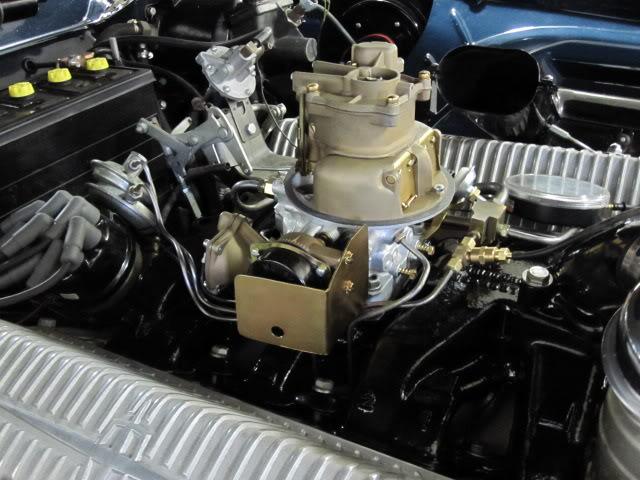
Hooked up the electric choke to the positive terminal of the coil. You can barely see the black wire against the shiny manifold.
A slight bend of the original shield conceals the fact that the car is fitted with an electric choke.
I did a very un-male thing and read Pony's instructions. They said that I should install the fuel filter they provided or the warranty is void. Years ago, when I worked in a service station, we'd remove the cartridge and let the gas flow while changing the filter media. So that's what I decided to do. I set up a pan to catch the gas, capable of containing about a half gallon of gas.
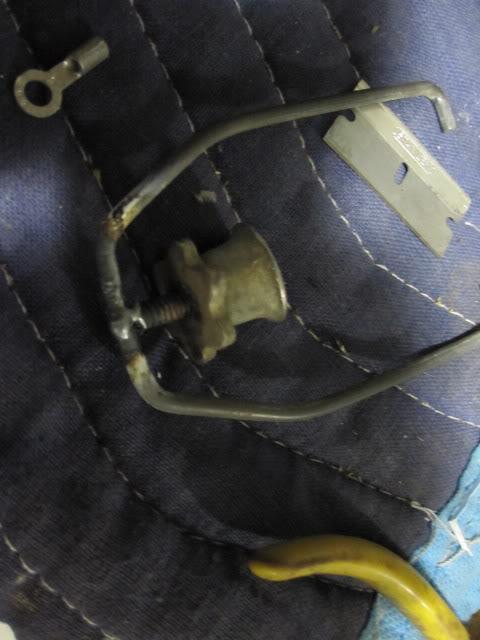
Then disaster struck, well, almost. I removed the cup and found that there was a fine-mesh screen, but no filter media. I quickly popped in the new filter and it was a perfect fit. Went to reinstall it and the device that clamps the cup to the pump was nowhere to be seen. It had broken it's weld and had fallen in the gas-filled tray. It took a second, but I realized what happened and slid a milk bottle in to catch the stream of gas. That gave me time to develop a plan, as the siphon feed nature of the gas line, just kept on running.
The first gallon jug filled up in about 20 minutes. I figured I could fix the part in that amount of time. I slid in an empty jug and scooted across the parking lot to my shop. I set up the part in the vise and gas welded the parts together and ran back to the storage building to find that the jug was only half-full. I installed the gasket and filter and stemmed the flow of gas.
Had I known I had more time I would have cleaned it up a little. If I had to do this over again I would have removed the rubber hose at the tank, breaking the siphon. I learn something new every day.
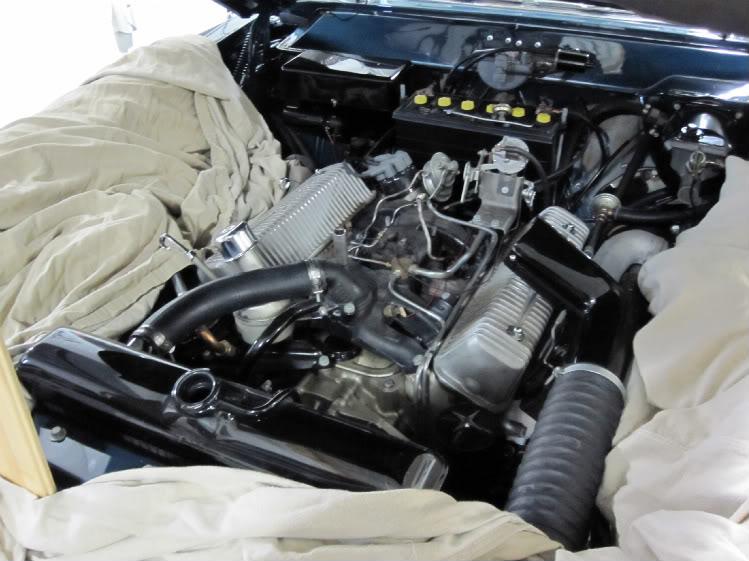
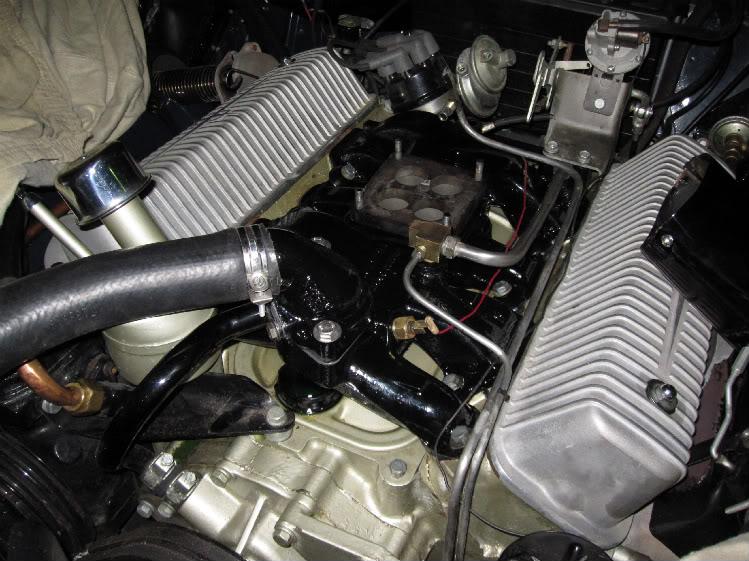
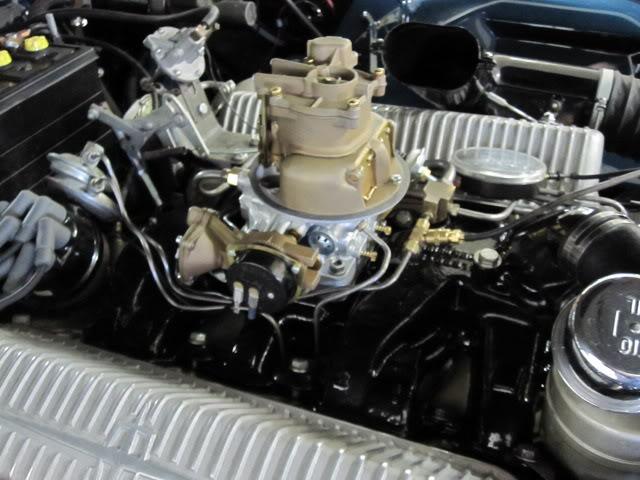
Completed installation. Followed their start-up instructions and it started right up and ran like crap and was noisy as hell. It was then I realized that I had not reinstalled the vacuum line to the Treadle-Vac. Oops!
Installed the hose and it smoothed right out. Choke worked but it runs at 700 rpm instead of 425. I'll have to figure that out.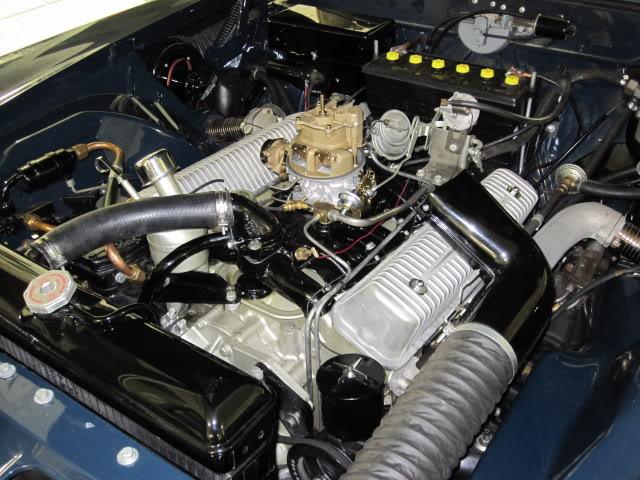
It starts differently now. It used to give a rush of rpm when it first started. Now it just idles smooth. Only another month before I try it on the road.
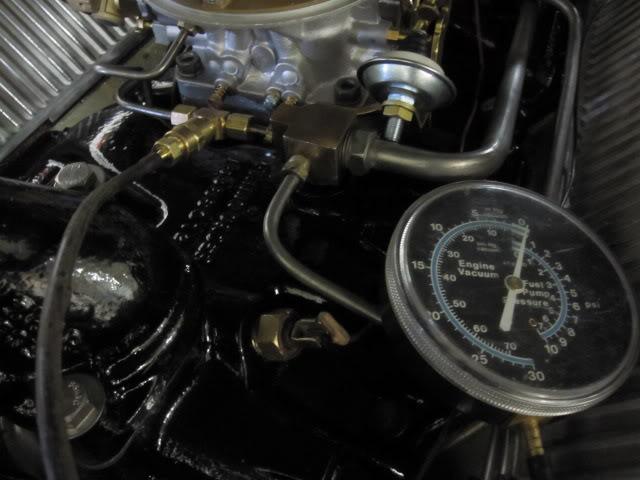
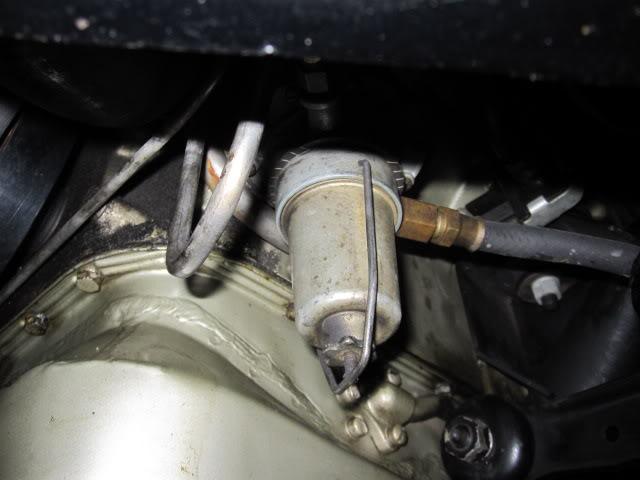
I also adjusted the idle mixture screws using the vacuum gauge. The audio cues are so low at that rpm that the vacuum gauge is the only sure way to tell when all the moons align.
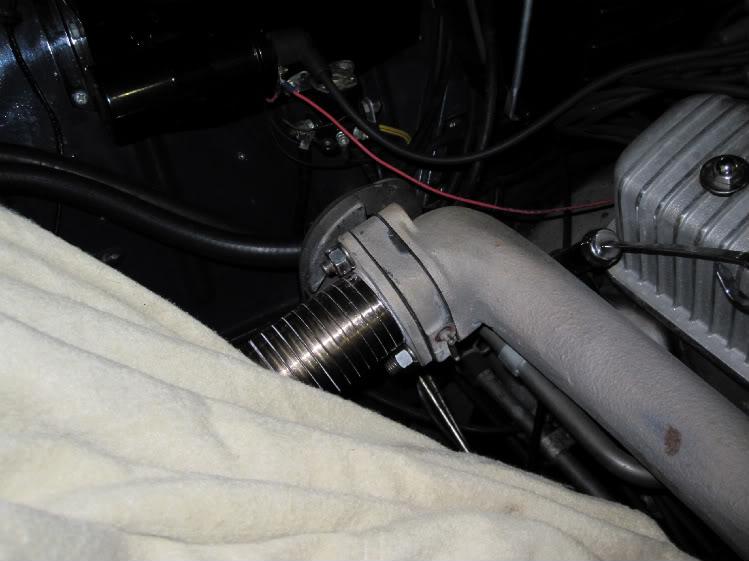
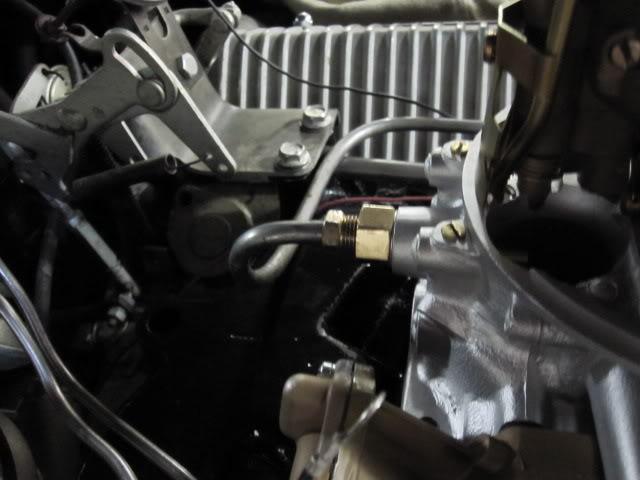
This is a close-up of my vacuum test port.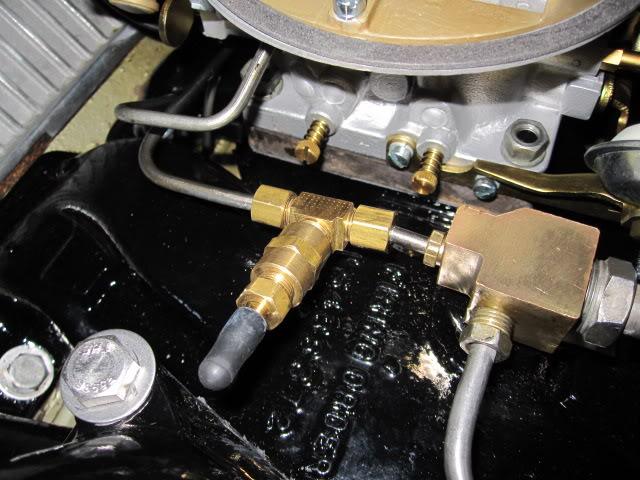
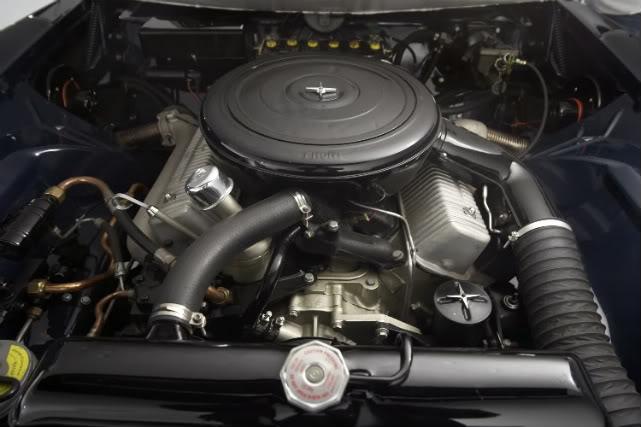
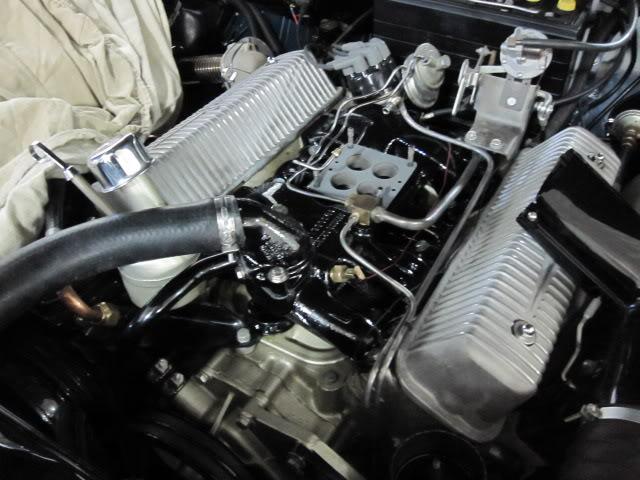
It's too bad you can't see the carb at all with the air cleaner on. Do they make clear ones?
I used this picture as the completed job as my camera doesn't do it justice. What a beautiful engine compartment.