- New Top
- Flathead screwdriver
- Needle nose pliers
- 10mm socket and extension
- 16mm socket
- 12mm socket
- Phillips screwdriver
You must be logged in to rate content!
4 minute read
Removing and replacing the convertible top on a 1990 miata
This isn't too hard of a job, 2 to 3 hours. The hardest part for me was reaching around the rollbar to get to some of the bolts. It helps to have a friend to help lift the old top off the car and put the new one on but I was able to do it myself. I was just extra careful to not scratch the paint.
1. Put top up
2. Remove the plastic tabs holding the carpet to the back of the interior. You will break some of these. The best way is to use a screwdriver to pry up the side then a needle nose pliers to pull it out from the Shaft. If you pry from the head of the tab it'll just break 
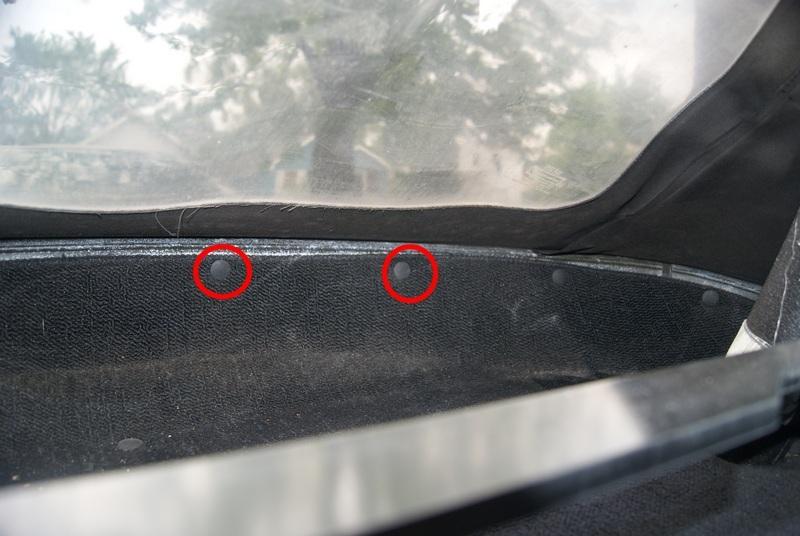
3. With 10mm socket remove the 13 nuts holding the top against the rear of the cockpit. Using an extension makes it a lot easier
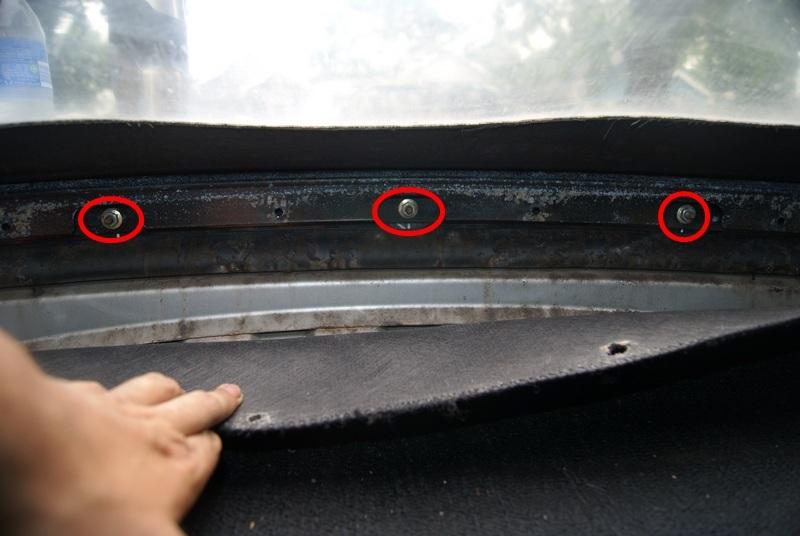
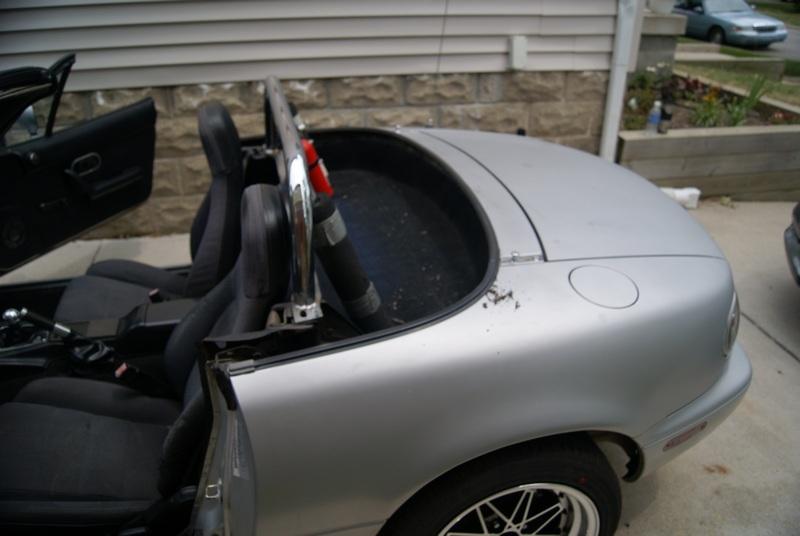
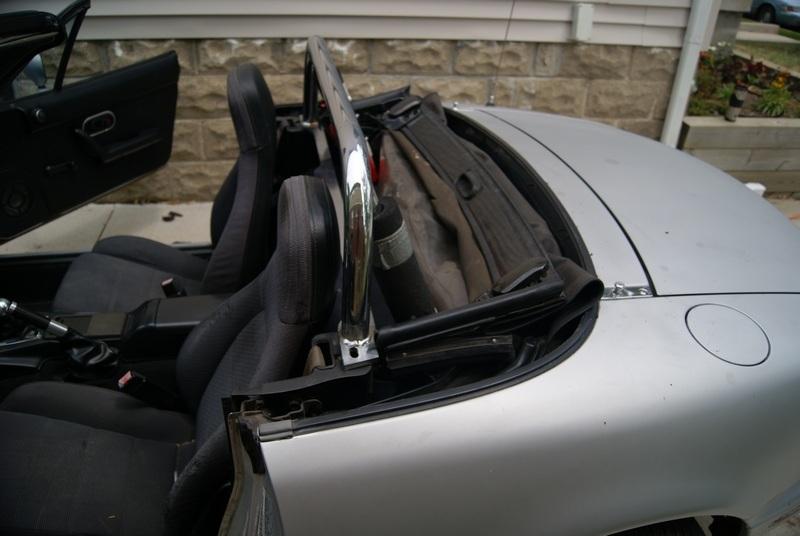
4. With the nuts off you can remove the 3 metal bars holding the top to the rear of the cockpit. I took the two side ones off first, then had to put the top down to remove the long center one from the car.
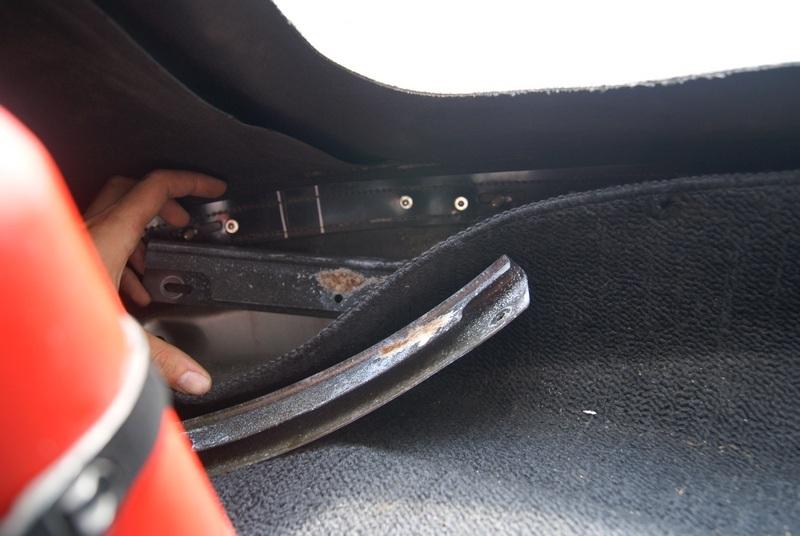


5. Put the top down. Use a Phillips screwdriver and 10mm socket to remove the screw and nut holding the metal top plate covering the gap between the body and the interior panel. Pull back the weather stripping.

6. Use the 10mm socket to remove the other nut further inward towards the center of the car and remove the plastic tap.
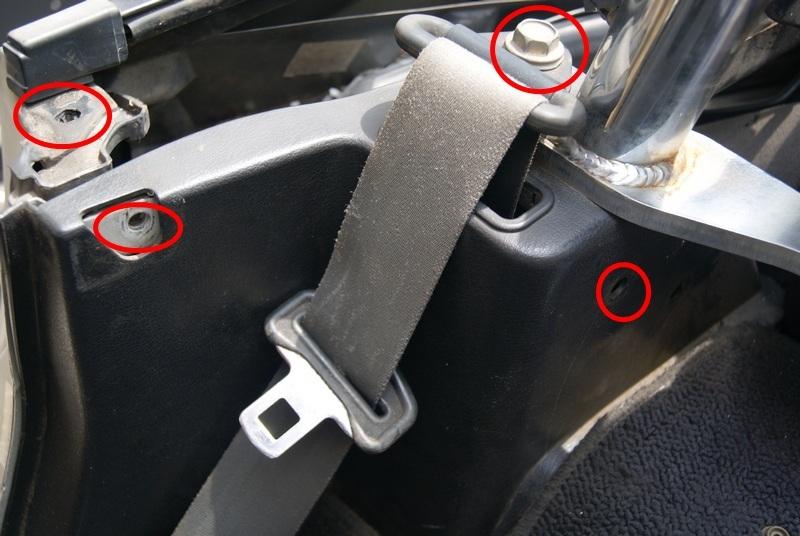
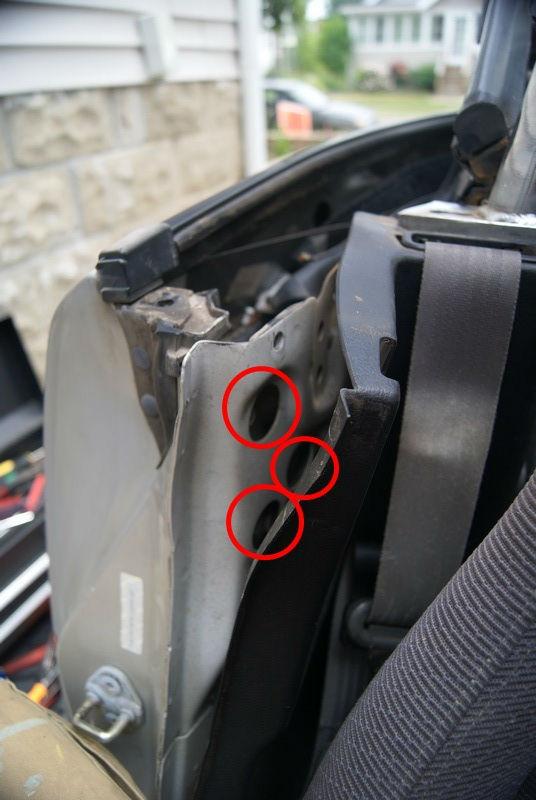
7. Use 16mm socket to remove the bolt holding the seat-belt to the body. There may be a plastic cover over this bolt. You can now carefully peel away the plastic interior panel
8. Use a 12mm socket to remove the three bolts holding the top to the body
9. Repeat steps 5-8 for the other side.
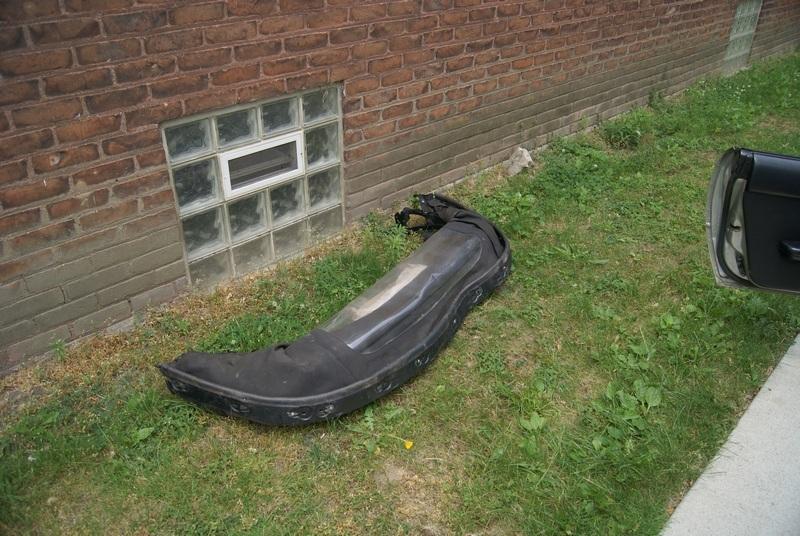
10. Carefully remove the top from the car, borrow a friend or neighbor to make this step easier.
11. Now would be a good time to do some vacuuming
12. Carefully put the new top in, make sure the seal to the back of the car is underneath the hinge that bolts to the side of the car.
13. To make sure the two side brackets are all lined up I put a bolt or two snugly on each side, then put the top up and finished with the rest of the bolts. Put the top up and down again with all the bolts in to make sure it is all working.
14. Re-assemble the seat belt tower and trim panels.
15. This part is kind-of a pain. Make sure the carpet is out of the way and push the bolts from the car body through the holes in the back of the top. Push those three bars over the bolts and thread the nuts on.
16. Now you can use the plastic tabs to re-attach the carpet to those three bars. I put the mangled ones on the sides so you can't see them.
Now you are all set. No more mildewy interior smells. Horray!