- Miata Exhaust manifold gasket
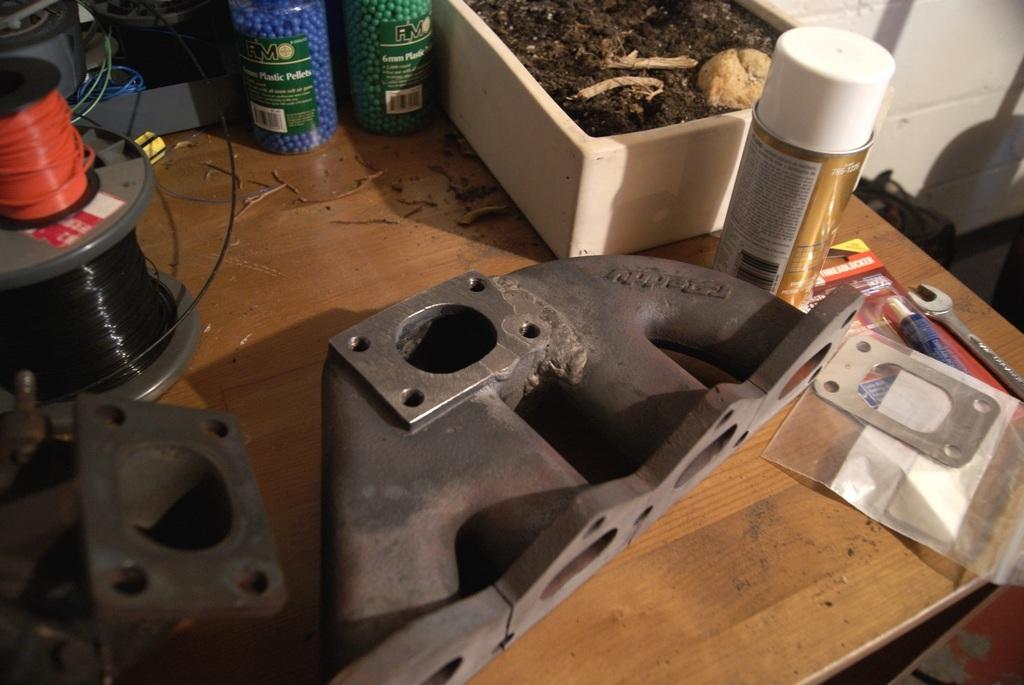
- Exhaust manifold to turbo gasket - Can be ordered from Greddy's site. The stud/bolt holes were too small and it had to be modified, which was a PITA.
- Turbo to Downpipe Gasket - I reused mine as it was hand cut from a copper sheet and still in decent shape.
- (Optional) - new bolts/studs to hold the turbo to the manifold.
- screwdriver Phillips and Standard
- 13mm socket
- 14mm socket
- 17mm socket
- Needle-nose Pliers
- Ratchet
- Sanding Block or something to clean gasket mating surfaces
- Extensions
- Swivels
- Copper Gasket Spray
- PB Blaster
You must be logged in to rate content!
5 minute read

Replacing the Greddy Turbo and Exhaust Manifold Gasket on a 1990 Miata
It is possible to remove the turbo by itself and just replace that gasket but the bolts are so hard to reach it was easier to just take the whole turbo/manifold assembly off at once. It was a good idea because the manifold ended up being severely cracked and needed to be repaired.
1. Use a screwdriver to remove the intake and outlet hoses from the turbo. I removed the whole intake to get some more room in the engine bay. You'll have to unplug the MAF to do this.
2. Use a screwdriver and a 17mm socket to remove the oil inlet and outlet hoses from the turbo. One is on top, the other on the bottom.
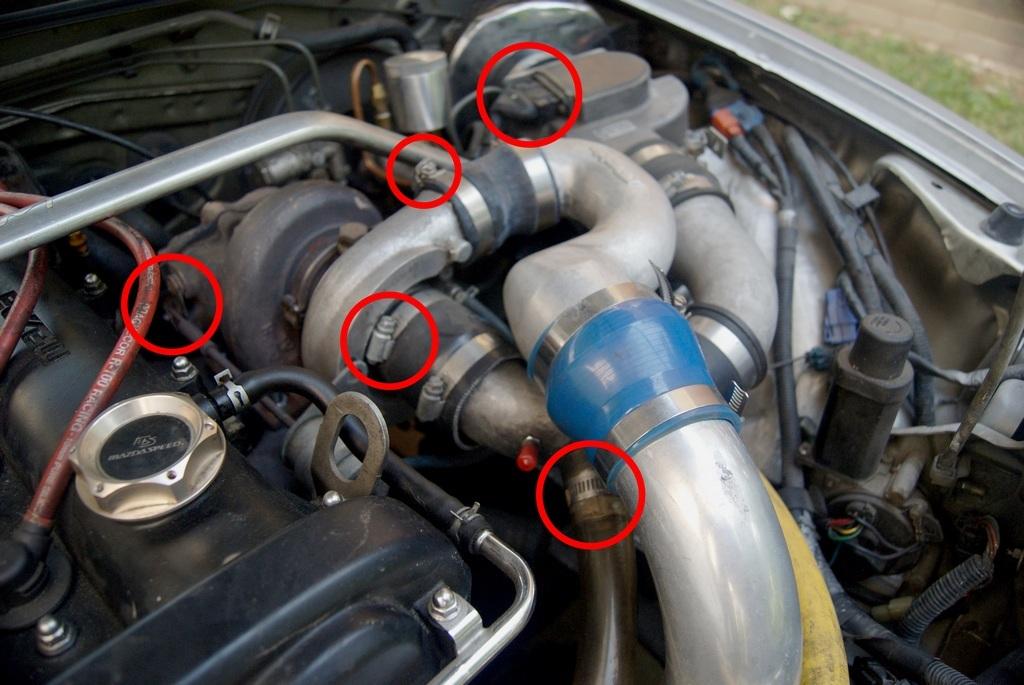
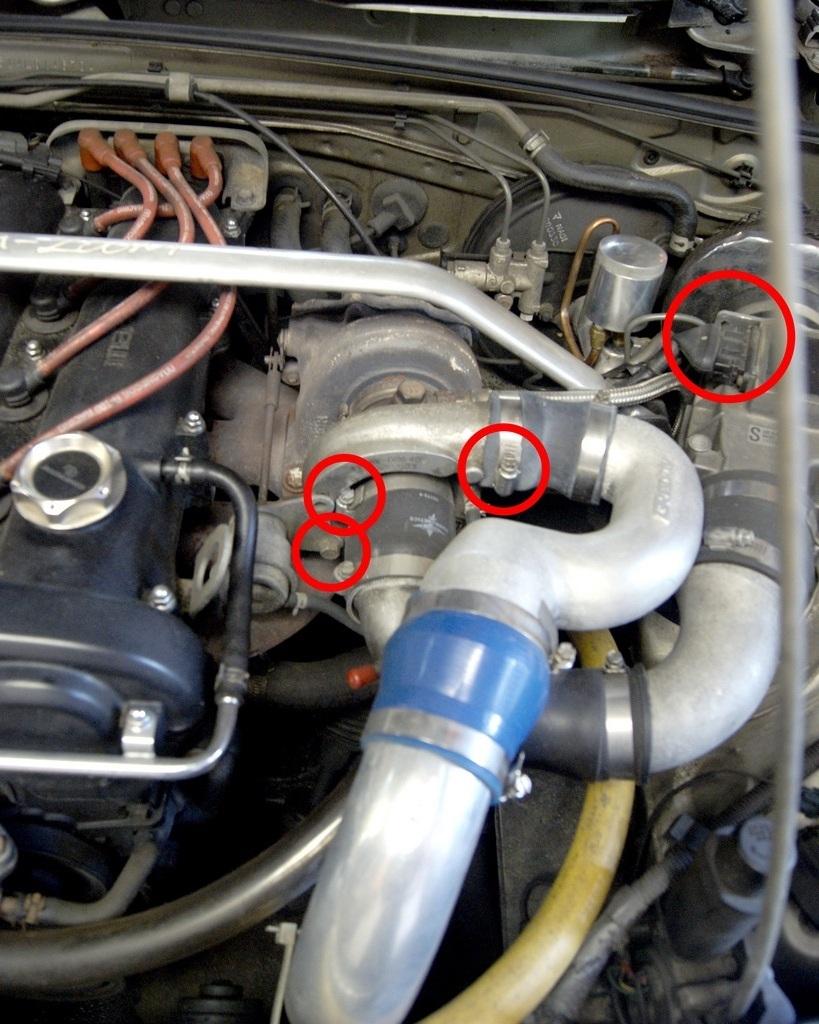
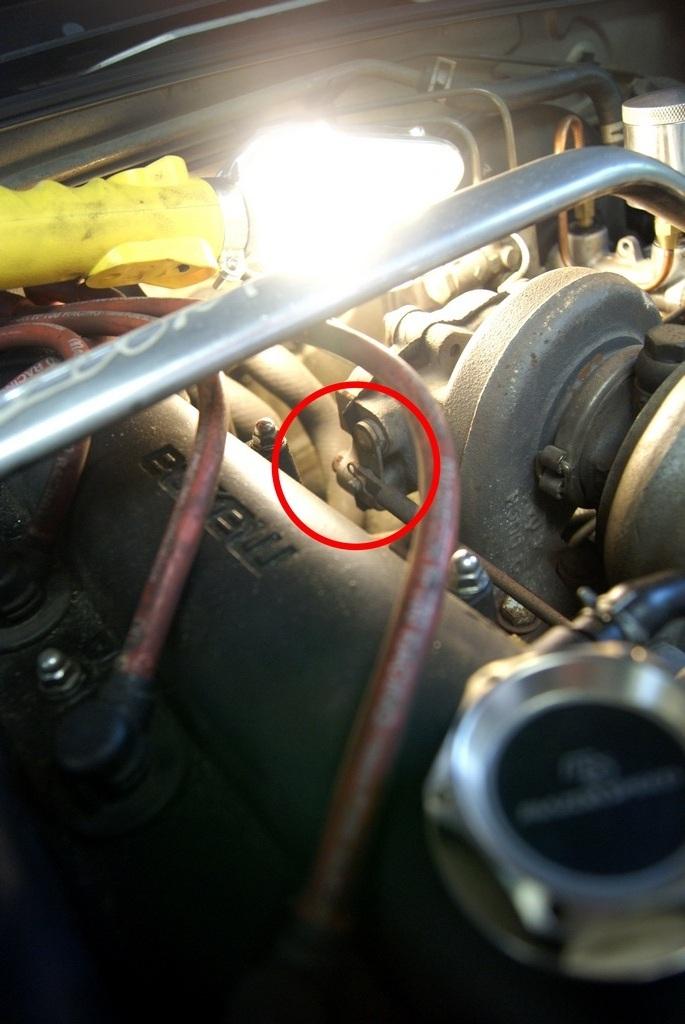
3. Use a needle-nose pliers to remove the pin for the waste-gate and a 12mm socket on the bolt holding the piston assembly. You can also use the pliers to remove the small wastegate hose from the turbo.
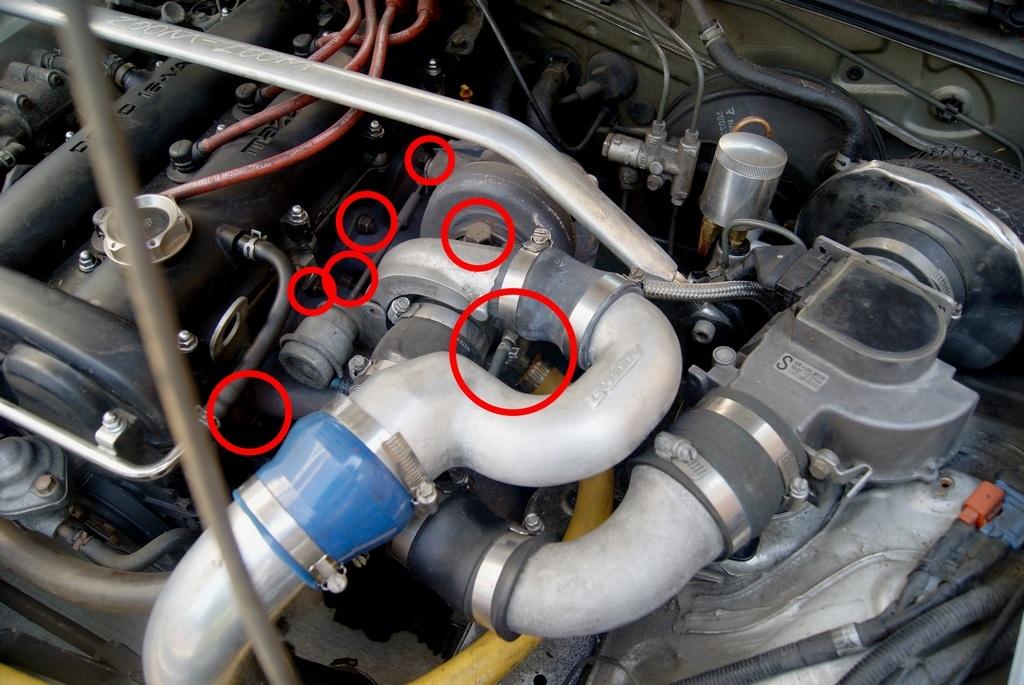
4. Use a 13mm socket to remove the bolts holding the downpipe to the turbo. The bottom bolt is quite annoying to remove, do this one last so you can adjust things. You'll know when you get there.
5. Use a 14mm wrench to remove the exhaust manifold bolts. If all the hoses and such are off you should be able to remove the whole assembly.
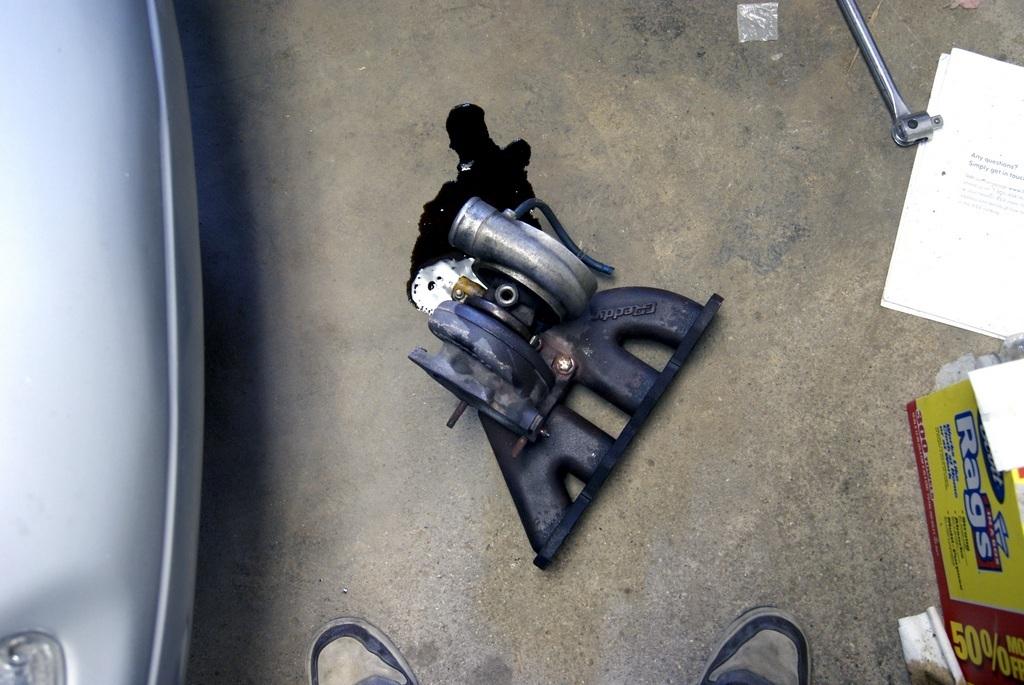
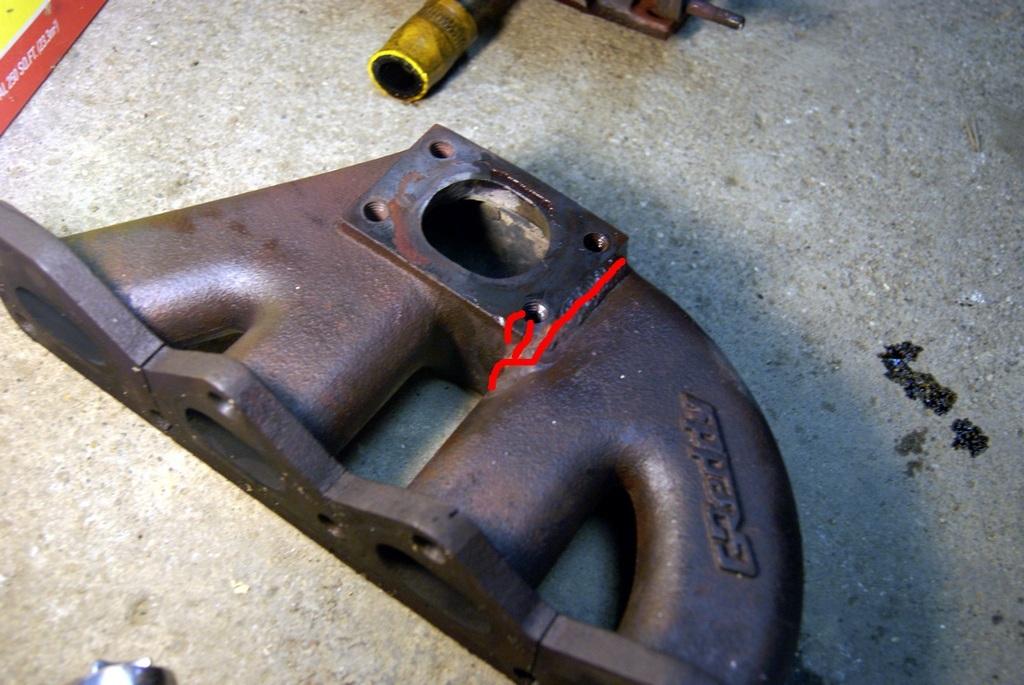
6. Upon closer inspection I saw that the exhaust manifold was badly cracked, almost all the way around. One of the bolt holes also had several cracks inside, which is probably why that bolt fell out.  The red lines show where the crack is.
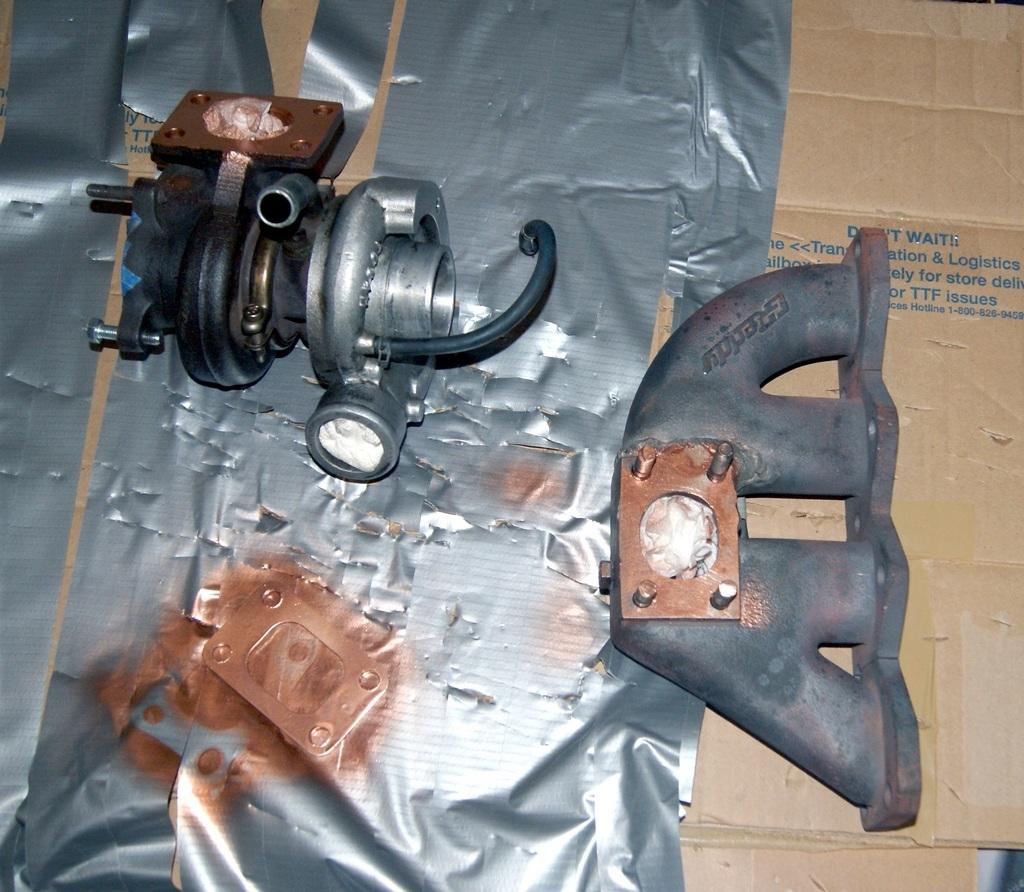
7. Thankfully I knew someone who could fix it for $20 and a bottle of Captain Morgan. He sandblasted it to reveal all the cracks, welded them up, and ended up needing to retap that one bolt hole since it was cracked to hell. He also planed the top of it nice and flat.
8. The old setup used bolts which didn't stay on too well. I got some studs that should do a better job. I used the high temp locktite on the studs, although it might not be hi-temp enough to work for this application. Unfortunately the stupid gasket didn't have holes large enough for the studs, and I had to grind the shiz out of them with a dremel to widen the holes.
9. After that is done make sure the gasket surfaces are nice and clean. Put a wad of paper towel or something in the turbo holes if you are sanding so no debris gets inside the turbo. I sprayed all the surfaces with the copper gasket spray which should help it seal.
10. I used locking nuts to hold the thing together. Don't use the nylock kind as the nylon would probably just melt or burn away from the heat giving you loose nuts. I had to cut some of the studs due to clearance issues. Make sure you tighten these really well.
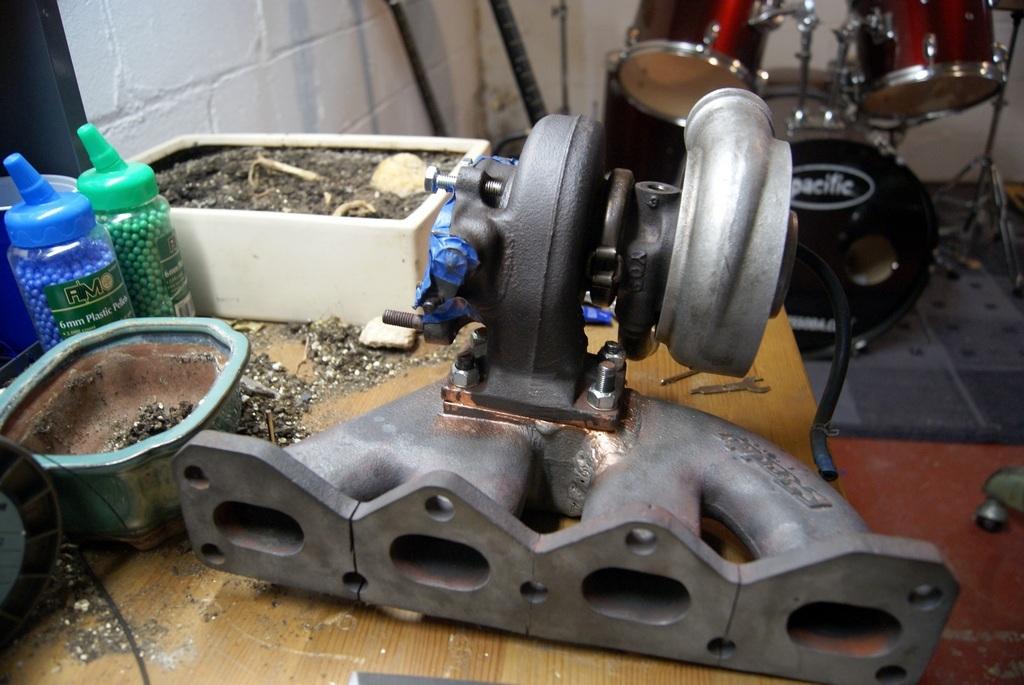
11. Now you are ready to slap everything back together. First make sure the gasket surfaces for the exhaust manifold gasket are clean, and put the new gasket on. Then put the turbo assembly on to the studs sticking out of the block.
12. Now reconnect all the various hoses to the turbo. When putting the downpipe on, do the bottom bolt first it is a lot easier that way. Re-attach the wastegate. After connecting the oil outlet hose I poured a little oil into the turbo so it isn't totally dry when starting the engine. Once everything is re-connected you should be good to go.
13. After bolting everything back together I ran the engine and revved it a little bit, then let it idle and checked around for any leaks. If it all seems bolted tight you should be done. Enjoy the boost!

Great detail!
Posted by Diggymart on 3/13/20 @ 3:25:32 AM