You must be logged in to rate content!
7 minute read
E63 Front Rotor Replacement DIY - RacingBrake
Compliments of Jon2007E63P30 @ http://mbworld.org
With 87,000 miles on the rotors including 2 track days, they were shot. I have had the RacingBrake front rotors for a few months waiting for an opportunity to put them on. This was supposed to be a day for both front and rears, but I could not find the E18 Torx socket for the rear. I will post that later.
I will tell you that the most difficult thing about the install was finding any reliable information on the torque requirements of the front caliper bolts. I had read stories about 200ftlbs to remove them and 135ftlb torque spec. However, all of these were from E55 guys. So I am ready to have to find a 3ft breaker bar as I remove the calipers and I am able to easily break them free by hand using a 18inch bar. This did not add up. Including the fact that the caliper is aluminum. So, in the end, I only torqued them to 85ftlbs based on some information on Brembo installs. If someone shows me definitively they should be 135ftlbs because they show me in a manual, I will re-install them. The bolts are Grade 10.9 and capable of >200ftlbs.
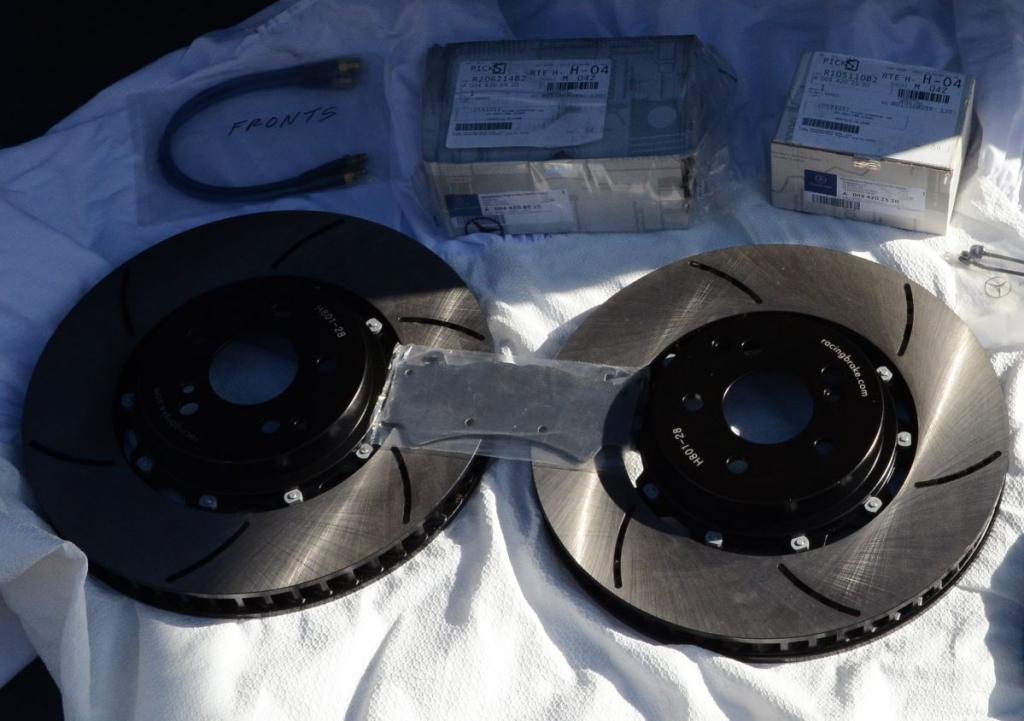
So here I am with parts ready to go, new brake lines and titanium shims from from evosport, OEM brake pads and sensors, and the new rotors.
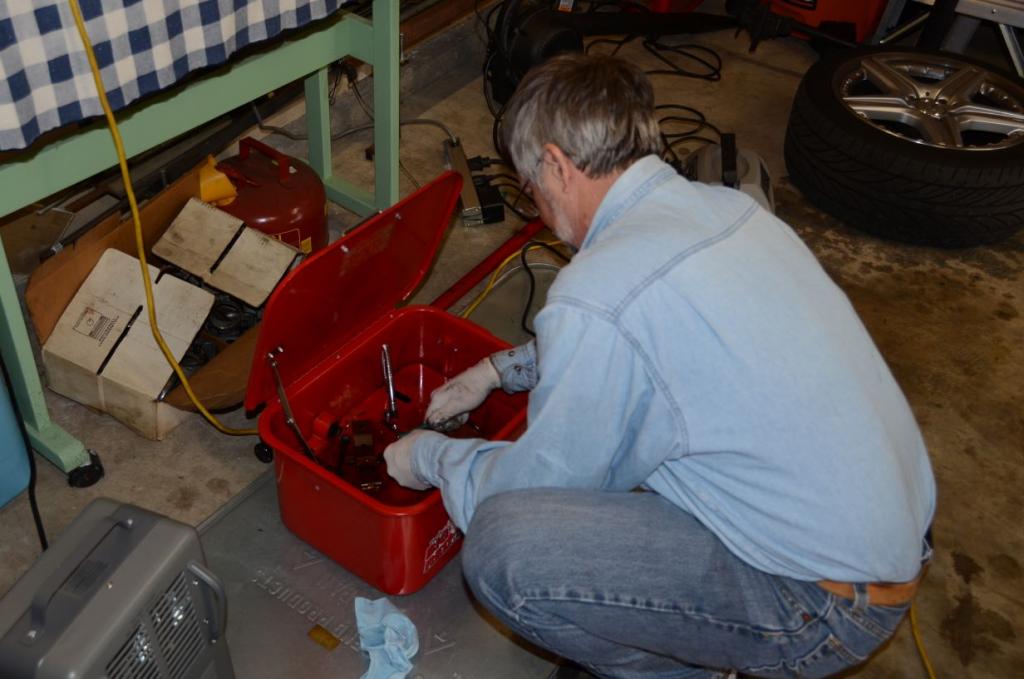
I was working at a friends garage and he had a parts cleaner facility that made it easy to clean the pins, clips, and bolts.
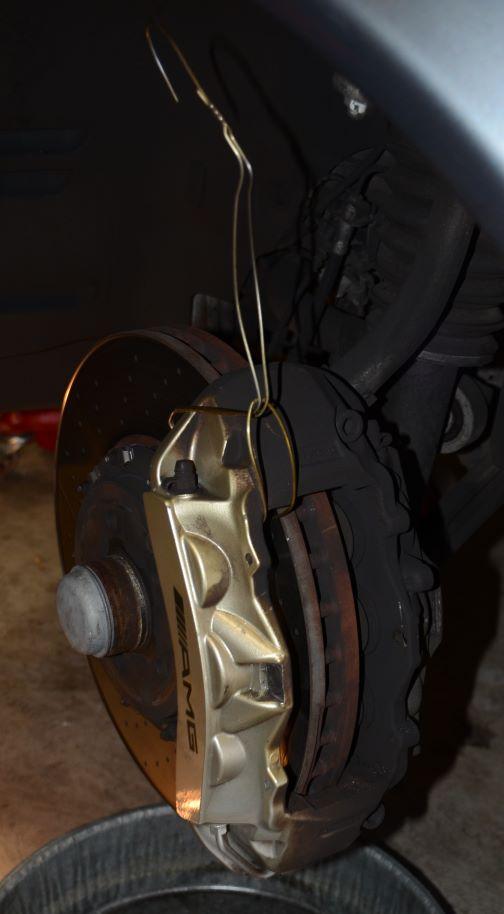
Here I am ready to remove the caliper. I used a hanger in order to hold up the caliper once the bolts were remove. We decided to see how late it was before deciding to do the brake lines. Turned out to be a smart move, we did not install the lines that day.
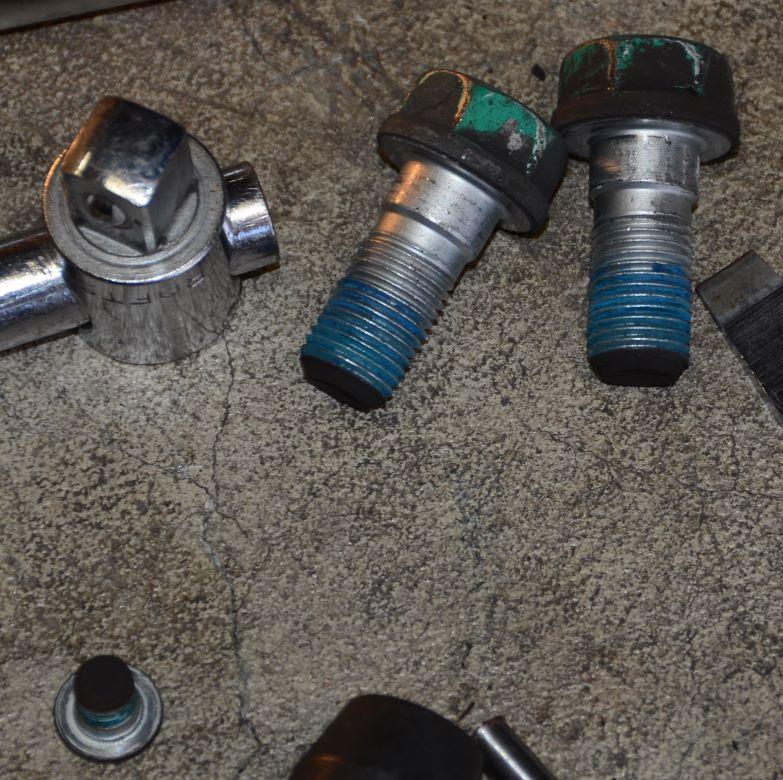
Here are the 21mm (socket size) mounting bolts and caliper keeper bolt. I cleaned them off and re-applied medium strength Loctite when replacing.
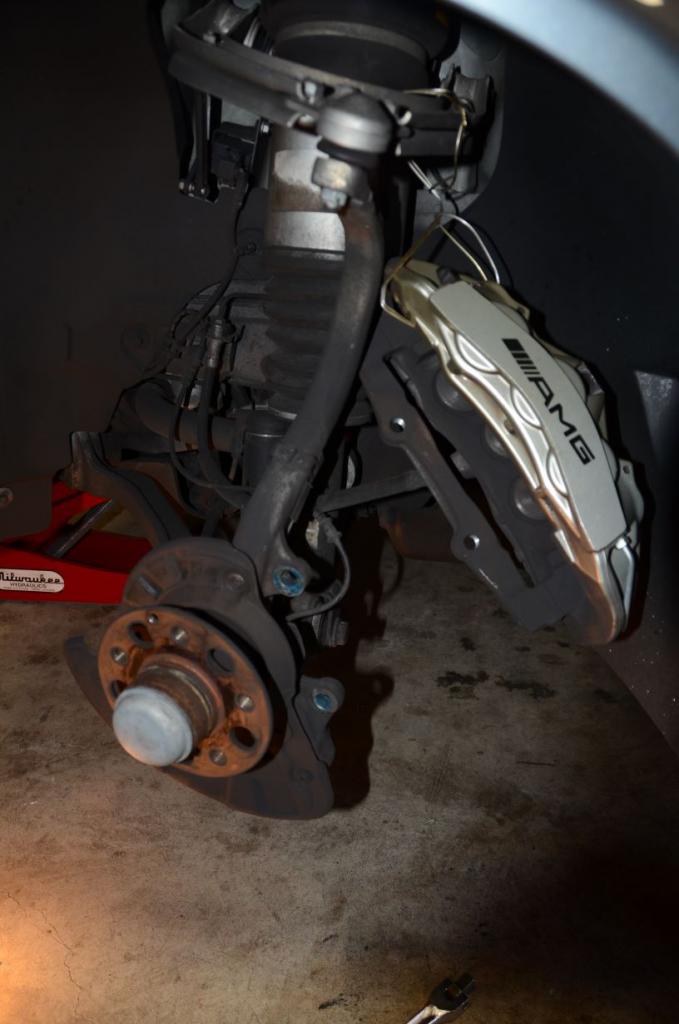
Here is the left side with everything removed. I wire brushed the hub surface and applied a think layer of synthetic axel grease as a rust inhibitor. Note the wire to the right of the top caliper mounting hole; the fat part of the wire fits into a clip behind the hub assembly. I needed to remove that to ensure I had clear access to the upper mounting bolt. Do not forget to put it back. The right side has two wires since that is where the wear sensor is located.
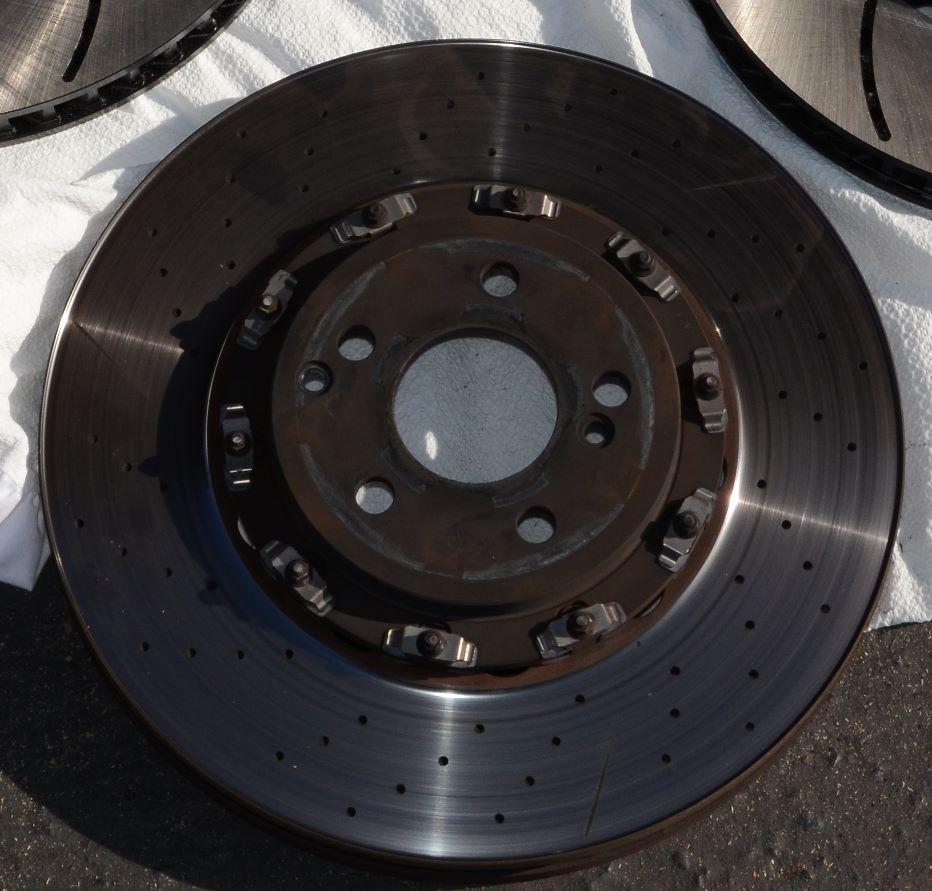
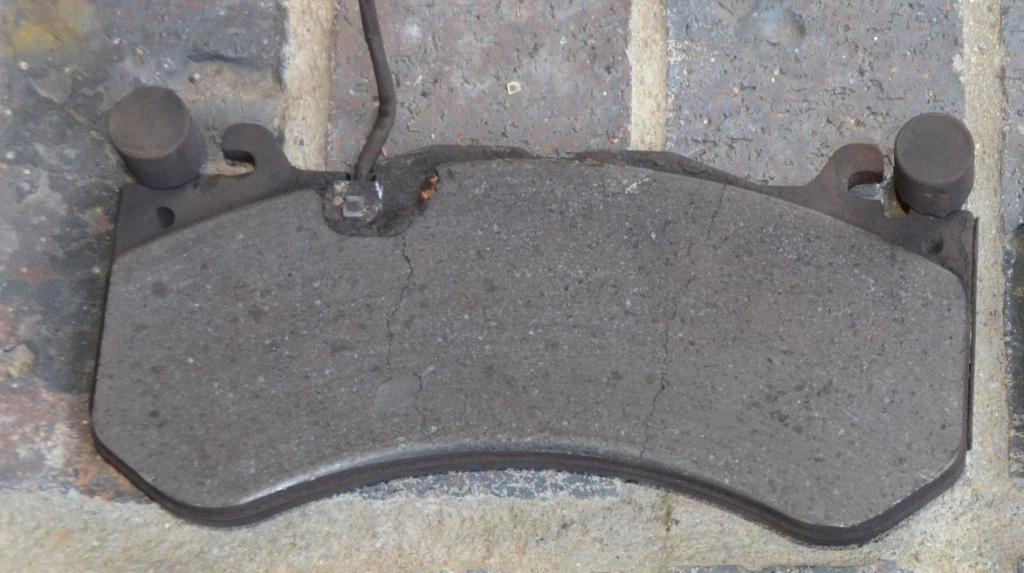
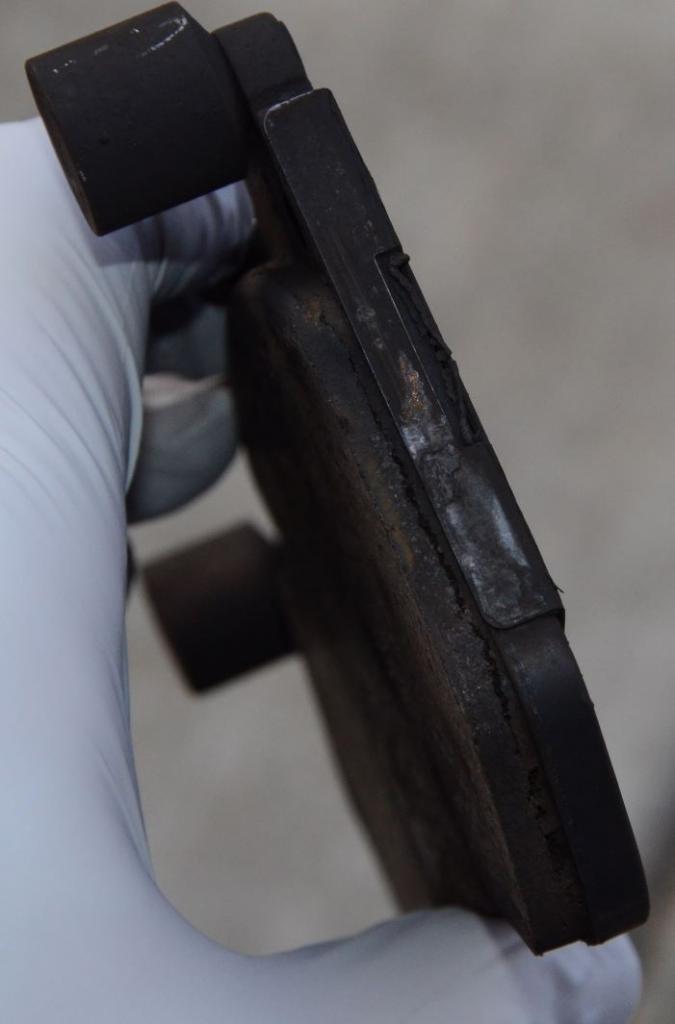
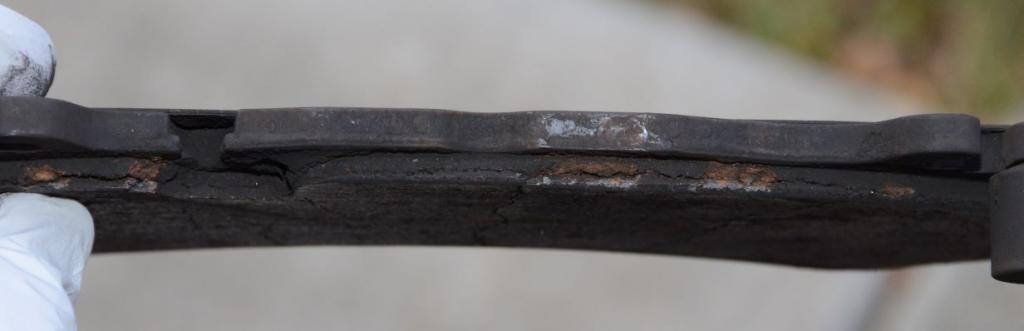
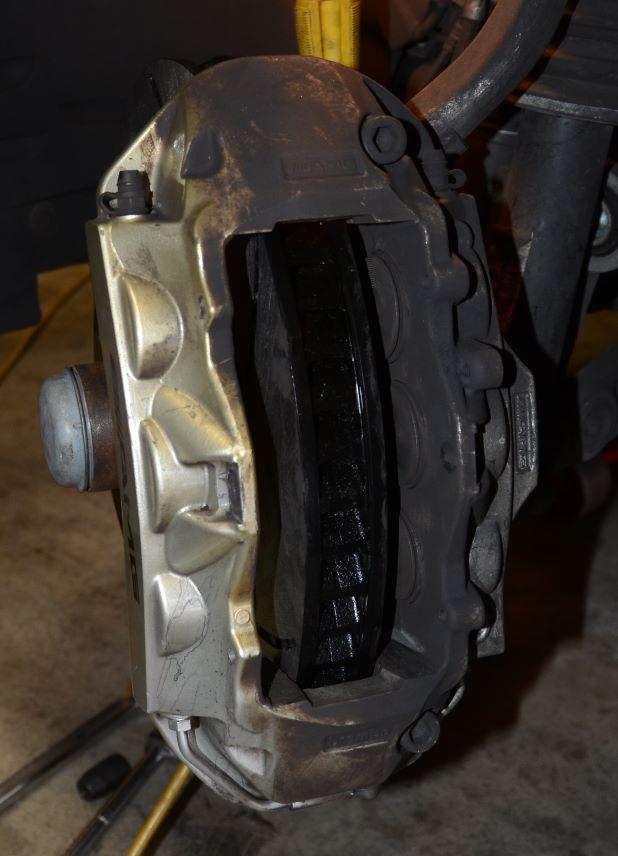
Here is the rotor I removed. Note that the slots are nearly gone. This is easily below minimum thickness. I do not want to get my hands dirty tonight, but I will follow up with measurements and pictures of the lip on these things. Not pretty. Also note the brake pad shots. Nearly to the point the wear indicator would have turned on. Also, the cracking indicates just how hot these things got. Not sure if this would have happened when I installed them during my Thunderhill outing or if it was at Laguna. Laguna certainly turned the calipers bronze.
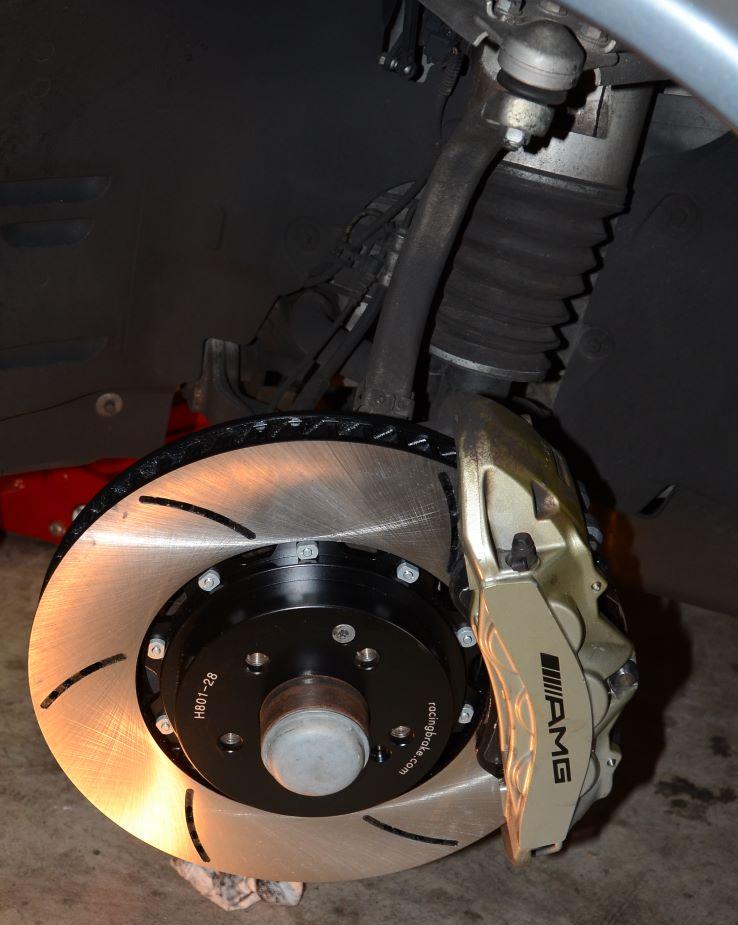
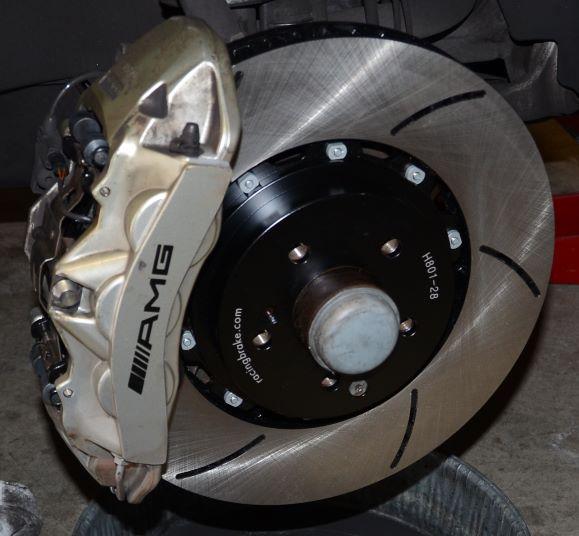
Here the new rotor is on and the bolts are only hand tight. I was not ready to torque them down until I had fitment on the pads. I did not need to remove the rotor again, but the fit with the new pads left no room for the Titanium shims. I do not use the word "tight fit" because without the shims it was fine. I am sure the shims will fit before my next track session. Titanium shims act as an insulator between the hot pads and the pistons. As a result, less heat goes to the brake fluid.
So here is left and right all done and torqued to 85ftlbs as mentioned in my opening discussion. Wires are all back in their retaining clips.
Although I did not perform a runout test on these, there is no indication anything is off. They have been working well. Hard to judge friction level given the machined surface has not been worn away yet. I followed the road car brake in recommendation from RacingBrake.
Some other notes. Use rubber gloves. I went through a bunch. Can of break cleaner to spray things off, in some cases to clean it up just for inspection to see if any of the piston rubber boots look aged or cracked. Also a pan to catch the brake cleaner. Remember which way the brake pad springs installed. I did the left side first and had it upside down. When I did the right, the little clip for the wear sensor wire was in the wrong spot and I realized my mistake.
Next time, I will post the rear install.
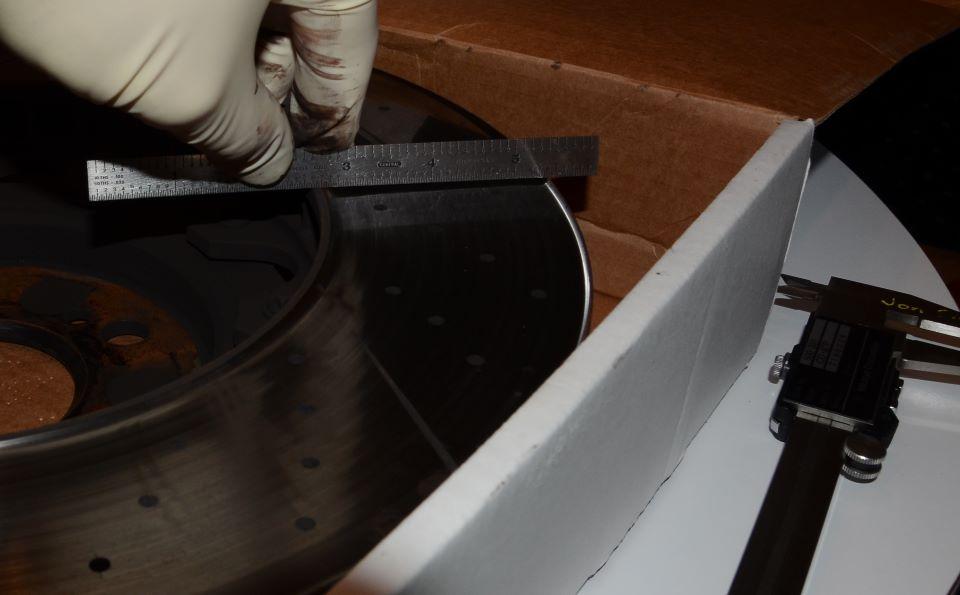
So I said I would update with the old rotor pictures.
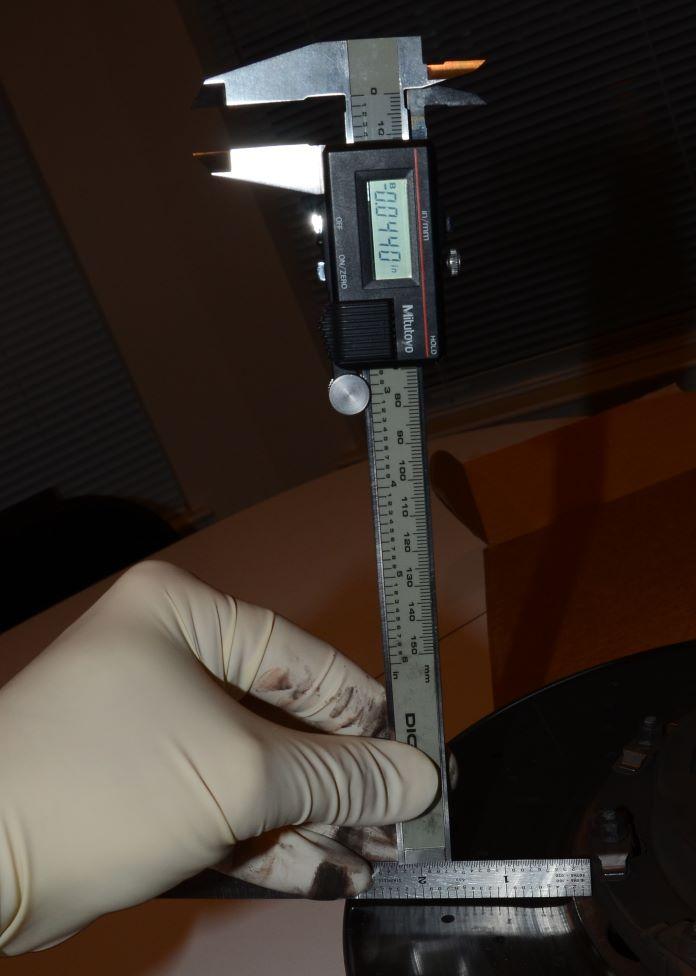
Technical: Min thickness 1.299 inches
Measured wear total on inside edge, 0.140 inch average
Measured wear total on outside edge 0.095 inch average
Approximate initial thickness, 1.40 inch
Measured thichness about 25% in was 1.31 inch (1.4-0.095=1.305 thus confirmed by two methods.
Of course that means the inside was about 1.260, which is below minimums. No surprise because the slots are gone.
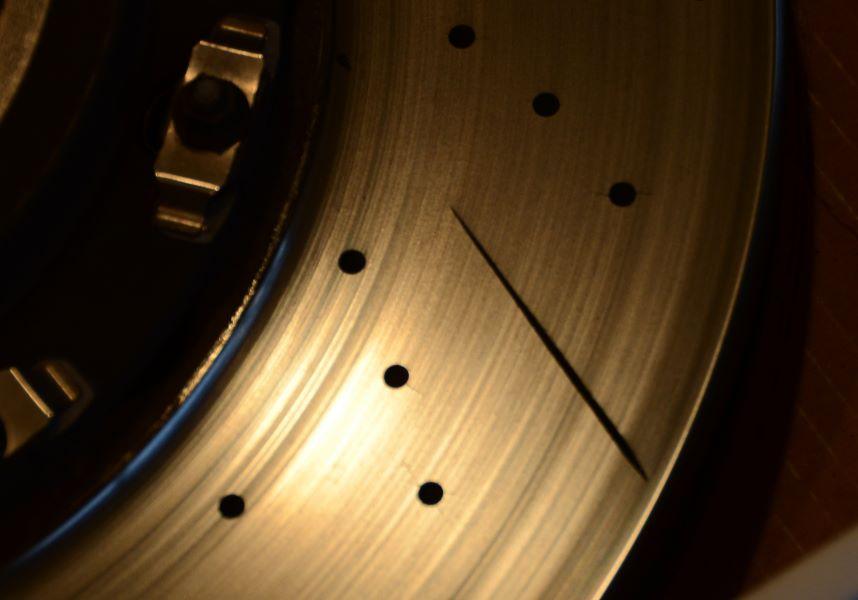
Enjoy the pictures below. Hey, I never notice the stress cracks around the cross drill holes. I have looked in the past but I guess the light was just right. This is one of the key reasons I went with the Racing Brake slot design.