You must be logged in to rate content!
9 minute read
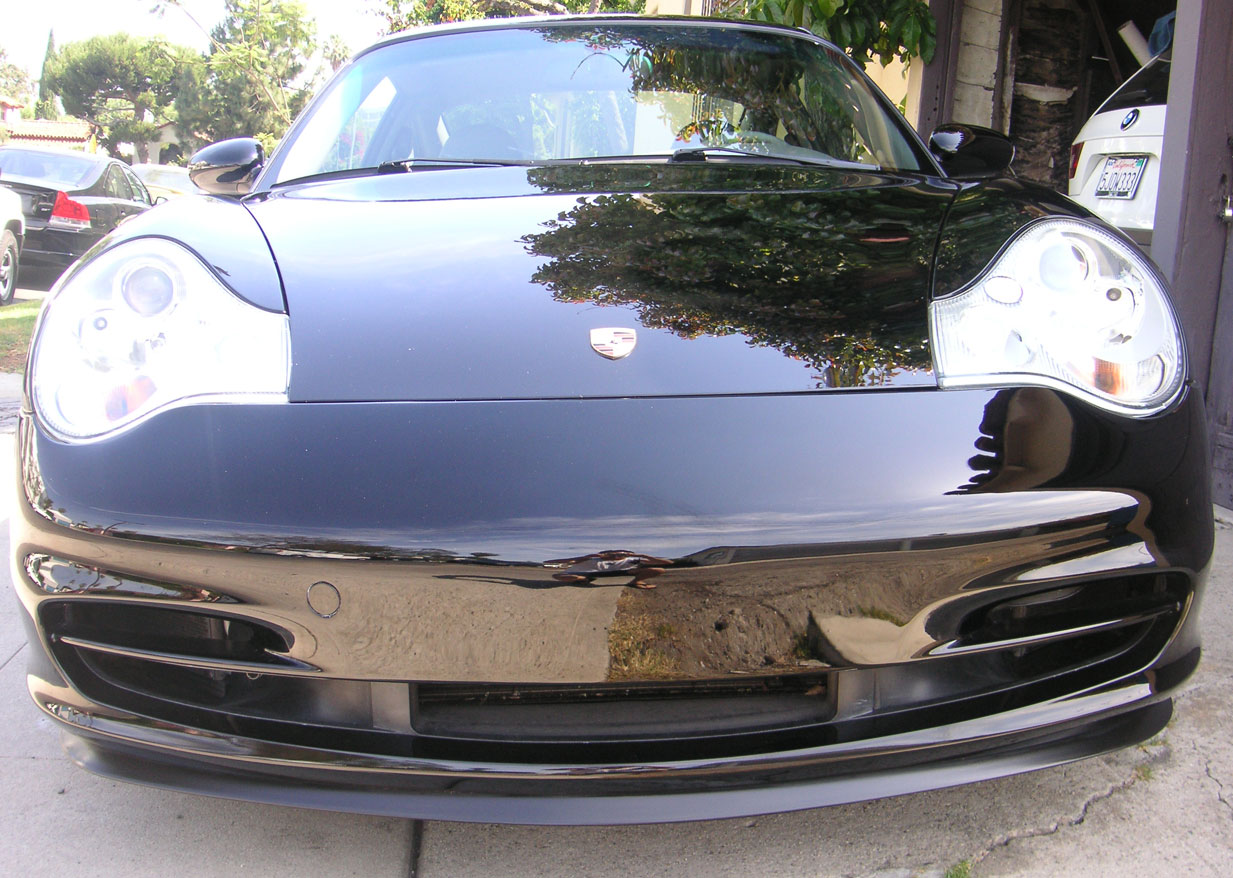
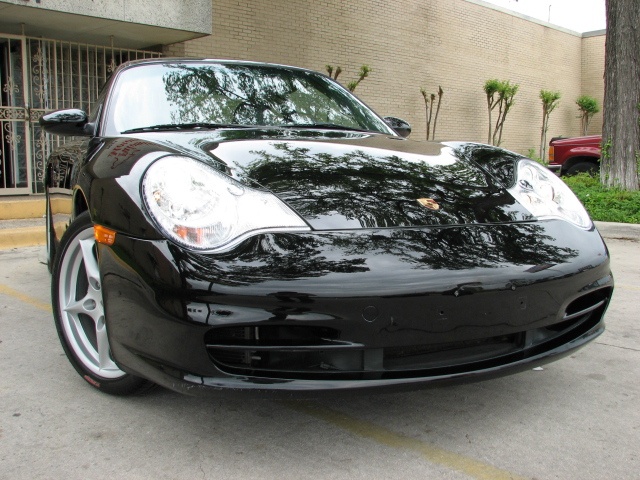
Installed 02 GT3 lip spoiler on OEM 996 C2 bumper
Compliments of p0rsch3 @ www.6speedonline.com
The project: Add lower chin spoiler to 2002 C2 standard bumper (08/01 and later facelift cars only).
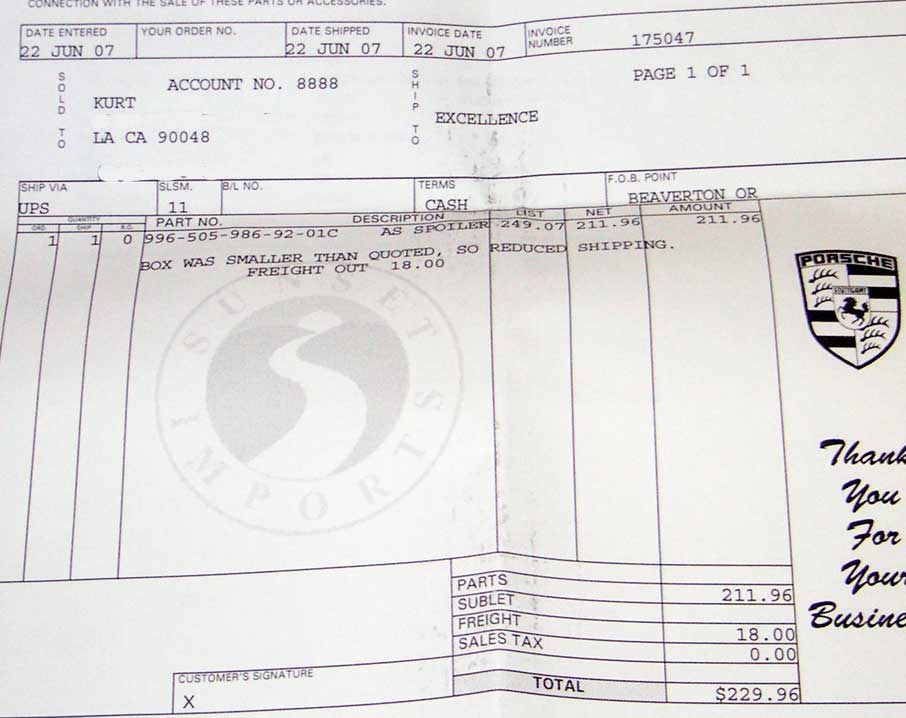
Cost - $211 plus ship
Install time - about 1.5 hours
Difficulty 4 out of 10 (IMO)
Tools masking tape, screw gun, dremel
Optional tools- two bricks, two medium size Fedex boxes (for the ghetto-style garage install..)
Porsche part number: 996-505-986-92-01
I was trying to find a way to improve the aerodynamics of the OEM 02 C2 front bumper, without actually replacing the bumper.
I figured that adding a chin spoiler would give some added benefit, but where to find one?
Looked high and low for aftermarket add-on lips, but only found one from TA ($700+) and another from some ebay dude
but it was ugly as sin- and $600
I came across a thread at renntech where some pcar owners had bought some sort of inexpensive under-spoiler that
fit on very well. No one had specific info other than they bought it on Ebay germany and that they think it is an OEM part.
I worked with Ric at Suncoast (Florida dealership) and Jeff at Sunset (Oregon dealership) to try and track down the elusive part.
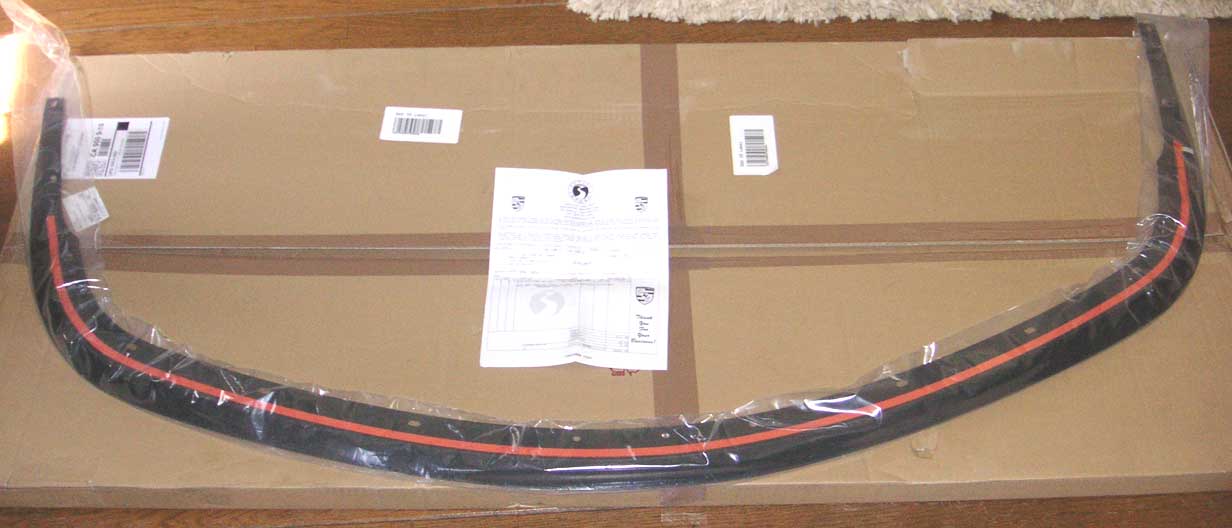
What I found was the 02+ GT3 front bumper lower-lip add on for about $200. It is black, poly, and screws on under the bumper.
Looking at pics it seemed that it was a very close geometry to the standard 02+ bumper and might fit with minor massaging.
So, I ordered one from Jeff at Sunset Imports of Oregon www.sunsetimports.com (would have ordered from Ric @ Suncoast,
but the shipping to West Coast was killer!!)
Ric - Suncoast Porsche www.e-partssales.com - Florida
Pics and steps below, let me know what you think-
Invoice and part number:
The part: 2002 GT3 lower lip
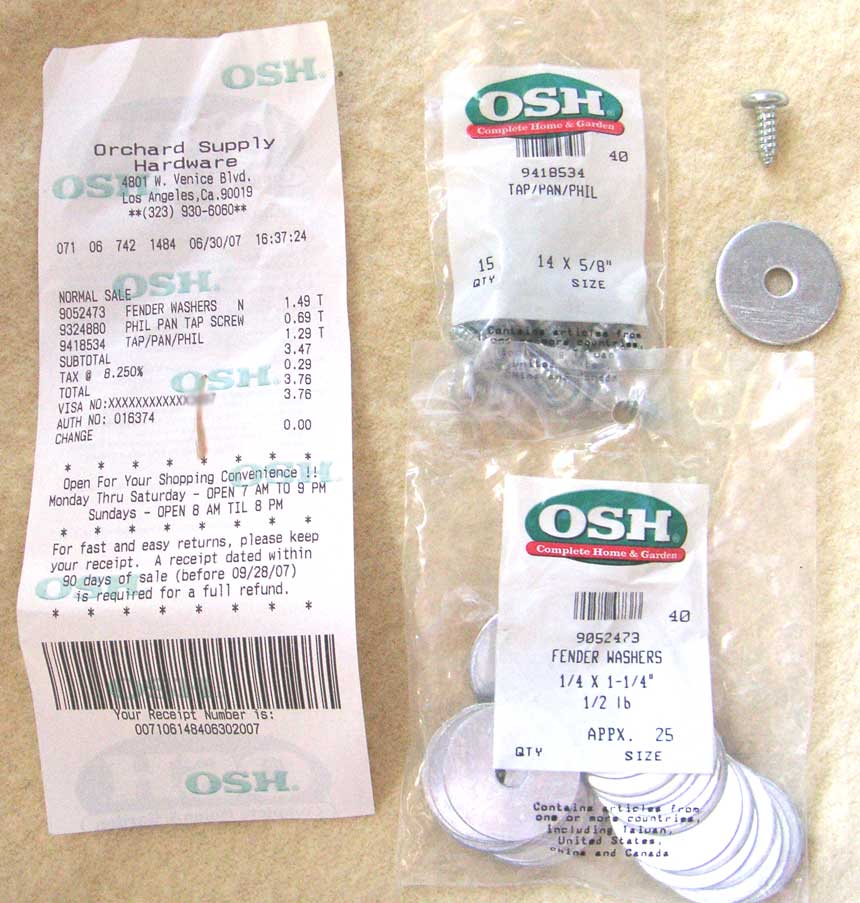
The mounting hardware:
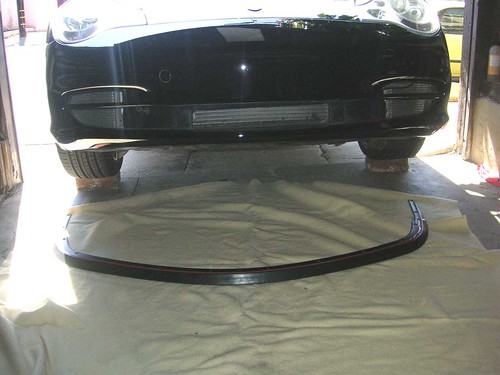
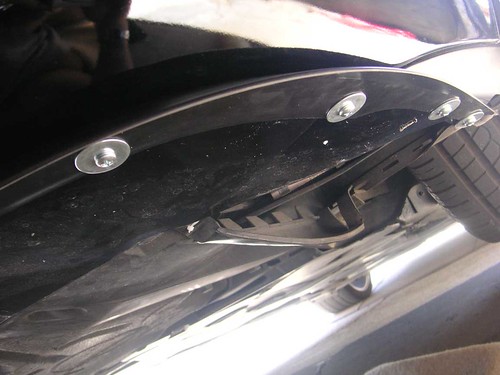
The bumper before:
 The
The
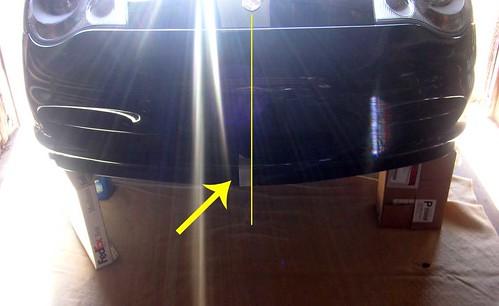
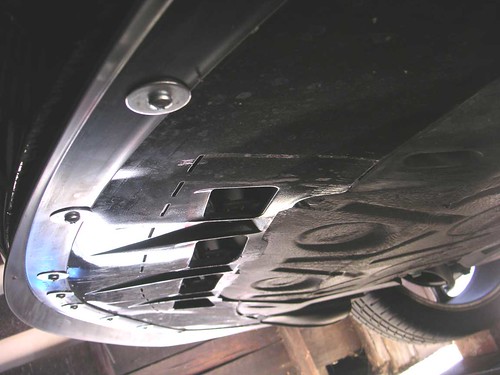
The bumper after:
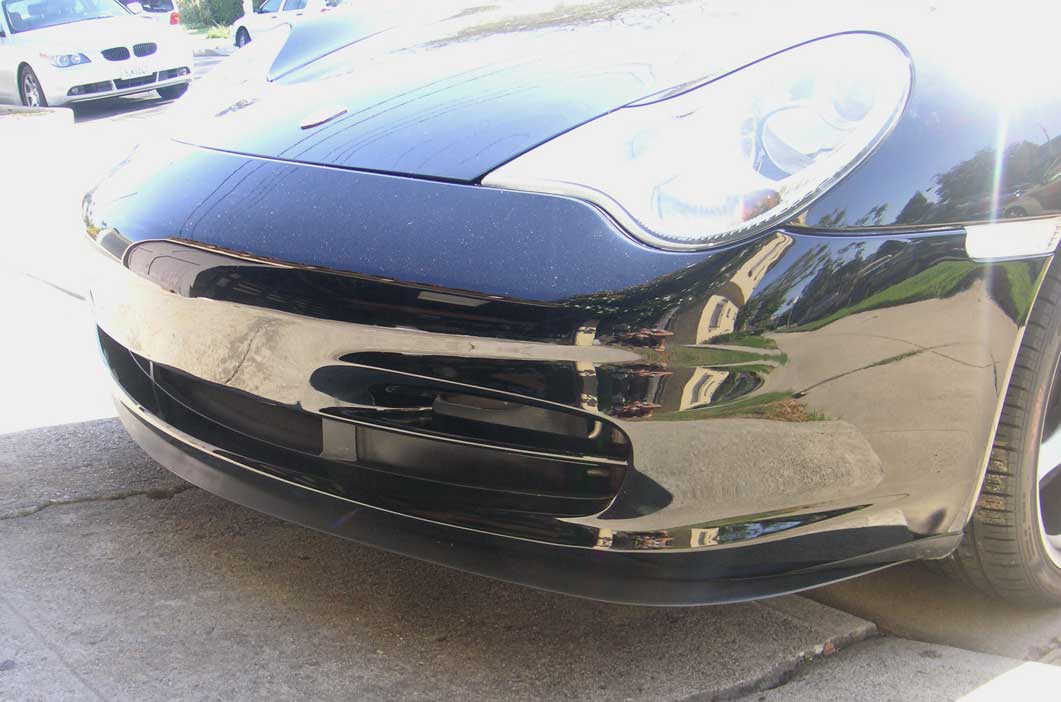
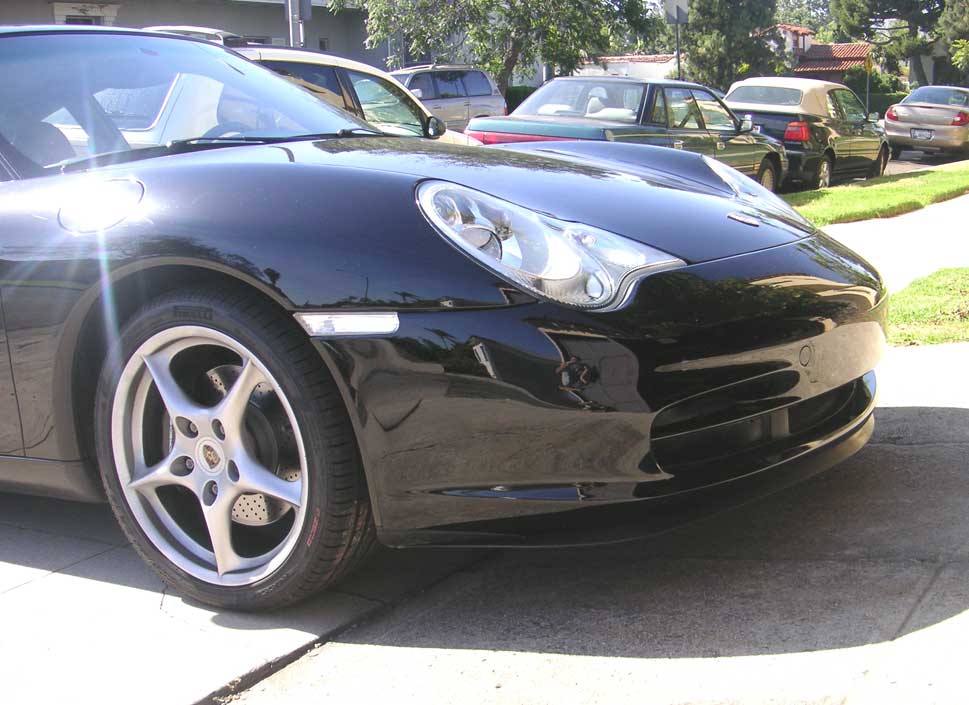

So it is a very subtle enhancement, may help reduce under-car air a bit especially after the car is dropped 1".
If anyone else is keen on this idea I will post the rest of the steps along with pics-
The fit / finish is very good and the lip sits totally straight from all angles. It may look a bit off in the 3/4 view, but it is totally straight.
1.
------------------------------
DIY STUFF
------------------------------
Ok so here's the steps. This is a pretty easy install, you just need to have a good eye to line it up before you drill holes and screw down.
1. You need about 18" to 24" under the car to lay comfortably and adjust / fasten everything. Most of your work will be under the car.
So, get something SAFE to jack up your car with- Don't be ghetto like me with the "angled driveway 2-brick method" - I do not want to be responsible for you getting squished. btw, I used OSHA-approved bricks...
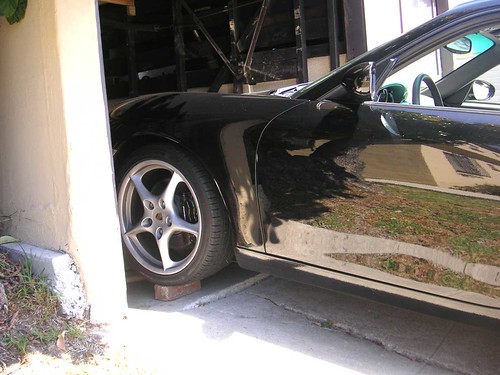
Lay out a blanket after you have the car up high enough and lay the lip under the car: (sorry for the crappy pics, the afternoon sun was coming straight in behind the car)
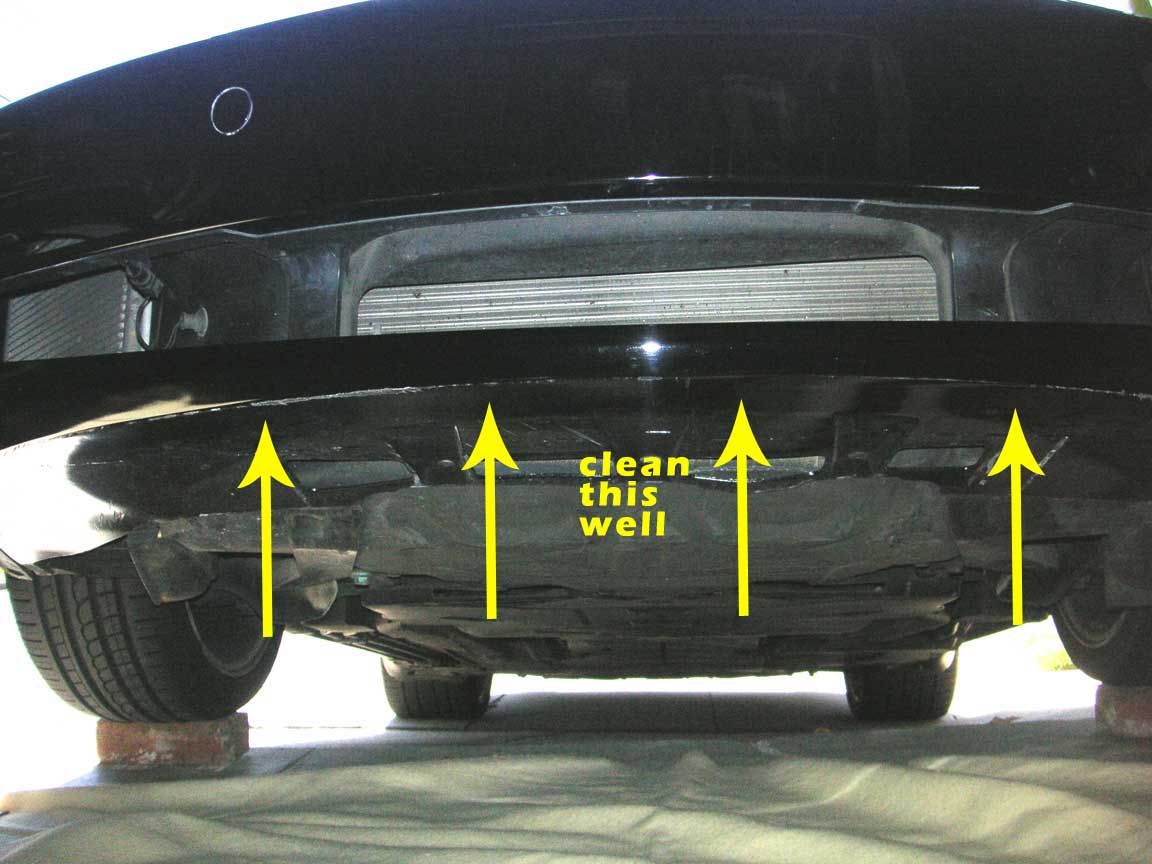
Clean the underside of the bumper and if neccessary chip off any scraped plastic (for those of you who park by braille...). You want a smooth surface.
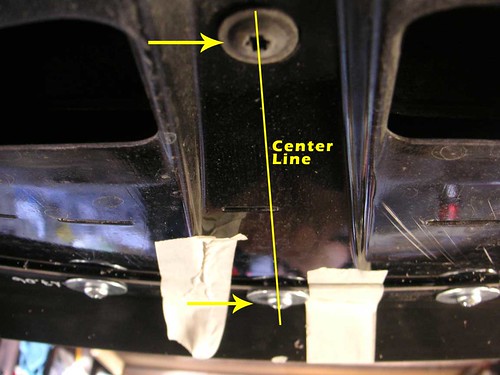
you will want to line up the center of lip with the center line of the car.
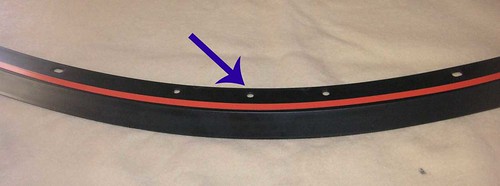
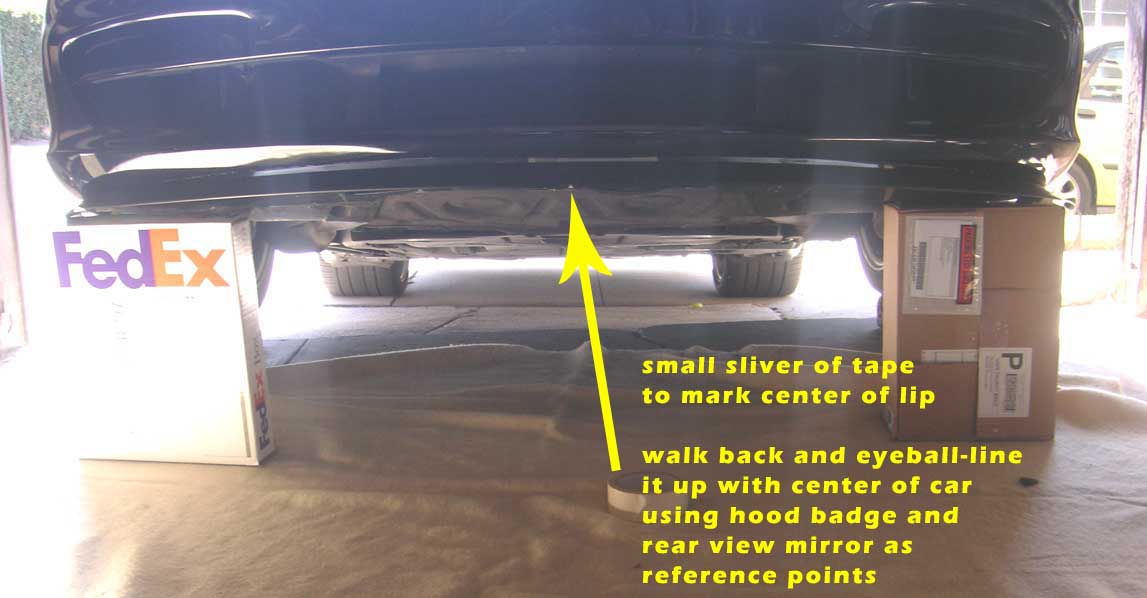
I used the center hole on the lip as a reference then stuck a sliver of white tape on the front edge of the lip. when I put the lip against the car the tape sliver gave me a center reference mark for the initial fitment.
It is easiest to get your initial fit if you can sandwich the lip up to the car snugly, then move it around until it looks straight. i used a couple of boxes for the props that held the lip against the bumper. (those free Fedex boxes do come in handy!!)
MEASUREMENT:
I set the center of the lip 1/4" recessed from the front edge of the bumper.
On right and left bumper corners, the mounting side edge of lip should be flush with the underside front edge of bumper.
At the wheelwell sides, you should have approximately 1.2" of the lip ends protruding into the wheelwell area.
If you line up initially to these specs, you are off to a good start.
Now that you have it in place and have adjusted it around to get it even, use a piece of tape on the middle center of lip to hold the lip in place on the car. Ditto for each of the sides nearest the wheel well.
Now crawl under the car and look at the center mounting hole of the lip.
It should line up with the center screw that holds the bumper to the car.
this is a good check to be sure that you have every thing centered. If you do not, you will see a lot of the orange tape of the lip sticking out on one corner of the bumper or the other. So it's pretty easy to tell when you have it just right. You should barely see orange tape at either of the bumper corners or sides.
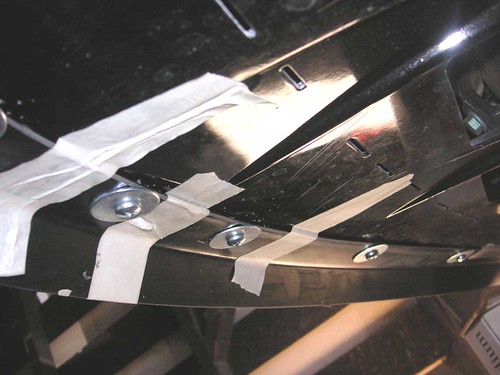
Now tape the lip to the bumper in several spots to hold it in place.
(This pic is just for reference of line-up- You should not have your screws in yet).
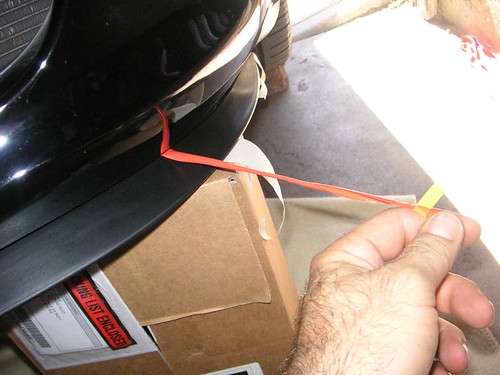
Starting on the drivers side of the lip, grasp the white masking tape handle on the orange sticky cover and begin peeling it off of the adhesive. do this slowly and gently so as not to move the lip. press the adhesive up firmly to bond to car.
2.
Now, you will begin putting in your screws and washers.
Start with the center and work your way out right / left.
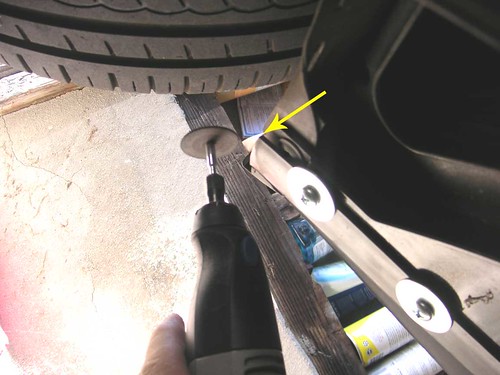
I used a dremel with drill tip to make 1/8" pilot holes, then used a screw gun to put the screws in. Do NOT over-tighten or you will strip the plastic.
I put the screws in snug at first but was still able to slide the washers a bit.
I made a second pass with a hand screwdriver and while pushing the washers forward, tightened each screw.
Put in the rest of the screws and pull tape off. Remove boxes.
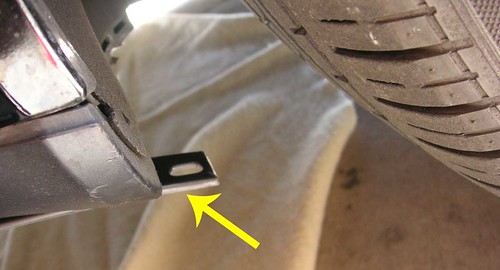
You will have to make one new hole on each end closest to the wheelwell.
Look on far right of pic- I popped in a new scew about 1" from wheelwell.
Use a dremel and cut off the 1" lip overhang on each side.
Check your screws for tighness, and you are done!