You must be logged in to rate content!
17 minute read
Clutch Install for 2005 WRX
Compliments of JDwhiteWRX @ www.rexnet.com
The need to DIY my own clutch replacement was born out of necessity, a slipping clutch, Rego due and an important weekend of motorsport approaching fast meant I really needed to get it done cheap.
Let me start by saying that if you are not short of some coin and have no real interest in working on cars or getting to know yours better then just pay someone else to do it. Labour is around $400 - $500 and the parts are around $600 if you order from OS and machine your current flywheel, plus allow for the cost of 3.5L of transmission fluid. Expect to pay anywhere up to $1500 installed or a little over $1000 for the parts at a dealership.
To confirm the parts needed and parts numbers for my MY05 wrx are:
DISK COMPL CLUTCH 30100AA881
COVER CP CLUTCH 30210AA630
BRG CLUTCH REL 30502AA130
BOLT/WASHER AY 800508310 (8 of these bolts but you can re-use your originals so not really required)
OIL SEAL 806786040 (may not need but can start leaking around 150k)
Pilot bearing 806212020
All up its costing me $516 USD with the express shipping option, flywheel machining is $55. I bought the parts from herehttps://www.subaruge..._parts_cat.html
Its possible to do this in one day especially if you buy a new flywheel, if you are getting yours machined then you still may be able to do it one day but remember not many places will machine a flywheel on a weekend and it usually takes about 1 hour.
If you have any issues (I had four) then its nice to have a day or two spare to sort them out.
For the most part I followed this DIY on NASIOC however there are a few mistakes in it and if you read the whole thread there are a few different opinions on how to do things and things I did different.
I wont list all the tools needed but if you are attempting this DIY you should have a decent collection of spanners, sockets, a good breaker bar, 10mm allen key, T-70 Torx (to drain fluid from transmission), crow bar, ratchet straps, clutch alignment tool, 4 car stands and a floor jack (2 if doing solo). If you have a cordless impact driver it will also speed things up but its not essential.
My car is a MY05 wrx but most steps will be the same for other models.
Start by disconnecting the battery.
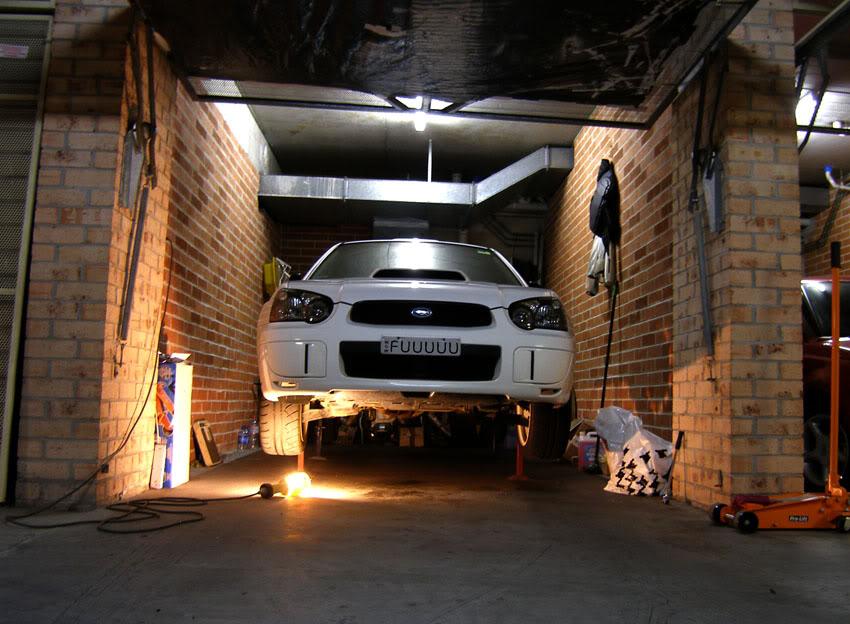
Next get the car up as high as you can on the car stands, note I also remove the two front wheels for a bit of extra room so loosen the lugs before jacking up the car.
You should now get under the car and drain your transmission fluid, if its not old fluid then you will need something clean to capture it and store it while you change the clutch. My car had a T-70 torx fitting for the drain plug, these can be hard to find at a hardware or tool shop, I got mine online. Replace the plug once drained but you can move on and do some of the following steps while you wait for it to drain.
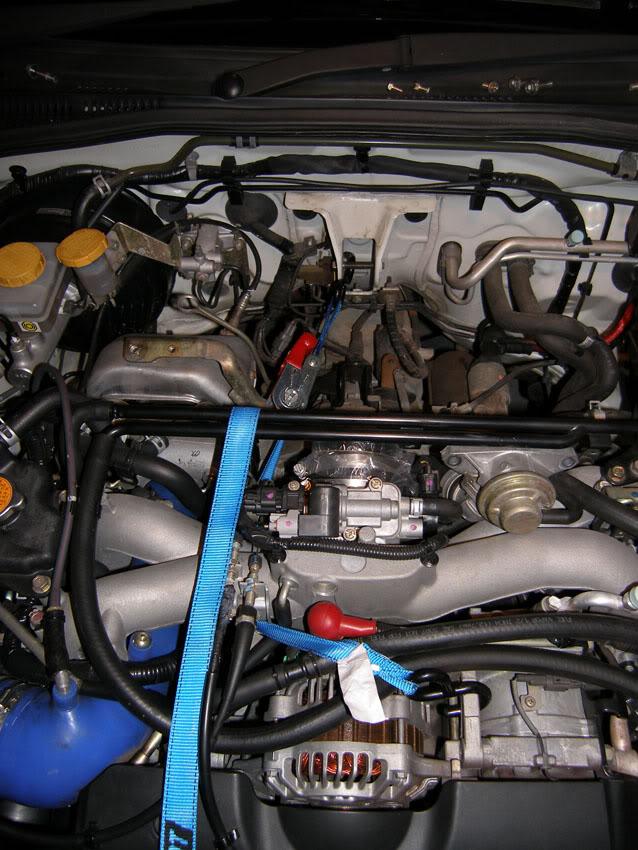
Then remove the TMIC and pitch stopper.
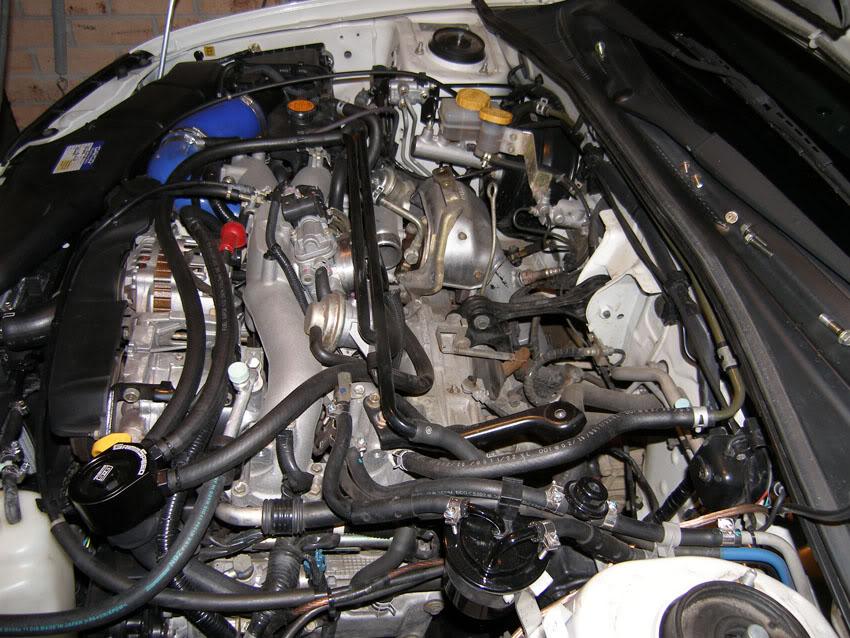
You now need to disconnect all the wiring harnesses that connect to the gearbox, there are a couple up top and a couple underneath the car.
Remove the 2 starter motor bolts and tie up out of the way with a cable tie.
Now remove the clutch slave (2 bolts) and move this up out of the way too.
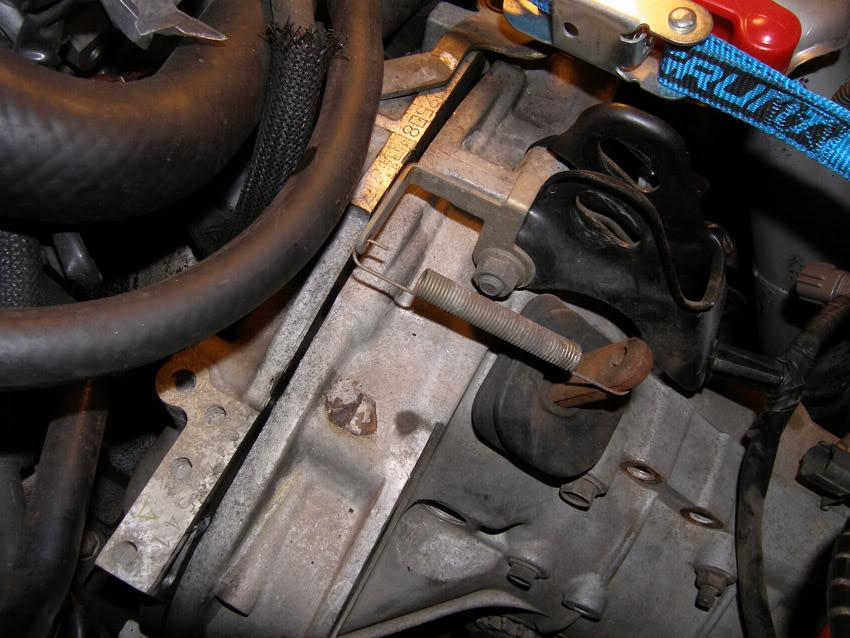
Remove the spring and rubber boot off the clutch release fork the you need to remove the large pin holding the clutch release fork in place. Get your 10mm allen key and undo the plug just next to the opening for the starter motor.
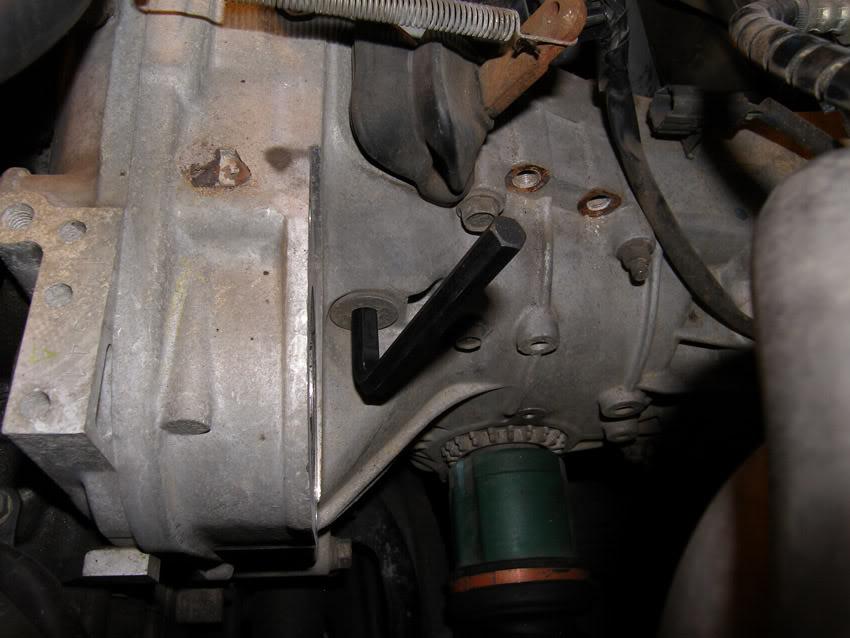
Now you need to thread a bolt into the back of the pin and pull it all the way out, I used one of the bolts that holds the headlights in. Screw the bolt in and use a flat blade screwdriver behind the washer to lever the pin out of the hole, not much force is required and once started it comes out easily.
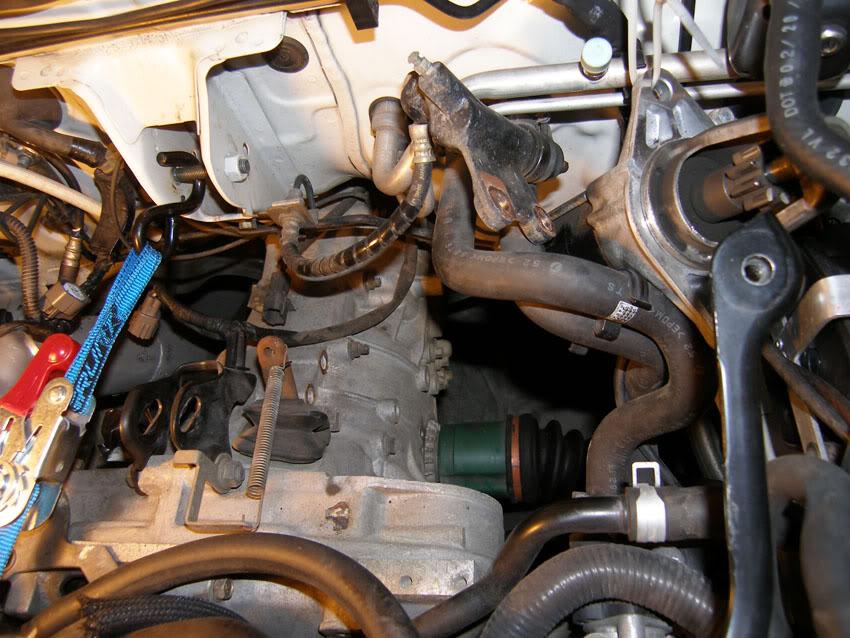
Ok next we are going to remove the drive shafts from the gearbox, the Subaru service manuals method is the method I used and its actually not very hard to do. The MY05 box has male drive shafts which slide inside the gearbox, the only thing holding them in are little circlips inside the gearbox that will pop out easily enough when you get a flat blade screwdriver and lever them out.
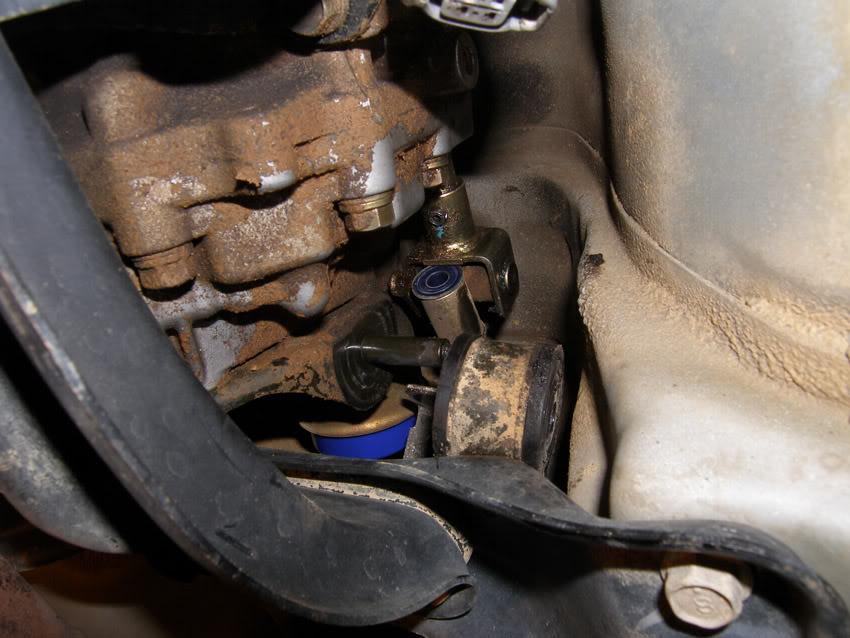
To get them all the way out though you need to pop out the ball joints from the hubs, to do this undo the pinch bolt in the hub which lamps the ball joint in place. Disconnect the front swaybar endlinks. Now you need to jack up the rotor a few inches then tap the control arm down with a block of wood and large hammer until the ball joint pops out of the control arm.
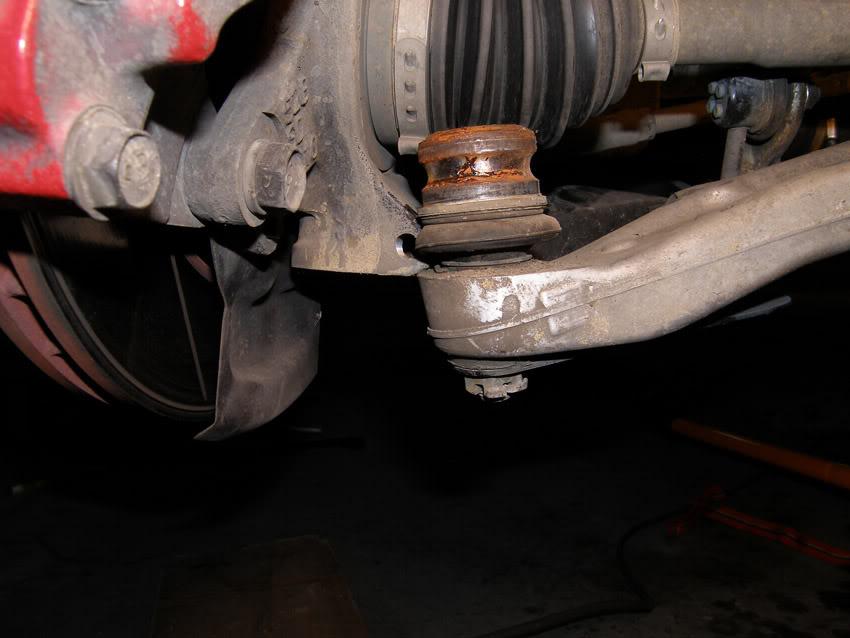
Once free you will be able to lever the strut outwards and pull the drive shafts right out of the gearbox, push them towards the back of the car so they are out of the way, be careful not to tear the rubber boots on the ball joints or drive shafts.
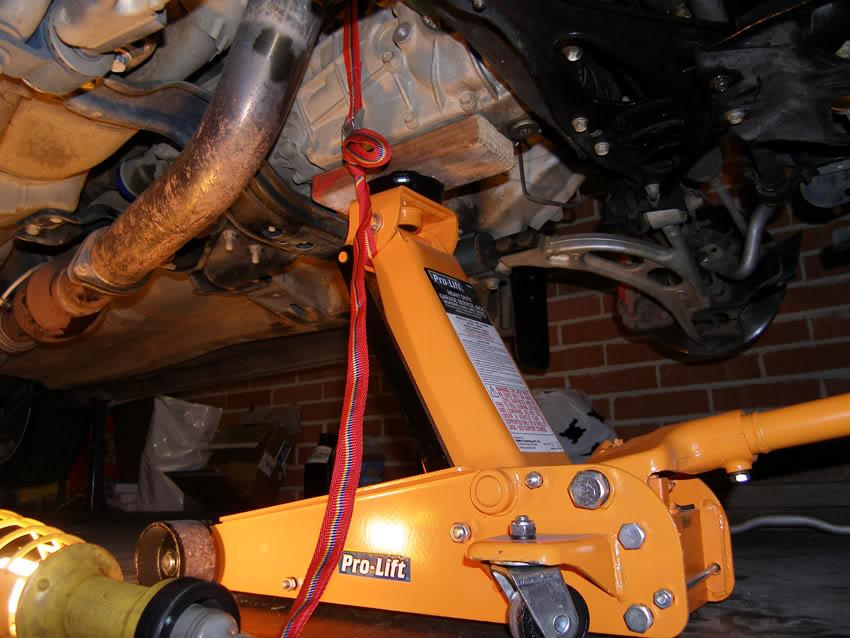
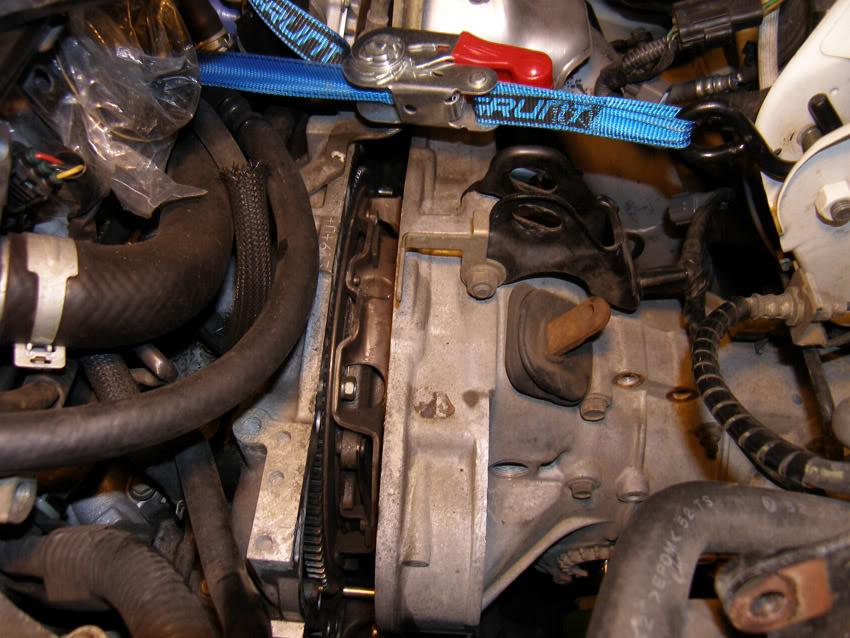
Next you should tie the motor to the firewall to stop it falling forward once the gearbox is removed. I put the bolt back in for the pitch stopper and strapped it to the motor with a ratchet strap, or plane rope would do.
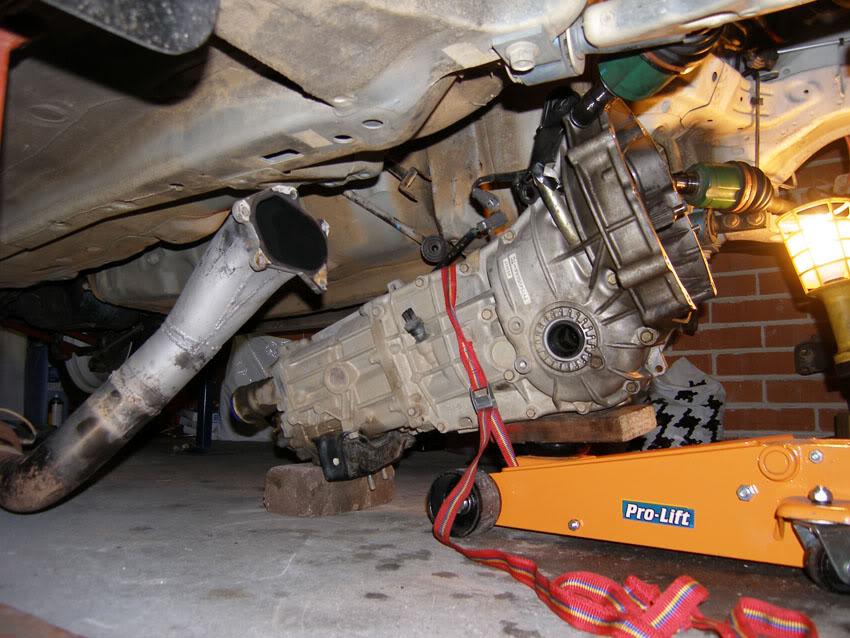
Now its time to get the floor jack under the gearbox or tranny lift if you have one. Place the jack towards the front as most weight is there and it will be more balanced when lowering. Place a strap around the gearbox the help stop it falling off the jack.
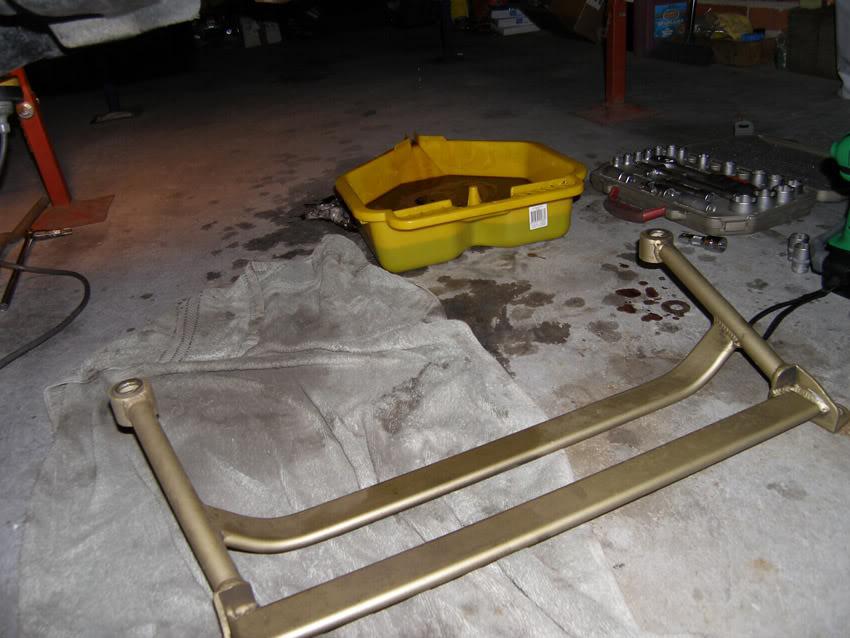
Now remove the gearbox crossmember from the car.
Next disconnect the shifter linkages from the gearbox, one nut and bolt at the top and one nut on the side.
Next I removed the exhaust, start by removing the turbo heat shield and the nuts and bolts holding the dump to the turbo. Next remove where the exhaust bolts to the back of the gearbox and all the exhaust hangers to lower the exhaust, its heavy and takes a bit of shaking to free the dump from the turbo, having two people really helps here.
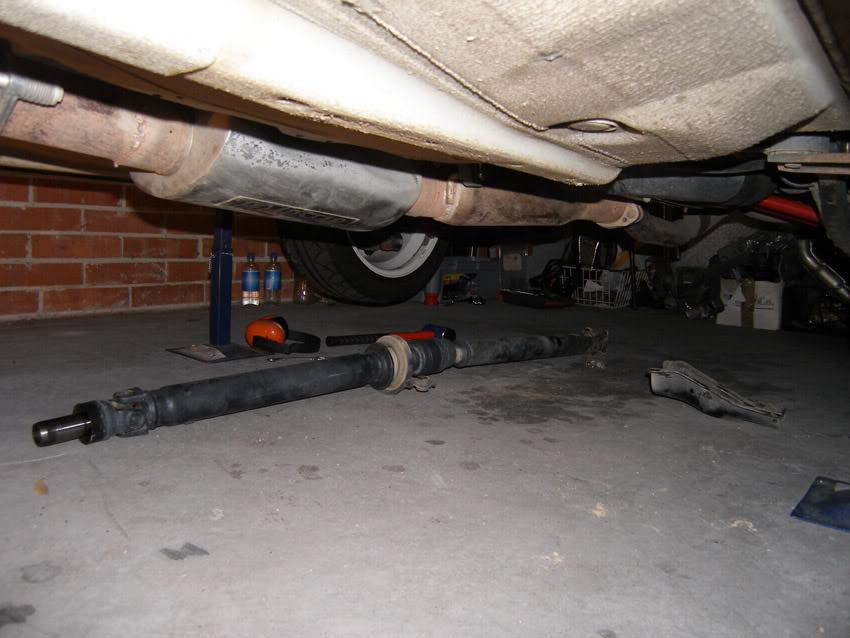
Next you must remove the tail shaft, to do this remove the protection plate at the rear then the four bolts holding the shaft to the diff. You will need the handbrake on to crack the bolts and then off again to spin the rear wheels to access the next bolts, again two people really helps here.
Once the bolts are out the tail shaft there are two more in the middle holding it up to the floor then it will pull out from the back of the gearbox, some fluid may leak out, you can place a pressure can lid over the hole in the back of the gearbox to stop it dripping on you.
Time to start removing all the bolts that hold the gearbox to the motor, these are all different lengths so I strongly advise you label them or bag them up so they don?t get mixed up.
To break the gearbox free from the motor can take a little muscle, pulling on the box is a waste of energy, I used a small flat blade screwdriver and hammer to create a gap, as the gap gets bigger you can use larger screwdrivers or a chisel to work them apart, a crowbar also helps once the gap really opens and playing with the height of the jack supporting the box can make things a lot easier.
opened right up
The box is sitting on dowels and some long threaded bolts so jack height is crucial to them coming apart. Keep an eye on the clutch release fork, it will be flopping around, see if you can get it to drop down into the box that may help stop it getting in the way.
Once apart you can lower the box to the floor and push it back out of the way, if you are doing this solo having a second jack at the back will stop it falling off, if you have a mate helping then just support the box as they slowly lower the jack.
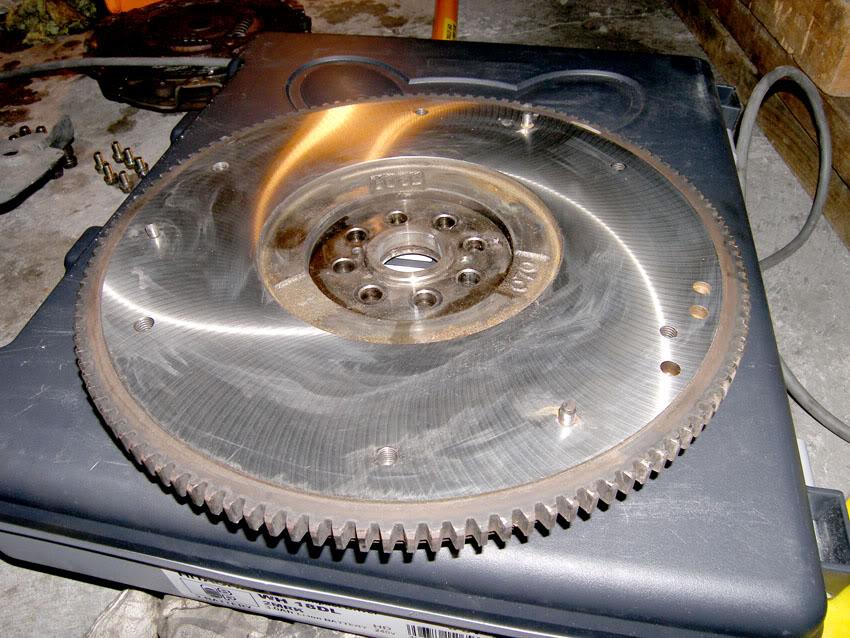
Now to remove the pressure plate and flywheel, a rattle gun is nice here but if not use a breaker bar and wedge some wood in between the flywheel and the edge of the box to stop the motor turning. I used wooden door stops.
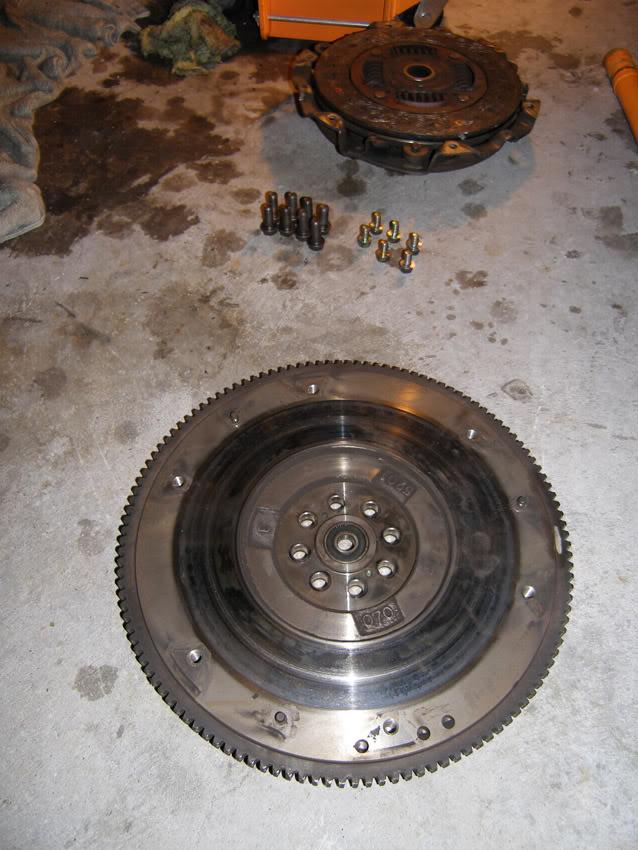
So get your flywheel machined and install the new pilot bearing (tap in with 22mm socket and small amount of grease, reinstall flywheel at 52.8ft lbs torque, use a diagonal pattern as you tighten, clean surface with brake cleaner, also clean your new pressure plate. Place new clutch disc in your pressure plate the correct way around (look at old clutch) then fit up to flywheel with the bolts finger tight. Use your clutch alignment tool to centre the disc inside the pressure plate and tighten in a diagonal pattern, torque to 11.6ft lbs, remove tool. You will notice a paint mark on the flywheel and on the pressure plate, some say these need to be installed with the paint marks opposite each other and some say that is BS and it doesn?t matter which way.
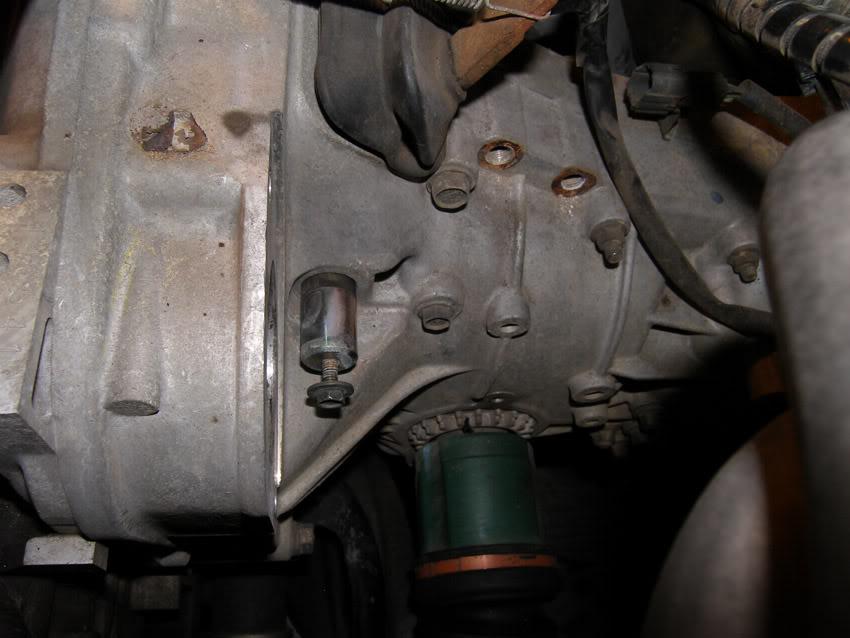
Now you need to reinstall the clutch release fork, slide your new clutch release bearing onto the spline of your gearbox facing the correct way (see old clutch) place the forks of the clutch release fork into the bearing and slide the pin back through to lock it in place. Replace the plug with your 10mm allen key.
Time to put the gearbox back in, lining it up can be hard but the key thing to remember is keep it straight, look at the gap between the box and motor and keep the gap even all the way around, if you have two jacks this will help or have a mate help line it up from the engine bay. Replacing the tail shaft and turning it as you push forward may help engage the spline into the clutch. Once relocated on the dowels you can use the bolts to pull the box back onto the motor, if you get resistance then stop and realign, it should come together smooth with little resistance.
Now just reconnect everything in the same order you took it off, put exhaust back on before drive shafts as it makes it easier to get to the bolts on the dump.
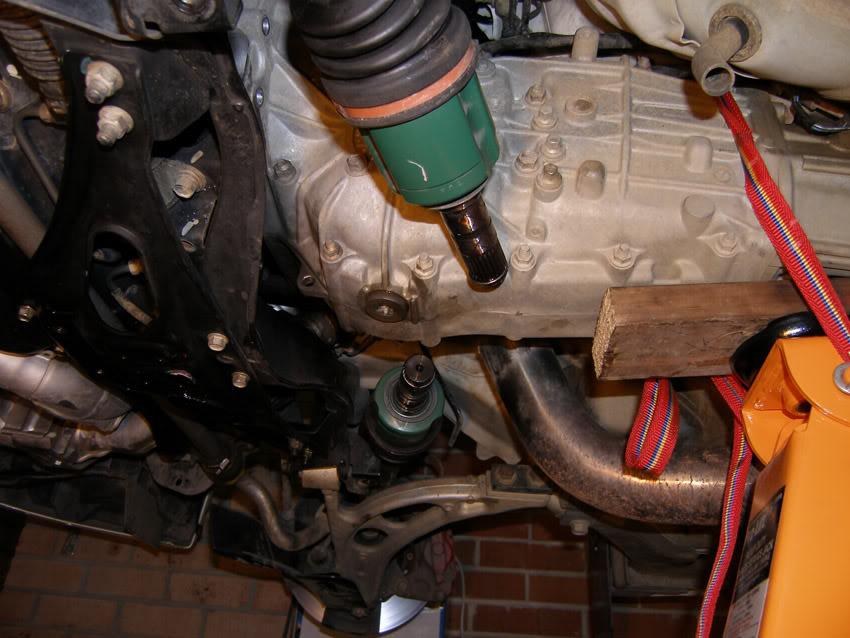
When it comes to putting the drive shafts back in you can put them in half way (careful not to damage the seals) then pull down on the control arm and move the ball joints back into place on the hub, the should go in a few millimetres then use a jack under the ball joint to push them back in all the way, replace the pinch bolt while still under load from the jack. You should then be able to push the drive shafts all the way into the gearbox, tapping with a mallet will help with the last 30cm or so but if its not going in try spinning the shaft a little and don?t force it. When you replace the transmission fluid be sure to check these seals are not leaking (one of mine did).
Fill up the transmission fluid before you replace the TMIC, its much easier, make sure the plug is in and tight first. It takes 3.5L
After you have replaced the clutch slave check the clutch is working, push the clutch release fork back by hand and it should engage the release bearing into the pressure plate, then replace the boot and spring and jump in the car to test the peddle. It should feel as normal but a bit higher engagement point and lighter feel than your old worn out clutch.
- Break-in period is minimum 800 km. After 1200 km it should be bedded.
- Do not drive above 3500rpms during break-in period
- Do not go past 12psi boost during break-in period
- Do not use the clutch at rest on hills or inclines.
- Do not ride the clutch for more than a sec or two.
- Short stop and go driving is preferable over constant highway driving.
- If your clutch overheats, release the clutch and wait 10-15sec to cool down before re-engaging.
- It is normal for the new clutch to shudder or slip when engaging 1st or 2nd gear. This will magically go away after a few hundred miles.
Issues I had
First issue was the gearbox would not come back past the turbo, this is because of the odd shape on my twin scrolls turbo flange, see photo
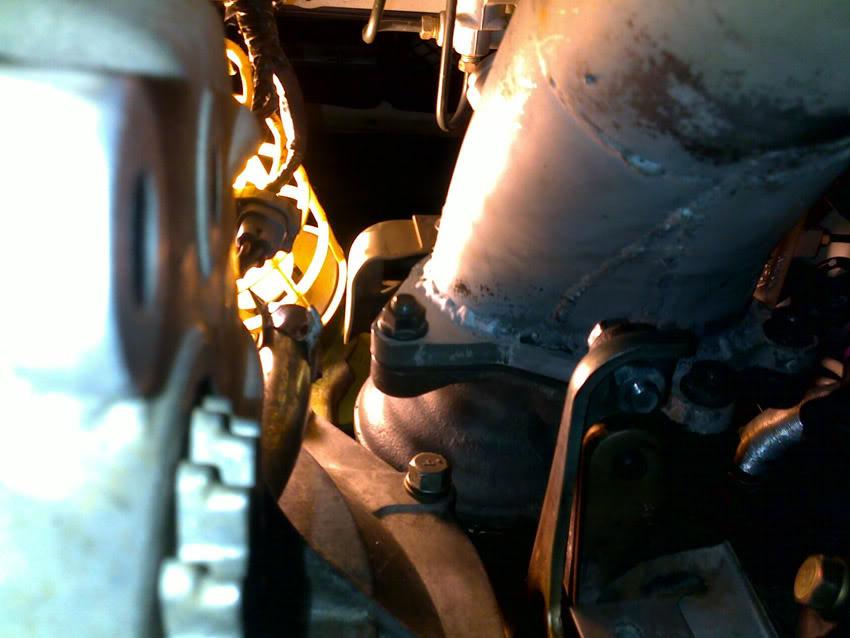
So if you have a twin scroll turbo or just a big turbo you will need to undo the turbo slightly off the uppipe and lift it a little as you pull the box back.
Second issue was one of my drive shaft seals was leaking after the install.
I had to buy a new seal from Subaru for $25 and then drain tranny fluid again, pop out ball joint, remove drive shaft etc. seal was easy enough to replace, pulled the old one out with an open end spanner using it to hook it and pushed the new one in by hand.
Third issue was a major PITA  turns out the guy who machined my flywheel totally stuffed it up, he machined a lot of material off one side which put the wheel out of balance. When I started the car after the install the whole thing shook with vibration. I had to take the box out again and get the balance checked on the flywheel and pressure plate, in the end the guy who stuffed up gave me my $55 back and fixed the flywheel but as you could imagine this was a major inconvenience.
Fourth issue was my own fault but I'm putting it down to pure exhaustion and delirium, I put the release bearing on backwards so the clutch didn't work, I found this early but still had to break the box from the motor again just enough to fit my hand in and flip the bearing around.
So in summary doing the clutch yourself is not that bad, there are a lot of things to undo but there is nothing super tricky and if you follow a logical train of thought and keep everything organised it should be a smooth process.
Good luck and if you use this DIY give thanks 
EDIT: Clutch pedal adjustment
With a new clutch you will notice the engagement point becomes really high as in the clutch engages with your foot only pressing the pedal down a couple of inches. I tried to get used to this but I could never get my shifts as smooth as before, especially the high speed shifts.
The solution is to adjust the clutch pedal. Now this does not change the engagement point but simply lowers the position of the pedal so its closer to the firewall.
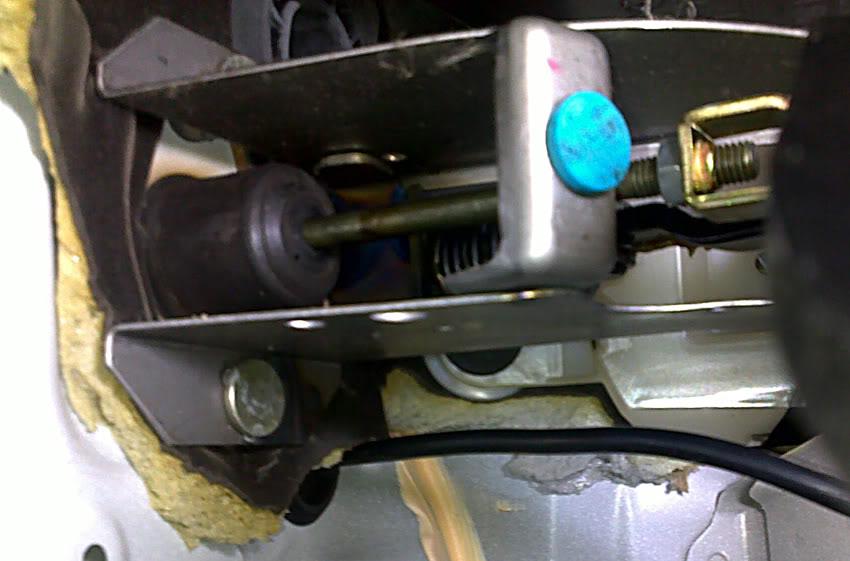
To do this you need a 12mm open end spanner, some small needle nose pliers, a marker of some sort and a light or torch. Get under the dash and look up behind your clutch pedal. You will see a rod that connects to the back of the pedal and goes into a rubber grommet on the firewall (see photo).
Now undo the lock nut on the end of the rod with your 12mm spanner. Next we want to pull the bolt out of the u-shaped bracket so we can turn the rod, the pedal is spring loaded so we can't turn the rod until the u-bracket is disengaged.
On the end of the bolt there is a split pin, pull this out with your pliers and the bolt will come out.
Now the important part, take your marker and mark the rod so we can count how many turns of the rod we make.
Now I did 2 full turns of the rod in an anti-clockwise direction while looking at the firewall and this was the perfect amount to make the clutch feel good again. It doesn't sound like much but it makes a big difference at the pedal.
Now replace the bolt and split pin, do up the lock nut and enjoy your new clutch pedal.