You must be logged in to rate content!
9 minute read
How to install a Mishimoto Fan Shroud on an Impreza/Wrx/STI
Compliments of Bradrcr @ https://forums.nasioc.com
Vehicle: Any Impreza based Subaru
Years: 02-07
Completion time: 2 1/2 Hours
I know there is a basic thread about wiring up a Mishimoto fan:
http://forums.nasioc.com/forums/show....php?t=1925392
However, it's not a true install thread, there's plenty of unanswered questions here, most of which I had, and not even a Google search could give me any more details. I took what I could from the thread and I have a durable way to install this fan shroud without modifying its harness or our stock harnesses. I'm putting this on my '05 9-2X.
Parts & Tools needed:
Aftermarket overflow tank (I used a TurboXS)
10mm socket wrench
12mm socket wrench
Phillips head screwdriver
4mm allen wrench or hex bit
5mm Allen wrench or hex bit
Smoothtip needle nose pliers
Standard needle nose pliers
Solder & Soldering Iron
Wire cutters/crimpers
2 Colors 18 gauge stranded wire (preferably one in black)
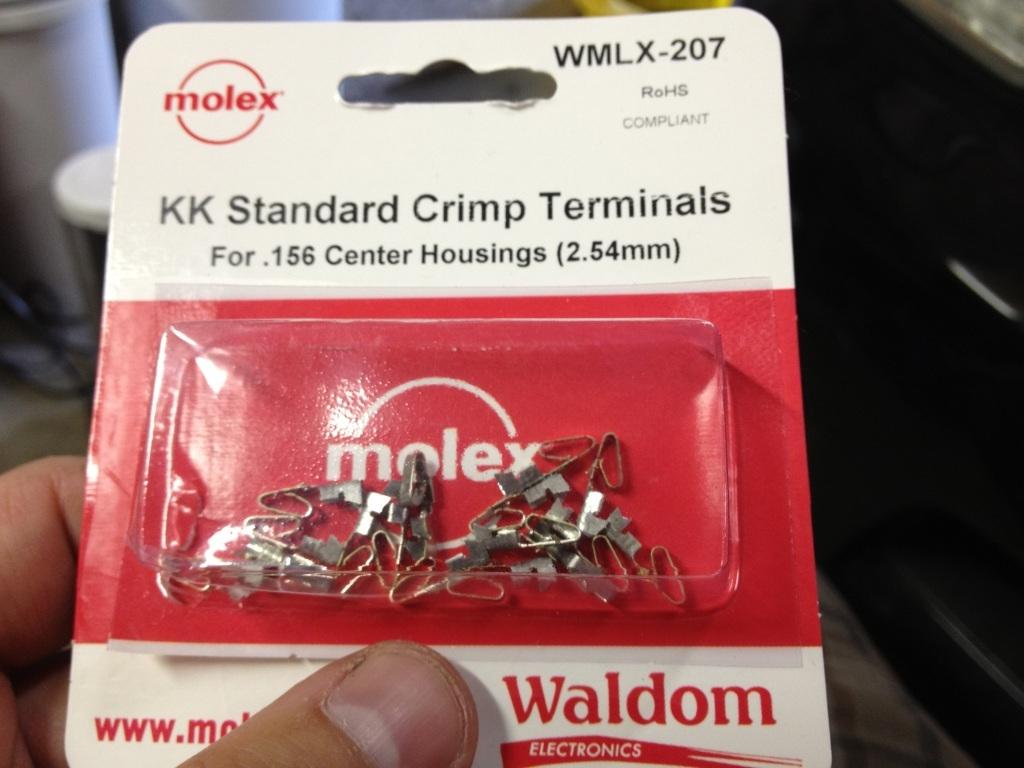
KK Standard Crimp Terminals for .156 center housings or pins identical to stock fans'
2 male & female butt connectors (waterproof if possible)
1/8" Shrink tubing
1/4" Shrink tubing
1" Shrink tubing
Electrical tape for extra weatherproofing (optional)
Zip ties
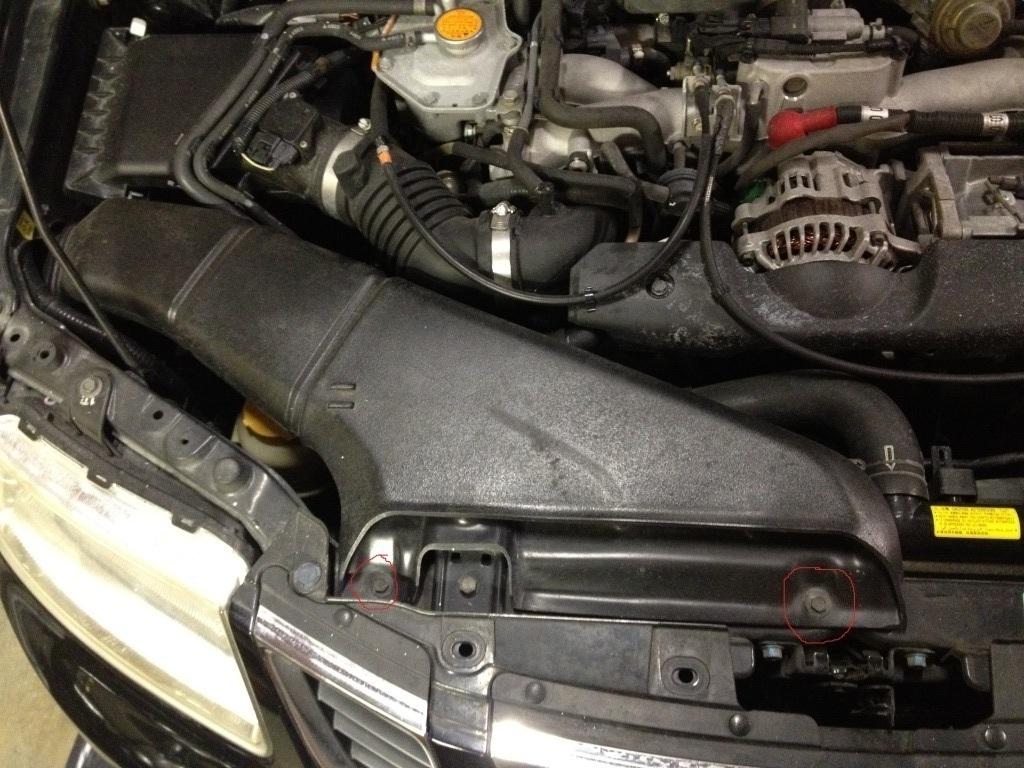
First, disconnect your battery negative, then remove your intake scoop using these two bolts:
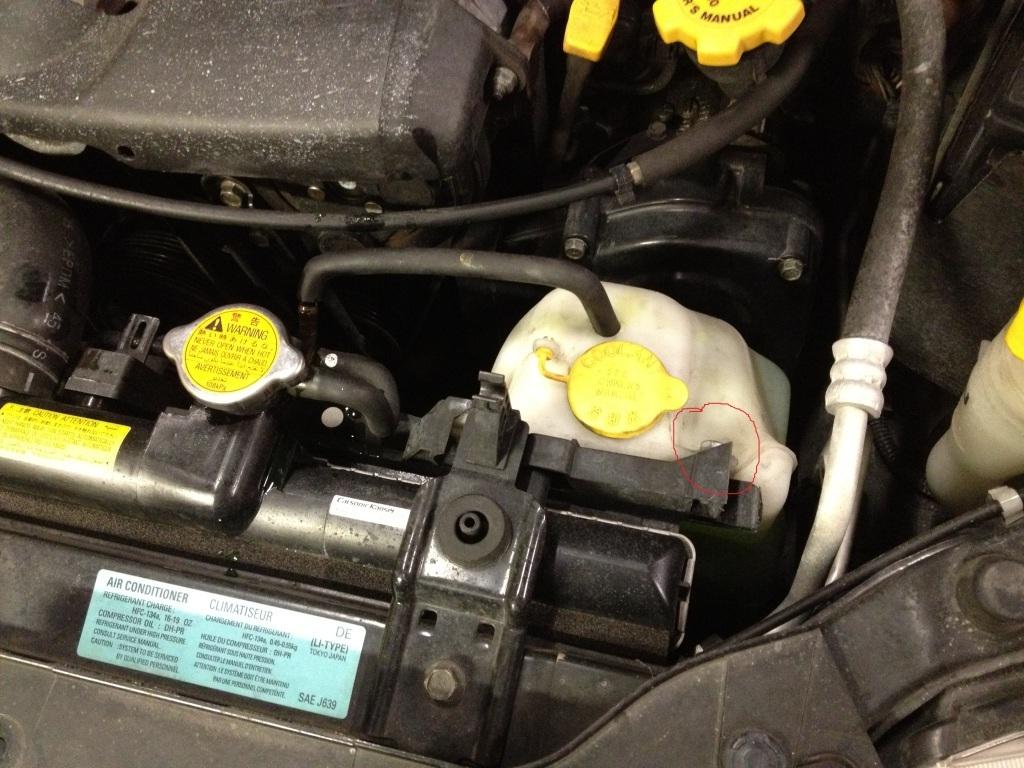
Then remove your overflow tank with this bolt, it doesn't attach on the bottom:
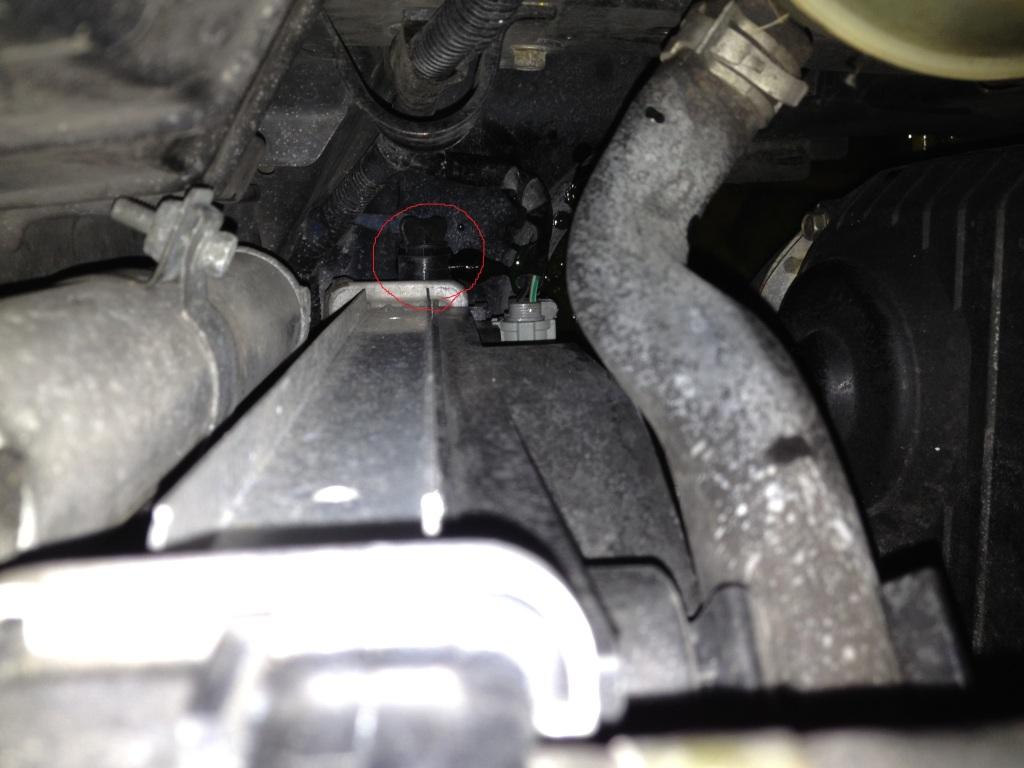
Next, remove the splash guard under the engine, there should be 5 bolts and 4 plastic clips, then drain your radiator with this plastic dial on the bottom passenger side. Notes: it looks like the coolant will come out of the tube connected to the dial, but it came out of the dial itself and that tube for me. Also, you do not have to completely drain the radiator completely if you wish.
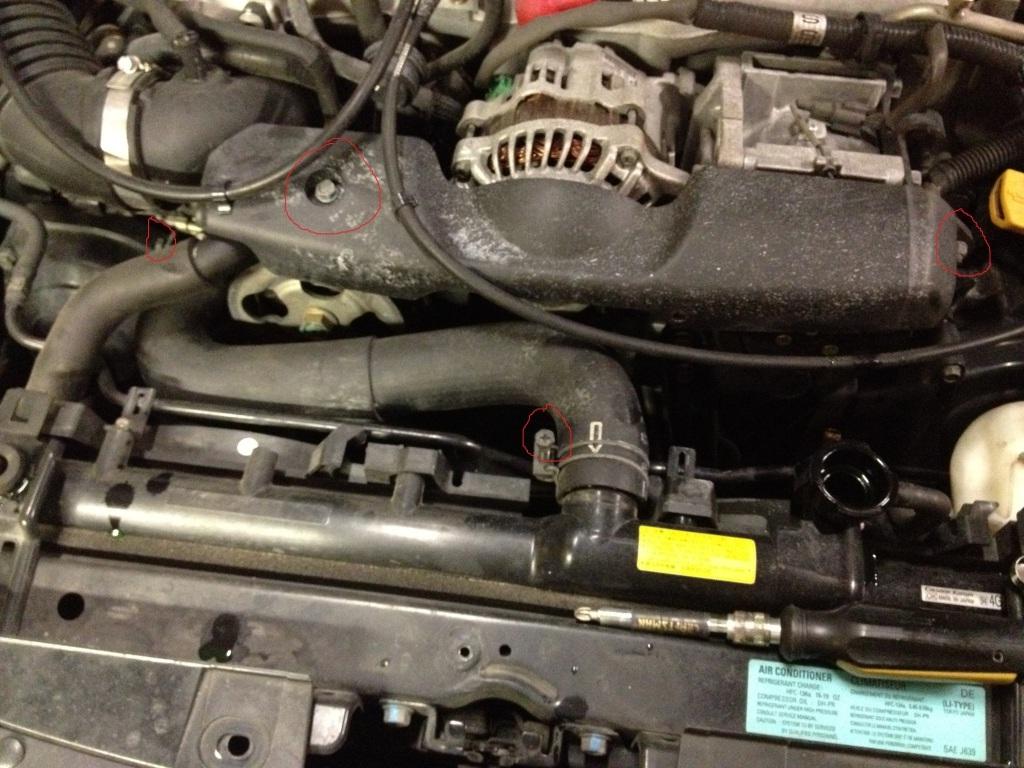
Then remove the upper radiator hose and the alternator splash guard using the bolts shown here. Note: if you decided not to completely drain your radiator, you can unhook the hose from the radiator and squeeze where it goes into the engine to hear if you've drained enough coolant.
Remove the stock fans and the metal hose indicated my the green line. Move that hose out of the way as much as possible. The fans do not connect on the bottom of the radiator and should pop right out.
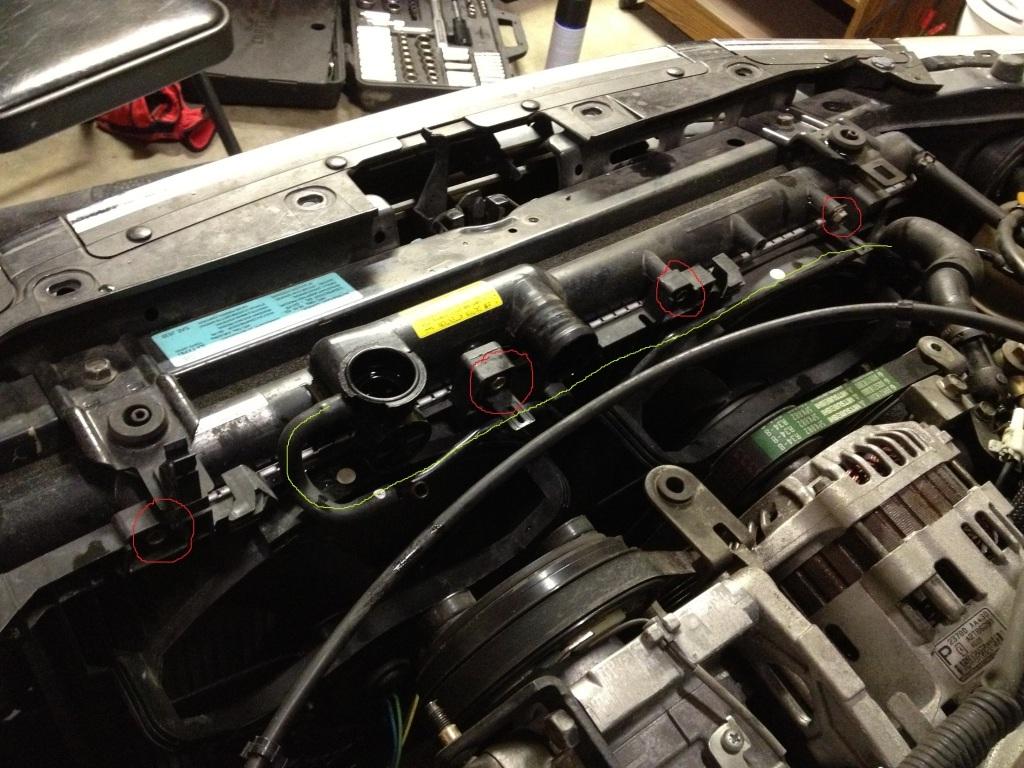
Note the type of fittings your fan has for positive and negative wiring before proceeding.
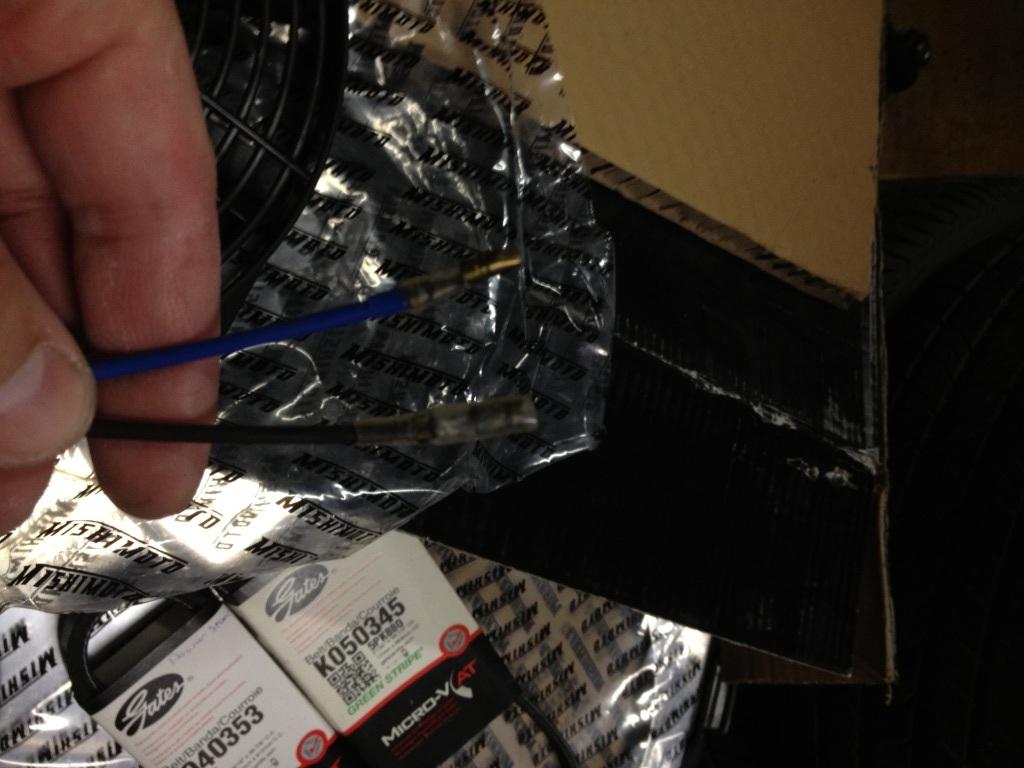
Look at the 4 pins coming out of the stock fans. Try to find these pins at retail. I have seen them at Fry's before, but not today, so I used these standard crimp terminals which were in ready supply:
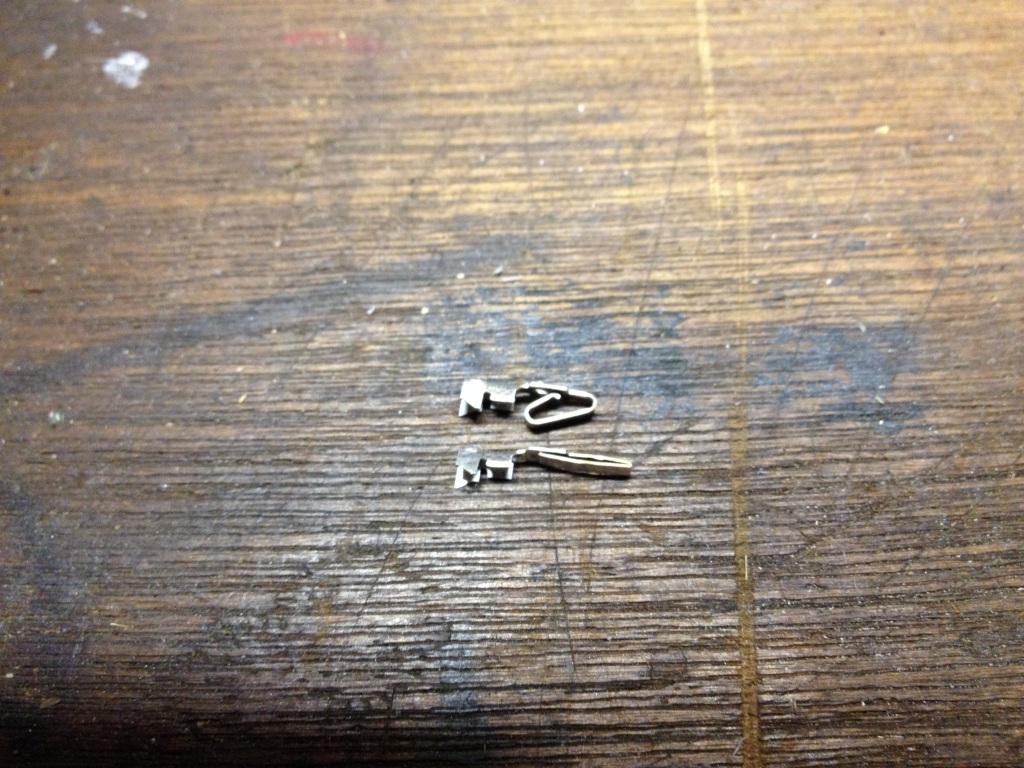
Flatten out a crimp with smooth pliers and fold them back just once, the tip should just barely go back into where the metal 'fattens'. I you get the fold wrong, start over, unfolding the crimp will break it. Make 8 of these.
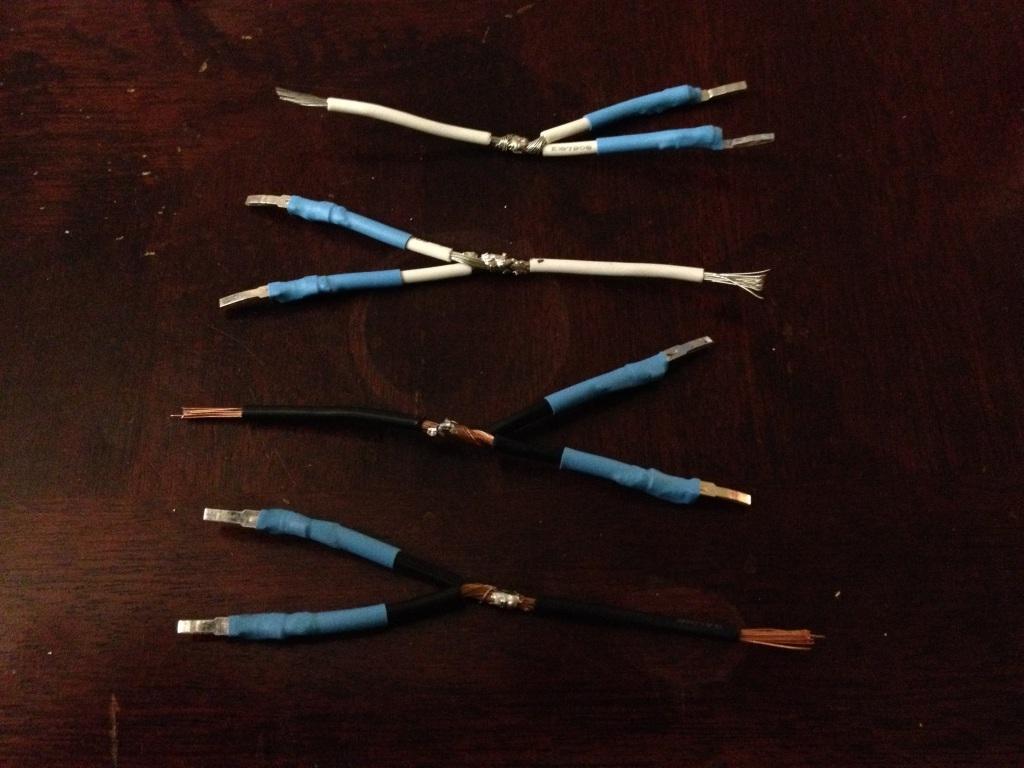
Cut your wires so you have 2 2.5" cuts of each color and 2 4" cuts of each color:
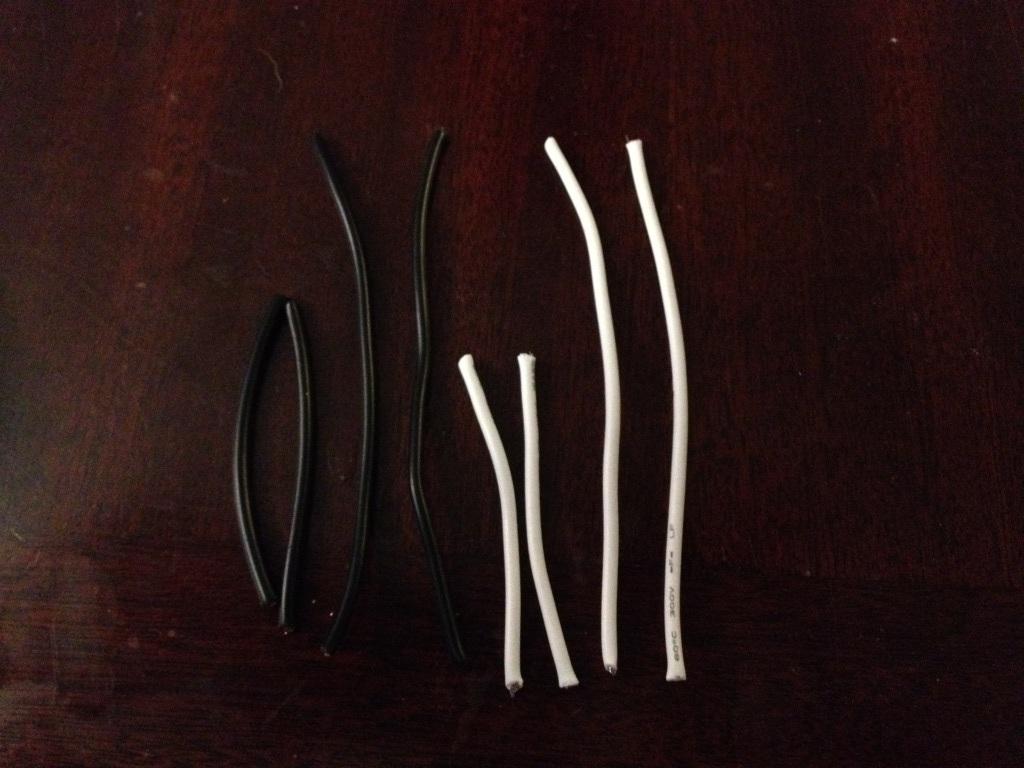
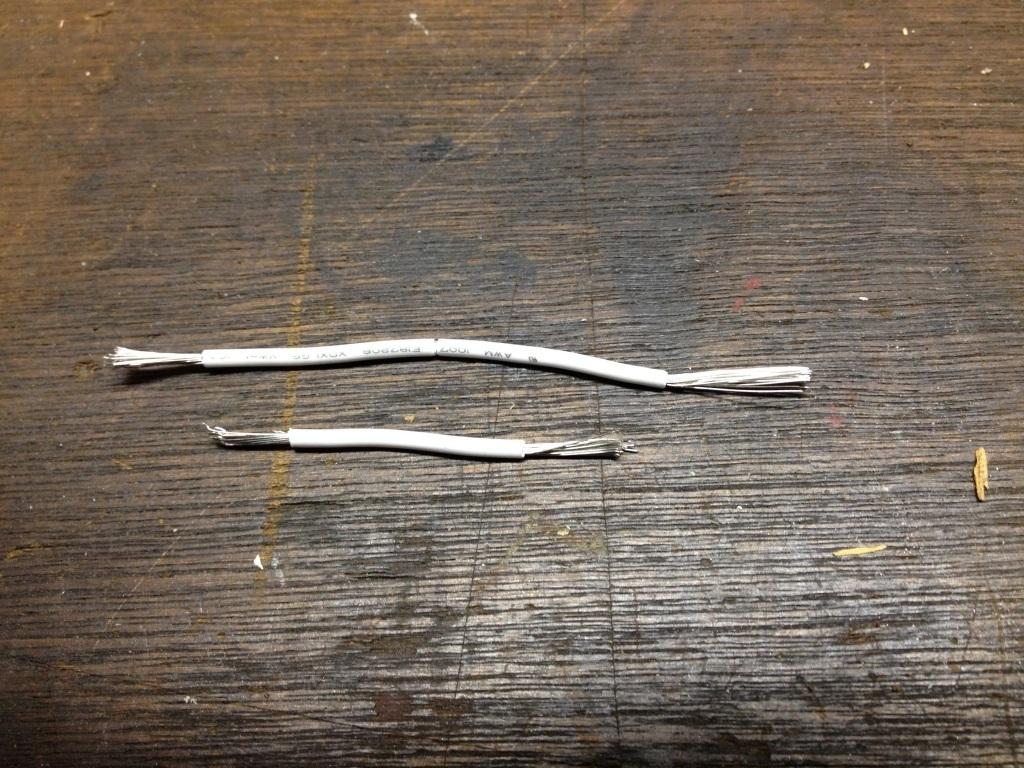
Cut .5" off each end of the short wires, then .5" off one end, 1" off the other end of the 4" wires and make a cut through the middle of the rubber shielding that's left:
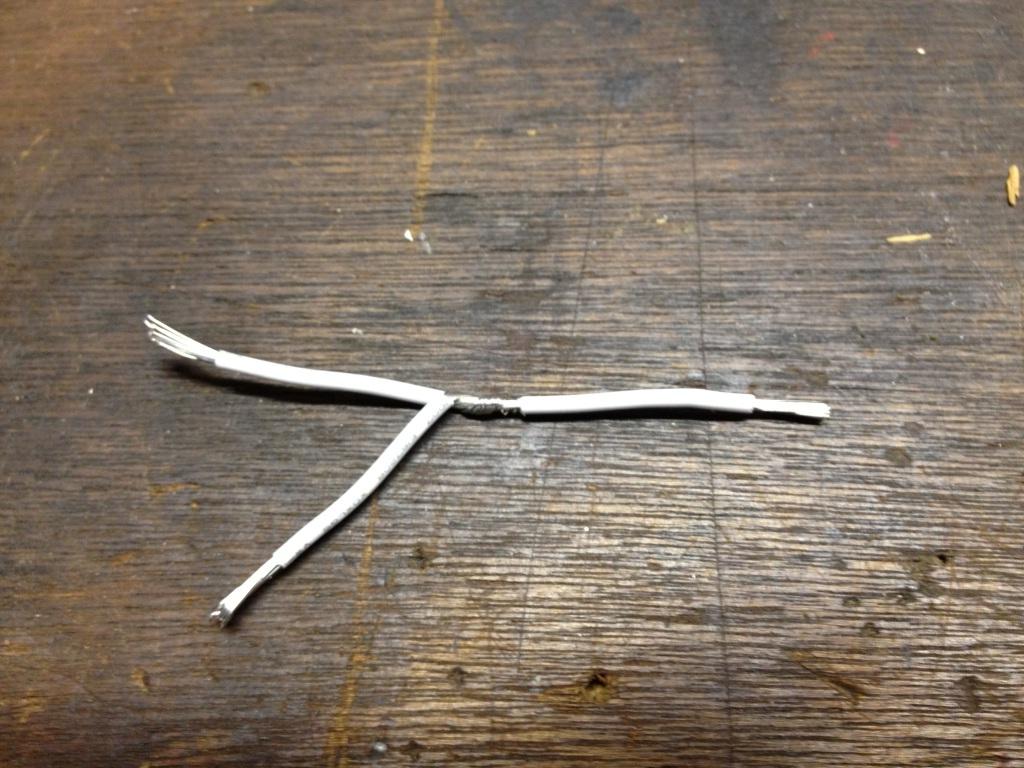
Pull the rubber shielding towards the 1" exposed wire to make a half inch gap, then wrap the ends of one of the short wires around the exposed gap:
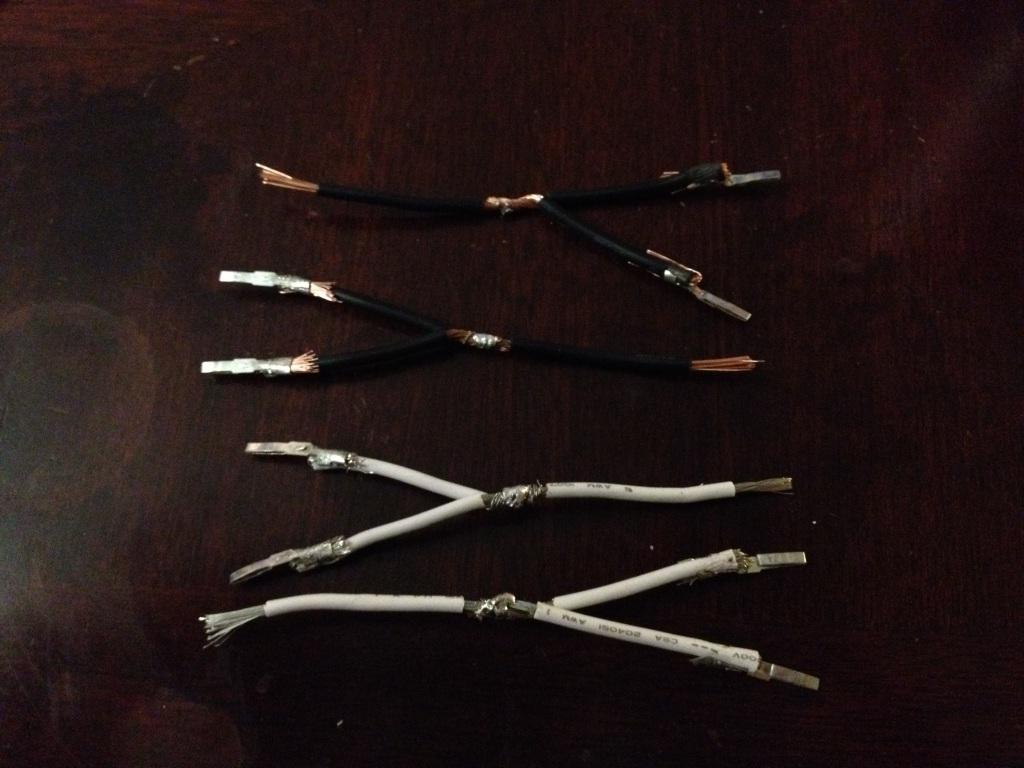
Solder the wrapped portion and attach the flattened crimps or pins to the ends of the 'Y', making sure that the pins/crimps are on the same side of the Y (I found needle-nosed pliers worked better than wire crimps for this):
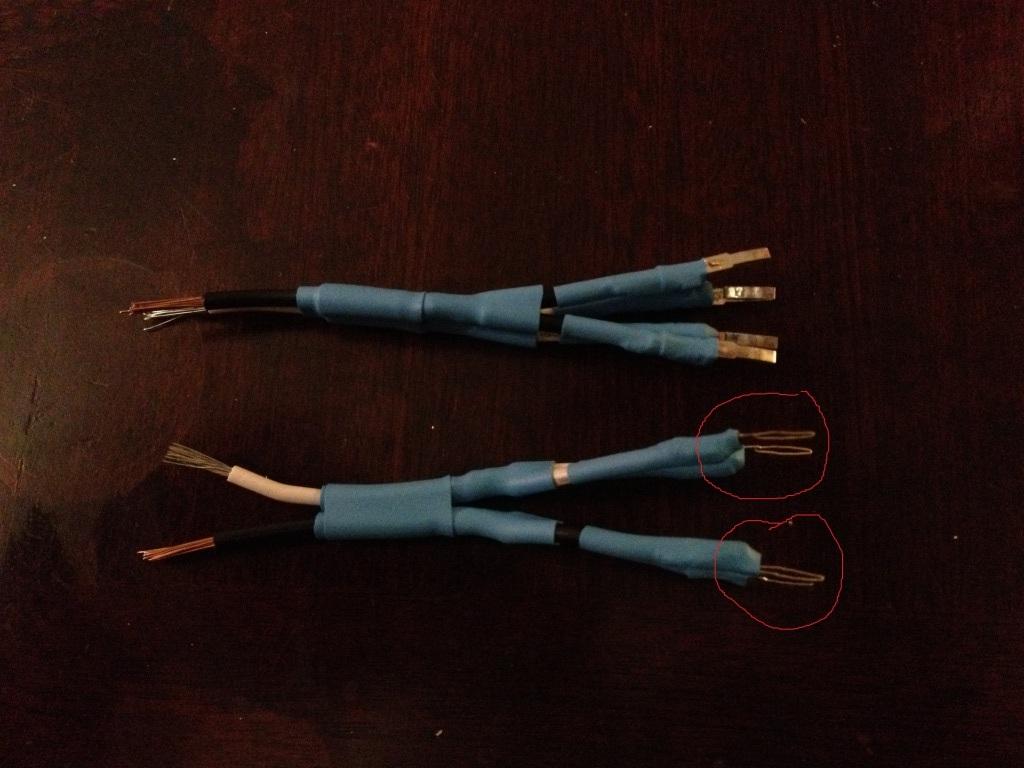
Put an inch of 1/8" shrink tubing over the crimp points:
Shrink tube the solder points with 1/4" tubing, then combine a colored Y and black Y with another piece of 1/4" tubing, making sure that the pins are on opposite sides of the harness:
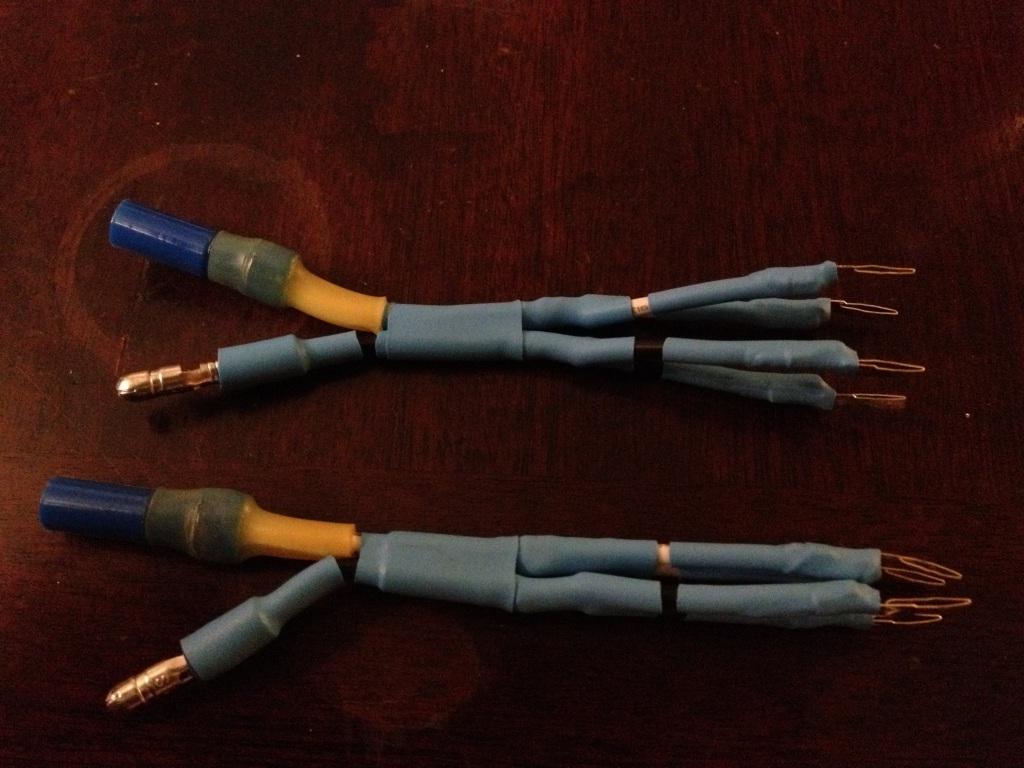
Attach the posts or female ends as appropriate to the end of the harness. If you couldn't get waterproof parts (I got mine at Autozone), then wrap the standard pieces with shrink tubing:
Insert the black pins into the black sockets on the factory harness and the colored pins into the striped sockets:

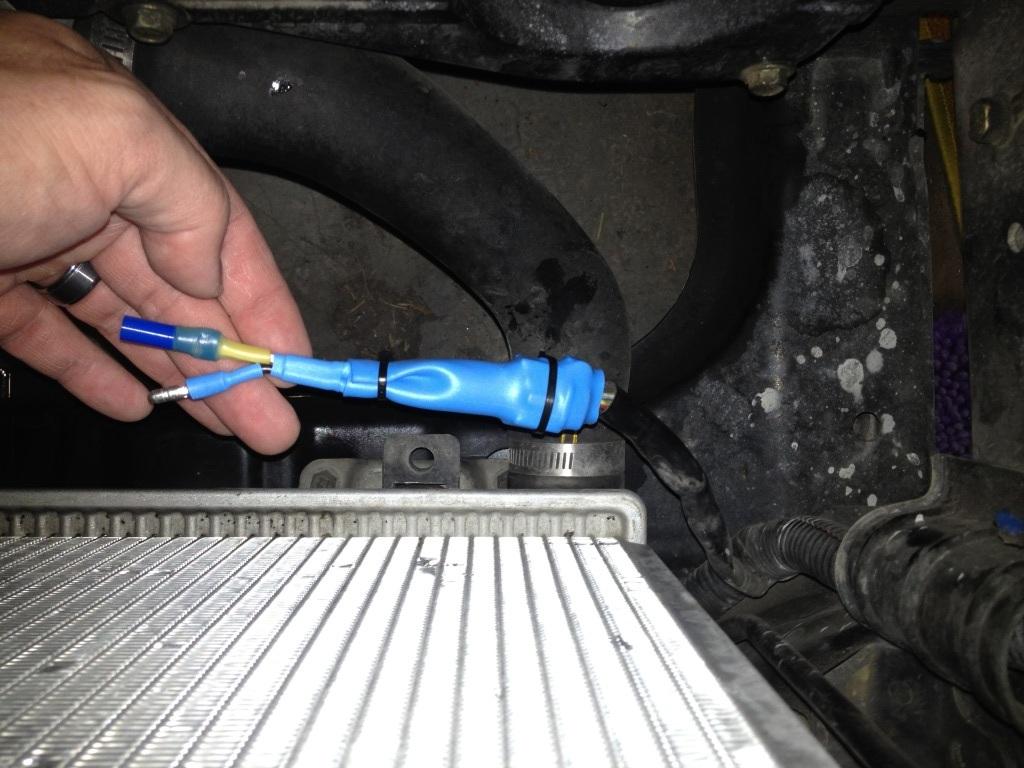
Shrink wrap your new harness over the plug (approximately 4") using the 1" shrink tubing, then secure one end with a zip tie completely around the stock harness plug, and the other end around the folded smaller end. Make sure to fold it before the zip tie is tightened, the shrunk tubing is surprisingly tough.
Now test fit the shroud to your radiator. If it's a perfect fit, go ahead and put on your weatherstripping that comes in the Mishimoto box:
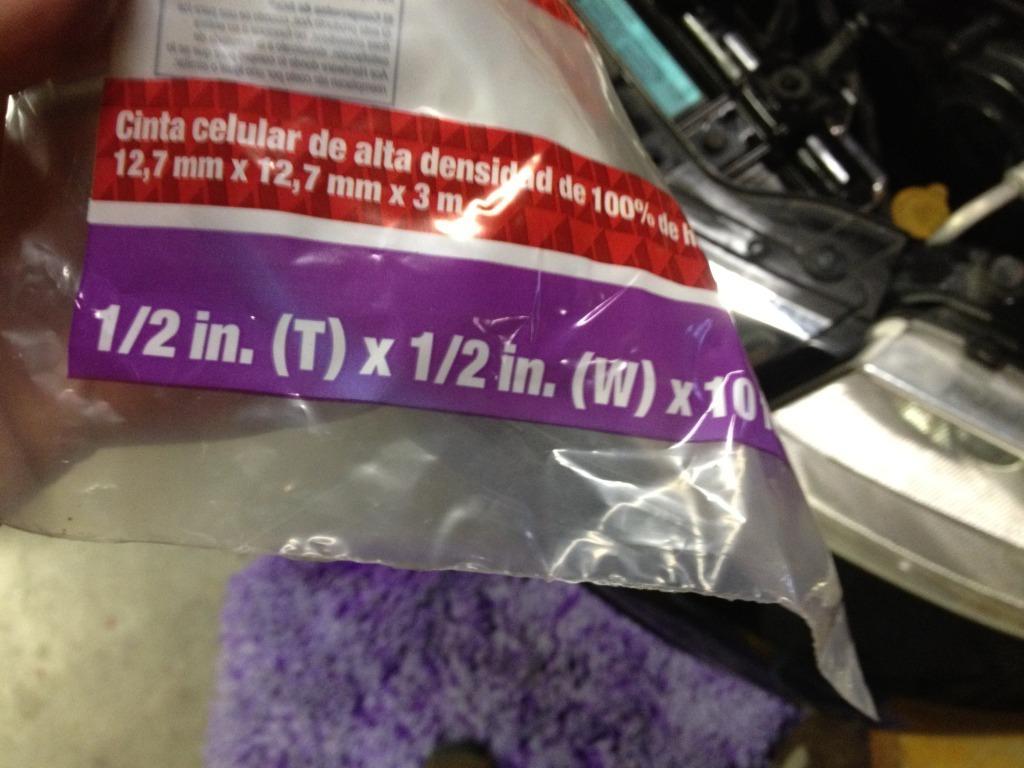
If the shroud isn't a good fit like mine, you'll need some 1/2" rubber weatherstripping tape like this I got at Ace. For reference, when I got the lower holes lined up, the top of the shroud sits too high and I have an approximately 1/2" gap all around, even on the bottom.
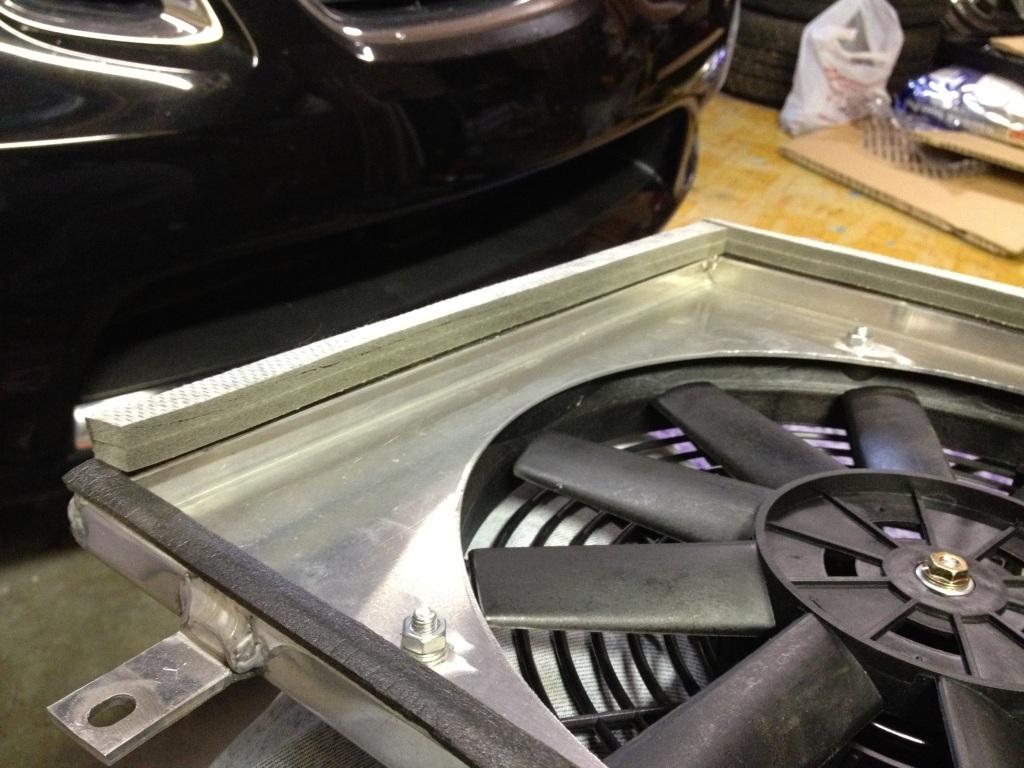
Since the top of my shroud was snug against the plastic/metal ridge of the top of the radiator, this is what my weatherstrip looks like, and what I expect most 04/05s will look like:
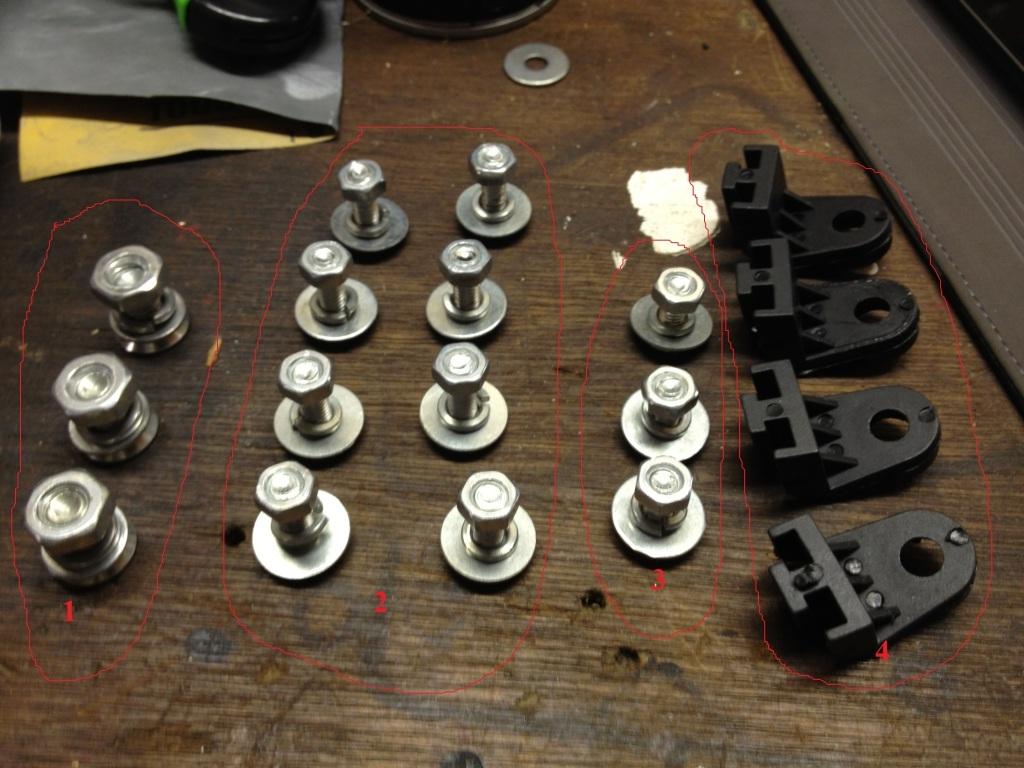
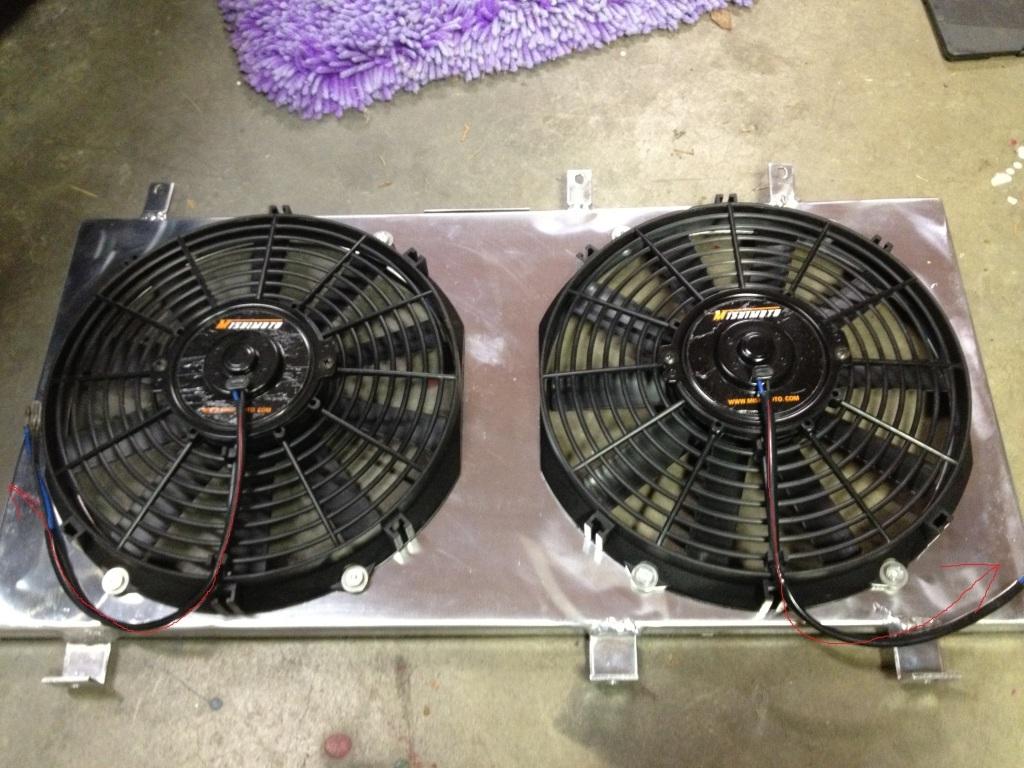
Here's the hardware for your fan, combined into Allen bolts, washers, lock washers and nuts:
1. 5mm bolts for the lower shroud connecting points.
2. 4mm longer bolts for the fans themselves.
3. 4mm shorter bolts I assume for the top of the shroud, these did NOT connect to my '05 radiator.
4. Plastic connectors for the sides of the fans, I don't know what purpose they serve with the shroud, however.
Install the fans to the shroud, this should be fairly straightforward, just make sure the wires go to the lower outside of each fan:
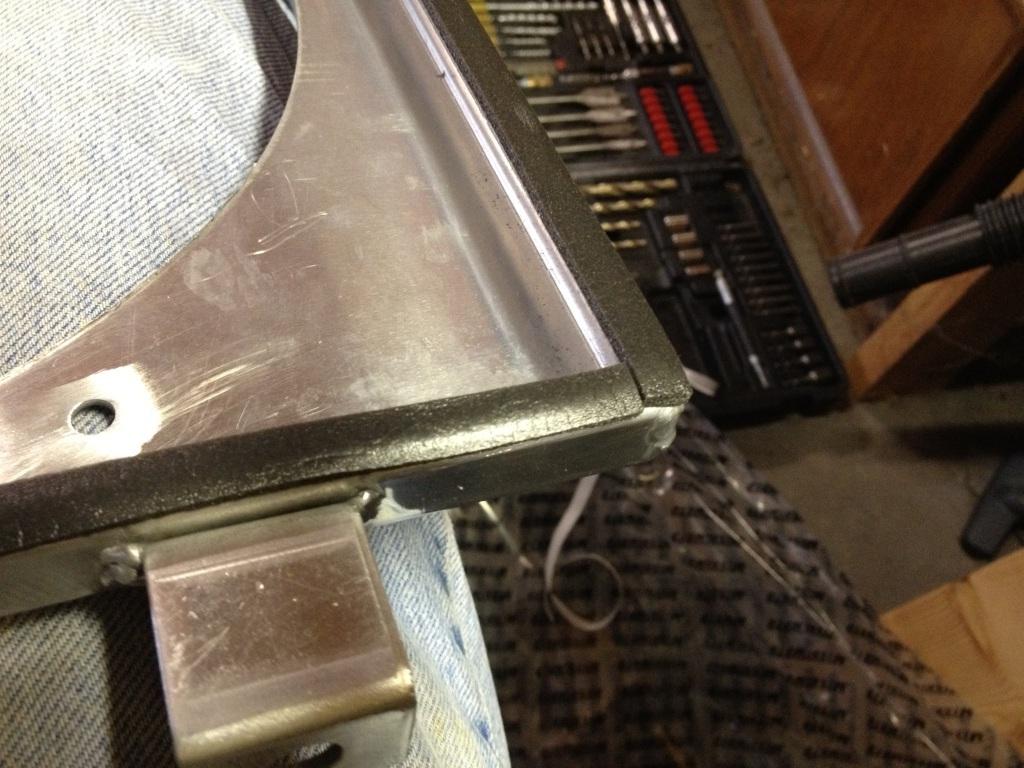
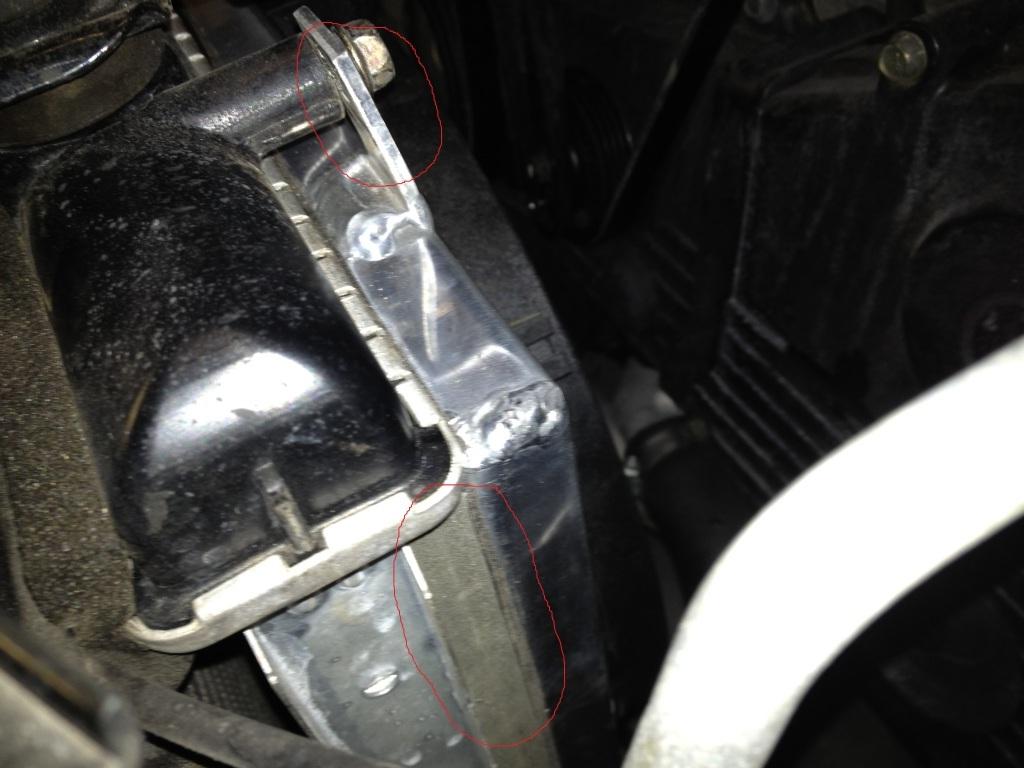
Now install the assembled shroud. For reference, I had to use longer, skinnier bolts for the lower mounting points, and you can see that the upper points required some heavy bending. However, the foam seems to get a good seal here:
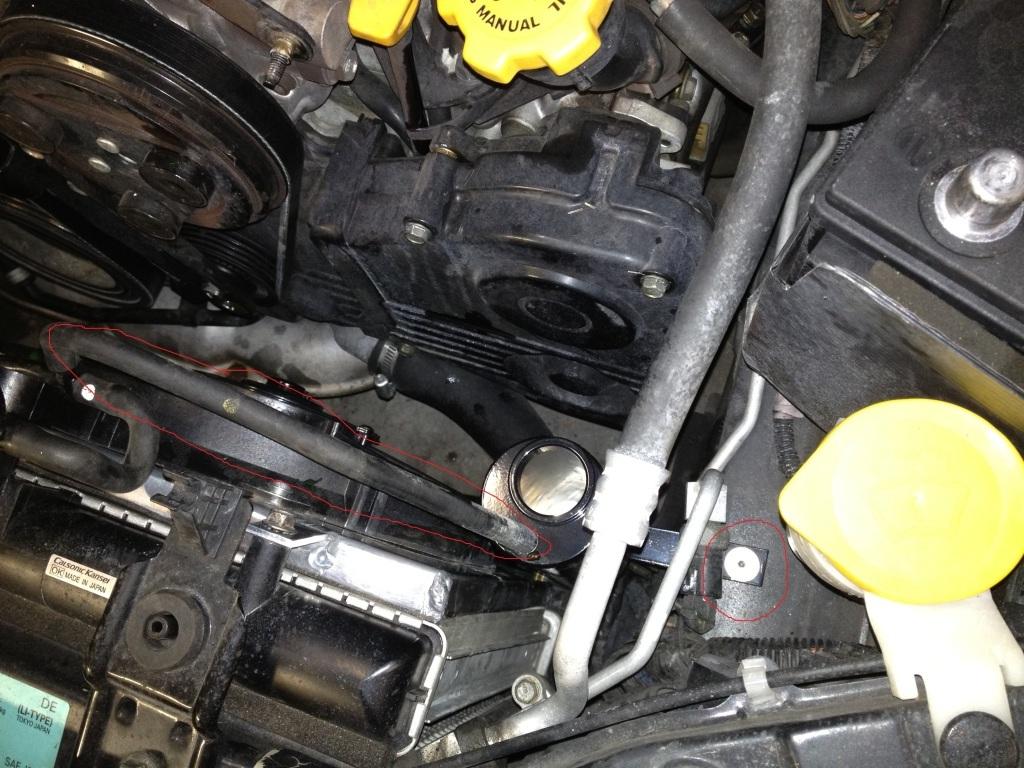
For the new overflow tank, I found a threaded hole next to the wiper fluid that fit the old overflow tank bolt or the 4mm hex head bolts if you have any left over. The stock overflow tank hose also reaches to this point:
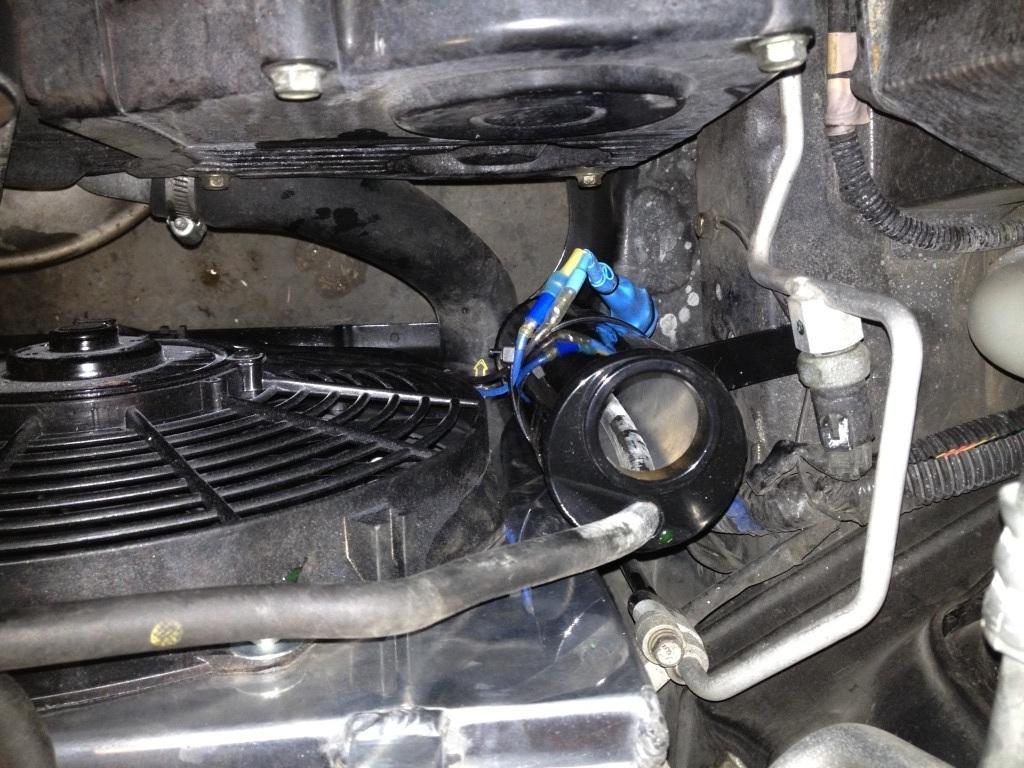
Now it's time to hook up your fan wiring and zip-tie it out of the way so it isn't under any tension:
Work your way backwards through the instructions and reinstall the upper radiator hose, alternator shield, splash guard and intake. Reconnect the negative battery terminal and start the car. Flip on the A/C or get the car good and hot to double-check operation. Enjoy your new fans! :ritz:
Great detail!
Posted by Diggymart on 7/30/19 @ 3:38:22 PM