You must be logged in to rate content!
6 minute(s) of a 278 minute read
4-26-2011
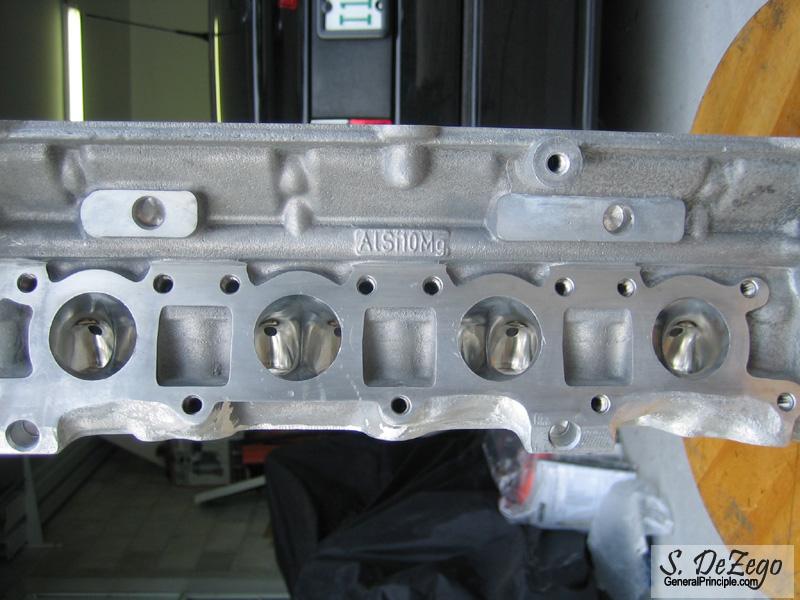
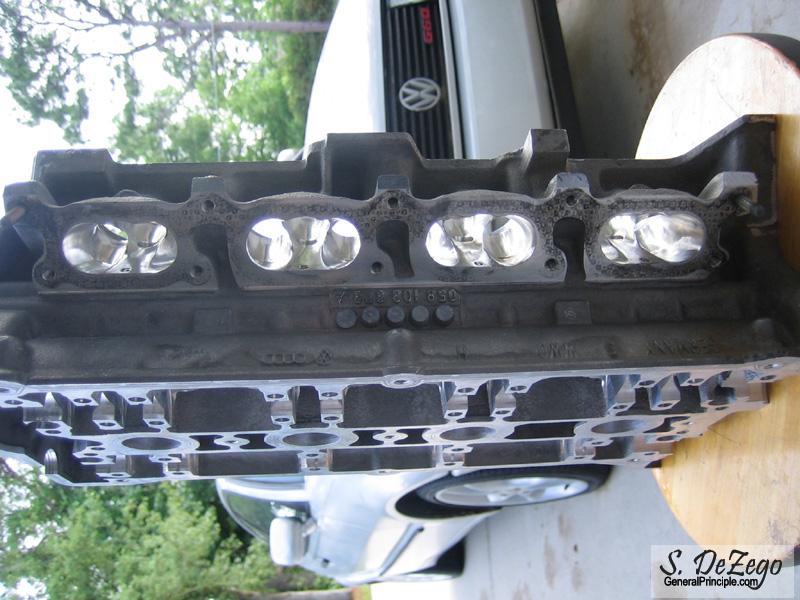
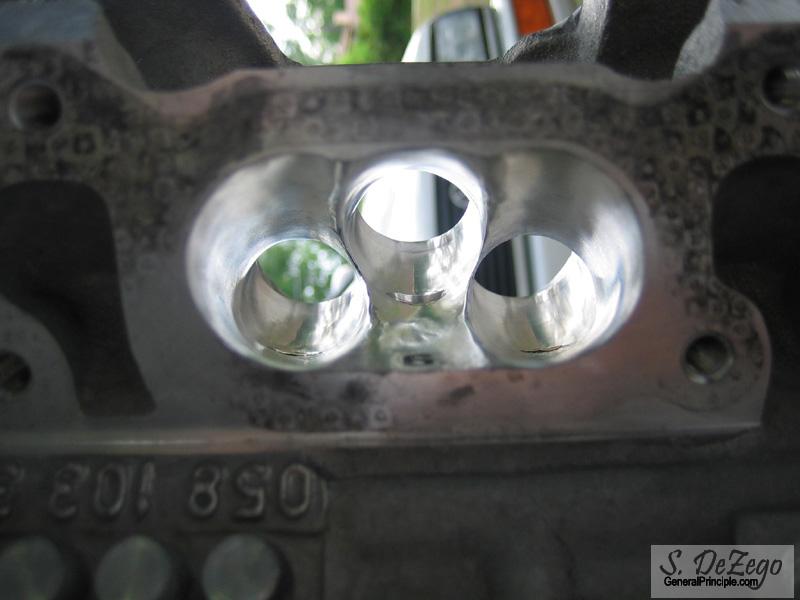
Here is a pic of one of the intake cyls that I had finished a little while back.

April 29, 2007
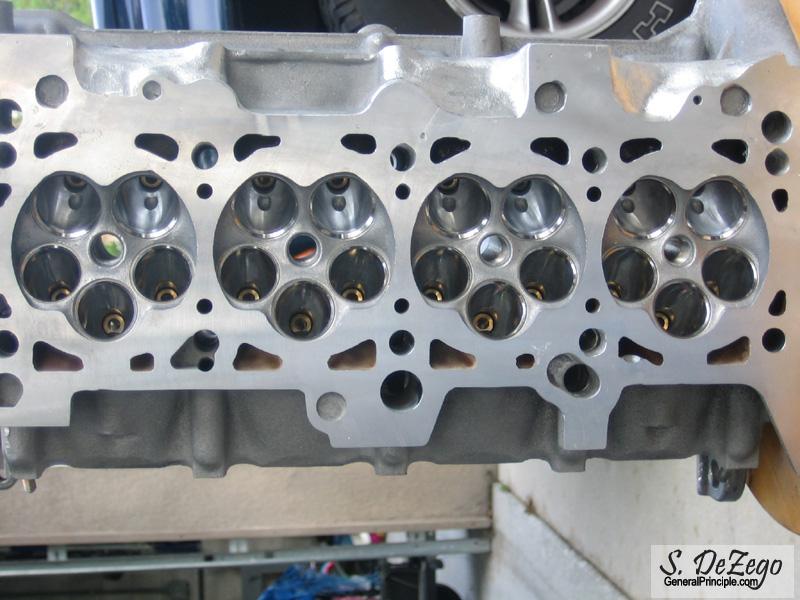
Porting is finished!

May 04, 2007
am using Stock valves since everything was in good shape.
My opinion is that I see no point in going oversize valves because of the head shrouding and closeness of the valves to begin with. I think the big gains here are the porting and bowl work and enlarging the ID of the seat slightly (i.e. under the 60* cut into the bowl). Also, there are significant benefits in Sodium filled Exhaust valves that I would rather not just throw away.
Not saying that there is no value in the very small OS valves available, just not worth it for my project goals and is reserved for the ballerz If, I needed all new valves, I would consider it.
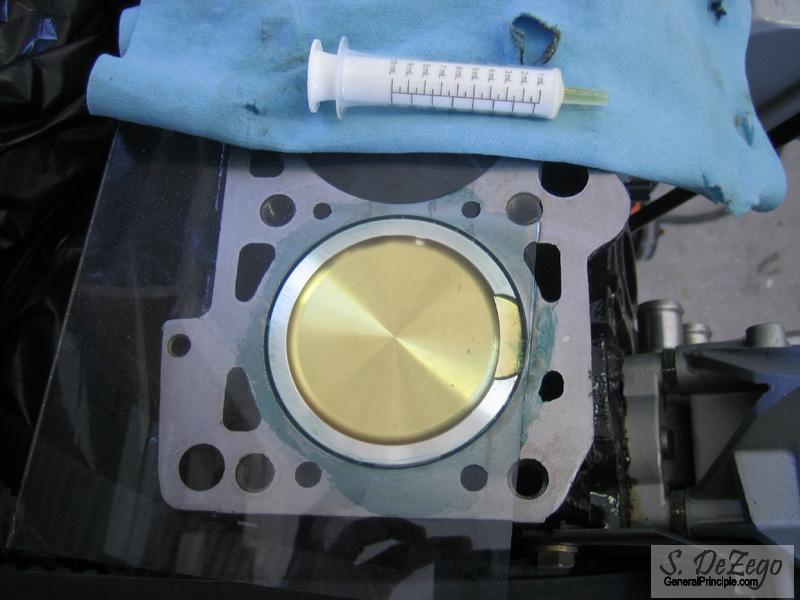
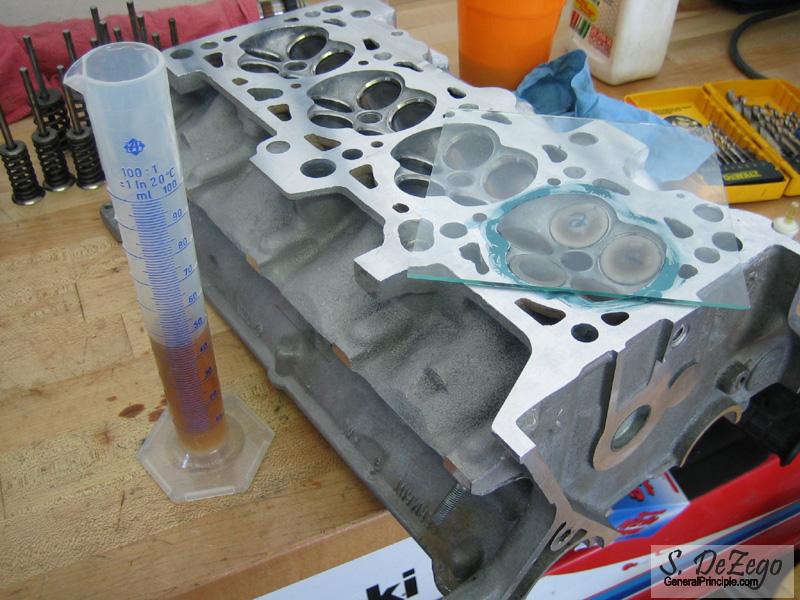
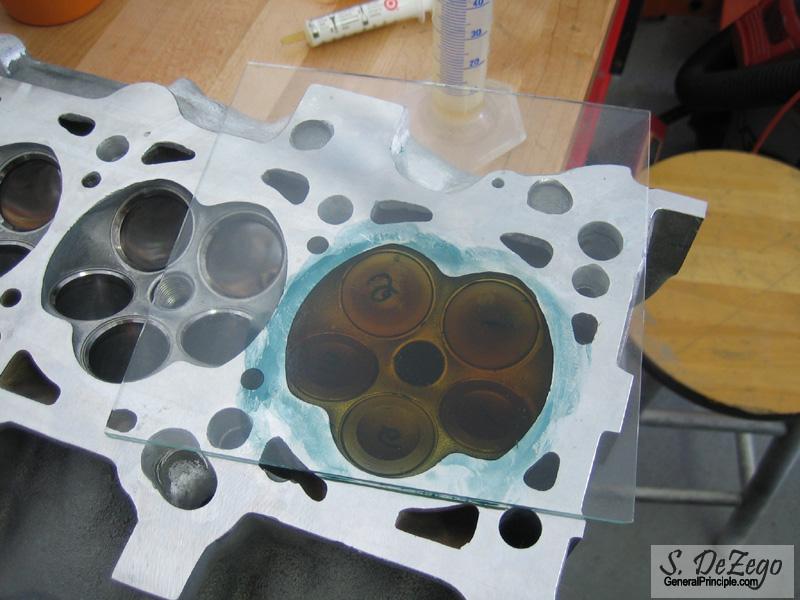
I just cc'ed my Cylinder and Head (#1) because I want to see what my CR is. Since, I decked the block and had to shave the head slightly after welding, I want to make sure I am still where I want to be.
I will post those details this weekend and still want to polish the Combustion chambers. I also planning on claying the pistons to check and verify valve clearance. I am sure they are fine as JE made the pistons, but I want to check in case I decide at the last minute to drop a set of cams in here
S
Forgot to mention that I removed all of the stock oil galley Ball Bearing plugs. what a PITA.
I just got my 1/16" NPT (Pipe Tap) yesterday (hard to find locally) and am going to allen plug all of them. I decided to do this to clean all of the oil galleys and make sure there was no debris/residues caught in any of them.
S
May 05, 2007
I just cc'ed my Cylinder and Head (#1) because I want to see what my CR is. Since, I decked the block and had to shave the head slightly after welding, I want to make sure I am still where I want to be.
The question "What is my compression ratio" gets asked a lot in the various forums, so I figured that I would "show my work".
Here is some stuff that may help
CC = Combustion Chamber (Referring to the physical chamber itself)
cc = unit volume cubic centimeter or cm*cm*cm or mL (mili-Liter)
PV = Piston Volume (At TDC to top of block)
CD = Cyl Displacement
HV = Head Chamber Volume (approx 43 cc for stock 20v)
HGV = Head Gasket Volume (depends on final Gasket thickness!) (Pi*R*R*Thickness)
My 2l= 92.8 Stroke and 83mm Bore = 2008cc
Cyl Dis (CD) = (Bore x Bore x Stroke x 0.0031416) / 4 = (2008/4 = 502 cc)
HGV = 8.66cc (~1.6mm Compressed for stock 2L MLS)
PV = 9cc (Measured)
HV = 42cc (Measured)
Compression Ratio = (CD + PV + HV + HGV) / (PV + HV + HGV)
Note: If you have a compression ratio goal you can work backward.
CR = (502 + 9 + 42 + 8.66) / (9 + 42 + 8.66) = 9.41 :1
I wanted to be around 9.25:1, but since the block was decked and the Head was shaved slightly, it brought it up a bit.
I am going to remove 1cc from the CC when I polish them which will be perfect.
Shawn
cc'ing the HV and PV
May 24, 2007
similar, but the head is "Last in Line" to get oil pressure per say and the oil galleys are small in comparison to the oil channels at the filter housing. Drawing from the head might drop the pressure in the head slightly (i.e. hydro lifters, journals, etc). Since the G60 line is so small and flows so little, though, I am sure it is negligible though and is likely where it will end up.
I just got done tapping all of the Oil Galley plugs and did tap the one near the Coolant flange to M10. It nothing else, the Mk2 secondary Oil pressure switch is going there, but i will likely run the charger line off there as well. I have the pressure switch in there now and it looks factory
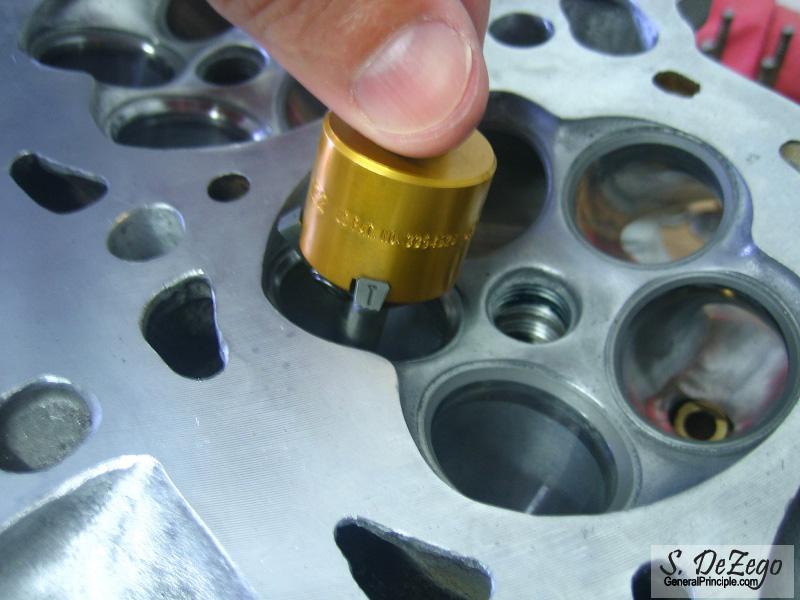
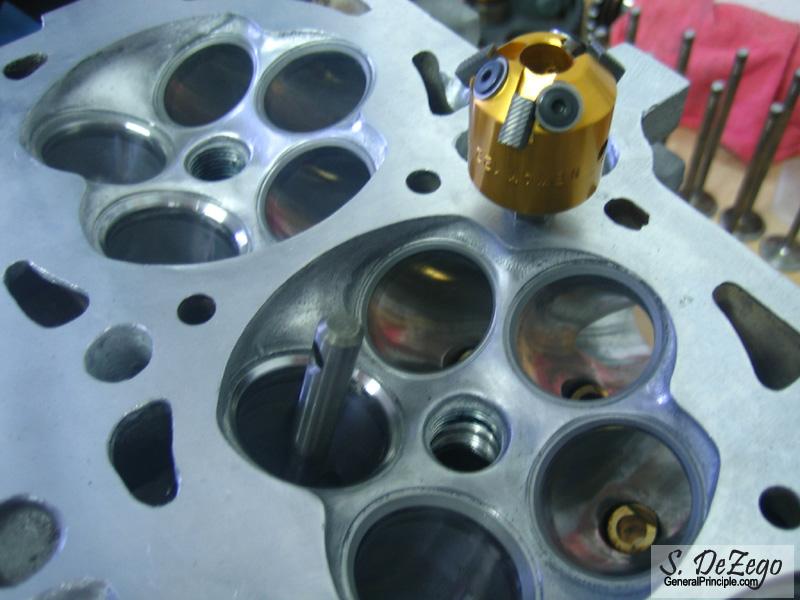
A small update. I went to finally assemble the head and hand lapped the valves to check them. 3 of the Ex seats had an ever so slight issue. I am not really sure from what (Factory possibly), but it is enough that i want to fix. My neway seat cutters were way too big for the 20v head so, I have the right set coming so I can clean up those Ex Seats. I'll have some pics to clarify it and hopefully my cutters will be here before the weekend.
Baseball season is over (I was coaching), so now I have my spare time back and am ready to get down to brass tacks..
Shawn
June 10, 2007
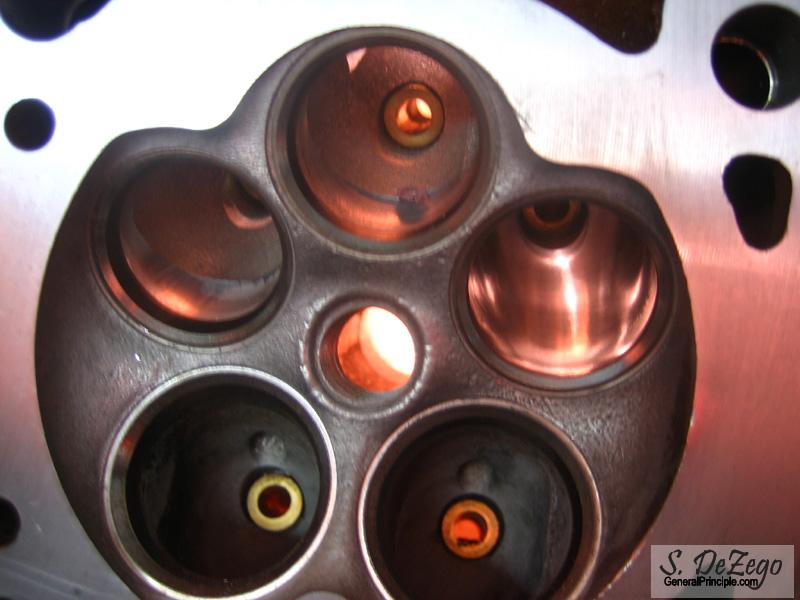
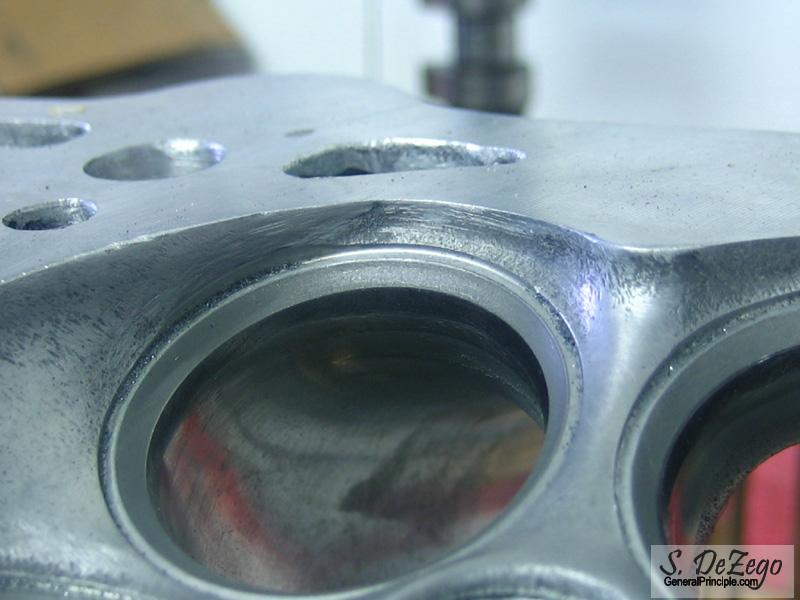
Good progress this weekend for a change. As I mentioned above, I wasn't happy with the way the valves Hand Lapped in, so I decided to do a valve job. In the First pic, you can see that there is an area on the top of the Exhaust Seat that the valve did not lap in properly showing there is some seat distortion for some reason. There were 3 ex seats like this, but I decided to cut all in/ex seats.
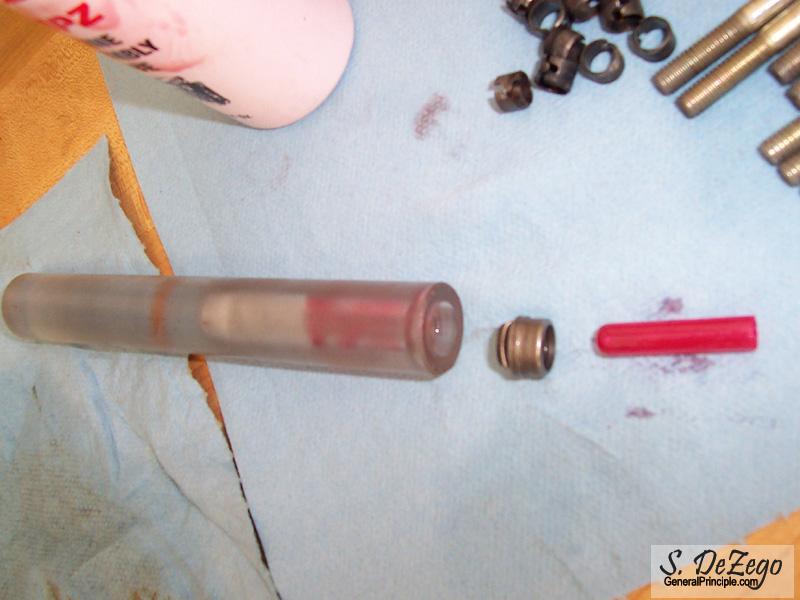
Also had a spare piece of Lexan Rod and made up a valve seal tool on the lathe. Worked flawlessly as you will see.