You must be logged in to rate content!
5 minute read
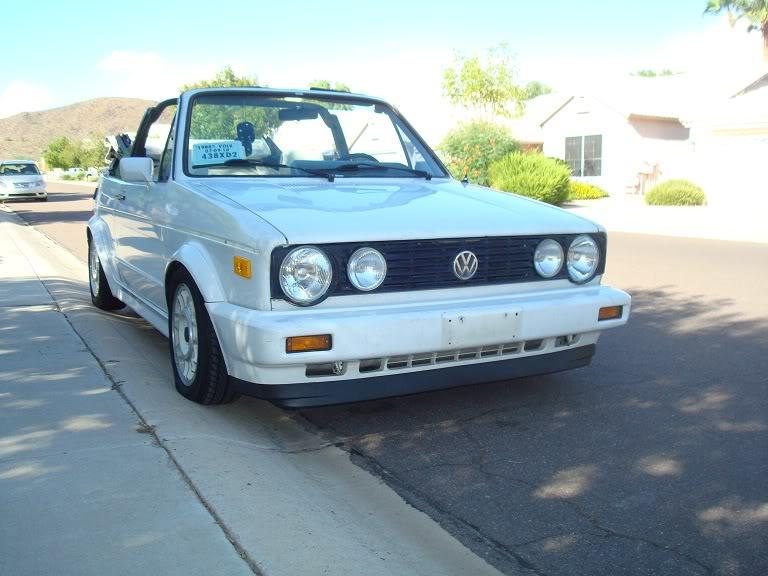
MK3 lip install on MK1 Clipper Kit
Compliments of DubsesdA3 @ www.vwvortex.com
Here you go people. I know that there aren't any good helpful posts out there about installing one of these. This isn't a true step by step DIY, but just a good hint of how to do it. It took me a while, but i kept stepping back to clear my head, which helped from over trimming.
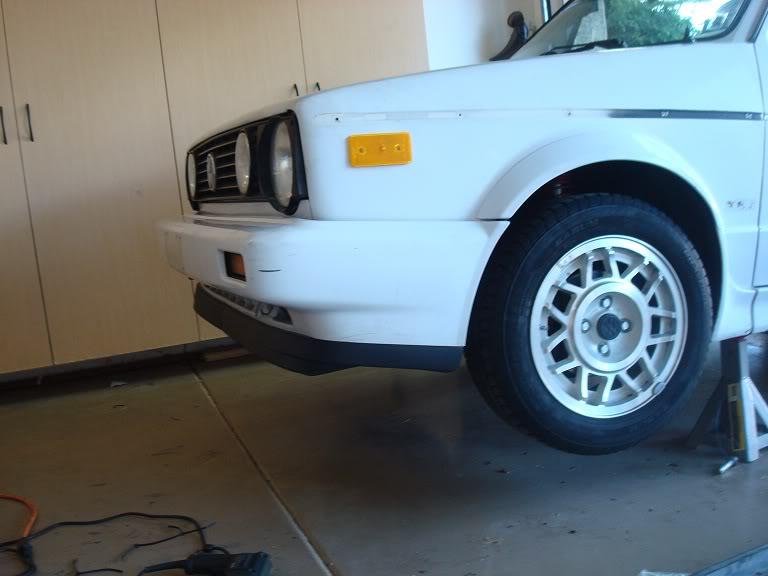
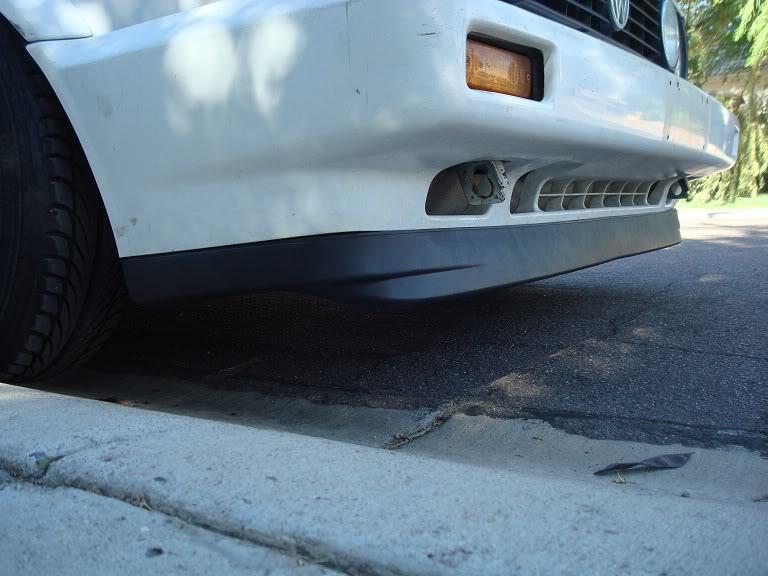
I installed a MK3 duckbill because frankly, the VR lip doesn't flow with the car, and looks out of place. This to me is a good subtle lip that looks as if it could be stock.
All you really have to do is line the sides up the way you want them, and trim the center of each half to fit. I don't know how much I trimmed, but i did it all with a razor blade to help keep it straight and tidy. It takes a while, but if you do it right and spend the time, it will come out great.
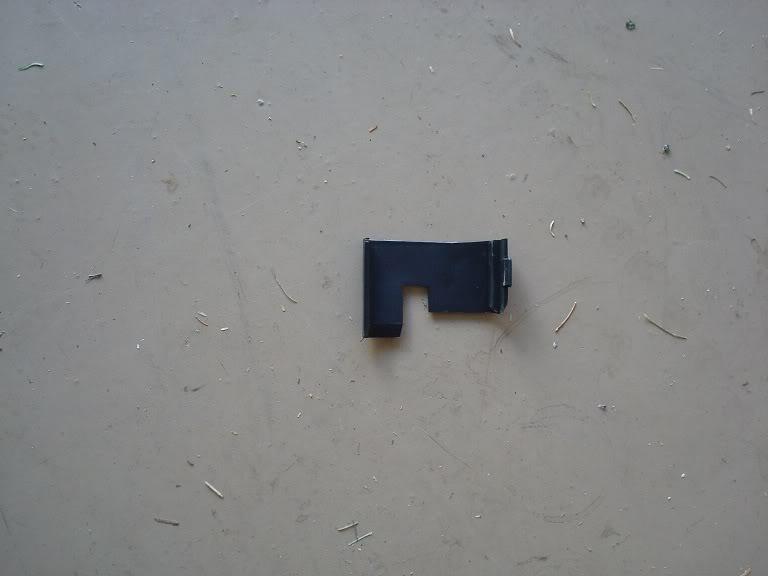
You will need to cut the clips off and the center slide connector out, and work from there.
BUT DON'T THROW THE CONNECTOR AWAY!!!!!!!!!!
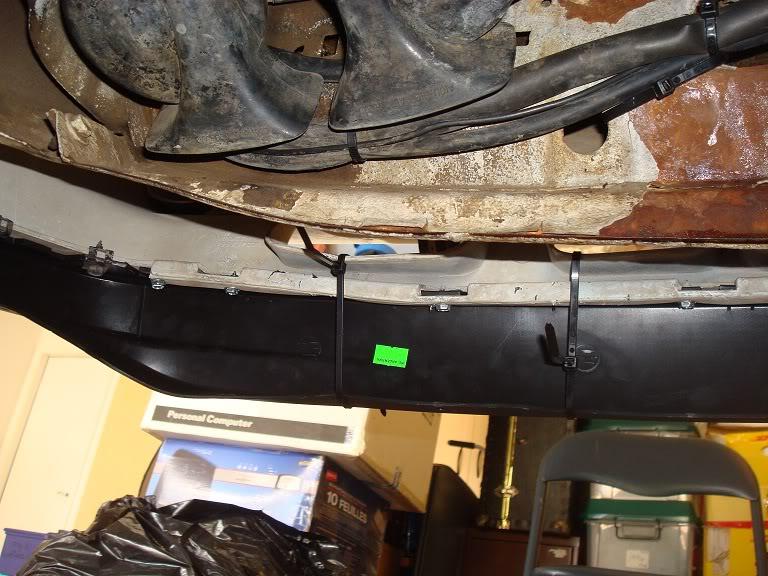
First thing is to mock the lip up. The pic here is post-cutting, but you get the idea. Zip ties are a great thing to have while doing this. I used about 50 or 60 from mocking, cutting, mocking, cutting, and the final hold up to help drill the screws in.

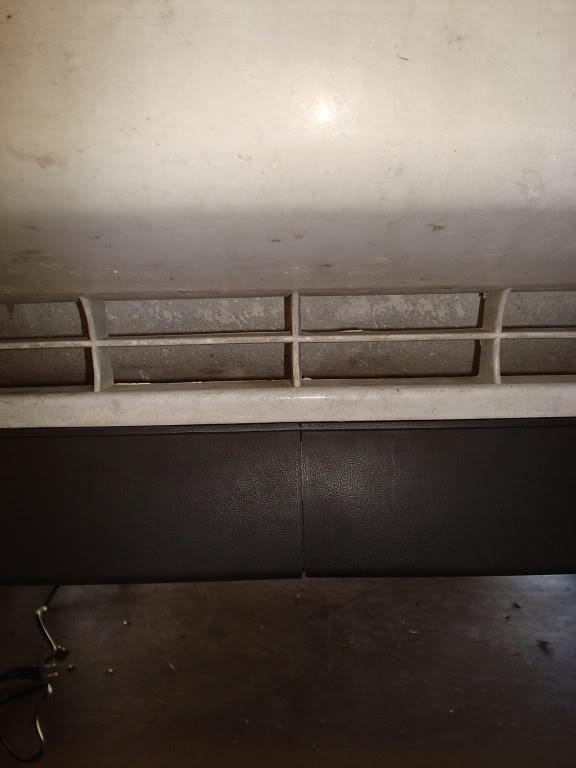
Once you have it trimmed enough, you're going to reuse the side holders (3 on ea. side), and you will probably need to make new holes. A sharpie helps alot, but use your imagination. I drilled a small pilot hole in the lip and the bumper to help guide the massive stock screw.
After you have the sides done, zip tie the lip in place as tightly as you can and MAKE SURE IT IS TRIMMED PROPERLY AND SEATED EXACTLY WHERE YOU WANT IT.
Use whatever style of screws you want to screw it in to the bumper, as the stock clips won't do a damn thing. I had sheet metal screws lying around, so that's what I used.
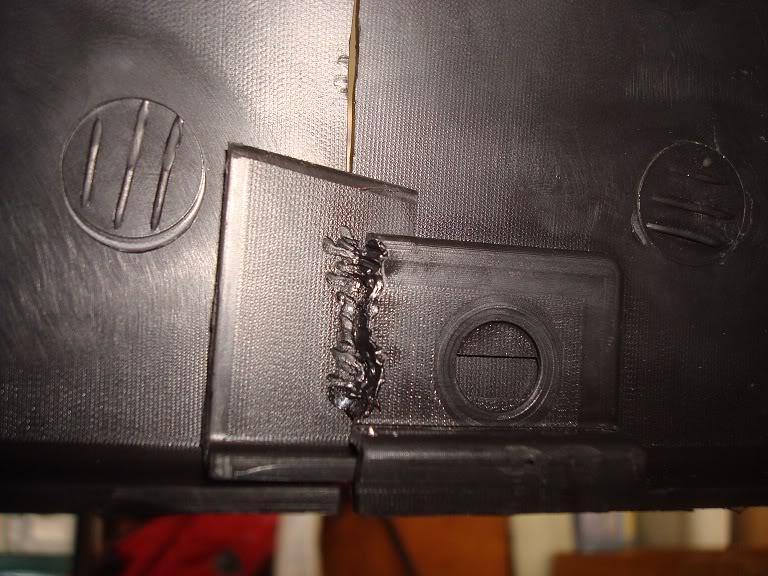
Here is the lip connector cut out.
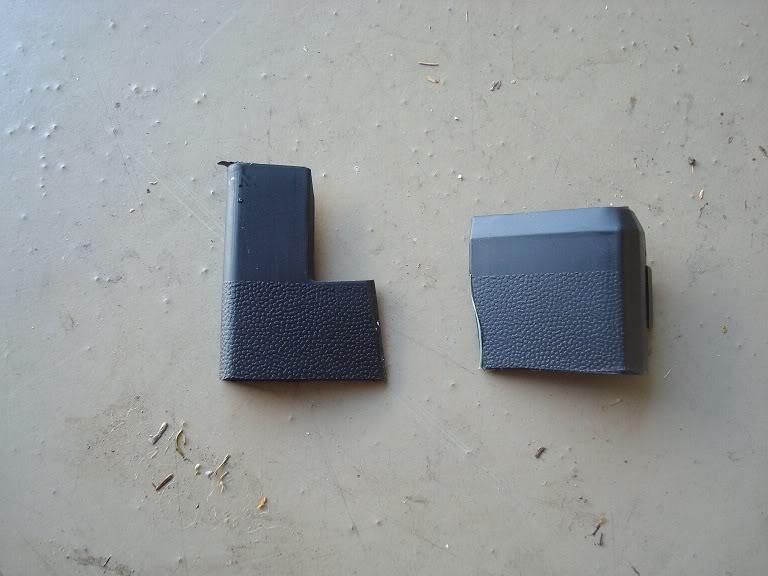
Here is the lip connector cut in half. This will be slid into the place where it would slide into if it was still connected to the stock, untrimmed lip. If you don't do this, the center of the finished lip will look like garbage.
Slide it in like so.
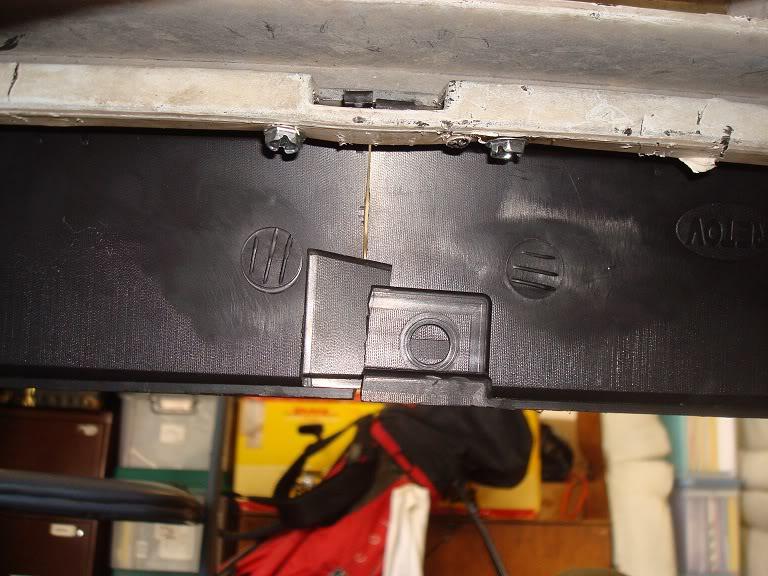
I plastic welded it to ensure that it didn't vibrate out.
And here is my finished product. I'm very happy with the outcome, and I ALMOST trimmed more. Very glad I didn't, which is why I say to take your time and mock it up as often as you have to.
There are other ways to do this, I'm sure, so this is just to help you out with some ideas. Hopefully there won't be too many posts asking how now. 
It helps to have a drunken, 3 legged dog to keep you company.
