You must be logged in to rate content!
10 minute read
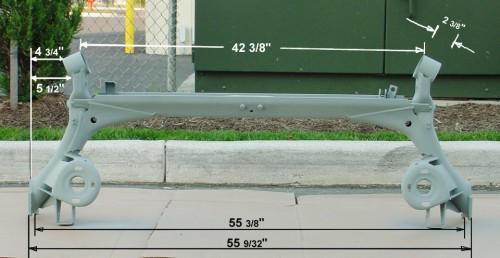
Rear axle bushing replacement
Compliments of RabbitsKin @ www.fourtitude.com
I did some searching and couldn't find what I was looking for, so here is a how-to on replacing the hydraulic-bonded rear axle bushings in a MKIV.
Why do this at all: Some MKIVs came with an oil-filled bushing which can crack and leak over time, causing clunks and poor handling. Mine weren't leaking, but they were cracked and the car is pushing 100K miles. I was adding bigger rear brakes and a sway bar at the same time, so I decided to just remove the axle from the car. I can't see how this could be done with the axle still in the car, but some people claim to have done it.
Why do this yourself: I already had the axle out of the car, so I figured it would be no sweat to have the machine shop press out the bushings. I was wrong. They took one look at it and said they'd never be able to maneuver it the right way in the press. I called the VW dealership and they said they farm the work out to another local machine shop. I called them and they claimed they'd never done one. I figured I better do it myself since I don't have all month to get this done. If you have access to a place that is willing and able to press them out / in for you, I would recommend it.
Replacement Part: Originally this was a non-replaceable item, just get a new beam if you need new bushings. Now the replacement part is: 1J0501541C. I ordered mine fromhttp://www.worldimpex.com, I think they came to around $60 for the pair. I asked about different versions of the bushing, i.e. an Audi TT bushing or a 337 bushing. The part number listed above is the same for all MKIVs, including the TT. It is a "bonded rubber mount", has no oil inside, and looks like this:
Tools you will need for this job:
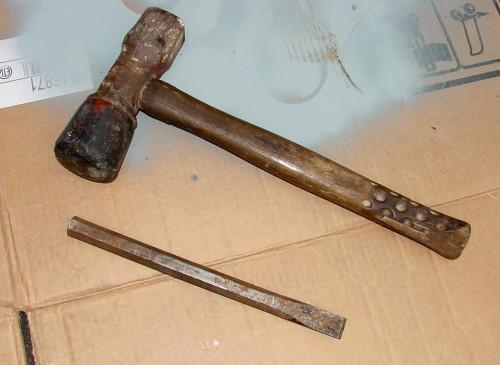
1) A decent-sized cold chisel, and a Big Hammer, like this:
2) A garden-variety hacksaw with a removeable blade
3) A drill with about a 1/4" bit
4) basic hand tools, air is nice, but not necessary
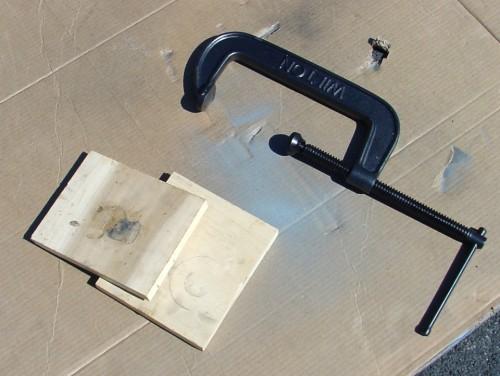
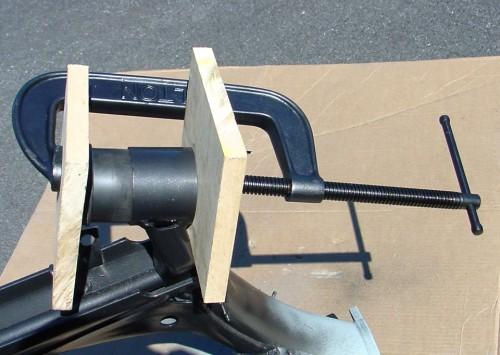
5) I didn't think I would need this, but it turned out to be the case -- a Big Honking C-Clamp, this one has at least an 8.5" throat. Oh, and a couple of scraps of wood:
Remove Axle:
1) Jack up car and remove wheels, obviously. Don't forget jack stands.
2) Disconnect brake lines, e-brake cables, and shocks (I left them dangling from the top mounts). Rotate the axle down and rest the rotors on the ground. Coil springs should almost fall out at this point.
I removed my calipers, rotors, and stub axles also, because they are getting replaced. This made handling the axle beam easier, but not necessary if you are just doing the bushings
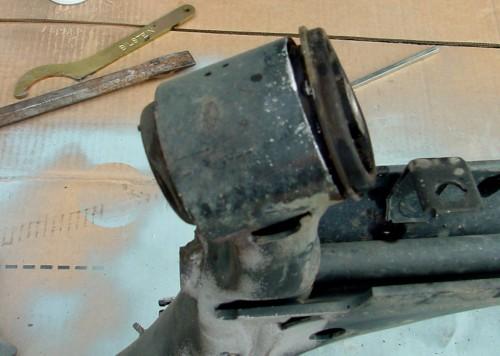
3) Remove pivot bolt and nut, which goes through each bushing. The inner fender liner is in the way, but you can bend it back rather than removing it. You might want to support the axle in the center with a jack so it doesn't come dropping down as you take out the second bolt.
Remove Old Bushings:
1) With the axle on the ground, drill a couple of holes in the bushing to drain out the oil. Let it all drain out, you don't want it splattering around when you're using your Big Hammer.
2) With the chisel and Big Hammer, go to work on the lip of the bushing, driving it in the direction of the bushing on the other side.
After a couple of hits it will start to look like this:
Keep driving it until you have it out. No need to burn it out with a torch, making a huge mess in the process.
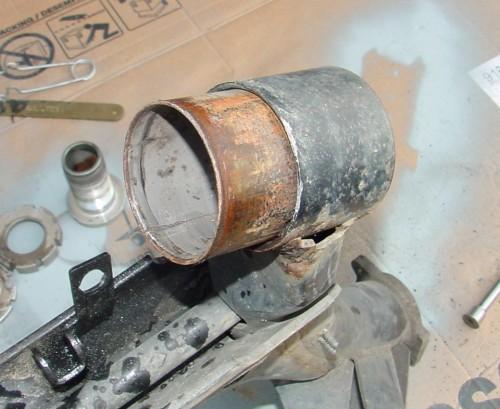
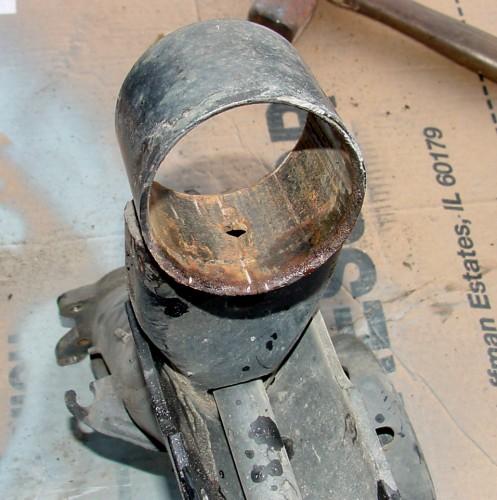
3) Now you have to remove the metal sleeve that was around the bushing. It looks like this:
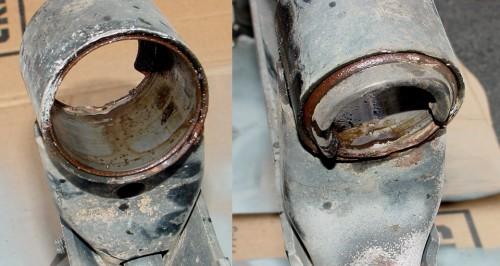
Take apart the hacksaw, put the blade through the hole, and cut one slot in the sleeve carefully. With the axle standing up, the bushing housing is angled perfectly for this type of easy cutting. You want to cut through the sleeve, but not into the housing:

4) One slot is all that is needed to relieve pressure on the sleeve, allowing you to pound it out with the chisel:
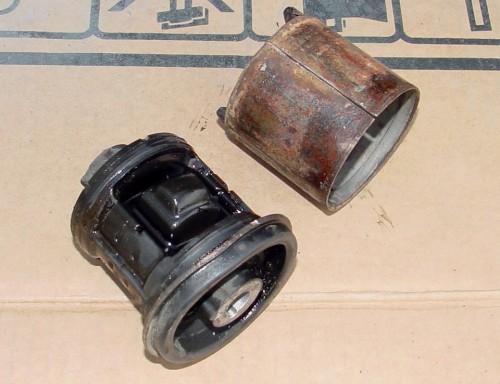
Here is what the old bushing and sleeve look like:
And the empty housing:
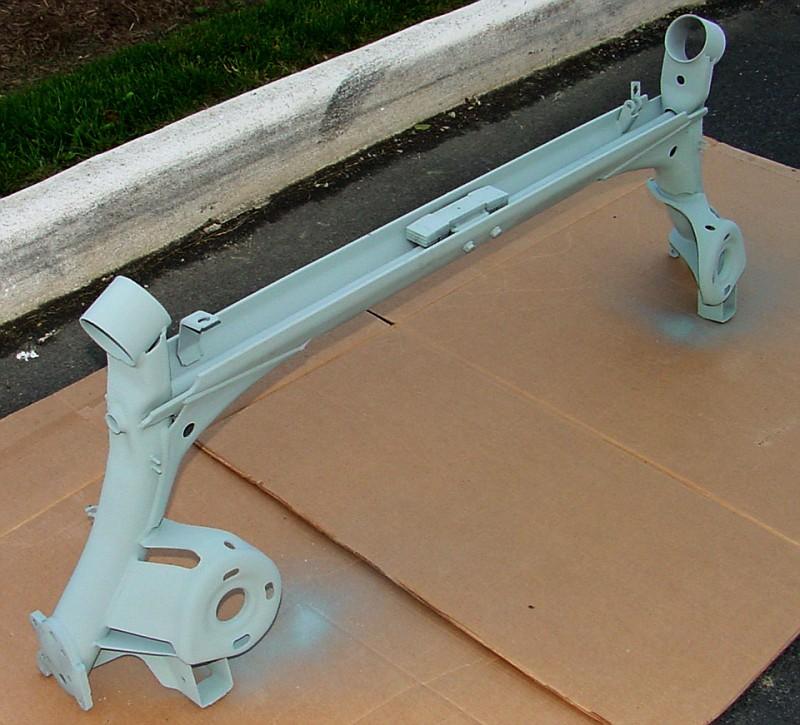
5) Repeat on the other side, stand back and admire your work. My axle looked like a mess, so I borrowed a friends sand blaster and went to work. After blasting and priming, it looked like this:
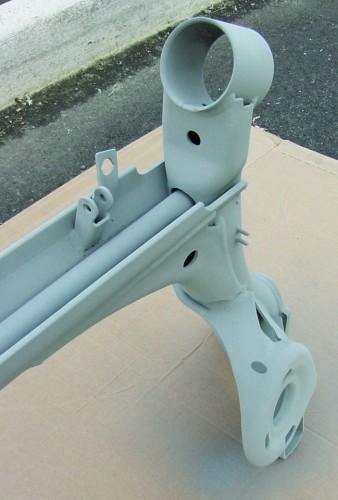
Just a little inspiration for you in case you're wondering why you tackled this job.
6) Go put your new bushings in the freezer.
Install New Bushings:
This part turned out to be a lot more difficult than I anticipated. I'm not sure if freezing the bushings did any good at all. Maybe the freezer wasn't cold enough or they weren't in there long enough.
1) Take new bushings out of the freezer. Try to fit them into the housing to see if they are even close. Mine were tantalizingly close, and I thought I could just tap them in with a hammer. Ha.
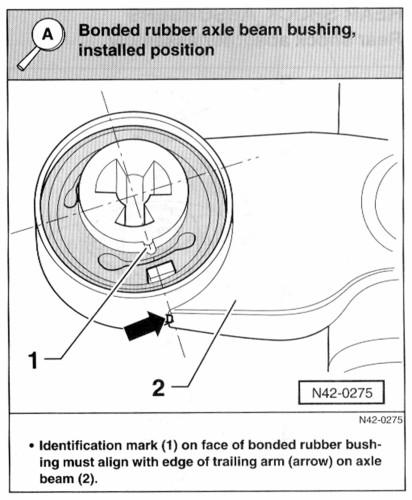
2) Check their orientation according to the diagram from the Bentley:
3) The problem is, the new bushings are rubber with a plastic sleeve, so the whole thing wants to give and rebound while you're hammering on it. There was just no way to get it started where it didn't pop back out of the hole when I hit the opposite side. There is a lead-in chamfer on both the bushing and the steel housing. My assessment: these chamfers need to be worked so that the bushing can get started in the hole. Break out a half-round metal file for the housing and some rough grit sandpaper for the bushing, and sand a nice gentle lead in on those puppies. I had hoped to get it done without filing metal, but in my case it was necessary. You might have better luck cajoling the bushing than I did.
4) Spray a little WD40 on the outside of the bushing and set it up as shown with the Big Honking C-Clamp. Once you get it started it will look like this:
I was able to get it a little over half-way in using this method, but then it didn't want to go any farther. I hammered it the rest of the way using the Big Hammer.
4) And viola! You're done. Now you get to do the other side!

Final Analysis: With a little perseverance you can do this. I would have much preferred to pay someone with a press to do this for me, especially after the difficulty putting in the new bushings. I had read where the frozen bushing just slipped right in, almost by hand. That was definitely not the case for me. I'll post up pics of the finished and painted axle once it is all assembled. On to other projects . . .
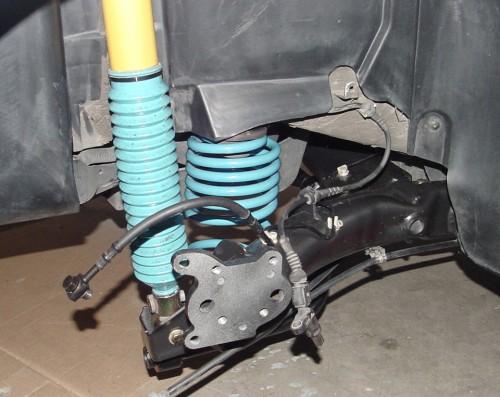
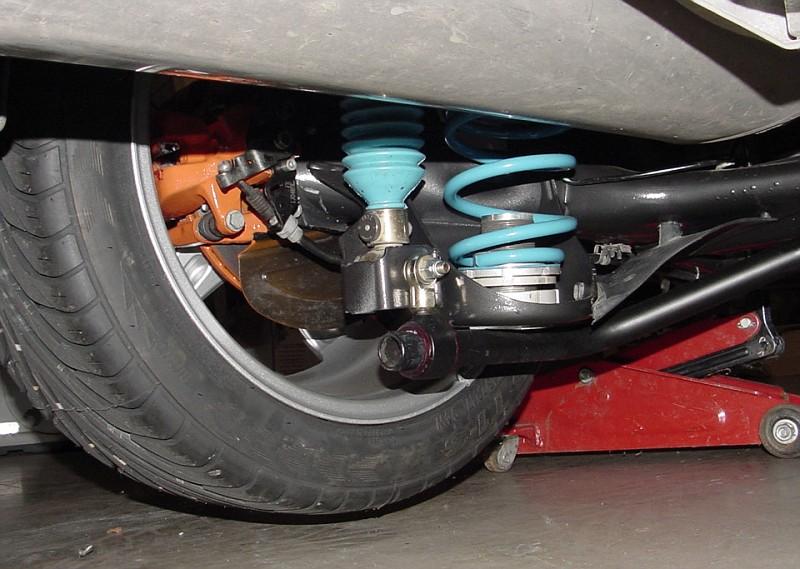
UPDATE: Here are some pics I snapped of the finished and installed rear suspension. Too bad it won't stay this clean:
Glad to see this is back from the dead again and still useful to people.
Close examination of the orientation of the bushings will reveal an important truth....their axis is not horizontal with the car. The bushings are tilted, yet the axle by design must rotate on a horizontal axis...so what does this mean?? It means the bushings are subject to twisting forces as the axle pivots up and down. It undoubtedly has to do with some kind of bias the engineers were trying to create, most likely to affect some toe or camber angle during articulation. Bottom line -- any poly bushing back there is going to squeak, in theory, because of the way it is being twisted every time you hit a bump. This is entirely different than what happens on a front control arm, where the bushing's axis IS inline with the pivot of the arm. The two cannot be really compared.
As far as why do this at all, that was covered in the original post. Crappy bushings are just....crappy. No one wants slop in their drivetrain, and VW's feel soooooo much better when everything is fresh. Plus the fluid-filled bushings are eventually going to leak.