You must be logged in to rate content!
4 minute read
How to remove and open your instrument cluster
Compliments of 71sbeetle @ www.vwvortex.com
UPDATE 31 OCT 2010: Since the original idea does not work I wouldn't recommend using this DIY to make the lights stay off, however it gives you a good idea of how to take your cluster out and also how to open it up to change the needles or to clean the inside for example
UPDATE 14 SEP 2010: well, I took the tape off today turns out that when it's dark, you don't get the full range of brightness out of your cluster lights and MFD display, it's limited to about 60% which is pretty dim in daylight ..... damn you VW !!!!
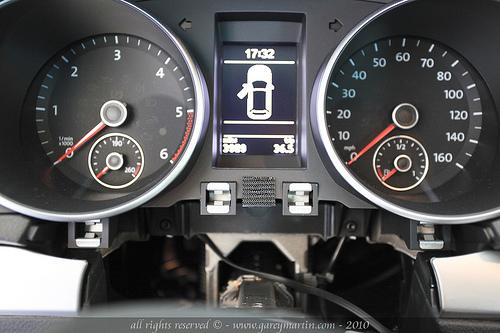
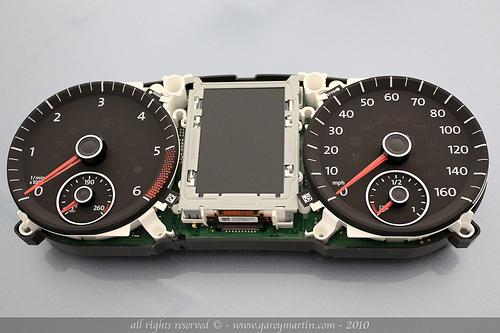
As some of you may be aware, the instrument cluster lights are always on as long as the ambient lighting is high enough even with the lights off. The turn off ONLY if ambient lighting gets low enough and your headlight switch is in the OFF position. The light sensor is located on the left gauge of the instrument cluster, between the 3 and 4 o'clock position (on a TDI between the 5,000 and 6,000 RPM marks).
I wanted my cluster lights to stay off during the day when my headlights were off, so I decided to trick the sensor and making it think it is dark outside, so it would turn the cluster lights off.
Now before you say it doesn't make sense why would the lights turn off at night, well it's a safety feature VW built in so that you wouldn't forget to turn your lights on at night .... except I need to be reminded to turn my lights on during the day too lol .... don't ask ! 
Anyway, it's pretty easy, should take you just a few minutes to do.
First, pull the steering wheel down and all the way out, next, unclip the trim on the bottom of the instrument cluster, you can also unclip it from the top of the steering column (it's just clipped on there)
Here is what you will see, now just remove the two Torx 20 screws below the cluster:
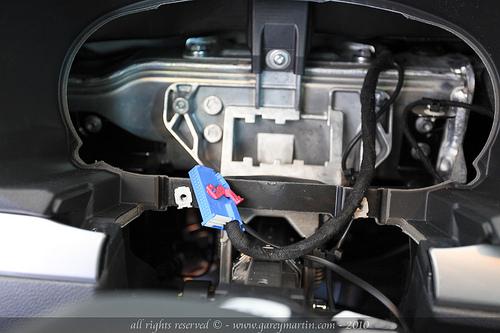
Next, just swing the cluster out and disconnect the single blue plug in the back (push the little tab and swing the pink locking mechanism out, the plug will come right out):
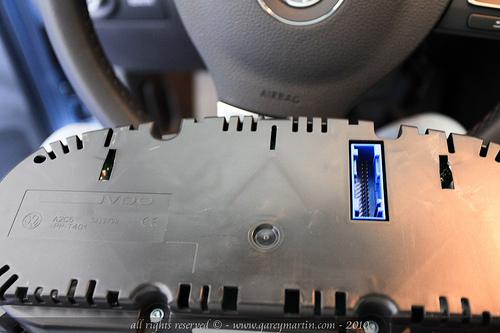
Now simply remove four little Torx screws (can't remember the size, but it's small):
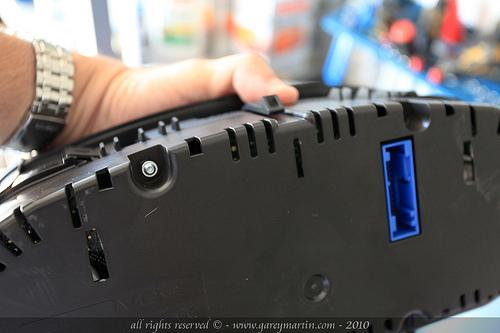
The front cover will swing out, it will only be held by the bottom sticker, you can just carefully remove the sticker from half of the piece and re-apply it later, here is what you will be left with:
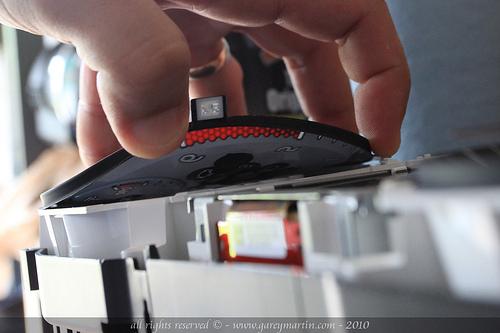
Now simply take a little piece of electrical tape (I cut a small square) small enough to not hide surrounding indicators, but big enough to cover the light sensor), lift the tachometer faceplate carefully and stick the electrical tape over the opening for the light sensor, on the back of the faceplate itself:
Now is time to clean the dust in the gauge with compressed air. Next just put teh front face back on, put the sticker back on, re-install all 4 screws, re-connect the cluster to the harness, put it back in the dash, put the two Torx 20 screws back in, put the trim back, re-adjust your steering wheel and you're all done .... see, that was easy !
Remember, I am not responsible in away for anything that happens while you work on your car !
Enjoy !!!