You must be logged in to rate content!
9 minute read
TMTuning 70mm Universal LED Foglight DIY- R32 Bumper
Compliments of Dmart44 @ http://forums.fourtitude.com
Ok so I currently live in Hungary, Europe and decided to purchase a set of 70mm Universal LED Foglights from TMTuning for my Jetta with a R32 front end conversion.
PLEASE NOTE: That I will not be held liable for any damage or improper wiring throughout this DIY. The following steps have been provided more or less as a possible suggestion on how to go about installing these fogs. Install at your own risk.
Now that is taken care of lets continue
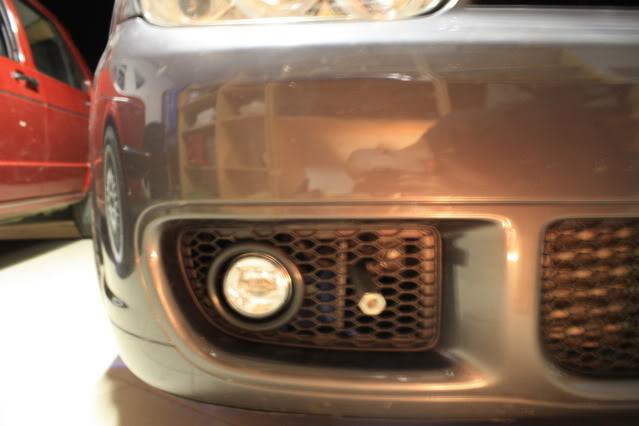
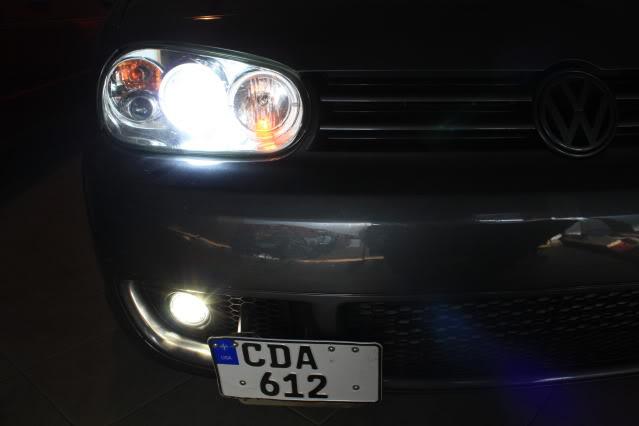
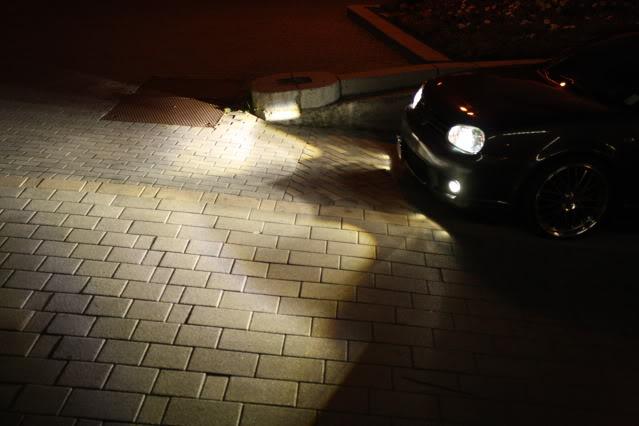
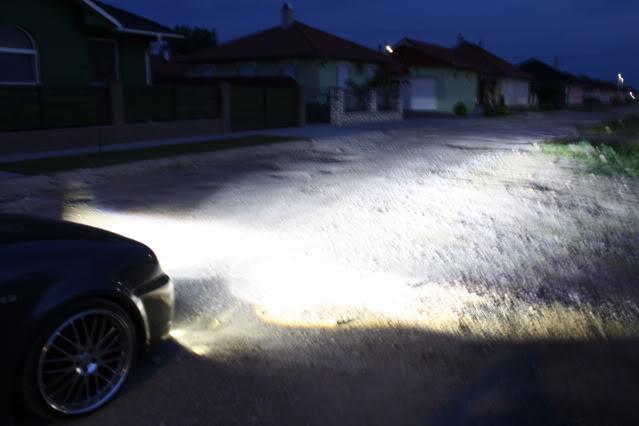
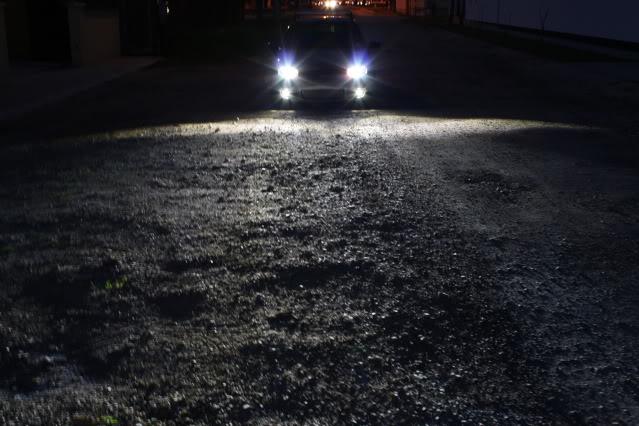
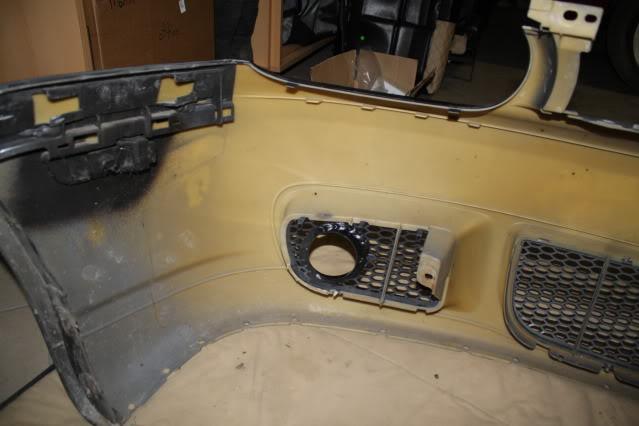
Because these fogs are 70MM there are no brackets that are mass produced for these so I figured I provide a DIY for all those who are interested in this product. As you will see these fogs are the brightest you have probably ever seen but you can be the judge. I also used the TMTuning R32 Bumper side vents with the foglight opening.
http://www.tmtuning.com/HOME/catalog...t_product=1644
The vent holes are a little bigger than 70mm but look great with the bracket system I made.
Items to purchase to have a clean install:
For this DIY I purchased everything from TMTuning. Service was good and they were able to answere some wiring questions for me as well.
http://www.tmtuning.com/HOME/catalog...t_product=2789
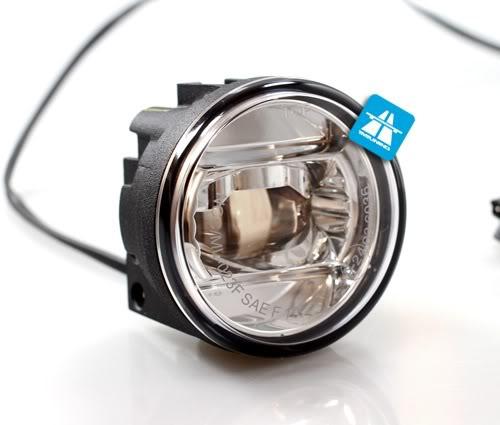
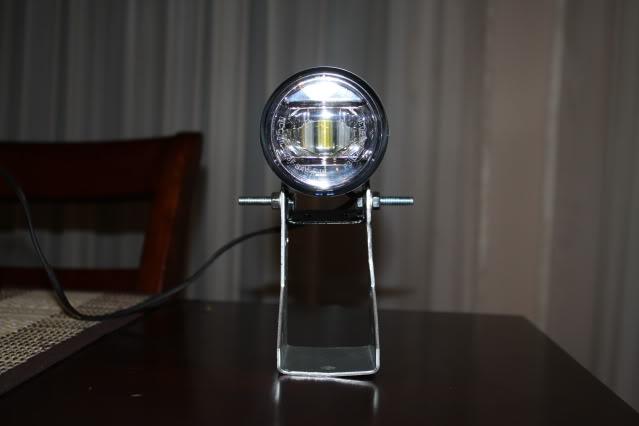
1. Set of 70mm Universal LED Foglights, LED High Beam lights, or the LED day driving lights.
Check out the Youtube video for possible fitment for MKIV, MKV applications and a tutorial.
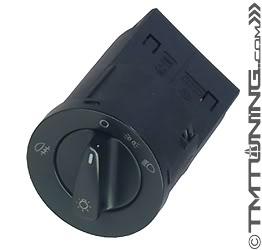
2. 1 VW OEM MKIV Euro Switch
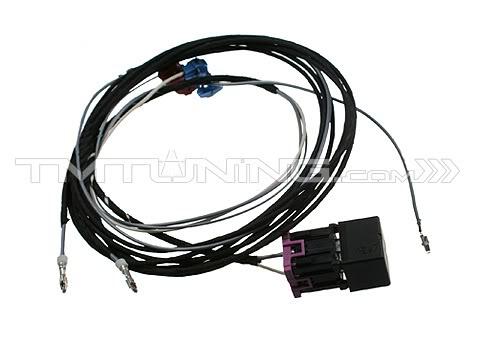
3. TMTuning MKIV Golf/Jetta Foglight Harness(Pretty Much Plug in Play)
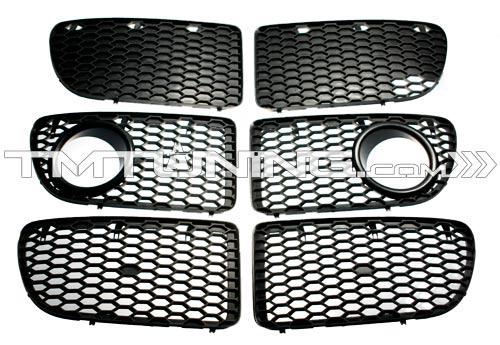
4.1 Set of OEM Bora 4 Bumper sidevents with foglight-opening.
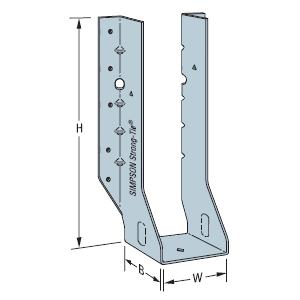
5. 2 Tie face mount joist hanger(Lowes, Home Depot or if you live in Hungary you can buy them at Baymaxx 
6. 10 Bolts with Lock Nuts and Washers
7. Left and Right R32 splash guards. Part#s to follow
Note for this DIY you will need these to mount the bracket for the foglight. more the support the better.
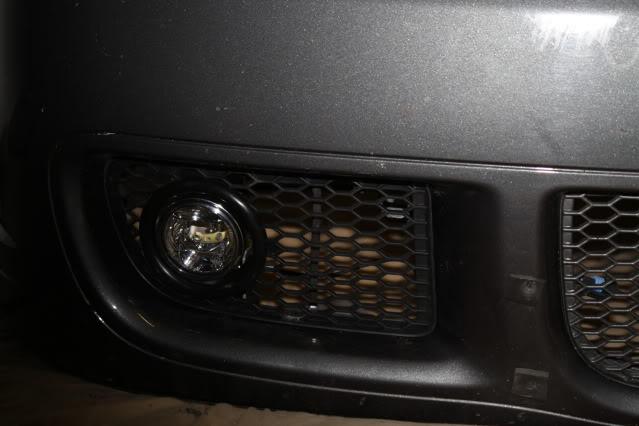
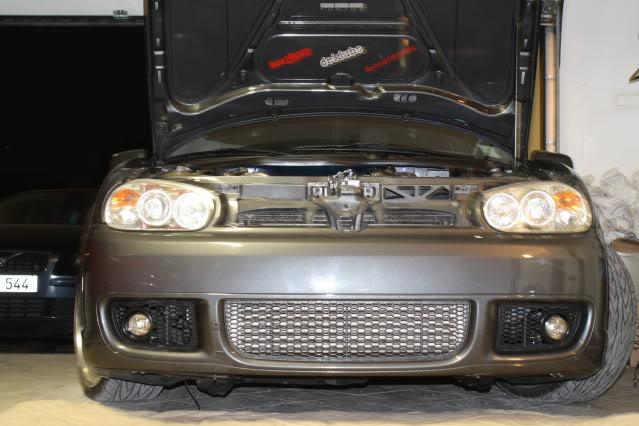
I will post some more pics tomorrow with additional equipment and the actual DIY in the next few days. In the mean time here is a picture of the final product.


----------------------------------------------------------------------------------------------------------------
DIY Begin:
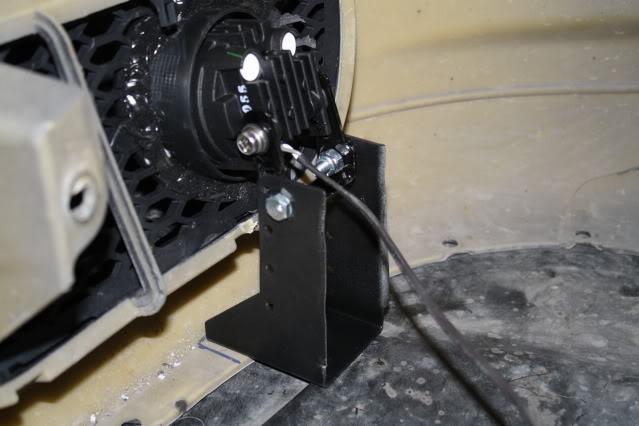
Step 1: Take each Tie Face joist hangar and cut the wings off the bracket so it is shaped like a U.
It should look like this.......
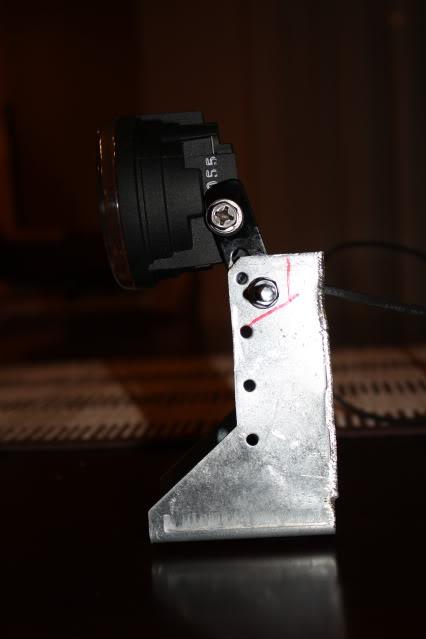
NOTE the pic has the Fogs already attached so here is the tricky part................
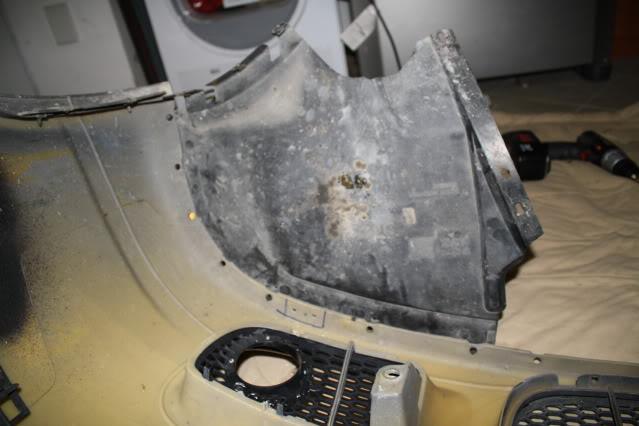
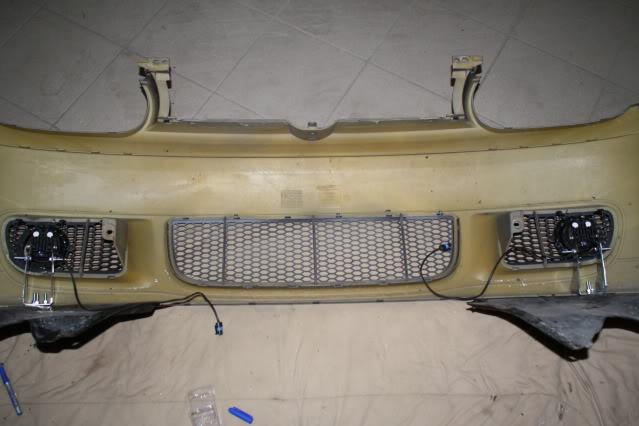
Step 2. Remove the left and right splash guards and install the light vents on the left and right. You will then have to pinch the Tie face joist hanger together with the fog light in between to see where the holes need to be drilled.
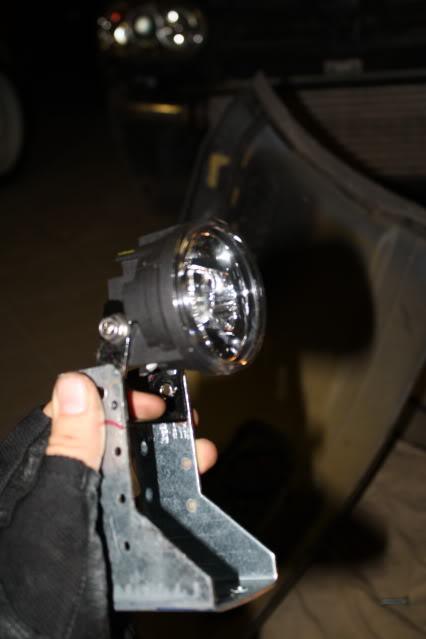

Then reach underneath the car and eyeballthe height of were the fog needs to be mounted and center it within the vent hole.
Should look centered like this.....
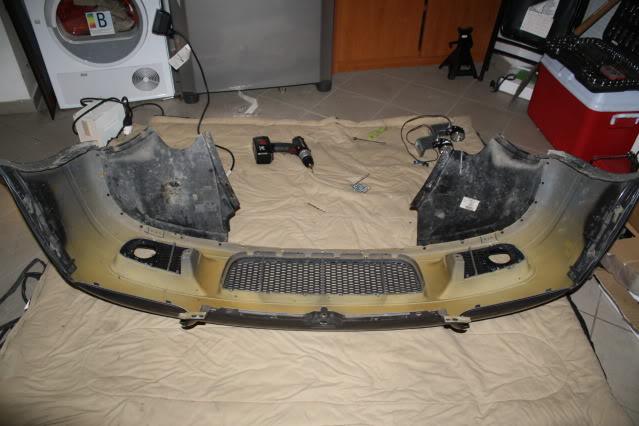
Step 3. One you drill the holes and mount the fogs to their respective bracket it is time to remove the front bumper.
Note: Didn't take pictures of this considering it is pretty much straight forward.
Step 4: Once the bumper is off. 2 holes will be drilled into the lip of the bumper through the splash guard and 1 hole set back about 1.5 inch into the splash guard. Check out the pics....
4.1 Bracket Centered
4.2 Mark bracket
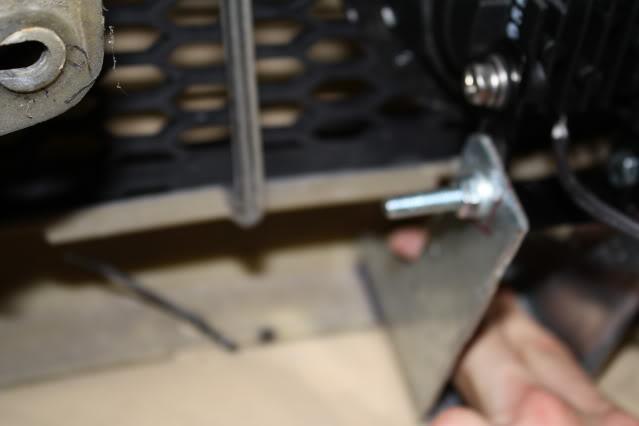
4.3 Drill two holes into lip of bumper where bracket will be.
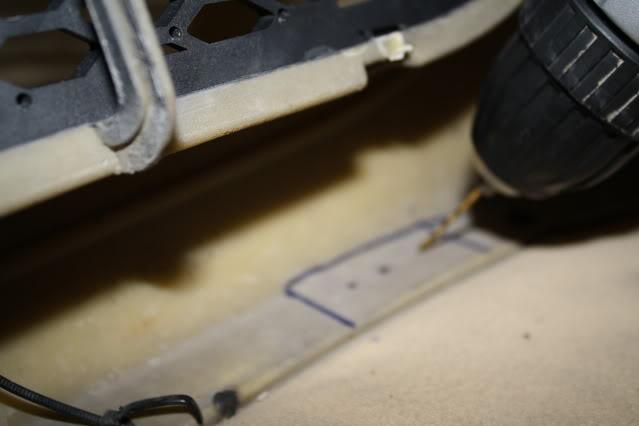

4.4 Temp Install splash guards--- mark and drill
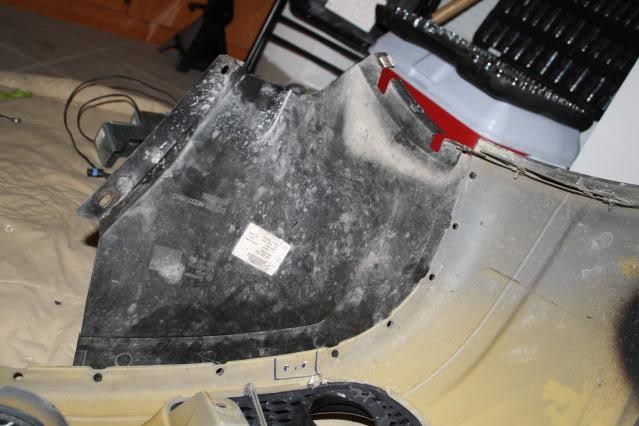
4.5 Finally mark bracket with holes drilled in lip of bumper
4.6 Drill holes
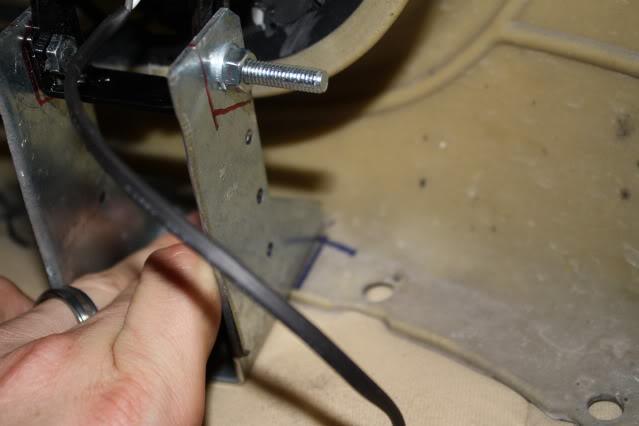
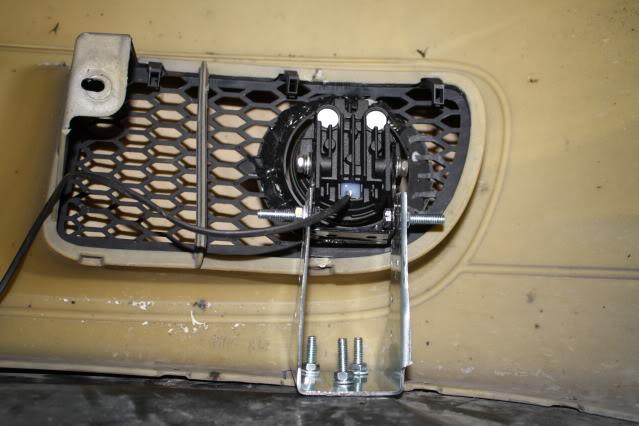
4.7 Install hardware in this order:
First: 2 front holes drilled in the bumper will need to be installed as such:
Bolt, 1 each washer, splash guard, bumper, bracket, washer, lock nut
Second: The rear hole drilled in the splash guard will need to be installed as such:
Bolt, 1 each washer, splash guard, 3each washers, bracket, washer lock nut
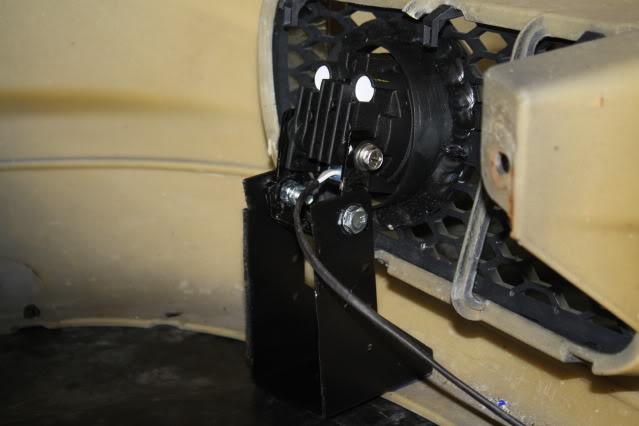
Once both brackets are installed they should look as follows:
Test fit
Step 5: Remove bracket and paint black then reinstall for a clean look
WIRING OF FOG LIGHTS
Step 1: Remove old OEM light switch. To remove Push dial in, then turn dial left, then pull switch out
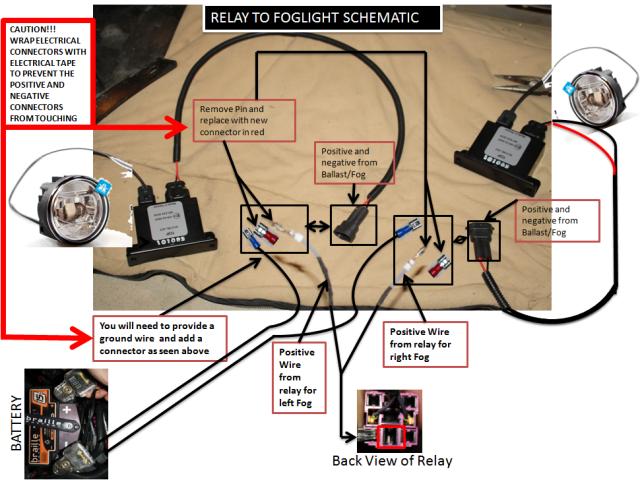
Step 2: Use this diagram to connect the wiring provided.
Note I didn’t make this but found it on a previous DIY.
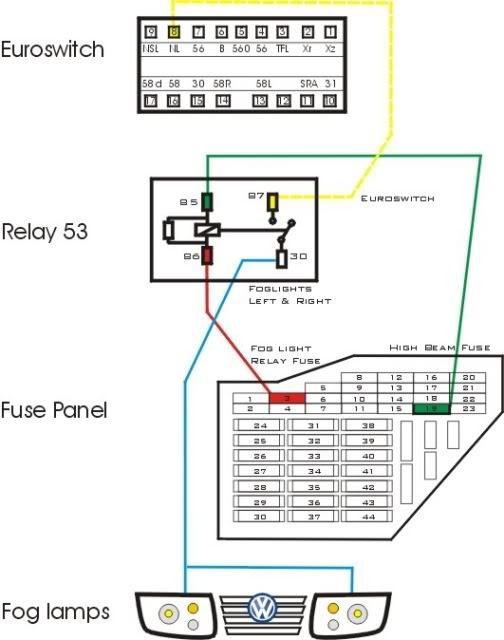
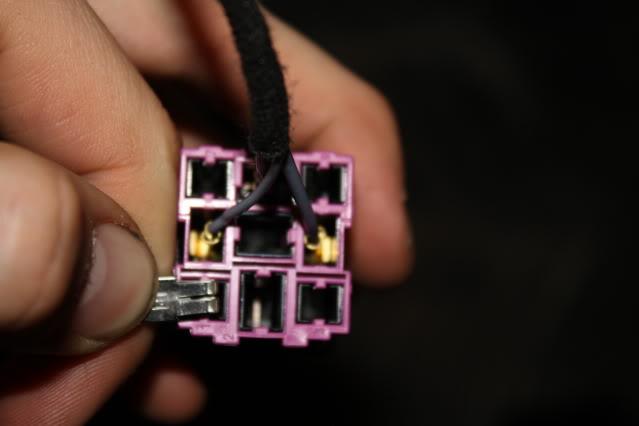
For this diagram Red is red and Green is blue. You will need to splice into the positive terminals behind the appropriate terminals provided in the diagram. Red is #3 and Blue (Green)#19
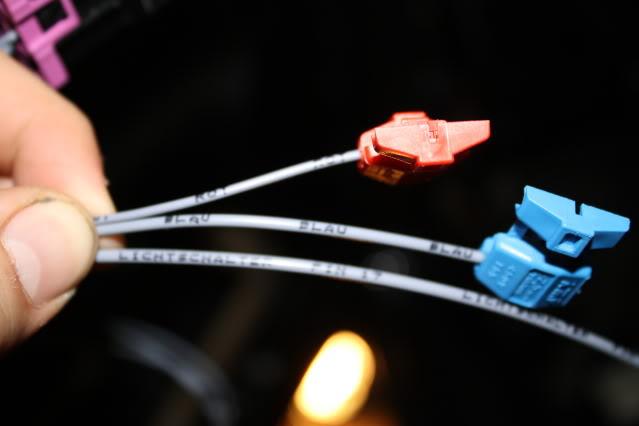
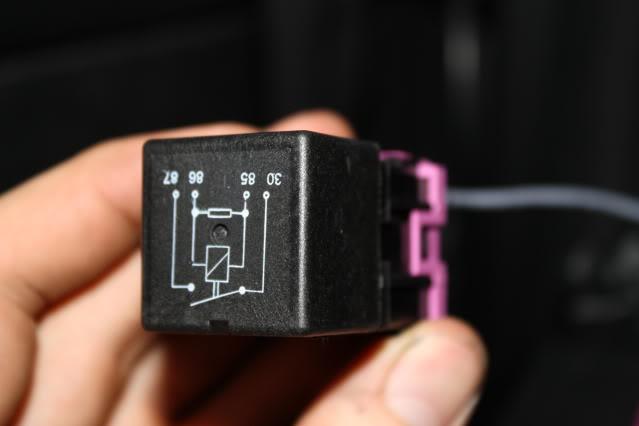
Three pins that plug into relay. Refer to schematic
Installed Euro Switch

Step3: Once all the connector are secured you can route the 1 to 2 wire connector for the fogs through the fire wall and route however you like
Use this schematic to wire the rest.
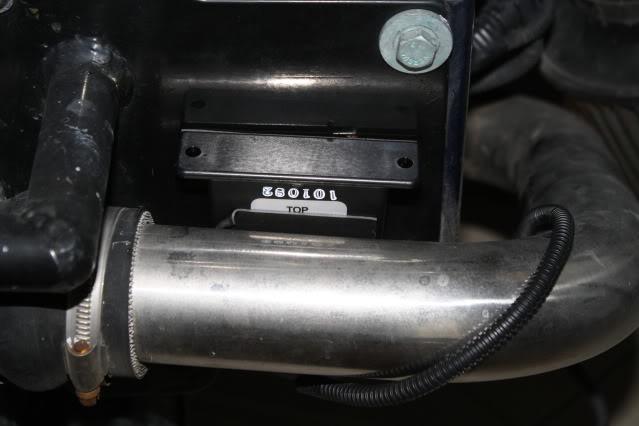
Ballast can be mounted with two sided stick tape to the left and right of the FMIC.
Also here is the final touch on the gominigo.com front license plate holder. It required me to shift the mounting holes about 2 inches to prevent to foglight beam being blocked.