By stevegolf
Ok, so this week end has been productive!
I had in my plans to ride my bike (ended up by plating & insuring my old black GSXR on friday, since it was so nice out) but weather degraded pretty badly... So guess what ? I worked on Euclid.
First, let me say that all this work has not been done on this week end, but I will say most of it has been. I just didn't take the time to post progress last week.
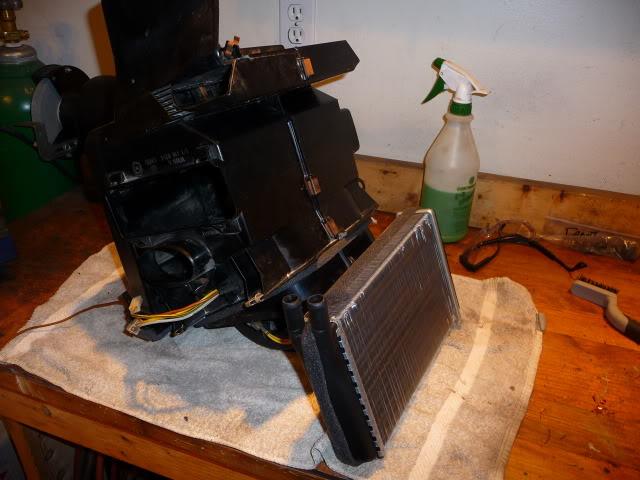
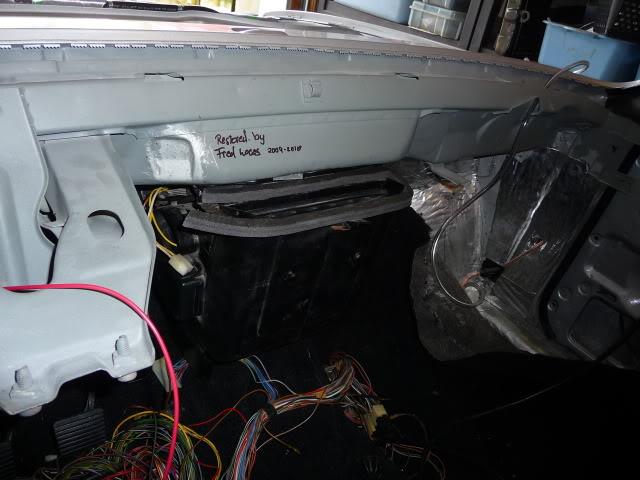
To start off heater box, was disassembled, cleaned ; OMG 30 year of crud, makes for very nice smell in the ventilation system... New heater core rad, and new foam seals surrounding the opening that mate with the dash & the main flap seal.
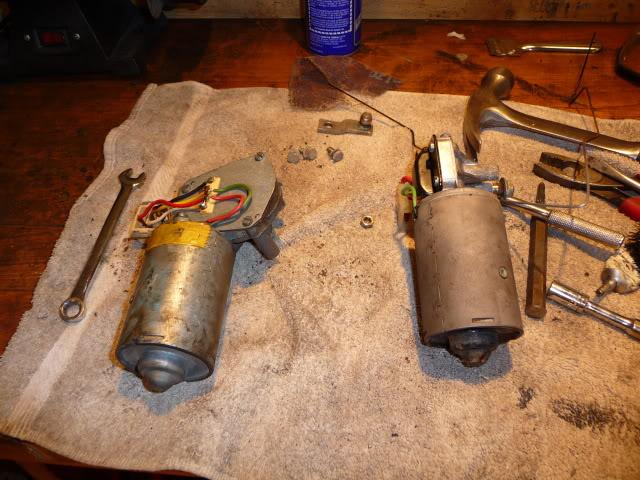
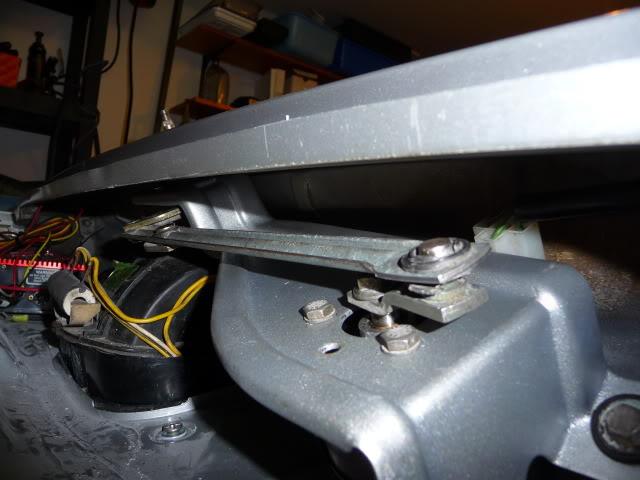
Next at hand; Wiper bracket / motor / linkage.
On the menu: retrofit a Mk3 motor with 52 cycles / minute at low speed, instead of the weaselly 42 cycle / minute, for the stock Rocco Mk1 windshield motor. I also sandblasted & painted the mounting bracket, and cleaned & lubed all the linkage & moving parts.
The Mk3 swap is not so bad;
- Changed the Stock backplate on to the Mk3 gear head assy'
- Cut the two wires on the motor, & re welded them into place (they are attached to the back plate
- I just had to redrill the mounting frame with the bolt pattern 60 degrees further (still with 3 holes)
Tested it with my battery charger & works GREAT!
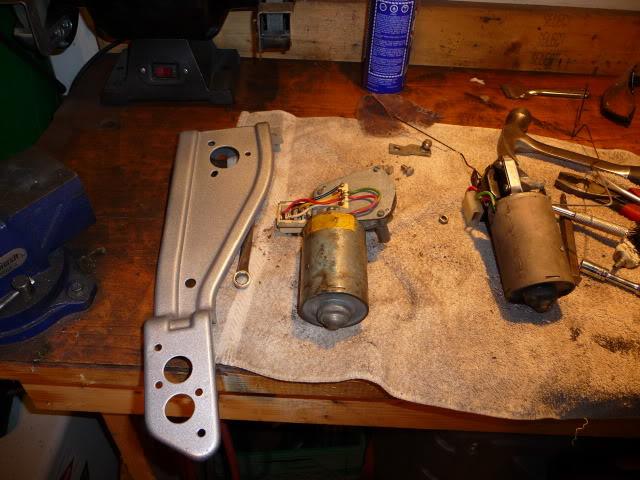
After all this, installed them both
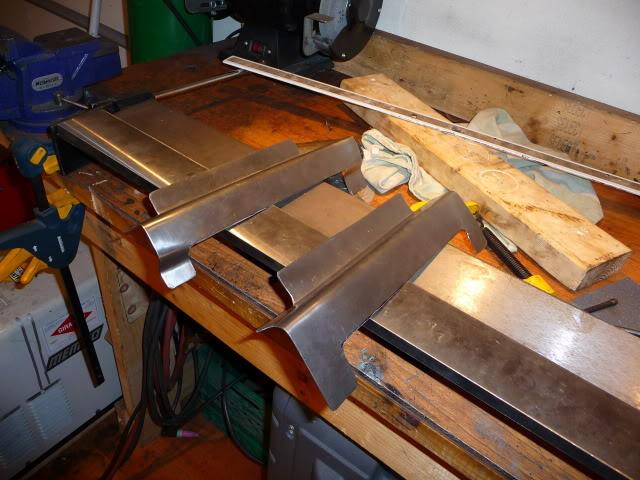
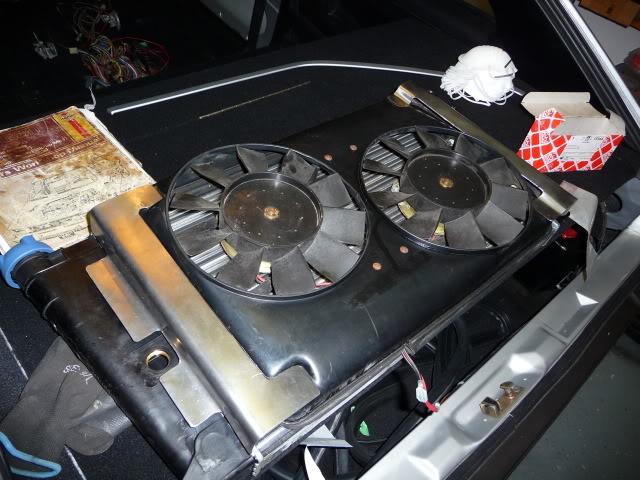
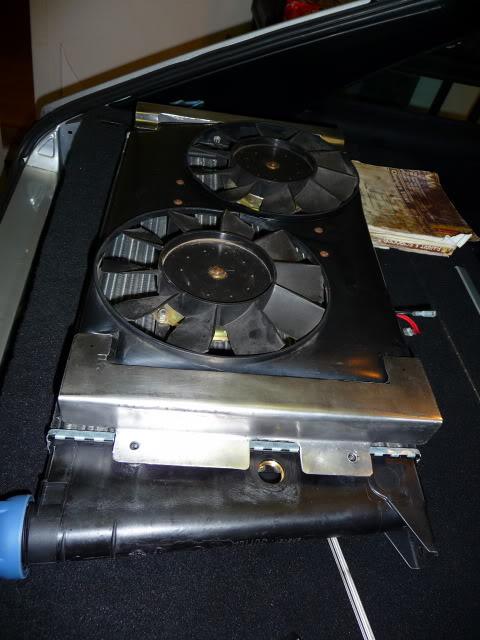
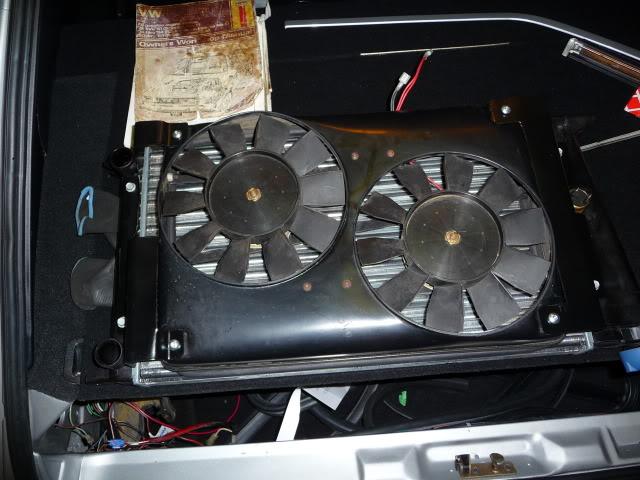
I am installing a Flex-A-Lite fan, because of the clearance issues with the carbs,, so I decided to attack that as well.
Decided to fabricate mounts to mate the rad & the fan. I saw that quite a few people just mount them up with metal strips, but wanted to make something a bit more cleaner looking...
Made a template with cardboard, the cut them out in the left over steel I had from making the body panel repairs. I like how it turned out!
Braked them just right, and after a few more cut outs for the ABF alternator set-up, and the fan switch, mocked them up for placement, and drilled the mounting holes accordingly. All corners, have been radii to prevent stress cracks, and it looks cleaner
Then, satin black finish...
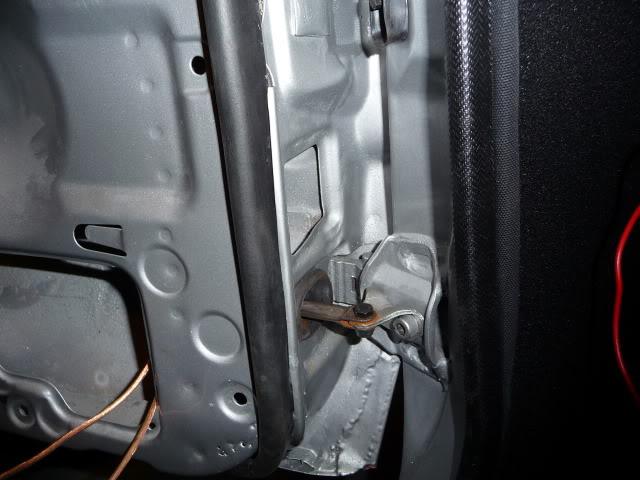
I then decided to disassemble, clean , & lube the door stops
PITA!!!
It took me a good 2 hours + to do this!
Thanks to the painter of the previous respray, I had to take of paint off the NLA seals, and the stop bar... Bla bla bla...
All new screws, and clean, and nice...
And ended up by screwing up my door alignment ; I did have support on the bottom of the door, when I too the bootom hinge screw off to refit the stop bracket, but the door managed to move anyways, and its real hard to close; it has to drop by about 3/8" at the latch to be align properly... Will do that near the end...
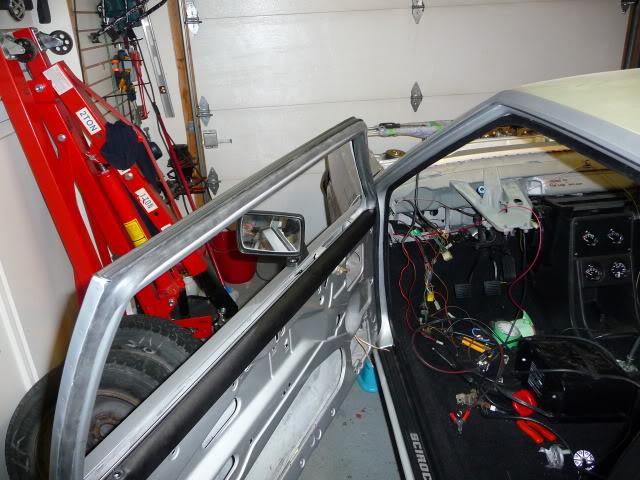
Installed the top door gutter seals, and the door seals too:
THANKS VINTAGE RUBBER !!!
Contact cement, and a heat gun to help the ABS top seal mold nice into shape...
You can also see my console mod with Oil temp, Oil Press, Voltmeter, and yes, EGT !!!
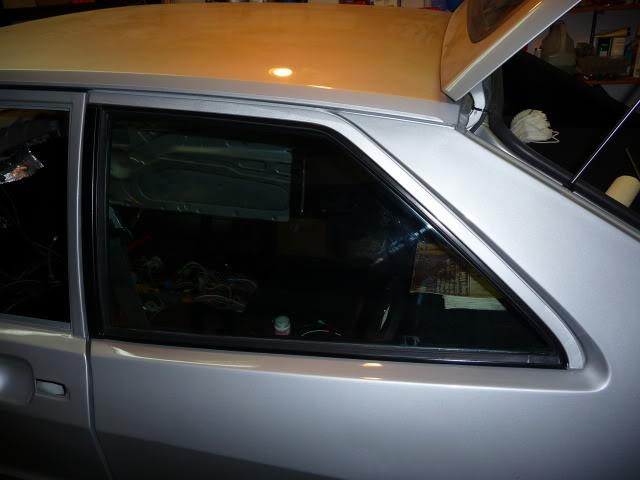
Worked on the rear quarter window moldings;
I sanded down the chrome moldings (they were pitted, and started to peel) and painted them satin black. did the same with the B pillar molding. Managed to salvage as many clips as possible to put them back on, but I'm missing quite a few of them for the other side; I ordered body clip moldings from MK1 Autohaus on e-bay, but he told me that these are not the ones for the hockey stick molding... I spend 25$ to try it anyways...
I installed one side only, the other has to wait for the famous clips...
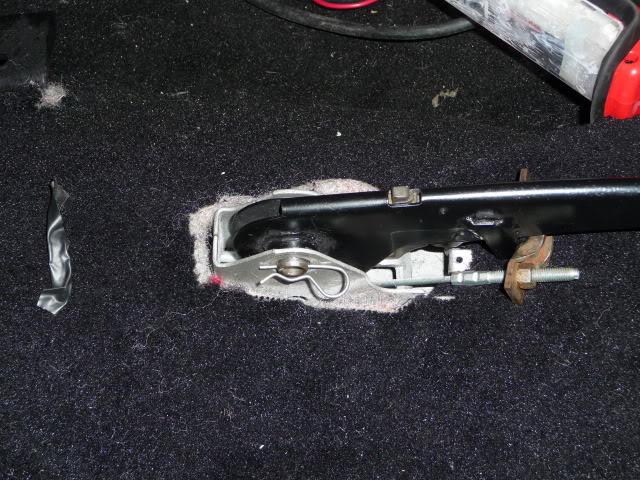
Installed the hand brake lever, but the mounting holes in the car has ovalized with the years; the pin has also been damaged, because of the shearing; I decided to drill a hole positionned with tight tolerance, to take out a bit of the play in the assembly...
Works good!
I have been dreading to work on my rear brakes. I hate brakes.
I hate brake lines, brake fluis, bleeding, and friggin hydraulic leaks!
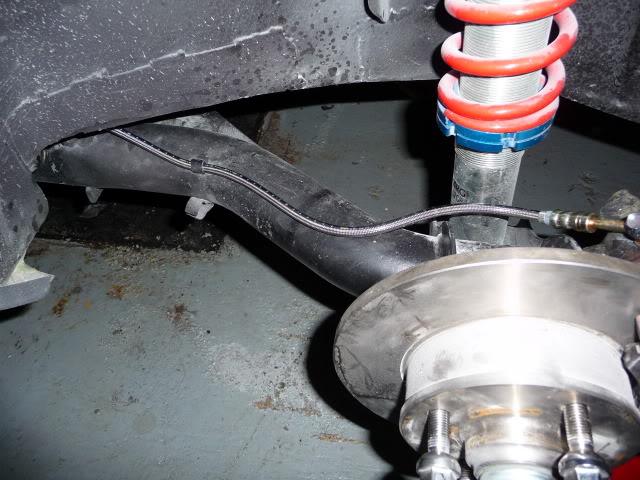
The rear set-up is crap:
The rigid line stops in front of the axle, then a flare fitting to a flexible line, more fittings to rigid line, then another flare fitting to another flexible line...
So 6 things that can leak... I wont say how many of mine did...
SO scrapped the whole thing, got myself 2 hoses of 30" and eliminated all my leaks!
Brakes are now bled, and very firm!!!
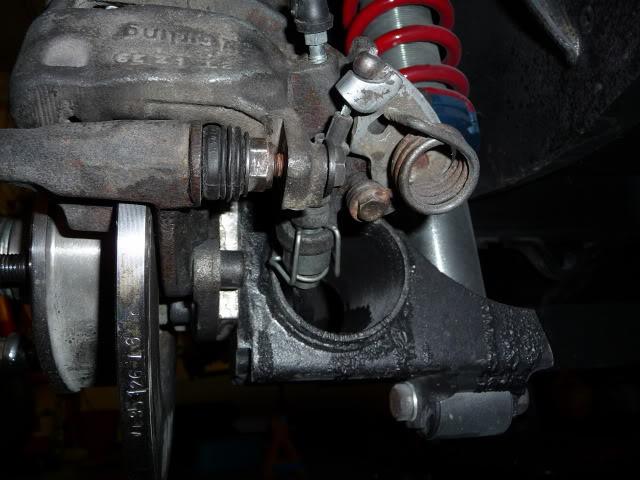
Someone asked a while back, about the rear brake set up: here are a few pics;
I routed my S2 16V cables through the axle, and this also fits very well with the Mk3 rear calipers being switched from LH to RH, & RH to LH...
Making the hand brake spring clearance issue obsolete...
As you can see, it cleaned up the axle quite well...

You must be logged in to rate content!
6 minute(s) of a 214 minute read
11-25-2020
Ok, so this week end has been productive!
I had in my plans to ride my bike (ended up by plating & insuring my old black GSXR on friday, since it was so nice out) but weather degraded pretty badly... So guess what ? I worked on Euclid.
First, let me say that all this work has not been done on this week end, but I will say most of it has been. I just didn't take the time to post progress last week.
To start off heater box, was disassembled, cleaned ; OMG 30 year of crud, makes for very nice smell in the ventilation system... New heater core rad, and new foam seals surrounding the opening that mate with the dash & the main flap seal.
Next at hand; Wiper bracket / motor / linkage.
On the menu: retrofit a Mk3 motor with 52 cycles / minute at low speed, instead of the weaselly 42 cycle / minute, for the stock Rocco Mk1 windshield motor. I also sandblasted & painted the mounting bracket, and cleaned & lubed all the linkage & moving parts.
The Mk3 swap is not so bad;
- Changed the Stock backplate on to the Mk3 gear head assy'
- Cut the two wires on the motor, & re welded them into place (they are attached to the back plate
- I just had to redrill the mounting frame with the bolt pattern 60 degrees further (still with 3 holes)
Tested it with my battery charger & works GREAT!
After all this, installed them both
I am installing a Flex-A-Lite fan, because of the clearance issues with the carbs,, so I decided to attack that as well.
Decided to fabricate mounts to mate the rad & the fan. I saw that quite a few people just mount them up with metal strips, but wanted to make something a bit more cleaner looking...
Made a template with cardboard, the cut them out in the left over steel I had from making the body panel repairs. I like how it turned out!
Braked them just right, and after a few more cut outs for the ABF alternator set-up, and the fan switch, mocked them up for placement, and drilled the mounting holes accordingly. All corners, have been radii to prevent stress cracks, and it looks cleaner
Then, satin black finish...
I then decided to disassemble, clean , & lube the door stops
PITA!!!
It took me a good 2 hours + to do this!
Thanks to the painter of the previous respray, I had to take of paint off the NLA seals, and the stop bar... Bla bla bla...
All new screws, and clean, and nice...
And ended up by screwing up my door alignment ; I did have support on the bottom of the door, when I too the bootom hinge screw off to refit the stop bracket, but the door managed to move anyways, and its real hard to close; it has to drop by about 3/8" at the latch to be align properly... Will do that near the end...
Installed the top door gutter seals, and the door seals too:
THANKS VINTAGE RUBBER !!!
Contact cement, and a heat gun to help the ABS top seal mold nice into shape...
You can also see my console mod with Oil temp, Oil Press, Voltmeter, and yes, EGT !!!
Worked on the rear quarter window moldings;
I sanded down the chrome moldings (they were pitted, and started to peel) and painted them satin black. did the same with the B pillar molding. Managed to salvage as many clips as possible to put them back on, but I'm missing quite a few of them for the other side; I ordered body clip moldings from MK1 Autohaus on e-bay, but he told me that these are not the ones for the hockey stick molding... I spend 25$ to try it anyways...
I installed one side only, the other has to wait for the famous clips...
Installed the hand brake lever, but the mounting holes in the car has ovalized with the years; the pin has also been damaged, because of the shearing; I decided to drill a hole positionned with tight tolerance, to take out a bit of the play in the assembly...
Works good!
I have been dreading to work on my rear brakes. I hate brakes.
I hate brake lines, brake fluis, bleeding, and friggin hydraulic leaks!
The rear set-up is crap:
The rigid line stops in front of the axle, then a flare fitting to a flexible line, more fittings to rigid line, then another flare fitting to another flexible line...
So 6 things that can leak... I wont say how many of mine did...
SO scrapped the whole thing, got myself 2 hoses of 30" and eliminated all my leaks!
Brakes are now bled, and very firm!!!
Someone asked a while back, about the rear brake set up: here are a few pics;
I routed my S2 16V cables through the axle, and this also fits very well with the Mk3 rear calipers being switched from LH to RH, & RH to LH...
Making the hand brake spring clearance issue obsolete...
As you can see, it cleaned up the axle quite well...
Read the Full Article:
http://forums.vwvortex.com/showthread.php?4217668-Mk1-getting-some-glitter-back
Beautiful car!
Posted by MPower on 11/25/20 @ 10:38:10 PM