You must be logged in to rate content!
9 minute read
Power Window Regulator Rebuild
Compliments of JonnyPhenomenon @ www.vwvortex.com
in this thread you will find information now how to repair broken power window regulators. it is an abridged rewrite of my original thread found here:http://forums.vwvortex.com/zerothread?id=4030063 If you have power windows in your rocco that are giving you trouble, then this is the thread for you.
lets face it, the rocco regulators suck. pure and simple. they fail in a few different ways and replacements are expensive.
CHAPTER ONE: Cables
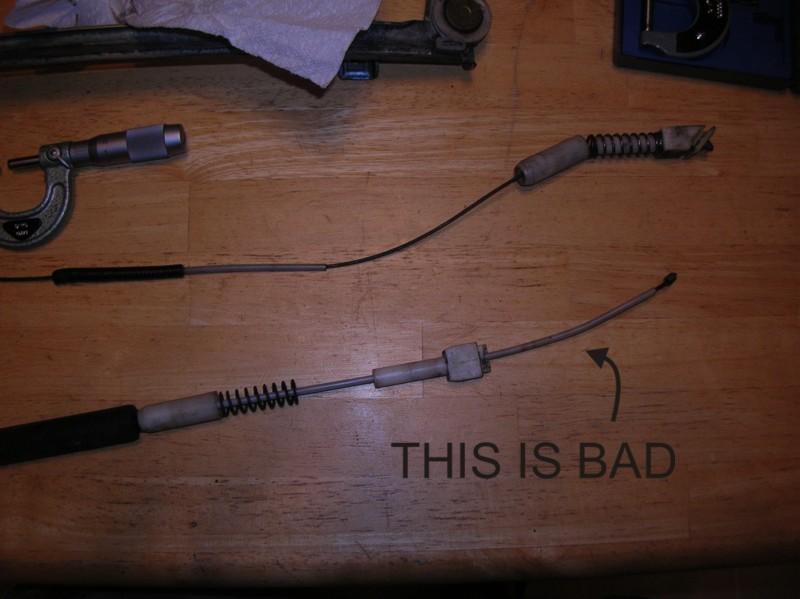
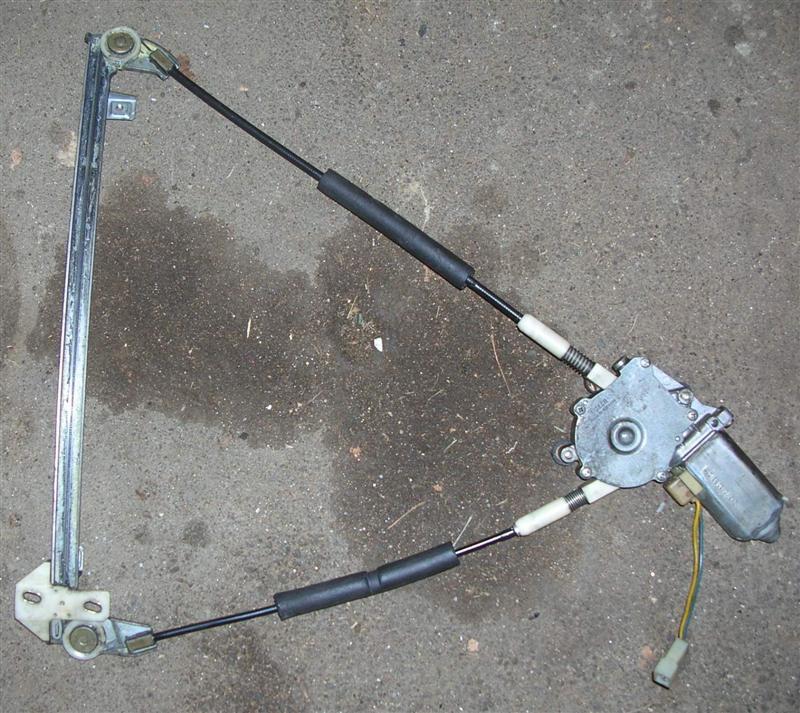
the main focus of this first section will be the repair and replacement of the cable housing that bends and cracks, causing portion of the lining of the 'conduit' (housing) to enter the motor assembly and causing it to jam.
when this jams, it will prevent the window from opening or closing, and repeated attempts to free it will will only jam it further, and eventually it will break this gear here:
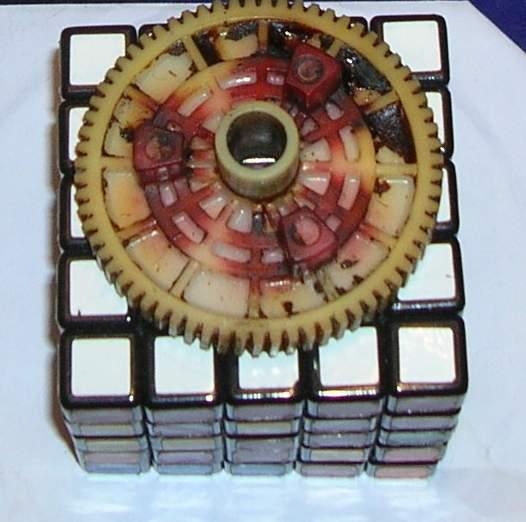
(this is sad  )
)
You will need to get the regulator out of the car, open up the gearbox and remove the cable. then grind or cut off the little metal end on the tip of the cable, (on the side with the cracked sleeve/housing) pull off the old housing, replace it with new stuff, add a ferrule to keep the liner out of the guts, reassemble and crimp a new end on the cable.
...the labor should be fairly easy...
...locating the parts was not so easy...
The good news is that I have located a source and I am sharing that with you. 
I found a place online that sells supplies to make custom throttle and clutch cables for motorcycles and the like. I purchased a yard of nylon lined conduit for 2mm wire and ferrules and "cable ends".
total cost on a yard of conduit, two ferrules and two ends is $7.06. (plus 5$ shipping)
I ordered the stuff from here: http://www.flandersco.com/FlanCableSearch.html
the ordering system here sucks big time, but if you scroll to the end Ill explain how do do it.
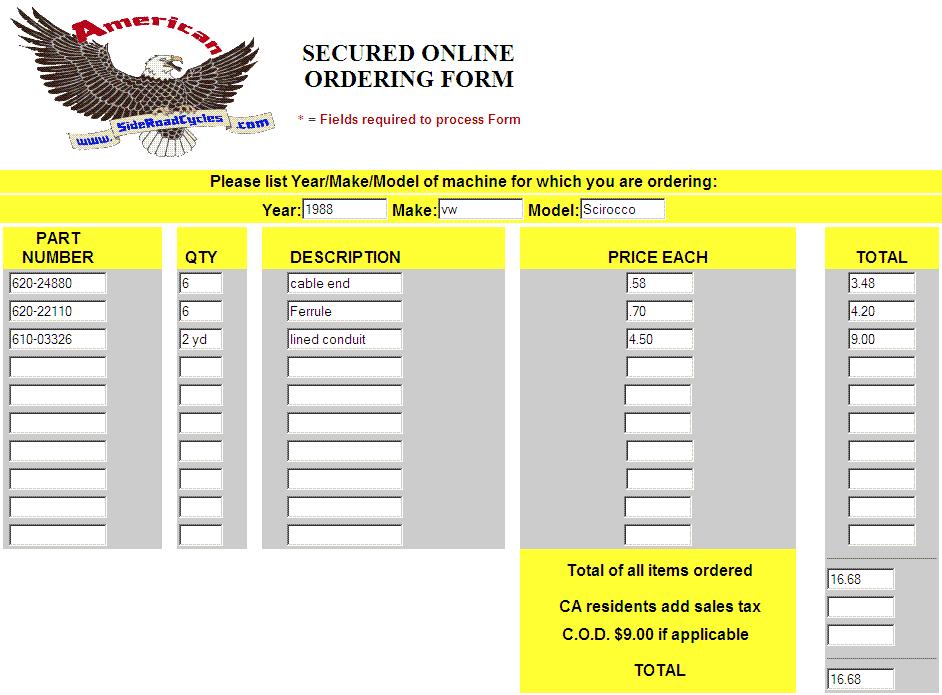
Parts I bought and the corresponding price:
610-03326 lined conduit 6mm OD, for 2mm cable. 4.50$ per yard
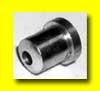
620-22110 cable ferule $0.70
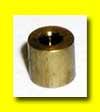
620-24880 cable end (Crimp Barrel) .176" long, .186 wide, 2mm cable size $0.58 each
in my original thread I bought a ton of assorted ferrules while I experiemented to find the best one. I settled on 620-22110 as the best (and only) suitable peice.
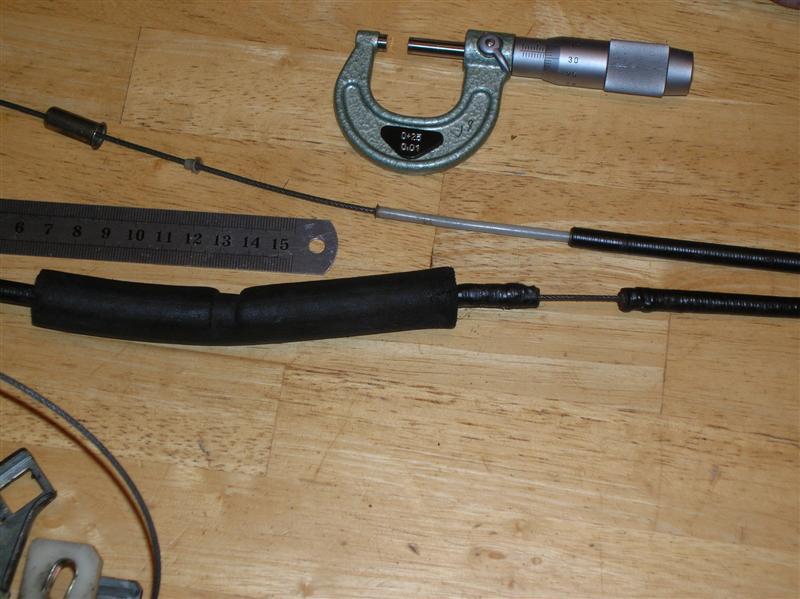
the Ferrule peice is required to prevent the cable liner from slipping through this plastic peice here:
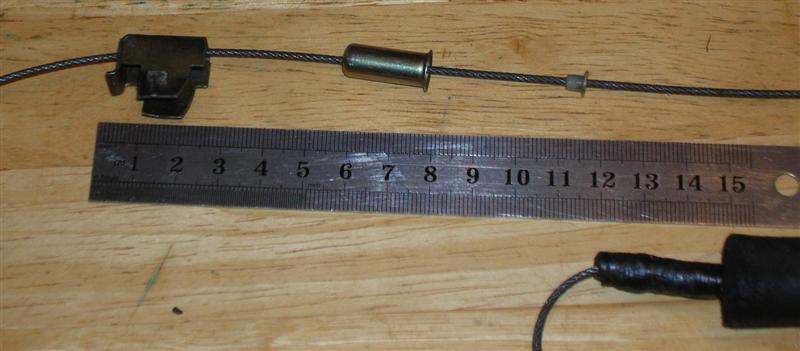
so I cut off the old crimp barrel on the side with the broken cable housing so I could take it all off and install a new peice of housing. I cut the new housing a little bit shorter to compensate for the shorter wire. wrapped some tape around the ends so it would fit into the ferrule.
I used this ferrule
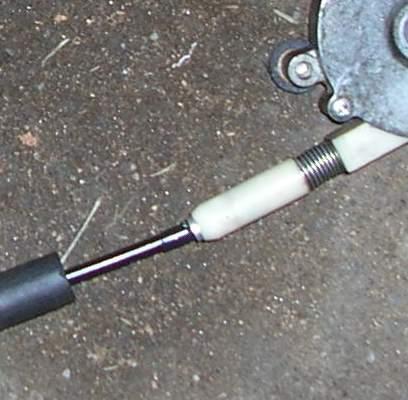
right between the housing and the plastic tube with the spring on it here:
it was a good fit in the plastic, but not so snug between the housing and the ferrule. so this is where I used the tape.
then I crimped this wire end on.
I dont have the proper tools for crimping things like this, so I slipped it over the wire, then crushed it with a vice, and frayed the end of the wire some in hopes it would not slip off. its not perfect, but I am hoping it will hold.
oh yeah, I forgot how much of a nightmare it was to put these stupid things back together! ARGH!
I finally worked out a good way to do it, but I didnt take any pics of the proccess.
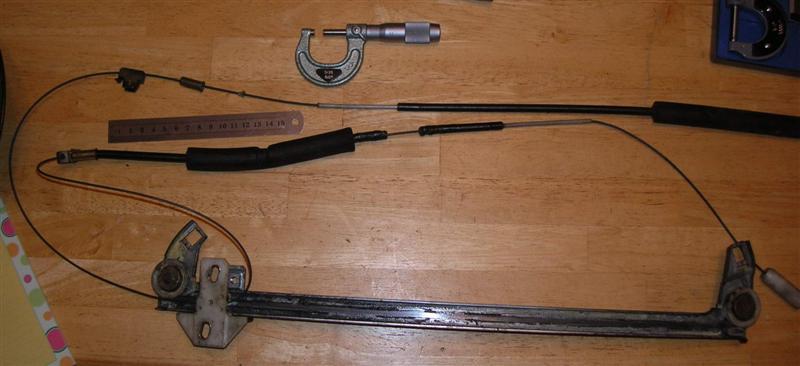
but here is proof I could get it back together 
--------------
and now on to the crappy flanders ordering system. here goes:
So placing an order on the flanders site was a big pain in the butt. So, in the tradition of the helpful DIY thread, and to make it easier on the next guy, I'll give a little howto on ordering from the flanders site.
If you are like me, you followed a link from this thread and browsed through the product listing on the page to find what you wanted to buy. now you want to add some items to your cart, but they dont have any cart button. So you have to write down the part numbers you want to buy, and then click on the "home" link at the bottom of the page.

http://www.flandersco.com/index.html
now click on the "place order" link on the left side of the page. that will take you to the 'sideroadcycles" web site.

http://www.sideroadcycles.com/....html
now click on the link to the "secure ordering page" and you will get a nice little "fill this out yourself" ordering form. pretty lame, but its better than making a phone call.
get our your trusty calculator, because you are gonna need it here. this page doesnt do any of the work for you.
Start entering the part numbers, names, quantities, and prices, then use your calculator to add up the totals.
I bought enough to repair both sides of three regulators.
Some day I will take more pics of the reassembly procces, but this is all for now.
CHAPTER TWO: Switches
These switches are junk.
if the ps window switch in the Drivers door is bad, then the passenger side door switch wont work either. Stupid design flaw. The Gerrman engineers were on break that week.
if you pull the switch holder out of the drivers door you should be able to get the plugs up through the hole without removing the door card. (slide the whole assembly up about an 8th of an inch, and pry out at the bottom.) you can swap the plugs for the drivers switch with the passenger switch and see if that makes any difference. I have a handfull old switches I discovered were bad using this method.
I also had an issue with one getting stuck in the open position. I discovered that the power wires coming out of the motor itself were damaged and shorting when I opened the window all the way down. (due to the deflection of the motor assembly under load)
CHAPTER THREE: Mounting Studs
each regulator is affixed to the door with three bonded rubber mounts. any number of things can happen to cause these things to break. the rubber cant handle the added stress of a jammed cable, and they will tear right in half.
If you are like me, you probably have a couple smoked regulators in a box somewhere, and you might have a couple of these rubber mounts still intact. be careful when you remove them so you dont wreck em.
Unfortunately, I don't have a vw part number for these mounts as ETKA and vagcat consider the rubber mounts to be part of the regulator assembly. A possible alternative part would be to use fuel pump mounts and a nut on top instead of a bolt. part number for those is 171121275e. - they have the same screw size(m6), but I dont know how tall/thick they are. they might put the motor assembly too far from the door and it might hit the glass. So use them at your own risk...
Anyway, If these tear apart, they can cause the regulator to jam, or your wires to get wrecked and leave you with a sad window. so check them, and replace them as needed.