You must be logged in to rate content!
12 minute read
BSW Stage 1 Speaker upgrade to L7 in an E92
Compliments of ProfessorCook @ www.bimmerfest.com
I can't claim to be an expert, like CA, but I've always enjoyed music and have some training as a musician (lower brass, piano) and have spent tons of money on stereo equipment over the years (DJ, instructor on intro course about audio systems, installed several car audio systems and a major home audio system). So, when I heard about the BSW upgrade being ready for my car, and after I'd done my online research and read good things about the company and its products, I decided to give it a try. (BTW, Halston Pitman of BSW was very responsive to my e-mail questions, writing me back at ridiculously late hours. Kudos to him and his company.)
The system for the E92 L7 costs $700 and for this, you get 11 speakers (all but the subwoofers) that are sized and wired to easily replace the OEM speakers.
http://www.bavariansoundwerks.com/pr...Series-M3-E92/
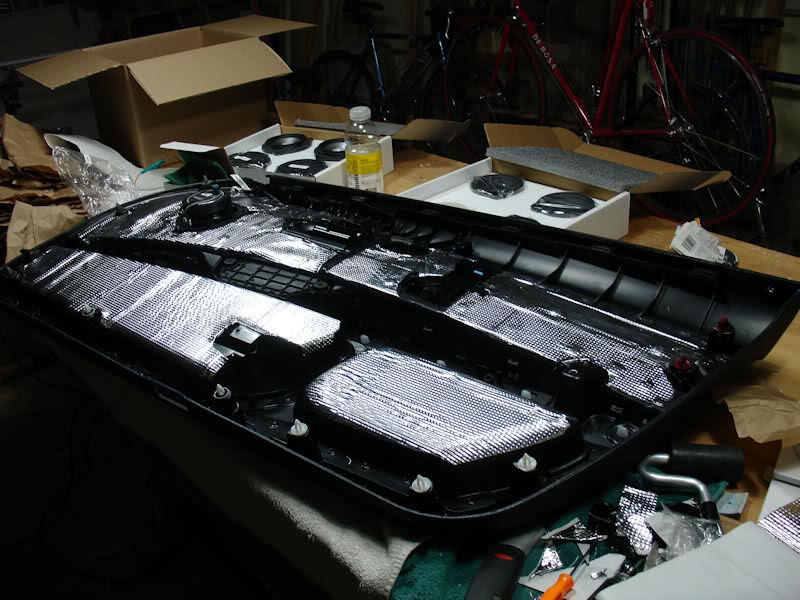
You can also opt to get sound deadening and a tool set for another $50. Figuring that I might want it, I bought two of their sound deadening packages.
The tool set isn't bad, though you might not need it. It consists of an excellent plastic panel removal tool (which I used a lot), a different forked steel remover (which I didn't use much, but was very glad to have the few times I needed it), a few pic tools (which I used some, but could have gotten along with the jeweler's screwdrivers I already have), and a nice screwdriver bit set (which I didn't use at all).

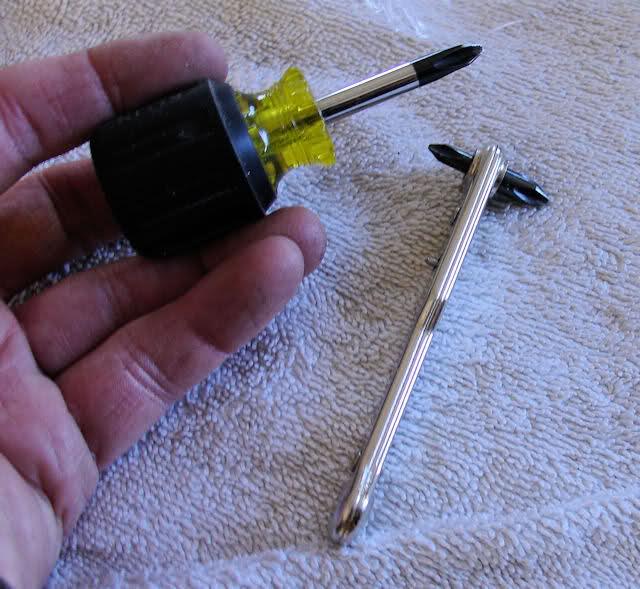
If you get this tool set, you'll also want to have a bit holder for a bit from the set or your own torx T20 screwdriver, you'll want an 8 mm socket and ratchet, and, IMHO, you'll also need a low profile phillips head screwdriver (the thin metal one shown in the next picture). You can get one of these from Sears, and you'll need it for the center speaker in the front dash.
I ordered these items from BSW and they came quickly and beautifully packaged. Individual speakers are clearly labeled, and you should keep the speakers in the packaging until you really need them so as to avoid confusion.
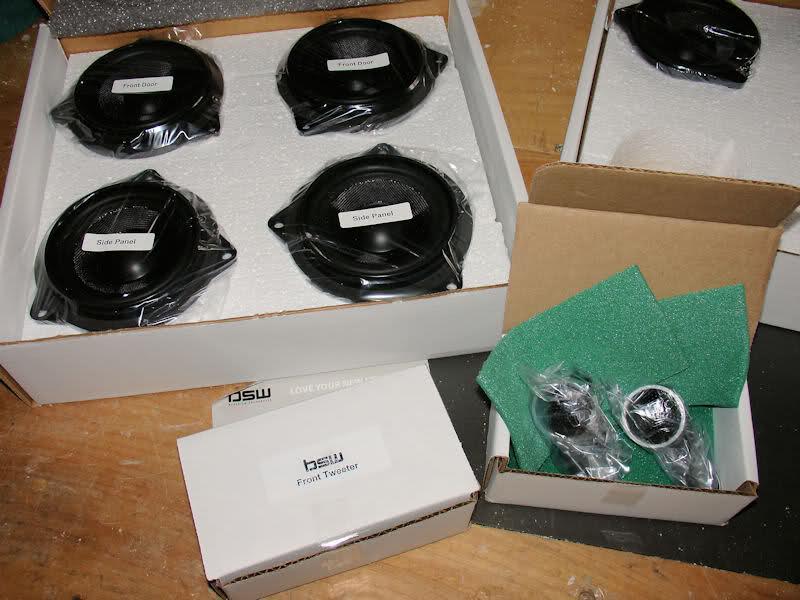
The speakers look great and give you the immediate feeling that you got an excellent product for the price. The magnets are large and heavy, the speakers utilize fabric cones, even the wiring and connectors seem well made. If you could judge sound performance by the look of the components, you'd already be grinning knowing how much better the system will sound. (Placebo effect begins here...)
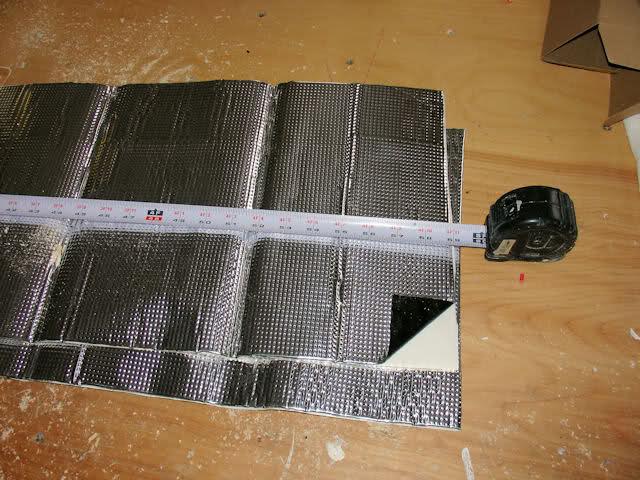
Though they promised 4' of sound deadening material, they actually sent nearly 5'. The material is a heavy rubber mat with a foil backing on one side and a sticky side on the other. It is similar to a heavy Grace ice and water shield. I paid for two and got two sheets about 16" wide by 4'-11" long and each weighed in at about 1 lb 13 oz.
I highly recommend watching the whole video on the BSW website before you get started. It's very good, but is wrong in a couple of places, which I'll point out along the way.
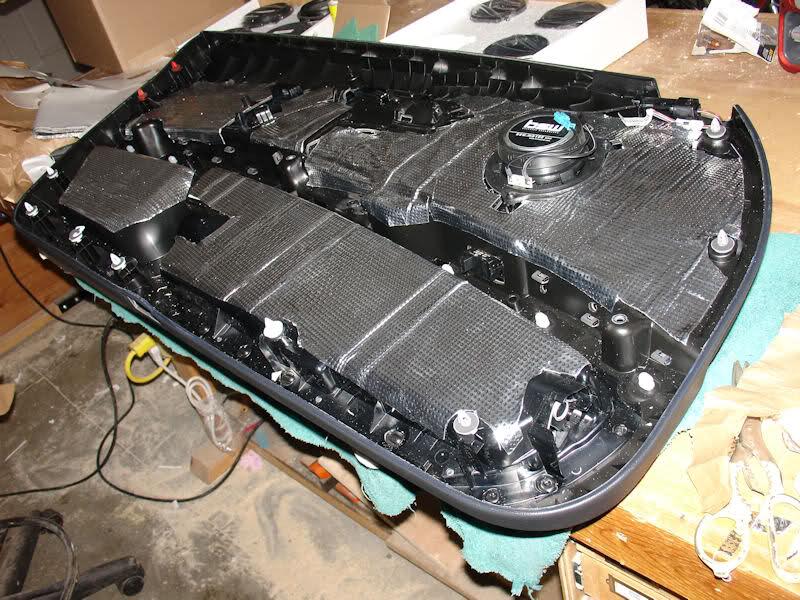
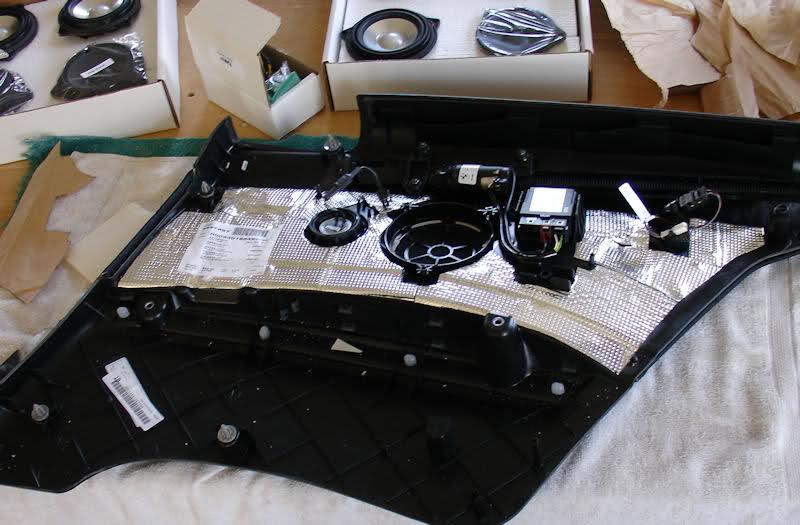
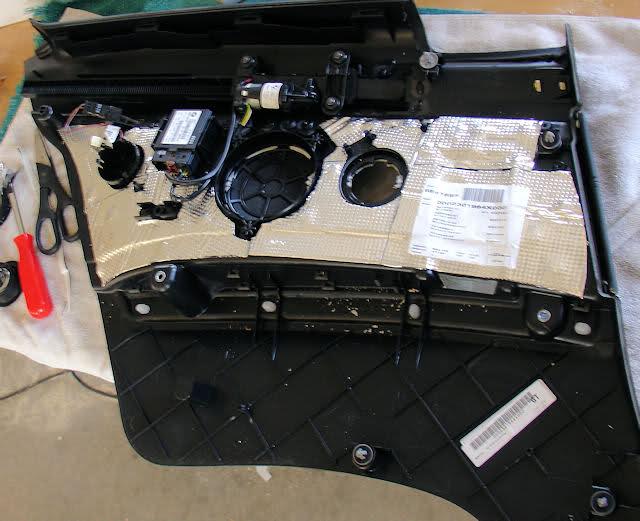
The passenger door panel came off exactly as described in the video. No problems at all. The existing midrange was easy to remove and had the aluminum cones I had heard about in the video. Again, the BSW replacement has the look and feel of being in a whole 'nother league.
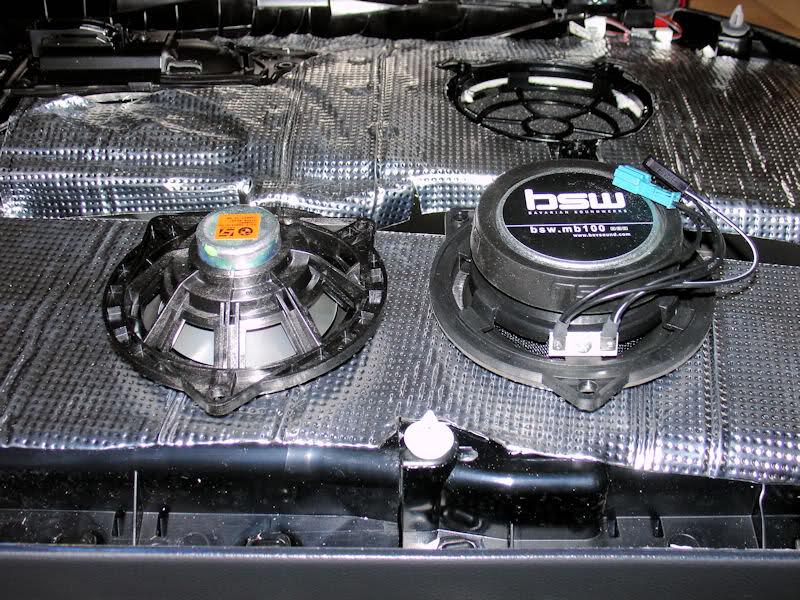
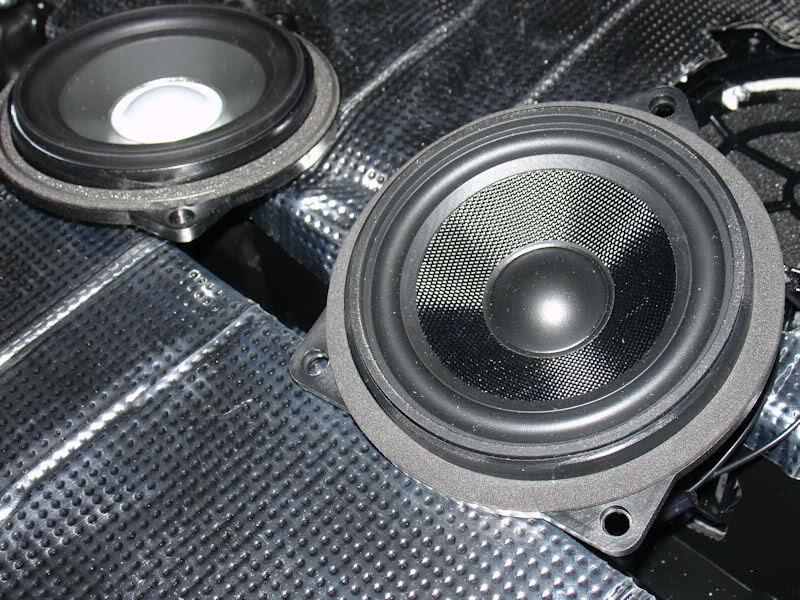
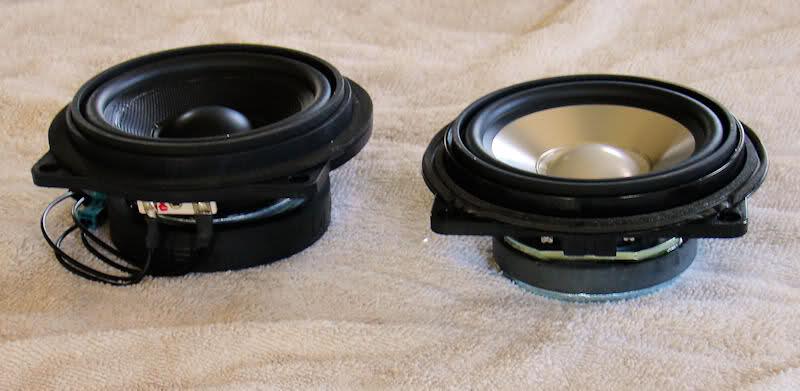
In these pictures, the BSW speakers are the larger ones with the black fabric cones. The BSW speakers each weigh 1 lb 2-1/8oz whereas the OEM speakers weigh 0 lb 5-3/4 oz. In the pictures, the background is the door panel with the sound deadening material already attached.
Knowing I had twice the material BSW figured I'd need, I got a little silly with the application, and covered every flat piece of the door panel.
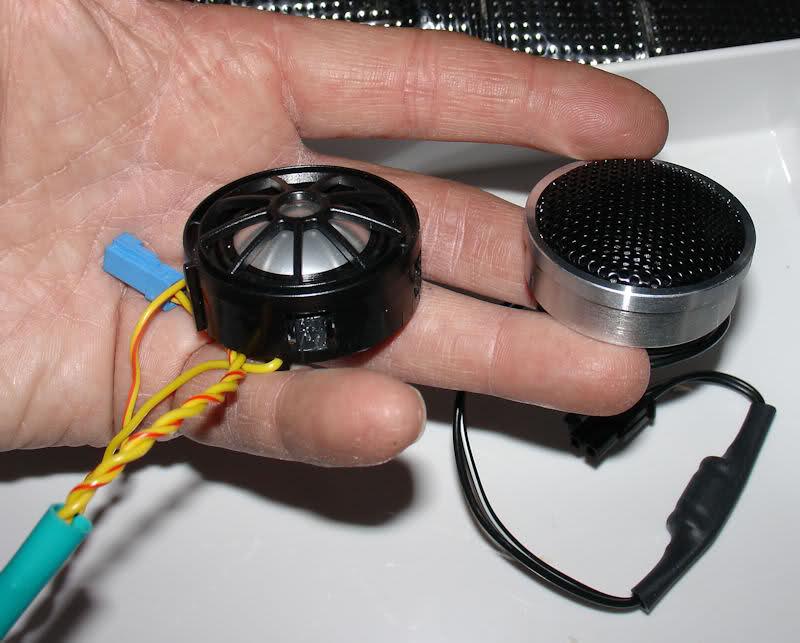
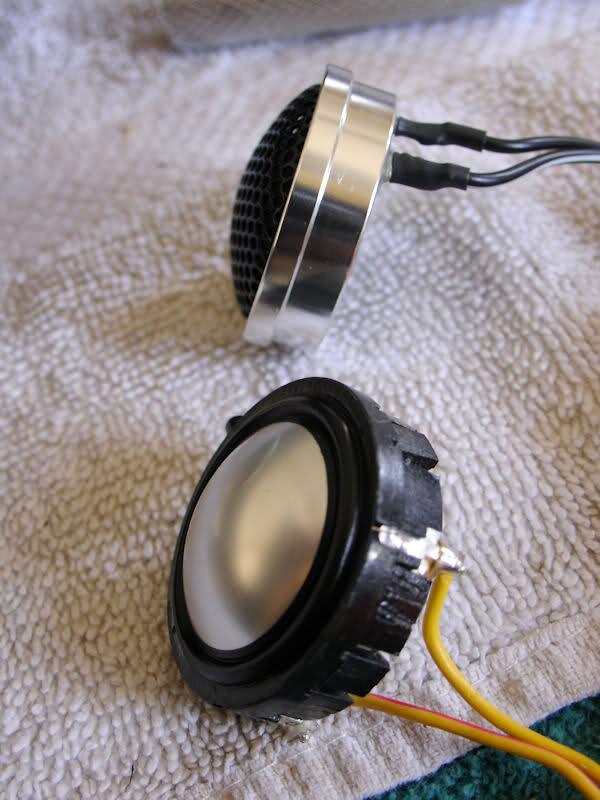
The tweeter replacement also seemed of much better quality and is slightly heavier due to the metal housing (2.5 oz vs 2.0).
I found it pretty difficult to get the old tweeter out of the A-pillar wedge, but I did eventually get it using the pic tools. Resetting the wedge in the door afterwards also took a bit of patience and persuasion.
Reassembling the door went well too. I found I had to hold the panel close to the door to route all the cables the way they should be routed, which was tricky, but it all went back fine. Before I did anything else, I checked to make sure the lights, switches, and window worked properly.
Here the video says the driver's side door is exactly the same and they don't show you anything about it. Well, it's very nearly the same, but there are only four screws (not five) and the connector to the switches is far larger and utilizes one of those swinging latches that helps unplug it and then plug it back in.
Again, I deadened the daylights out of the door panel.
The rear panels come out as described in the video too, but in the video, he peels back a bit of the door sill trim first. After getting the first rear panel out and then back in and putting that whole door sill back in, I realized playing with the door sill trim was unnecessary. On the second rear panel, I left it alone and was able to remove and replace the side panel without a problem, and it was easier to boot.
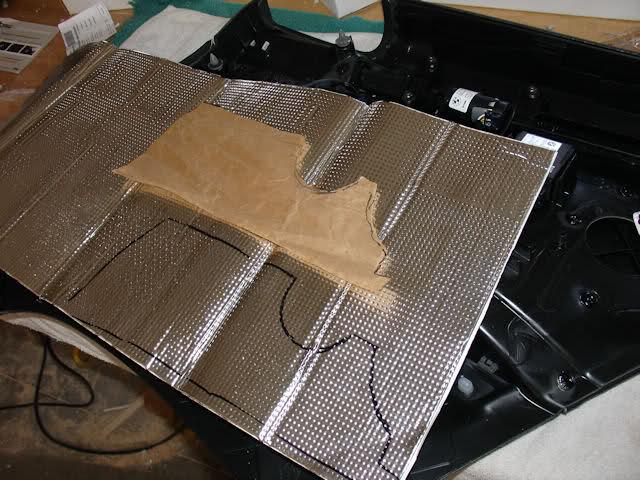
I also used a technique on both the door and rear panels that helped some if you're going to be as nuts about the deadening material as I was. I took some of the paper used for packing the boxes and made a template by pressing it down and rubbing the paper down on the door panel, using scissors to cut along the impressions, and fine tuning until I had a template. Then I transferred the shape to the material and cut it out. I then flipped the template and transferred the mirror image of the shape for the other panel. I think it saved me time in the end and gave better results.
The rear midranges are also more impressive looking than the OEM speakers, but the OEM speakers actually have magnets so the difference isn't quite so striking. The BSW speakers weigh 1 lb 2-5/8 oz vs 1 lb 0-3/4.

Now in the video, the BSW guy explains how to snap open the tweeter housing for the rear panel and tells you not to worry because you won't break anything or hurt anything. He's lying, lol. I found the only way to open the OEM housing for the rear tweeter resulted in snapping a back plate off the housing. In the end, it doesn't matter... you don't need the parts you break... but if I ever went to reinstall those OEM tweeters, it wouldn't be the same.
The new tweeters for the rear are also better looking, but this time their a tad lighter at 1-3/8 oz vs 1-3/4.
I also recommend peeling off part number stickers and then sticking them back down over the deadening material. Here's the last rear panel.
I ended up using nearly all the sound deadening material I bought. In the end, I was picking out scraps to finish the last panel. Between the speakers and the material, I figure I've added about 6 pounds to my vehicle. (There goes my 0-60 time.)
Once you've got the panels done, the rest is a piece of cake. I found it easier to replace the rear deck midranges by first folding down the rear seats to get the headrests out of the way. The rear deck speakers and the front speakers are all the same and are, again, of excellent apparent quality weighing in at 1 lb 1 oz vs 1 lb 0-3/8 oz. The grills popped off easily. I suppose you could back out the 8 mm hex head screws with an adjustable wrench, but a small quarter inch ratchet drive and socket will be much more useful.
The front speaker is a bit scary as I envisioned scarring my dash and having to look at that for the rest of my life. In the end, though, the grill popped off pretty easily, although I did use an extra couple of panel tools I had to more gently persuade that plastic to pop off. In the video, he says it's an 8 mm hex head screw again. They're not. They're phillips head screws and, unless you have the low profile screwdriver I pointed out earlier, I think you'll struggle to remove and replace those screws. I also urge extreme caution not to drop a screw down one of the heating vents... I expect that'd be easy to do.
So that's it. It took me about 5 hours, but I'm thinking I spent about two hours or more just messing with the sound deadening. It takes some guts for a rookie like me to pry open the panels on a relatively new car, but I got better as I went along and wouldn't hesitate to open them up again.
A few days after the installation, the seat belt assist bar caught my son's seatbelt funny and tugged on it unexpectedly. My son's immediate reaction was to tug back, and the assist rod got stuck and wouldn't move. I figured, at the time, I'd have to take it in and then it occurred to me that, if the dealer wanted to, he could claim I'd voided the warranty by messing with the panels. In the end, after the car rested, the assist arm started working again all on its own, so I don't know what would have happened, but I figured I'd mention that here.
Sooooo... the sound? Well, now. I have two important disclaimers: 1. I do not claim to have a well trained ear. I love music and have concentrated on it for most of my life, but that doesn't mean I'm an expert. 2. No matter what, I cannot deny there must be a placebo effect. I invested $750 dollars and five hours installing equipment that looks fabulous. After you install it of course, you spend time listening for every little nuance to convince yourself you've improved the sound. You hear things you never heard before. It's natural to chalk it up to the new speakers.
So there are my disclaimers.
Now trying to be objective, this is what I think: excellent! I now have the high end that I had felt was missing. The tweeter placement is excellent in the car, but the OEM tweeters didn't seem to do a great job. I had the equalizer adjusted to compensate, but it was still unsatisfying. The new high end response is superb and I now have the equalizer set flat from end to end. In the 80's, people got all excited about "presence"... hearing the fingers slide on the acoustic guitar strings. Well... I now have "presence" in spades and am glad for that.
I find the midrange much more responsive.... I particularly notice it in the human voice. The way Armstrong's vibrato falls off into puffs of raspy air at the end of a phrase, the silk from the mouth of Eva Cassidy (thanks CA), Spektor's tonality. Wonderful. I find also that I can more clearly distinguish quiet backgroud colors better... like the careful mixing of Imogen Heap or the layers in Mocean Worker.
So, I'm glad I did the work and recommend the upgrade.
I hope somebody out there finds this thread helpful.