You must be logged in to rate content!
10 minute read

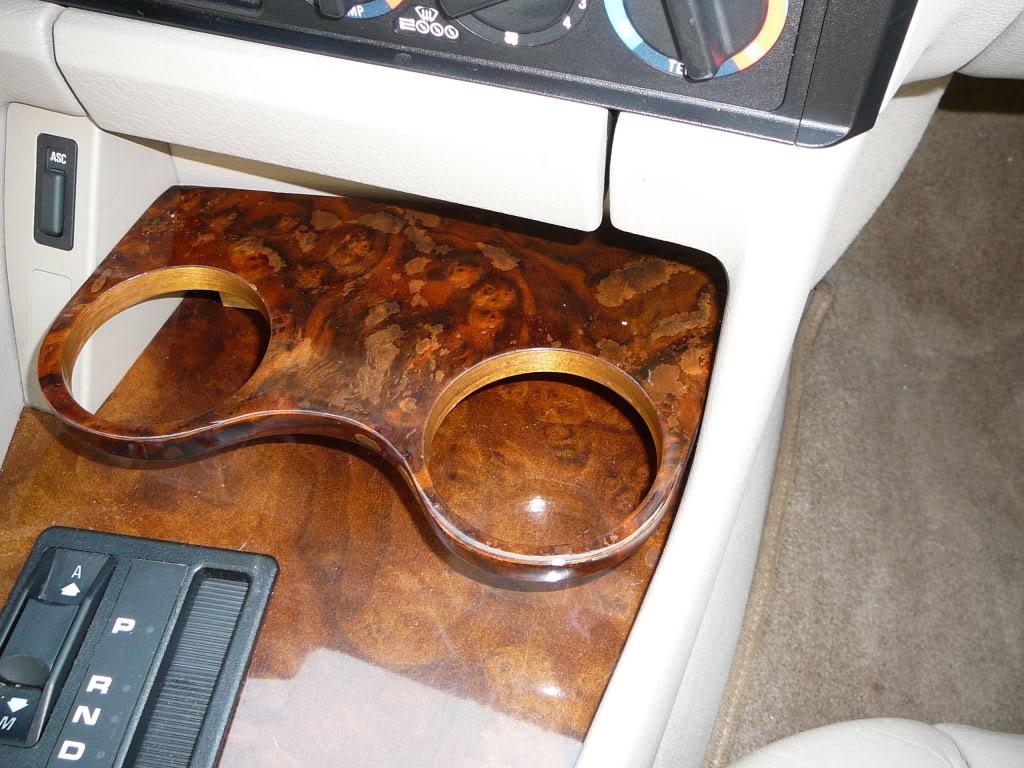
BMW E34 Cup Holder Build
Compliments of woodnthings @ www.bimmerfest.com
So here is a detail of how to build your own cup holder for an E34.
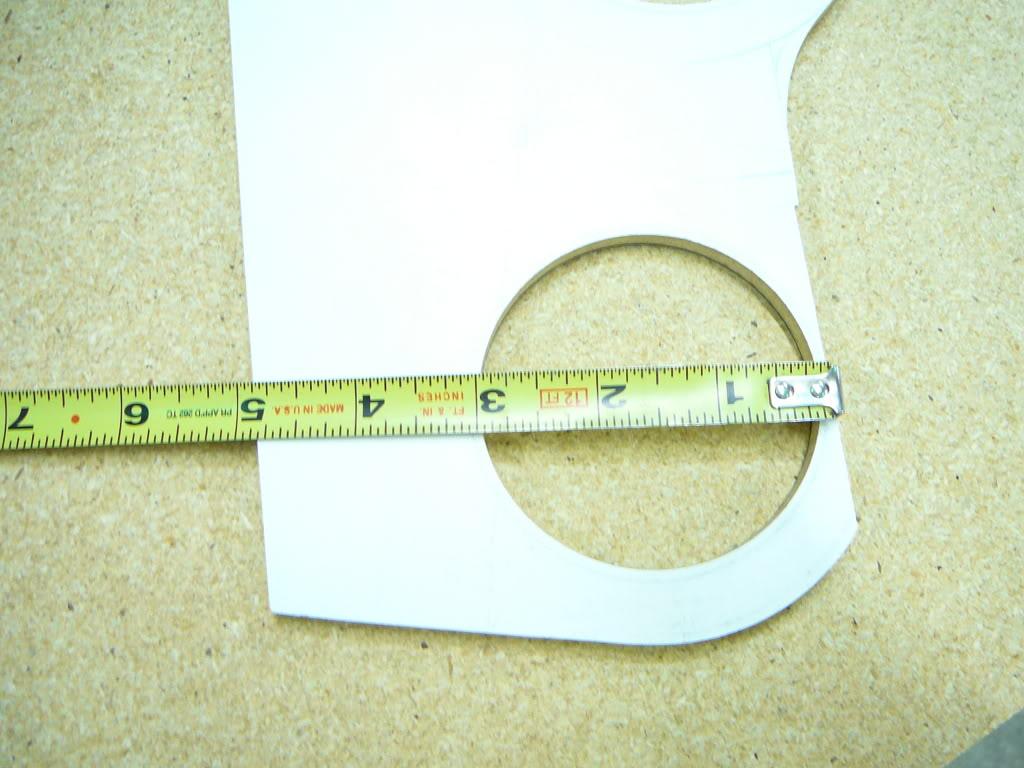
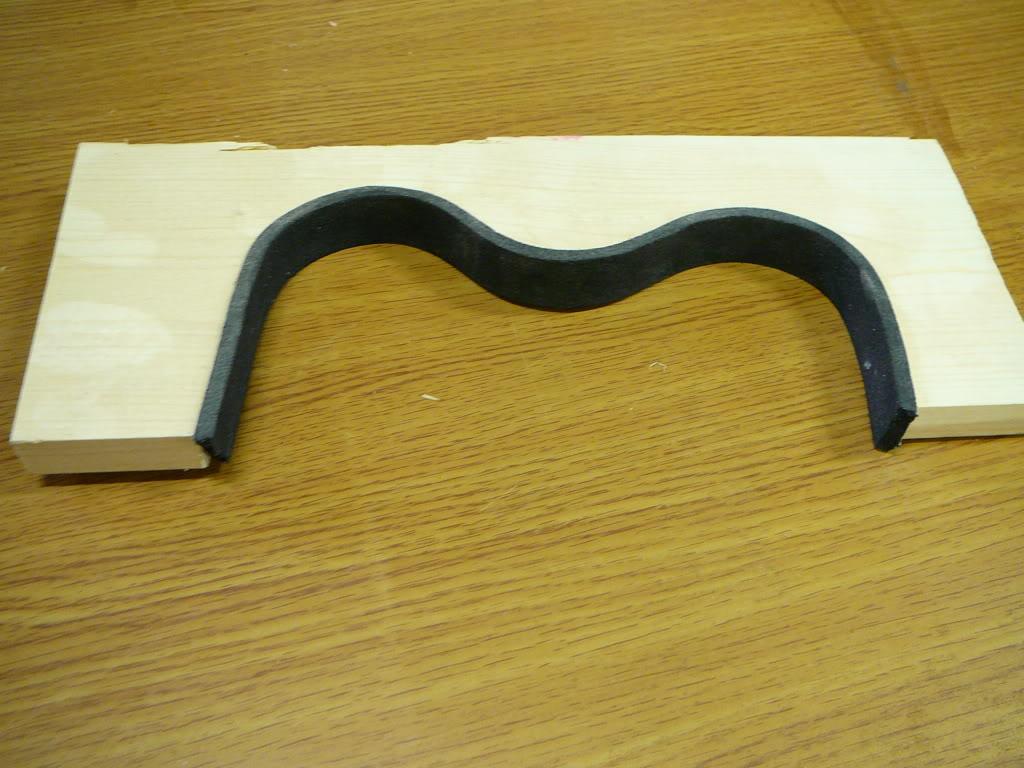
First thing you need to do is make a template of the area forward of the shifter, dont use cardboard, use something like heavy poster board or another similar type of media. Trim this very carefully to get the best shape to fit. Also make sure you place something on the console to maintain the same height all the time. Mine is spaced about 1 ½ off the console.
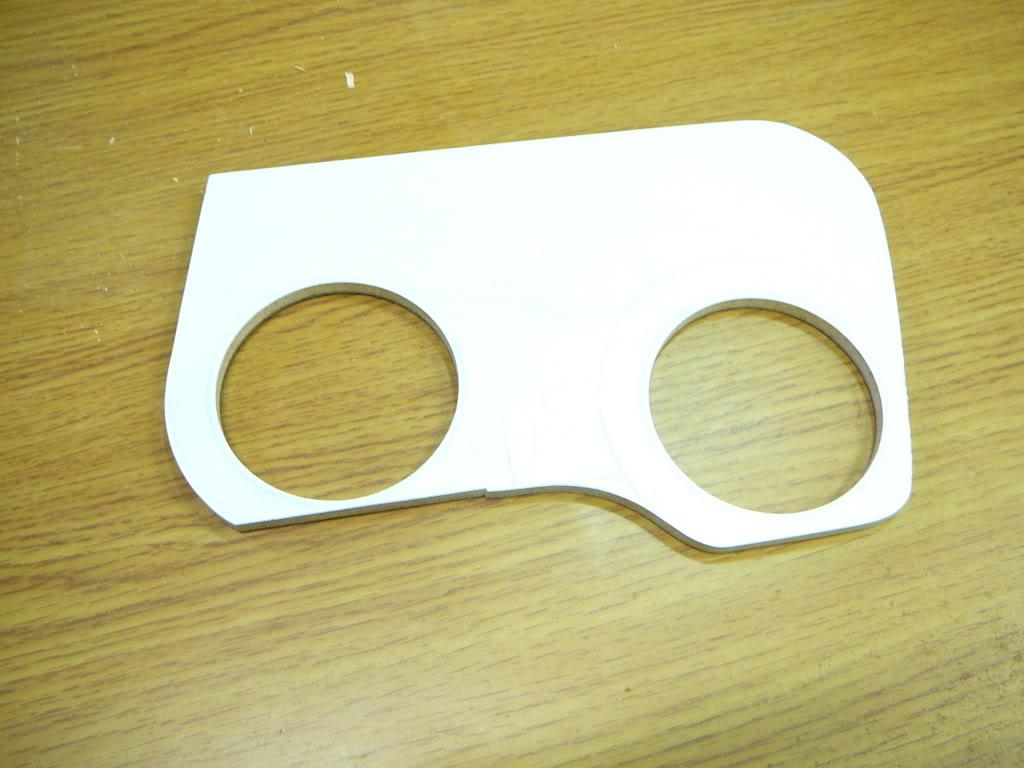
Second thing to do is transfer that template onto a piece of ¼ or so wood. I used ¼ hardboard, which is cheap and plentiful in my shop. Carefully sand the console contour into the hardboard and make it fit really tight. I use a stationary belt sander but anything will work just work slowly and check the fit often. This template will be used to make the real piece!
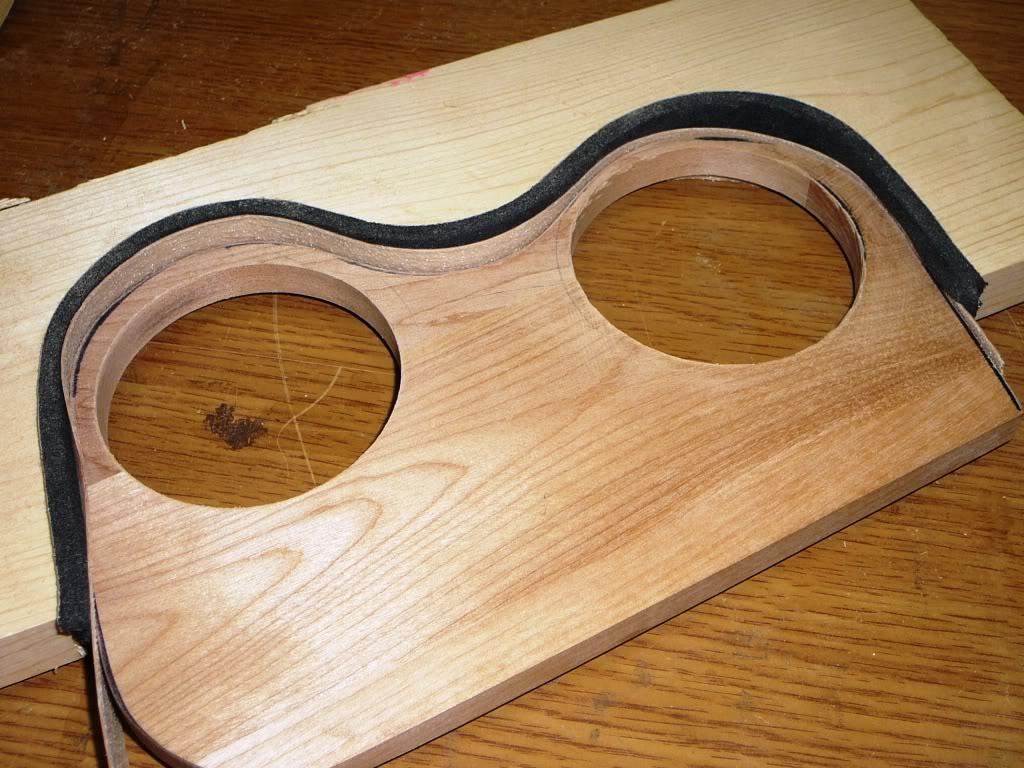
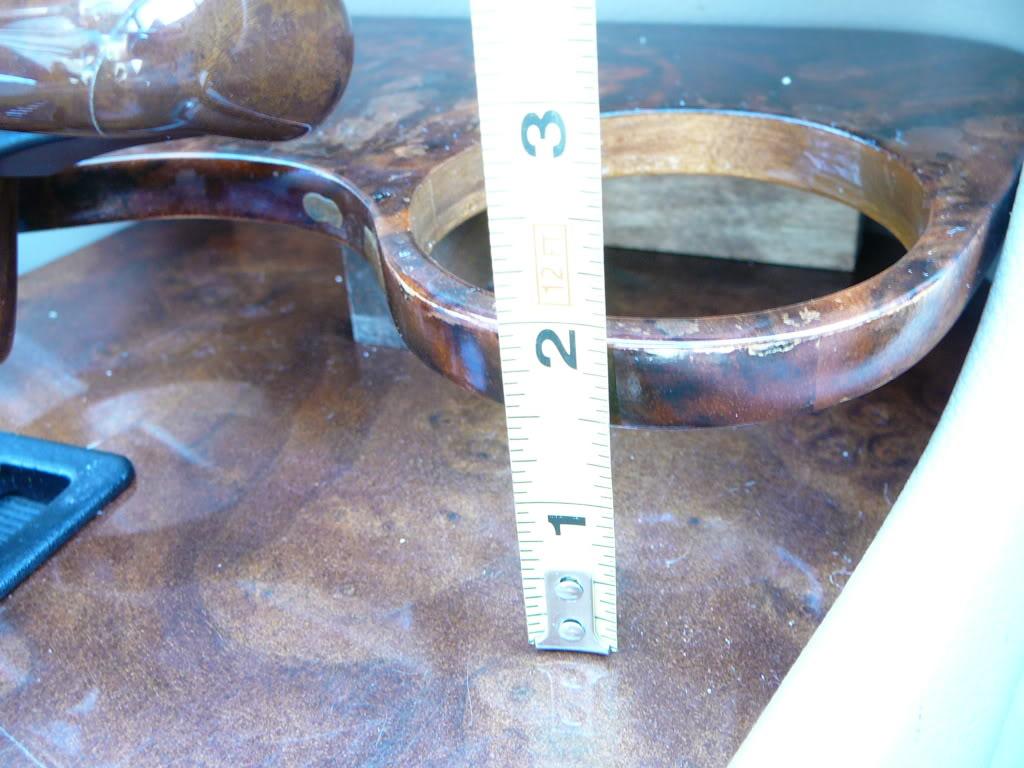
Once it fits the contour of the console get a couple of cans or cups and put them roughly where you think they will fit nice. I use a Starbucks commuter mug so it is taller that most. It fits into the holder on the passenger side. Layout where the holes should go, and determine what size to make them for your application. Then comes the task of deciding what shape to make the area near the shifter. As you can see in my pictures I rough trimmed the ¼ template until I had a decent fit and my knuckles wouldnt get hit every time I went into park.

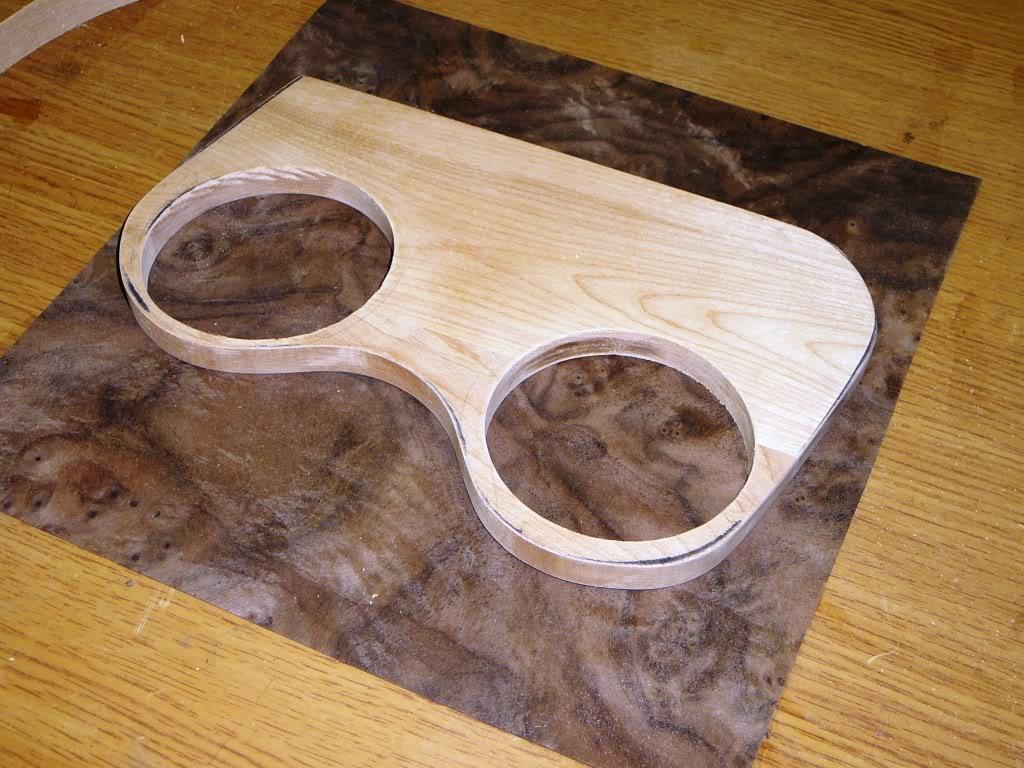
Now that you have the basic idea as to the shape, I used a ½ thick piece of hardwood for my cup holder substrate. You can use just about any wood as it will be covered in a veneer. Try to choose a wood that has a good tight grain structure. Pine may not be so good, but will work. Poplar is a good choice and is available at Lowes/Home Depot in ½ thickness. Layout the ¼ hardboard template onto your substrate and determine your final shape based on what you have trimmed off. To make it easier to make round shapes I use cans, rolls of tape, and French curves to make the design pleasing to the eye.
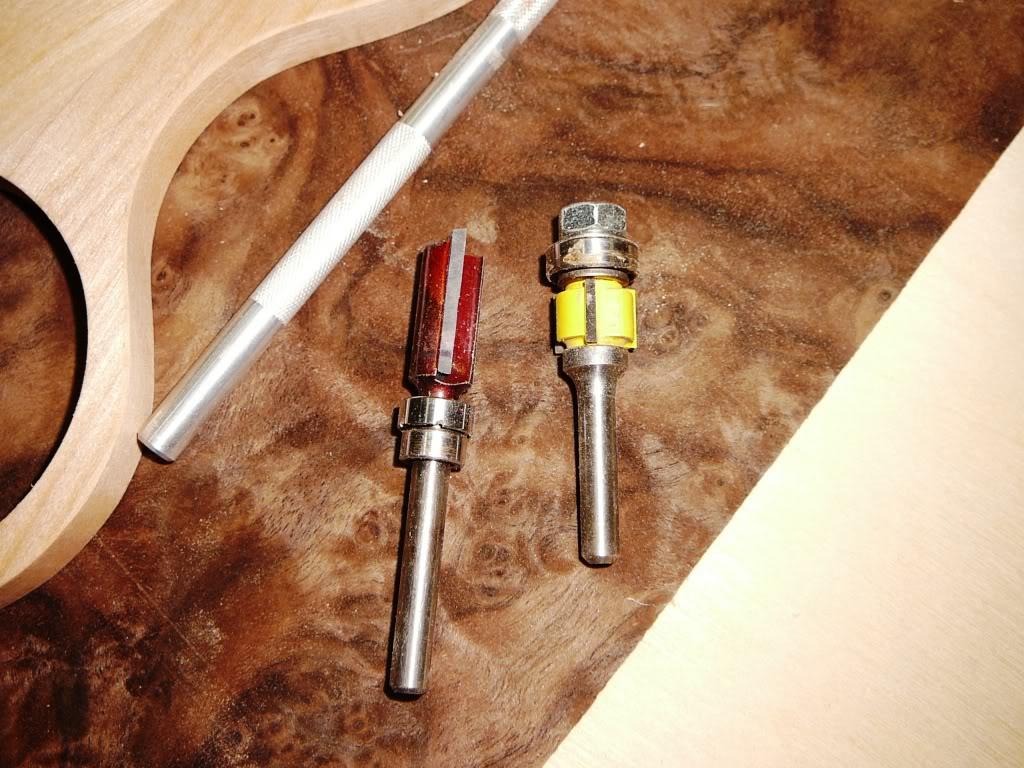
Now cut out the shape and sand to a nice smooth edge. Also cut out the holes for the cups and sand smooth. You can use just about anything to cut the holes out. I used a hole saw kit but anything will work, some will just require more sanding.
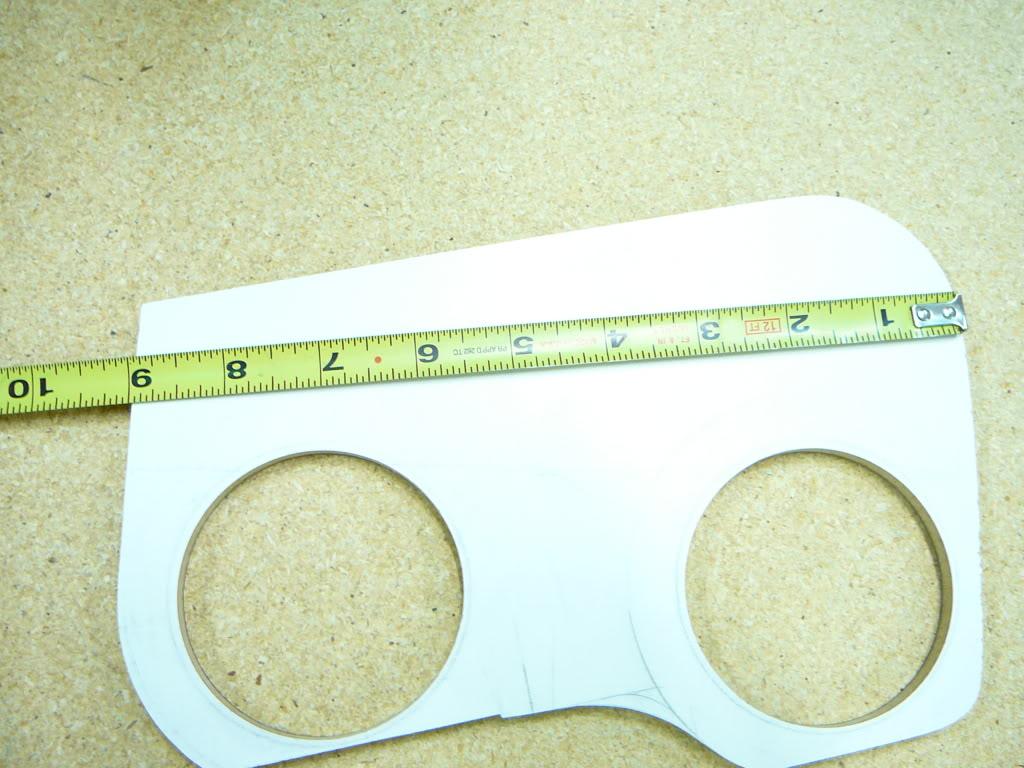
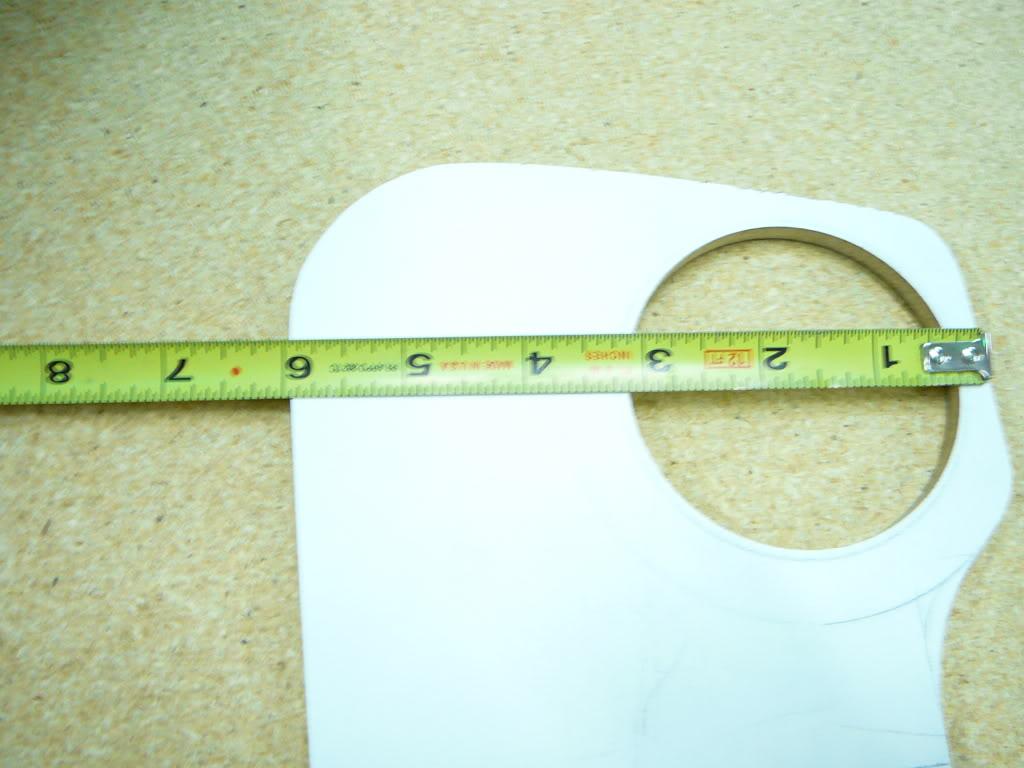
Check the fit again and see how tight it is side to side. You will be adding a little thickness to the sides by putting on a veneer so a little side to side is ok. You can always cut a few strips of veneer to test fit it, now.
Now you will need to get your veneer, I used Walnut Burl veneer, you can get this at woodworking stores, but I got mine off of ebay. The price is pretty cheap, I bought enough for 3-4 cup holders and it was under $20. I just looked and you can get it as cheap as $4.99 for a single piece. Most veneer is around 1/42 thick. Try to choose a piece that best matches your dash. You will be able to use stain to match color somewhat but make sure it is close. Also when the finish is applied the color will change a bit depending on the type of finish applied.
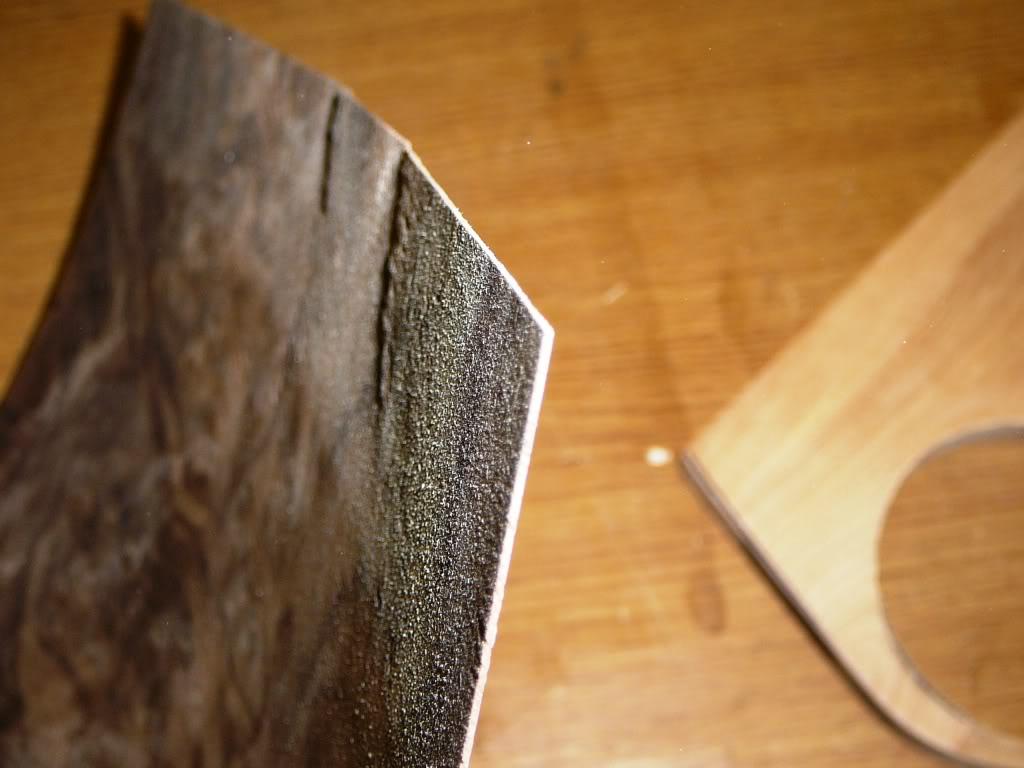
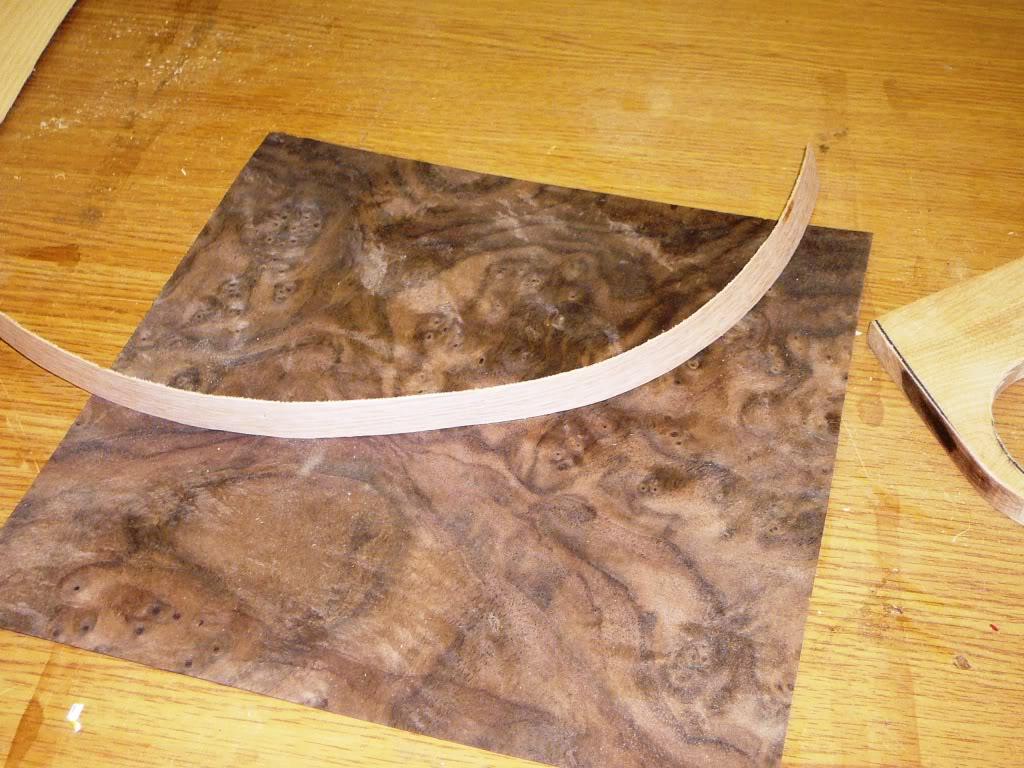
Now you will need to take a hobby knife and trim of a ¾ or so wide strip of veneer to wrap around the edge of the cup holder. In my picture I am using a piece that is a light wood but you will use whatever veneer you choose. The trick is to be able to glue this onto the edge and hold it while the glue dries. What I did was to take another piece of wood, layout the cup holder on it and cut it out on my band saw. I cut it a little larger than my layout lines. The reason behind this is because I am using weather stripping to compress the veneer to the edge. Then you will just have to add a clamp or two to hold it into the fixture while the glue dries. Once the glue dries you can carefully pull it out of the fixture. Now you need to trim the excess veneer from the top and bottom. I use a very sharp hobby knife to slowly cut the veneer, once trimmed you can sand it flush as a final step.
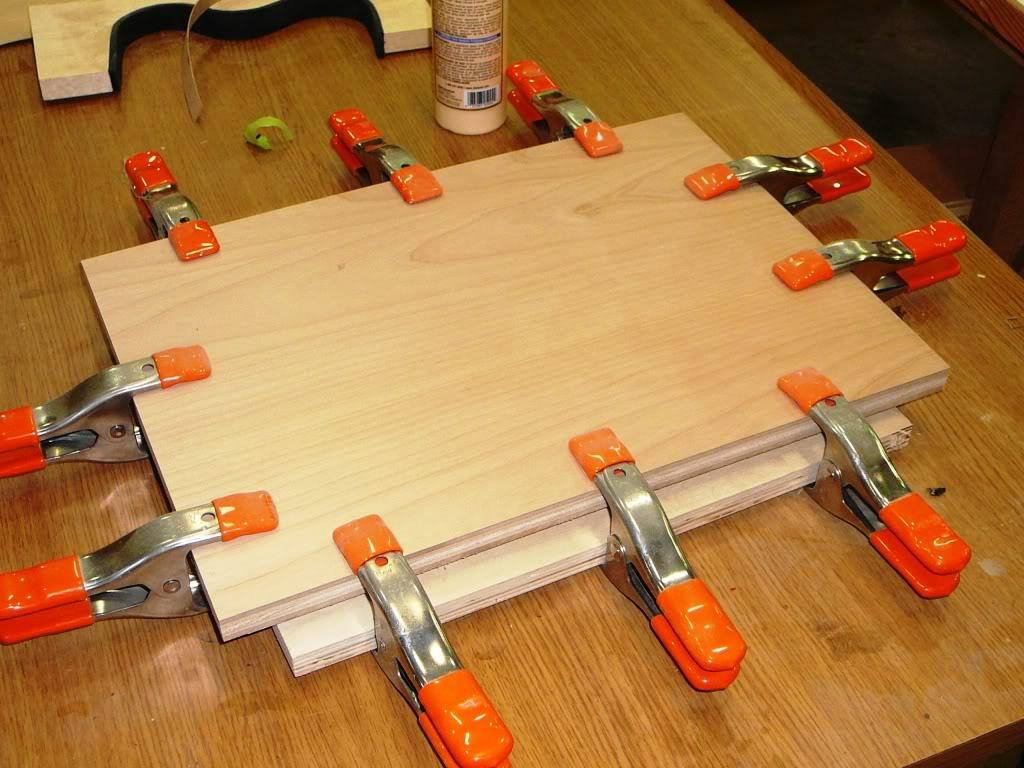
Now you will need to glue the top veneer onto the substrate. For the glue I use normal woodworking glue, you can use Elmers white glue if you have it. Coat the substrate in a good layer of glue, not so much it goes all over the place but a nice even layer. Now lay in the veneer and place between two flat surfaces. I used a couple pieces of ¾ plywood and clamp securely. Make sure you put wax paper between the substrate/veneer and the plywood or you will have one glued up mess. If you dont have clamps, simply stack books, bricks, or anything heavy on top. Let the glue dry for 24 hours, just to be safe.
Unclamp the plywood, and trim the excess with a hobby knife. I use flush trim router bits when I do this but for those that do not have these I would use the sharp hobby knife, just work slowly as the veneer is fragile when not glued to something, you can accidently break of a piece that will go into the glued area and cause a flaw.
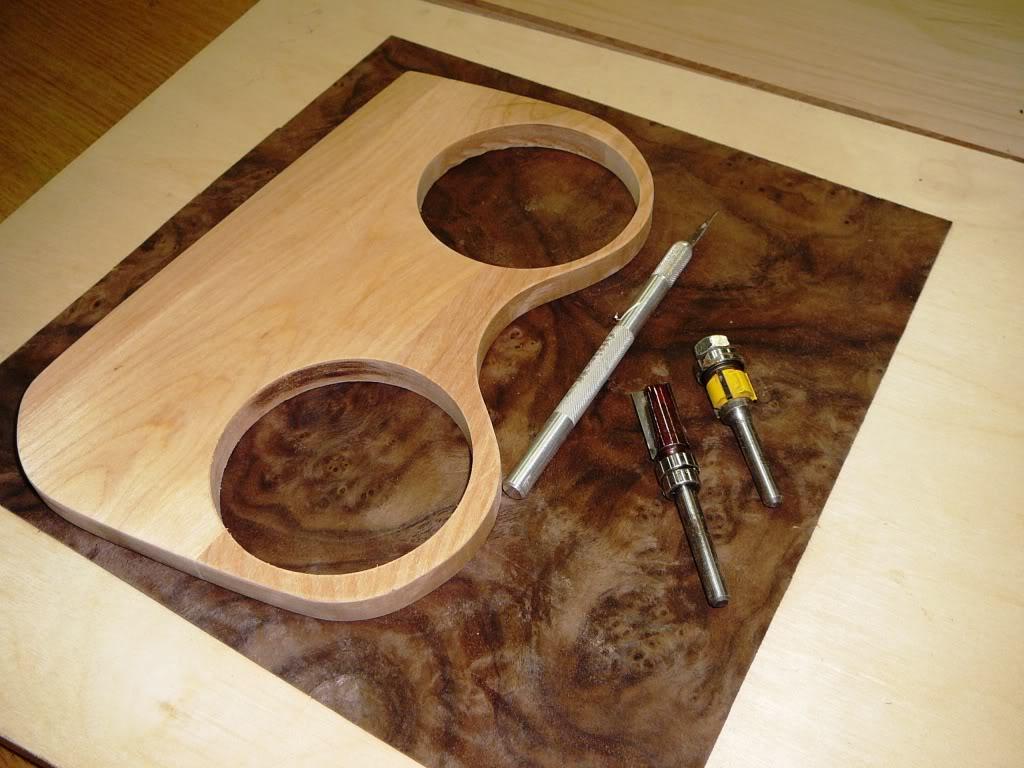
Now that you have it all trimmed you can start your final sanding. Again the veneer is only 1/42 thick so power sanders may be out of the question. You will be surprised as to how quickly with some 180-220 grit paper that you will have a nicely finished piece. Careful on the edges, as that is where you will most likely sand through. I final sanded mine to 400 grit just to make sure it was glass smooth.
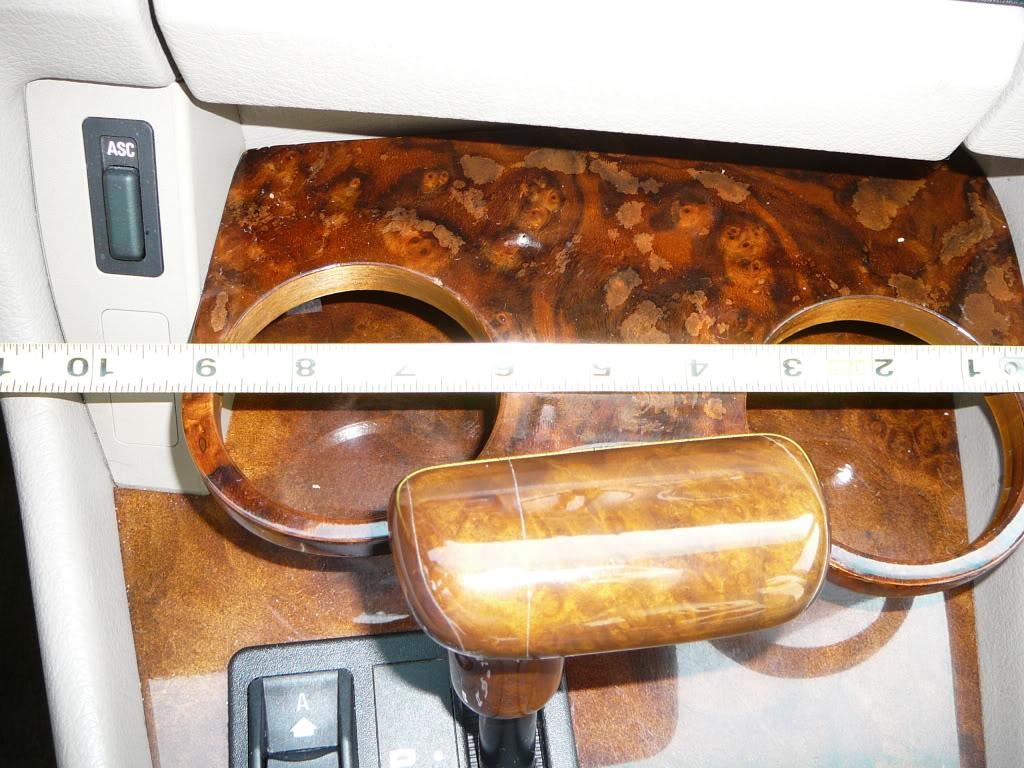
Now that you have the piece to your liking you can determine if you need to adjust the color a bit, if so get some stain (color varies) and lightly test it for shade. The darker the stain the darker the end result will be, I think I had to use a light brown (summer oak) to get the color I was looking for. Let the stain dry 24 hours to ensure the solvents evaporate completely in the drying process. Use a dark colored stain in the cup holder hole edges. This will allow it to disappear once the clear is applied.
Now for the clear finish. Depending on the finish selected, you will get different results. If you use water based products most likely you will get a no change in color clear finish. If you use a oil based polyurethane you will get a slight amber color added that will provide a little darker deeper looking finish. You can also use a lacquer based clear, and they provide a clear no color change finish. I used gloss for mine as most will probably do, for the one timer guy I will suggest using the Minwax fast dry polyurethane in a spray can. 1 can will be plenty. It is oil based and will provide a slight amber color change, more change as coats are applied. Use very light coats, apply 3-4 coats then use 0000 steel wool to scuff the surface to a smooth finish, apply more coats using 0000 steel wool in between coats. If you get real motivated you can sand with 1000 grit to make it like glass. The last coat needs to be sprayed to where you get a nice even finish then leave it alone for a day or so.
I made a couple of 1 ½ strips of wood that are glued to my cup holder to keep it in place. On the strips of wood I applied a couple small pieces of double stick carpet tape. This holds nicely and allows the cup holder to be removed if I need to get access under the console.
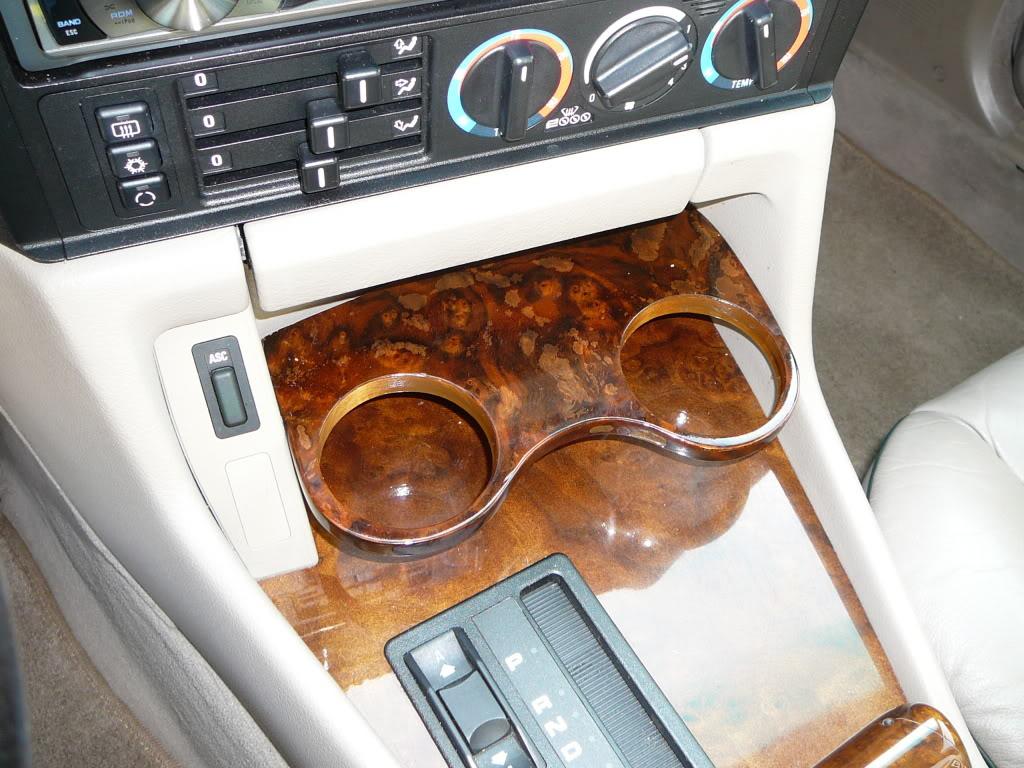
Enjoy the look a convenience of having a custom cup holder in your Bimmer!