You must be logged in to rate content!
52 minute(s) of a 107 minute read
1-12-2021
LQ9 6.0L PT88 w/ Truck Manifolds in an FBody Build
Compliments of 98Z28CobraKiller @ www.ls1tech.com
*****Please note that I am copying and pasting the main posts on here from a local site that I am on more frequently. I started that thread Over a week ago so this first page is in a sort of time laps mode  ******
I have officially thrown in the towel on the nitrous. With 4cyls running 8's and 9's on the street, I figured that there must be something to this new fangled turbo stuff. I decided to dive in to these new and unchartered waters (for me atleast). So without further delay, here come the pictures.
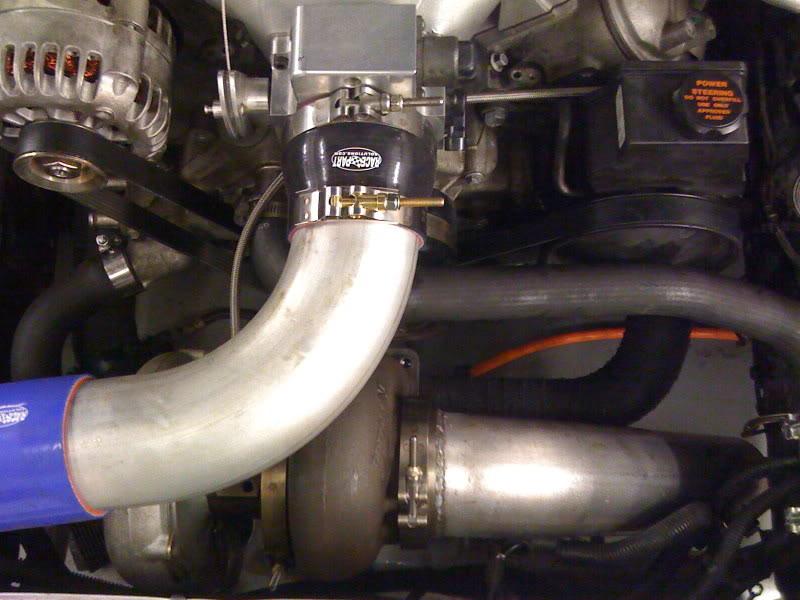
Star of the show will be this PT88.
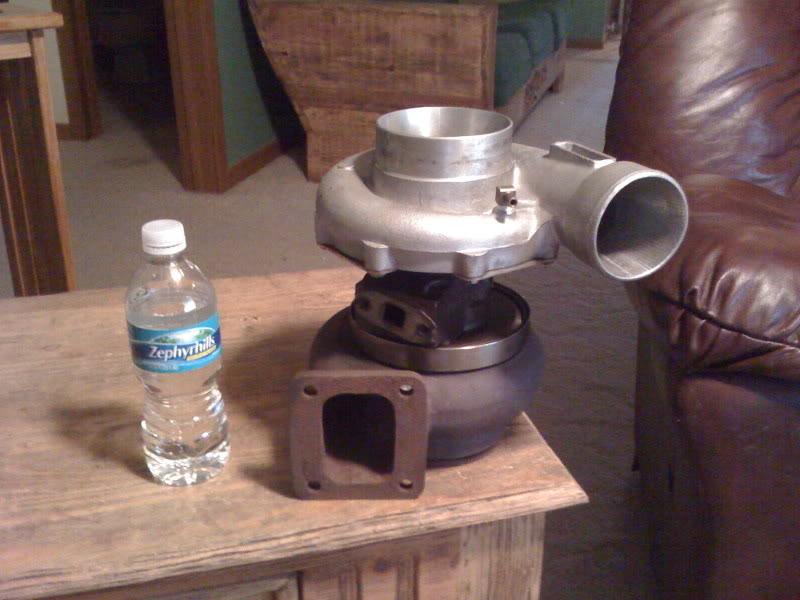
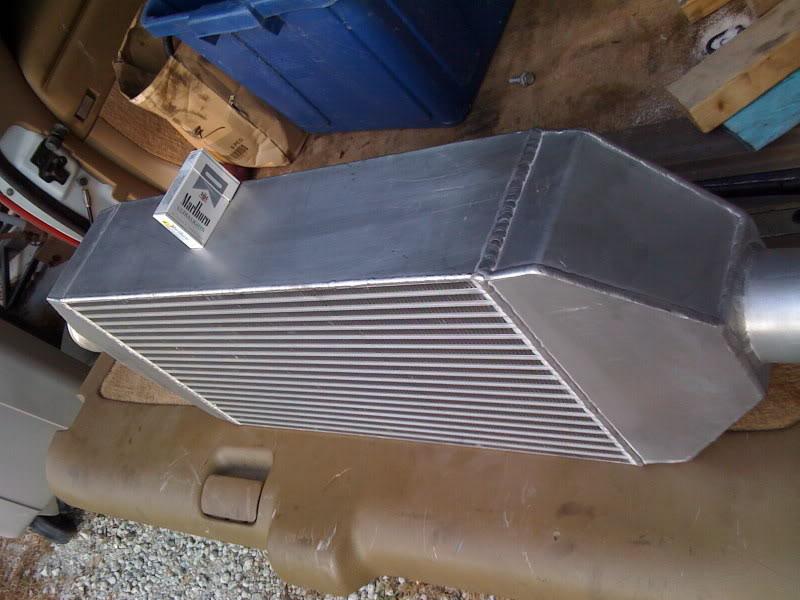
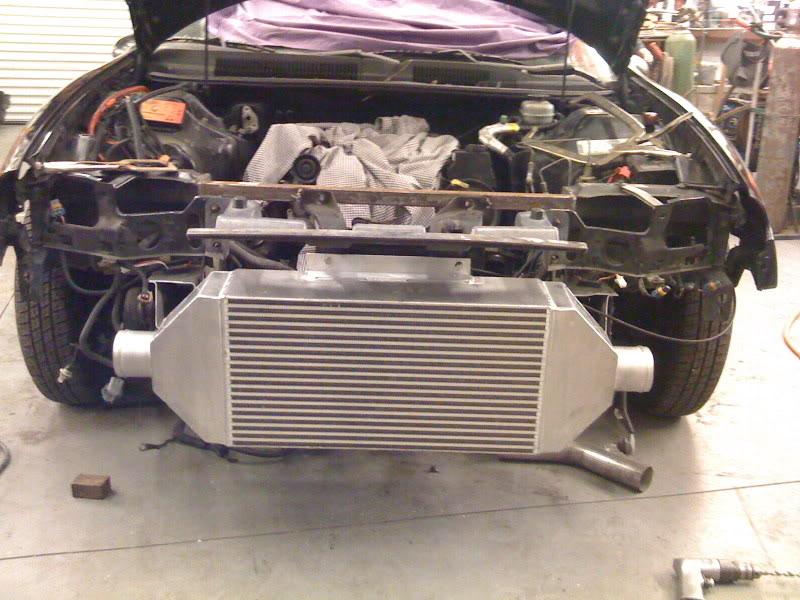
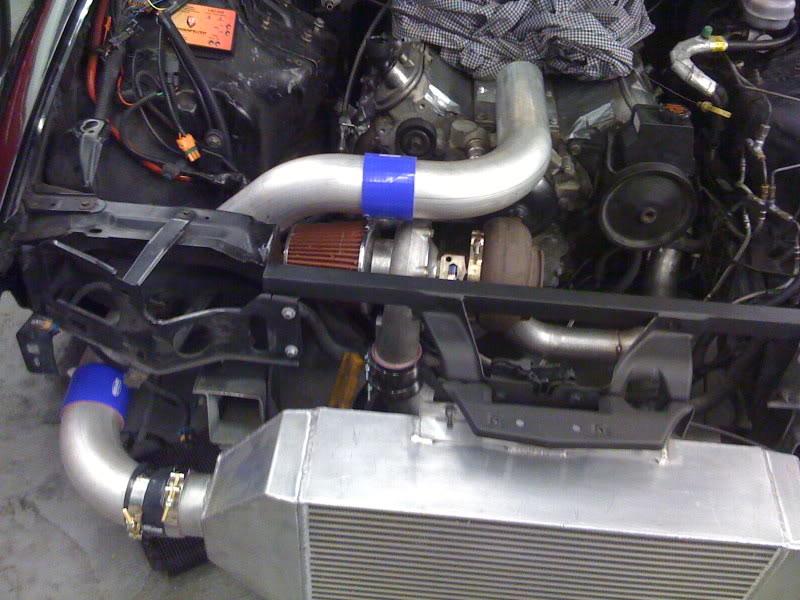
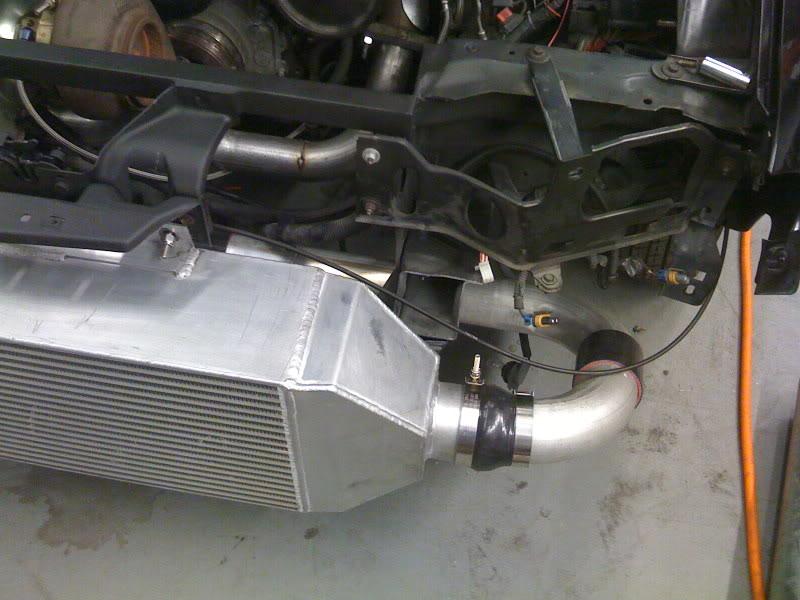
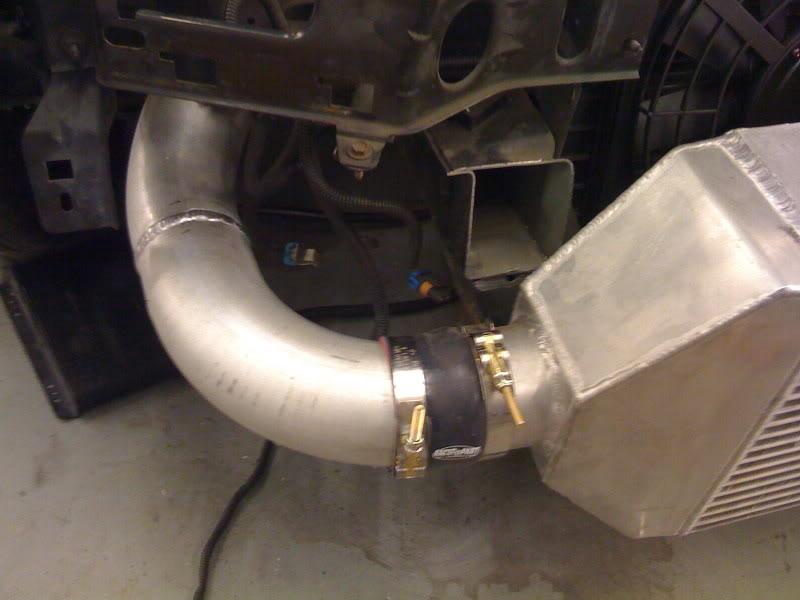
Costarring will be this massive Air to Air intercooler with a 24X12X6 core. (Thanks BMR Tech)
I will be going backwards a little in of motor and cubes. I will, for the time being, be running a pretty much bone stock LQ9 (Cast Iron LS1 6.0L) long block. I picked one used and just threw it in. This was done for 2 reasons.
1) I don't know **** about tuning a so if I **** up and blow something up, it's not the end of the world.
2) It was cheap and will help to greatly reduce the down time on the car.
Once I get the low boost tune (wastegate spring) ironed out, I'll throw some rods and pistons in there and turn it up. No more forged cranks for me for a while. Pretty much everytime that I have blown my motor, I have managed to ruin my forged crank. There are lots of guys with over 1000hp on the stocker so I will be giving it a chance.
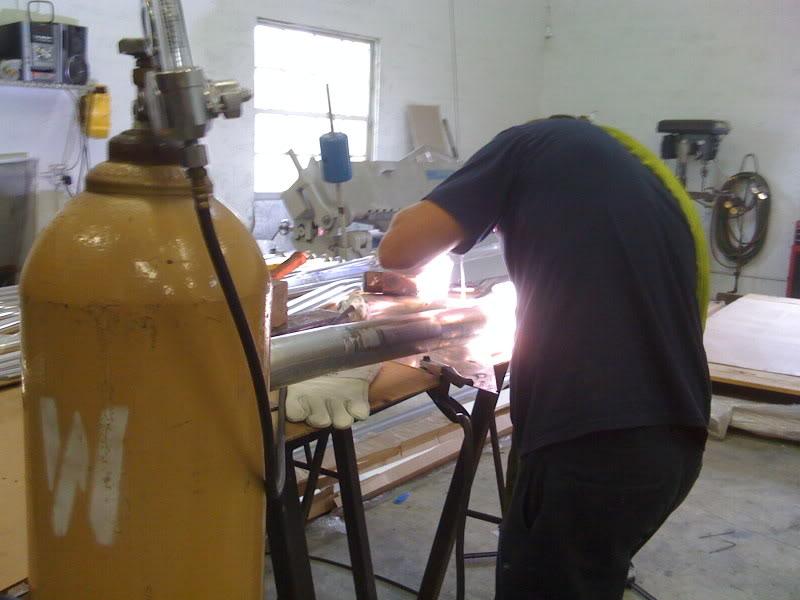
Pictures of getting started.
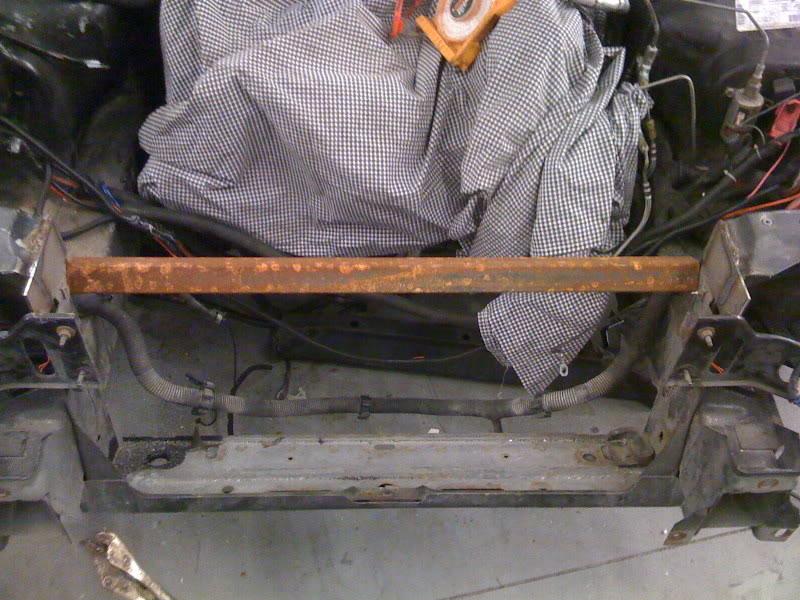
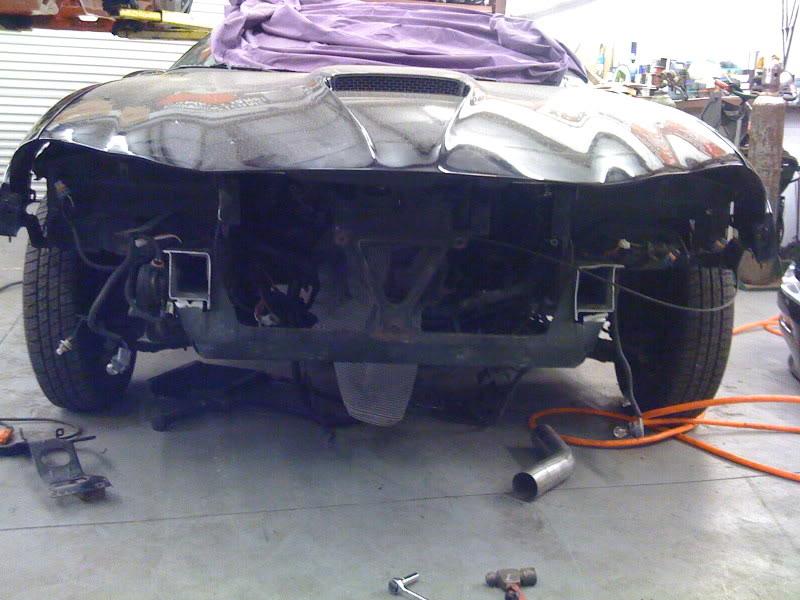
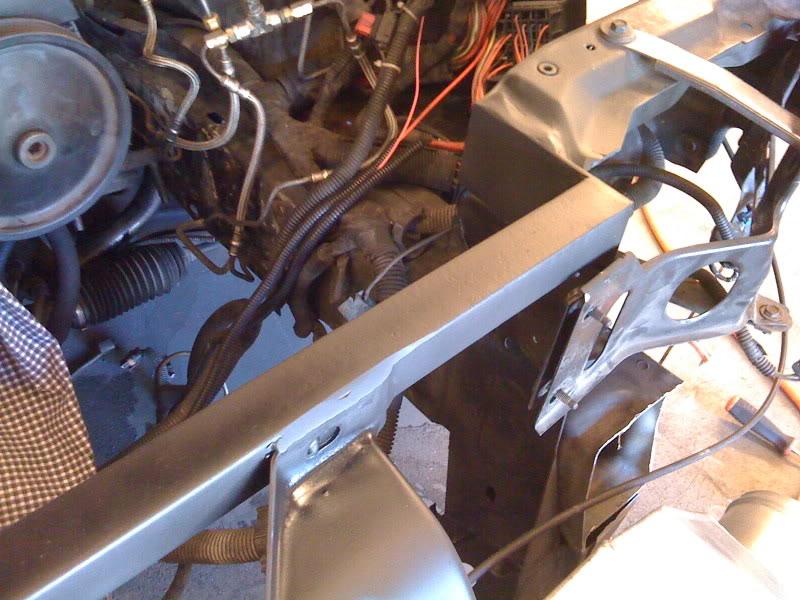
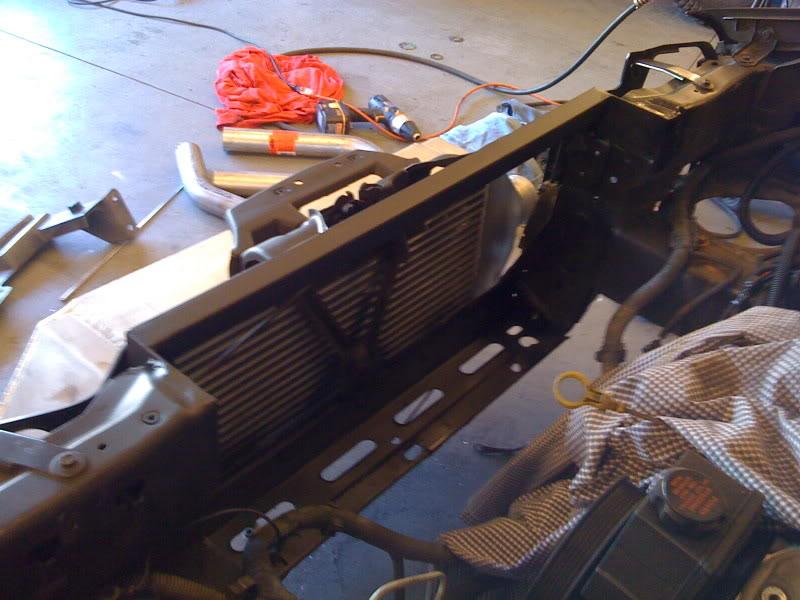
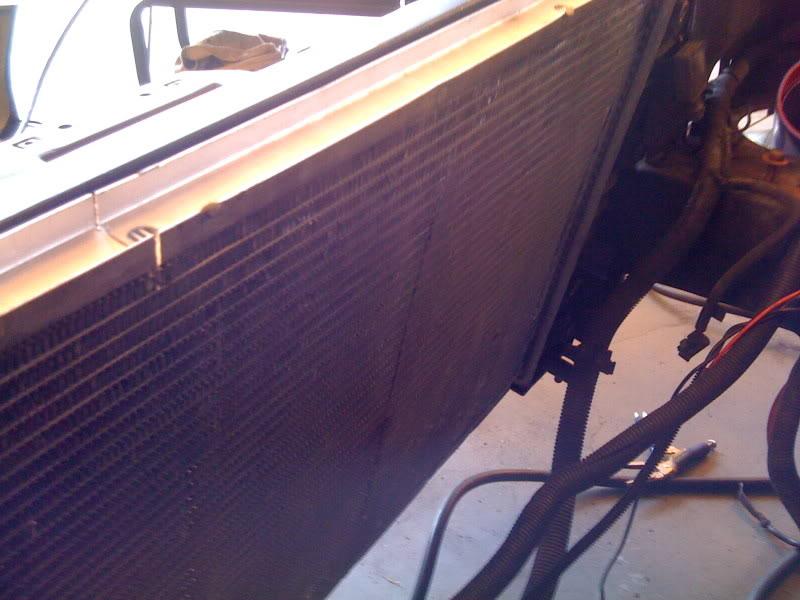
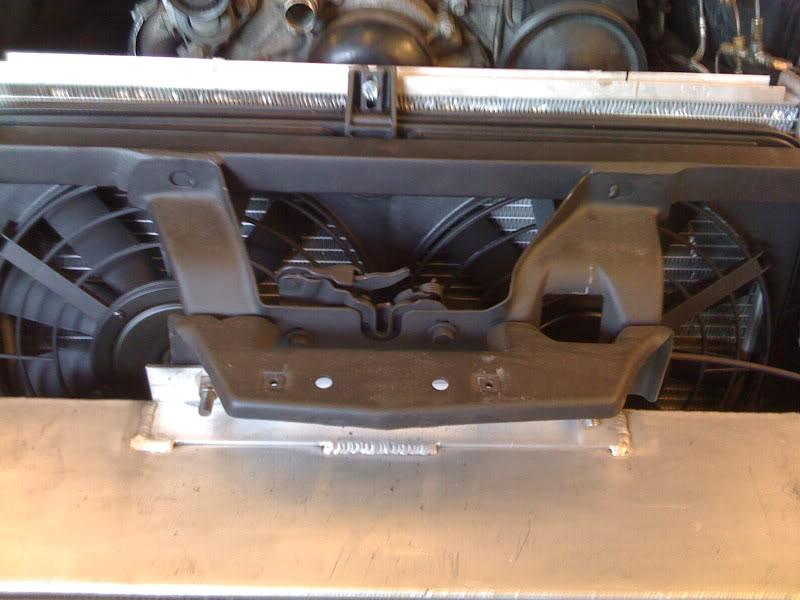
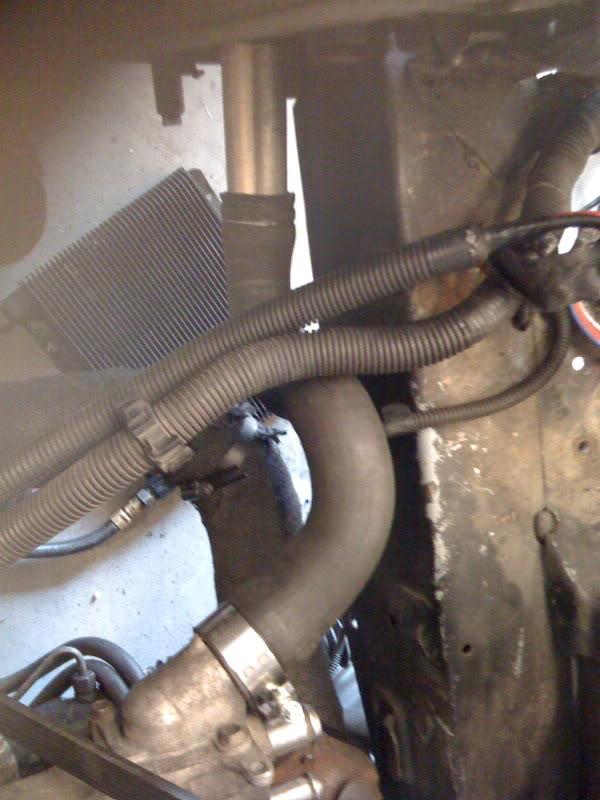
we cut out the radiator support in order to make some space for the turbo. The bar running across the middle is just being used as a spreader in case the gap wanted to close in a little until he welded in the relocated support.
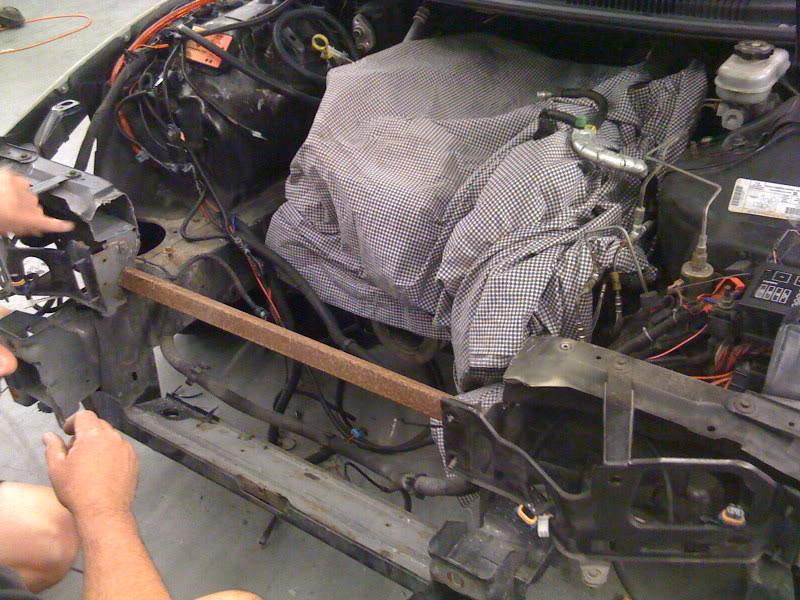
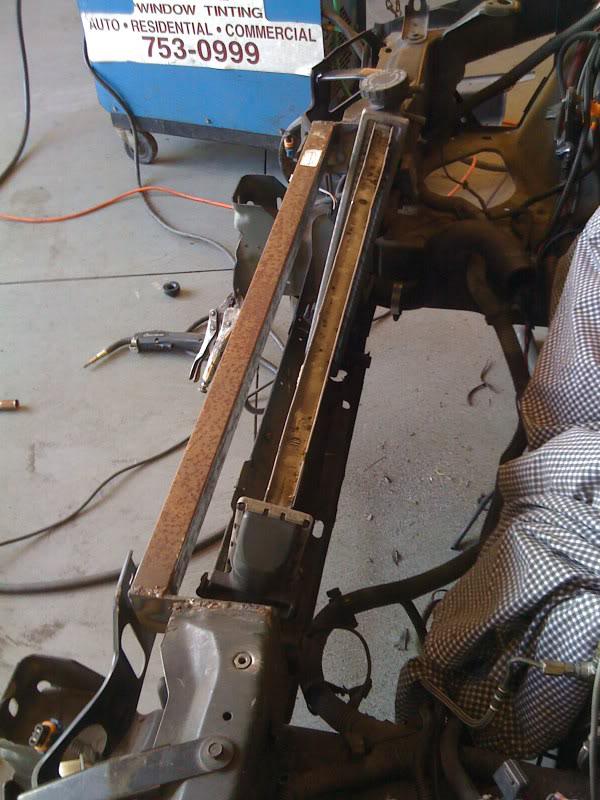
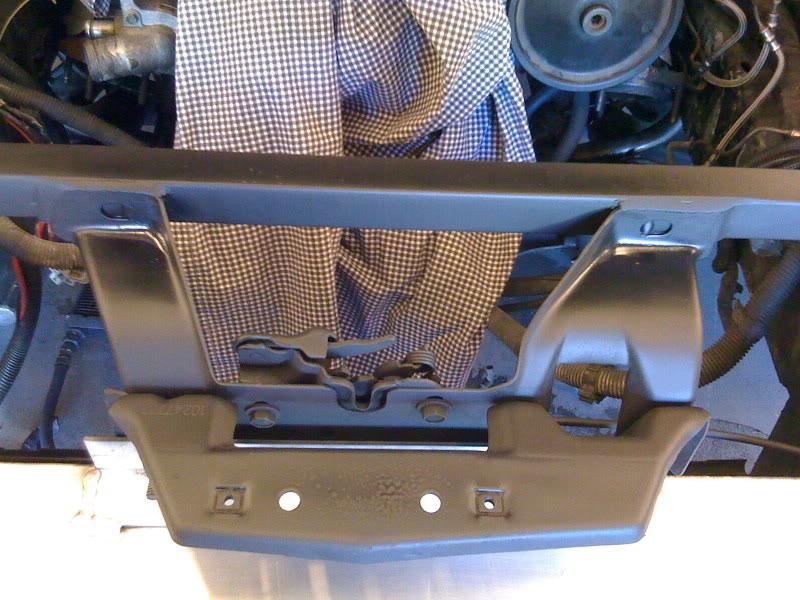
Then he welded some caps that come out a little forward for the new support. Again, the rusty bar is just a wedge.
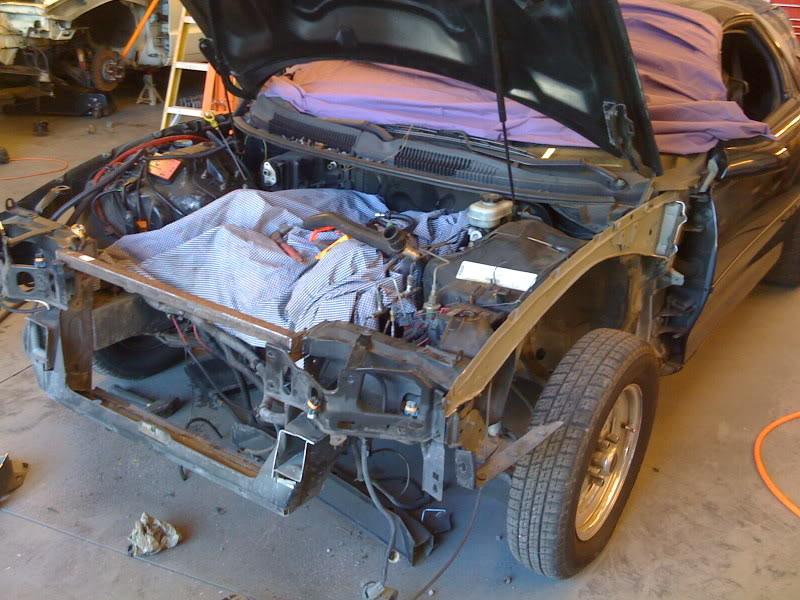
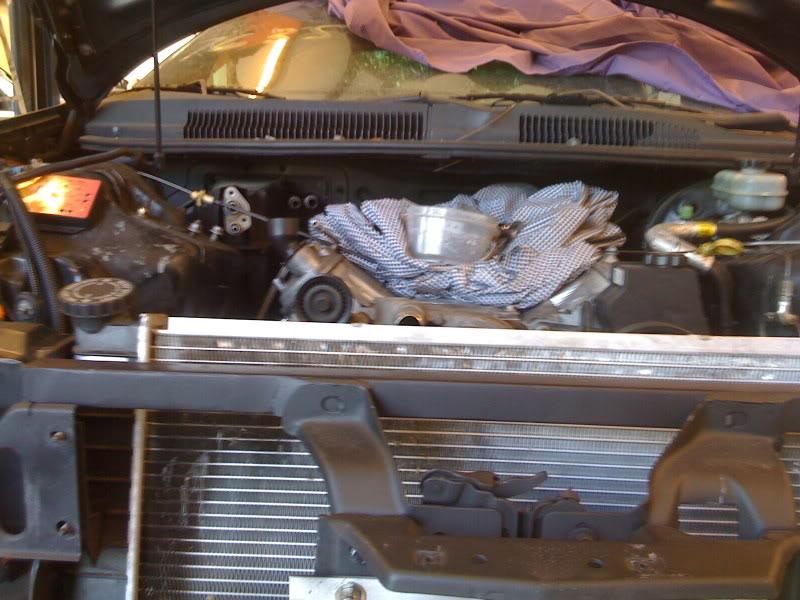
Here it is with the support in place and the radiator sitting in the hole. Between the radiator relocation and the use of pusher fans on the front, you get an extra 5 inches or more of clearance.
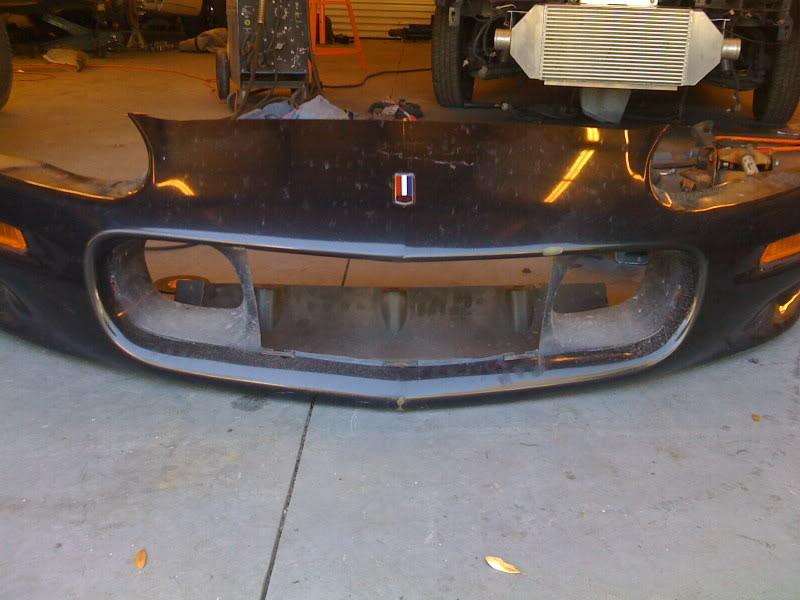
Due to all of the additional weight from the turbo, intercooler, piping and the iron block, I am trying to remove some weight. I cut the horns of the front for the bumper supports, the extra metal behind the fenders that we aren't sure what it does, and am in the process of removing the A/C.
I got my flow matched 80# high impedence injectors today from FIC Injectors. They came with a flow sheet (matched) and 2 of them flow about 4 CC's more marked for the notorious #7 & #8 cylinders.
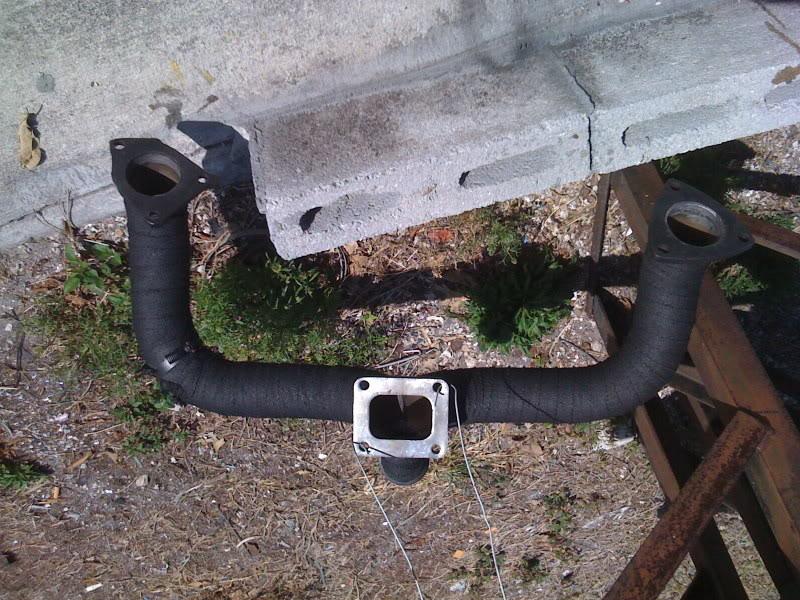
Oh, and I also got my truck manifolds today. Flanges are running behind.
I also sent out the FiberTuned intake to have the divider plate removed which was causing most of the flow restrictions. They are also going to brace it up a little for the boost as I heard from another tester that it was flexing a bit at about 15 psi (which I wont see until I get some rods, pistons, and my heads on it). If you're curious as to what I am talking about. The answers are here http://www.ls1tech.com/forums/genera...-pictures.html
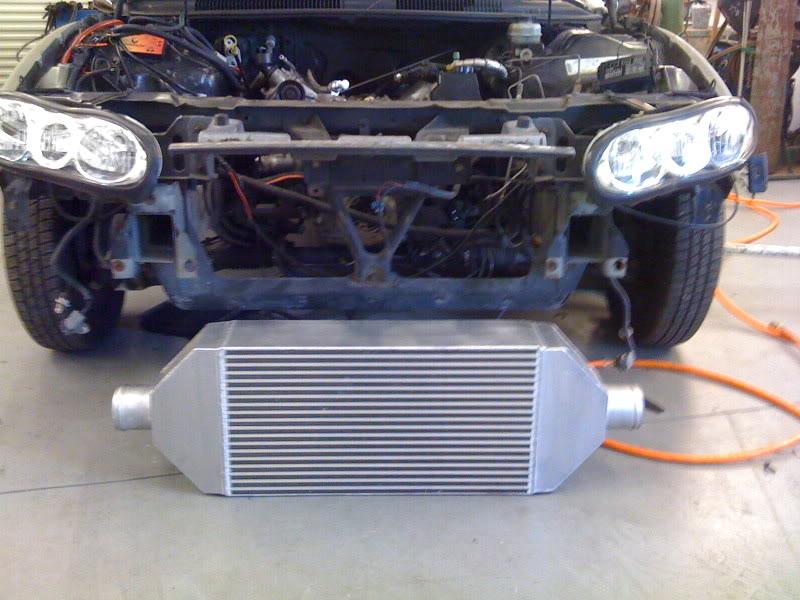
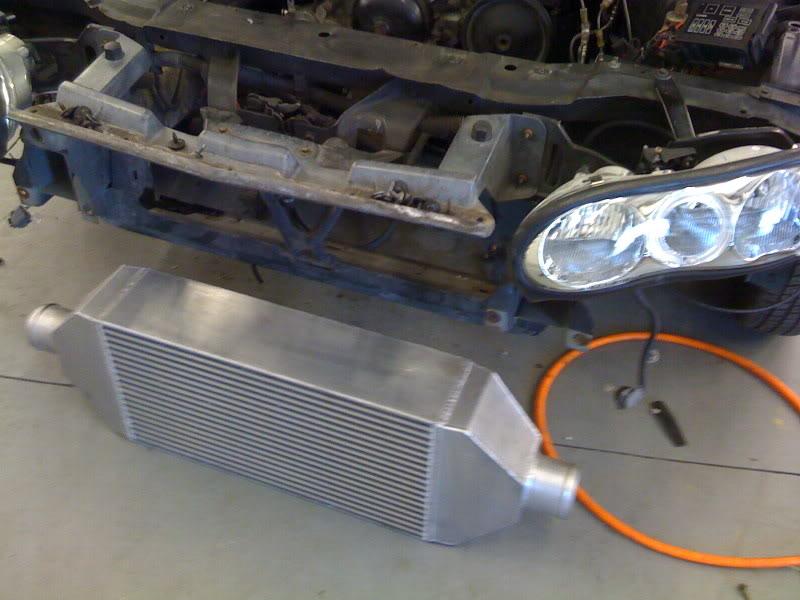
Bolted on the truck manifolds and bent the power steering and brake lines out of the way on the driver's side. Mocked up the intercooler so I can get some tabs welded on it at another friend's house with a TIG welder. Looks like it will be easy to mount without adding too much bracketry and **** to the nose.
Made some progress yesterday. Put the fenders back on and got the hood aligned good with the bracket that holds the latch. In an effort to keep the fabrication down to a minimum, we decided to mount the intercooler (top bracket) to that bracket so we had to make sure that one was in the correct spot after reassembly. Bolted the intercooler on top, measured and welded some plates to the bottom radiator support to reach the bottom of the intercooler. It is very sturdy.
This morning I went over there and ground down the welds, sanded, painted the bare metal and cut the front of the bumper cover for better airflow.
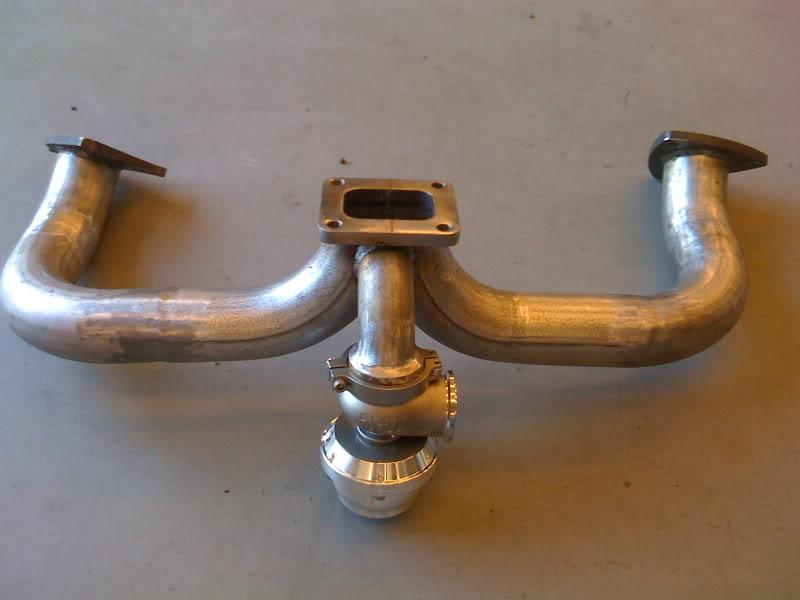
Just got this stuff last night and now we can get started on the hot side.
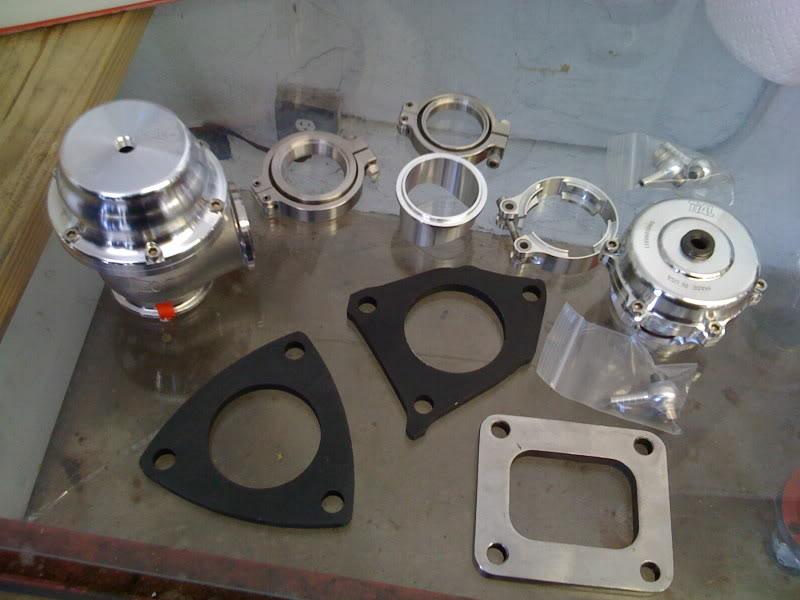
Going with the Tial 50mm BOV (Q) and Tial 44mm Wastegate.
3/5/2009
We got the hot side all tacked together. What a pain in the *** that was. Measure cut measure cut measure cut trying to get all the mandrel bends to line up without being able to bend any pipe.
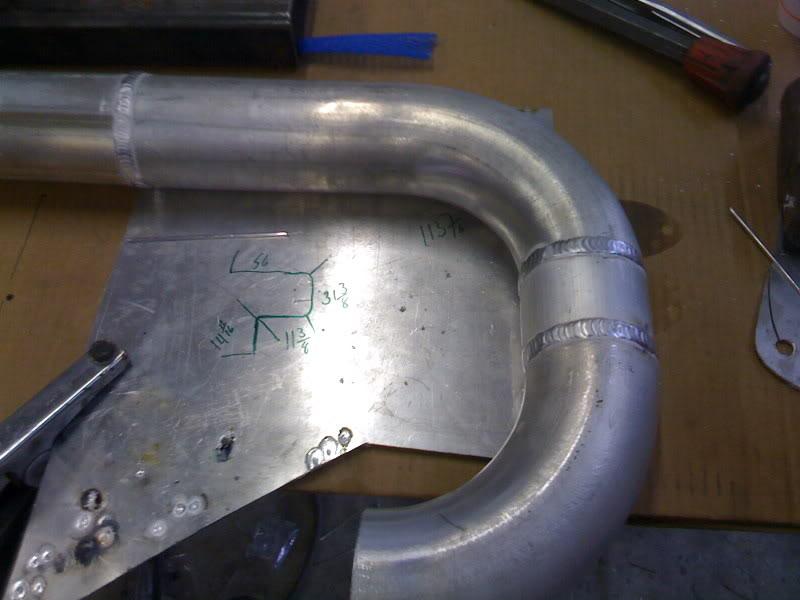
Here is the center section with the T4 flange. Basically it's a u-bend 2 1/2" cut in half, filleted and turned back on itself.
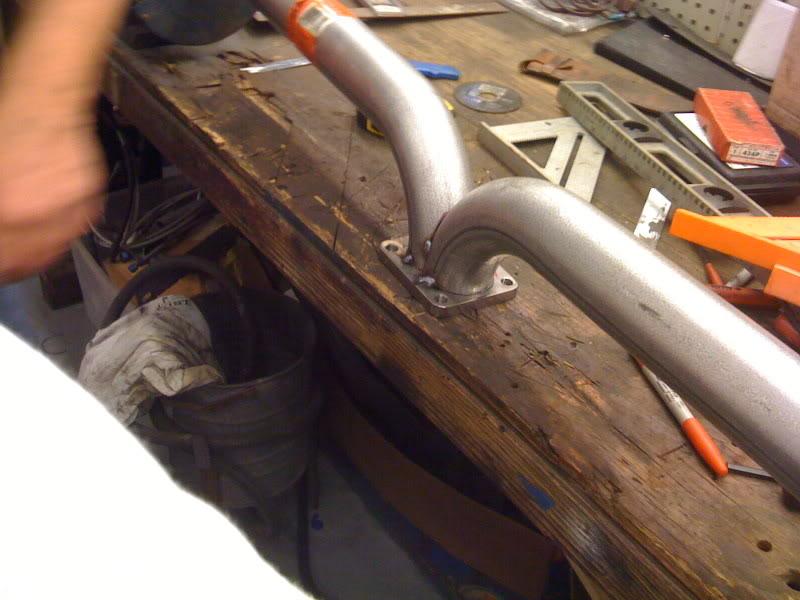
Here it is almost all tacked up missing the drivers elbow.
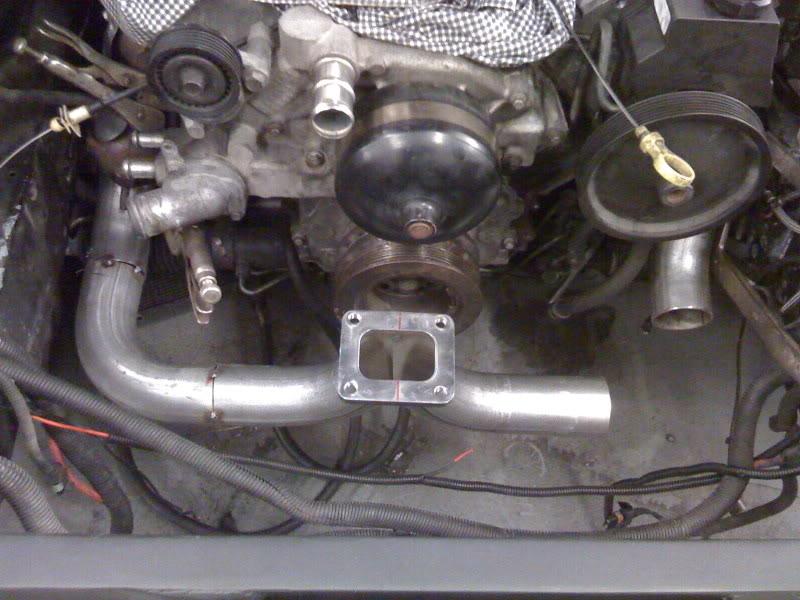
All tacked and ready to be welded up on the bench.
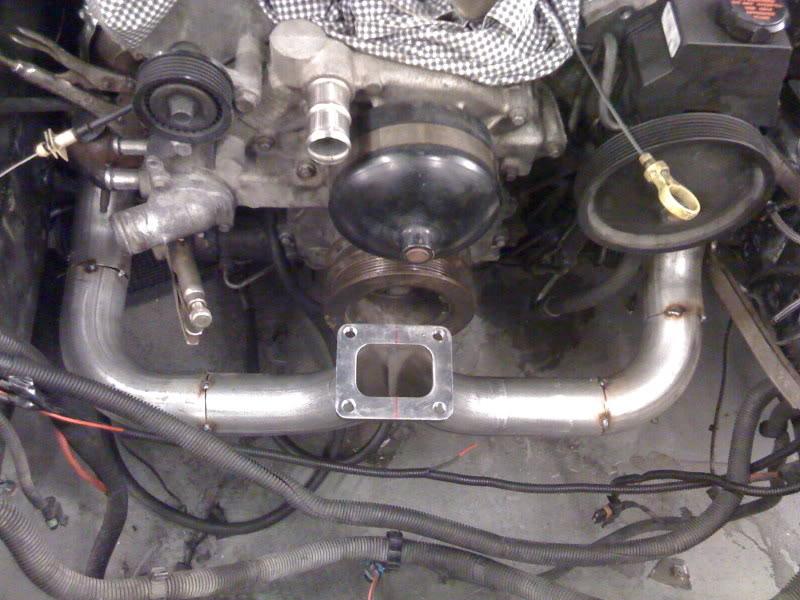
Most of the other front mount single turbos that I have seen have the exhaust side aimed at the side. I found that the passenger side manifold came down so far that I wouldn't be able to take advantage of the turbo k-member and would have had to route the down pipe between the motor mount tower and the block. By flipping it the other way, I can easily fit a 3 1/2" down pipe and might be able to squeeze a 4" pipe thru there. Any thoughts?
3/7/2009
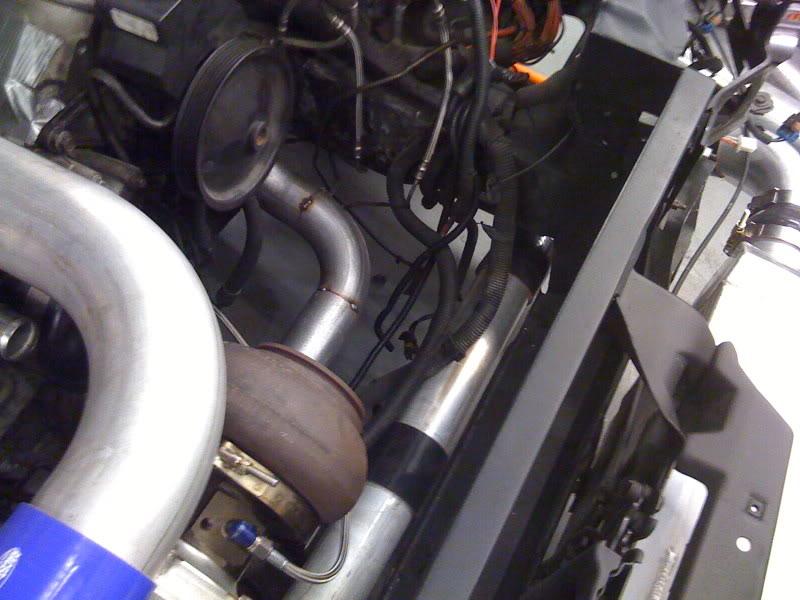
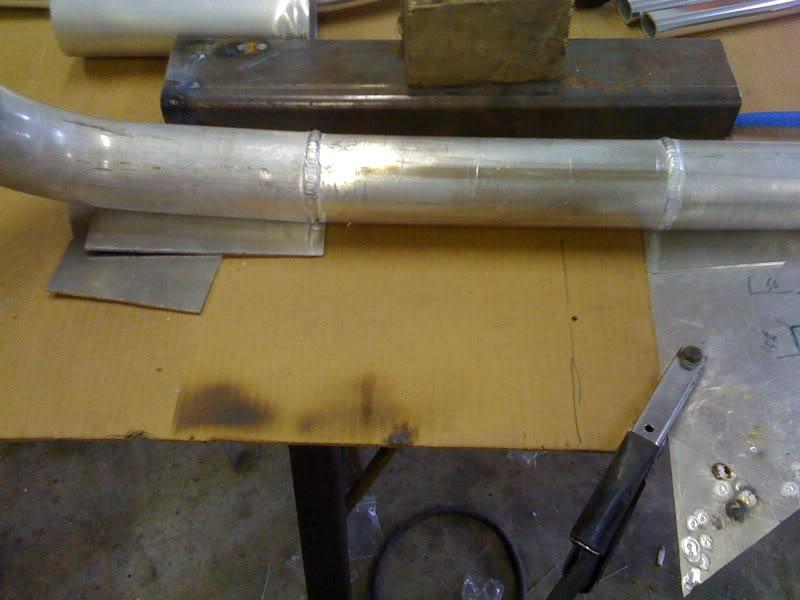
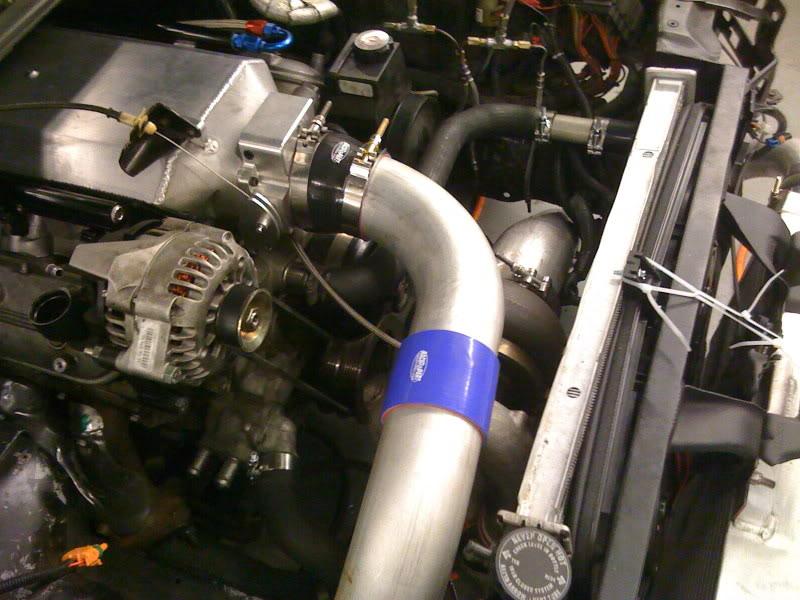
This afternoon/evening was very productive. We got the charge pipe from the turbo to the intercooler all cut and marked for welding. The other side is almost done but I cant finish it until I get my intake back as I am not sure as to where exactly the throttle body opening ends up and on what angle.:shrug:
So here are some pictures:
3/8/2009
ot my buddy Dave to TIG weld up the aluminum pipe going from the turbo to the intercooler.
In the mean time, my buddy Joe was welding and polishing the hot side and adding the tube for the wastegate.
Once we got everything in with the radiator and all we were looking at how high up the radiator was sitting. We realized that we hadn't tried closing the hood. No go. So I cut the bottom support out and Joe made a couple of brackets to hold the radiator up.
3/9/2009
Just got done painting the (50 feet of) wrap so the hot pipe is all done.
Sold my dedicated nitrous fuel cell last night. I used that money to order the pusher fans (FLX-240), turbo heat shield, boost gauge and T4 flange gasket. I got the exhaust flange gaskets today also. Getting close.
3/12/2009
Got some stuff today. I got the T4 Flange gasket, Flex-a-lite 240 pusher fans with shroud, boost gauge with chevy emblem in itChevy_anim, BonnarLS1 got me the 2 bar MAP sensor, and the turbo cover. I don't think that this turbo cover is going to work though. It looks a little small.
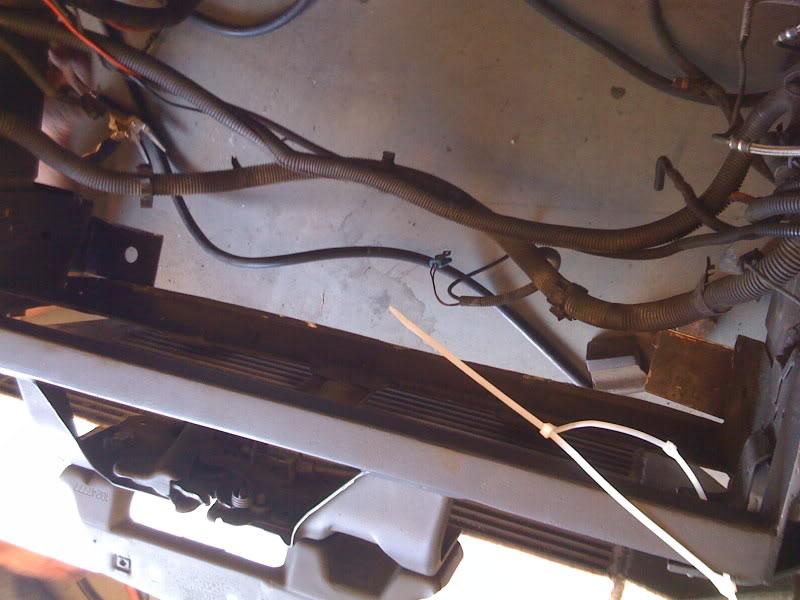
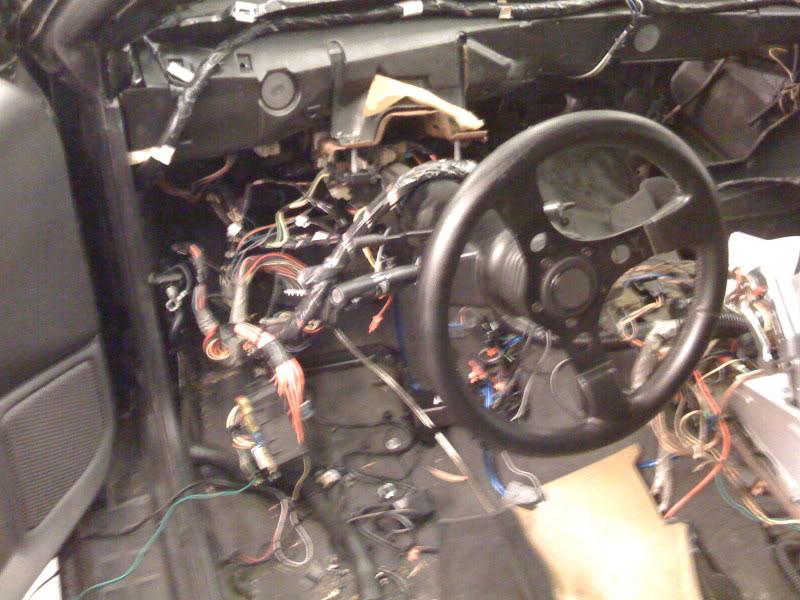
And here are some pictures of the wire clusterfuck!!
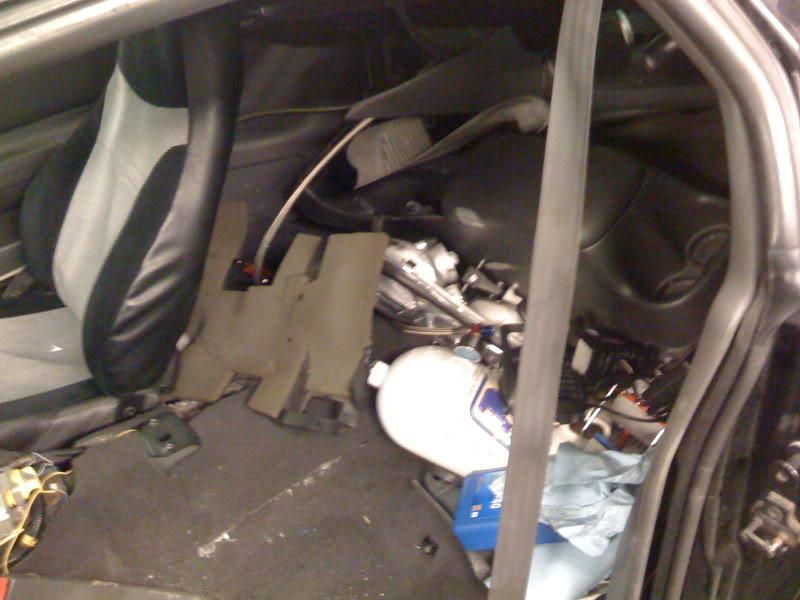
And the pile of **** in the back.
3/13/2009
I got the flex-a-lite dual pusher fan with shroud (part#FLX-240) installed today. It was a piece of cake to mount and looks good. Hope it works good.
I got the oil flange and gasket last week and put it on today. I had to open up the bolt holes a tiny bit on the flange as I couldn't get both bolts started without it feeling like it was going to crossthread. No big deal though.
I ordered a generic T4 exhaust cover from Summit. It was a little small. I cut it and spread it open and it will work for now.
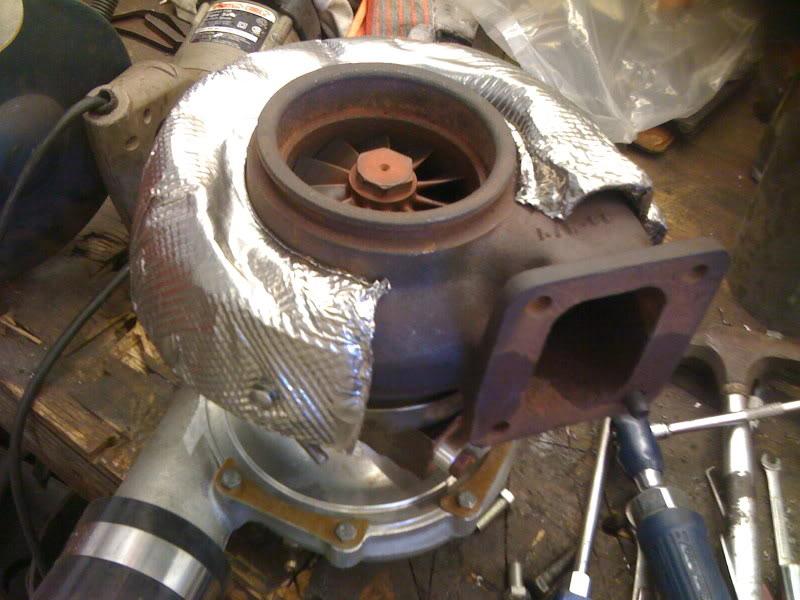
I am having a little bit of difficulty clocking the exhaust housing. It appears to only be held together with the v-band clamp but even after taking the clamp all the way off, it wouldn't budge. I tried twisting and sliding and nothing. I put lots of WD40 in there also. Nothing. Do I need to get aggresive with it? Maybe a BFH is required?
Also I got my 2 bar map sensor AC Delco Part# 213-1631 . I kind of had a hard time finding this number so I figured I'd share.
3/14/2009
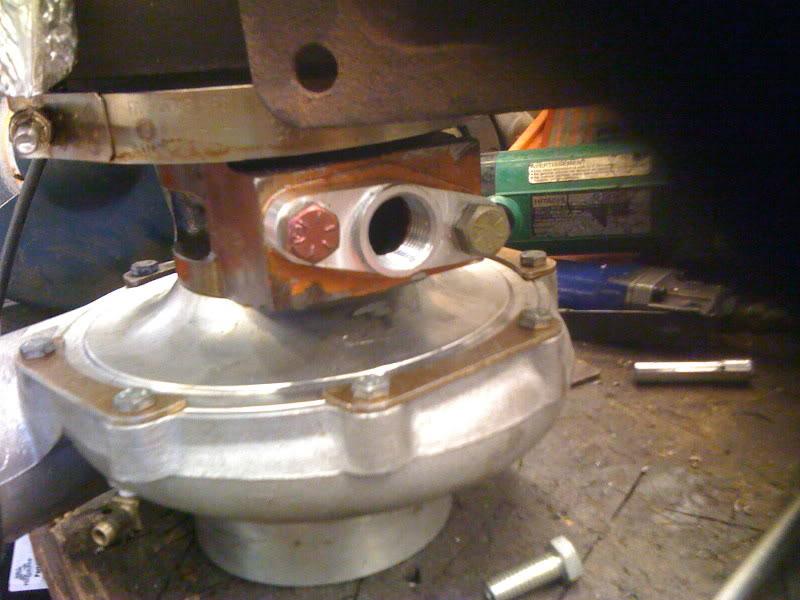
Yeah, I can see the light at the end of the tunnel. The only problem is the web of wiring that is in my way. After some of the posts on here, on the other forum, and PM's, I decided to run over there this morning and try the flange that I bought from dman for the exhaust housing and actually crank it down to see if it would bite.
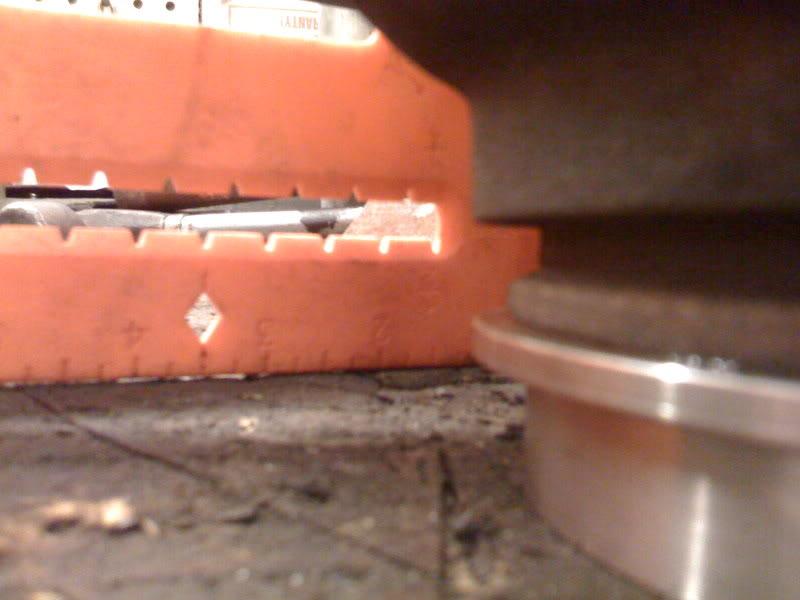
This is why I didn't think that it would work. Notice how much larger the OD is on the shinny flange sitting under the turbo.
I went ahead and cranked it down and sure as ****, it's on there good.
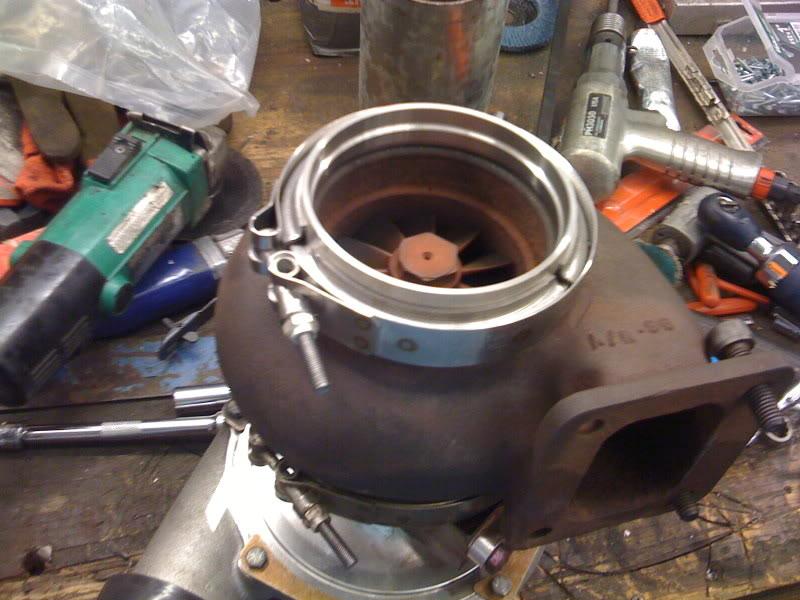
The bad news is that the exhaust housing will not clock. I wacked it with a big hammer and it wouldn't break loose. The good news is that the oil feed is only 20* or so off center and that is where it is staying. Since I dont have to weld the exhaust flange now, I'm not gonna worry about it.
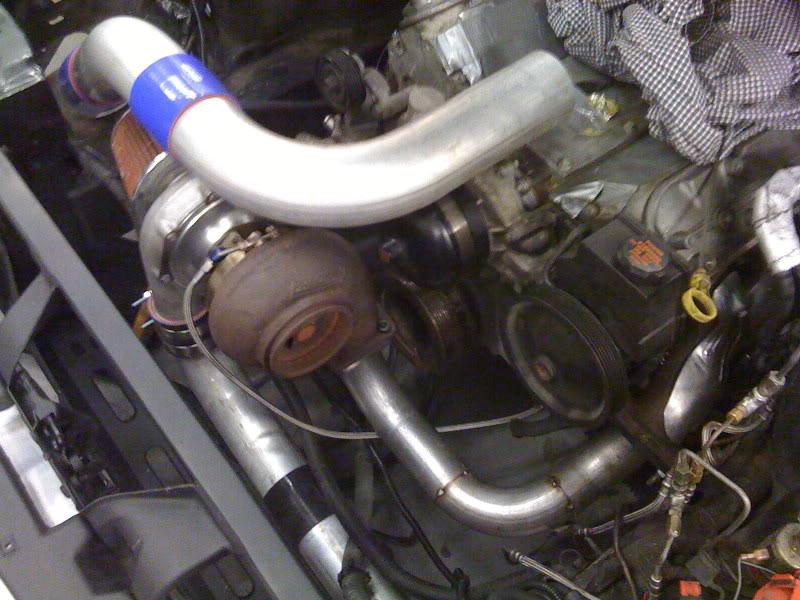
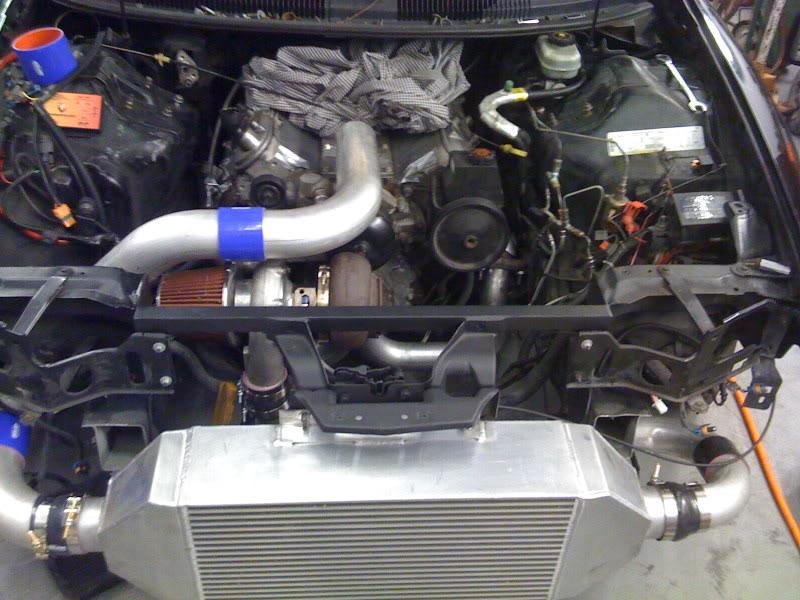
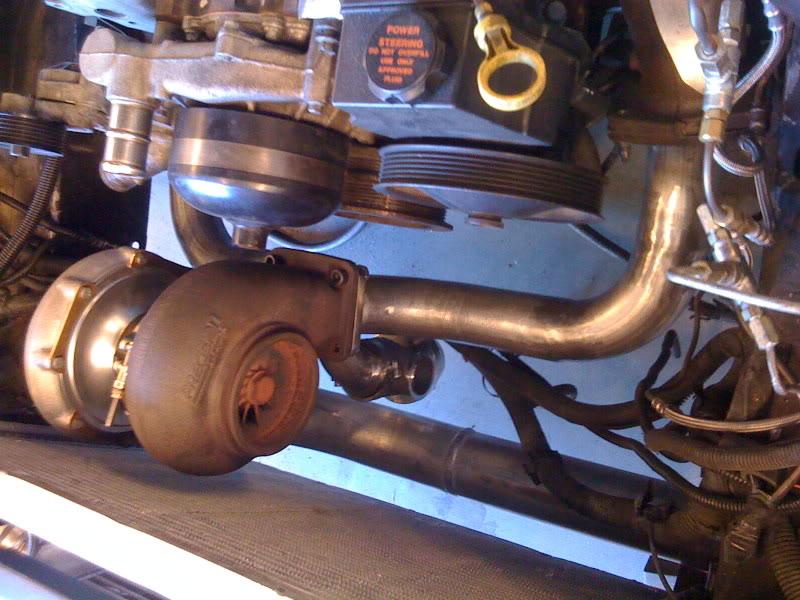
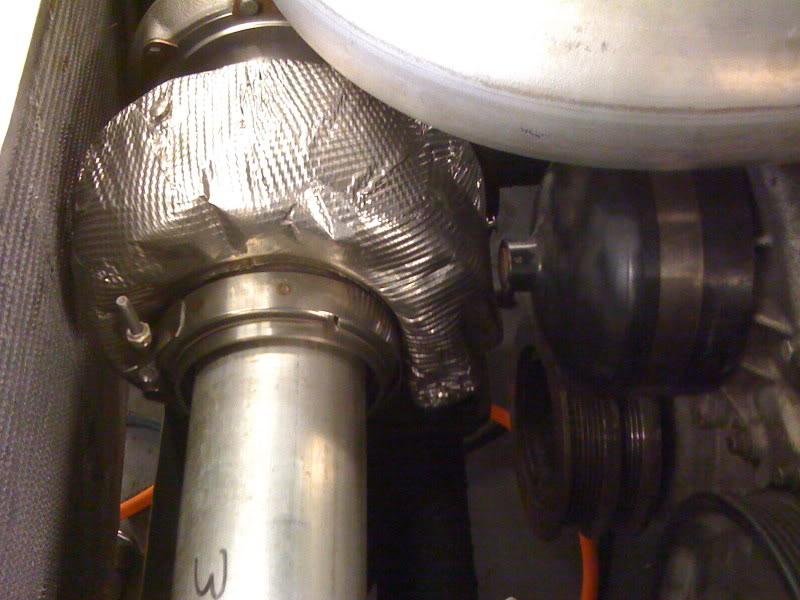
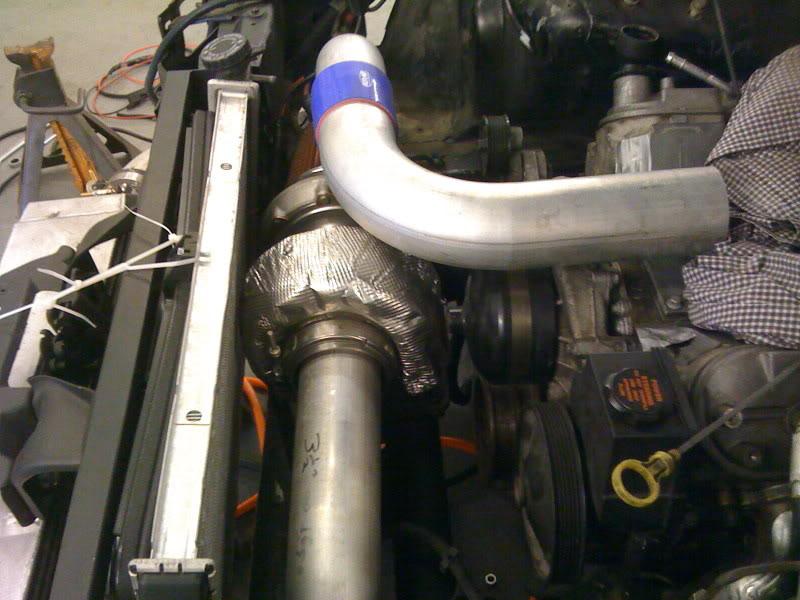
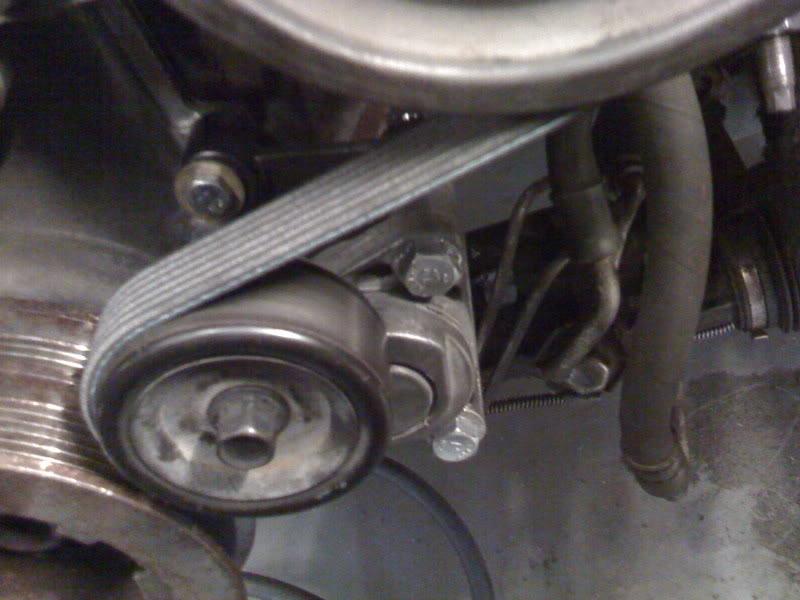
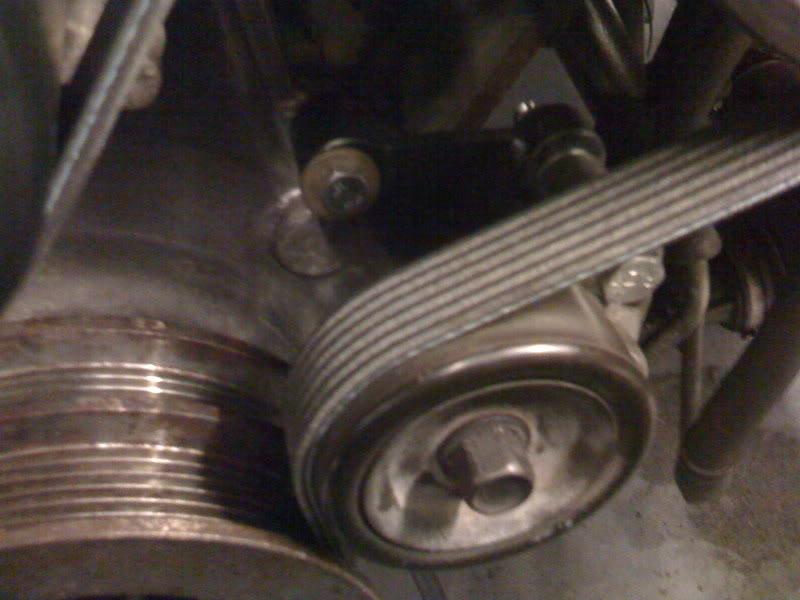
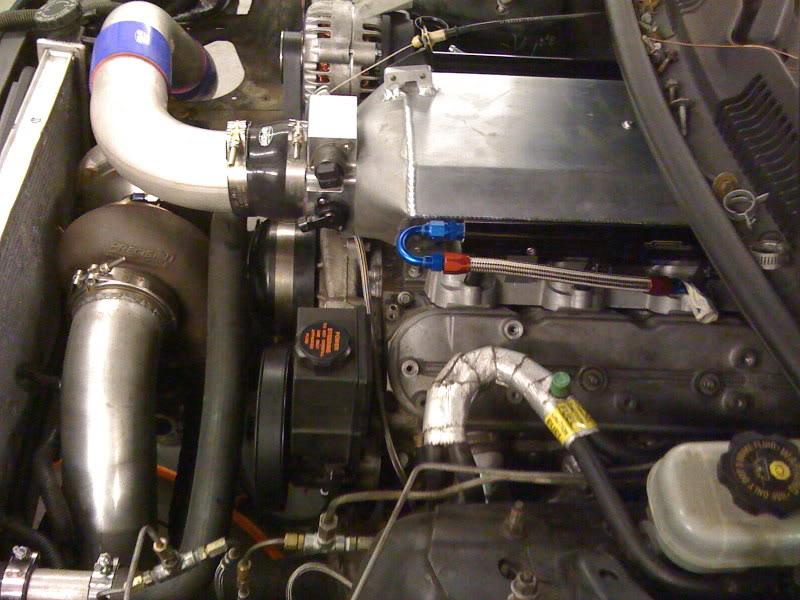
So I decided to put it all together and double check everything. Check out the gap between the turbo cover and the waterpump pulley and the gap at the radiator. Looks almost like we did some serious measuring. I pretty much got lucky that it landed right in the center.
I ended up with an extra 3 1/2" 90* tube so I stuffed it in the exhaust just to see how it would look finished. I will be using a 4" down pipe though.
I am just waiting for the alternator relocation bracket, the FiberTuned intake which will be here this Wednesday and some wiring.
3/16/2009
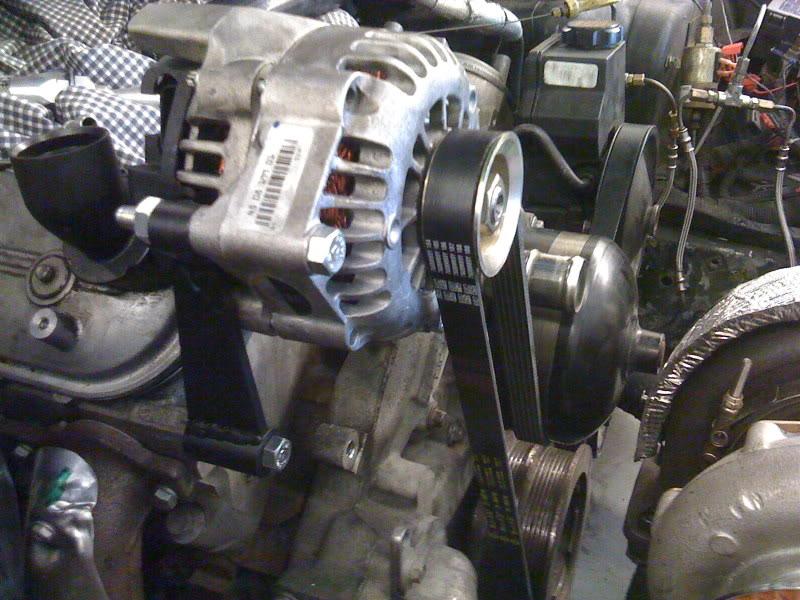
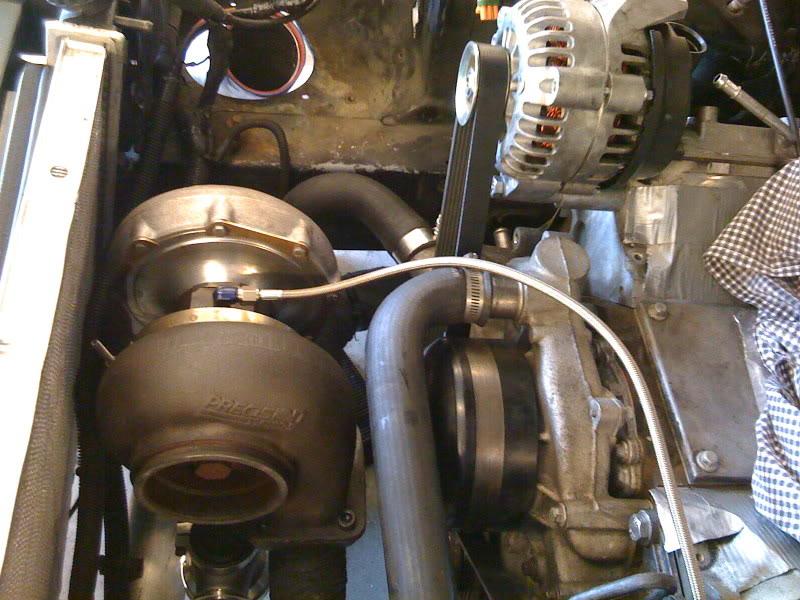
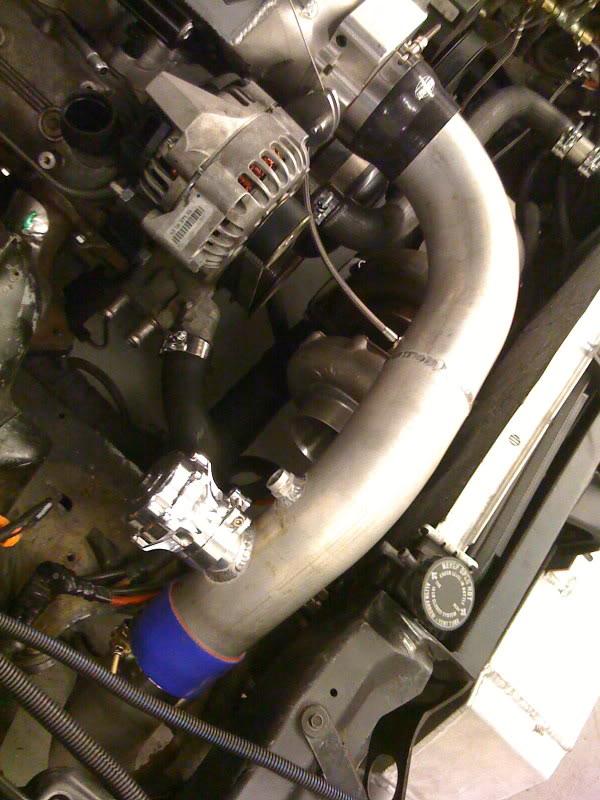
I got the alternator relocated today. It was a little bit of a pain as I guess that I ordered the wrong kit. xfenix999x makes an LSx (aluminum) and an LQ9 (Iron) block kit. The LQ9 Iron block does not have a bolt hole on the front of the block that the LS1 has. I ended up having to modify the bracket slightly in order to get it to work as I didn't want to wait for the other bracket. I had to elongate one of the holes on the bracket in order to catch one of the bolt holes from the front cover.

My next obstacles are the radiator hoses. I think that I will be OK with just using some extension tubes. Should I use PVC, aluminum. stainless or aluminized mild steel?
Oh, and clocking this exhaust housing thing. Gotta get that blaster ****. WD40 isn't making it happen.
3/18/2009
Well I went down to see dman yesterday, returned some of the extra couplers and tubing that I didn't need. He gave me a couple of sections of scrap aluminum tubing and showed me a really cool way to make a lip on the end with a pair of ground-down crimpers. I also picked up the couplers and clamps to tie it all together. UPS will be delivering my intake today. I will try to get that on and finalize the cold side tubing as well today.
I picked up a can of PB Blaster today so I will tackle the clocking issue and see if I can break it loose.
I blew off working on it last night but I put in a little time this morning. I picked up a can of PB Blaster and went to work on the exhaust housing. I had to knock it back in order to get it to free up some. Then I was able to clock it to the 12o'clock position on the oil feed and 6 o'clock on the drain. I was about to give up on it about 30 minutes into the process.
I got the coolant extensions in and the oil feed line run. Apparently I didn't use a big enough tap in the pan as the oil drain fitting is 1/2 NPT X -10. I may have used a 3/8 which really really sucks as I will not be dropping the motor again so I will be doing it with the pan on the car.
And last but not least, my intake is back so I will be bolting it on tonite and getting the final measurements so I can get the rest of it welded up.
Feed line was the perfect length.
Upper radiator hose extension
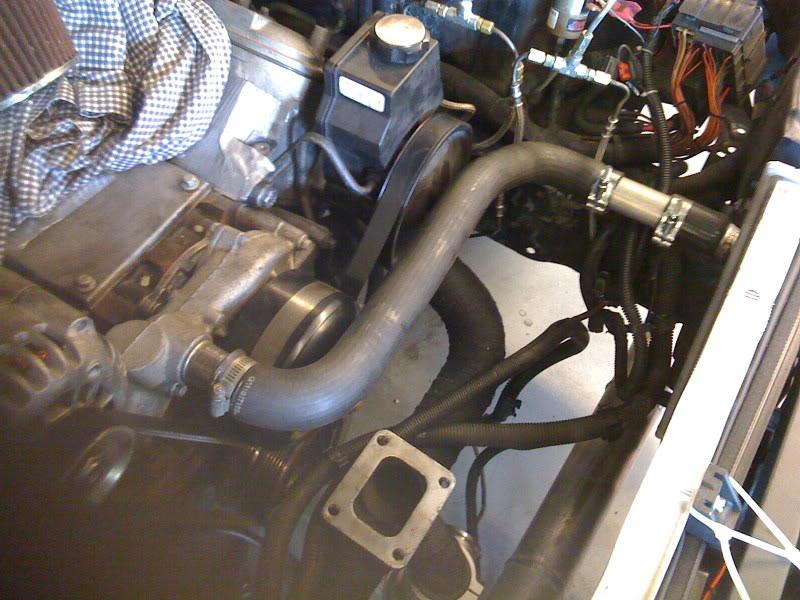
Lower radiator hose extension
3/18/2009
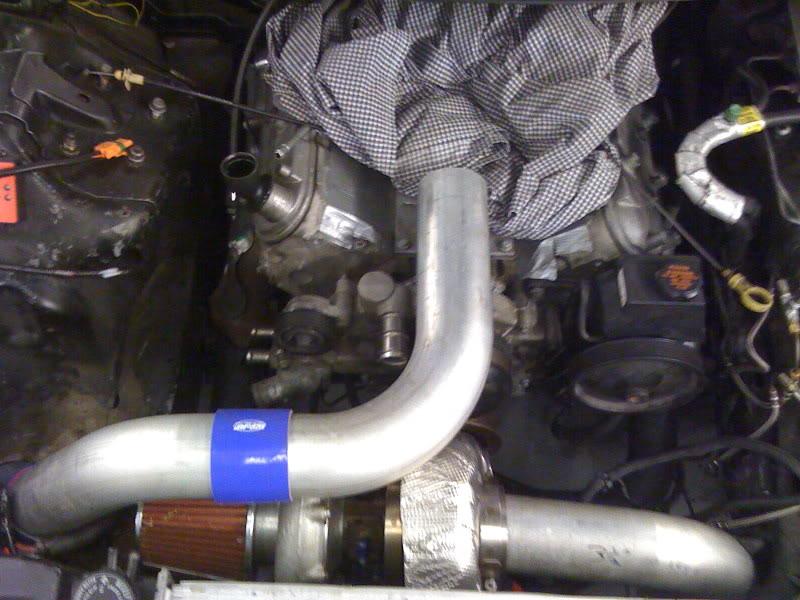
I got the intake all put together and dropped it in place to finish up the cutting on the cold side pipe. I cut the down pipe and Joe welded it to the v-band flange. It's starting to look like something. Here are some pictures.

3/21/2009
So today I ran the oil return and it worked out perfect. I got the wrong fitting for the motor side of the oil feed. I must need a 1/8 npt x -4. I got a -3.
I got the rest of the t-bolt clamps and shortened up the tube on the upper radiator hose for better clearance of the power steering pump pulley.
I took the rest of the cold side tubing to my friend's house to finish up the TIG welding. I decided to keep it as 2 peices, leaving one coupler in between for quick removal. He also welded the BOV tube and a threaded bung for a screw-in type IAT sensor.
3/24/2009
We are bringing the car over to a friends shop to clean up the rats nest of wiring and put the inside of the car back together on Thursday morning. Not sure how long that will take but I will be present as much as possible cracking the whip. No more than another week.
3/30/2009
LS2Formula got the wiring almost done. I finally got some good work for Friday and today so I haven't seen her in a few days. I don't have any work scheduled for tomorrow so we will get the dash back in, run some vaccum/boost lines and maybe put in some fluids. I'll get some pictures up tomorrow afternoon. Hope to fire her up before the end of the week.
That may or may not be this week. She has to be able to get to the exhaust shop under her own steam.
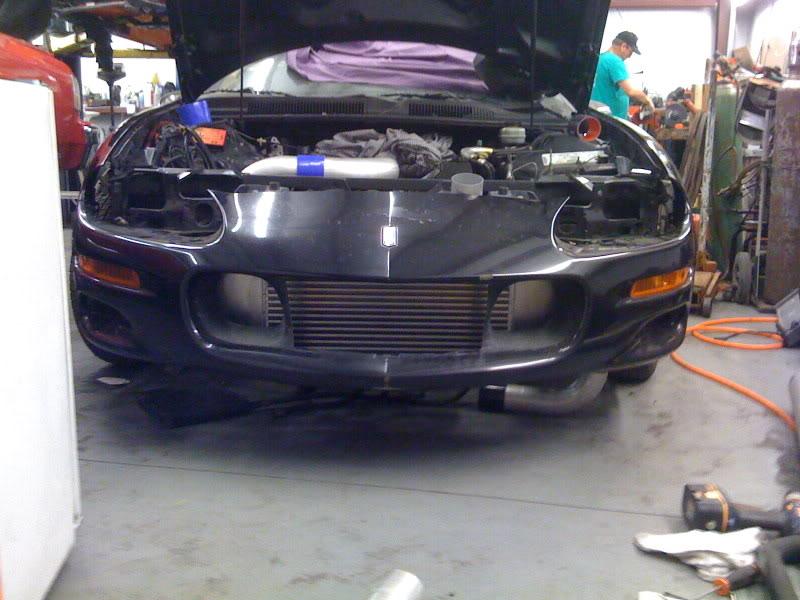
This is how she will go to the exhaust shop.
Today was productive. I got the starter on. Made a very ghetto bracket to hold the radiator in place for now until my decorative aluminun cover gets made. Made a plate to cover up the A/C hole. Put some sound deadning **** behind it (thanks Heavychevy and Up2Nuthingud). And most importantly, the dashboard went back in which was a huge psychological barrier for me (thanks LS2Formula).
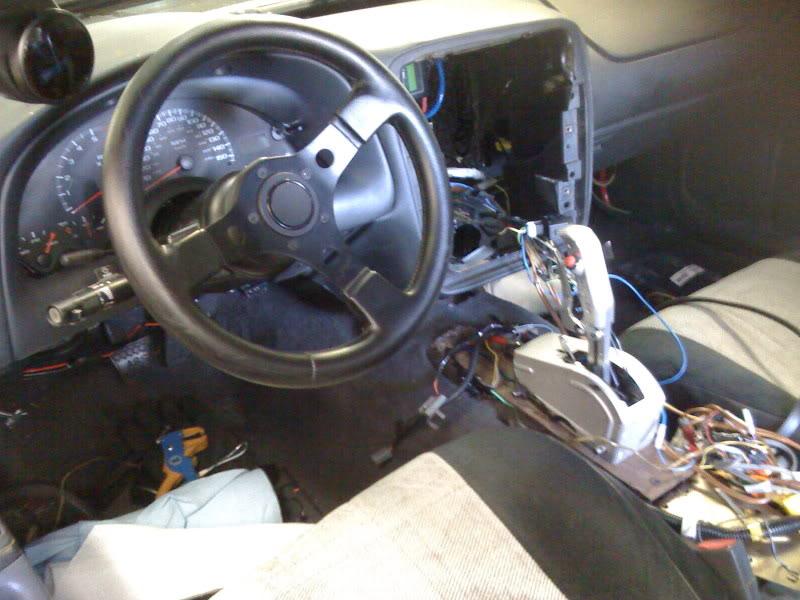
He will finish up getting the stereo in and buttoning everything up after we crank it up which should be in the next couple days.
I did run into a little trouble while bolting down the intake. I got 2 bolts that are giving me a hard time. Hopefully just need to run a tap down in there and clean up the threads
4/2/2009
Got it fired up today but no oil pressure.
This was a truck motor with a deep truck pan and long pickup. There was some sludge in the pan so I replaced the oil pump just to be safe as well as the pan, and the pickup. I may not have seated the o-ring on the pump correctly. I'm not happy at all about having to drop the pan. It's kind of a pain in the ***.
4/5/2009
I got the pan off last night. There are a couple things that it could be but nothing that really jumped out at us. The o-ring was a little sloppy on the pickup tube. I'm gonna take the stuff to our engine builder to see what he thinks on Monday.
4/7/2009
I got a new oring for the pickup tube yesterday and installed it correctly. After about 15 seconds of cranking, I got oil pressure. Fired her up and she sounded really good. No knocking or any weird noises. So that was a major relief and step forward. Won't idle but the tune is WAY off as this setup is so much milder than the old one but with twice as much injector, and a 2 bar map sensor.
Still to do:
1) I have to buy an overflow tank for the coolant and install it. Stock one had to go in the garbage due to it's location.
2) I may have to pull the intake again as Steve believes that water was coming out of one of the back tabs on the crossover tube in the head. I hate pulling this ******* intake off
3) Bleed the brakes.
4) Find somewhere to mount my trans cooler under the car.
5) Have a bung welded in the down pipe for a wideband so that I can start tuning.
6) Get the rest of the interior back together.
7) Get an ailgnment due to the new K-member.
8) Have exhaust made.
9) Get the boost gage installed.
10) Plumb all the vaccum lines to all the vacuum nipples that I have all over the place.
Could I get some help with the vacuum lines? Here is what I have.
1 availabe vacuum port on the intake manifold.
1 port on the compressor housing of the turbo.
1 port on the side of the wastegate.
1 port on the top of the wastegate.
1 port on the back of the boost gage.
What goes where and why?
Suffered a major setback tonite. Turns out that the water leaking out wasn't from the crossover tube. Water is pouring out the back header bolt hole. I have to drop the motor and will likely need another 317 head.
4/8/2009
Been talking to a bunch of people today and the general concensus is to drill, helicoil and rtv. I guess that it is common on small block chevy's to hit the water jacket when helicoiling a header bolt hole. I'm going to give it a shot as these heads are just temporary and I will be using my AFR's once I get some rods and pistons in this thing. I don't want to get into any more expense of buying another head and head gaskets. That will be a few hundred dollars in the toilet.
4/9/2009
Initially just off the spring in order to get it all dialed in. I do intend to run a boost controller in the not to distant future. I was thinking of going with the eBoost2.
I was going to drill and helicoil the header bolt hole. I bought a stud and ran it in there first just to see if I could catch any threads. Way down in there it felt like there were 3-4 good threads. I decided to pack the hole with JB Weld and run the stud in behind it. I smoothed it all in around the stud and bolted it all back together. I used the slow set JB Weld so I couldn't test it last night. I think that it will work. Other than that, I was able to knock a few more things off the list.
1) Bleed the brakes.
2) Wire up WB02 sensor and start tuning.
3) Get the rest of the interior back together.
4) Get an ailgnment due to the new K-member.
5) Have exhaust made.
6) Get the boost gage installed.
Well I drove her home tonite!
Water leak is fixed.
Still have some things to do but she is road worthy. Only got her to 4K RPM but she starts whistling at 3K and gets pretty noticeable by 3.5K. Then you get that woosh of air when you let off the gas. It made me smile. Car makes ridiculous vacuum at idle. I need to close up a hole in my throttle blade as I cant get the idle below 1K once she warms up.
I'll get the front clip on tomorrow morning and start doing some tuning. I just did enough this evening to get her running. I hope to drive to the track tomorrow night but not down it.
4/11/2009
I took her out for her first real maiden voyage. Here are some initial observations.
1) Running a little hotter than I had hoped 210-220*. Will the air dam help on a radiator that is standing up with shrouded pusher fans on the front? I am going to put my tin foil cover on the turbo today to see if that helps. Also running straight water right now so going to put in some water wetter.
2) I have a small leak from the extension on the upper radiator hose. Put in a GM seal tab. Gonna see if that fixed it. If not, some RTV should do the trick.
3) Oil return seems to be working good. No smoking from the turbo.
4) Transcooler was relocated to under the car beneath the passenger seat. Seams to work well there.
5) I started doing some tuning with HPTuners. I got most of the idle and part throttle done. I dont have the boost gage hooked up yet but HPTuners has a custom PID that converts MAP Kpa to Boost PSI and it was showing 12 psi as soon as I tried going WOT. I thought it was a 5 lb spring in the wastegate. Is a 44mm Wastegate not enough for this turbo?
6) Somewhere between 4500-5K RPM, the car falls on its face and breaks up. I think I am floating the valves as I think that the springs are the stockers. I doubt that I am blowing out the spark with a #8 plug and a 035 gap. Thoughts?
4/11/2009
Reggaped the plugs to 022. Pulled to 6K no problem part throttle. I was definetly blowing it out.
Decided to do some WOT tuning. It was very rich once it got into the 7 lb range and would break up. Took about 5% of the fuel out beyond that point. Got on it in 2nd, got a little hesitation at about the 2psi mark and then HOLY SHIT! It pulled so ******* hard that I knew something was wrong and let off. It pegged the MAP sensor at 14.8.
I'm pretty sure that the wastegate is not right. I am going to take it apart tomorrow morning and see what's going on in there. Look at the 133% injector duty cycle LOL.

4/14/2009
I got my hands on a 60mm wastegate. Thanks Rich (XdamxincX). I'm going to try to get it on in the next day or 2. I have to cut a bigger hole in the hotpipe and weld in the new 2" tube that goes to it. No point in screwing with this 44mm wastegate anymore. Even if I could get it down to 9-10 psi, don't know that that will be low enough for the screet.
4/15/2009
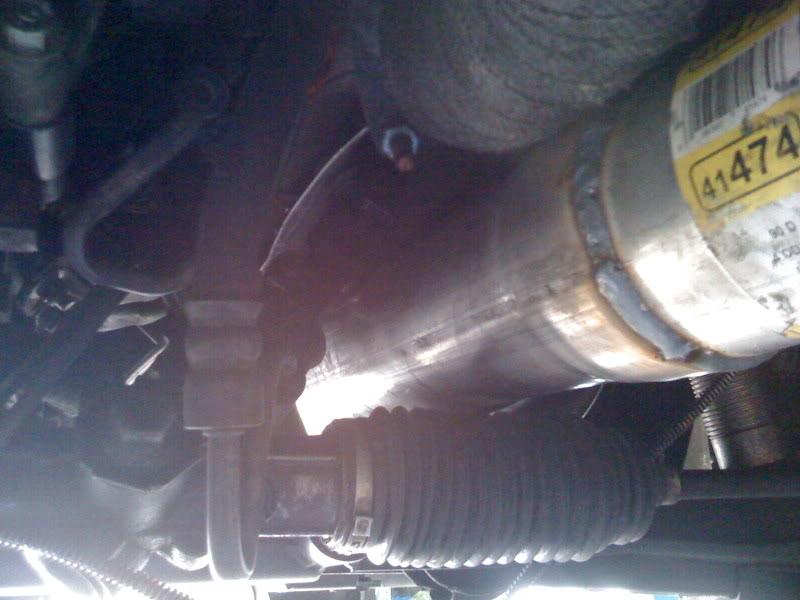
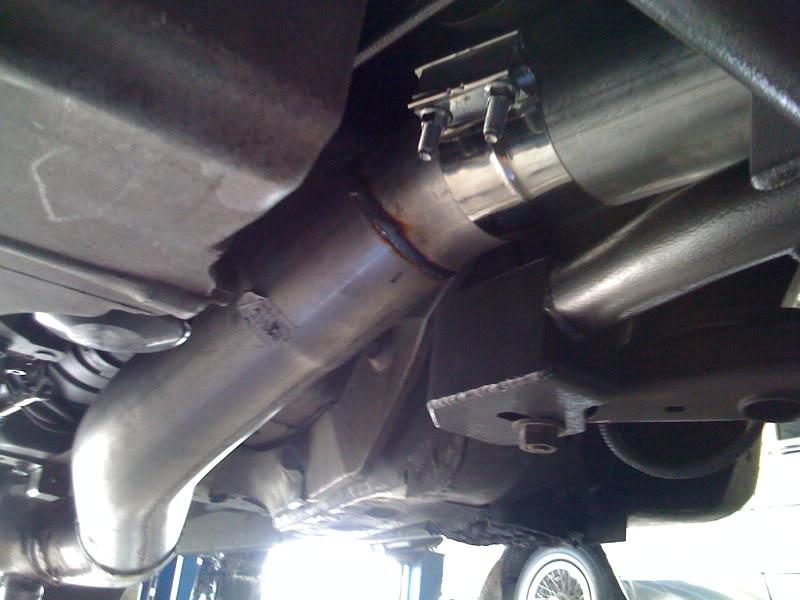
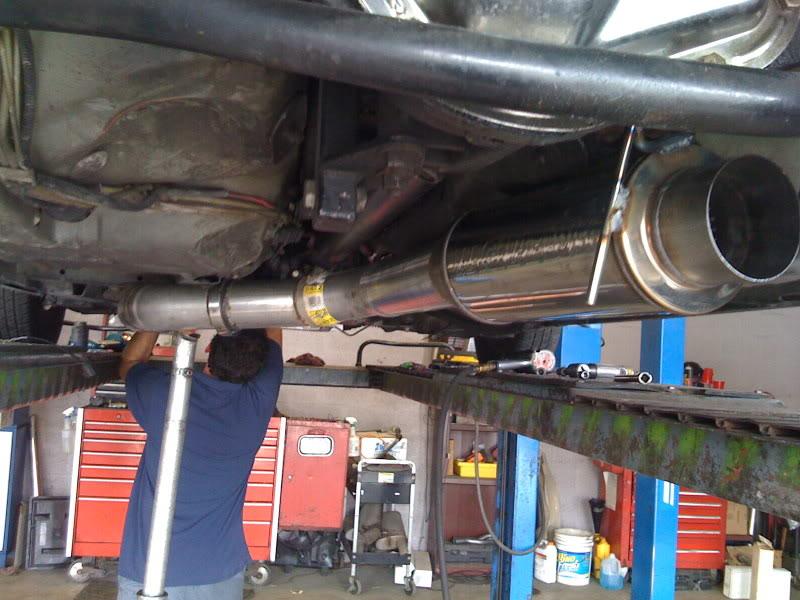
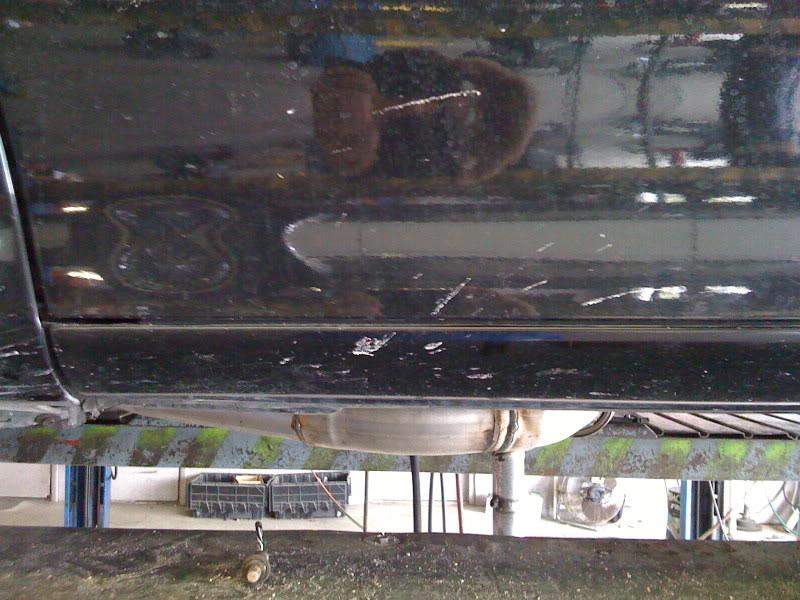
I got my 4" exhaust built today. Sounds much better now.
Looking from the back of the k-member forward.

First bend off the downpipe.
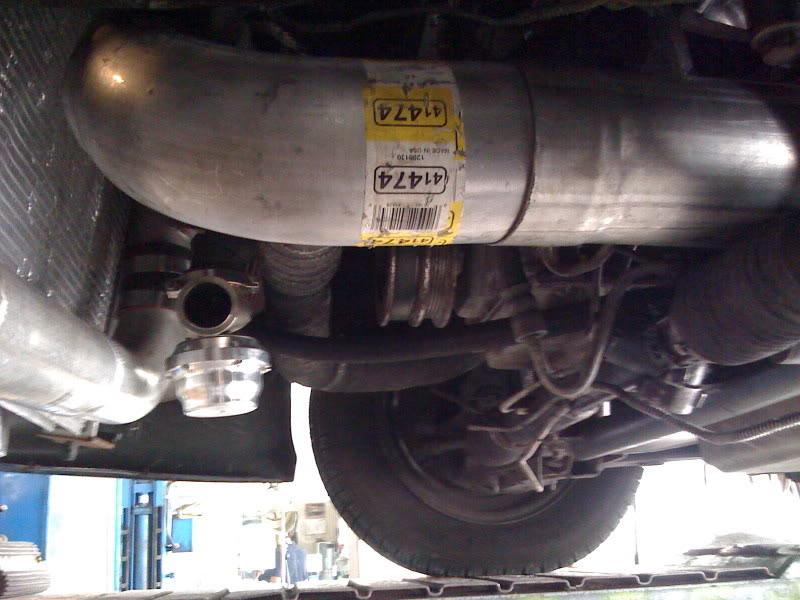
Looking from the front to the back going thru the k-member.
4/18/2009
I took off the hot side and brought it to Dave's house again. He cut off the 1 3/4 pipe that I had feeding the 44mm wastegate,he bent me a piece of 2 1/2 and welded it on. We popped open the new 60mm wastegate to see what it had for springs. It was loaded with 2 springs. The WG came with one more spring in the box. That one felt comparable to the 11 lb spring in my 44mm so I took the other 2 out in favor of the one middle sized spring. I hope to get it put together and take her out for a spin early in the AM tomorrow. If I can get the boost down under 12 psi, I'll be at the track Wednesday for some shakedown passes.
Did some tuning today. The spring that I used got me to 13 psi. I need to try one of the other 2 springs. Should get me down to about 10 psi. I would leave it at 13 but the fuel pumpwont support it. Injectors are pretty much going static to keep the air fuel correct. Still a touch fat up top (10.5-11.00). I went ahead and tuned it with the 13 psi spring in it only going to 6K RPM. It feels pretty nasty and pulls clean the whole way up. Another good reason to drop boost is because the converter is too loose with this combination shift point/power setting. I should be ready for Wednesday.
4/21/2009
I'm running the single racetronix walbro setup and stock lines. I've already bumped up to the 80# injectors. At 13 psi I was seeing 130% duty cycle. My problem is the pump. I'll be getting a MagnaFuel 1200hp pump here shortly and upgrading to a boost reference return style system.
I'm hoping to see some 10.o's tomorrow in the 1/4 with some low to mid 130 mph. If the power is there, the suspesion will put up the number.
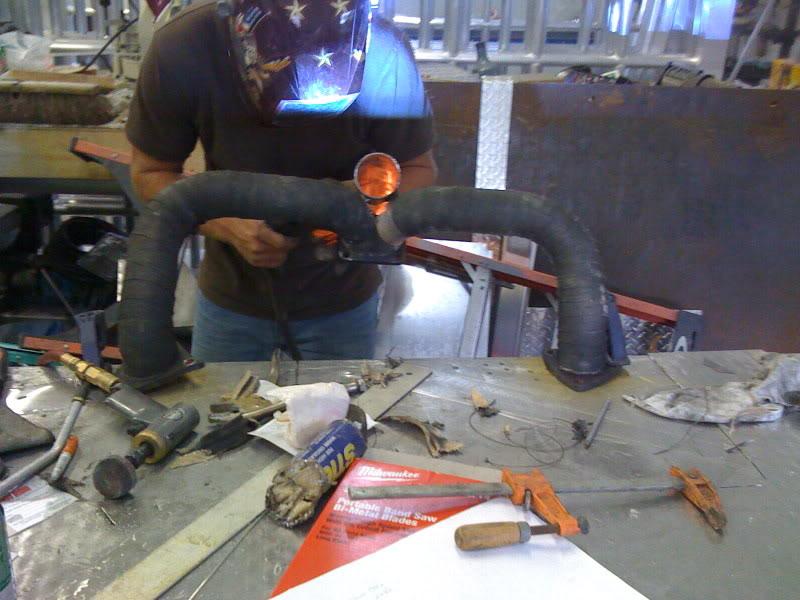
I put the lightest spring in the wastegate this afternoon and it gave me 6 psi. Injector duty cycle went down to the 42-44% duty cycle range. Kinda weak. Since changing springs is kind of a pain in the ***, I decided to make myself a ghetto manual boost controller just for now. I ran down to Home Depot and Advanced Auto and spent $25.00 for this stuff.
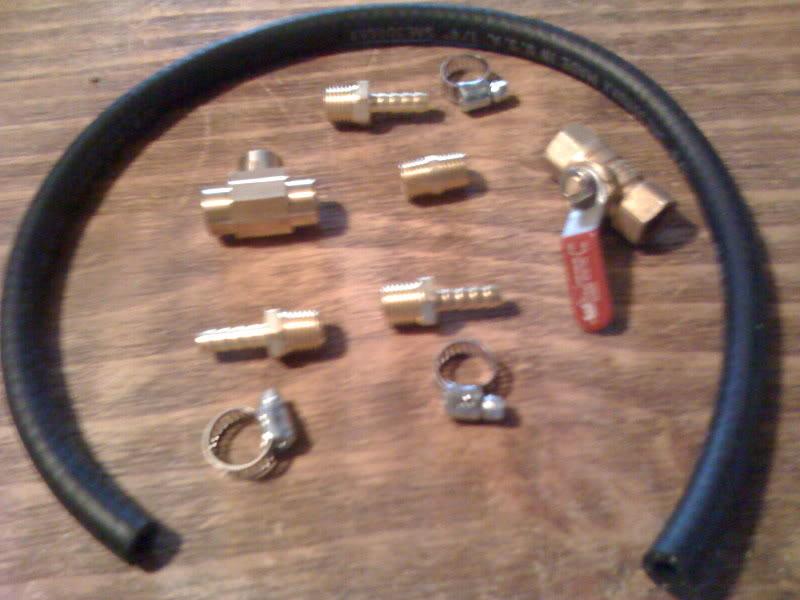
Put it together to look like this.
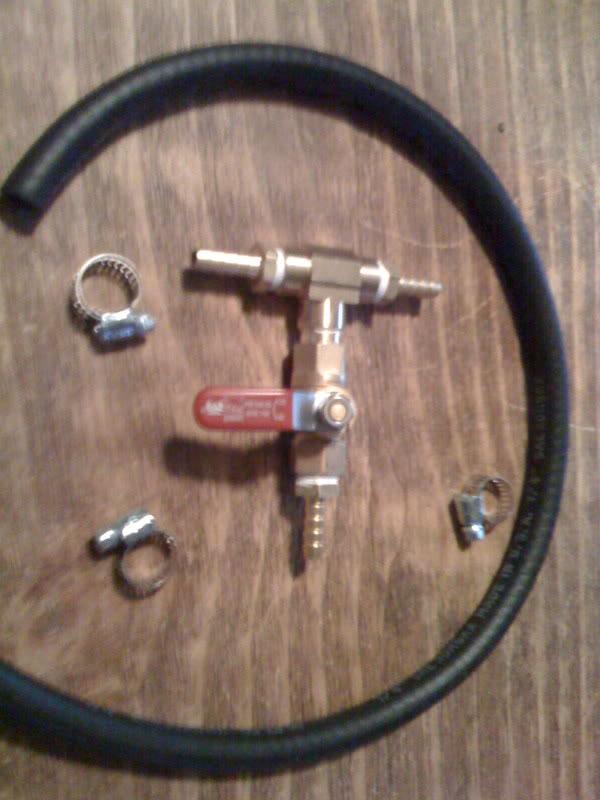
And spliced it in to the compressor boost ref port. After a couple of adjustments (very sensitive), I got to 9-10 psi at 55% duty cycle. So I'm pretty much ready to go for tomorrow.
4/22/2009
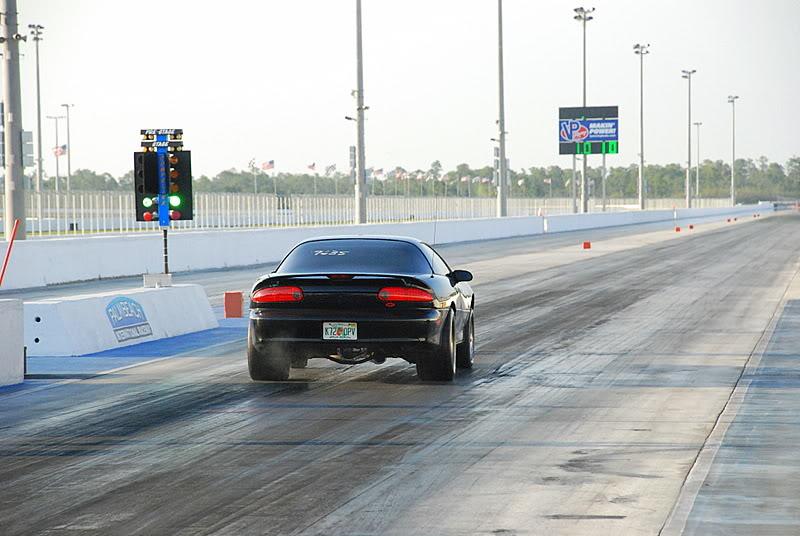
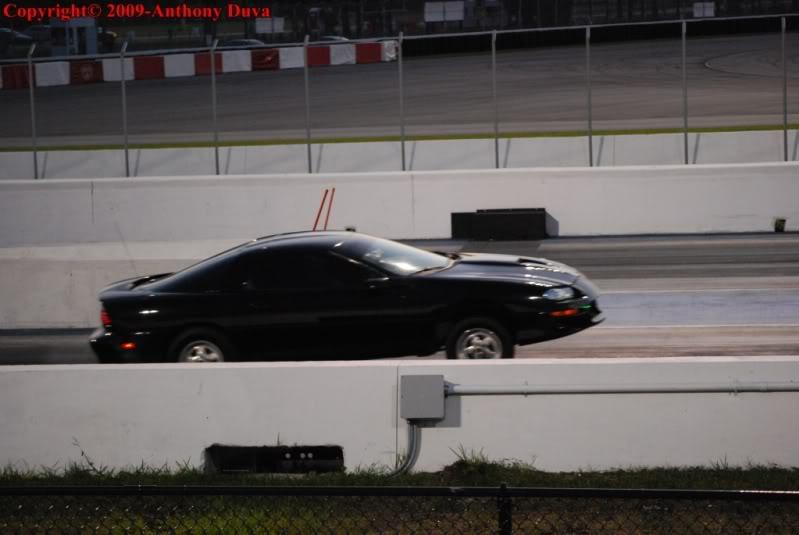
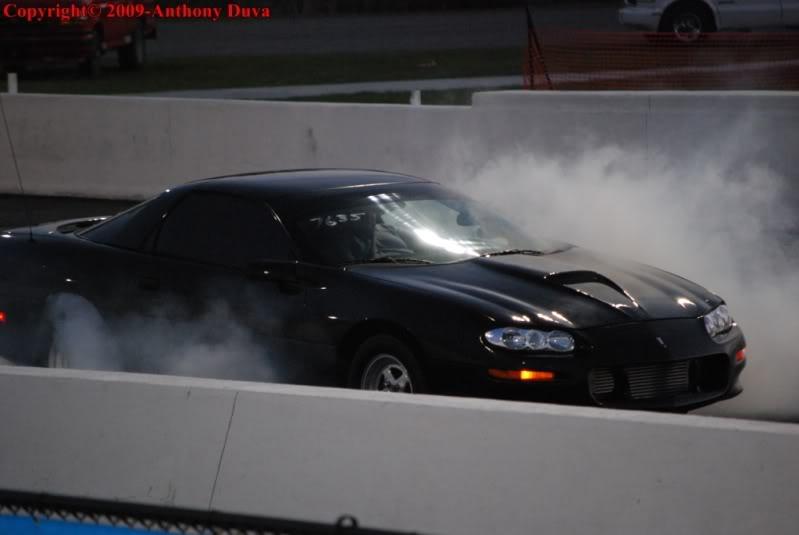
First, don't use the valve that I used in my ghetto boost controller. I was screwing with that damn thing all night. You turn that thing a hair and it swings 5 lbs+. I finally got it to 11-12 psi and ran a 10.55 @ 132.23 w/ a 1.64 60' on Nittos. I had to leave much softer than I am used to. The Mickey Thompson will be on for the next time out. I was hoping to go a little quicker but 2/10 off the 60' would net me the 10.0 pass that I was hunting for. Race weight was 3680 lbs. DA was about 950 for this pass.
4/26/2009
I think that there is video of an earlier pass in the mid 11's on 6 psi. I have to try to locate it. Don't think that the 10.55 was caught on video. I did get a few pictures in my email.
I'll get the 10.0 for sure Wednesday night. I can drop 2 tenths off the 60' on the mickey's and turning up the 2 step from 3400 to 4000 rpm will get me another couple lbs of boost out of the hole. Should be good for a high 1.3 60'. Turning up the rev limiter may help me get another mph or 2 also as I was off the gas going thru the traps.
4/27/2009
Rev limiter is set at 6400 and am trying to get out of the gears by 6K RPM. I run a TH350 w/ rmvb and tbrake wired to a 2 step. I had the 2 step set at 3400 when I went out to the track on the nittos this last time out. I can bump it up to 4K and hook the mikckeys no problem.
I do have lots of bugs to work out though. One of which is that my converter was setup to stall at 5K RPM N/A (running 10.31@131) and about 5800 on the big shot. The converter is flashing up to about 4500 RPM on the launch and then never drops below 5800 RPM. Basically, as soon as it really starts pulling, I shift .
.
The other problem is my rear end and gearing. I run the S60 which apparently cant be geared below a 3.54 . Currently running a 3.73 gear.
And then there is the fuel problem. Currently running the 80# Motrons but only a single Racetronix/walbro 255 intank thru the stock lines. I already have an aeromotive vacuum reference fpr and will order the Magnafuel 4301 on Monday. Not sure if I have any other choice but to sump my tank.
And last but not least is the issue of boost control. I'm considering buying the AMS-500 or 1000. Need to do some research to see if the 500 will be good enough.
4/29/2009
Went to the track tonight. Had the boost setup exactly the same (13lbs for most of the pass creeping up to about 15lbs). Pulled one degree of timing down to 13*. Turned the 2 step up to 3900 (about 9 lbs)and put the MT DR's on.
1st Pass
60'............1.432
330'............4.197
1/8.............6.475
MPH.........108.09
1000...........8.431
1/4......;....10.100
MPH.........130.24
2nd Pass (lost the slip from memory)
60'............1.46
330'...........
1/8.............6.46
MPH.........107.5
1000..........
1/4......;....10.11
MPH.........127.xx
3rd Pass
60'............1.417
330'............4.166
1/8.............6.437
MPH.........108.08
1000...........8.395
1/4......;....10.071
MPH.........128.31
5/1/2009
Some pictures that I've found so far from the track.
5/3/2009
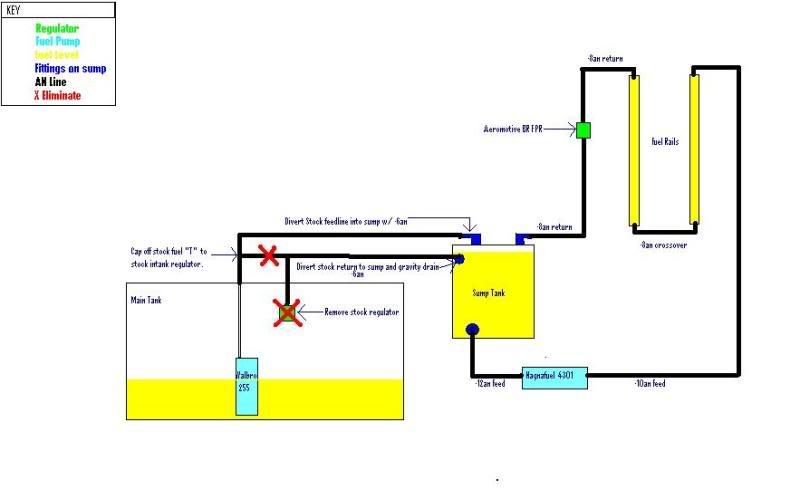
My current fuel system is inadequate to support my current needs. I have already purchased the Aeromotive Boost Ref Fuel Pressure regulator and the MagnaFuel 4301 inline pump. My original plan was to sump the tank and toss out the walbro 255 and stock regulator setup. The more I think about it, the less I want my tank sumped. For some reason, I have a major hang-up about dropping the tank and welding on it. I am thinking of doing this instead. Your thoughts and any pitfalls that I may run into would be appreciated. Thanks.
5/6/2009
Fuel System is in. It really changed the fuel curve alot. I didn't do any logging yet but I was watching the wideband. For the moment, I set the fuel pressure to 58psi and left the boost ref disconnected. Basically the same pressure as before. Car was issues starting and I had to give it a little throttle. Got it running and AFR was at 10.9. I started dropping the pressure and the car kept running better. Ended up dropping it to 30 psi to get idle to 14.7 and purring like a kitten. As soon as I started driving, AFR went up into the low 16's. I'll have to spend some more time tuning in the next couple of days. I have to get the pressure up to atleast 50 psi.
Only got a couple of pictures. Off the end of the black filter there is a 90* elbow and the line follows the frame to the front. I'll get some pictures of the front tomorrow.
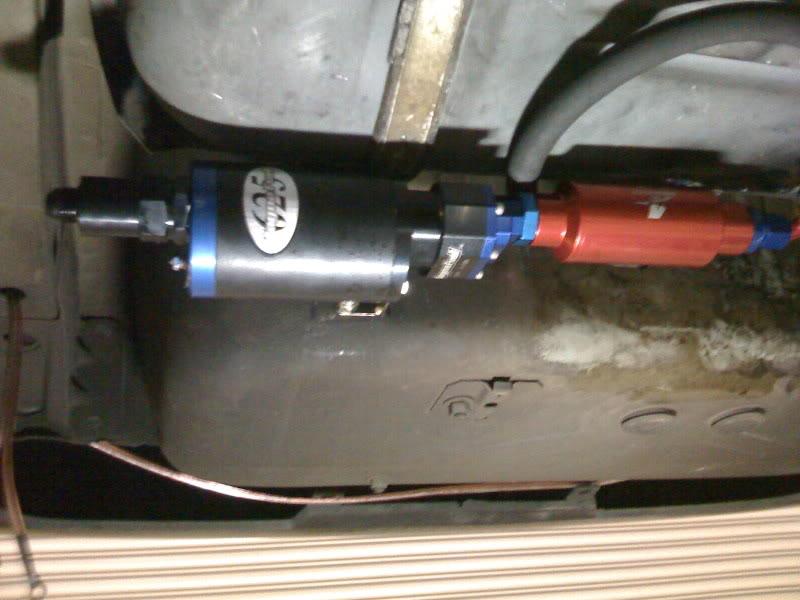
The pump is mounted to the well. The bung in the bottom of the tank is obscured by the prefilter.
5/10/2009
Took the car back to the track Friday night to do some tuning after the new fuel system. Fuel curve pretty much wants to look flat as the additional pressure provided by the boost reference seems to handle the additional fuel demands at the higher KPA. It was hot and humid out and my converter was about to catch fire from hot lapping it. I ended up running a best of 10.15 @ 135 with a 1.51 60'. The car left good but the converter wass just too sloppy at 220*. It's way too loose anyways. I really need to ship it off to Greg @ FTI to get it restalled. The good news is that after spending most of the night leaning it out, I finally got it down into the 11.0-11.2:1 AFR range (still rich, I know) and the injector duty cycle is now down to 74% (from 130+%).
5/28/2009
Different angle after the support was welded on and painted.
There are 2 small brackets (one on each side) which I believe have those 2 studs sticking out of them. Those would bolt to the sides of the radiator supports normally and the bolts go all the way thru and out the other side. We ended up welding those brackets on and not dealing with the bolts. It's tight in there. The grinder will become your friend. A portable band saw is nice for much of this and a plasma cutter would come in handy sometimes also.
6/18/2009
Waiting on a friend to return the tranny jack so that I can ship off the converter. My work has slowed down alot so I haven't had the coin to finish up my to-do list. It's also looking like I will need to either sell/swap my rear end for a 9". Closest ratio I can go with the S60 appears to be a 3.54. I think that I will need something more like a 3.23. I've been told that I can have a custom gear cut but then what happens if the rear screams and howls like a banshee?
I'm currently running a 3.73 gear with the 325/50/15 tire (28" tall). Spending $500-550 to go down to a 3.54 gear and only drop my RPM by 200-300 just doesn't calculate for me. I've been 9.33 @ 146 on this gear but I was going thru the traps at 7300+ RPM. I intend to go 155MPH once I get my list all knocked out. I'd like to get there by 7K RPM. Don't think that will happen on the 3.54 with a stalled auto. Not to mention that the 3.23 would be so much nicer for cruising with the 3 speed.
To do list:
1) Restall the converter. Needs to be tightened up over 1K RPM.
2) AMS1000 boost controller with CO2
3) Gear/Rear swap
4) Forged pistons and rods/Cam/AFR225's
6/23/2009
Spoke to Greg @ FTI this afternoon about the converter. He asked me some questions and told me he knew what I needed. Cant wait to try it out. Seems like every mod that I been doing since building this turbo has made the car more and more streetable (except for removing the A/C). It was 100* here yesterday and 110* with the heat index. I'm regretting having removed my A/C.
6/27/2009
Got the converter back yesterday (from getting tightened up) and put it in. I also pulled out the radiator and epoxy'd the hole that the turbo shield rubbed in it. It worked to my surprise. Also removed that shitty shield that was giving me the clearance troubles.
While I had use of the lift, I decided that it would be the perfect time to change the oil. As stated in a previous post, I used 5-30 Mobil one on my last oil change and the turbo would smoke a little when I came to a stop. I switched it to the 15-40 Delvac 1300. Some nice diesel oil. Well, when I pulled the drain plug, the cam dowel was stuck to the magnetic tip of the plug. I remember seeing another thread here just recently that had the same thing happen to their high performance stock bottom end. Fortunately, right before I threw this bottom end in, I pulled the front cover and checked to see if the cam was stock (was supposedly a Z06 cam) but it was just the stock cam. I made sure to use red loctite on the cam sprocket when I put it back together. And since the cam sprocket wasn't of the adjustable nature (slotted holes), I think it should be OK for now. Worst case scenerio it will bend up the valves and beat up the pistons. I had no intentions of reusing either for the forged build.
Of greatest concern to me right now is that I am only seeing about 7-8 psi of boost whereas I was at about 15 psi before I took the transmission out. I may had accidentally bumped the manual (Home Depot) boost valve while I was under the car. If I have a leak, what's the trick to finding it?
And last but not least I need that stupid little tube for filling the trans with a Lokar dipstick. I'm about a quart low and I can't find mine.
7/25/2009
Getting a little frustrated. Still haven't figured out where my boost went.
About 2 weeks ago I finally got around to pressurizing the cold side and try to hunt down my boost leak. Everything seemd tight. The only air that I was able to find escaping was around the injector orings. I found that the bolts that hold down the fuel rails were a little loose. Tightened it all up, took it for a blast and same ****. down 2 lbs on the spring and about 4-5 lbs on the manual controller.
To be clear, boost isn't falling off. Everything seems fine and behaving exactly the same as before. I am just not getting to the same boost levels with the same setup.
I decided to pop off the wastegate and inspect it. I found that the diaphragm had a small tear in it. The diaphragm that these cheap X02 Wastegates use is cheap garbage. I found out that you can use the much better diaphragm from a TiAL instead so I ordered one and put it in. Same ****. And now I think I have a vacuum leak because the car is idling about 100-150 rpm higher. I'm getting frustrated.
I was JUST pegging the 2 bar MAP at 210 KPA before and now only seeing 170's if I remember correctly from my last scan. I only scanned it to verify that the mechanical gage was correct. Temps have been within 10 degrees of each other (85*-95*).
My biggest frustration is that I dont have enough experience with turbos in order to know the symptoms of a cold side leak/problem vs a hot side leak/problem. How can you tell if the BOV is maintaining a lower boost level vs the wastegate?
Here's the entire story leading up to this problem. I took the car to the track. I made a 10.teen pass at almost 135 MPH which was good considering the weather being really hot. 2nd pass sometime just before the 1/8 mile I felt the boost drop off about 3-4 lbs and continued the pass with a 10.5x. Then the rain came. I took out the torque converter and sent it out to get tightened up 1K RPM (it was loose still from my previous setup). I put the car back together and I have been missing the boost since.
I pressurized the cold side and found that I was leaking around the injector orings. Tightened the fuel rails down and fixed that but apparently that wasn't the problem. Took out the wastegate and found a pinhole in the diaphragm. Replaced it and same problem. I'm pretty sure that NOW I have a vacum leak since it's idling a little higher than normal. Haven't felt like looking at it in a couple days.
8/1/2009
Finally got a chance to work on the car last night. In the past, when chasing gremlins, I would always have tunnel vision trying to associate the problem directly to the power adder or the new parts that I had most recently installed. 9 out of 10 times the problem has been something basic. This time around I decided to tackle it as if I am doing an overall inspection.
Symptoms:
Reduced max boost level - I have been down 2-4 lbs of boost for a while.
High idle/vacuum leak - Just recently, the car has started to idle about 200 rpm higher.
Hard start - When I go to start the car, sometimes it starts right up and other times it will take a few trys and backfire thru the exhaust. Very much like a cam position sensor problem.
Low Oil Light On - Low oil light on intermitantly but there is plenty of oil in it.
I know that reading the symptoms it would appear that the low boost and high idle problems are related as a vacuum/boost leak inside the throttle body would cause both of these problems. The thing is that the low boost problem happened weeks before the high idle.
I went ahead and pulled the plugs as I haven't even looked at them since I regapped them shortly after putting the new turbo setup together. They all looked good. Upon inspection of the plug wires I found my first problem. 4 out of the 8 plug boots were a little brittle and 3 were split all the way thru at the bend. There is no question that 3 of them were arcing. I guess this is why they put those heat shields on the wires. I'll get a new set today with something to shield the heat.
Next I checked all the hot side bolts. I found one very small leak around the exhaust manifold. Several bolts took a 1/2 turn to tighten up. Now it's all tight.
While it was up in the air and I was looking around I discovered that my poly motor mounts have turned to goop. It doesn't seem like they are all that close to the exhaust manifold. I have wires and loom that run closer without any damage. I am wondering if perhaps the wires were arcing to the motor mounts and melting the poly. They must be replaced.
I also found that one of the 2 wires that goes to the oil level sensor had broken off the pigtail. LS2Formula pulled the pin out of the pigtail and soldered the wire on for me.
At this point, the only problem that had been resolved for sure was the Low Oil Light. Time to tackle to the vacuum leak. Last time that I tried chasing down this problem, I pressurized the cold side and found that air was getting around my fuel injector orings in the intake bungs. At that time, we found that the bolts that hold down the fuel rails had backed out alittle and the rails were loose. I tightend the rails down and the idle seemd to be lower and I took it for a ride. My boost was still down so when I got home I pulled the wastegate and found the hole in the diaphram. I thought that would fix it but I never repressurized the system to check it again. This time around, we didn't pressurize the system since now I am hunting a vacuum leak. We found some decent old wires that Steve had laying around just to be able to start the car. Got her fired up and started spraying break cleaner all around the intake. It was sucking air around every injector. I got pissed and started cursing the FiberTuned intake. Fortunately, Steve runs one of these same rare intakes on his car. We fired his up and sprayed it and his wasn't doing it. We pulled one of the fuel rails off to see how the injectors fit in the bungs. The went in and out fairly easily. Fortunately (again) Steve had a couple extra (brand new) injector orings laying around. We popped the oring off the injector and held it side by side with the new one. It was immediately obvious that the old oring had a larger inside diameter and was thinner than the new one. We popped a new oring on and pushed it into the bung. Now that's a snug fit. I'm going to pick up a set of the same orings today and replace them all. That should fix that.
As far as the hard start is concerned, Steve checked the wiring on the cam sensor and it was good. I am going to resolve everything above and see if that improves the startup. If not, my next thing to do will be to replace the cam sensor.
8/12/2009
A buddy (FEAR) called me a little while ago about the melted motor mounts. He asked me what I was doing about grounding my block to the chassis. On my old setup I had atleast 3 grounds from block to chassis. For whatever reason, I didn't put any back on the car when I put it back together. About 2 weeks ago, Steve put one small one on there as he noticed that I didn't have any. So it appears that my block was arcing to the kmember which is what melted the poly prior to us adding that one little strap. This could also be causing my starting problem. I'll be adding 2 more strap tonite.
I changed the wires ($60) and put insulated boots on them ($60). Replaced all the o-rings (donated). Fired her up and I could hear the air sucking in. Before it was leaking everywhere so you couldn't hear it. Now it's down to the last leak which I think is this Fibertuned intake having a split weld somewhere underneath or a seperated runner. Tomorrow I'll pull it off and I will NEVER put this thing back on. Been a pain the *** since day one. I'm going to put my ported and epoxy'd FAST90 back on and pray that I dont blow it apart at 16 lbs or so.
8/15/2009
Sure as ****, the Fibertuned intake was split. Just not where I thought.
I ended up doing some modifications to the FAST in order to make it a little more boost friendly. I tapped the MAP hole in the back and screwed in a barbed fitting. Worm clamped a little piece of high pressure fuel line to it and worm clamped the MAP sensor to the other side. Found a short, coarse thread screw and screwed it into the small vacuum port (for A/C controls) in the rear with a generous helping of RTV on the threads. We cut both of the front large nipples off (PCV and the one that vents the gas tank). Neither of which is barbed. We drilled and tapped both holes. Driver's side got a plug and passenger side got a barbed fitting for boost gage and BOV reference. I also got the 8 threaded plugs to plug the nitrous bungs. I also removed all the rubber gaskets on the inside and replaced them with black RTV.
Put it all together and the car would not start. Just crank and crank. I was like WTF? There was spark but no fuel. Turns out that one of the wires to the TPS sensor broke. Apparently, that kills the injectors. Called the dealer for a new pigtail, $42. Are you ******* kidding me? I took it over to my buddies house and we took it apart and soldered all new wires to the connector. Hooked it up and all was good. Fired right up and took it for a drive. Stabbed it and saw about 18 PSI. Woot! Throttle response from the FAST is far superior. With the other intake I would only have about 4 psi at 4K RPM. With the FAST, I'm seeing 4 psi at 3500 and 8 psi at 4K RPM.
So the weather held out and after a little street tuning I set out for the track. I wanted to make one pass at the 18 psi just to see how it would do because it felt so good on the street. Told my buddies to look out for the wheel stand. Got to the line, got up on the tbrake/2 step to 4K (about 10 psi) and let her eat. Carried the wheels almost all the way through first, pulled 2nd and right before the shift to 3rd (before the 1/8), it fell over completely. Coasted out the back. My charge pipe from the turbo to the IC popped off. Here's what it ran on that pass.
1.361 60'
4.07 330'
6.54 1/8
87.3 MPH LOL
Previous best
1.417 60'
4.166 330'
6.437 1/8
108.08 MPH
I turned the boost down 12 psi and managed to run a couple of 10.60's @ 128 w/o blowing the tube off. Spun to a 1.57 60' both times. Track was going away. Tried turning it back up and it popped off again. Taking it to another buddy's shop that has a bead roller tomorrow to see if that helps. The motor mounts being shot isn't helping and I will replace those next week. Atleast I'm back to racing.
Just ordered my AMS-500 boost controller and motor mounts.
8/20/2009
R.I.P.
LQ9 stock short block.
You will be missed.
4/9/09-8/21/09
But before she let go, she put down a strong 1/8 mile.
1.38 60'
4.08 330'
6.32 1/8
109.55 MPH
3700# Race weight.
The bad news is that atleast one rod let go and broke the block. Probably wasted the oil pan also. I just hope that nothing went thru the turbo. I'll take a look at it in the next few days and post up the carnage to close out the thread.
8/22/2009
That's the video of the good pass which is the 6.32 @ 109.55 in the 1/8. Well it was good to the 1/8. Then it chunked a plug. I new it was bad but I wanted to make another pass. Switched plugs and fired it back up. No knocking so I made another pass. Then the carnage hit at about the 1100' mark but it felt a little sluggish and ran a 6.409 @ 109.09 to the 1/8. Came out the back at 10.179 @ 116.14 in a cloud of fire and smoke.
I'm pretty sure that one or more rod bolts failed. I'll know better after the autopsy results are in. Won't be for little while though.
9/17/2009
No carnage pics yet. She hasn't moved an inch since we rolled her off the trailer that night. I'll take her apart when it's time to put the new short block in.
I did manage to snag a good LQ9 shortblock without a crank for $200 this week. It came out of a running truck with about 200K miles. Seasoned.
Dropped it off at the machinist/engine builder. He's gonna get the deck nice and flat, and bore it up to 4.030.
Mike @ TEC (the builder) had a set of LS7 lifters, trays and oil pump that they pulled out of one of their Mosler road race cars after 60 hrs as part of the maintenance schedule. He builds every engine that goes in a production or race Mosler car. They come stock with a forged LS7 427.
My buddy Dave, that did all the aluminum welding, recently picked up a PT94 for his camaro and found a LQ9 longblock out of a wrecked Escalade for his build. He's going to let me have the crank out of his 98 LS1. That motor just had bad cam bearings.
My other buddy Steve is donating a set of Eagle rods that came out looking new from his old LS7 motor.
My AFR 225's are currently being repaired. I bent a couple of valves and beat up the deck back when I had the LS2 408 on the juice. Never used them with the turbo due to the small 62cc chambers and stock flat top pistons.
Tony Mamo is getting me a good deal on a Comp Cam (he doesn't know it yet ). I want to try out one of those new LSL lobes. I'm thinking 231/231 .624/.624 115+1. I like the look of it on paper for a front mount PT88 370ci build. Open to critique.
I intend to continue to use the FAST90 intake until it breaks. The boost will be going up over 20 psi. Shooting for high 8's.
The entire first portion of this build was intended to show that with some creativity, good friends, and good buys it is possible to put together a turbo power plant and not break the bank. Seems like the forged bottom end is going to follow the trend. It takes a village to build a race car.