You must be logged in to rate content!
11 minute read
CTS-V Brake Install w/ Pics
Compliments of Wesmanw02 @ www.ls1tech.com
I installed my CTS-V/Z06 brake setup today and I figured I might as well make a writeup while I'm at it, since there are so many questions surrounding the conversion and whats needed. Please feel free to add info and correct anything that you think may not be right.
Here you go:
1. Whats needed:
A set of 2004-2007 CTS-V Calipers (Brembo) or 2006+ Corvette Z06 Calipers (PBR). The CTS-V Calipers are 4 piston, the Z06 calipers are 6 piston. However, its been said that the 4 piston Brembo (CTS-V) are better suited to track duty than the Corvette calipers, but its your pick. The CTS-V caliper bolt up without the need for a bracket. These can be found on GM Parts Direct, or eBay.
A pair of 2006+ Corvette Z06 Rotors. Part # 19121787. These can be had for a total of $239 shipped (for both) from GM Parts Direct.
Brake Hoses. These are must be custom tailored to this application, because the stock lines nor the Corvette/CTS lines will fit properly. These can be obtained for $75 from Flynbye Performance LLC.
You will also need some other misc. parts that I will mention later. These include copper brake hose washers, (8) Grade 8 M12 or 1/2" washers, DOT 3/4 Brake Fluid, and possibly wheel spacers.
Tools required include a full socket set with ratchets, a ft/lb torque wrench, 12mm and 7/16 line wrenches, jack and jackstands (or lift).
2. Wheel Clearance:
If you have stock 56mm offset wheels, they WILL NOT clear either caliper. You will either need to get wheels with a 41mm or less offset, or get wheel spacers. I just purchased stock offset rims, so I went with the wheel spacer option. More on that later.
3. The Install:
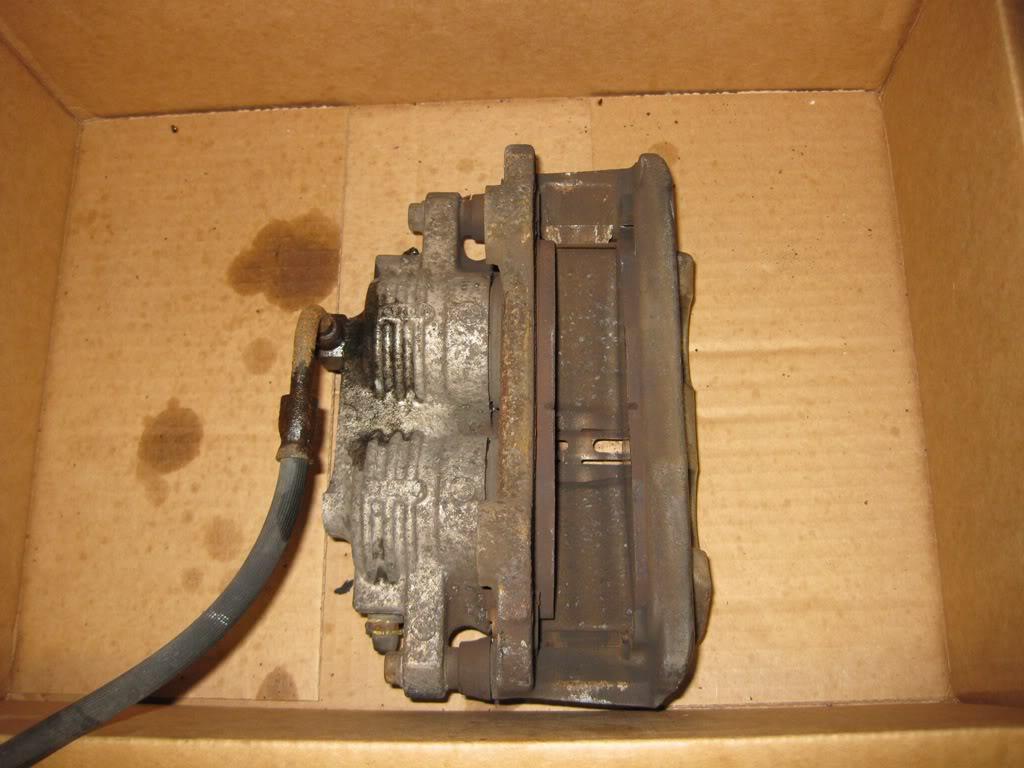
Heres what my stock caliper and rotor looked like after years of abuse. I purchased this car 3 years ago, and this is the first time I'm doing the front brakes.
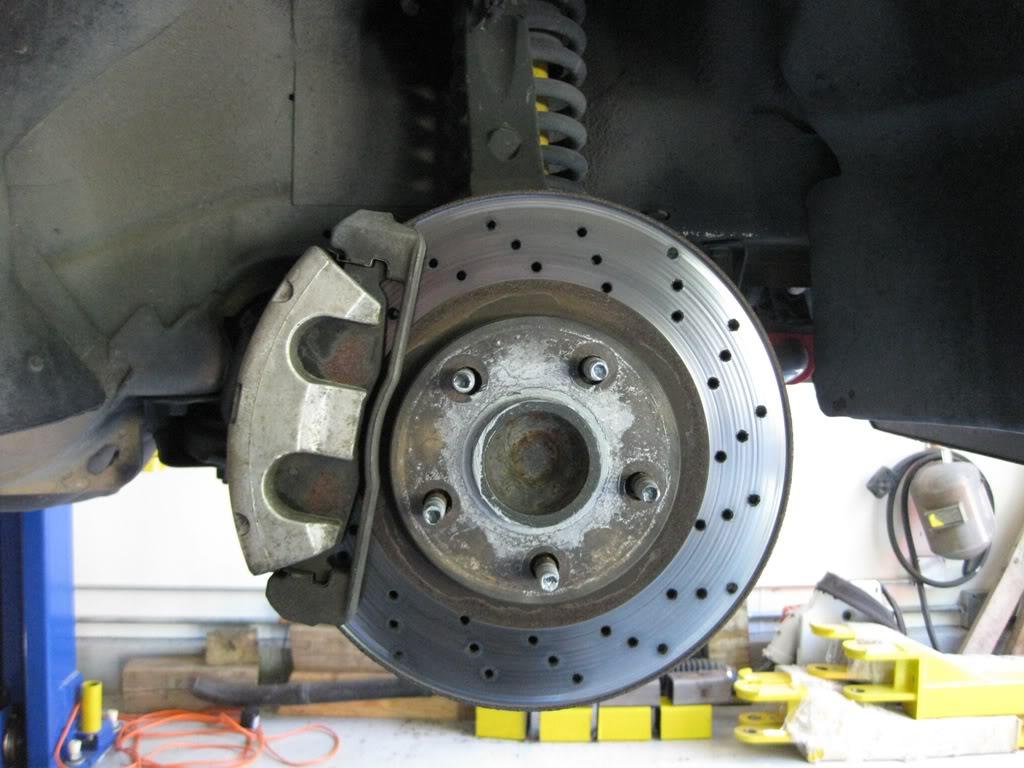
First order was to get all the old stuff off. You can remove the caliper bracket and caliper as one assembly, just remove the 2 bolts holding the bracket to the spindle, pry the caliper off the rotor (mine was stuck due to the huge rust lip on the outer edge of the rotor) and set the caliper on a bungee cord for support. Leave it connected for now. Rotors were rusted to the hubs, a few good blows with a rubber mallet freed them and they were off. Lots of rust on the floor.
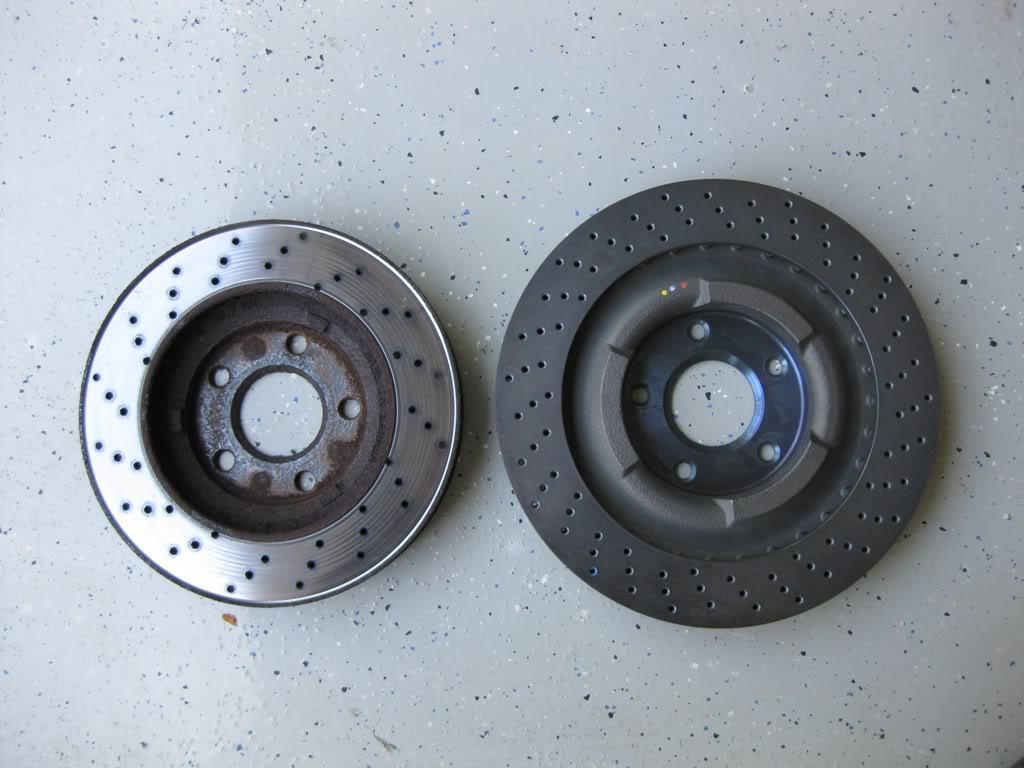
New rotor next to old rotor:
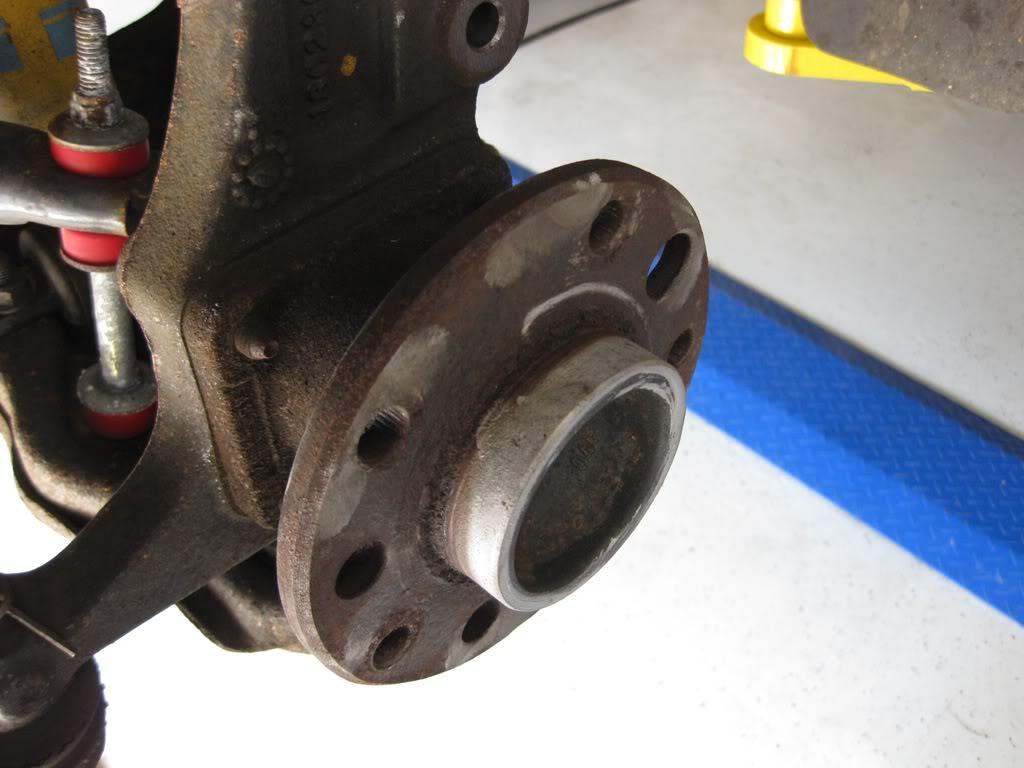
Now comes time for changing wheel studs if you don't have the offset on your wheels to clear the calipers. This was the worst part of the job, pounding out the old studs with a sledgehammer (regular hammer wouldn't do it) and installing the new ones. The studs were very rusty and corroded, so I soaked them in PB Blaster before attempting to remove them.
Studs out:
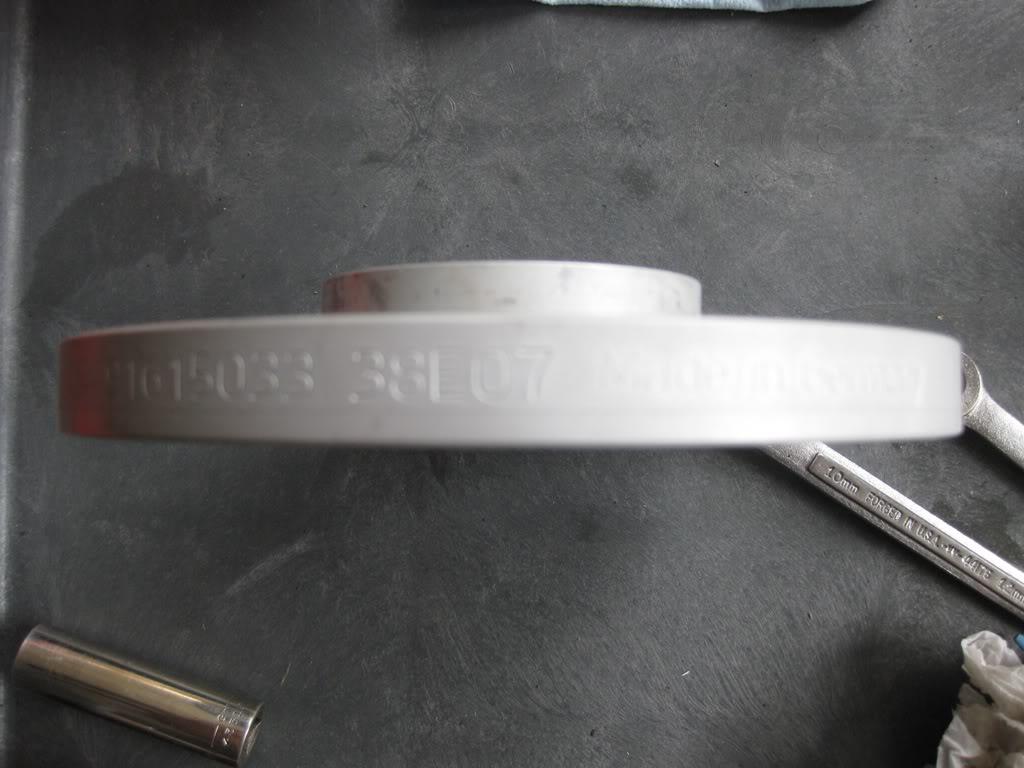
Next install the new studs. I ordered the Eibach Pro-Spacer 15mm 1967-02 Camaro hub centric wheel spacer kit to give me sufficient clearance. The difference between my wheels and the Corvette wheel offset is 16mm, so 15mm is still plenty of clearance. Eibach's part number is 90.6.15.033. They are some quality pieces - machined aluminum, "Made in Germany" engraved on the sides. To install the studs, insert the stud into the rear of the hub, put a couple M12 washers on, thread on an M12 grade 8 nut, and zip it down with an impact wrench. It will pull the stud into the hole, seating it against the hub. Once it touches the hub, stop turning it, otherwise you may stretch the threads. Beware that the nut will get extremely hot, I used anti-sieze on the threads as a lubricant, and PB Blaster to cool the nut off.
New studs installed:
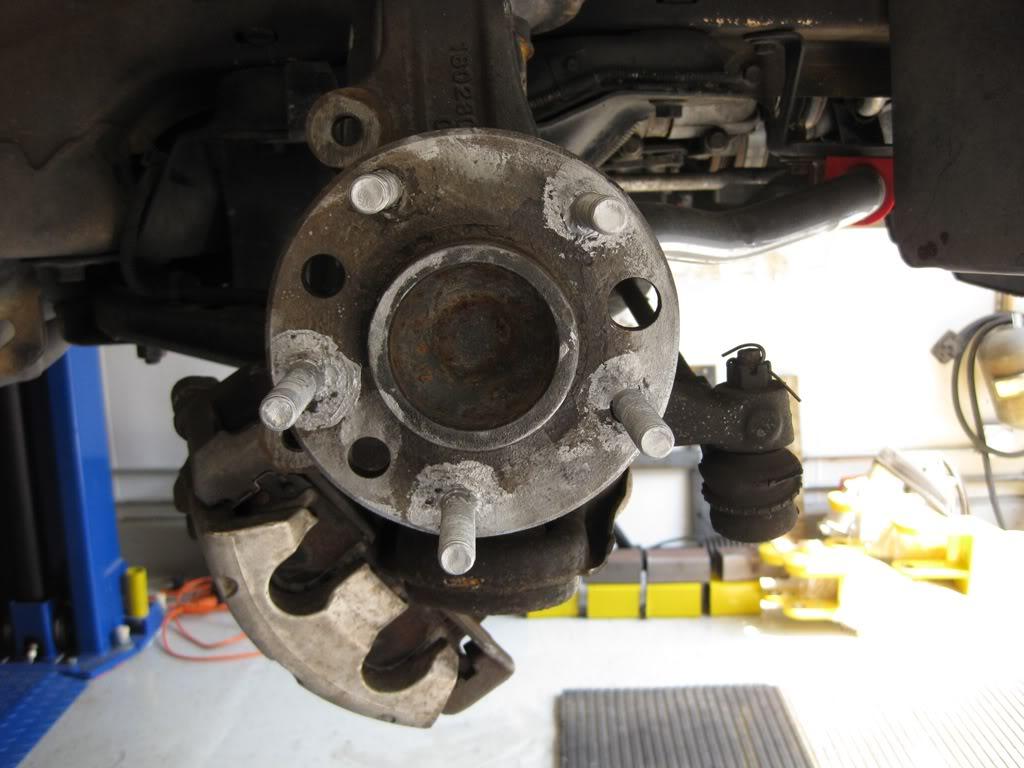
Now that the new studs are installed, you can begin assembling the brakes. Take a wire brush and make sure to get any visible surface rust off the face of the hub. If there is rust on there, the new rotor may not seat all the way on the hub, causing alignment issues. Once the hub is free from rust and clean, put some anti-size on the center of the hub as well as on the wheel studs, and install your new rotor.
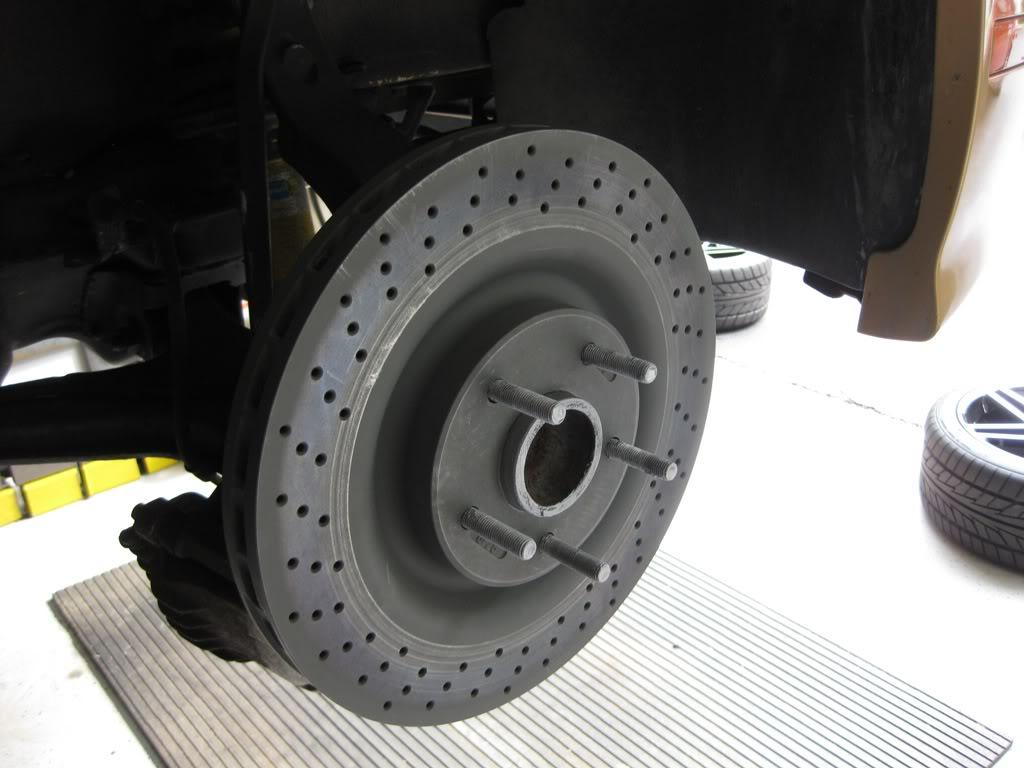
Next, get your new caliper and do a test fitment. The new caliper will install the same way as the old caliper bracket did, mounting holes are the same, as well as the thread size and thread pitch. However, you will need washers to space the caliper so it sits evenly on the rotor. I used (2) M12 washers on each bolt, and it spaced it out perfectly. Looking down from the top of the caliper, there was a small gap between each pad and rotor. If the gap is not even, you will not get proper braking. I picked the washers up from Advance Auto, they were $.94 per bag which includes 2 washers.
Here you can see the washers and their placement:
Another view:
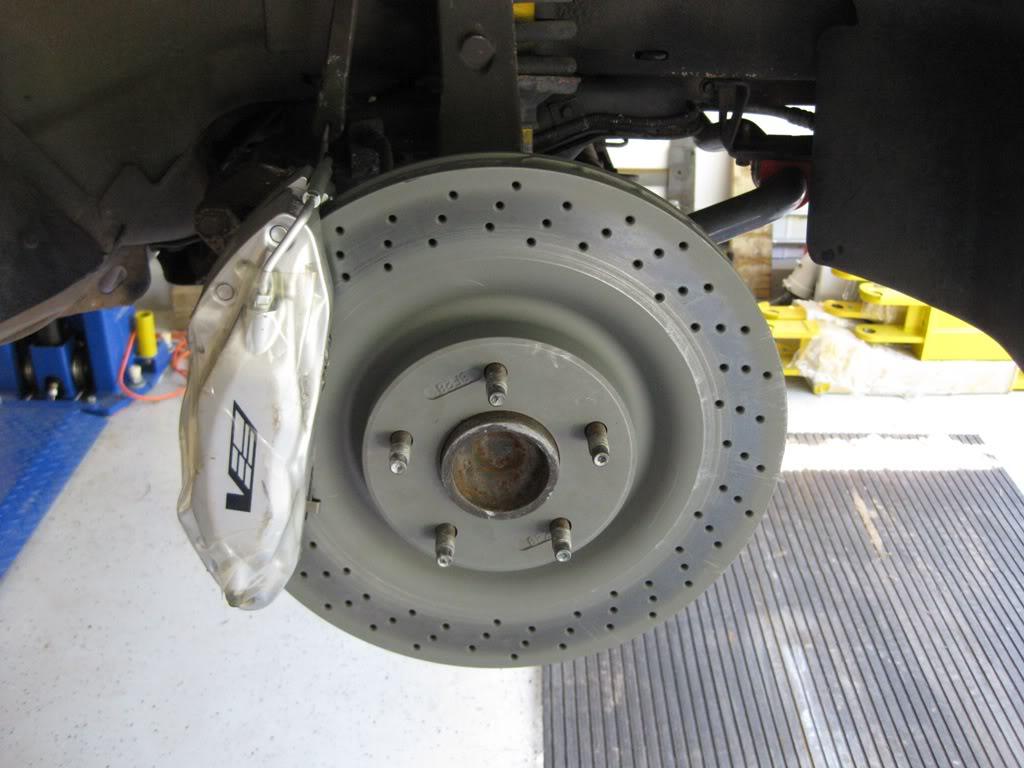
Caliper centered over rotor:
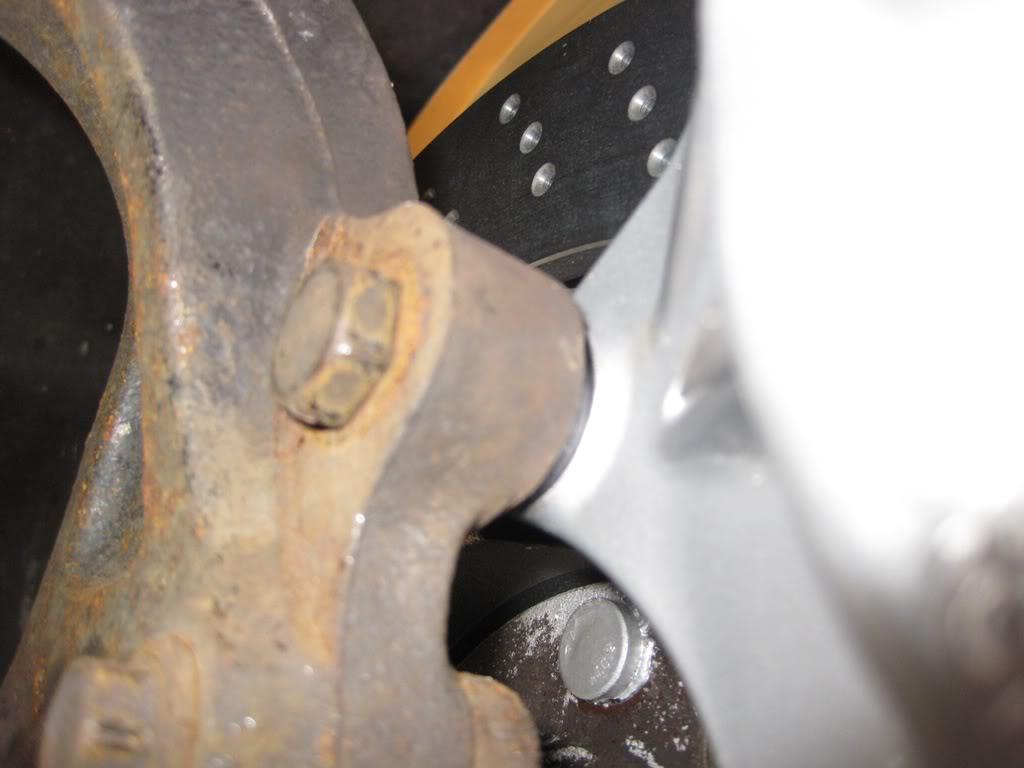
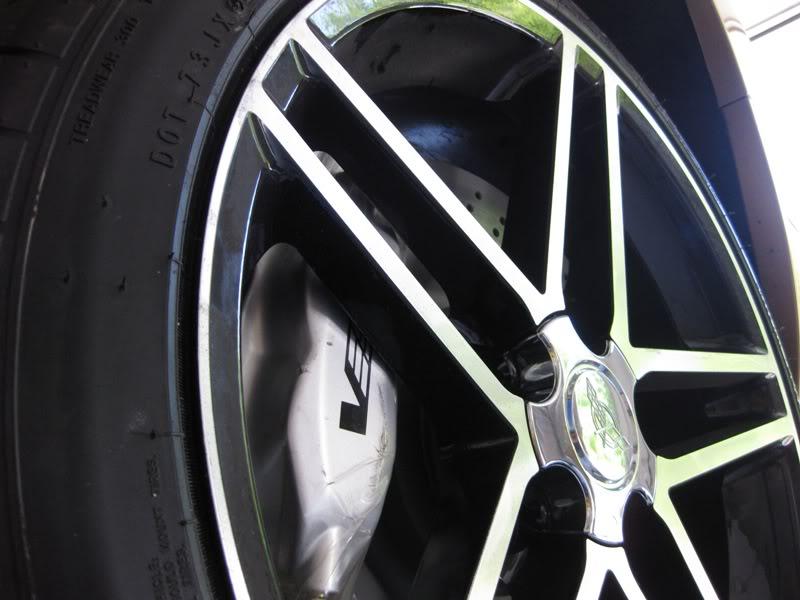
Now that you have your rotor on and your caliper bolted up, check your wheel spoke to caliper clearance. Grab your wheel and slide it on the studs, if it goes all the way on and you still have a couple mm between the spokes and the caliper, you're set. If not, you'll need wheel spacers.
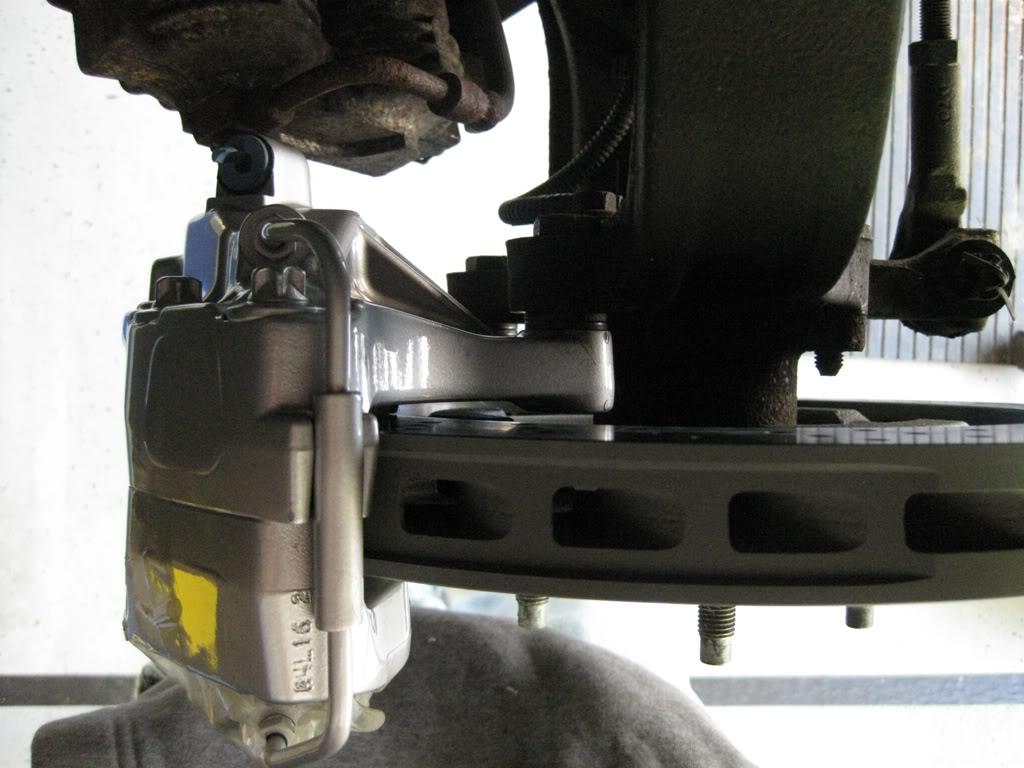
Caliper and rotor assembly:
(Notice bleeders are upside down - I was only test fitting, this caliper belongs on the other side so the bleeder valves face upwards).
Wheel on studs, not enough clearance without spacers:
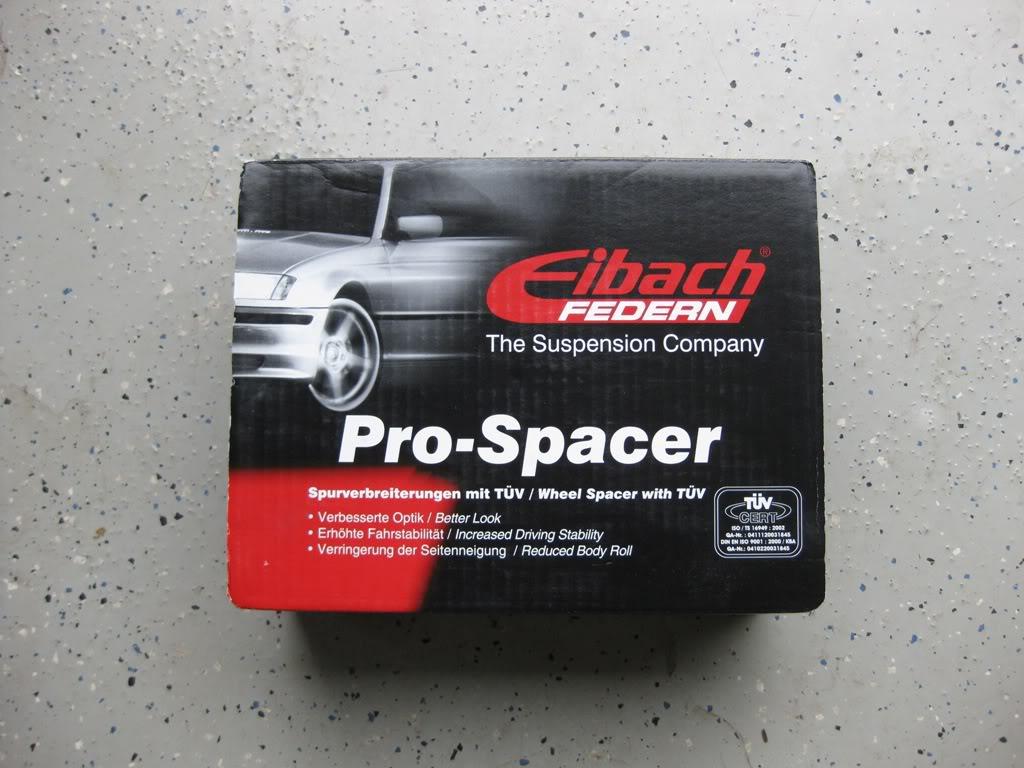
Here's the wheel spacers I purchased:
EDIT: If you want to purchase them from Advance Auto, the part # is 906150331.
As you can see, unlike regular spacers, they are hub centric, meaning they fit directly on the rotor and maintain the center connection between wheel and hub. Generic spacers don't have that feature, and instead place the wheel to hub alignment solely on the wheel studs and lug nuts.
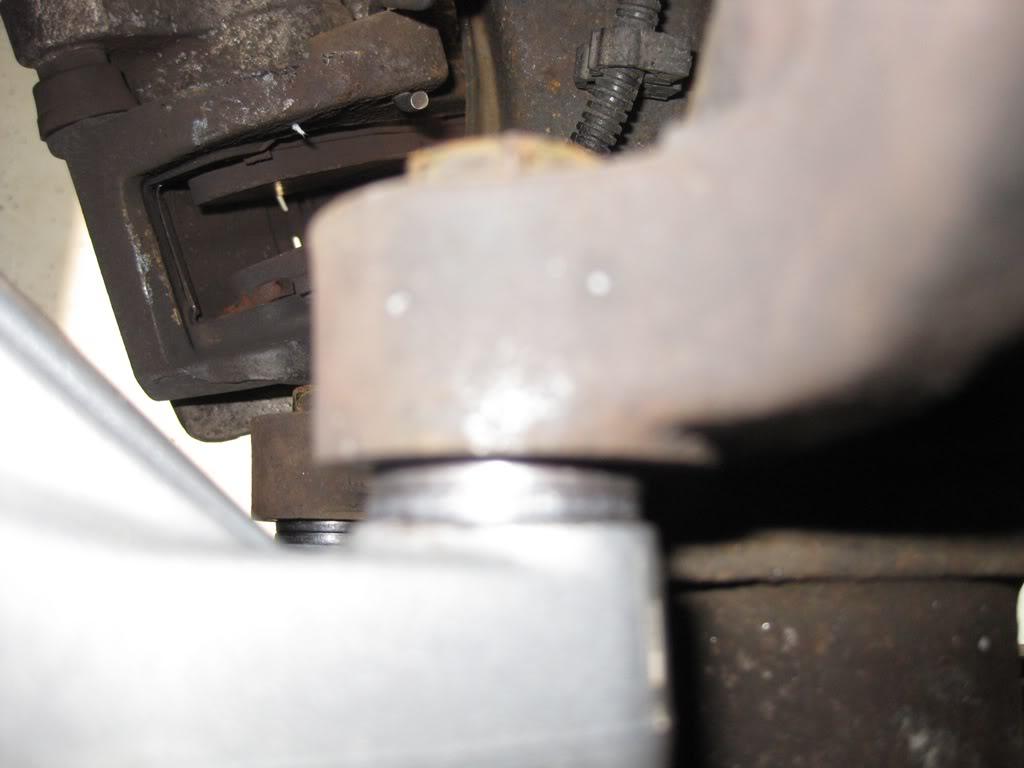
So if you mount your wheel and everything clears properly, you're set. Time to remove the old calipers and lines and put the new lines on. Start by soaking the hard line (chassis) to brake hose fitting in PB Blaster. It will probably be rusted, and the last thing you want to do it turn it and end up twisting the hard line with it. Once it soaked, you should be able to break it loose with your 12mm line wrench. Put cardboard or a pan down, because brake fluid will start dripping out and onto the floor once the fitting is loose. Once you have the tubing nut broken free, remove the clip that retains the hose the the bracket. You can use a screwdriver and just pry it up and off. Then you can remove the entire line and caliper as one unit and get it out of the way.
Old line and caliper:
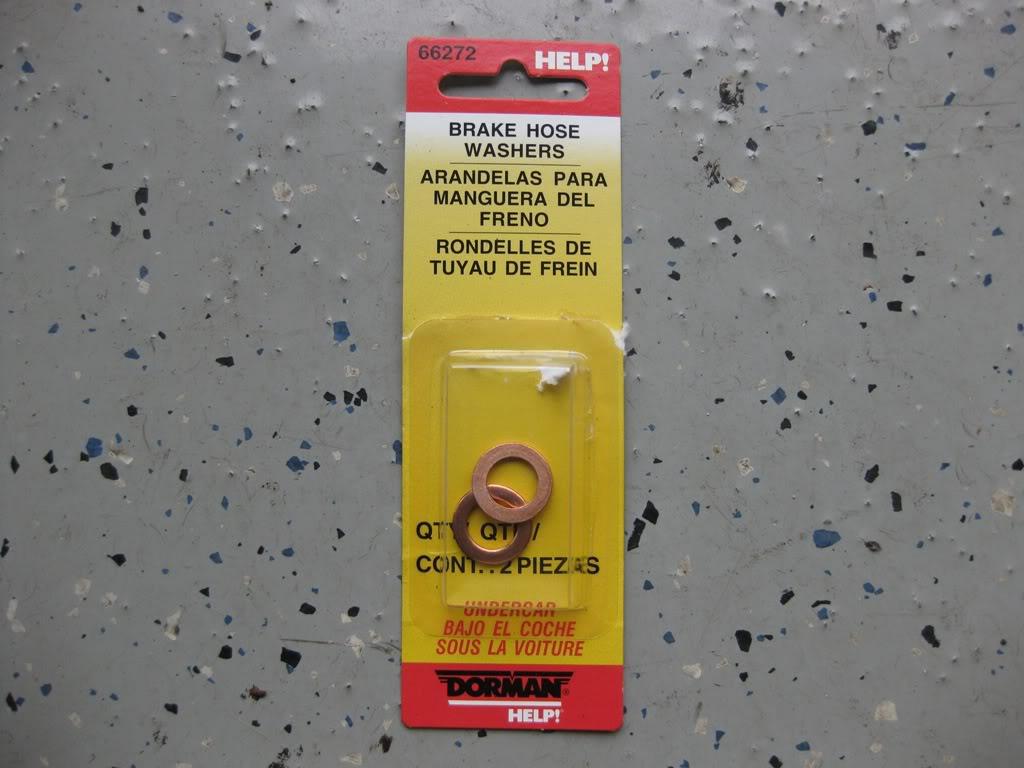
Now you can install your new line. The lines you get from Flynbye Performance will include the 3-piece line itself, banjo bolts, and adaptors to go from the new lines to the stock bubble flare fittings on the chassis end. This is where you will need the copper washers from the parts store. I purchased mine from Advance Auto, you can go to any store that has brake washers in the help section though. I bought various sizes to see which would work, you will need two boxes for a total of (4) washers. Here is the size that I found fits best, part # 66272:
Start by installing the caliper side of the line, with one copper washer on each side of the eyelet on the line, as seen here:
My Haynes repair manual calls for 30-32 ft/lbs, which seemed excessively high, so I just torqued them until they were tight enough to compress the copper washers.
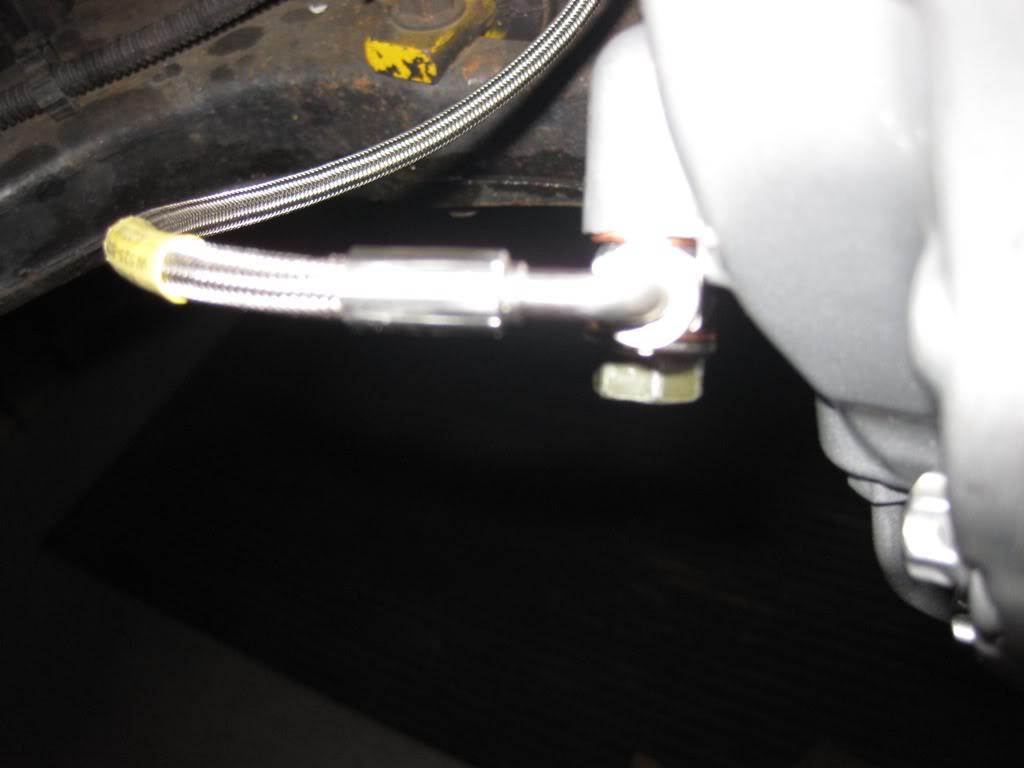
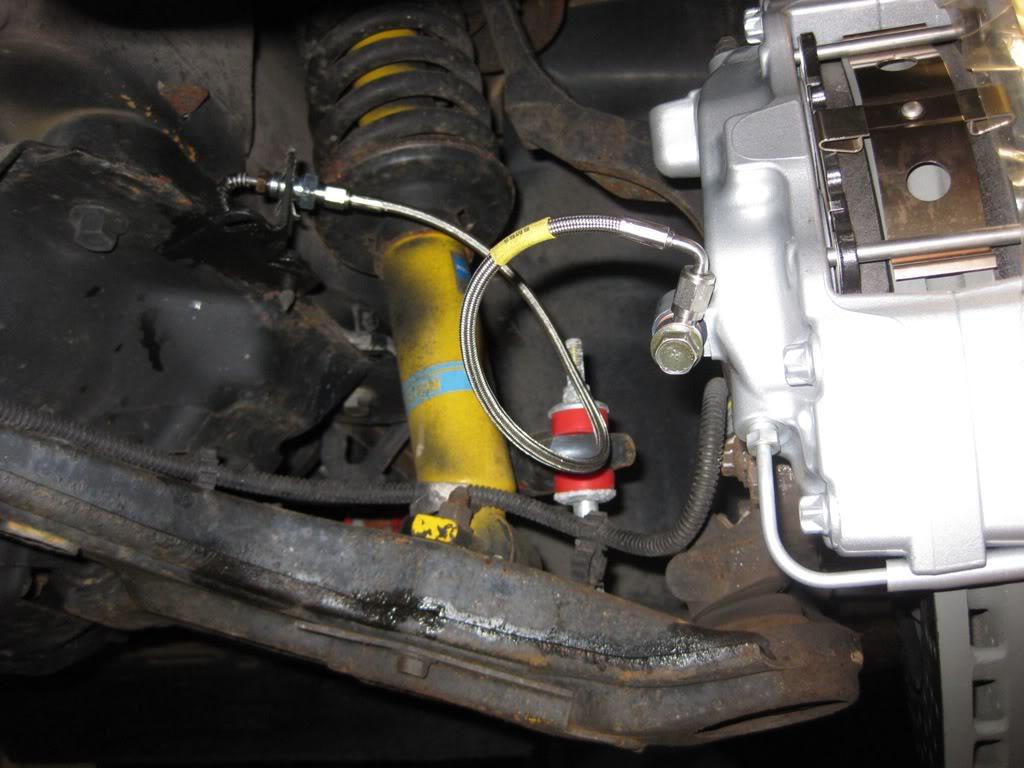
Next install the chassis side of the line. First, thread the hard line into the supplied adaptor, and tighten with your 12mm line wrench and an 18mm open end wrench to hold the adaptor side. Once thats tight, you can thread the braided line into the adaptor fitting. Tighten until snug. Also tighten the "L" shaped fitting that is down near the caliper side, it must be snug as well. Make sure not to twist the line as you are tightening the fittings.
Assembled line:
Once you have both sides connected and tight, you can start bleeding the calipers. I had a friend help, but you can also do it by yourself if you purchase a one-man brake bleeder kit. Start with the right (passenger side) caliper and then do the left (driver) side. According to the CTS service manual, bleed the inboard side of the caliper first, then the outboard side (thanks to some punk). Both the Z06 and CTS-V calipers use two bleeder valves, make sure to bleed both to ensure there is no air in either side of each caliper. Keep the master cylinder topped off with fresh fluid to avoid it going empty and sucking in air. I also bled the rear brakes for good measure, to make sure that no air was in the system.
Once you're done bleeding the calipers, double check your work, bolt your wheels back on, and you're done!! Take it for a test drive to enjoy your new brakes!!