You must be logged in to rate content!
6 minute read
How I Removed the Door Cup Holder
Compliments of mx5mia @ www.miata.net
My Thanks to "rakessler" for giving me the push I needed to finally remove the cup holder from the driver's door. I am a big guy, like to sit with legs spread a little in the car, and the cup (Bottle) holder pushed into the thigh muscle where I had knee surgery years ago. I love the car, but the "Bottle holder" had to go. Yet I wanted it to look presentable when done. I am not "tickled" with how it came out appearance wise, but I can live with it.
*****WOW, the driving is WONDERFUL! No pain in the thigh muscle when I got home. It was worth the effort to me.****
** The interior door panel is held in place with 3 screws and several push clips. One screw is in the bottle holder. Remove the cap at the top of the door pull handle and remove that screw. Behind the interior handle at the top of the door (where you open the door inside) is a plastic plate, pop that out and remove the screw. Go around the front, bottom and back edges of door interior panel, and pop out the push clips. These fit tight.
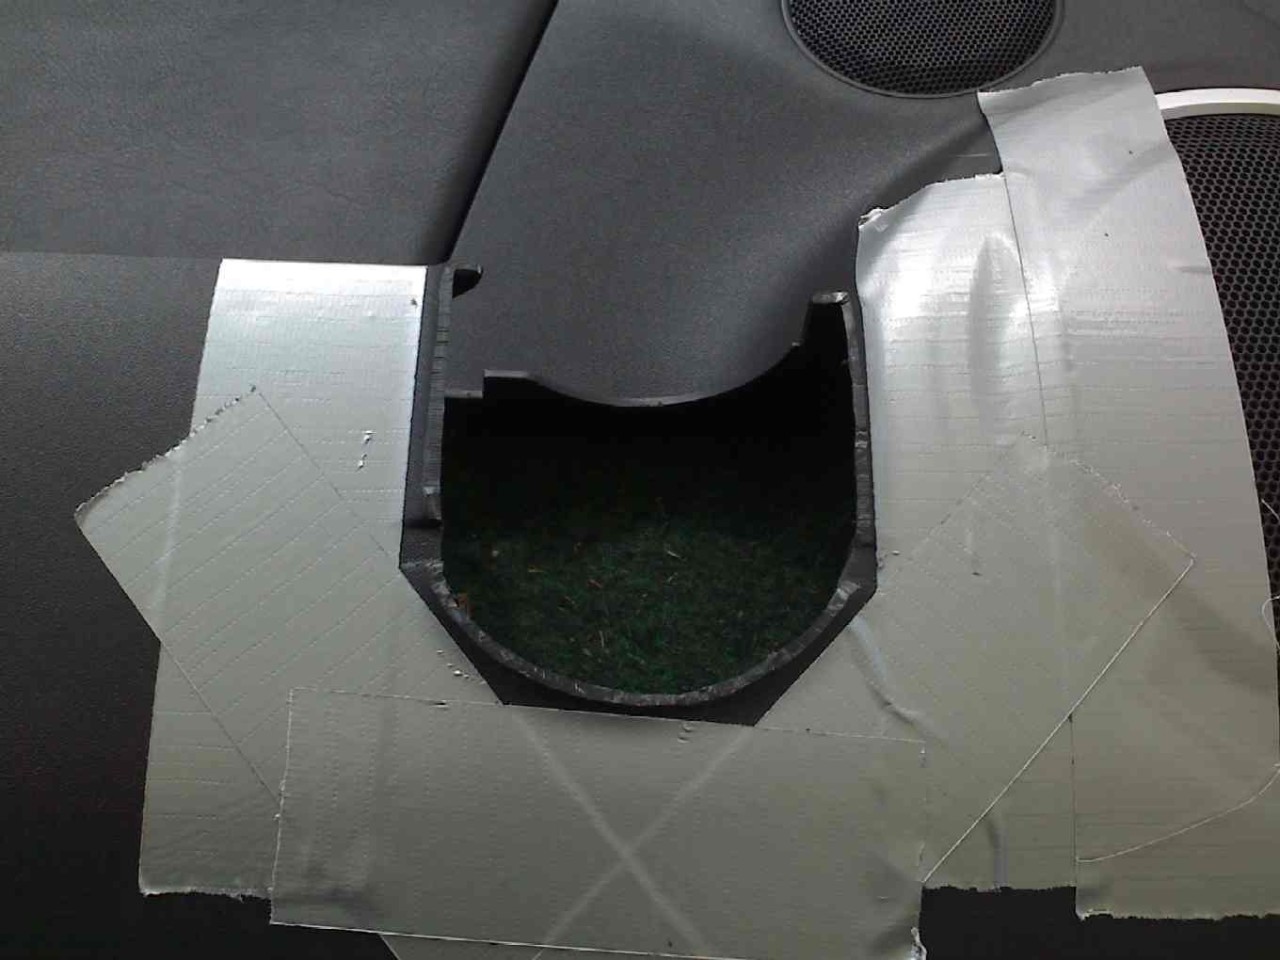
1. Picture #1 below is the door panel. Remove the pull handle and inside cup holder, and put duct tape around where you want to cut. Then I used a hack saw blade (not in the hack saw). I carefully cut just the outside, not the inside actual cup holder part. Cut off less than you think, so you can trim to fit later.
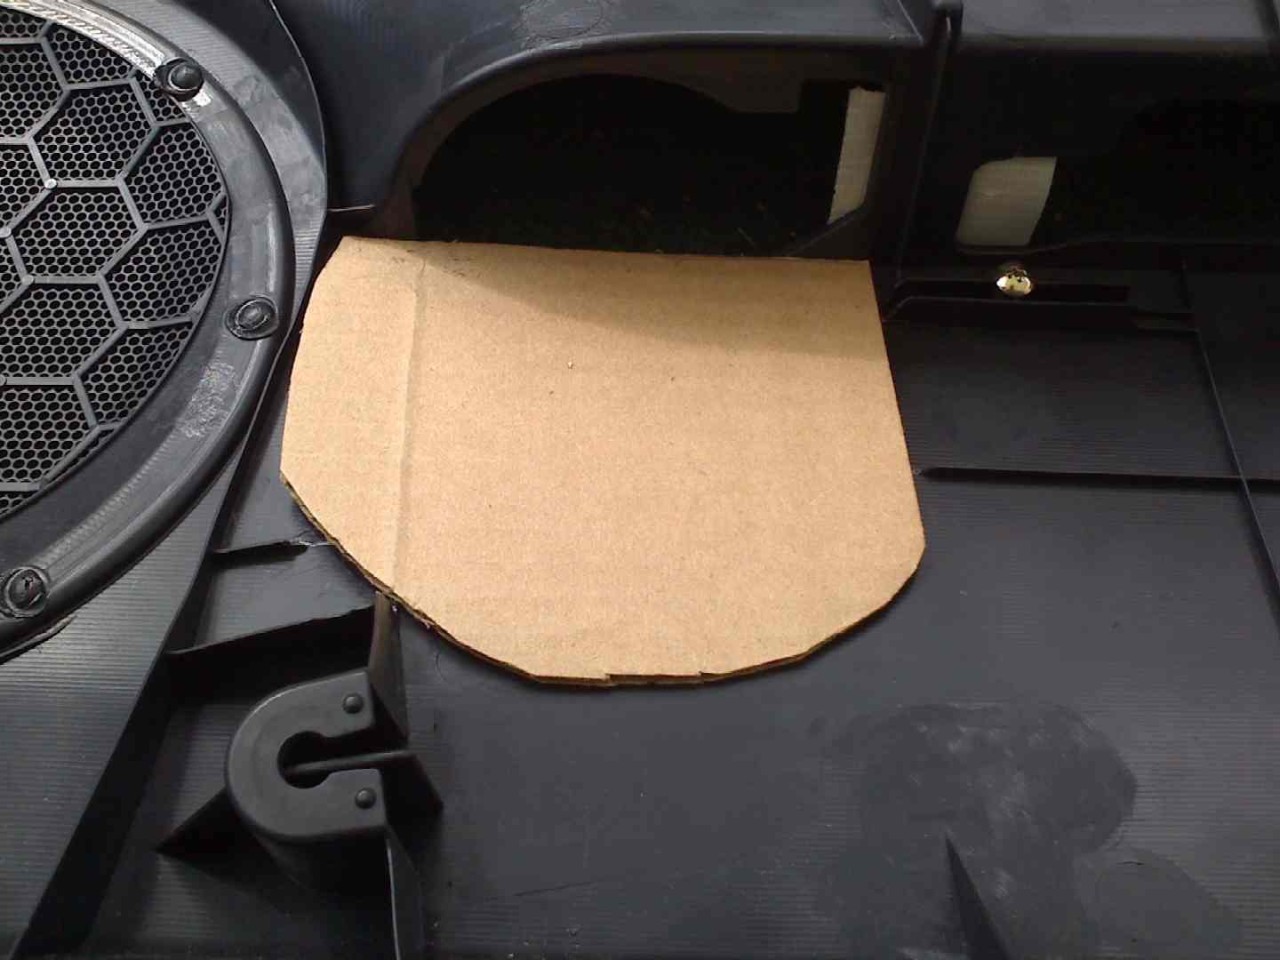
2. The next picture #2 is a cardboard template I made to fit behind the door. Use that to cut a piece of 3/8" plywood to that shape. The door panel is curved, so I used my belt sander to shape the side of the plywood to match the door panel. The Plywood ended up about 1/8" thick at the bottom, full thickness in the middle, and about 1/4" thick at the top when it matched the curve of the door panel.
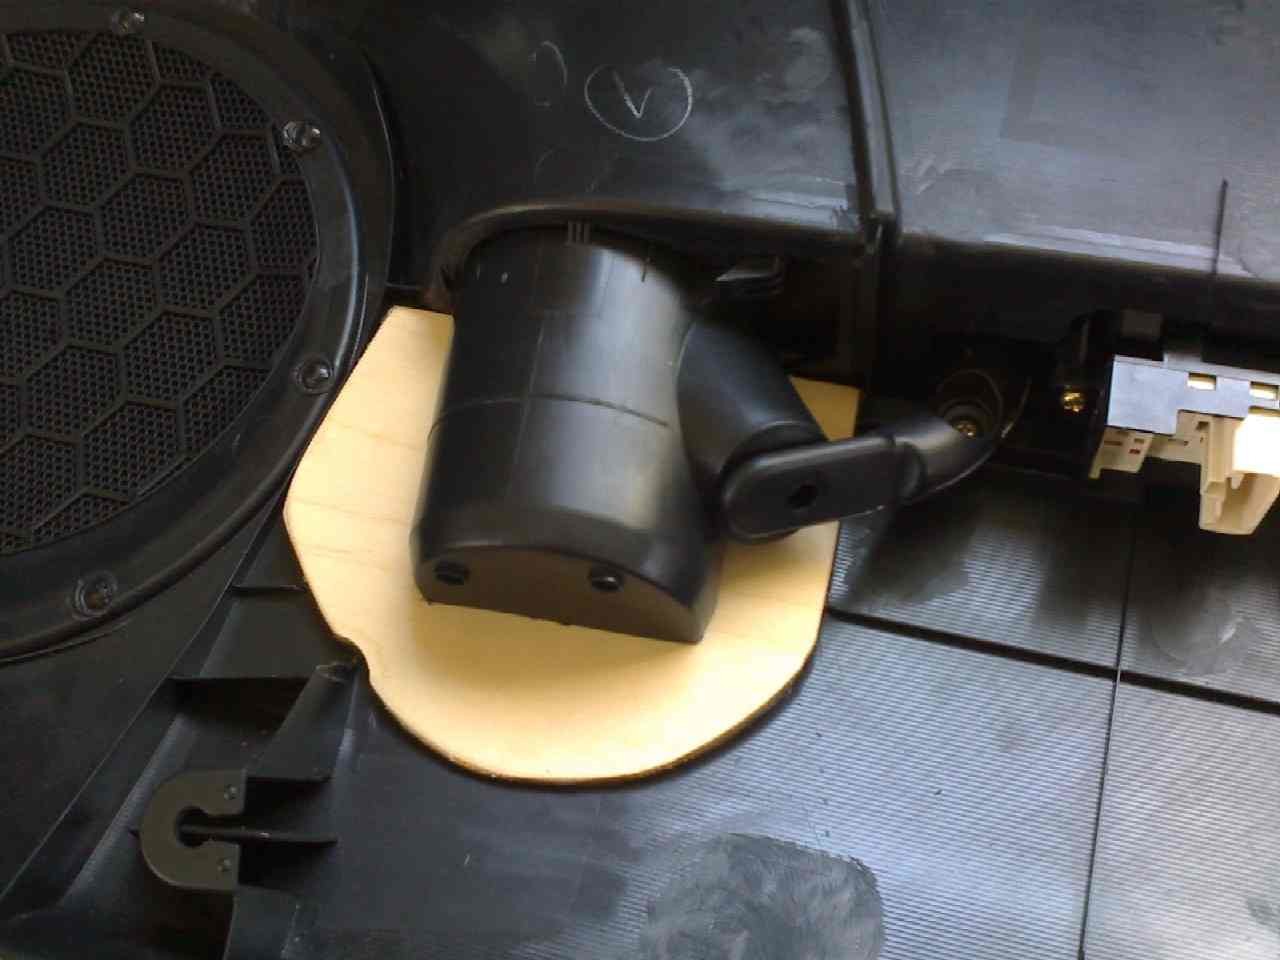
3. Then I cut some of the face of the inside cup holder away, a little at a time, until I could fit the plywood and inside part in place. Picture #3. I wanted to end up with a holder for my sun glasses case, so this is why I did this.
4. The next picture #4 is with the inside cup holder and the plywood in place, looking from the face of the door panel. Notice I made the plywood stick up to meet the top edge of the inside cup holder part.
5. When I had everything fitted, I put some foam 1" wide x 1/4" thick weather stripping on the plywood, and glued a piece of black vinyl over it. Picture #5. I left the end sticking up (covered by paper in pict) as I wanted to fold that down inside the finished cup holder.
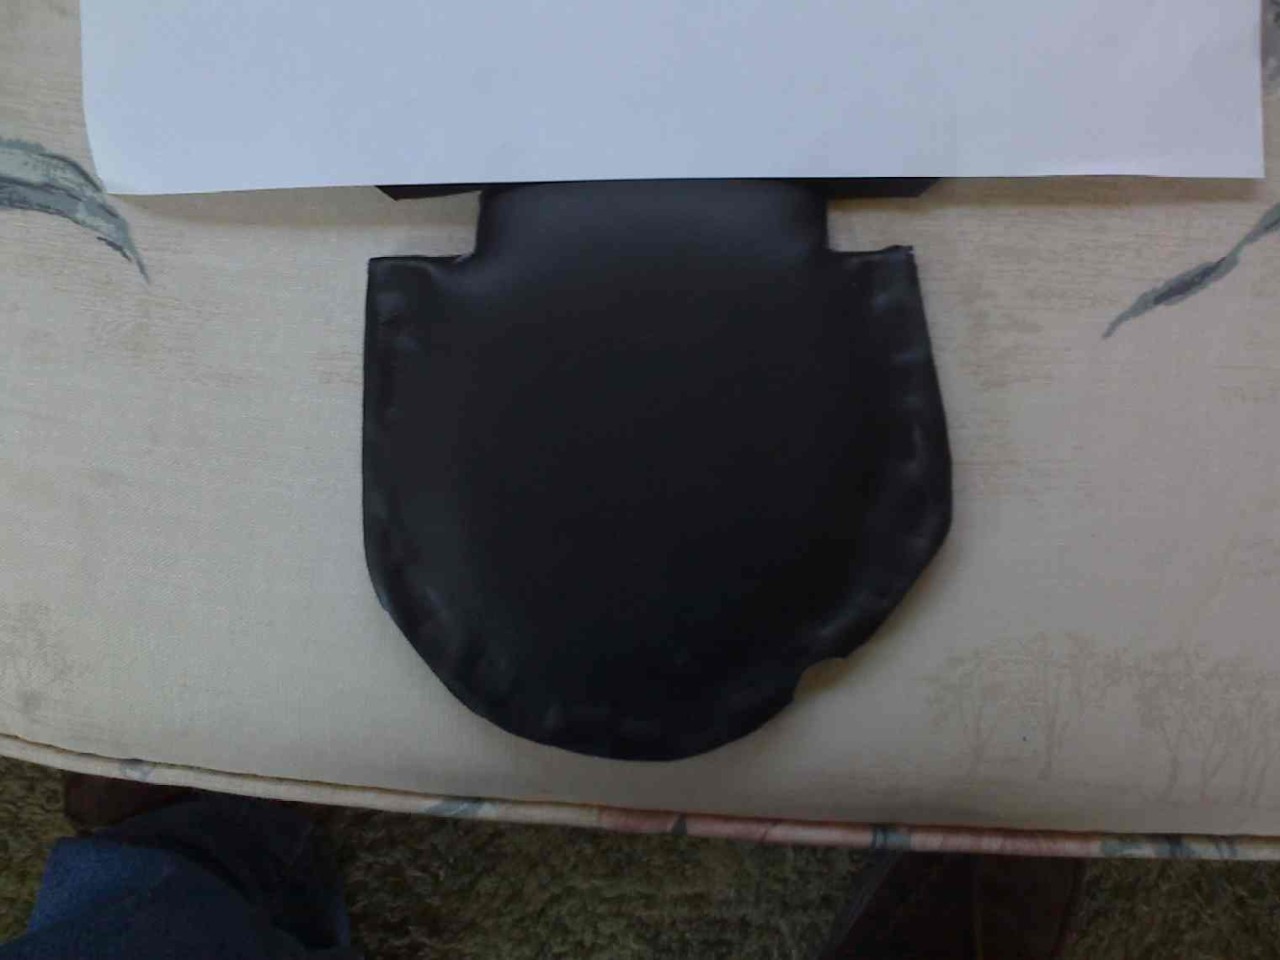
6. I used the GE Silicone Sealant to "glue" it into place behind the door panel. For strength, I drilled and countersunk about 7 holes around the perimeter of the cut out area, and used small #6 x 1/2" flat head screws to hold the plywood in place. I didn't like having these visible, but could not figure out a better way as I was doing this.
.....Picture #6 (1st below) shows everything fastened into place. I then used Black GE Silicone sealant to go around the edges of the vinyl, and make a fillet between the black vinyl on the plywood, and the cut edges of the door panel. A smooth blade table knife makes a good tool to smooth out the silicone. If you pay attention tot he curing of the silicone, you can rub the surface just as it is setting up, and take away the high gloss on the surface. I painted the screw heads flat black, and the smoothed some silicone in the screw "holes".
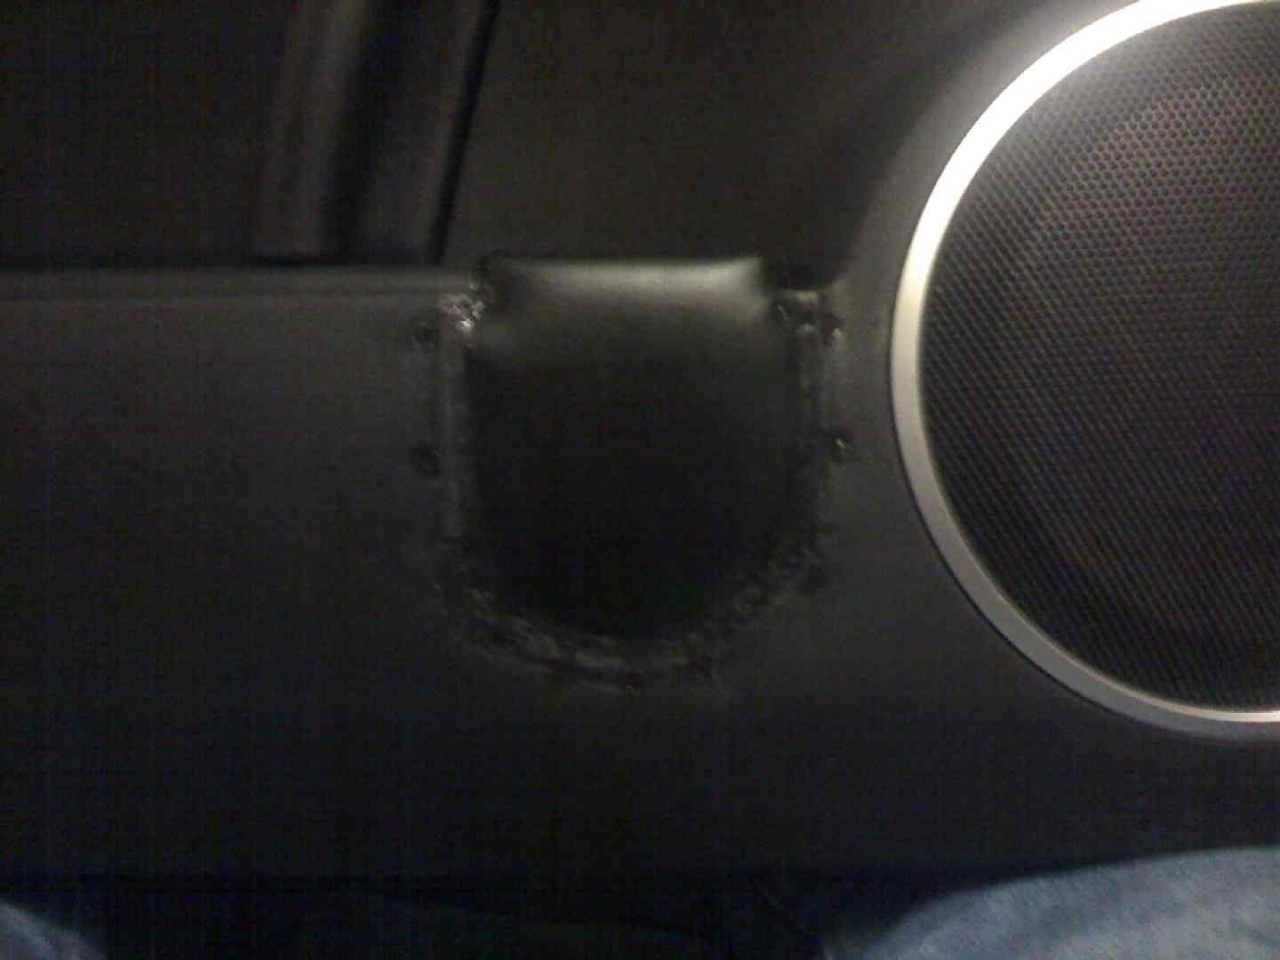
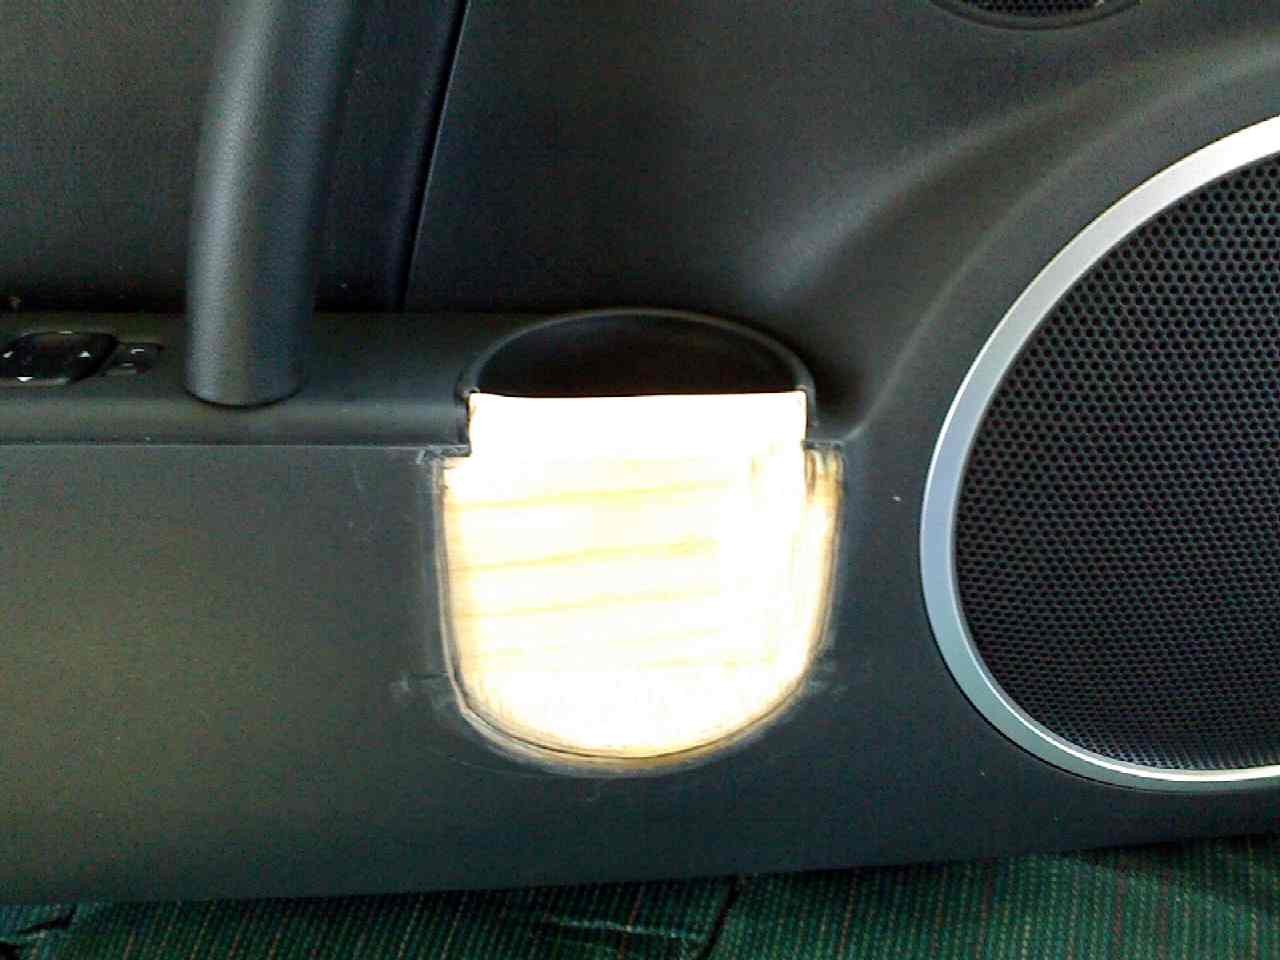
7. Picture #7 (2nd below) is the finished top view. You can see it is now a 1/2 bottle holder, and my sun glass case fits nicely!
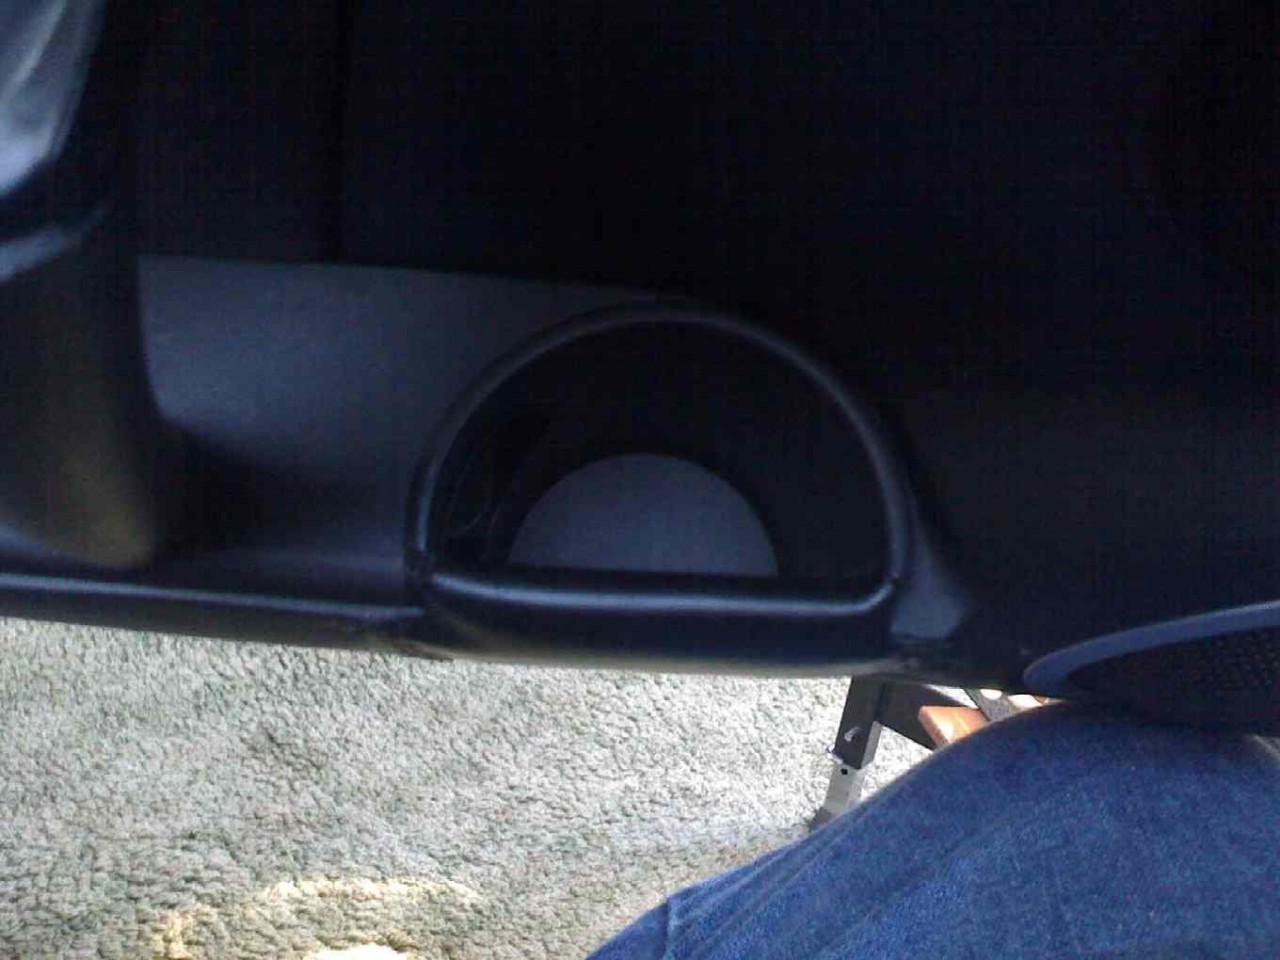
8. Picture #8 (3rd below) is how it looks from the outside of the car looking in.
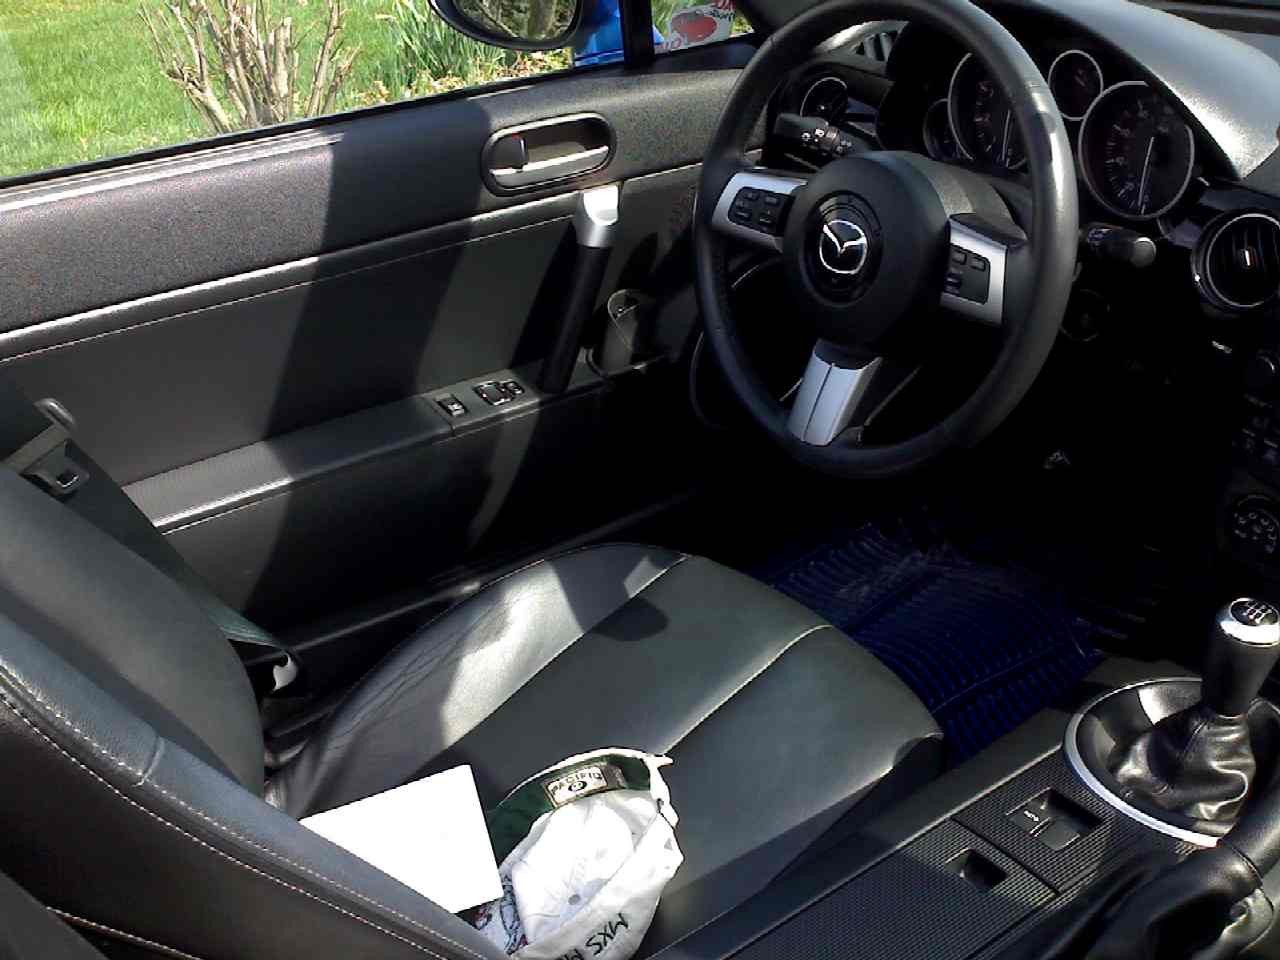
A close look at the finished job does not look as "perfect" as I wanted it to end, but I am not a fabrication expert. I used 303 protectant and wiped it on the interior of the door panel and the cup holder, and it looks "decent".
But for me to not have the pain of the cup holder digging into my thigh muscle is worth the slightly degraded look.
If the looks starts to bug me, I will make a 1/2" thick black vinyl covered cushion just bigger than the effected area, and hide it with that.
I hope this will help someone who wanted to do this, but didn't know what to do first.