You must be logged in to rate content!
5 minute read
PowerFlex Bushing Upgrade
Compliments of Cyberbug @ www.miata.net
I received the final bushing from powerflex and in the correct size 14mm.
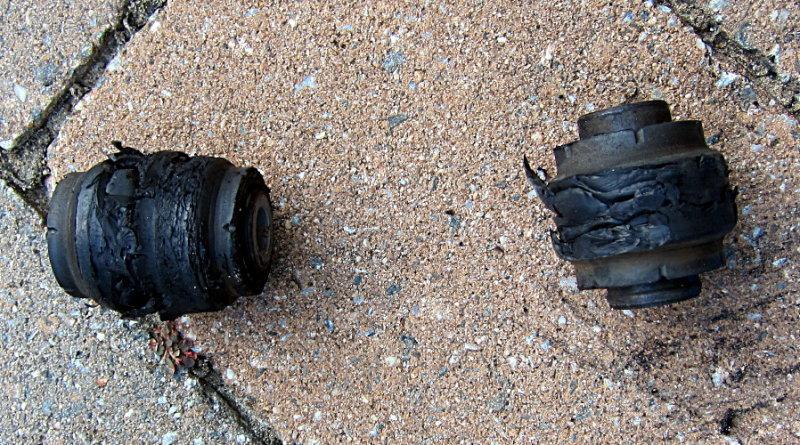
Today I did two upperlink bushings on one side, it took over 3hrs as there was some learning involved and a trip to Lowes to get a torch to burn the bushings. The Bushings are epoxied.
This week I'll do the other side as well. I only did the upper as the alignment affects will be minimum.
Next month, taking my time I'll do the rest and post pictures. I don't have any events next month, I'll need corner balancing and alignment when all is done. Some may be tricky to get out.
These two were not difficult with the bushing removal tool, I got for $50 and heating them with the torch. There was some left over rubber which need additional burning off and wire brush to clean them off, so that took some time. There were some scratch while working on it so quick coat of paint and ready to mount back on. These come with copper grease, I also use some super lube on the inside link and used the copper grease on the inside of the rubber bushing.
Finally started this again, I had done two on each rear and today finished the driver side completely.
Its fairly easy with the tool and torch. made quick job of it. I used a rotary tool with a steel brush to quickly clean left over rubber.
I marked the toe and camber bolts and was easily able to put every thing as is, so there shouldn't be much alignment difference.
That said, I will get a realignment and corner balancing
There are two upper bushings and four lower in the rear, I did not do the sway bar as I already have MS bars with poly bushings.
This weekend I should be able to finish the other side.
So the rear upgrade is all complete, next week I'll do the fronts.
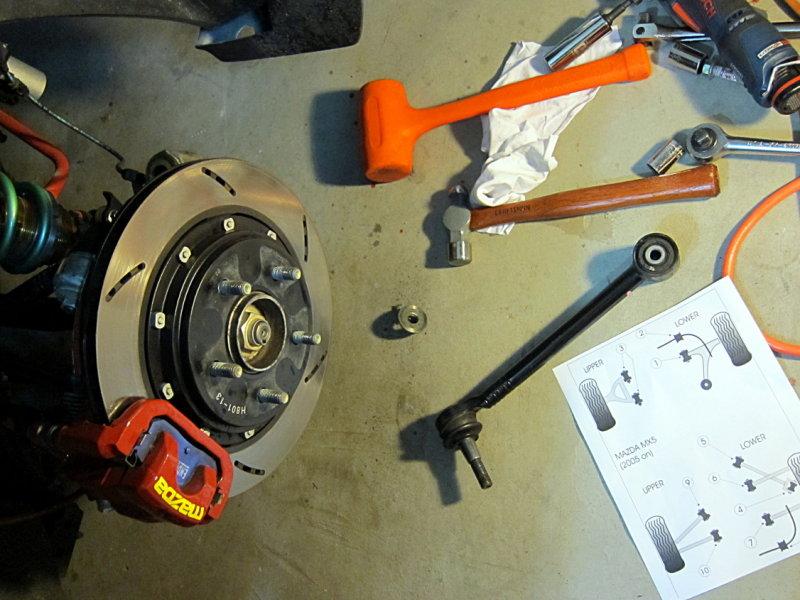
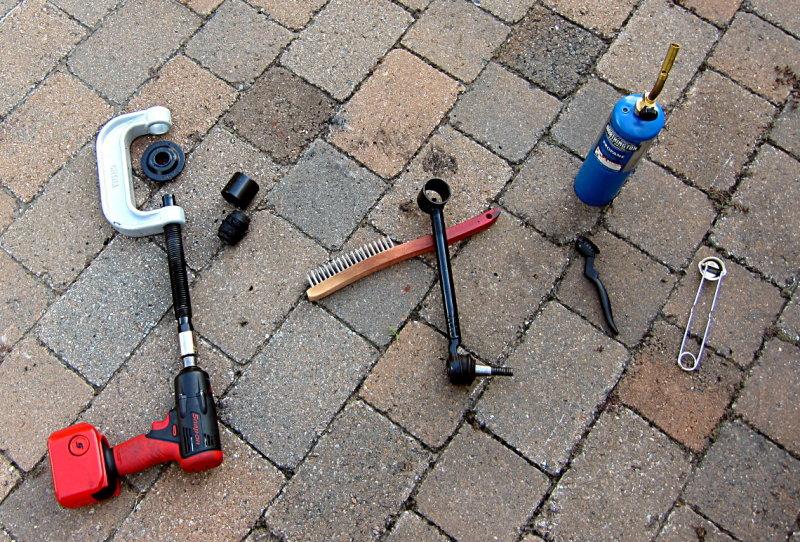
Getting all the tools out - lots needed 
Be sure to properly mark the Camber and Toe bolts.
Do the lowest link first, the bushing pushing out easily no heat needed. Its not glued.
Press in the new bushing, don't forget to use the copper grease.
Do the next lower link, the bushing will push out but will require heat
Press the bushing in first and then heat the sides. You'll hear cracking sounds as the epoxy comes apart.
Bushing is out, time to clean the end
Using a rotary tool with a sanding disc clean to remove all the rubber until its all clean and polished.
Use rustoleum paint and give it a coat to protect from rust.
Take out the swaybar link last and install last.
Install the links and camber/toe bolts last, you make need lie down and push the hub with your feel to align them
Keep all bolts loose and torque at the end.
Make sure you Torque every bolt you loosened keep a count.
complete
Started on the front driver side today, had to take every thing off to get the upper and lower arms out (pictures soon)
The lower arm requires only one bushing replacement and will be easy to get out (tomorrow)
The Upper A-Arm bushing are a problem, they need to be pushed out from the inside out so the tool I have wont work.
Also these have metal sleeve, Did some research
I'll have to cut the the outer rubber bushing out, drill out the centers and cut the remainder, lots of work.
Like this
http://www.panteraplace.com/page82.htm
I don't see any easy way.
Today, instead of trying to get these bushing out I took them to a performance shop few minutes from my house. Good shop, lots of R34s and other tuner cars. They were putting in a R8s V10 in Porsche Boxer
Got a good tour of the shop, lots of potential, they charged me $20 a bushing.
Putting everything back was quicker and I took out the passenger side as well tomorrow I'll go back to get the other side done and then button up the front.
I also noticed uneven wear on the front tires, I have -1.9deg camber
Longest drive yet, car rides beautifully. I'll probably adjust the Swaybar Endlinks this weekend.
Did not notice anything drastic with the alignment even on highway speeds. Everything was smooth and straight.
I did mark everything before and put everything back as is.
But will still get an alignment and corner balancing done in spring