You must be logged in to rate content!
19 minute read
Another Rocker Repair thread for an NA Miata
Compliments of Austin G @ www.miata.net
After a few months of reading old threads on rocker rust repair, I decided today to take the plunge. I personally found that I could not read enough threads on the subject, so I decided to make another rocker repair "journal". The threads by RichardNorman and iwfur25 were a huge inspiration.
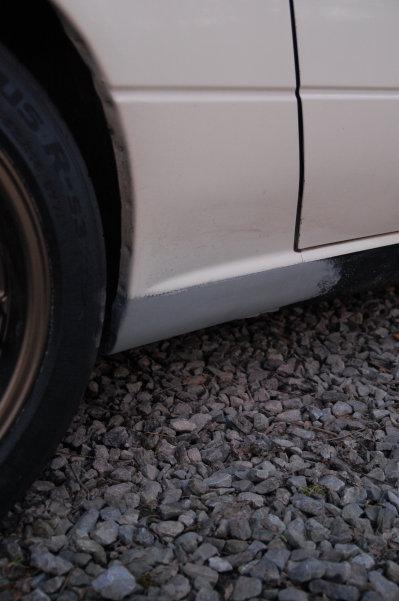
I cut open the driver's side today, which is the worse of the two. I would estimate that the paint first showed signs of blistering 4-5 years ago. I bought the car 2.5 years ago, and this is how it looked. It did not change in appearance from the outside while I've owned the car.
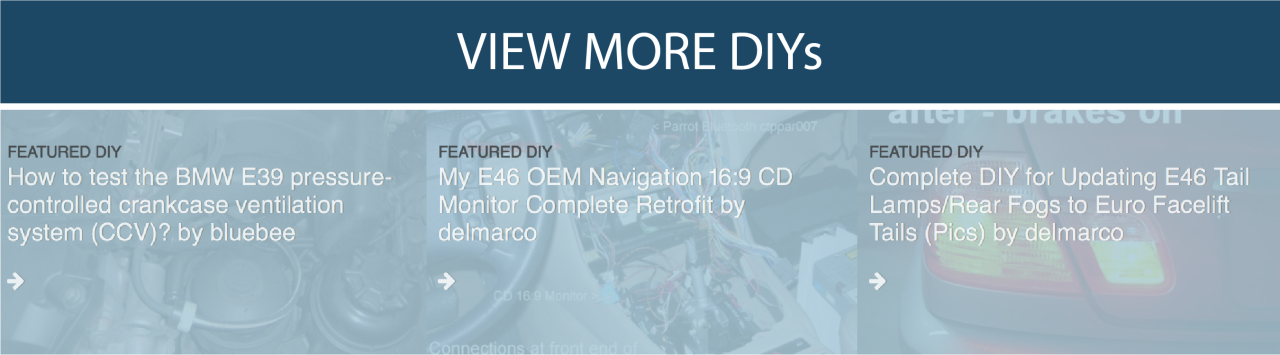
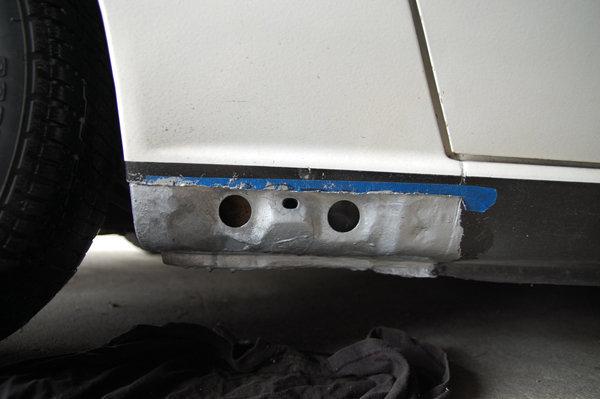
Skin removed
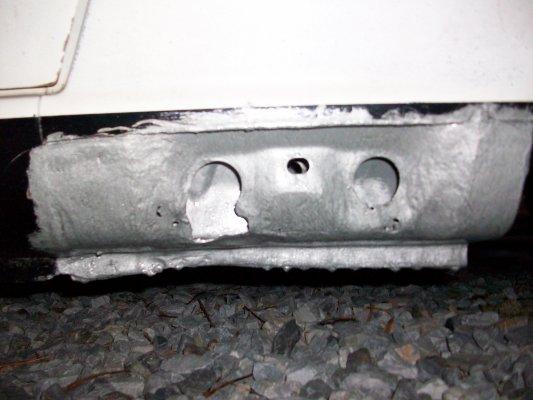
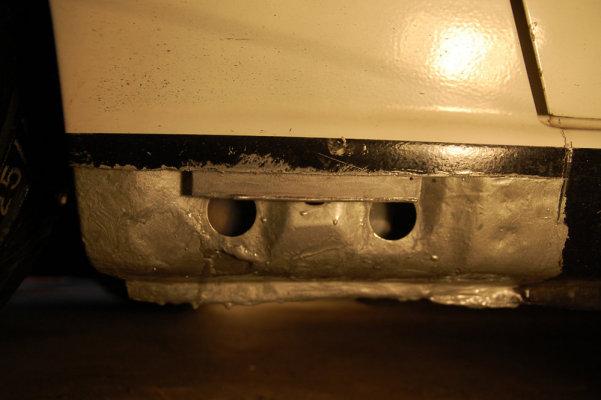
Cleaned up
It doesn't look too bad once I ground the rust off. There were a few thin spots where I broke through, as seen in the last picture. Also, the frontward hole rusted out on the bottom. However, it's all solid if I probe around with a screwdriver, and no rust on the inside.
My question for the experts is: do I need to get the welder out, or will it be ok left as is?
I plan to give it the full POR-15, rust encapsulator, etc. treatment before closing everything up. Right now I plan to go the epoxy route, but I may have a body shop weld in new panels.
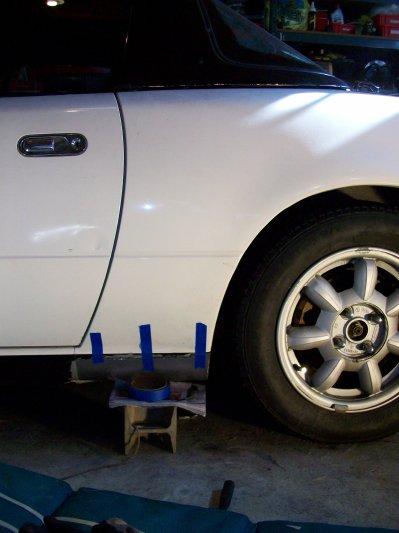
I got to the passenger side this weekend which appeared to be the less severe of the two. I started with the driver side thinking it was the "bad" side, judging from the outside. After seeing that the driver side wasn't too bad inside, I thought the passenger side would have at most a little surface rust on the beam.
Judging from the outside, this shouldn't be bad at all inside, right?
Not terrible:
Sigh 
 :
:
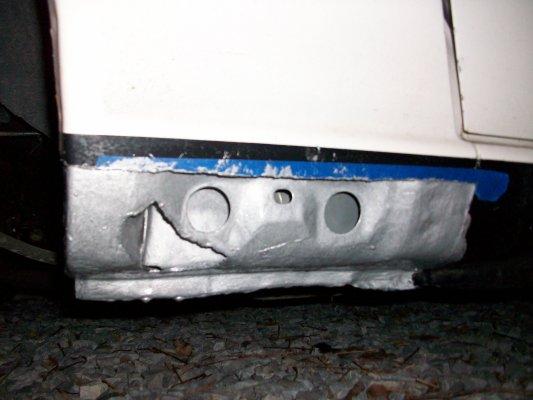
Once I hit this side with the angle grinder it started flaking away. I was not at all expecting the pass. side to be so bad inside. I coated both sides with POR15 until I decide how/if I'm going to repair this.
I know the right way to repair this is to weld in new metal where rusted through, but I'm torn as it's not horrible. My mig welder isn't set up for gas shielding yet, so I'd either have to pay someone to do the work or invest in the equipment. With 240k on the clock, the chassis itself is nearing the end of its material lifetime, so I'm not sure it's worth it. On the other hand, I autocross and track this car, and I don't know how much rigidity I'm giving up.
For now, I'm going to start shaping new skins and ponder what to do about the rocker structure. 
Here's the driver side coated:
I've decided that I'll repair the rocker beams myself. I bought the gas conversion equip for my mig welder. The plan is to weld a patch into this area, and possibly do the other side depending how this goes.
I'm planning to do most of the shaping by hand. I just bought a sheet metal brake, so I'll experiment with that a bit, but I suspect hand shaping will work best. Check out harbor freight for gas cylinders. They sell them for $80 where as I was quoted about $200 from the local welding store. The great part about DIY is buying nice new tools with the money you had planned to pay someone else to do the job.
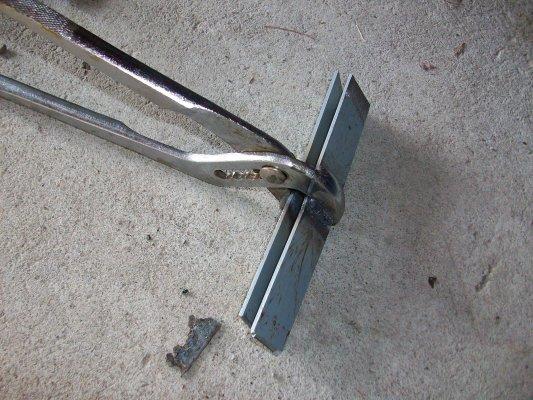
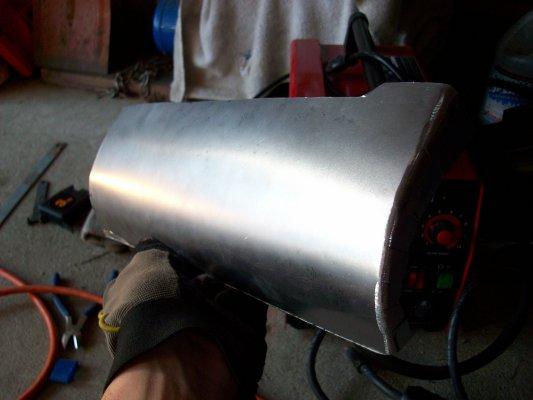
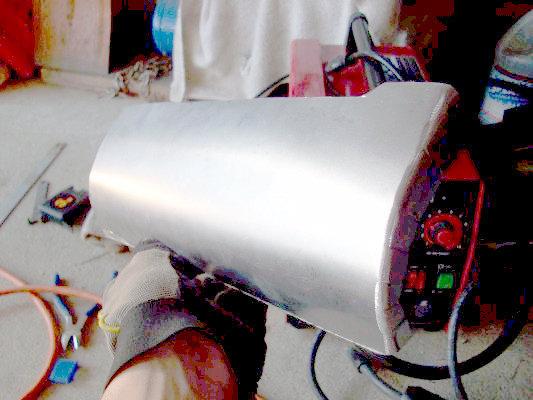
Made some progress today by making the skins for both sides. It was very time consuming shaping these panels, but not really difficult. I found it best to massage the sheets with my hands. I made my own sheet metal pliers, but they were making too many creases where I wanted smooth bends.
Driver's side
Passenger side
This one didn't come out as good as the driver side and I may redo it.
I think most, if not all, year round driven miatas in the winter weather states have some degree of rust in the rocker panels even if the paint looks pristine. My passenger side rocker panel skin was showing very early signs of blistering paint, but inside was a completely different story. If I buy another NA, I'll most definitely be looking at southern cars.
I used plain steel sheet. I haven't decided yet if I'm going to weld these in or go the epoxy route.
I got my welder setup with the gas and .025" solid wire this weekend. I had a real tough time laying down consistent beads. Half the time I was able to get nice looking welds that actually looked pretty compared to flux core. The other half the time the gun was popping and spitting and I would end up with some blobs sitting on the surface. From what I understand, poor penetration is a result of low voltage. If the machine settings don't change, what else could change voltage? I wasn't having any problems being consistent with flux core, what gives?
Don't you have a regulator on your gas bottle? You should be able to control the flow rate / pressure with that.
Also, are you getting the surface you're going to weld really really clean? Any contamination at all will cause you to spatter. I've been cleaning it with a wax and grease remover and then wiping that off before I weld.
Other possibilities are the distance you're holding the gun from the metal - the further out, the less shielding you'll get, and the wire feed rate. My HF machine has been criticized for having inconsistent wire feed. So far all I've done is practice, but it seems fine to me.
Still plugging away, slowly but surely. Welding on the car was a lot more difficult than practicing on a clean flat sheet. I didn't cut the rusted metal back far enough, had lots of burn through, lesson learned. In the end it turned out ok, not exactly pretty, but it's solid.
Just waiting on the temps in the northeast to come up a bit so I can glue the new panels in...
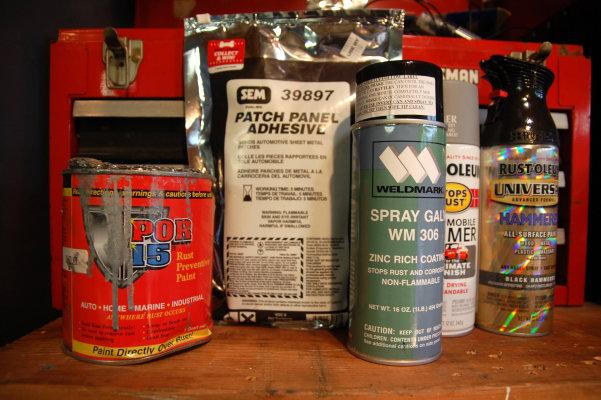
I'm about ready to bond the new panels in; just a few questions first. I bought SEM 39897 Patch Panel Adhesive. I read that adhesive is better suited for this application than epoxy and I read positive things about this particular product. In the instructions, it says to prep the surface by grinding with a 36 grit sanding disc. If I do that, I'll completely remove the POR-15 and be down to bare metal. I don't like the idea of leaving any bare metal exposed in there. Mal, what did you do? If I scuff the coated surfaces with some 200 grit sandpaper will I be OK?
What can I use to fill the slits on the end?
Should I use an epoxy like JB Weld or can I use regular body filler? Some of them are maybe 1/8", seems like too much for body filler. Whatever I use I don't want it to crack in the future. Thoughts?
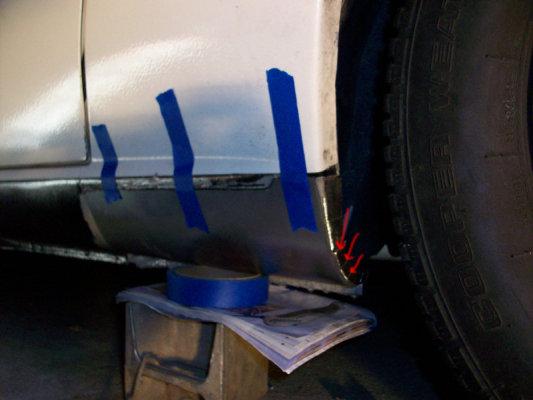
I used the same method shown in the ehow video and elsewhere, mine just aren't quite as tight as they got in the ehow video. rem83, I'm not sure what you mean by filling that with metal? As in welding the seems?
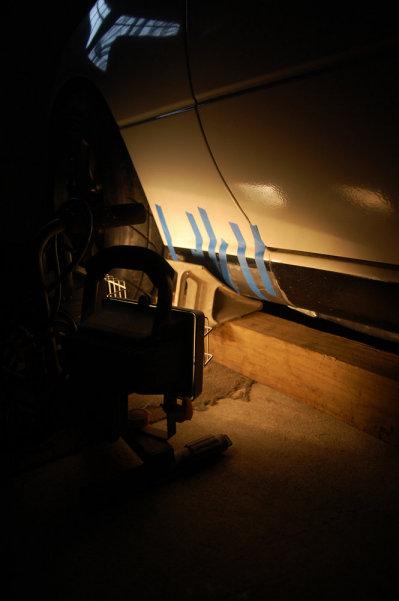
Maybe the first picture was misleading, I played with the levels on this one to enhance the part I'm talking about. I'm looking at the gaps between the bent tabs in the wheel well. They're not much, I'm just wondering the best way to make that surface smooth.
yeah, with the slits - weld them up, grind them down and paint.
Made some good progress this weekend; finally got the new panels bonded in. I used the SEM 39897 Patch Panel Adhesive which worked incredibly well. I would highly recommend it to anyone doing this job. A bit pricey, but you get what you pay for. The tube I got is made to be used with a 3M pneumatic adhesive gun so it was a bit of a PITA to squeeze the tube by hand.
I bonded this tab to the back side of the existing panel to give the new panel support where the rocker structure is recessed. As with everything else, coated generously with POR15. I did this on Saturday, baked with work lights overnight and bonded the outer layer Sunday.
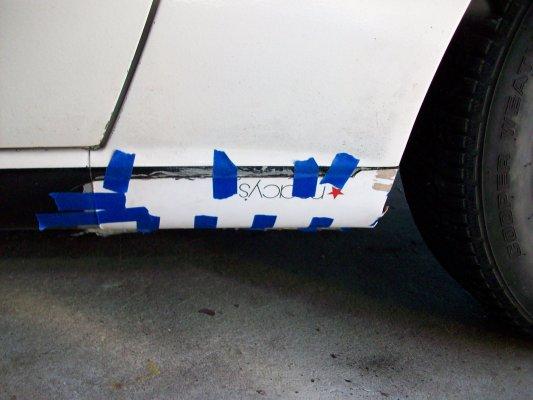
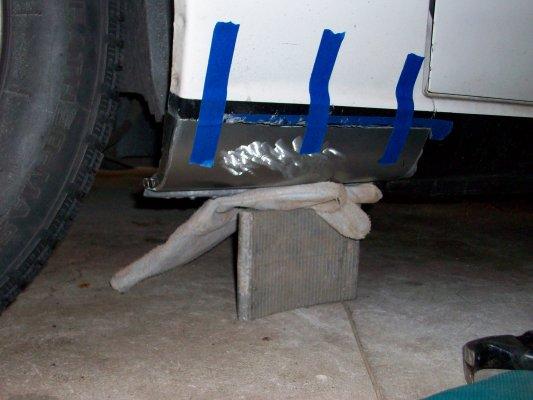
The new panel bonded in place. The 3M adhesive sets in 5 minutes so by the time I layed down beads on both faces the masking tape and wheel chock supports were hardly necessary. I was able to use work lights to keep the new panel between 90 and 100 F.
And, after a few hours of "baking" they're very solid and ready for finish work. I might get lucky on this side and not need to touch the white.
This side, not so much.

Thanks for the kind words everyone. I thought about adding some sort of drains, but ultimately decided to just replace what was there. I also agree that drainage, or lack thereof, is the cause of these failures, but I think it's really only a problem with winter driven miatas. I don't think rain water itself is a cause for concern; its the slushy, salty, sandy mixture commonly found on northeastern roads in winter months. On my car, the space between the rocker panel structure and outer skin was packed with silt, and I think this was the real problem.
My miata is now only driven on nice days April - November. If I'm wrong about the drains, I guess I'll be replacing the rocker panels in another 15 years / 238k miles
I still think it would be a prudent idea to seal off the rear wheel well pinch welds with a sealant even if the car is only going to be driven in summer weather. Driving in a heavy rain can add a fair amount of water/debris/silt if those pinch welds have any porous areas.
I've looked at cars in the Chicago area that were allegedly never driven in winter weather that had rusty rear rockers. So while winter driving conditions certainly is a rear rocker panel killer I think any road water introduced through the wheel arch pinch welds will eventually rot the area.
I hate bondo, such a temperamental thing to work with. The new panels have some funny dimples in them like a bad nose job, but I think with the black hammercoat they'll look fine. Feels good to be rust free 
It seems to get in via the unsealed seam that connects the inner fender liner to the outer rear quarter panel. There's really no other logical point of entry that anyone else has been able to ascertain.
Though it's been 4 years since I got my 14k Miata, but I still haven't sealed mine yet. I think I'll quit putting it off and get a tube of that 3M automotive body caulking, and see how well I can attack the problem with the wheels removed. As I mentioned before that stuff is paintable after an hour or so, so I can just dab some single stage paint on it and hopefully forget about water ever getting trapped in there again (let alone soil).
I've only been forced to drive in rain a couple of times (normally it stays in with the top down and only comes out for good weather), so I haven't bee sweating it too much
Austin I was just curious as to what gauge sheet metal you used for the patch panel?
What was the cause of the "funny dimples" you mentioned?
22 ga. steel
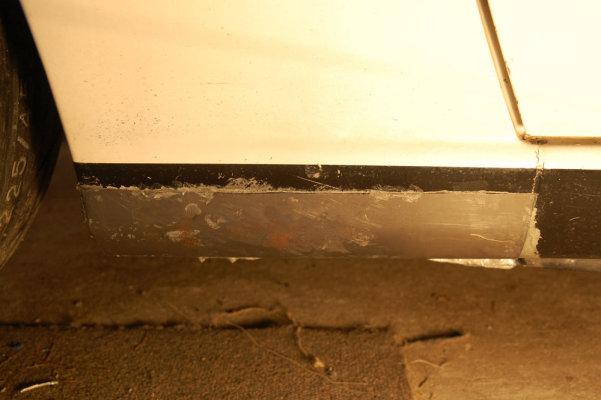
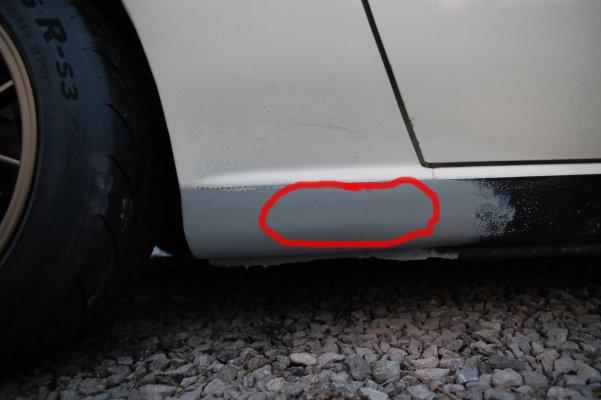
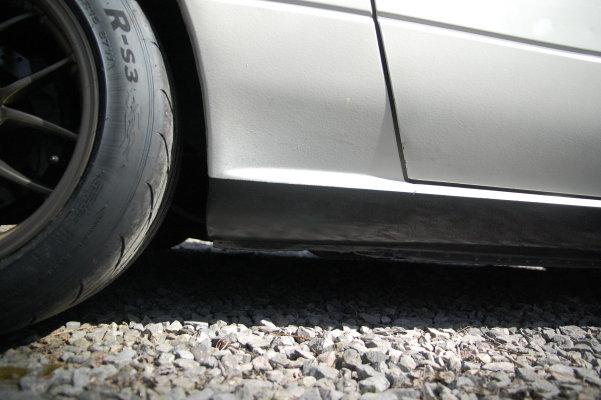
"funny dimples" was the wrong way to describe it. I circled the area I'm talking about in the pic below. It's an uneven valley, I tried to find a picture where it was most visible. I would say it's a result of my autobody experience, or lack thereof  .
.
Here's some of my thoughts
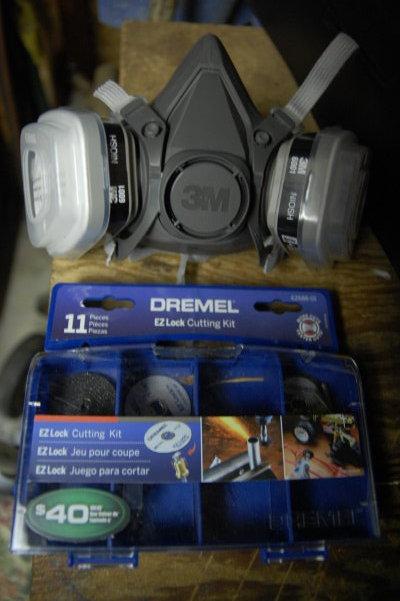
First, I would suggest getting these 2 things; 3M vapor mask and this dremel cutoff tool kit. The grinding and cutting is very messy, those traditional paper dusk masks didn't cut it for me (no pun intended). This cutoff kit is superb; the blades last a long time and make very nice cuts. Some other tools I used for this step: chisel set, hammer, angle grinder, dremel.
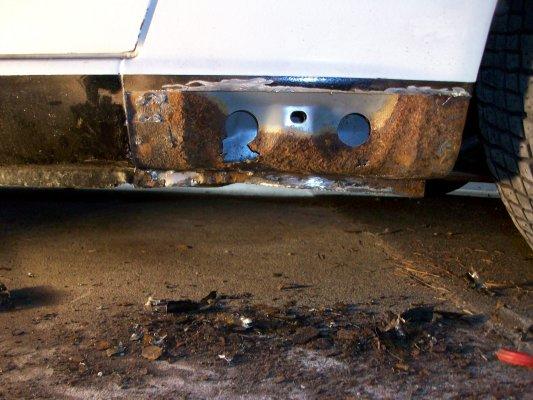
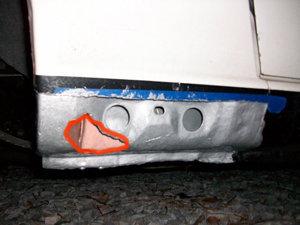
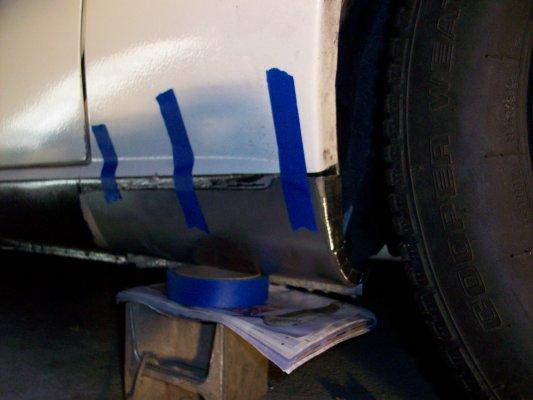
The first thing I did was to poke the loose rust with a screw driver. If the paint is only bubbling and the panel is still solid you won't be able to, but if it looks like mine below you'll remove quite a bit without even really doing anything. Next, I'd make these cuts with the dremel tool shown by the red lines.
Put a piece of painters tape down where you'll make the top horizontal cut. Measure and draw a straight line on the tape. I didn't think of this until I did the second side and it was helpful.
For me, the middle section came out with only 3 cuts because the bottom was rusted out. Otherwise, I'd make a horizontal cut through the middle to remove that piece. When cutting, be careful not to go too deep. Cut a little, check, then cut more until you're through. Once you do a few inches you'll get a feel for it.
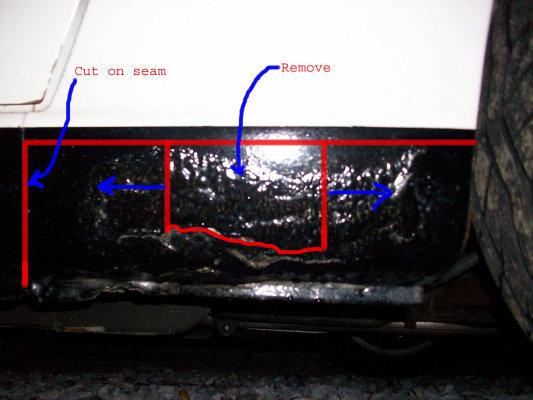
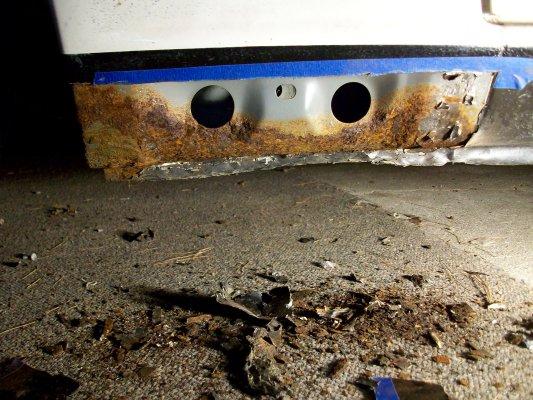
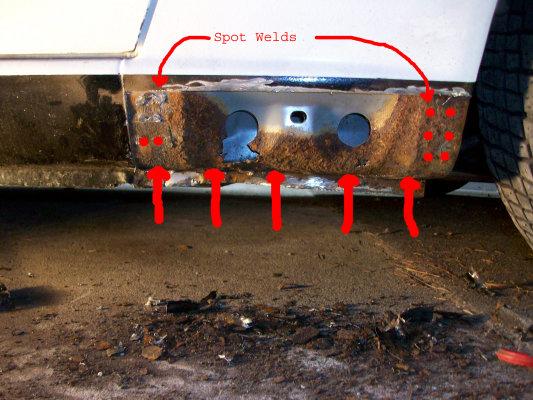
Here's the "tricky" part. The red dots represent approximate locations of the spot welds. The arrows are the spot welds on the bottom surface. Work in the direction of the blue arrows above, by peeling the panel away. When you get to a spot weld, I found chiseling it off to work best. Chiseling it off made for less work with the angle grinder later on.
Keep cutting away small sections with the dremel, peel some more, chisel, repeat. I'm sure there are other ways to do this, this is what worked best for me.
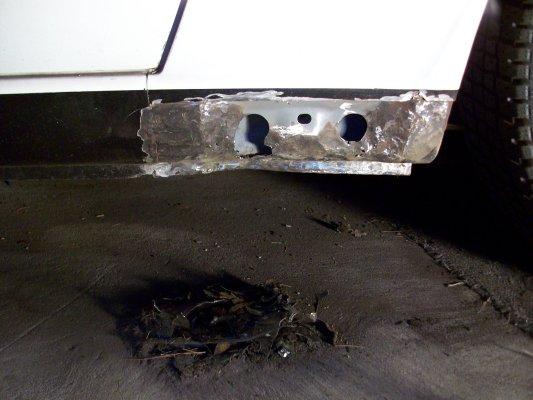
In the upper left are spot welds that I did chisel off. I used red dots to show approximately where the other spots welds are that I chiseled off.
Once you get the skin off, it's just a matter of grinding the rust away. I used a combination of the angle grinder, various dremel bits, and wire brush.
This was the worst part of the job. My original plan was to cut the rust out, clean up the inside, POR15 everything, then have a body shop replace the panel. Once I got through this step, there was no way I could justify paying someone $900 to do the rest. You'll see how straightforward replacing the panel is once you cut it away. With the BTDT panels, this can easily be DIYed in a weekend with very very good results.
Hope his helps. Good luck with your project 
That was an extremely helpful post Austin...thanks a lot!
Just one more question. Did you have to cut away or grind off or remove any metal on the wheel lip that folds inward and is crimped/spot-welded to the wheel well? I know your patch panel was shaped and formed to overlap and cover that area so I was wondering how the rusty panel you cut off terminated around there?
The factory panel wraps into the wheel well. I think theres a few spot welds on that face, but I forget offhand. I continued the upper horizontal cut into the wheel well. Basically, the panel that I formed is the same as whats there in terms of how it wraps around.
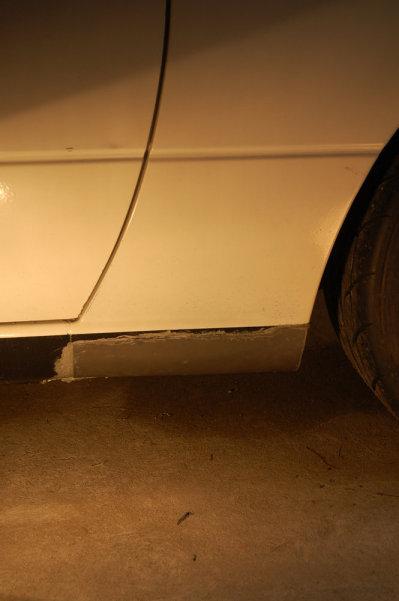
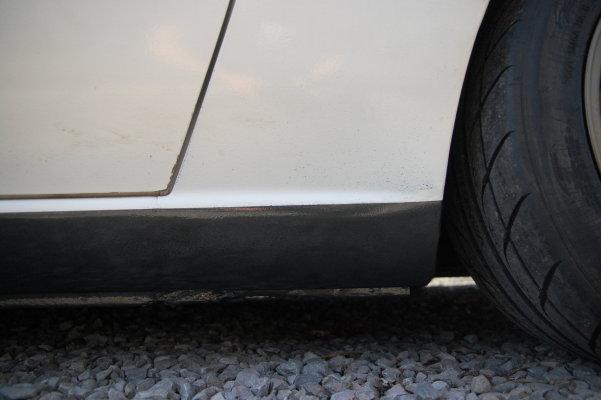
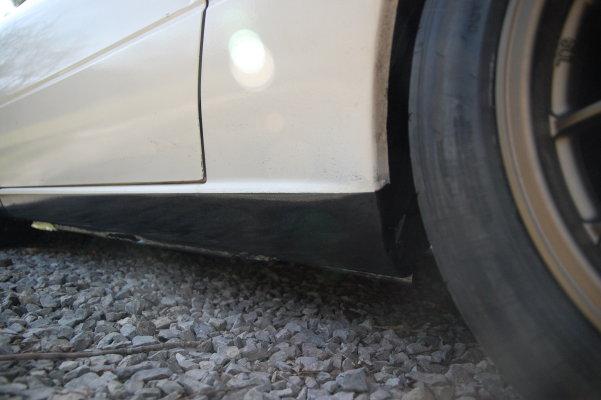
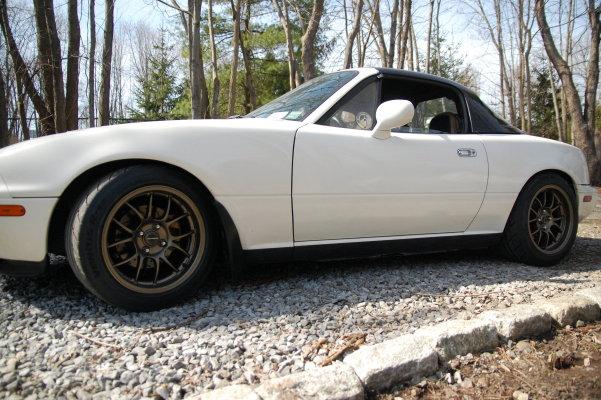
Almost 3 months later, the project is complete  . The rustoleum hammer coat looks perfect on the rocker panels! I'd be surprised if anyone could tell I replaced these without a thorough inspection.
Well written, I think I'll be doing this in the fall. Thanks
Posted by fez on 6/27/19 @ 9:09:28 PM