You must be logged in to rate content!
21 minute read
Nissan 240sx Automatic to Manual Conversion
Compliments of roushman90 @ http://zilvia.net
READ FIRST: Don't rush this process, make sure you have EVERYTHING you need before you start. Don't just use this write up, use every piece of information you can find.
This write up should answer pretty much all questions about manual swap in S13. If you have any questions please feel free to ask. Also feel free to correct me or add information and I will edit my information! Thanks for reading!
Phase I: Gather Required Parts (More parts required if it's S14)*
- S13 Manual Transmission (DOHC or SOHC; Either work, different gearing, S14 will work as well)
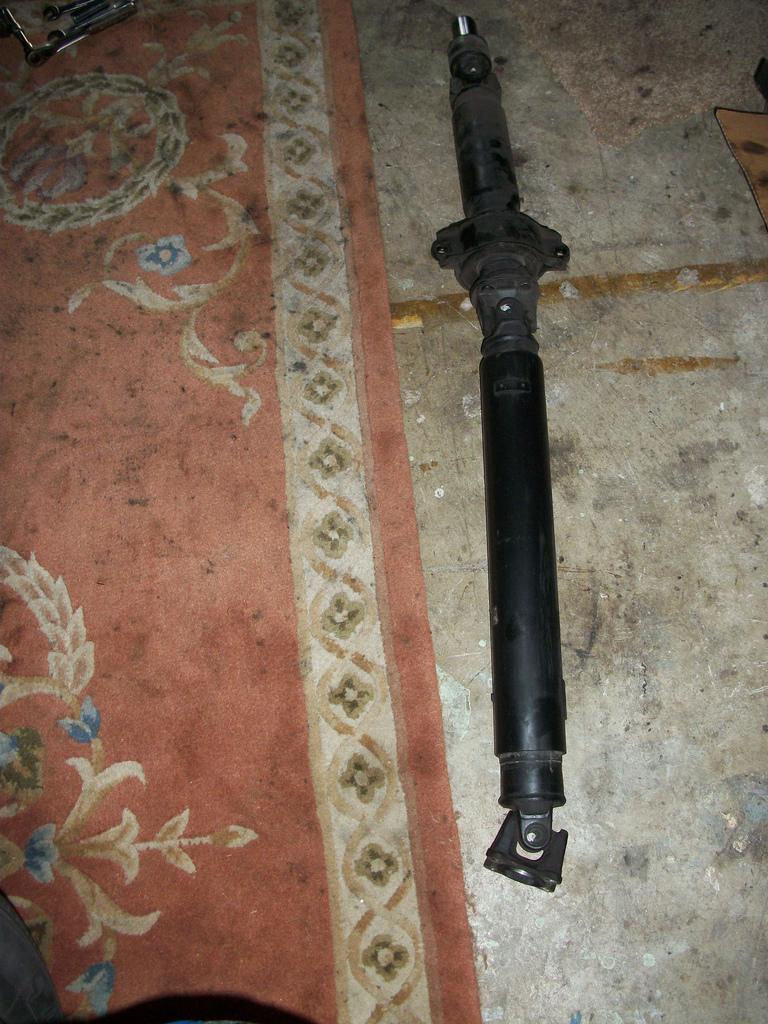
- M/T driveshaft (A/T is a bit longer, won't work)
- M/T Clutch Kit (I suggest buying a new clutch. Clutch Kit should come with Pressure Plate & Throwout, also make sure you get a MANUAL pilot bushing)
- M/T Flywheel (Either new or resurface used)
- M/T Flywheel Bolts
- M/T Engine to Trans Dust Plate (Or bend A/T one to fit)
- M/T Transmission Crossmember (Slightly different from A/T)
- M/T Transmission mount (Suggest Nismo mount, stiffer than stock)
- Clutch Master Cylinder (Suggest new, if not, leak test)
- Clutch Slave (Same as Master, buy new!)
- Complete Clutch Pedal assembly & Clutch Pedal
- M/T brake pedal (Or cut A/T to M/T size & use M/T rubber cover)
- For clutch line, couple of options. 1) Use OEM hard line from Master to OEM rubber line OR 2) Buy Stainless Steel Auto to Manual conversion clutch line (Straight from Master to Slave & cuts out factory clutch dampener)
- OEM Rubber Trans Dust Cover
- OEM Rubber Trans boot & finisher plate
- M/T Shift boot w/ M/T shift boot center piece
- Shift Knob
- Three quarts of your choice of GL-4 rated Gear Oil (NO GL-5), Transmission takes approx 2.4 quarts
Optional Parts:
- Short Shifter (B&M, ISIS etc.)
- SS Clutch Line
- Upgrade clutch
- Rebuild Transmission
- Solid Shifter Bushing
- One-piece Driveshaft (Aluminum or Steel)
- Nismo Transmission Mount
- Lightweight Flywheel
- Aftermarket Clutch Fork Pivot Ball
- Magnetic Trans & Oil Pan plugs
Phase II: Removal of Automatic components
So before we start pulling stuff, we should double check that we have all parts we need & have the proper tools to complete the job. Believe me, having the right tools for the job will mean the difference between two minutes and two days.
Before anything comes off there are three things that need to be done: 1) Drain Transmission Fluid (To avoid a mess) 2) Remove Battery (For safety) and 3) Jack up your car and safely secure it with good jack stands. Before climbing under give the car a shake and confirm that it is on the jackstands solid. I also leave the jack under just in case and throw spare rims under just in case.
1) Remove all interior center console parts. This includes the center console, and shifter trim. Take it out, you won't be needing it for a while. Make sure to disconnect the plugs at the cigarette lighter & power mirror. (The shifter should now be completely exposed)
2) You're transmission may still be dripping oil, so let it drain real well for a while. While you're waiting for that, let's now pull out the A/T Shifter assembly. This is pretty simple once you have the trim pieces gone. First disconnect all plugs on the shifter assembly & also get underneath car to disconnect the A/T Shifter from the linkage that goes to the transmission. Just take off the little clip holding it to the shift linkage. Go back up top and remove the four screws holding the base of the shifter assembly on. Now you should be able to pull the whole assembly out whole.
3) Next, let's get rid of that A/T driveshaft. First remove the four bolts holding the rear of the driveshaft to the differential. Once you get those off remove the two bolts holding the middle of the driveshaft. The diff should not be leaning down, just pull it off the A/T trans and voila. Six bolts and you're done.
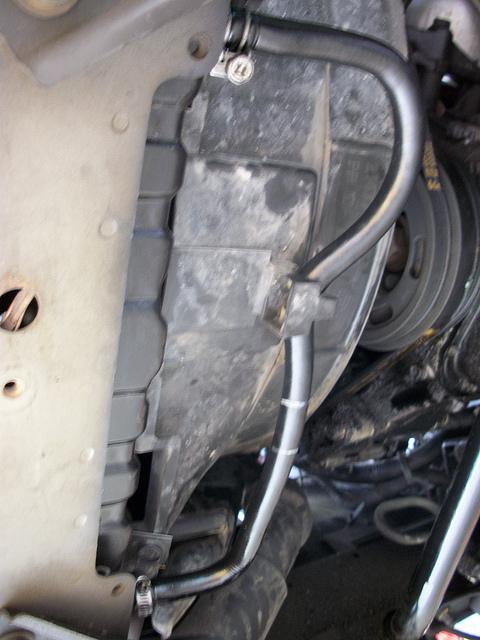
4) Now let's unplug all the sensors on the transmission we can get to. After those are unplugged, there are two cooling lines coming off the A/T transmission that go to the bottom of the radiator. Let's remove these lines and plug the two holes at the bottom of the radiator. The passenger side line is much easier, Use a 19mm to unscrew the big bolt holding it to the A/T transmission & get something underneath it. It's going to leak out more fluid! Then trace it's path to the radiator & remove all screws holding it down. Then last remove the clamp holding the rubber piece to the radiator. For the driver side cooling line start at the radiator and take off all the screws holding it on & disconnect it from radiator but you won't be able to get to the 19mm on this side holding it to the transmission. So just bend the line out of your way (you won't be needing it) and put it in a position that won't break anything when you drop the A/T transmission.
Before moving on, use the longer rubber hose off one of the two cooling lines to connect the two holes at the bottom of the radiator. Makes things simple, instead of JB Welding the holes shut. Just make sure to put the clamps on nice and tight!
5) Finally we're getting somewhere, time to get those bellhousing bolts off and this A/T out! There are going to be some difficult ones, so be prepared. Try not to get discouraged. At one point I was ready to pull the engine just to get the transmission out, but it ended up not being as bad as I thought.
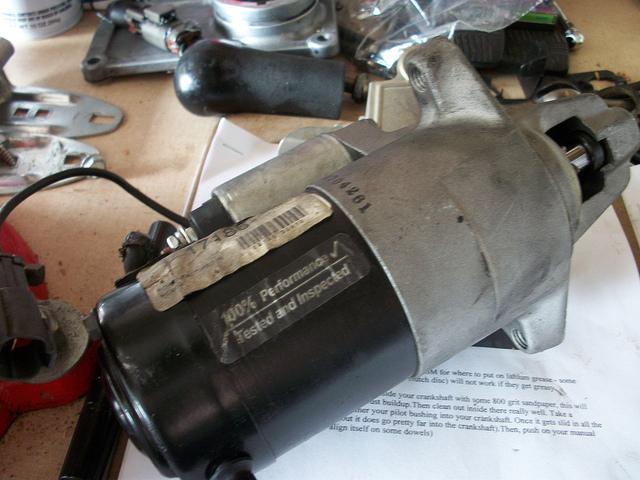
Remove the bolts on the bottom first, they hold on the A/T dust plates, also completely remove those. Then start working your way up. Most aren't too bad. I suggest having at least one friend to help from the top or the bottom either holding the socket on or whatever. Having a friend help makes this process much easier. Once we get all the bottom/side bolts, let's get up top and have a look at the engine bay. To remove the Starter, remove the bolts holding it to the bell housing & disconnect it from wiring. To get to the top three bellhousing bolts you will need to remove a few small things in the way. I suggest you take some pictures of how everything is near the back of the bay so that you know exactly how things went when you get around to putting things back on. I didn't have to remove much to get to the top three bolts, but I did have to move some things in the way. I guess it really just depends on how small you're hands are!
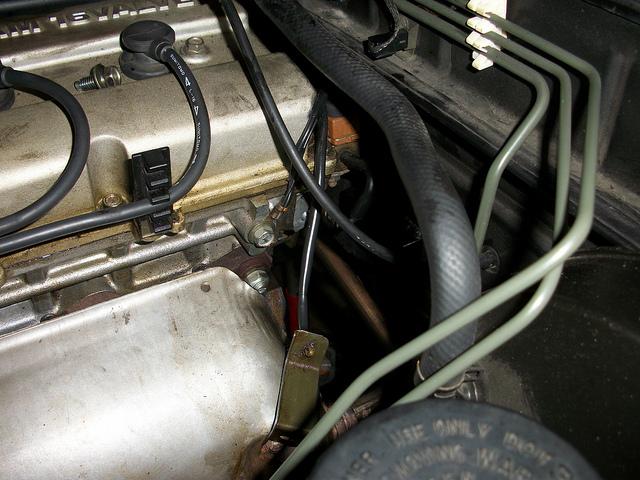
For the top passenger side bolt: Remove the screws that secure the big hose going to the BMC along the top of the firewall. After it's loose, pull it back and out of the way. Pop the throttle cable out of its guides and move it out of the way as needed. That's all I needed to move to get to the bolt.
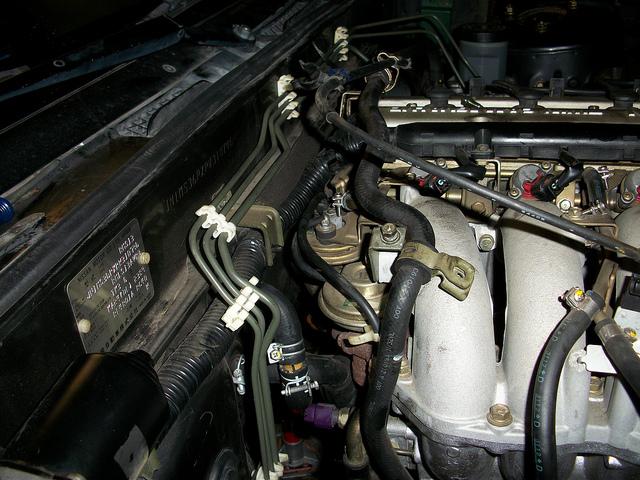
As for the driver side, I removed a few small things, check out the pictures below:
I believe it was the O2 sensor wire that I removed from where it was mounted by a screw on the block to get more room & I also took of the small ground wire off the top of the firewall. (Drivers side) Nothing too major at all.
To get the top center bolt out, remove the two nuts holding the transmission to the transmission mount. Place a jack underneath the rear of the transmission and jack it up until it can't go higher (Until it hits the chassis). Doing this gave me just enough clearance to reach my arm in from the passenger side and break that elusive "top bolt". If you use this method it really isn't that bad. It also makes getting the top driver side bolt easier as well. (This piece of information is thanks to Christian! )
*Now is a good time for a beer break*
6) Before we drop the transmission, we have to remove the four bolts that secure the torque converter to the flex plate (a/t flywheel). To do this, Pull off the dust plate on the bottom front of transmission. Use a screwdriver to push the flex plate along and get to all four bolts. Once you've done this, now you can make sure the transmission is secure and remove the four bolts on the cross member. Once you remove the cross member bolts the transmission should be resting on one or two jacks. Using the jack(s) try to move the transmission backwards slowly and it should come right out. You may have to give it a little wiggle. Slowly lower it down on the jack and remove any connections off the transmission that you may have forgot. Remove the torque converter and set it with the opening facing upwards so it won't leak oil everywhere. Move the transmission out from underneath your car using the jack(s).
7) Now we have to remove the flex plate or "automatic flywheel". It is held on by six 19mm bolts.
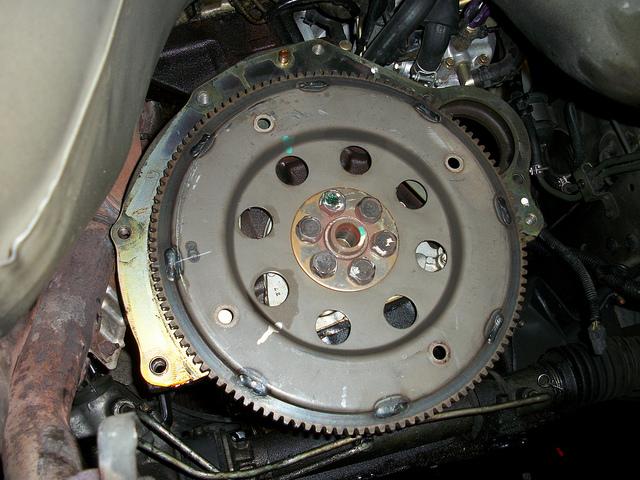
This is the time when an impact gun would come in handy but not quite necessary. It can easily be done by having a friend hold the crank steady with a 27mm(1&1/16 SAE) socket and a breaker bar. They're only torqued to about 120 ft/lbs I believe. Once all six bolts are off, wiggle and pull the flywheel and it should come right off.
8) The last part to remove is the A/T adapter bearing which is where our new M/T pilot bushing will be going very soon. Most people say to rent a pilot bearing puller/slide hammer from AutoZone/Kragen but there are other methods such as the "grease" method. I will post a link or two so you can see different methods. To get the A/T one out I stuck the end of the threaded slide hammer into the A/T bushing and just pryed it out. Once I tried it like this, it came out without a problem. But feel free to try whatever method suits you best!
The one that Kragen/O'Reily's rents doesn't work on our cars, If I remember correct it is for VW.
MG Pilot Bushing Removal and Installation - Les Bengtson
http://www.240sxforums.com/forums/general-...ot-bushing.html
So now you have got everything pulled, time to install the M/T gearbox finally!
Have a ice cold beer and pat yourself and/or friends on back!
Phase III: Installation of Manual Transmission & Components
1) The first thing I would do before anything is drill holes to mount our clutch master cylinder & clutch bracket. This isn't very difficult as you just need a drill or angle grinder and some bits. You have to make a total of three holes in order to mount these up. Nissan made it easy for us, and left the template so all you have to do is pull back the carpet and locate where the template. (Picture below)
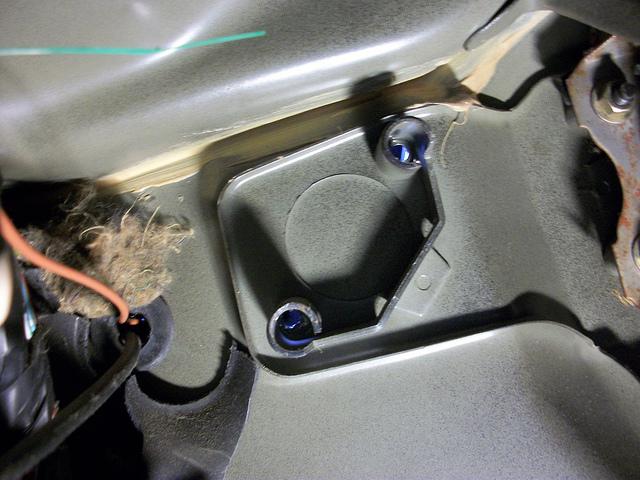
First, remove the A/T shift lock unit, but don't toss it. Leave it plugged in, just tuck it somewhere out of the way.
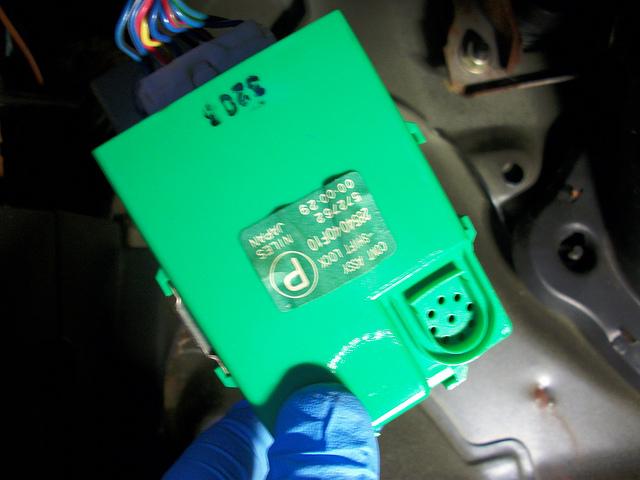
It comes off with one bolt, save that bolt, you will be using it to mount you're clutch bracket.
Now for the three holes. First I found a drill bit just slightly bigger than the template hole, and drilled the two outer holes. The third hole took me longer just because I didn't have the proper tool(s) to make that big of a hole easily. I just used my biggest bit and kept hacking at it until it was big enough. Then I used a file to smooth it out.
Once you have got all three holes done you are ready to install the master cylinder and clutch bracket/pedal.
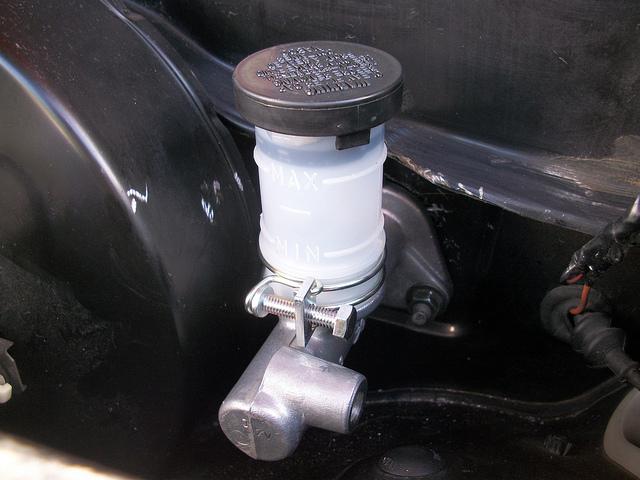
Just mount the master cylinder up and have a friend inside car to pop on the pedal bracket. Screw on the two nuts in the engine bay for the master cylinder finger tight, then get inside the car and mount the clutch pedal bracket. The clutch bracket is held up top by one bolt (The bolt you removed for A/T Shift Lock Unit). So grab the bolt you had set aside and put it in to hold the bracket up. Now make sure all bolts are tightened. You should look like this now...
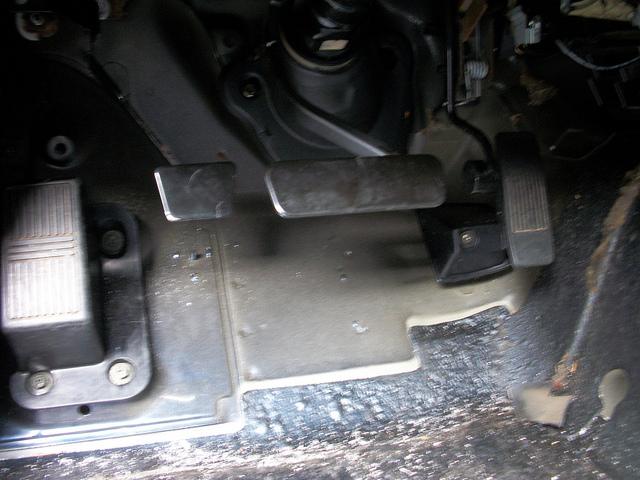
Next, you can either install the M/T brake pedal OR you can do what I did: Cut the A/T brake pedal down to the M/T size and simply put a M/T pedal cover on it. I used an angle grinder to cut the pedal with no problem.
Now you're done with the pedals.
2) Wiring: This can be done later, but I chose to get it out of the way now.
Keep in mind this is for S13, as S14 WILL be slightly different.
For the S13: You only need to wire two things up: The reverse lights & a plug underneath the passenger side engine bay fuse box.
Part A: For the reverse lights, all you do is find the row of three plugs on the back of the passenger engine bay fuse box. Now, look at the second plug down. Pin 3 & 6 should be a black and a bright green wire. Locate the ends of those wires and splice them directly to the reverse gear switch on the M/T. It should be the sensor closest to where the clutch would be on the M/T bellhousing.
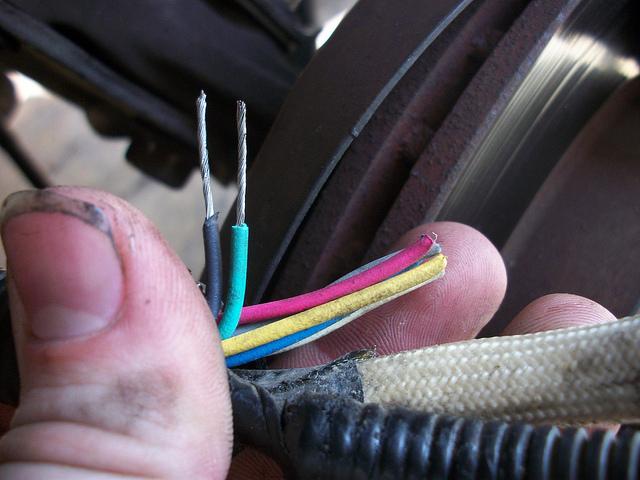
^These black & green wires are for the Reverse Light switch^
Part B: To make the car start, we have to trick it into thinking it is in P (Park) at all times. To do this, locate the plug that is underneath the row of three you were just looking at. It is literally underneath the fuse box. Now, unplug it and clip the wire on the A/T harness side. Tape up the exposed wires you snipped. All we have to do now is jump the two wires (Black &Tan wires) to themselves to complete the circuit so the ECU thinks we are in P at all times. Once you jumper them together, secure them nicely and tape them up so the weather can't get in. Just simply plug back in the piece you just jumpered and you're officially done with the wiring. DO NOT use twist caps to jump the wires like I did, I suggest soldering them or at the very least use a real connector LOL.
Pictures:
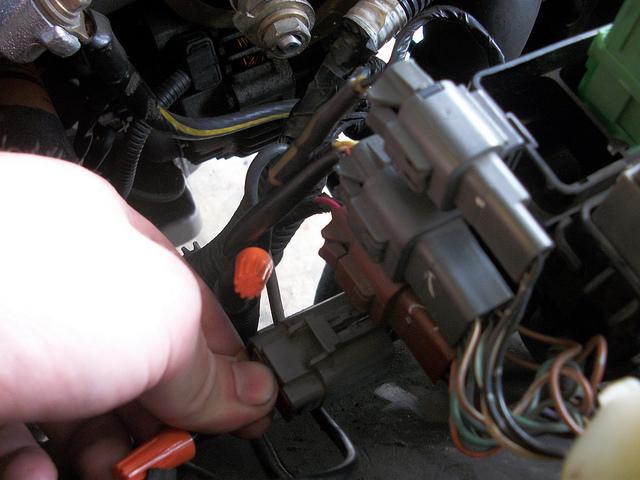
^This is the plug we need to jump to complete the starter circuit^
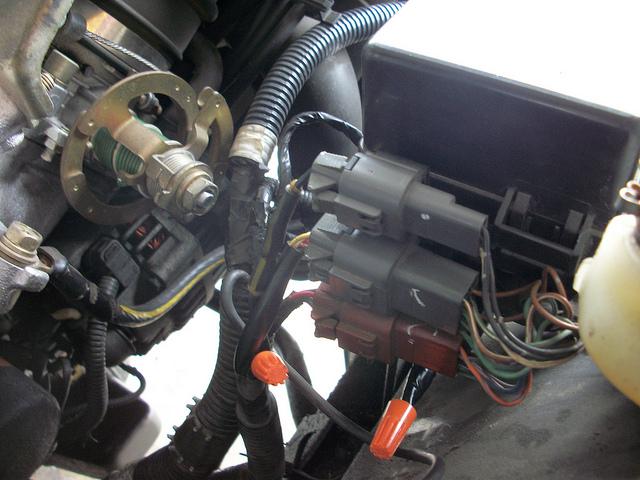
^Once we jump it & plug it in it should now look like this^
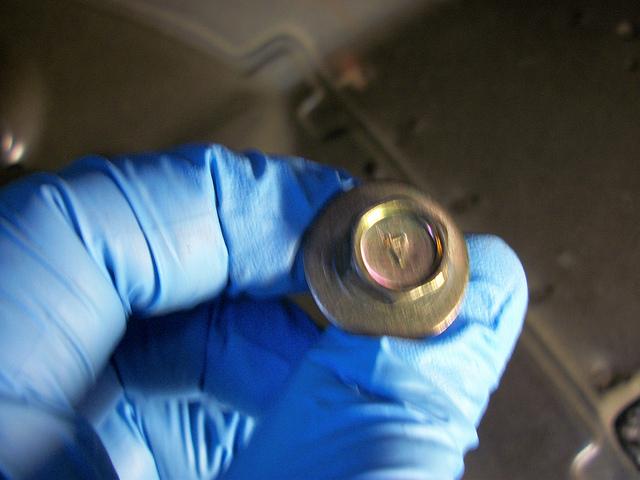
3) Now install you're new M/T pilot bushing.
Just like removing the A/T adapter bushing there are various methods to install the new pilot bushing. I lined up the bushing and tapped it in with a rubber mallet until it was flush with the outer lip of the crank. I also used a socket the size of the bushing to get it in right. Just make sure not to force it in crooked, it will break pretty easily.
Now put on the M/T engine to transmission backing plate. This goes between the engine and transmission and it aligns on dowels. If you were unable to source a M/T backing plate you can also use the A/T but the bottom will be exposed (not good).
Mount the M/T flywheel up and put in all 6 M/T flywheel bolts (hand-tighten). Torque the flywheel in a criss-cross pattern to 100 ft/lbs. To keep the flywheel from moving while tightening have a friend hold a breaker bar on the crank pulley again with a 27mm (1&1/16 SAE) socket. Make sure to double check all six bolts, you do not want a loose flywheel!
Before you install the clutch break out the Brakleen (brake cleaner) and clean the flywheel real good. You want a clean surface for the clutch disc to grab. Using the alignment tool mount the clutch disc on the flywheel. Leave the clutch in with the alignment tool and confirm that you have the clutch disc on in the right direction (The disc should be marked "Tran Side/Engine Side").
Mount up the clutch pressure plate and put in all the bolts. Finger tighten all of them evenly then torque in a criss cross pattern just like the flywheel bolts. Torque first to 14ft/lbs then to 16-22ft/lbs. It doesn't really take much.
Replace the throwout bearing on your transmission with a new one. Don't skimp on the simple stuff. You don't want to drop the transmission in a month due to a stupid bearing! Slip the old TOB off of the fork it's mounted on and then you can hammer off the old bearing from the carrier since the old bearing is garbage. Grease the splines the TOB goes on(Lithium grease works). To install the new bearing place a 2x4 over the new bearing on the carrier and hammer it on. Just make sure to put it on straight, don't bend bearing! Once pressed on check to see that the bearing is still functional. Install the carrier back on with the fork opposite of removal.
Before we install the transmission remove the shifter. To remove just the shifter remove the C clip holding it in. Now we can get the transmission situated underneath the car.
So now we need to install the transmission into the pilot bushing. This is a pain in the ass and pretty much just comes down to trial and error. It took me and my two friends about an hour to get it in. We tried using jacks to slowly raise it up and into position but in the end it was just easier to lift it up and into place. After a tip from a friend we jacked up the front of the motor (oil pan) with a jack and block of wood to give ourselves a better angle at the hole. We lifted it so the starter hump was somewhat facing the ground and turned it as we moved it up. Once you do get it mated on there don't let go and get a few bolts in to hold it on! Put a jack under the rear of transmission to hold it up once you get some bolts in. Also, make sure you lower the front of the engine back down.
Install the M/T bellhousing bolts the opposite of removal and then put the lower dust plates back on.
Reinstall the Starter and reconnect the wiring to it. Jack up the tail of your transmission and install the manual cross member. Secure it with the same four bolts as the automatic cross member.
Once it is all secure make sure the speed sensor is plugged in and the reverse light wiring you did earlier is connected to the reverse switch on the transmission. Tuck and secure all wiring that is hanging loose.
Now you can install your M/T driveshaft. First I mated it to the transmission, then installed the middle mount (two bolts) then finally secured it to the driveshaft (4 bolts).
Before you reinstall the shifter, put your transmission fluid in through the shifter hole. The manual transmission takes approximately 2.4 qts. of GL-4 rated gear oil.Do not use GL-5 rated gear oil, it will eat away at yellow metals (your synchros are yellow metal).
Reinstall shifter with C-clip. Install shifter dust boot then rubber upper boot with finisher plate. Then Center console, Shift boot, and finally shift knob of your choice.
At this point, reinstall everything you removed or moved in your engine bay and make sure everything is how it was before you started working on it.
Run your clutch line from your master cylinder to the slave cylinder on the transmission. I opted for a stainless steel auto to manual conversion line from DIF to avoid the hassle of installing the hard line (It eliminated the stock clutch line and the useless stock clutch "dampener"; Makes bleeding the clutch line a lot easier). Fill master cylinder reservoir with DOT3 brake fluid.
Bleed your clutch line. To do this you preferably have a friend. First of all make sure the clutch master cylinder is full with fluid and make sure it stays full while bleeding (You will lose fluid)
One person should be open/closing the bleeder screw on the slave cylinder and the other should be pushing in/out the clutch pedal. To bleed, open bleeder screw, have friend push and hold in clutch, close bleeder, release clutch pedal. Repeat this until the pedal has a normal feel!
You're pretty much finished. Lower your car safely off of the jack stands or however you have it raised and put wheels back on if you took them off. Make sure everything you took off is back on and all bolts are secure!
Start your car. Now you've got a 5-speed!
You shouldn't have a check engine light or anything like that on S13, while S14 is a different story. Take it for a drive and follow whatever your personal liking for clutch break-in if it is a new clutch.
Here are some useful links to sites I used while I was researching and learning about the conversion:
http://forums.nicoclub.com/how-to-5-speed-...13s-t77784.html
http://forums.nicoclub.com/auto-to-manual-...on-t181139.html
http://ka24development.com/cwilfert/S14_tr...electrical.html