You must be logged in to rate content!
3 minute read
5 Bar FPR DIY
Compliments of Mikelly @ www.renntrack.com
The key is to follow these simple instructions:
HAVE A MANGET HANDY, YOU WILL DROP STUFF.
Have a DECENT LIGHT HANDY. You'll need it to see the stuff you drop!
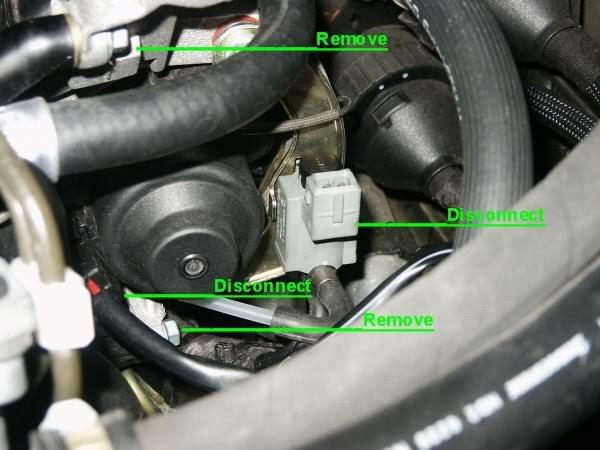
Unbolt the metal clip that holds the oil filler neck and rotate the neck counter clockwise and slide it up and out of the metal bracket. You can see a groove in the air pump bracket on the left side that that groove is where the filler neck must clear to release!
Next you'll see the air pump:

You want to remove the electrical connectors and these two bolts:
The trick is to rotate that pump completely out of the way to give you the space NORMAL HANDS REQUIRE... DO THIS AND YOU'RE GOLDEN:
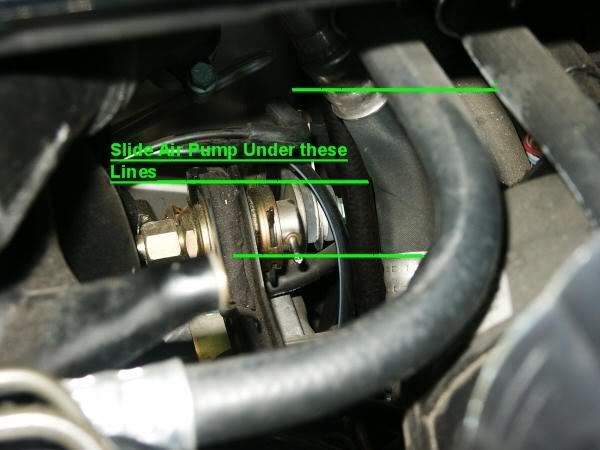
Slide the pump completely as far right as humanly possible, beyond those lines and you'll expose the fpr and clip. Without doing that, you can't get your hands under the clip to pop it out.
Once you get the FPR exposed, disconnet the vacuum line and get a screw driver or long needlenose plyer under the edge of the housing, between the clip and housing and pop it out...
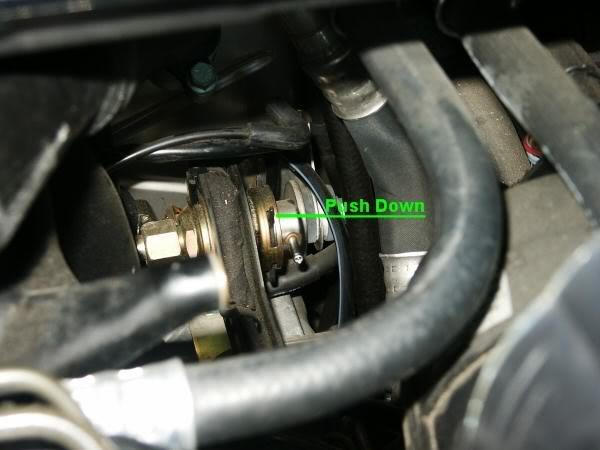
Once you pop it out, you'll want a rag handy to get the gas up... DO THIS REMOVAL WITH THE MOTOR COLD. No heat, or you'll have a nice car-B-Que!
When you install the FPR it will undoubtedly be a bitch... I used the clip to pop it into place once I got the new FPR in the hole... Once the clip was used to "pop" it in, I was good to go. Reassembly is 10 minutes, assuming you werent' like me and dropped a couple items that required finding!
It really is an easy 1 hour job.
Mike