You must be logged in to rate content!
22 minute read
In the Footsteps of Giants - VF Supercharger Install
Compliments of Purplxd @ www.6speedonline.com
Hi all,
Well thanks to seeing justatoy's installation thread, I too have decided to take on this adventure of a DIY installation of a VF Supercharger kit in my 2001 996 C2.
I'll be posting here the many trials and tribulations in an attempt to keep me motivated in seeing how far I have gone and to also get helpful information from the more educated of you out there on the subject.
Anyone that has done this, I know a few of you out there, that want my personal contact information (including home address to lend a hand  ) PM me and I'll send it your way.
Will post some pics when the kit arrives... it is the newest V3 kit and it's being built right now!
Cheers
Aaron
The website says it was last updated for the SC in 2006, so I doubt it has recent information.
As to the company and the kit version, I'm going off local knowledge about the quality of the kit and the install, so that gave me the confidence. I actually bought a used TPC kit a while back, but the install looked like a nightmare dropping the engine, etc.
As to V3, Vortex has made many changes due to market experience and installation feedback. For example, not needing an external oil supply and better cooling. I suspect the V3 is in reflection of Vortec and only minor changes to the overall VF piece. I'll take pictures and post them when it gets here.
11/21/2010
Just as an update, VF is putting the last bits and bobs together for my SC kit and should be shipping shortly.
Still have some garage organization to complete and a boat load of servicing to get done, so not too bothered...
Was looking up the V3 Vortec supercharger online today, neat piece of kit. Apparently, to answer a question I saw, you don't need a blow off valve unless you go over 6 PSI. As the kit is not intended to go over 6 PSI I'm assuming that is why there isn't one in the kit.
The V3 I saw online can go up to 22 PSI, but that is not something I am about to entertain with my install even if it were possible...
11/23/2010
Anyways... DIY costs is an interesting question. This would depend on you personally in terms of how much work you're willing to do on your own and how picky you get.
Justatoy (aka Stacy) did some custom billet hose mounts, oil separator, etc, etc and hired someone to do the electrical. I've heard builds like this taking $2k to do.
Technically speaking I'm at $1k already and it hasn't shown up, but let me explain. I'm doing a wad of servicing in preparation for this kit as I'm doing spark plugs, tubes, and coils so it has the best spark possible. I'm also putting in Mobile 15w50 and I need to change one of the front rad fans. Something I've been putting off, but since I have to pull the bumper anyways...
I'm also doing that 2nd gear detent mod to prevent any future pop-out issues. I don't have it now, but with the increase in boost coming into faster times in the RPM bands/gears, I'd say that doing that little upgrade may pay in the long run. Again, you have to remove the shields underneath for the SC install and the detent install, so why not. I'm sort of one of those "while in there" people.
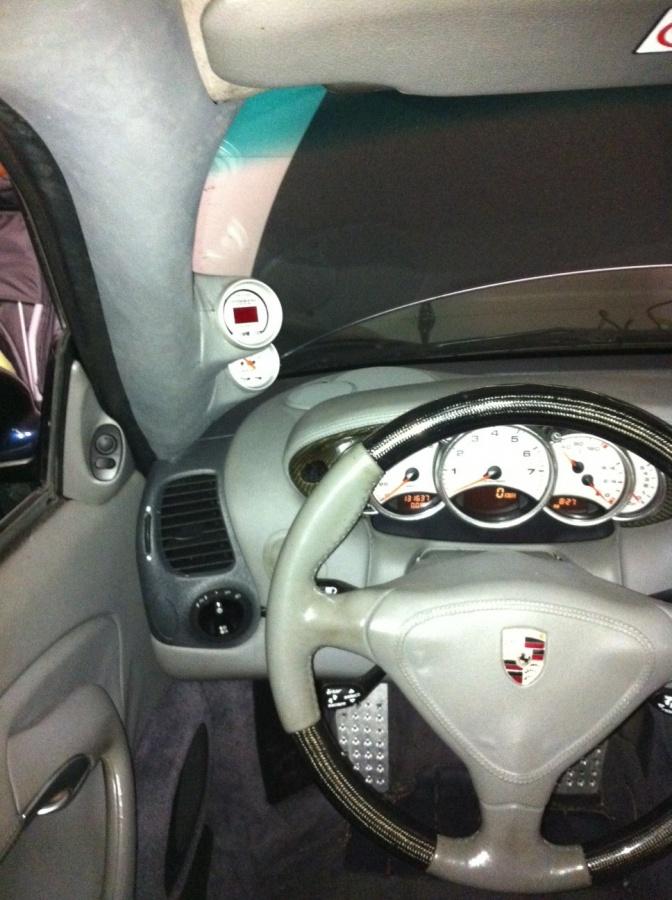
Ok, now to be flamed... I'm also installing the boost gauge but I'm going to make it look as factory matched as possible. Some will say "rice!" adding any gauges, but I like to see information. It isn't the full meal deal gauge as I have the Durametric to do data logging.
Other things include changing the headlight bulbs and polishing the headlights, etc, etc. Lots of winter work getting caught up on to really have a sweet ride next spring.
Anyways what was the question... oh yes, is it DIY and install costs. Yes it is DIY. Install costs are unknown (ignoring the above as that doesn't really count). However, I will keep track of any SC unique purchases. I'll include the boost/vacuum gauge setup in this area as why the heck else would I have one... although it will be listed as optional.
To DIY, to me anything is DIY. I'm also patient and have been around cars my whole life as my Dad is a mechanic and hot rodder. I've also built cars with my Dad. Now old '57 Chevys and my current 1969 Super Bee are FAR different than these. But I can say I have done a lot of work on my own to the Porsche and it is a very easy to work on, logical car.
Plus there is a BOAT LOAD of information on the 996 out there now as more people pick them up used and have been modding them. This thread and previous threads on my blog are case in point...
I was like you, nervous to spend the money. At $11-12k there was no way. At $7k with shipping, it is still expensive. Sometimes I think, WTF are you doing man!?!
But as the tracking information puts my SC closer and closer, the grin on my face gets bigger and bigger... I have been watching SC'd 996s on YouTube for ages! The missus keeps saying "what the hell is that noise?!"
I don't know if this answers anything. But if I were you and had the cash, I'd say go for it... we can help each other with our installs as I think you have the same year.
11/30/2010
Hi all,
Just a quick update... My SC has been delivered and I'm going to pick it up tomorrow as my new exhaust is coming in tomorrow and would rather just get it all in one trip.
Today I got some basics done, will see if I get some more time to tackle a few more things on the task list.
- Removed the K&N Intake
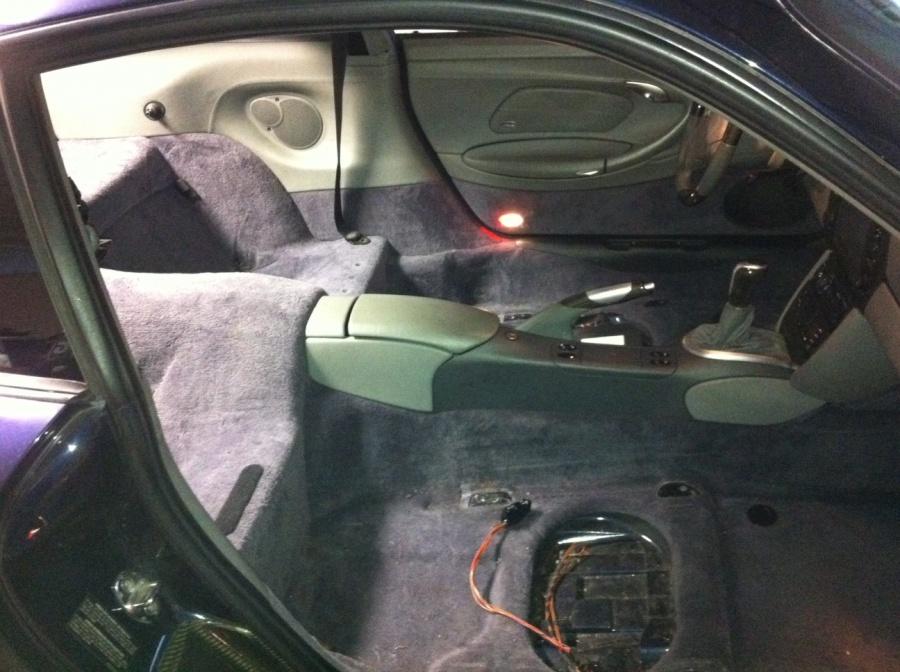
- Removed the Teq Rollbar and GT3 seats
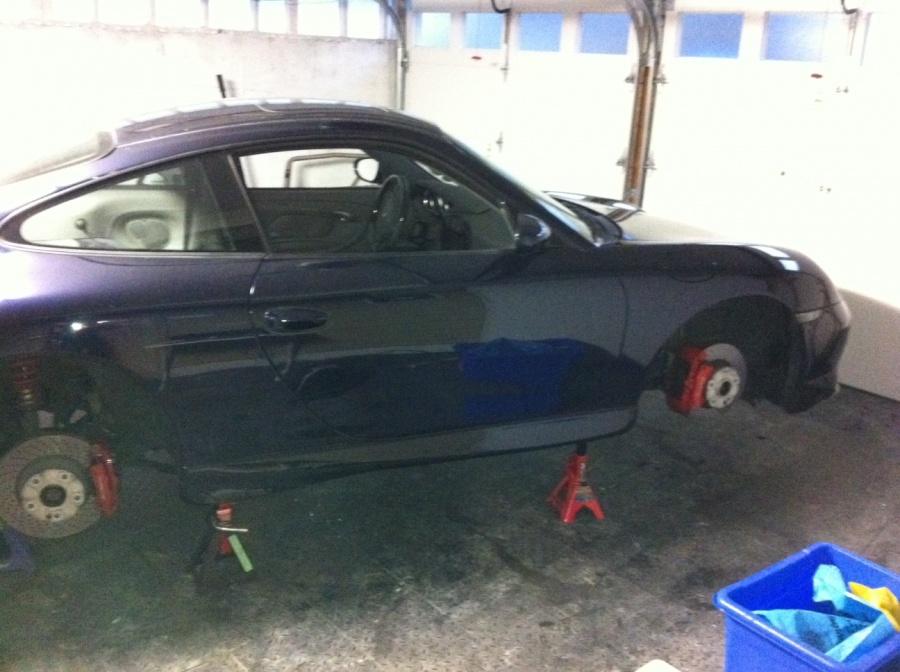
- Jacked the car higher
- Removed the wheels
12/1/2010
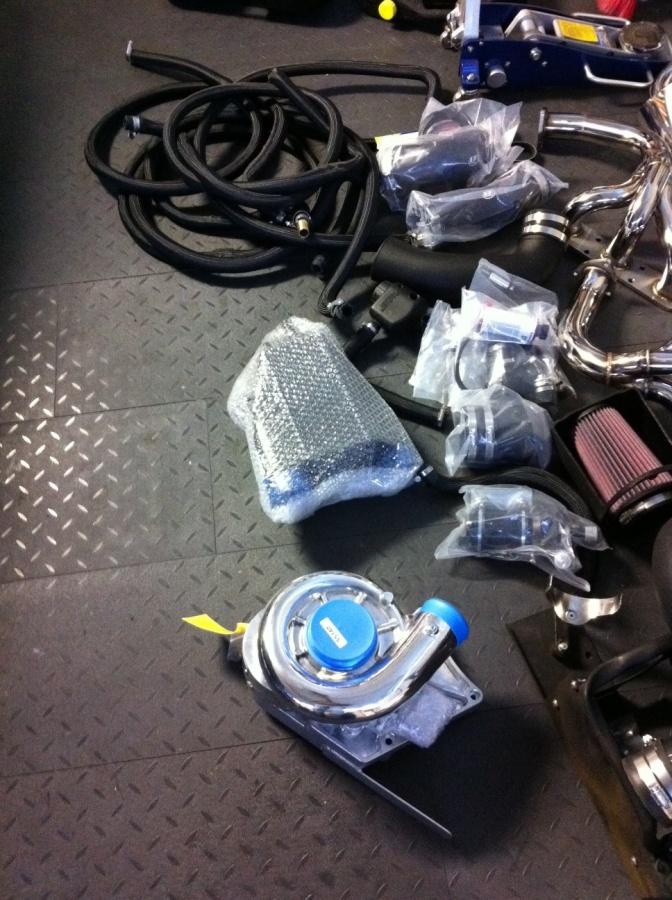
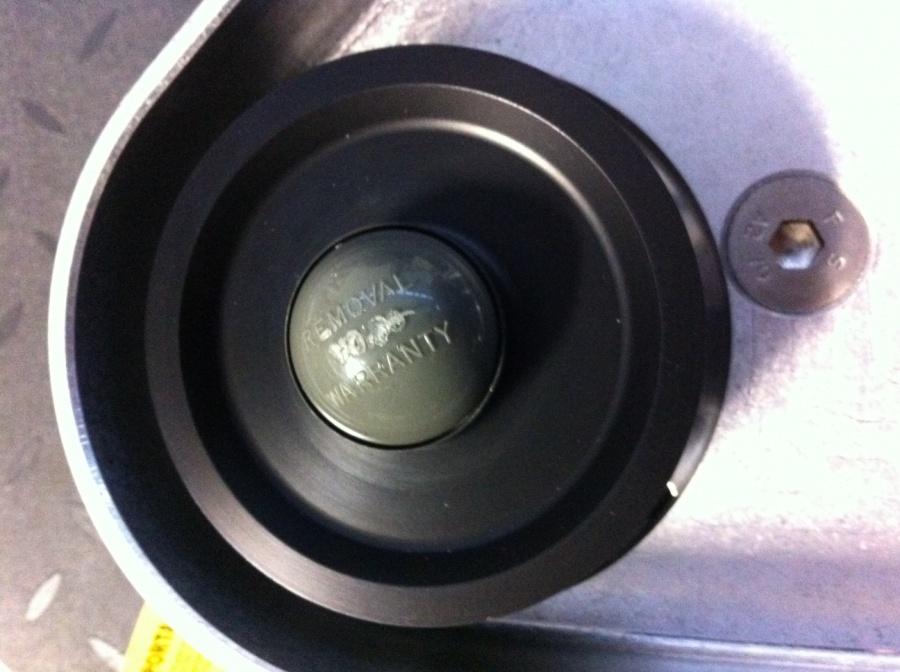
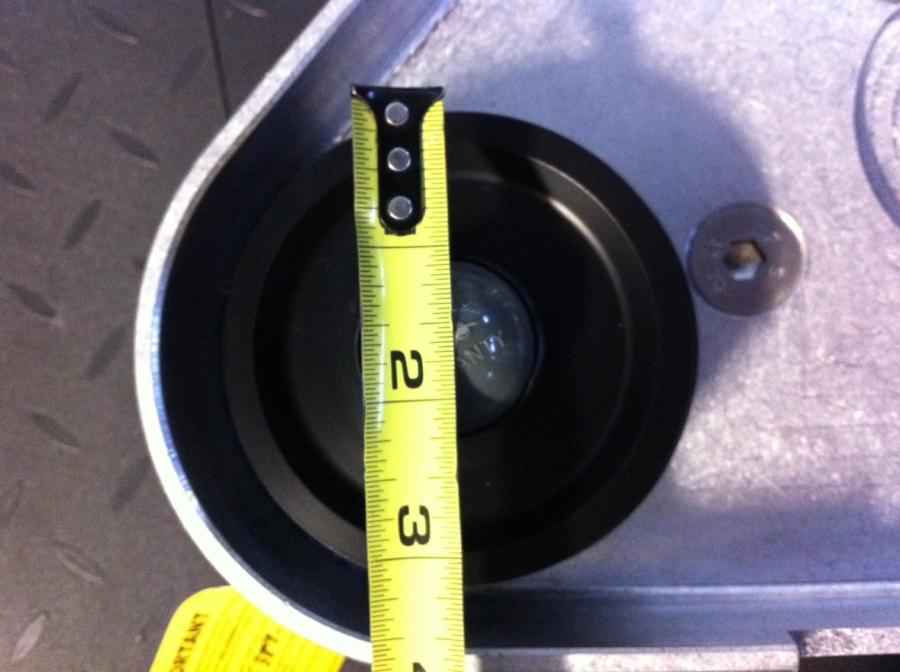
Here are some pictures of the new parts... pulley is about 3 1/2" in diameter, there are no markings. Will take a more accurate measure later.
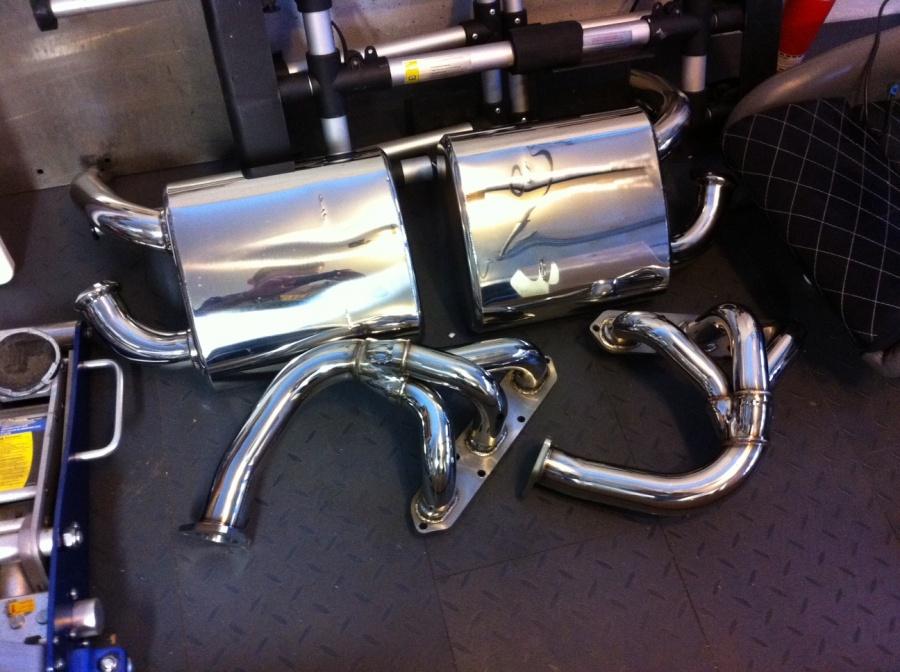
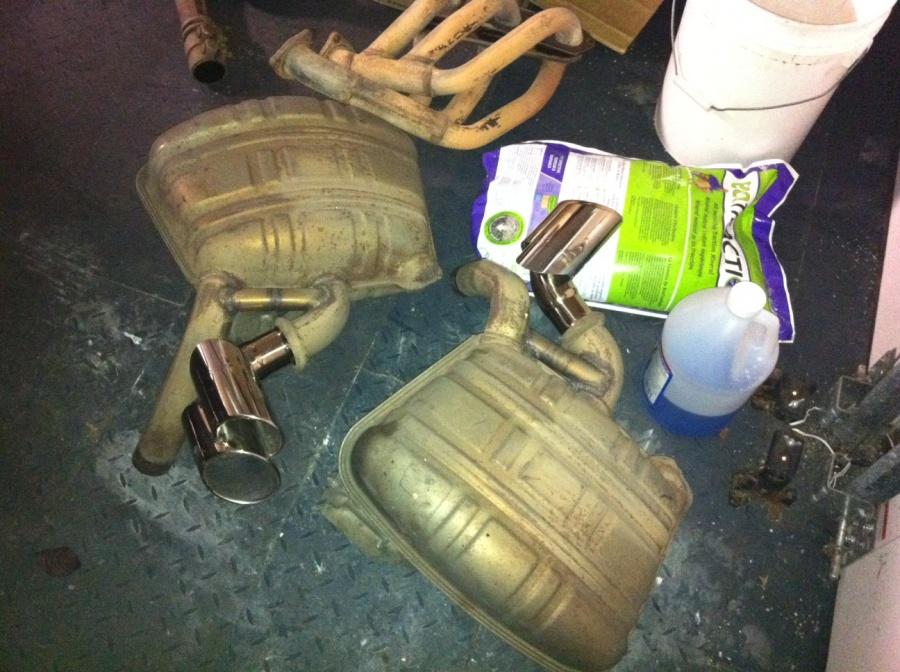
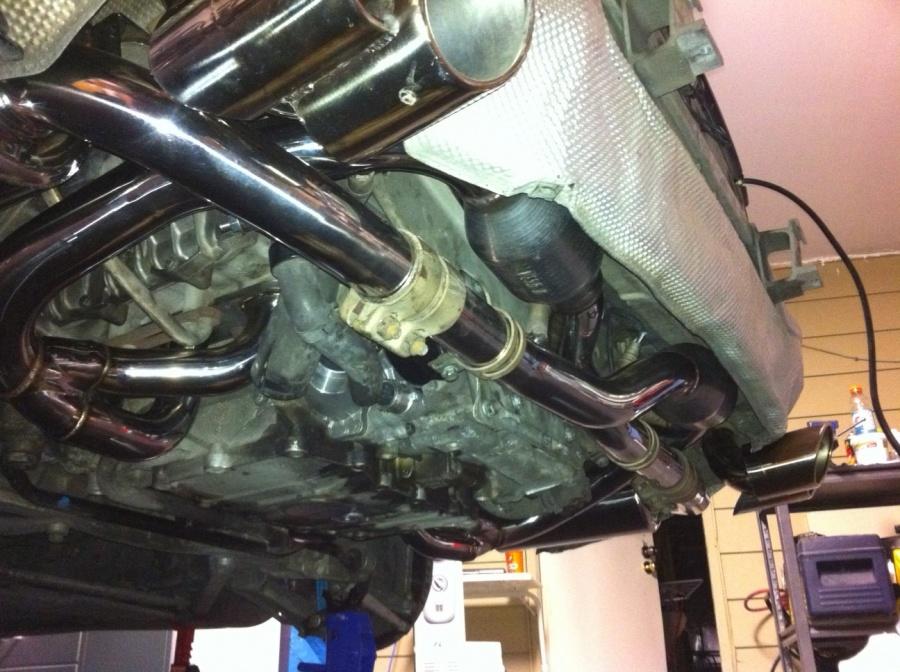
My cats come later, so just took a picture of the headers and cans for now.
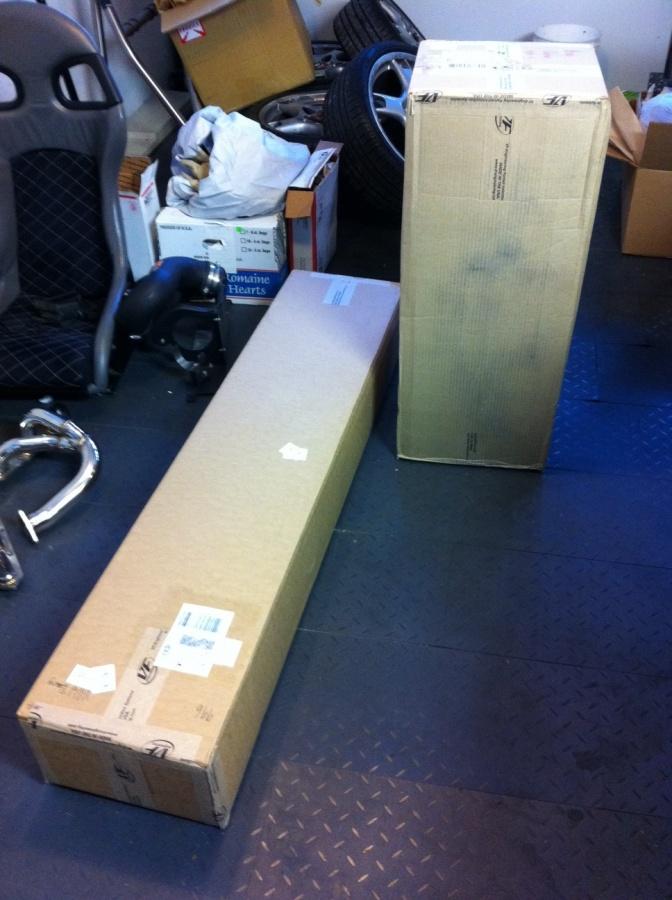
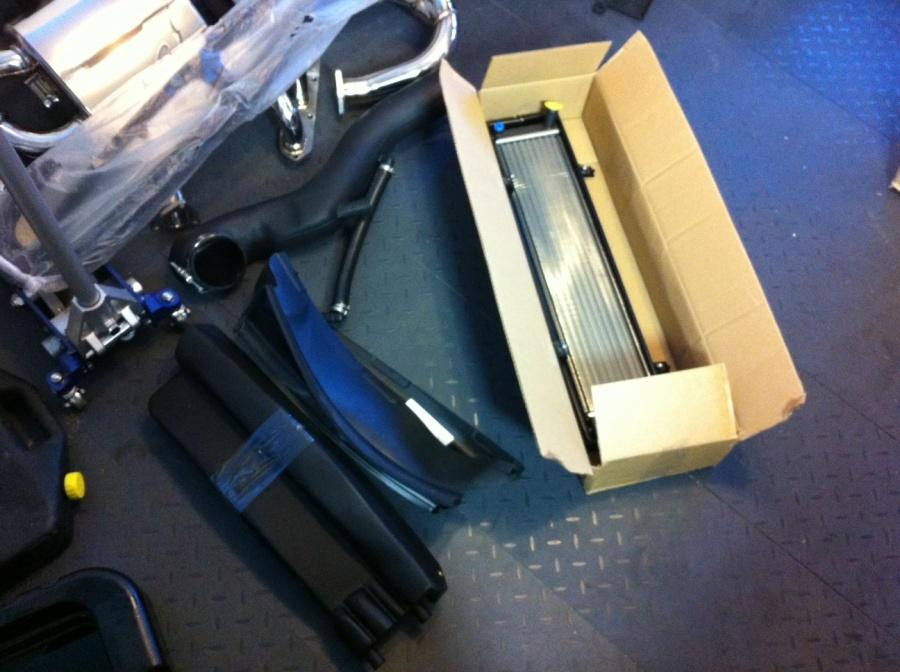
You get two boxes from VF if you go with this... one is long and light and contains all of the front radiator parts and bits as well as some SC intake tubing it would appear.
The other box is smaller and much heavier and contains all the other goodies. It is less than I was expecting in terms of knowing the challenge I thought it would be 1000 parts to deal with, so that gives me hope.
Everything looks to be very high quality and it was great packaging. The only thing you won't see in the pictures are the injectors as I put these in a safe place as soon as I found them.
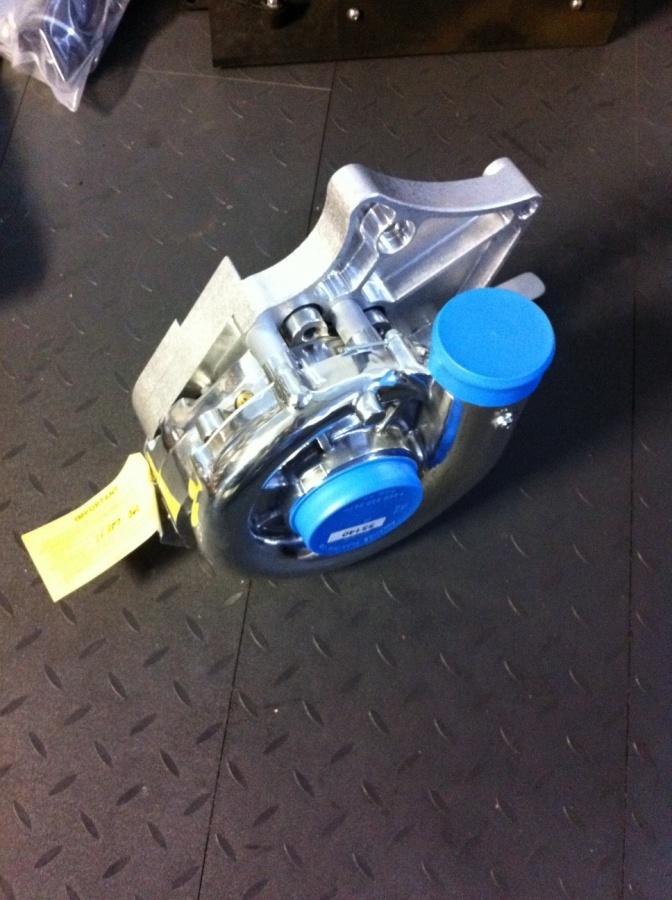
The pulley.
Little more work...
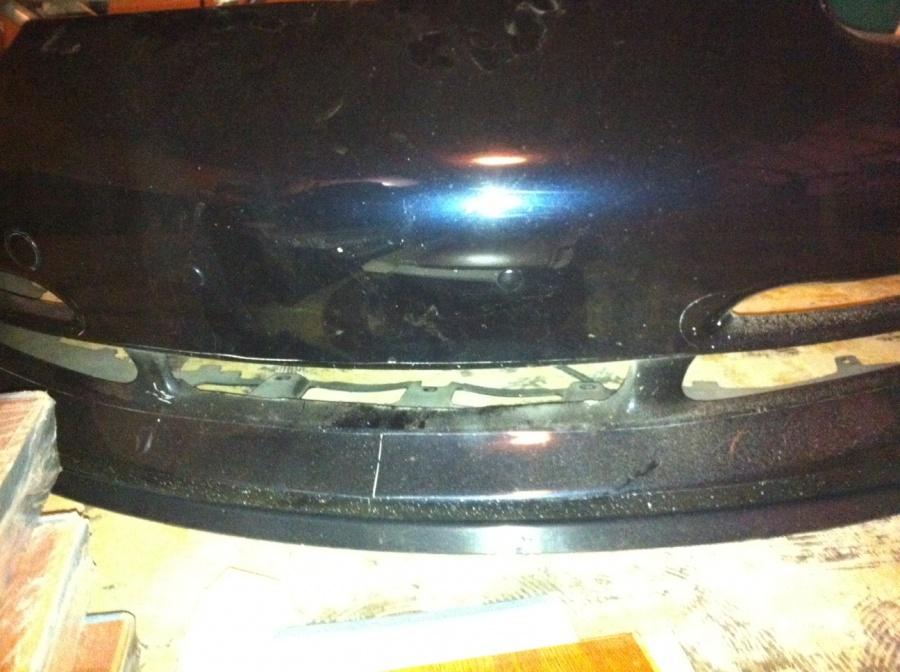
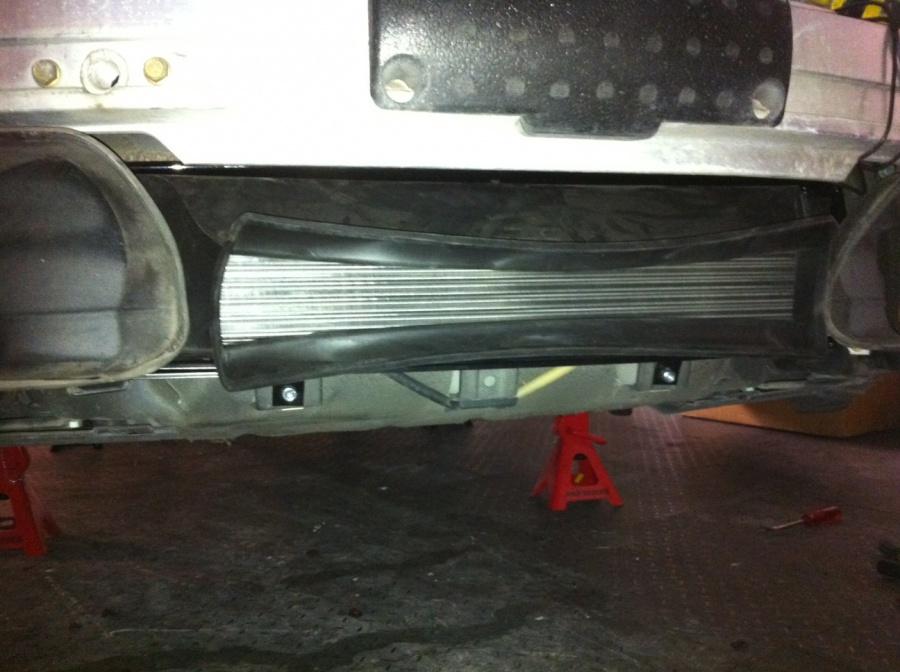
Removed the front bumper and cut the center section out of my Aero bumper to accept the new GT3 rad to be used as an intercooler for the SC.
Not sure why, but the bumper just looks more "right" with the center section cut out. 
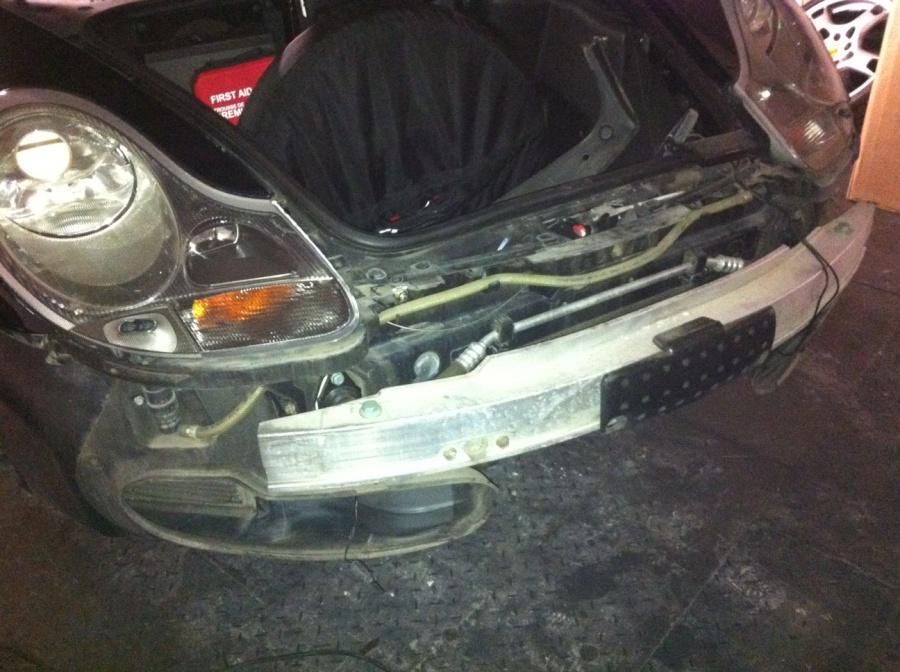
Threw the GT3 rad on, needed the box and didn't like the idea of it lying around the garage with all the work going on.
If I have to move it around a bit during install, so be it...
Ok last post for today...
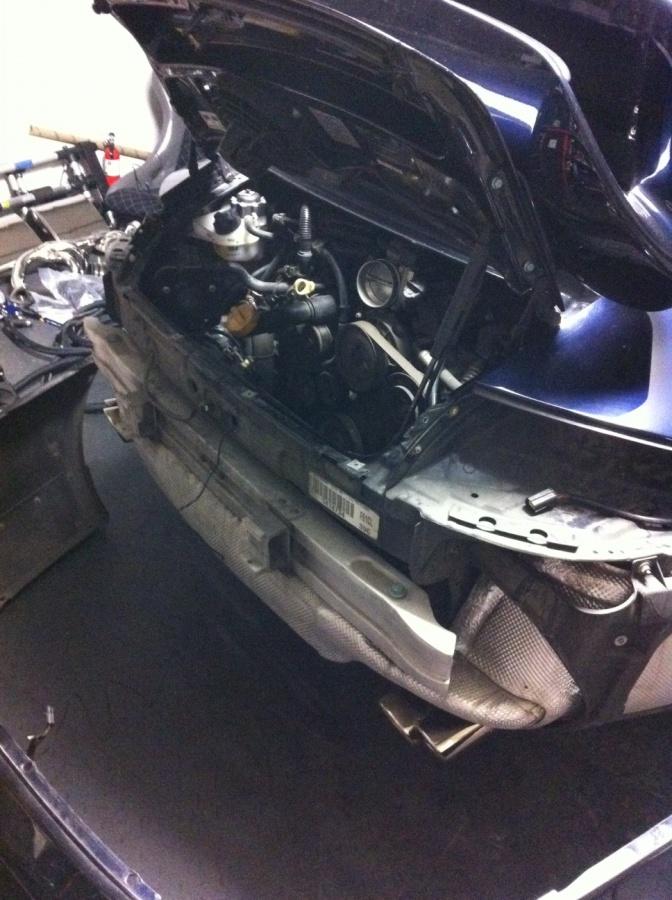
Took off the rear bumper and the cats. Was going to drop the whole exhaust, but was called in for tea and sweets then got too tired to go back to it.

12/3/2010
Well I got the rest of the exhaust off today and started in on the spark plugs, tubes, and coils.
The bugger thing is those spark plug tubes. I tried the boat transom plug idea, but that did not work at all. I think there is a removal tool out there for them...
So for today, looks like I'm stuck until I can source a tool tomorrow...
12/4/2010
Well fairly productive day considering all the other things I had to do and that I had dinner plans.
Anyways, I finished the plugs, coils, and tubes on the other side. Also changed the fog and city lights, I know not SC related but was on my list.
Also put the new headers on as I remember an old saying that you shouldn't leave headers off the car too long. I also need to line up the bung placement for an O2 sensor for an AFR gauge.
Going to start on the water pump and thermostat next week...

12/5/2010
Hi again,
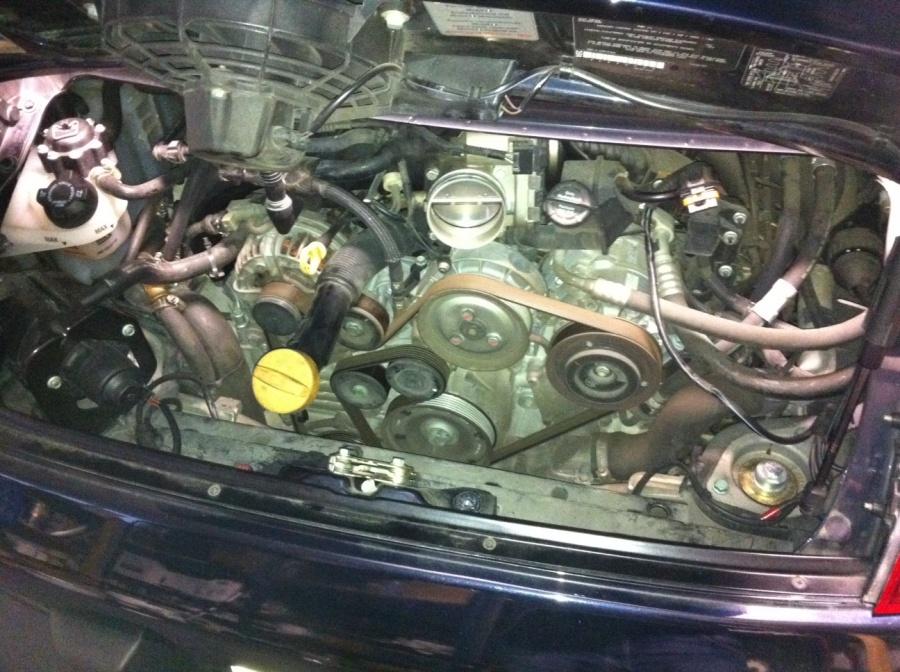
Well I got the water pump and thermostat replaced today. If you follow on Renntech at all, there was a discussion about IMS, RMS, and cracked head failures on the 996 engines. Jake Raby was saying that he has seen the plastic sprockets fail on the water pumps and the pieces causing cracked heads. His recommendation was to replace the water pumps every 3-4 years.
Anyways, I am a preventative maintenance sort of guy so since it is all apart now, I did it. Lucky I did, it was the factory original pump and the cooling fans were fully intact, but very brittle. They broke right off when I was checking it out after it was off. Dodged a bullet there...
I used the following instructions: http://p-car.com/996/diy/waterpump/
I'd like to add a few points though... First, no matter what you think, the water pump is removed through the bottom. NOT the top, don't bother trying even though it looks like a smart idea.
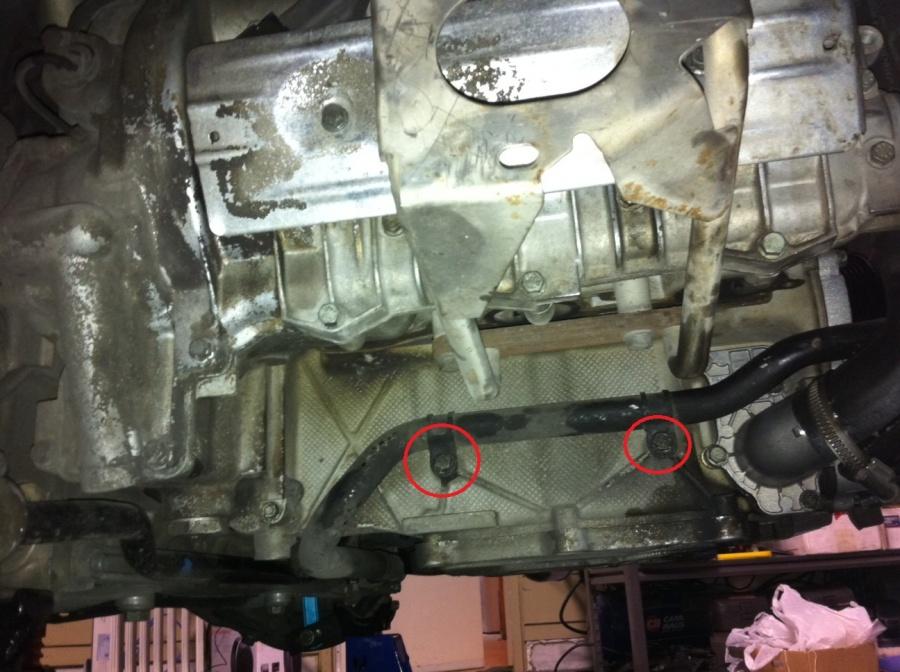
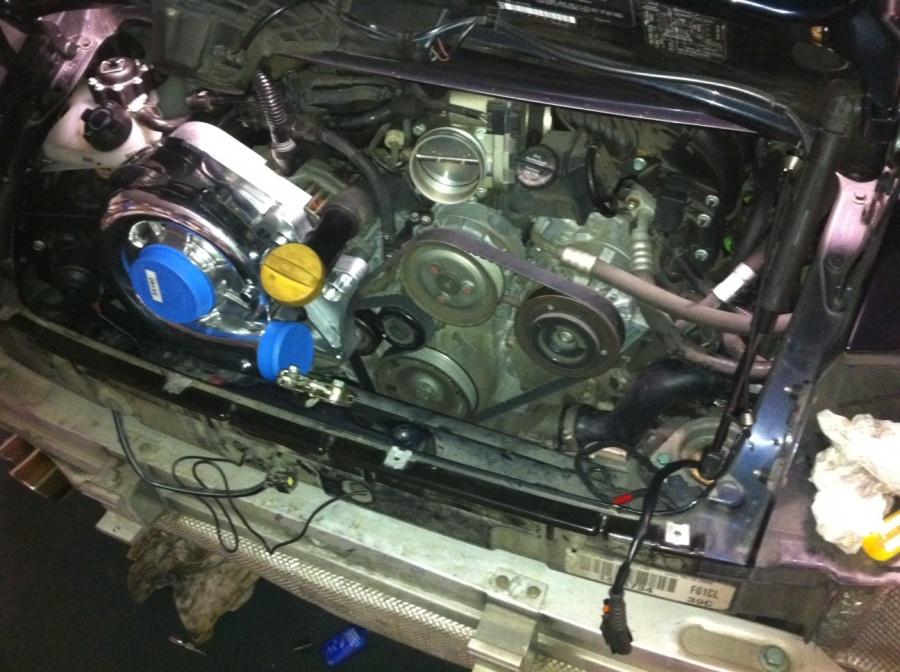
Also, to do the thermostat and to remove/replace the water pump, it is much easier to loosen a cooling line that is bolted by two bolts behind the headers on the driver's side. Once these bolts are out, you can get at the thermostat bolts with an extension and the water pump is much easier to clear in and out. I've attached a picture for reference.
I was going to start in on the injectors today, but got a little tired. Will focus on that this coming week... I also have a full set of new coolant hoses coming as a few of mine are looking about ready to replace, so if those come in I'll be doing that as well.
12/9/2010
Hi guys,
Well I got the front driver's side rad fan replaced and I'm just waiting on my new coolant tubes next week before I put it all back together.
I also finished the injectors on the driver's side of the engine. It wasn't really that bad, but looking at the passenger side makes me a little nervous. There are AC hoses all over the place which will be so much fun to get my hands around.
I also swapped over the mounting brackets from the old mufflers and put them on the new agency power ones, put the tips on, and mounted them on the car. Lastly, I mounted the driver's side header and looked for a place to mount the O2 sensor for my AFR gauge. It's at the welding shop now getting TIG welded so should be back on the car tomorrow night.
My plan is to complete the passenger side injectors, the 2nd gear detent mod, and fuel filter this weekend. If I get time I'll also start running some of the new intercooler lines from the front rad to the back...
12/26/2010
Not sure if anyone follows this thread anymore haha... but Merry Christmas.
Anyways, I finished installing the injectors, put the expansion tank back in and have changed a good amount of the coolant hoses.
Replaced the front rad fan on the driver's side and put the radiator all back in. I also completed changing the fuel filter and doing the GBox 2nd gear detent modification to the transmission.
I completed the installation of the full new exhaust system as well, and I was able to mount the supercharger to the motor.
If I get time this week the plans are to run the coolant lines and water pump for the SC as well as take of the throttle body to do a complete cleaning. I've noticed some old oil build-up in the intake, so want to get it all nice and clean while I'm in there.
At this rate I am hoping to have most, if not all, of the SC install complete by New Year's so I can pack and ship the ECU.
1/10/2011
ECU shipped to VF-E today... Yay!
Cheers
Aaron
1/11/2011
I saw that in the other thread. The TPC option came on the market after I made my purchase and along with the exhaust I also purchased it was about the same price point.
However, your dyno results on the 3.4L are much better than what is seen with the VF-E kit on the 3.4L. I guess you have to also note that I'm running the latest and greatest V-3 kit which has many improvements to the SC itself and the rest of the kit it comes with and in addition, this kit had no dyno results for our 3.4s so its possible I'll see the same gains as you.
At this point though, it would seem that you are going to get more "bang for the buck" so to speak.
Personally, I prefer SC kits to Turbos due to the smoother HP/torque bands and lack of a Turbo lag. I don't like how it requires crank to produce the power, but everything is give and take with customizations.
Looking forward to road testing it, but they are calling for snow here soon so it will be a few months off.
I also need to complete some interior modifications and some polishing/detailing to get it all set to go. Fun stuff.
1/16/2011
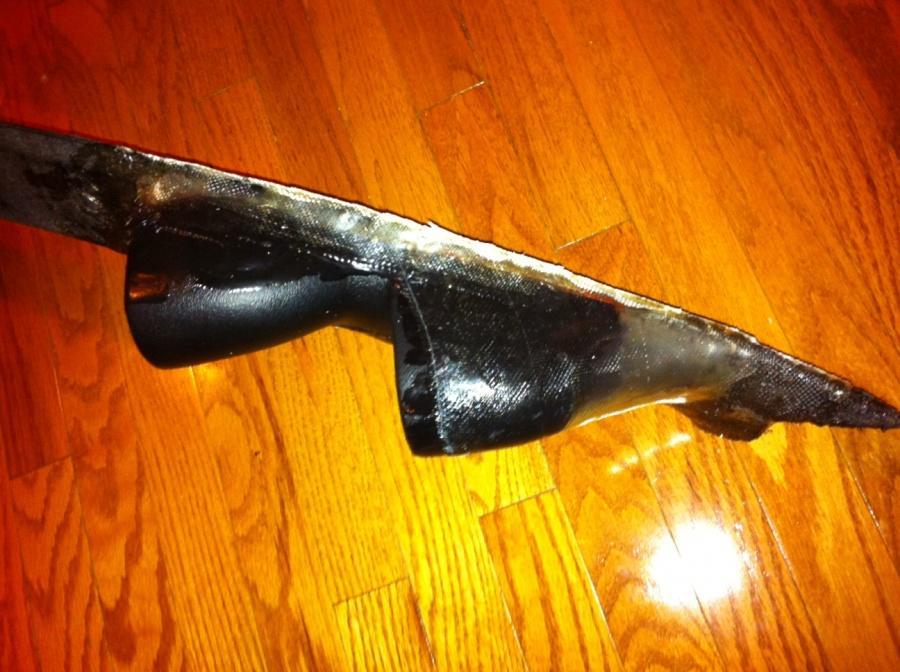
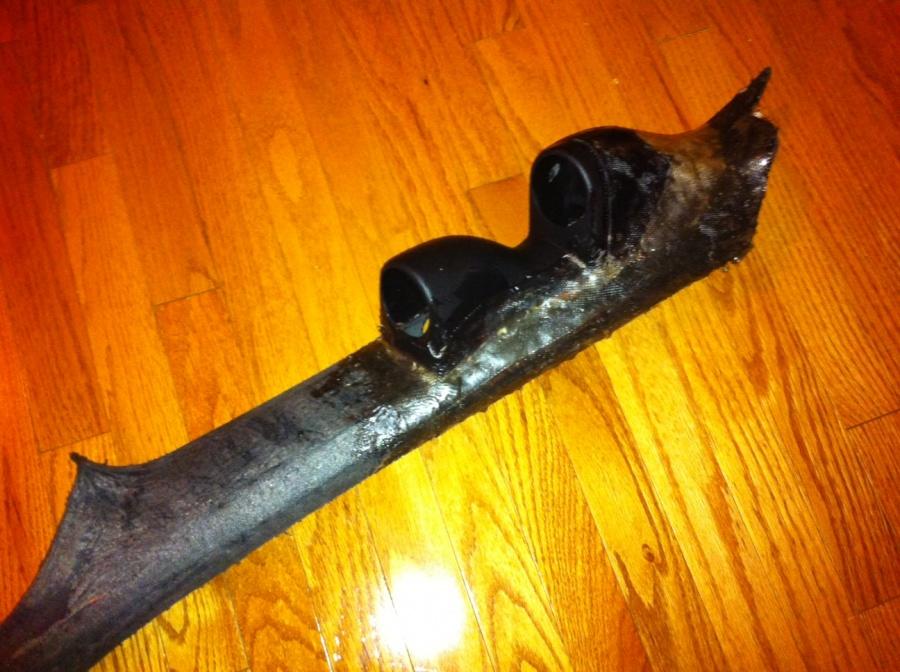
I'm just working on my gauge pod/a-pillar installation fiberglassing it all in to look "stock" then it will go off to the upholstery shop for a leather wrap.
The SC installation is complete, I just need to wire up the water pump to the battery. So basically, I think the whole car front to back and all the other things in the middle will be finished worst case in a couple of weeks due to time delays.
The amount of actual work left is 4-6 hours.
VF-E also received my ECU late last week, so I'm hoping to get that back next week. So, almost there!
PS It looks fricken wicked in there now that I have the bumper back on, etc.
1/27/2011
It's ALIVE!!!!
I got everything back together today, except for the interior work as the a-pillar is at the upholstery shop. But I was able to hook up my gauges to test...
Anyways, as I did the fuel filter and many other things, it was gagging on the first start attempt. This is a video after it got a little smoothed out...
It kicked up a few error codes on this start and was still a little rough. I cleared those codes after noting them and did another start which I didn't video. That was waaaaayyyy smoother and the whine from the supercharger is awesome!
I was getting between 10-12 on my vacc/boost gauge at idle and my AFR was between 11-12, but remember it didn't get up to temps so little lower than the 14.6 but still in range.
I'm sure its the computer learning everything but I did email the tech guys at VF-E just to confirm.
Anyways, there were no leaks I could see anywhere on the car, no knocking, and no throwing of the belts.
So far at this point, looking like a successful install...
Now I can't wait to get my a-pillar back, dye it, and complete the entire project. A little past the mid-January I originally assumed, but some of the delays will end up in a better finished product.
1/28/2011
I put the vacuum sensor on the metal area towards the back ahead of the smog pump. I had the bumper off, so this was easy to drill and mount a bracket.
I had the AFR sensor mounted in the collector of the Driver's side header. I had this done professionally with a TIG. It takes some thought tho as the clearances are minimal and I could see only one angle that worked out. So, I had to mount the header, find a place that cleared the height and the bolts for the cats then mark it to have the bung welded in.
Simple hole saw on my drill press and it was good to go.
The wiring was ran through the large grommet on the far upper right corner of the engine bay. You can get a drill to it to make a hole by removing the tail lights.
2/5/2011
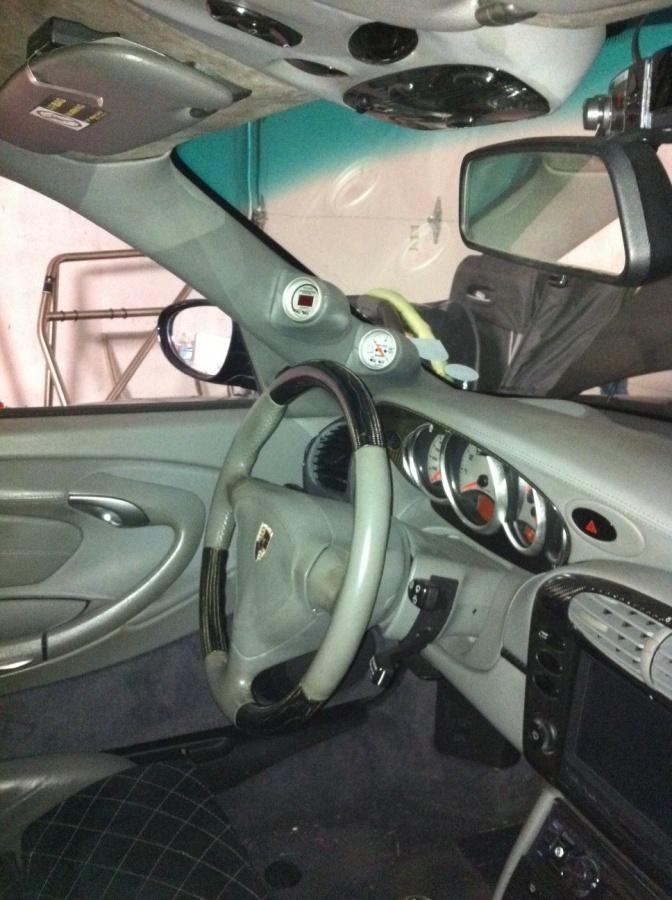
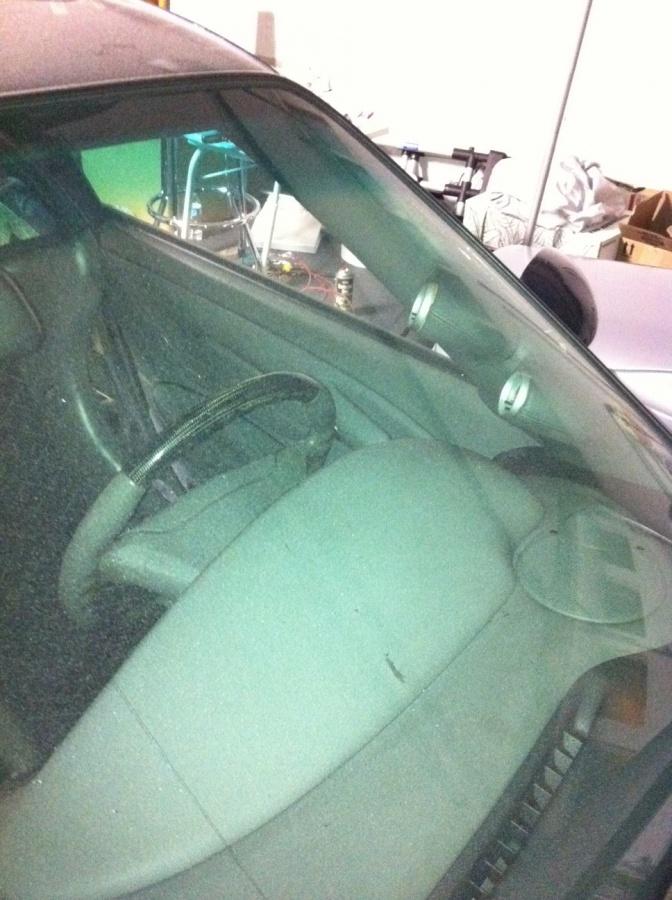
So I got my a-pillar back from the upholstery shop and it came out great. Took the time to dye it with the color match I had before from the GT3 seats, and it looked even better!
Tonight I installed it in the car with the gauges. Personally, given the fact that you're trying to add gauges in a car and make it look as stock as possible, I like the result!
I'm sure there will be some out there that hate it... anyways, here are some pics...
With that done, I can now move on to put all the interior back together and get into some much needed cleanup of the car and the garage!
3/25/2011
Well the weather turned, got the insurance on, and got one day of short test driving... then it started raining again.
Anyways... back to my post.
I cannot wait to drive this thing on a regular basis. The exhaust is much louder than before, but I can still hear the SC whine. I pulled out of my driveway and no word of a lie people walking stopped and got up on the grass. haha
There is a break-in period before you can start to push it, and I'm waiting for a day when I can have a co-driver follow me while I test it further and a little harder. So, it was a limited driving experience, but very fun.
I did get it up to about 3-4 lbs boost and the car just snaps. That lag I was trying to get rid of has disappeared.
Anyhoo.. first impressions. More to come when the sun comes back. Hopefully Monday..
4/19/2011
Another day on the road... it just seems to be getting better everyday I get to drive it.
One thing I was worried about was the GIAC flash and not being able to pass AirCare which we have here in BC. It basically consists of an ECU scan for error codes and my concern was that it may show up as a modified ECU.
Anyways, it passed so if anyone else is considering this and has a similar local regulation/inspection requirement that just uses an ECU scan, you're good to go.
PS Looking forward to pushing it this Summer!
8/29/2012
Ran great. Got past the 300 mile break-in period... such a painful wait. But, it happened when I was on the way back from Seattle so got to really put my foot into it, was fantastic.
I haven't update on this thread in a while as I am still doing the body upgrades. I'm doing my MBA, doing a major basement reno, and have twin boys. My plan to get it done for this Summer didn't pan out so well.
Will be back on the road next Spring. Doing a full body wrap in matte navy blue metallic, just some odds and ends I want to fix on the car to get it all perfect. Also have a bit of maintenance, just oil change and upgrading to the LNE stainless spin on oil filter, etc.
11/10/2012
The 300 mile break-in period is for 300 miles where you do not take the car over 4500 RPM. This is to ensure that everything is installed correctly or you risk excessive damage over 4500 RPM. Imagine a pulley flying off at 8000 RPM or a vibration. It is a long painful 300 miles because it is so tempting to punch it...
Ok I admit, I did it once at about 200 miles when this M3 pulled up with his blonde girlfriend in the car and when the light went green I was being "good" and was taking it easy because I was in the break-in period. He punched it and I could see him and his chick laughing in the mirrors... He wasn't laughing much at the next light. In fact, he didn't even look at me. I didn't much care because the experience was wicked and I was smiling ear to ear because of that. Sounded like this whine of atomic power and awesomeness behind me as I accelerate like Marty McFly in the time machine... Ok, maybe a bit of colorful exaggeration in there... 
My car has been off the road for a year now as I was doing body upgrades and enrolled in my MBA. Time = no more. I'll have it on the road next Spring though.