You must be logged in to rate content!
8 minute read
Hoodscoop Splitter for big TMIC
Compliments of paintbing @ www.nasioc.com
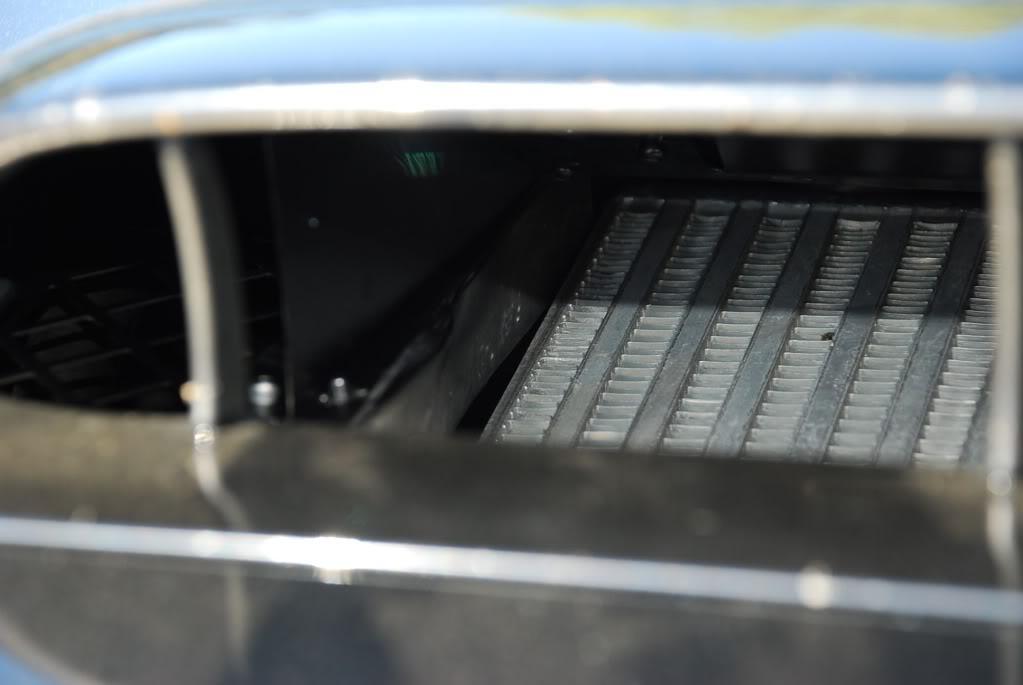
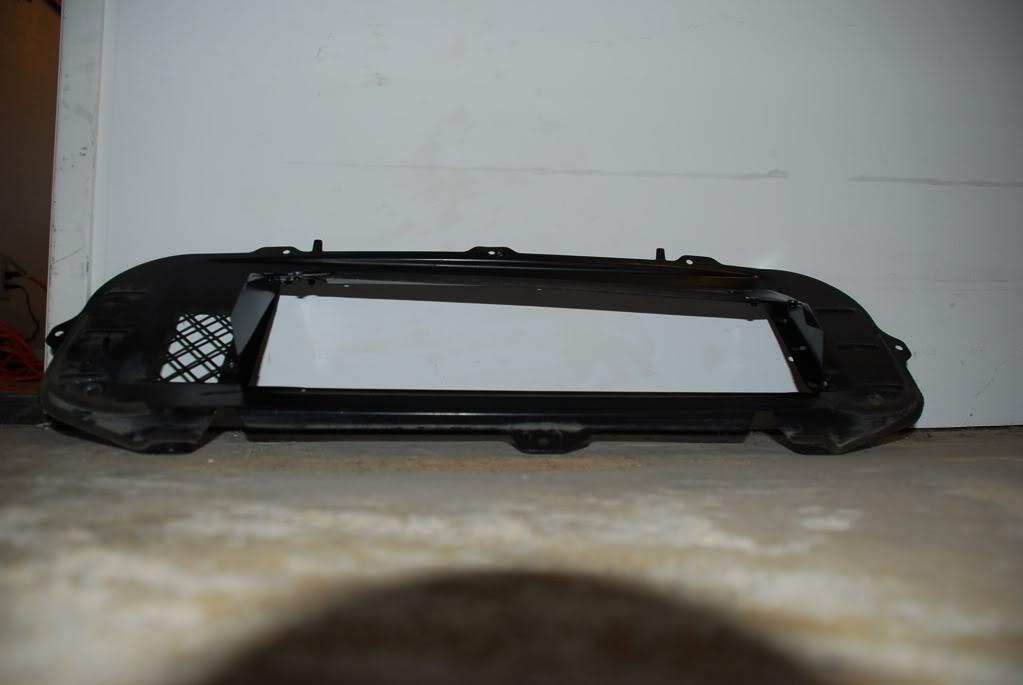
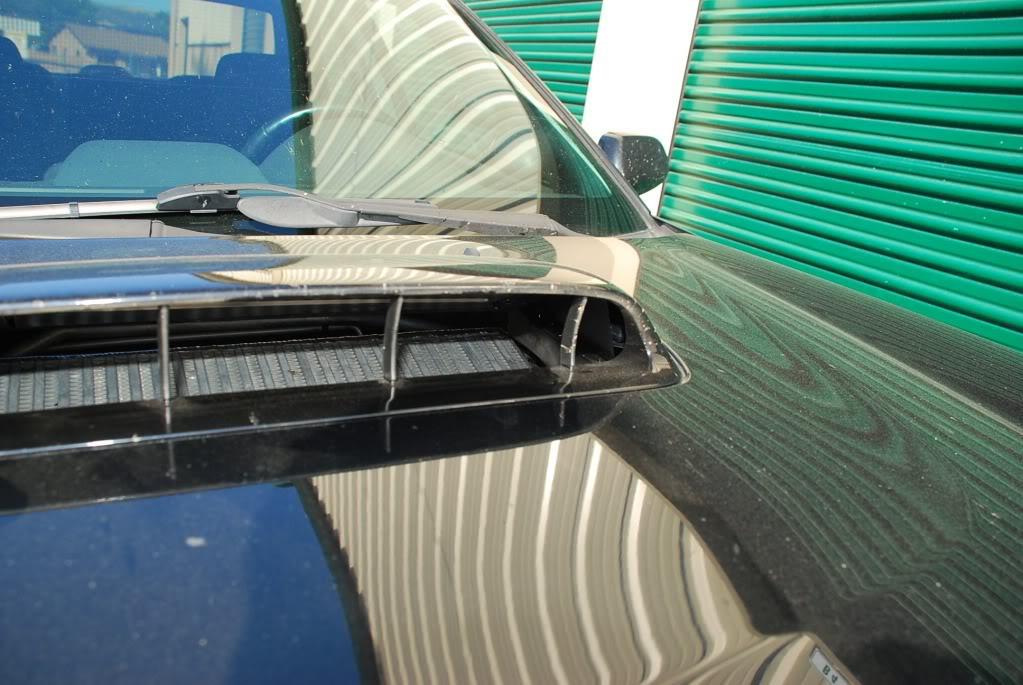
I recently purchased the JDM STI hoodscoop for my bugeye and also picked up a new TurboXS TMIC. After installing the hoodscoop, I noticed the stock splitter was not efficient in filling up the scoop. It left a good 1/2 inch of space between the scoop and splitter.
I then installed the TXS TMIC and saw how much more of a splitter that was needed. I searched everywhere and couldn't find a decent DIY on how to modify the stock splitter to be efficienct enough for the TMIC. Since I wanted this to be sort of a budget build I wanted to go as cheap as possible. The theory behind this is two-fold. First is to raise the heighth of the splitter to maximize the use of the scoop. Second is to widen the opening so more air can be directed over the TMIC.
Tools needed:
Drill with 3/16" bit and 1/4" bit
Sheet Metal Snips
12"x12" galvanized sheet aluminum (0.028 thick)
3/16" x 5mm pop rivets (15 of them)
Can of Black Spraypaint
Sharpies
Piece of paper/Cardboard
Patience
Optional: Dremel with cutting disc
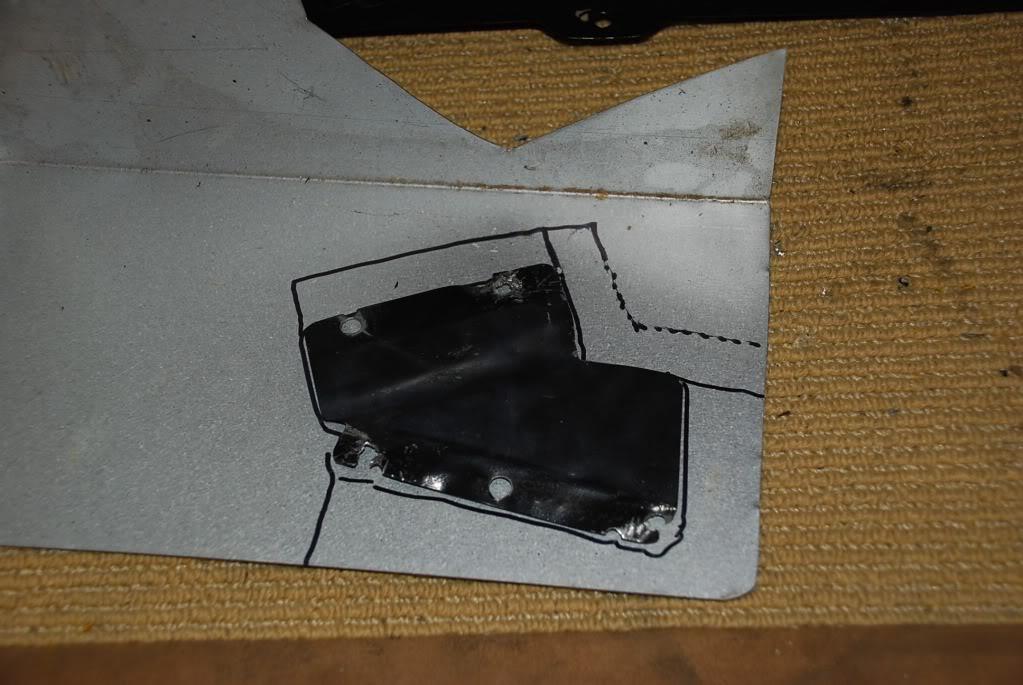
After I started into this project I realized I should document my progress. First off, I took a paper and/or cardboard to create a template. I laid the paper on the intercooler and then penciled the outline of the big TMIC. I then closed to the hood and then reached inside the hoodscoop to mark where the stock splitter seal/weather stripping hit the intercooler. With this, I can directly see where the stock splittler can be opened up so that we can direct the airflow across the new TMIC.
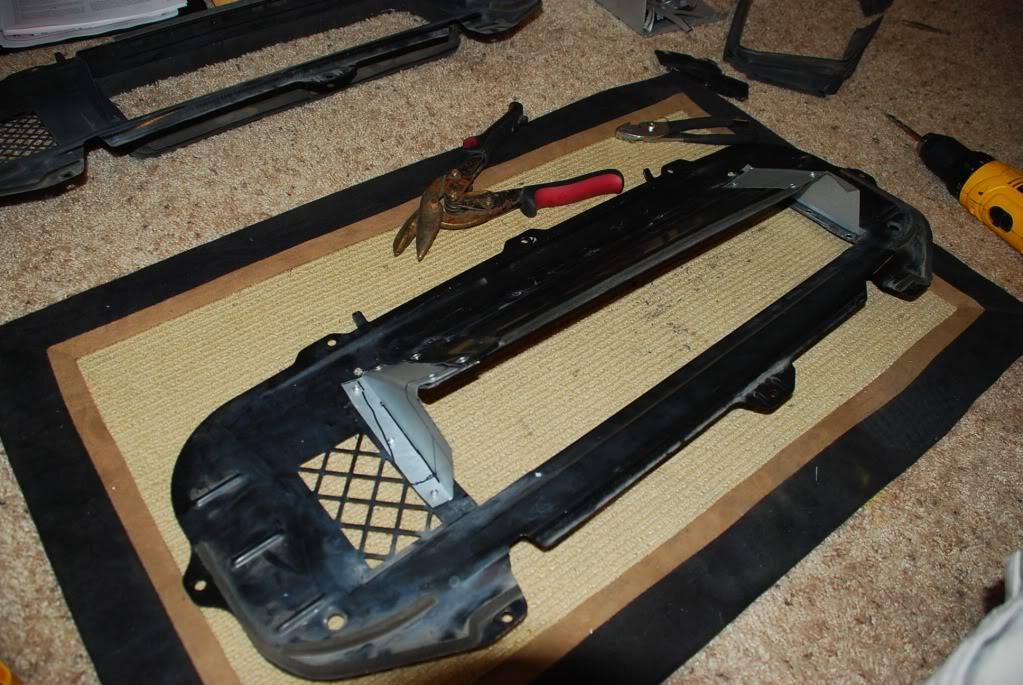
I started off by removing the rubber seal being carefull not to damage the little plastic clips. I resuse these later. I then cut out my template so that all I had left was the portion of the TMIC that needed to receive air. It looked like a giant "C" or "U". I laid this on the bottom of the stock splittler and marked where the new opening had to be.
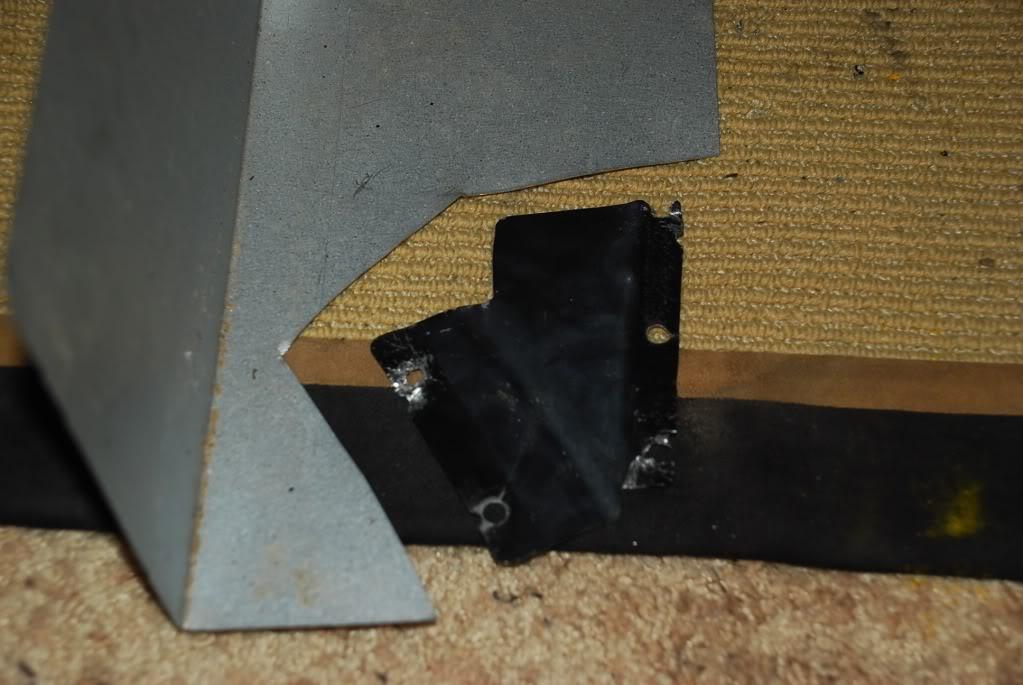
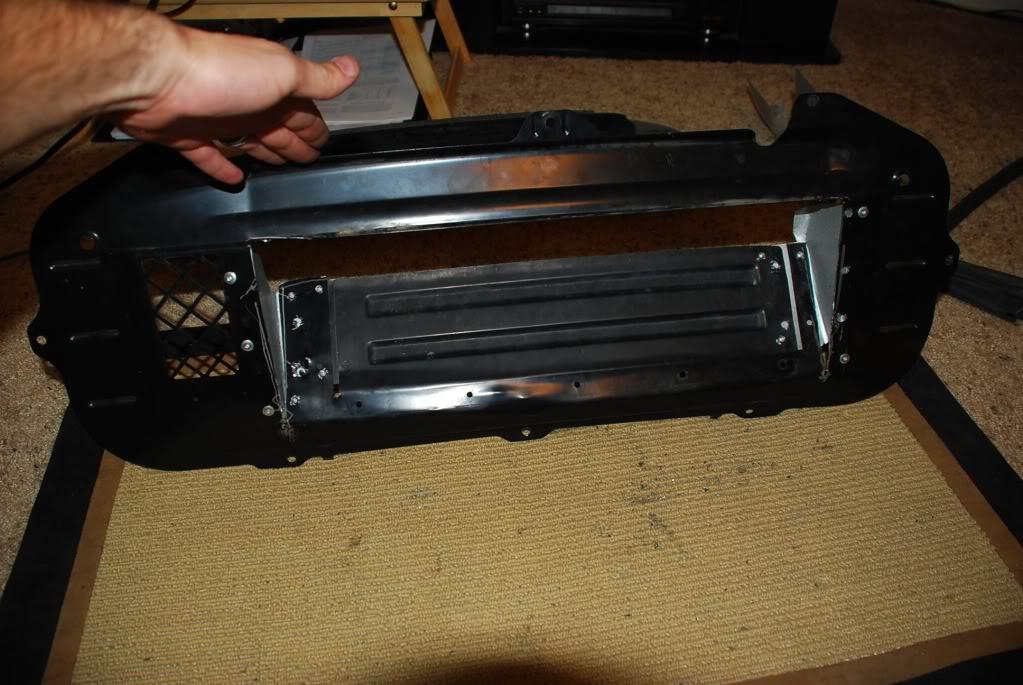
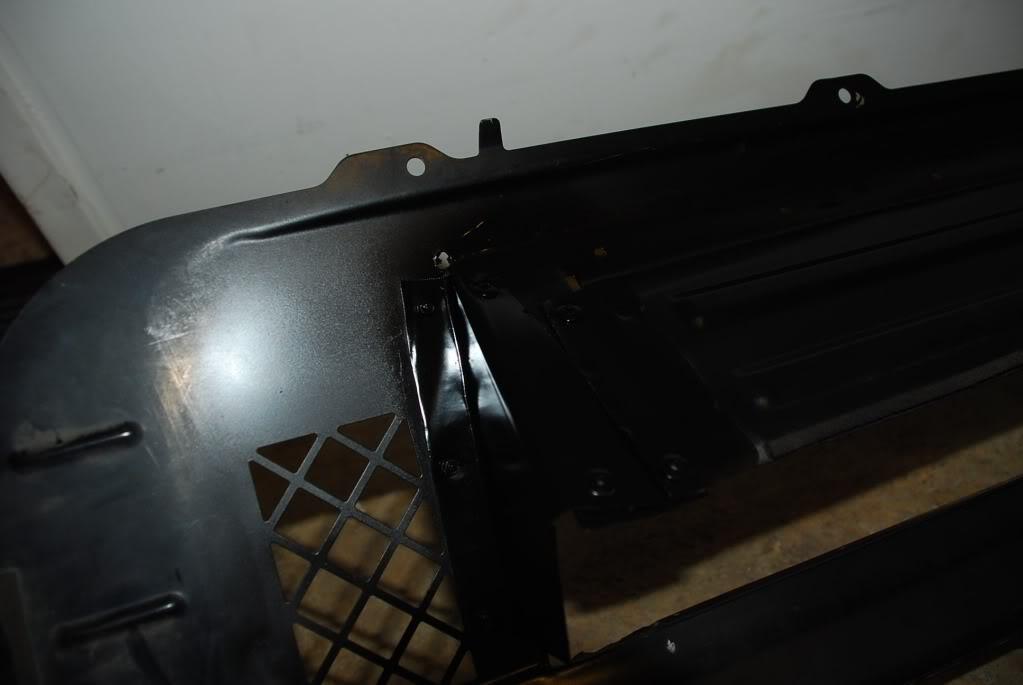
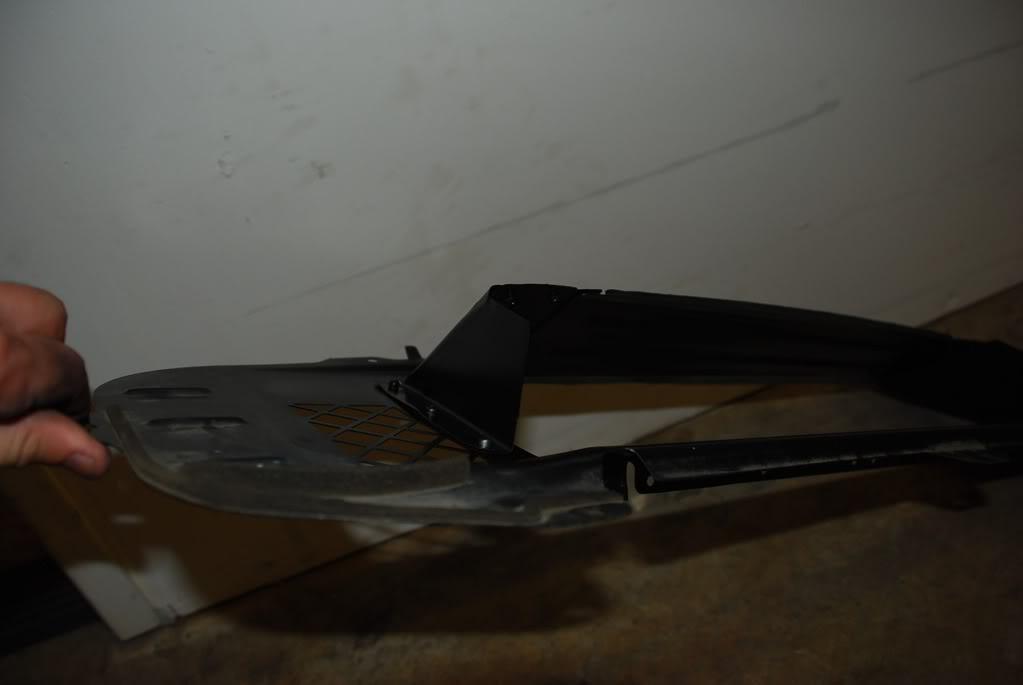
Next I used the 1/4 drill to drill out the 5 tack welds that held the edge bracket. I removed the Drivers side all the way and left half on the passenger side. I then used this piece as a template for my new angle brackets. (Picture Below)
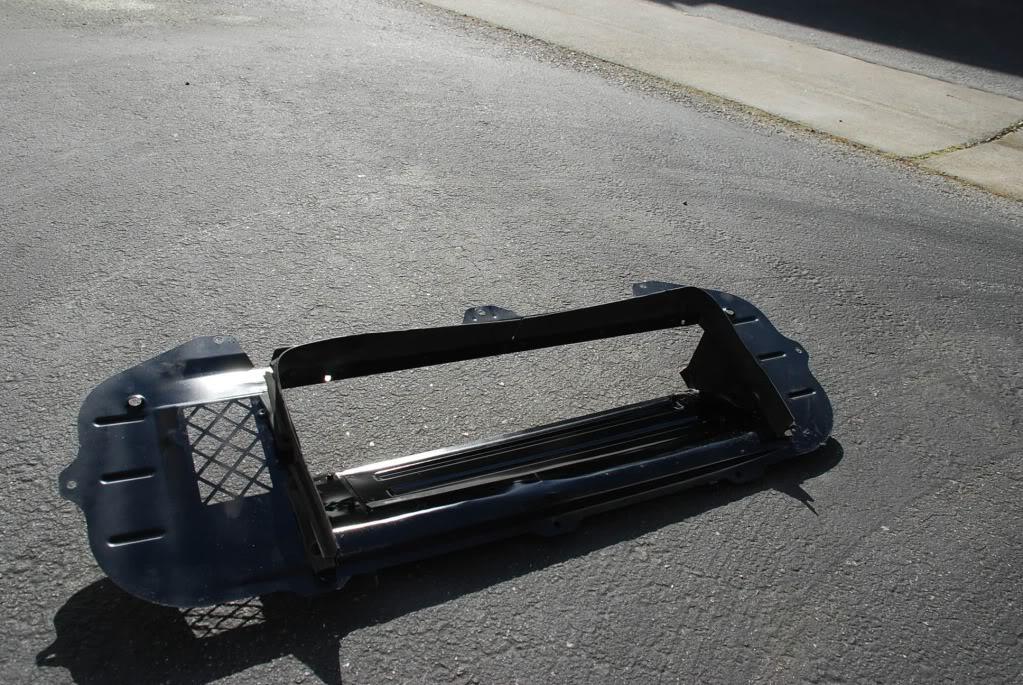
I then used a dremel to expand the opening on both sides.
*Make note here that because the TMIC is long, the rear edge of the TMIC actually sits at the back edge of the splitter, so I was unable to cut all the back. I stopped about 1.5 inches from the back.
I had access to a friends splitter to "practice" this on.
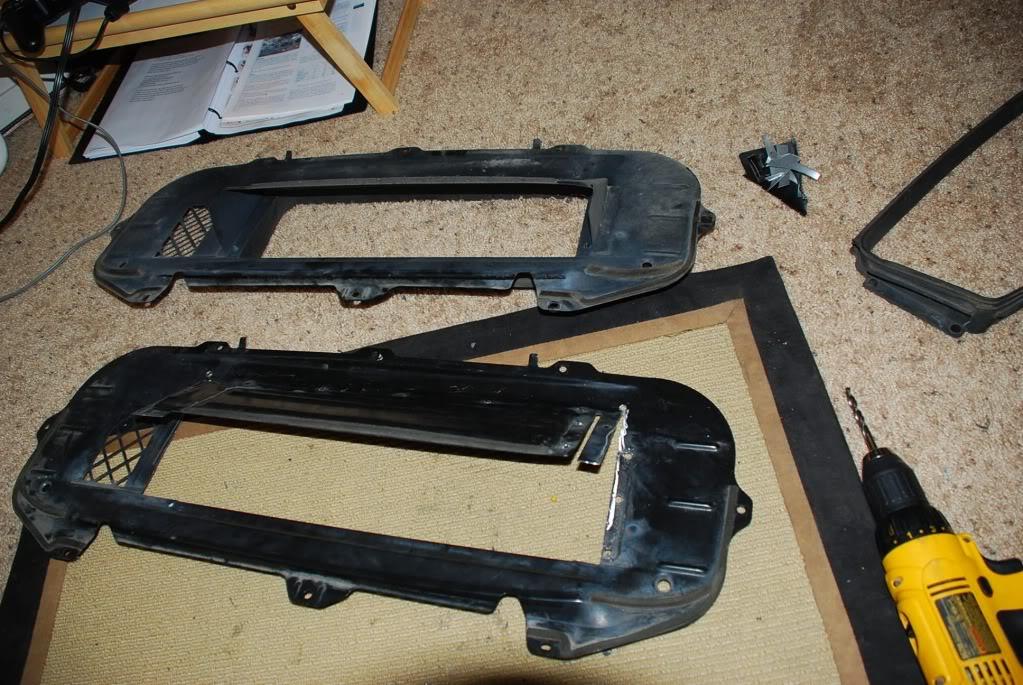
Passenger side I left part of the bracket to use to attach the new expanded splitter.
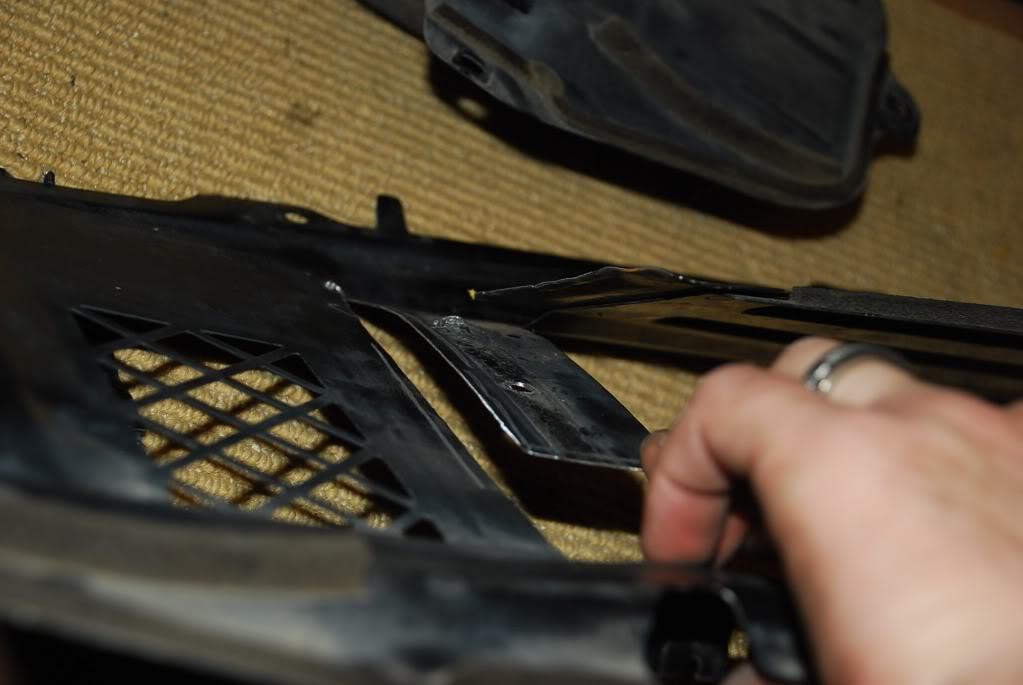
Note the space I left from the rear edge. Note I drilled a "stop" at the end so that it vibrations from the car wouldn't let the new cut to keep running.
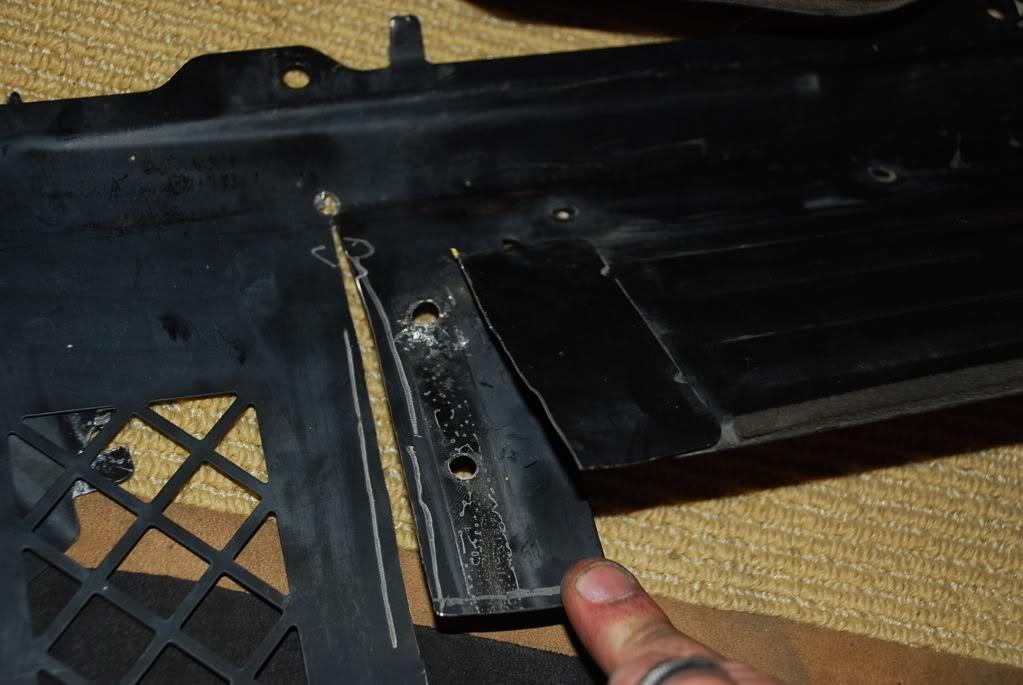
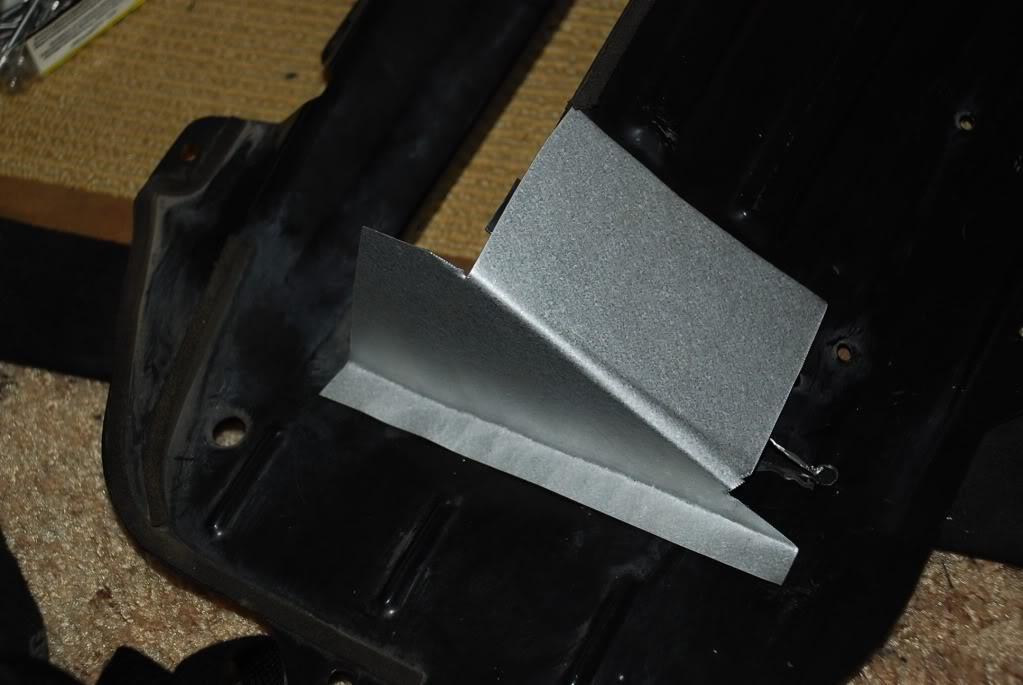
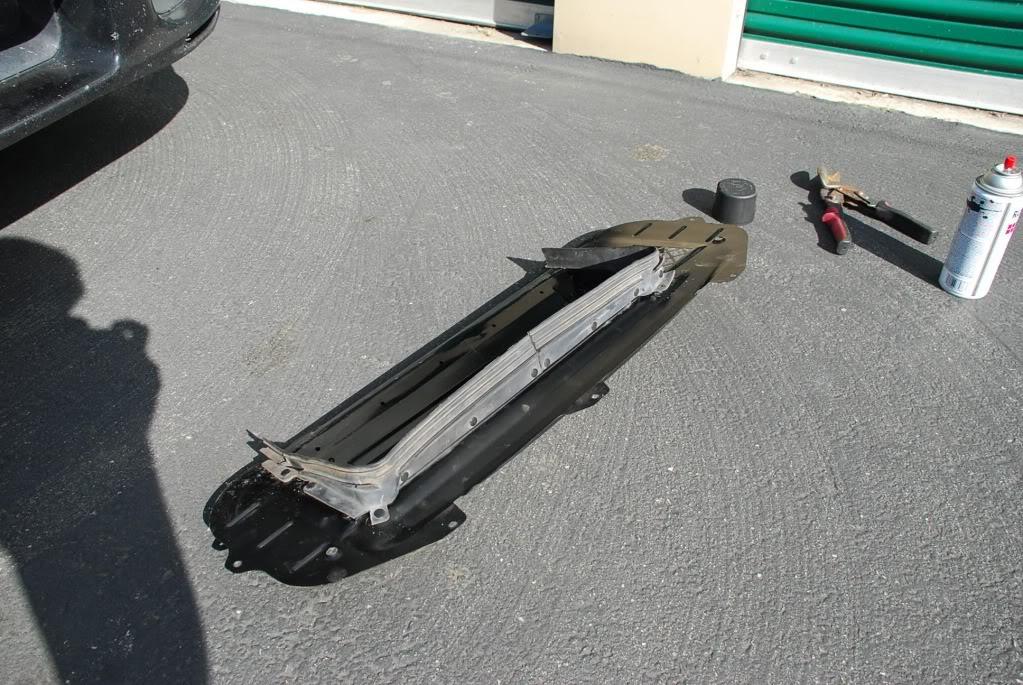
Comparison of the two splitters. Note the top one has been re-bent closer to the backside of the splitter. (this was a pain in the butt!) I first flattened the exisitng bend, then used a makeshift break (kitchen counter edge) to rebend at the end of my new cuts.

Template - I cut it bigger than I knew I would need to give myself room for error and trimming. Since the angle of the splitter will be a little higher than stock (to fill the hoodscoop) you will need to adjust the angle a bit. Trial and error.
My new template. I did MANY dry-fitting before I revited this in place. I used the 3/16 bit to drill my new holes. (Note the 3/16 bit is the SAME bit you'll use for relocating the plastic pop-rivits for the rubber sealer.)
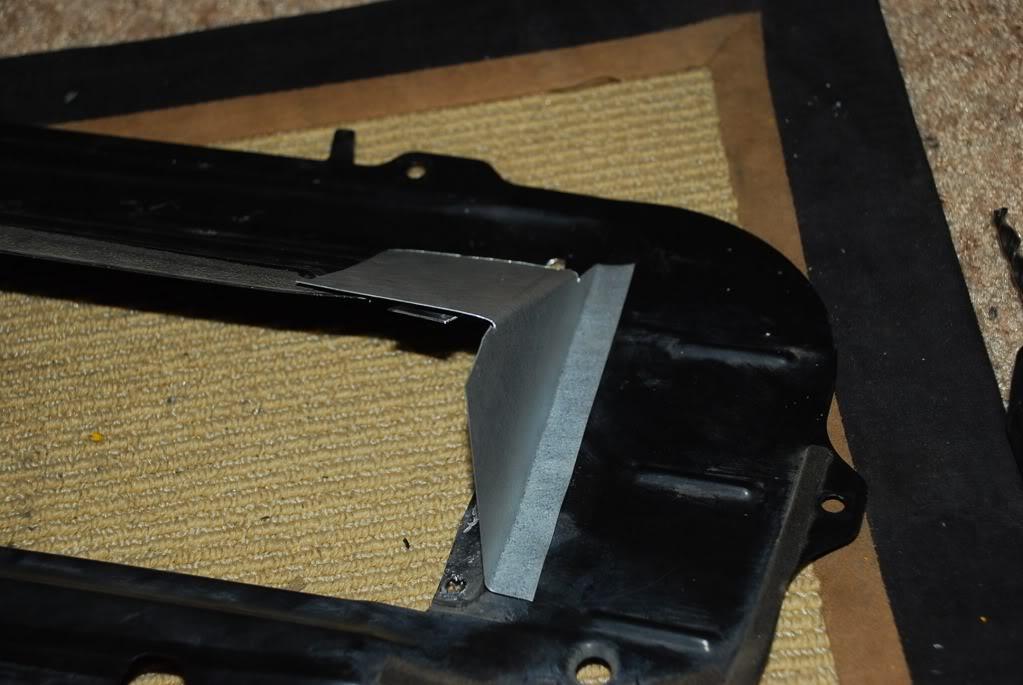
Rivited in place!
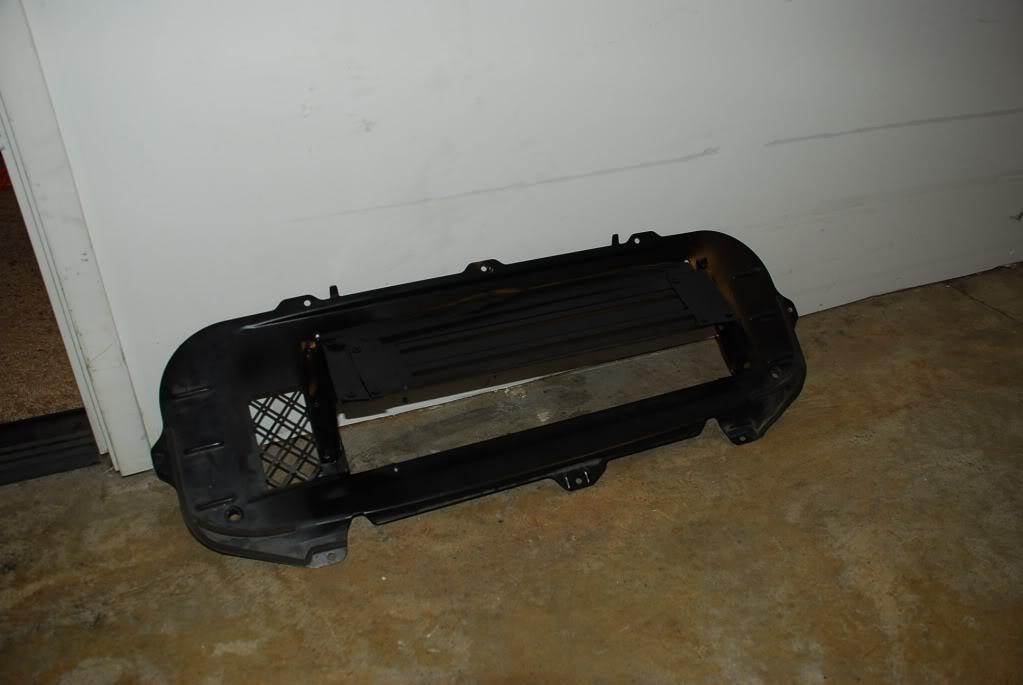
I then painted the new pieces. I just painted the exposed parts. Since this is galvanized aluminum, it should last as long as I need it to last. Below are some different shots of the semi-finished product.
In this picture you can see that I've reused the oem rubber molding.
I ended up starting at the front of the splitter and then worked my way to the new edge. I had to cut the lip so that it rounded the corner without deforming too much. Again, I used the 3/16 drill bit to drill new holes for the plastic taps. It's a perfect fit! Once I reached the backside of the splitter, I cut the remaing rubber off. I then started back in the middle again with the other end of the leftover rubber. Notice I am done with the exception of the rear piece. This is where the back plate of the splitter reaches the back of the TMIC.
Since I had two stock splitters to use, I used the rubber from the spare one. However before I used the spare rubber, I tried to find a good weather/garage door sealer to use, but didn't find anything I liked. This back rubber piece really only needed to be ~1/2" thick. I attached the back piece with the stock plastic clips.
I test-fitted the piece and noticed that on one side, the edge of the TMIC caught the rubber just barely and folded over one row of fins. To remedy this, I reached inside the scoop and pushed the rubber off the TMIC so it hung over the side. I then took a sharpy (again with hood closed) and drew where I had to trim the rubber. After trimming, the rubber gently sits on the edge of the TMIC creating a perfect seal.
This was my only screwup... Since the one side was slightly off, the other side was slightly off too, so as you can see, I have about 1/4" of a gap that I haven't been able to deal with yet... I think I'll just leave it to help push the turbo heat away though.