You must be logged in to rate content!
5 minute read
How to install a Subaru V-Limited Lip on a Saab 9-2X
Compliments of Bradrcr @ http://saab92x.com
Vehicle Model: Saab 9-2X(Any)
Years: 05-06
Completion time: 1 hour (Plus 24 hours cure time)
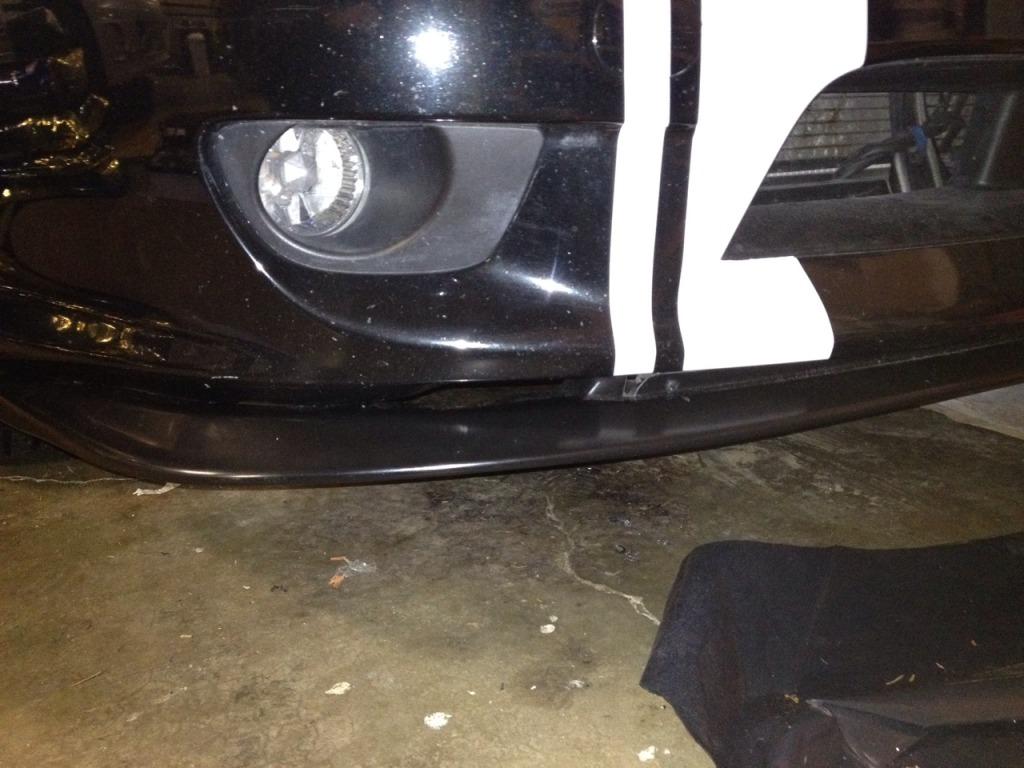
Ever since I picked up my Saabaru, the thing that's been killing me about the looks is the upward slant of the front bumper, I've always liked how WRXs are nice and even with the ground. I've seen a few folks post pics with a V-limited lip but never how the fitment worked, so I kept track of my install to ease things up for those debating weather or not to do this and I'm posting this how to on Nasioc and Saab92x.com.
Tools & parts needed:
Drill with 3/8", 5/64" and 3/16" bits
Belt sander
Jigsaw
Pair of small screws & lock nuts
Black shoe goo
300-500 grit sandpaper
Chalk or paint pen
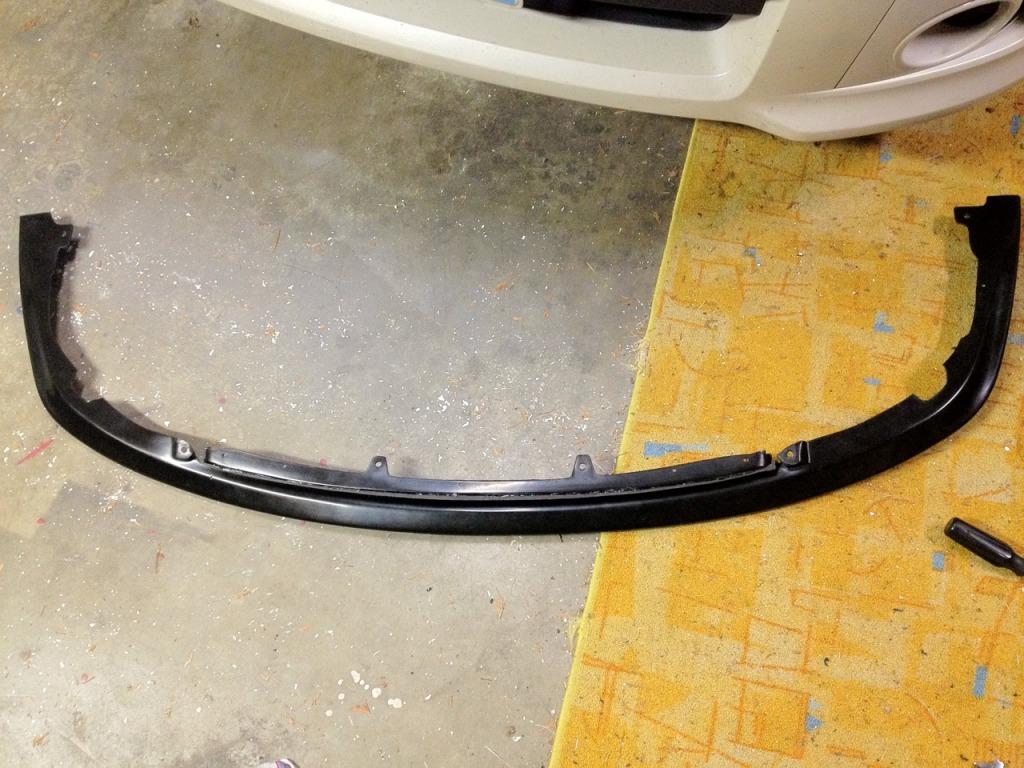
For reference, I used an 04-05 V-Limited replica front lip from eBay that included all screws & clips. Start by sanding with the sandpaper the back of the center part of the lip and then draw a line with chalk or paint pen from one side to the other starting and ending even with the top of the two mounting 'bumps' on either side of this section.
Use the jigsaw to cut across this line, then the belt sander to smooth out any bumps and dips.
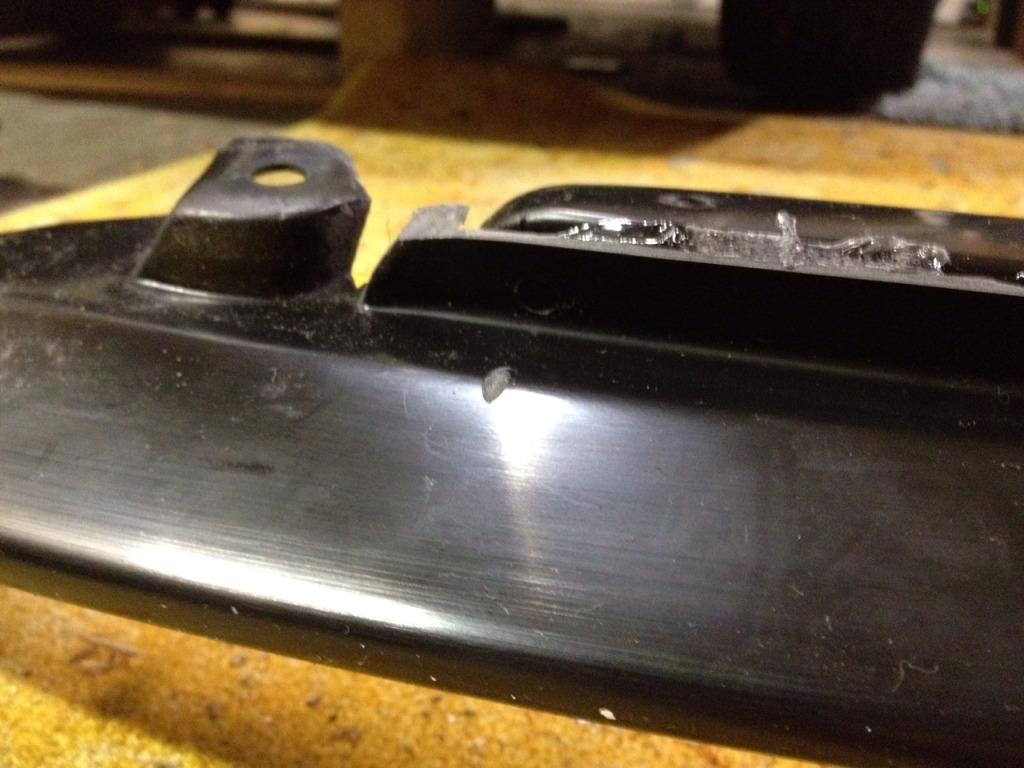
Now glue the piece you've just cut off to the rear of the center section, essentially shifting it down an inch. You will first need to sand the two surfaces being glued together. Hold the pieces together with tape to dry overnight:
After the drying is done, cut out the two raised plastic clip mounts next to where the lip bends, be careful not to cut out any more plastic than is absolutely necessary or you'll show gaps:
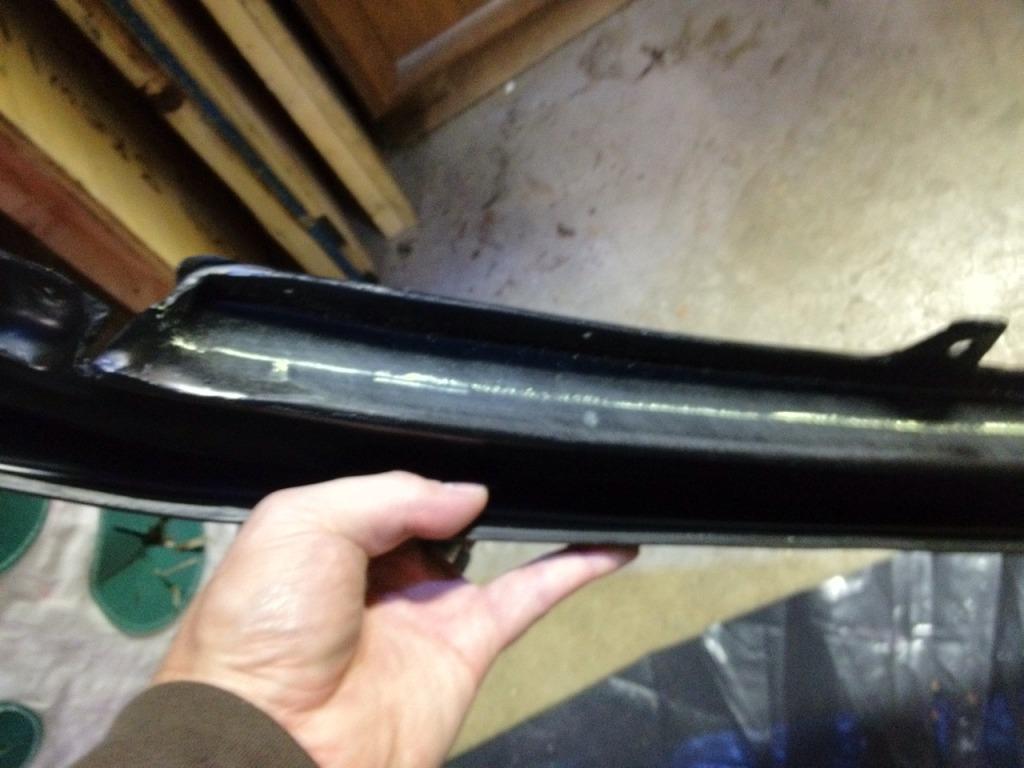
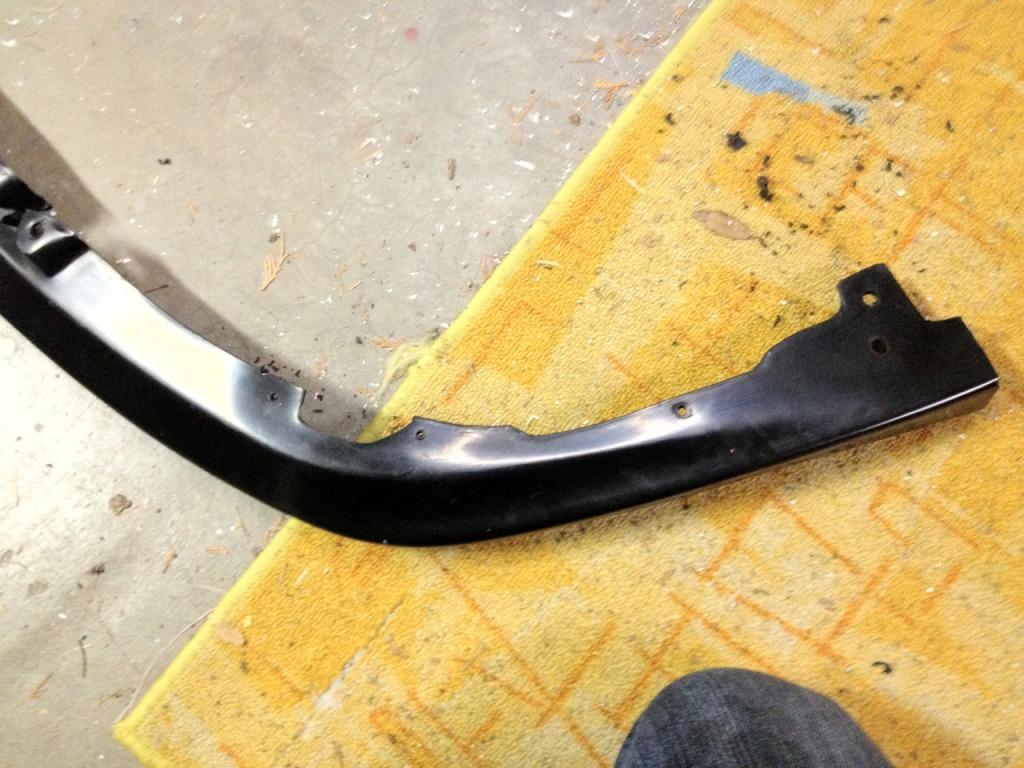
Next, drill a 3/16" hole through each corner of the glued pieces. Be careful not to graze the lip like I did! Secure each hole with a screw and a lock nut. I used 2 black vinyl license plate screws and nuts, which matched perfectly:
Now, secure the front 2 plastic clip holes on your lip to the matching holes under your bumper using a temporary attachment like a couple of twist ties; the plastic clips that came with my lip broke when removed. Locate the plastic clip at the lower edge of your passenger side fender and draw on the center of it with chalk:

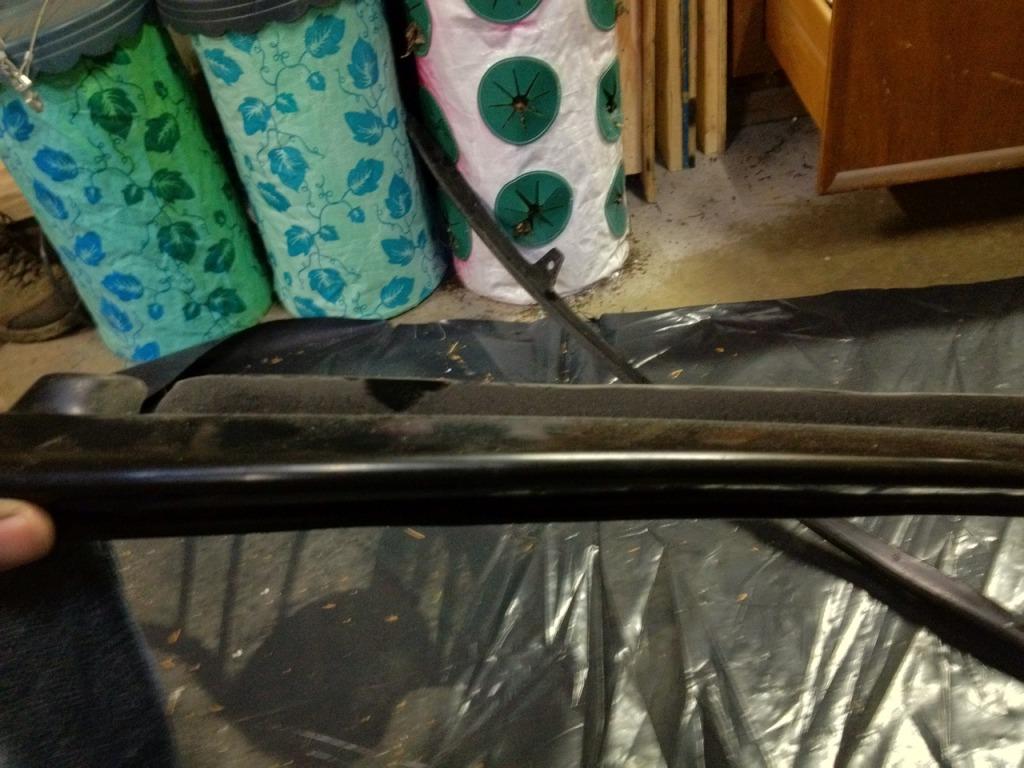
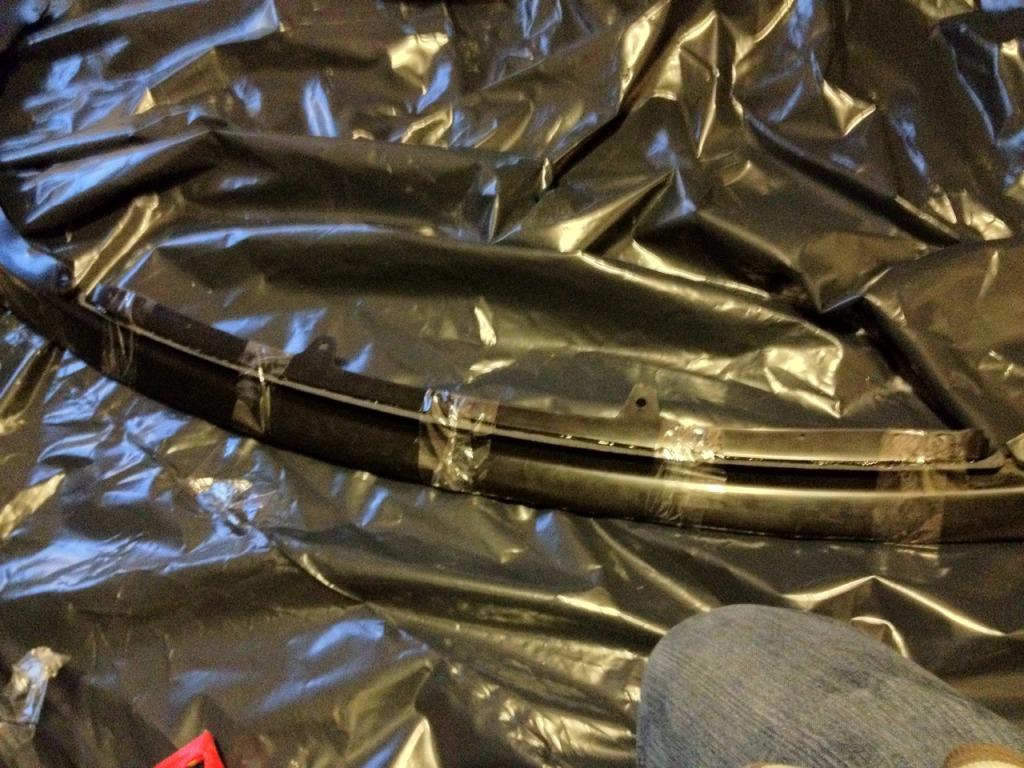
Line up the back edge of your lip with the fender where you want it and press it against the chalk to make a mark. Remove the lip and drill out the chalk mark with the 3/8" bit and then make an identical hole on the opposite side of the lip. Next drill out 3/16" holes on either side of each of the cutouts you made earlier. Your drilled lip should look like this:
Next, it's time to attach your lip. Jack up the front of your car first, you'll need to fit a drill/driver under there. First, use the supplied plastic clips to attach the two center holes you temporarily mounted earlier. Next, pull the fender clip you chalked earlier and its drivers side counterpart, and use the same clip to secure the lip. I had to use a small rubber mallet to get it all the way back in. Next, put the screws into all the small holes in the lip and into the bumper, predrill the bumper first with a small 5/64" bit through the holes in your lip. Last, drill through the clip mounting locations on either side of the center section and into your bumper with a 3/8" bit and secure with the plastic clip. You should be able to use all your stock lip mounting locations besides the center screw. Sorry about the lack of pics, but black screws on black plastic don't tell much of a story... Here's the finished product:
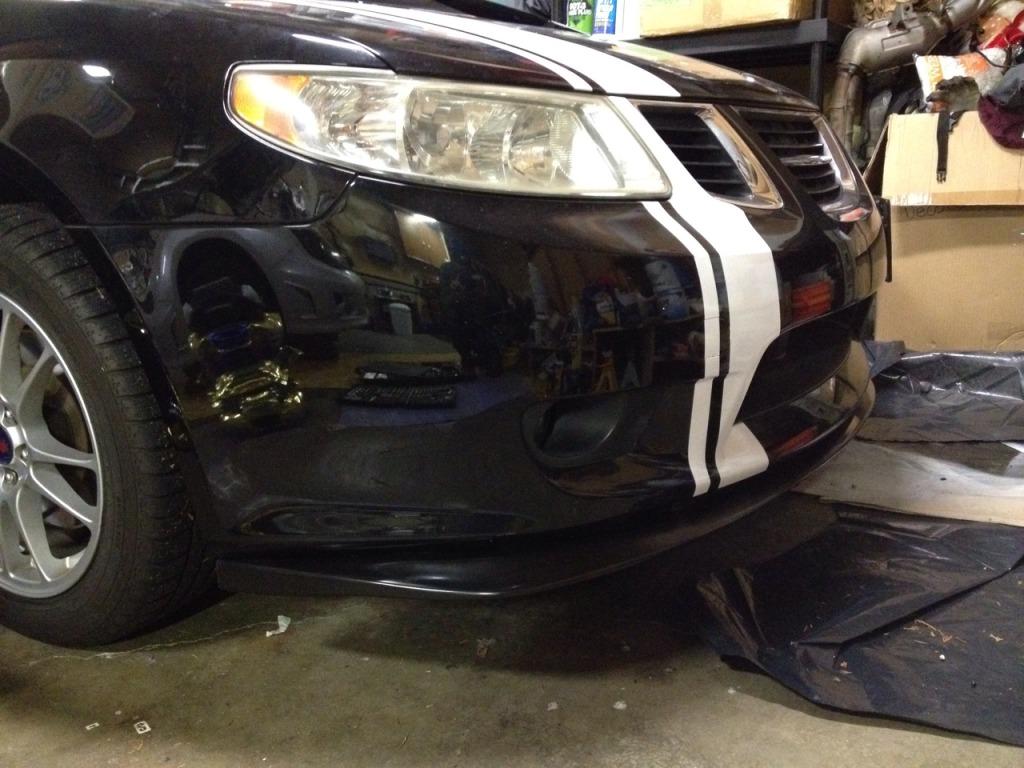
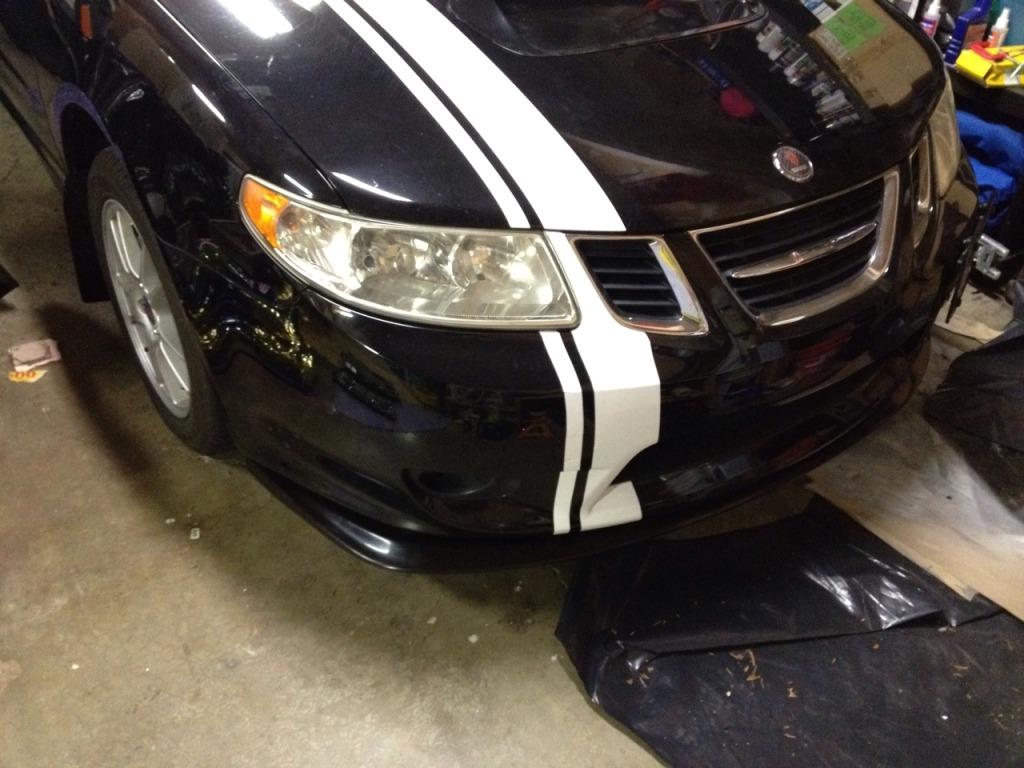
The gaps on either side of the center section are barely even visible unless you're at just the right angle: