You must be logged in to rate content!
7 minute(s) of a 37 minute read
6-8-2020
Callaway Turbo installation thread in a 1983 GTI
Compliments of jpawl @ www.vwvortex.com
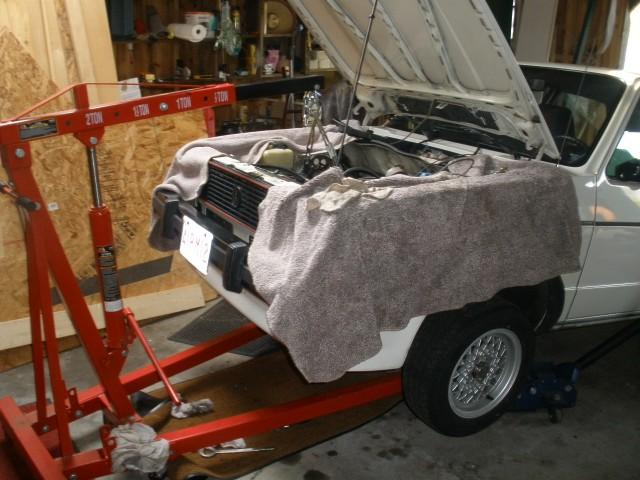
The subject here is my 1983 Rabbit Gti which used to have a Callaway Stage II kit in it. The original owner moved from NY to CA and had it removed in 1985 at New Dimensions. I wanted the whole package when it went up for sale in 2001. I missed out on the car but got the Callaway parts. I installed them on a 1984 Rabbit Gti in 2003. In 2004, the Gti that you see here (that I missed out on) went up for sale. I was still obsessed about it so I bought it and had it shipped from San Jose, CA to Lexington, MA. Ever since I bought it, I always wanted to get a Callaway turbo kit back in it like it had before it went to CA in 1984. So finally, my friend Bill and I, who have three Callaway turbo installs between us, got started on it this past weekend.

Rebuilt Roto-Master TO4B completed by Blaylock Turbo in Kansas. This instruction manual was used as a reference in my first install on my 1984 Rabbit Gti several years ago.
Twenty five years without the turbo. It is only fitting that a turbo goes back in.
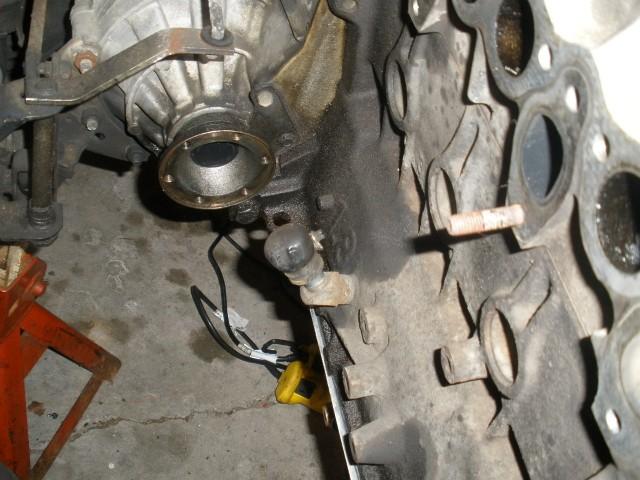
The back of the motor after the intake manifold, exhaust manifold, and axle removed. Note the drain plug tapped into the block that has been sealed off since 1985.
This is most of the Stage I Callaway kit to be installed. The heart of the kit is below.
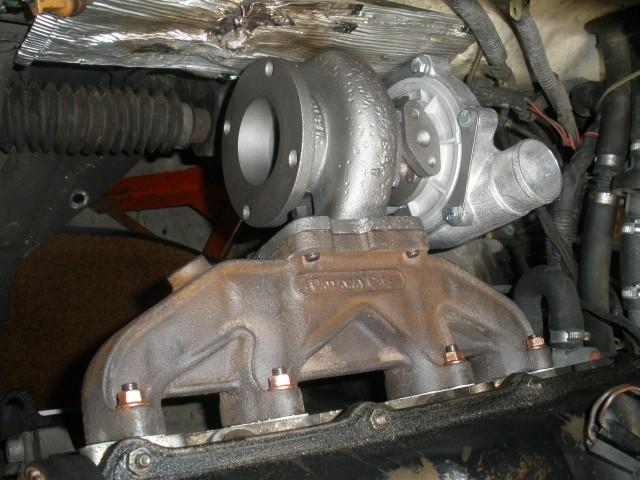
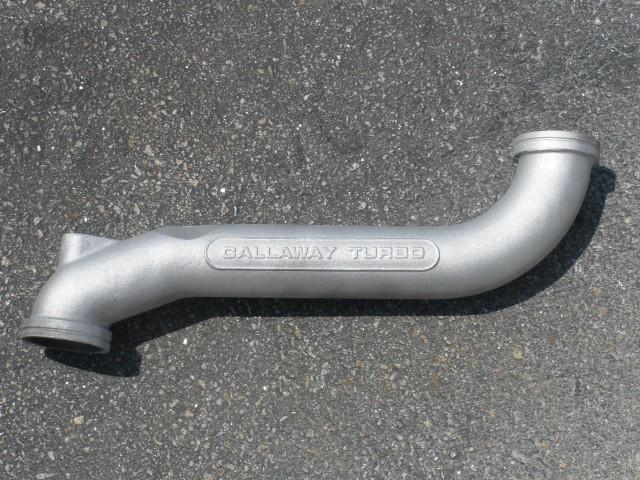
This is a quick shot of a test fit of the turbo to clock it properly. Note the stamp of "Callaway Cars" on the exhaust manifold. In addition, a used (torn) heat shield will protect the brake line from the heat of the turbo, mounted on the firewall.
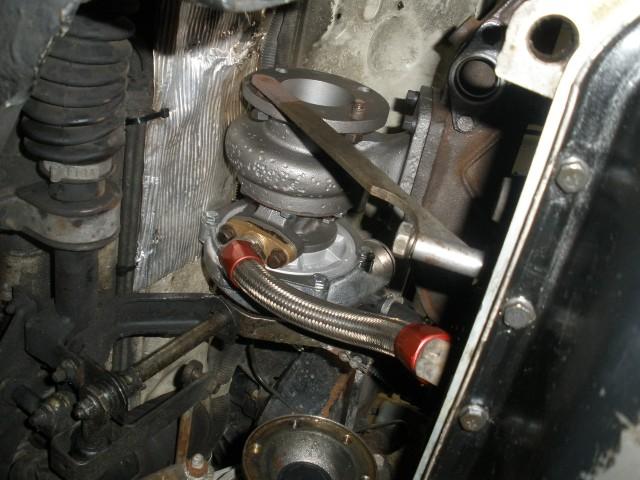
Here is a shot from below to show the oil drain from the turbo to block. Note the bracket to help support the turbo once the header pipe is installed.
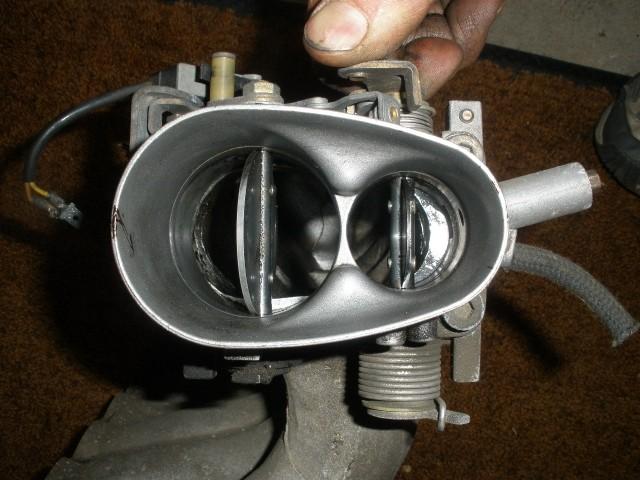
This is what you get when you install an aftermarket, enlarged throttle body onto a A1/Mk1 intake manifold. Note the restriction once the butterflies are opened. This will be taken care of real soon. Stay tuned as Bill is going to work his magic and create a 2.5" downpipe.
Stay tuned.
Thanks,
Jim
5/12/2010
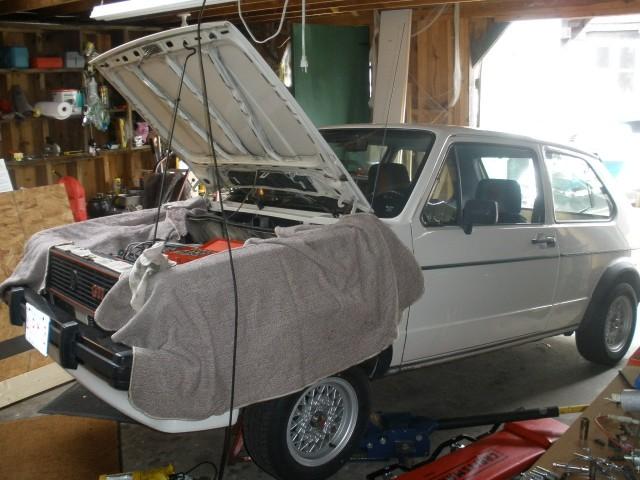
Bill and I have had some time over the past few weekends to clean up a few items and sort out the small stuff. You will be surprised how much time it takes to sort out the small things. I want to take care of anything that might be a weak point down the road.
Below are some pictures from a few weekends ago.
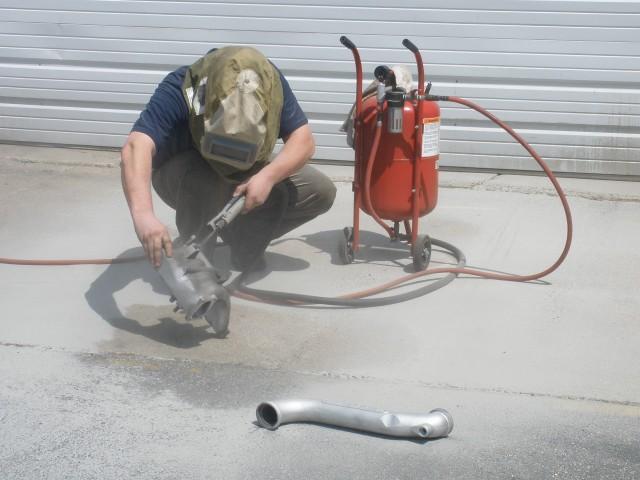
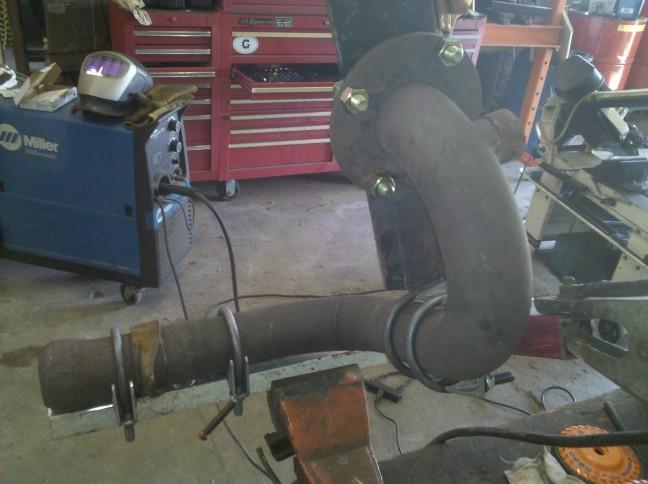
Bill tackled the sandblasting on the Callaway pipe and intake manifold. The end result is worth it.
This came out very nice. No more grease and grime. 
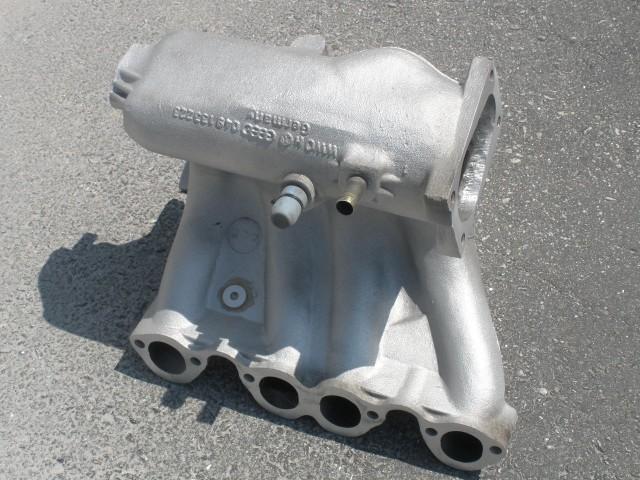
In addition, the intake manifold came out spotless as well. Note the porting at the throttle body end of the manifold.
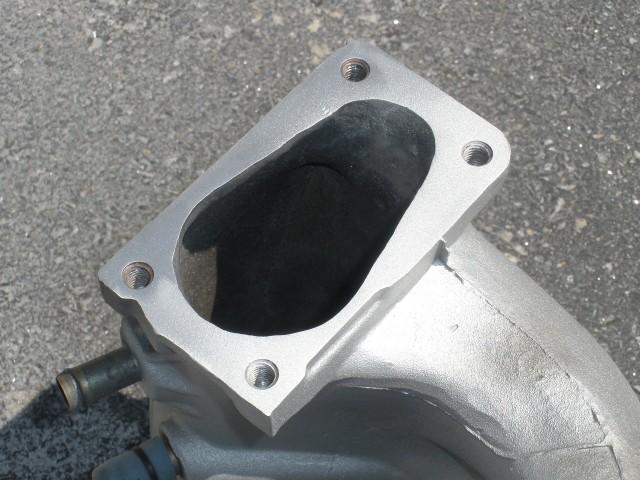
This is a closeup of the porting. A decent amount of aluminum was cleared out to match up with throttle body ports.
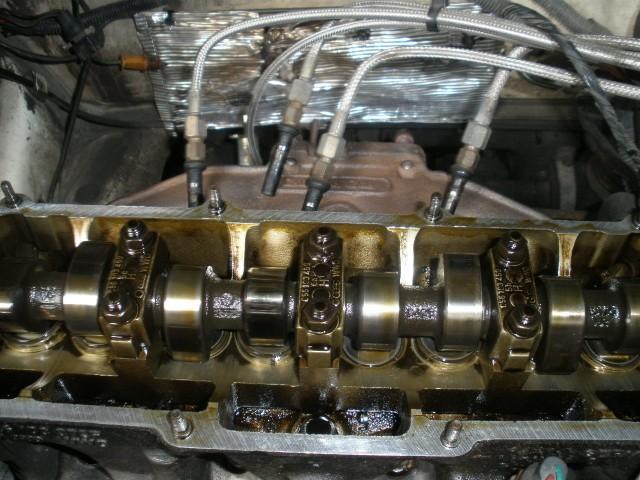
According to the receipts from the previous owner, this should be a 1.6 liter cam. New studs and a rubber valve cover gasket were laid down to cushion a Callaway valve cover.
The motor dropped down a bit to remove the motor mounts on the drivers side and passenger side. Each mount was in great shape so I did not bother replacing them with the HD mounts I had on hand. Lining up the mounts later to get each bolt in is quite the challenge. I am sure some of you know what I am talking about.  At any rate, a new timing belt and tensioner were installed. In addition, all mechanical timing marks were lined up correctly - crank pulley, cam gear, while cyl 1 was up at TDC.
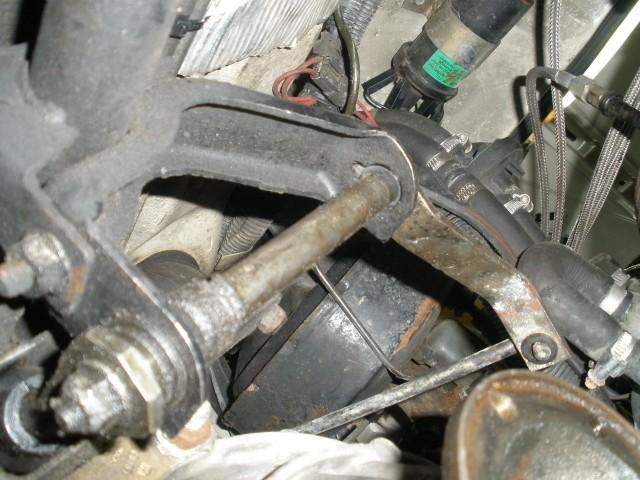
Here is a picture of the relay shaft and the missing bushing at the top of it. This picture is taken from underneath. I used Teflon bushings as replacements. They should hold up well to the heat radiating from the turbo. While each axle was out, each drive flange seal was replaced.
As of now, I am waiting for some G11 coolant and Redline MTL gear oil so we can fill up the engine with new fluids. The next step is to button up the bay and then begin manufacturing the down pipe with some stainless 2.5" stock. We can't replace the passenger side axle, which received two new CV boot kits, until the downpipe is finished and installed.
Jim
5/17/2010
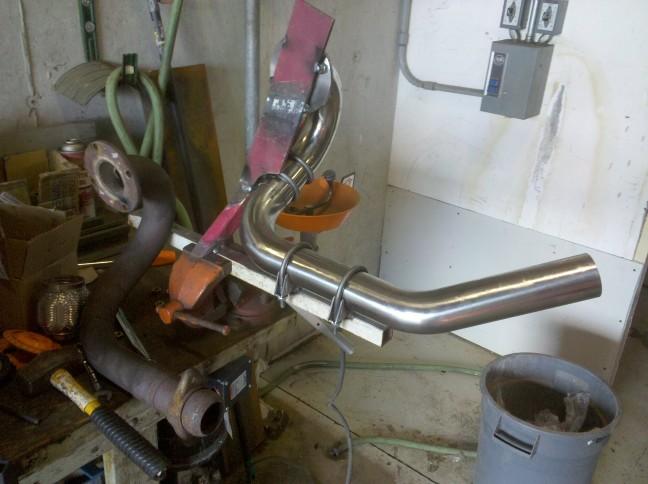
This past Saturday was all about getting a new down pipe made out of stainless steel stock to maintain a 2.5" diameter from the outlet of the turbo all the way to the tail pipe. Bill put his welding and fabrication skills to work :bow:before I could turn on the camera.
Because I had an original downpipe, a jig was made. Don't under estimate the time and effort needed to lay one out as this is the ground work for the new down pipe.