You must be logged in to rate content!
10 minute(s) of a 13 minute read
4-21-2012
An E92 and the Atlas Kwik Bay 7000 Mid-Rise Lift
Compliments of ProfessorCook @ www.bimmerfest.com
4-21-2012
When I designed and built my barn 8 years ago, I left the area over the car bay open to the rafters above and supported the roof with an I-beam as a structural ridge. This, with the idea that I could someday install a lift. With the incredibly generous and patient help of DSX and his grandson, I got the lift today and got it running. The instructions were of little help and I couldn't find anything on the web, so I thought I'd put a DIY together and show you how it works with the coupe.
I considered a full range of lifts and how they would work for my needs. When I came across this lift, I knew I'd found an excellent fit. http://www.gregsmithequipment.com/At...-Mid-Rise-Lift. I was very pleasantly surprised to find there was a location a short drive away and they had a few in stock.
After waiting for a family group of men to finish ordering enough equipment to outfit an entire shop, we got the lift into DSX's work pickup truck and headed to my place. I've got a hoist and a trolly hanging from the I-beam, so DSX backed in, we hooked it up, lifted it off the bed, DSX drove out, and we set her down on the floor. The lift is supposed to weigh in at about 1100 pounds with another 100 or so for the control unit. (The control unit is in that wooden box near the back of the bay.)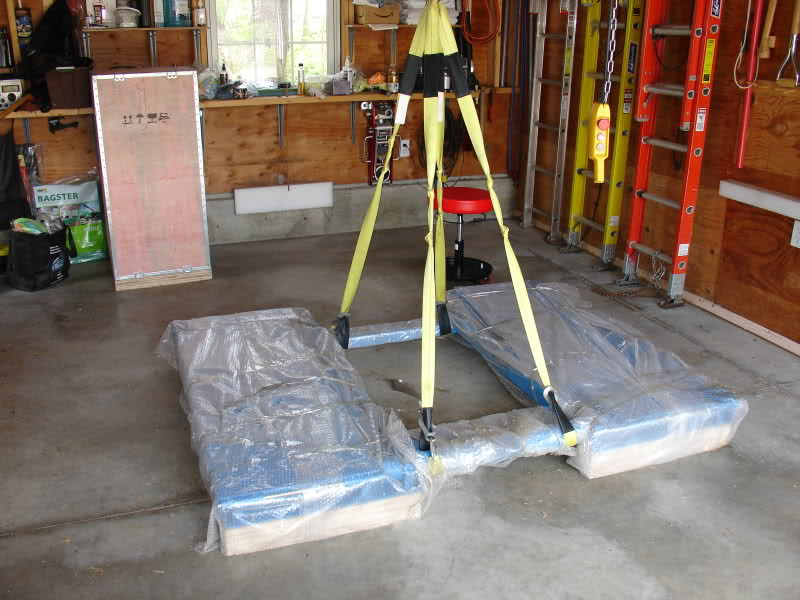
After getting things unwrapped, you'll find you have the control unit, a combo hydraulic/air line, four ramps, a couple of casters, four heavy rubber blocks, and the lift itself. (The dog and the kid on the stool aren't part of the package.)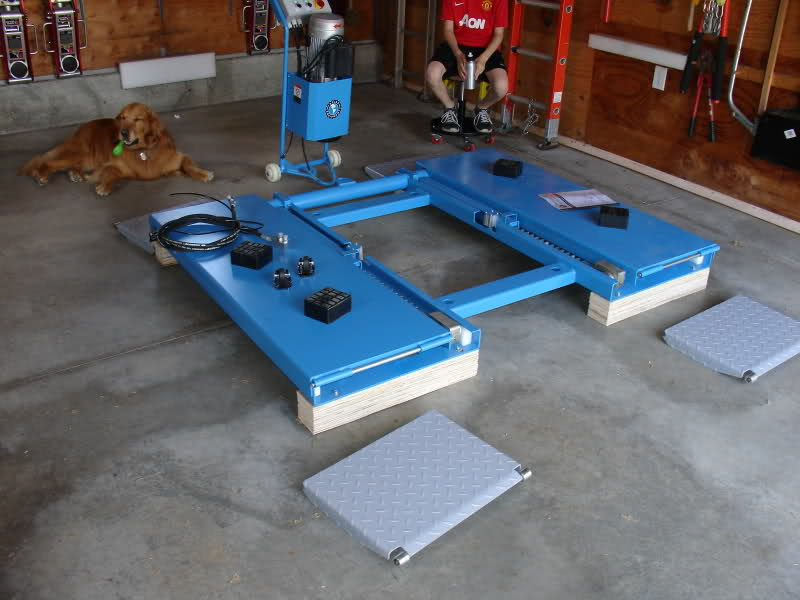
To get the ramps on, you have to pull and replace some steel rods. The rods are held in place by a snap ring or retaining ring (also sometimes referred to a bit incorrectly as a C ring).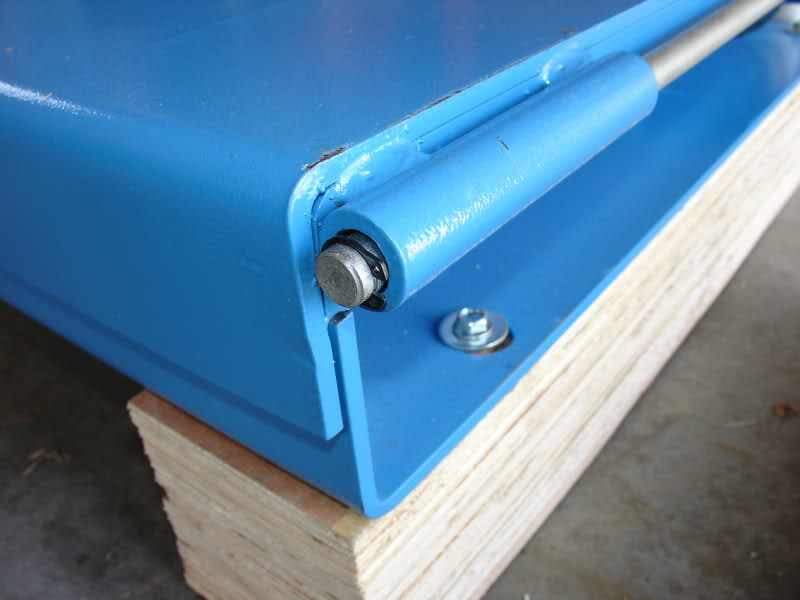
Getting these puppies on and off will be a royal pain if you don't have the right device, snap ring pliers. These pliers are pretty easy to find and pretty cheap as well.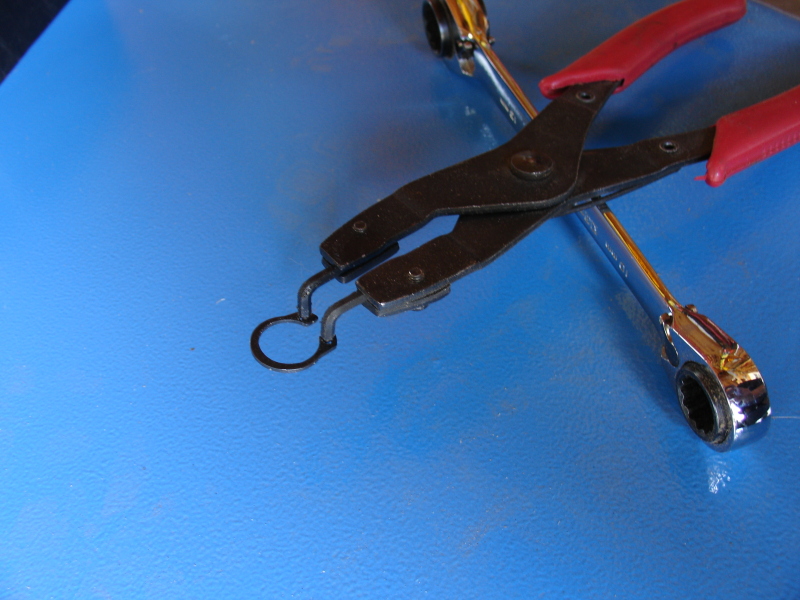
By the way, before you install the ramps, you need to back out the lag screws from the fork lift blocks. Three of the four ramps went right on. The fourth ramp didn't fit correctly and I had to straighten a bit near the hinge to allow the central cylinder to line up for the rod. A large wrench and a bench vise made quick work of it.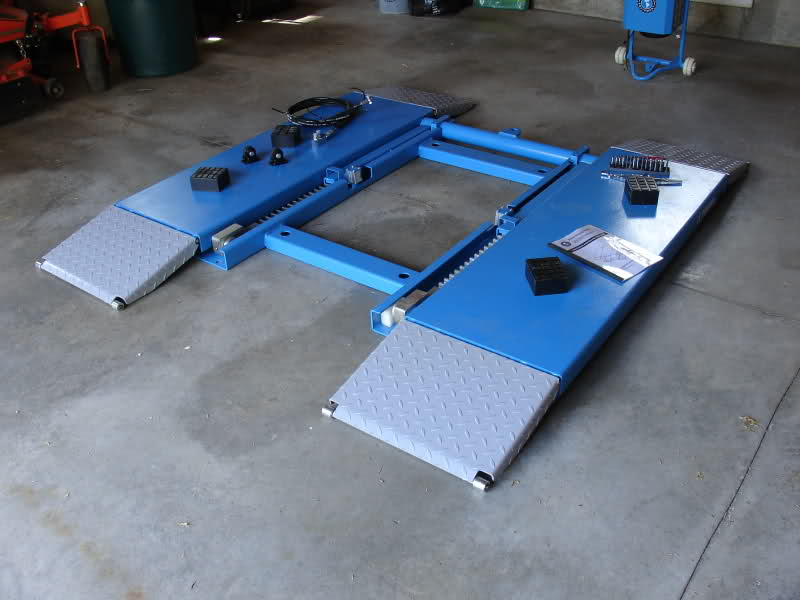
Next, I hooked up the hydraulic and air lines. At the lift, the connections are straightforward. The air line is a small black tube you just push into the fitting. To remove it you push the blue flange into the fitting and the tube easily pulls out. (Pretty sweet.)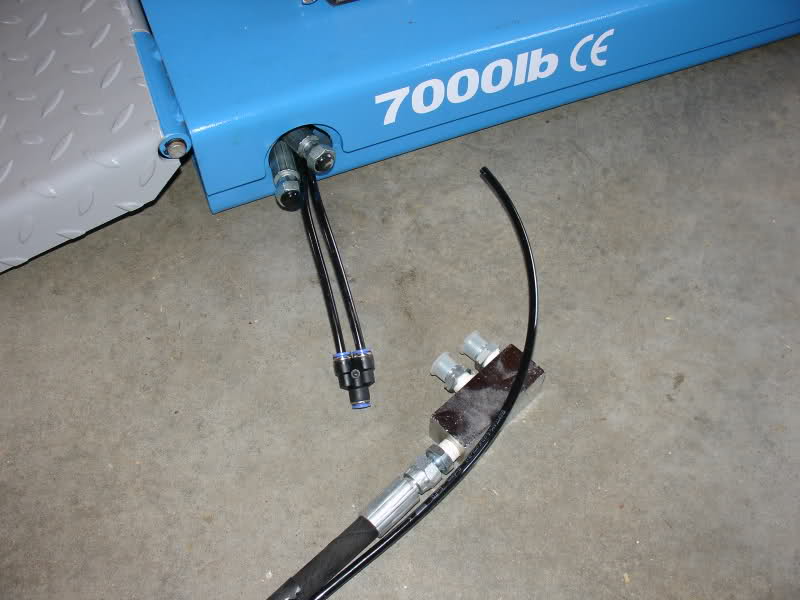

At the control unit and pump, you have to remove a shield to get access to the fittings. The directions offer no help about what to connect where. It took me a while to find the location for the hydraulic line.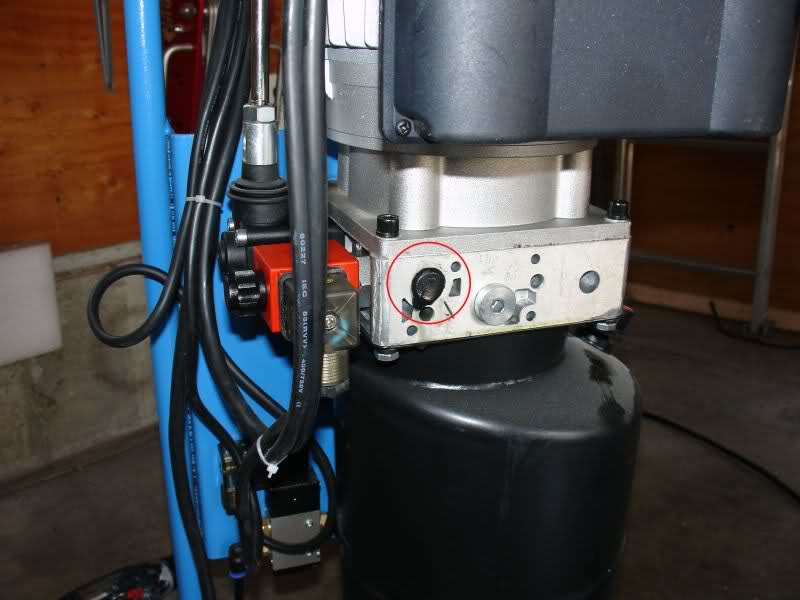
There are two possible locations into which to hook up the air lines. In the end, I figure out that the line from the lift platform goes into this location.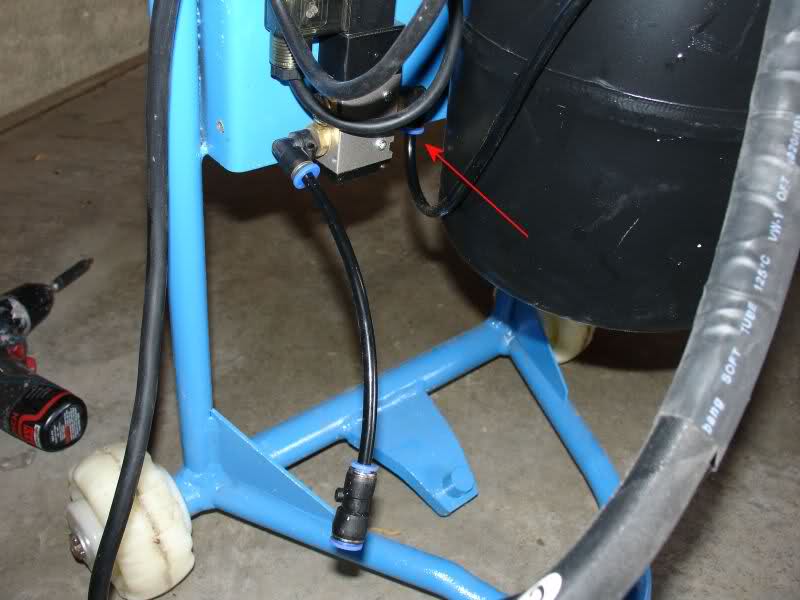
You need to supply about 120 psi of air to the other connection (shown dangling in the previous picture). Though I do some carpentry and have plenty of air tools, I'd never seen an air line like this before. There was nothing in the instructions on how to make the connection. Not willing to give up, I improvised. I removed the tube from the pump, took an extra air fitting, drilled it out with a #3 bit, tapped it for 1/4" -28 thread, added some Teflon tape, and screwed the tube into my modified fitting.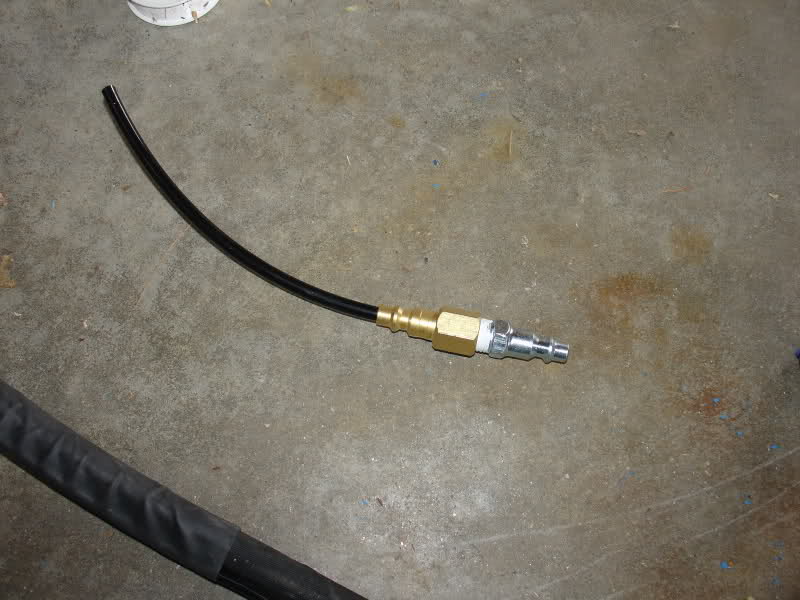
The air releases the lock devices on the lift. I figured that if my improvised fitting failed, the worst that would happen is that the lift would be stuck in the up position. ('Turned out the fitting held just fine and was airtight.)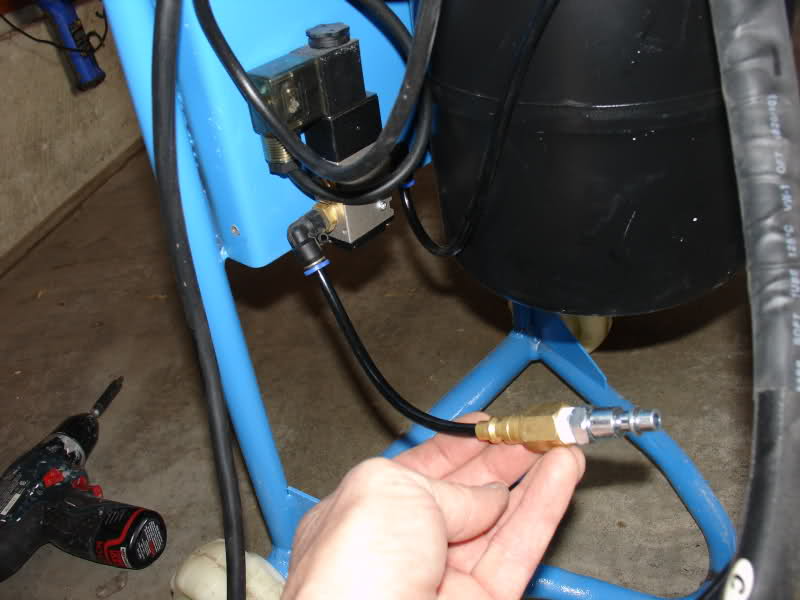
I then wired up a plug. Black to black, blue to white, and green/yellow to ground.
I used a 20 amp plug. The pump should draw a maximum of 14 amps. There are recommendations to use a 30 amp circuit, but, so far, the lift has been running just fine on a 20 amp circuit using a fairly long run (70') of 12 AWG copper.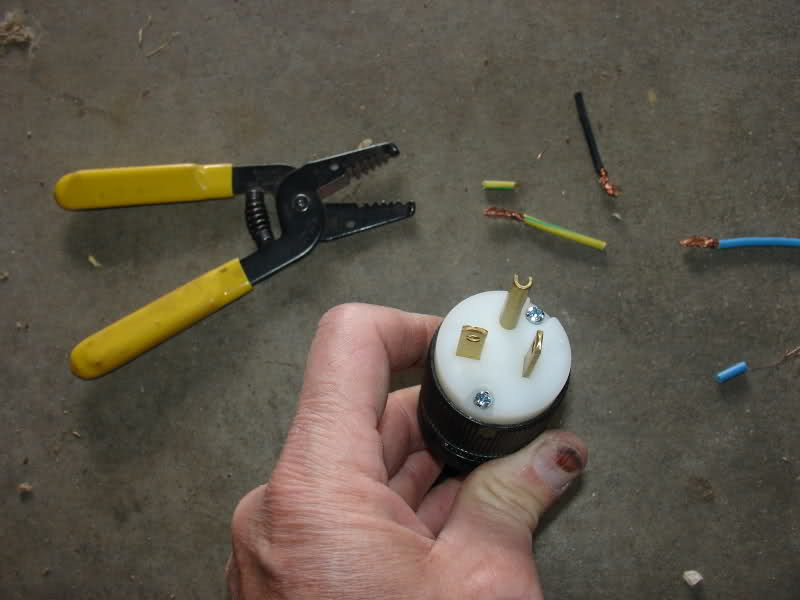
After doing a bit of research, I landed on two types of hydraulic fluid I could use: AW-32 or R & O. After talking with a knowledgeable Napa guy (with lifts of his own), I settled on the R & O. The reservoir took about 5 liters (a gallon and a half) as listed in the lift manual.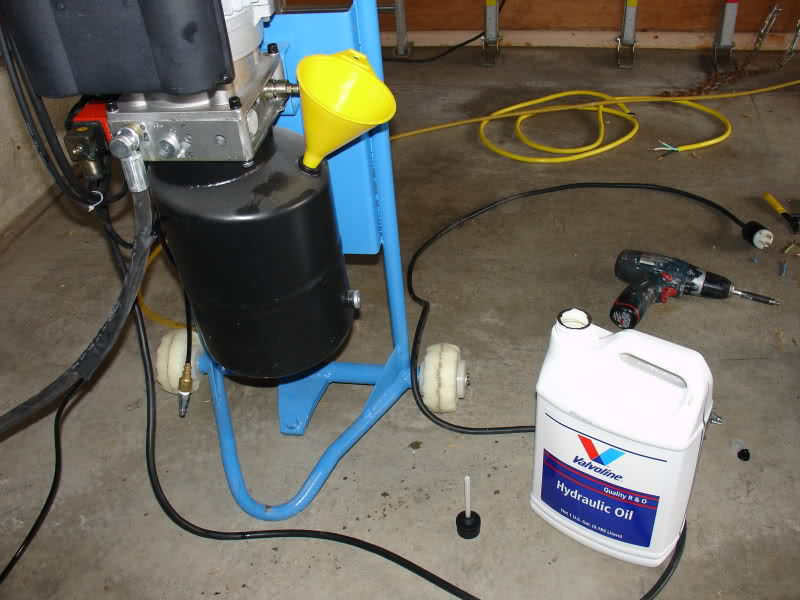
So... it was time to test it out. I hooked up the air line, plugged in the electrical, switched the control unit on, took a deep breath, and gave her a try. First, I checked that the fan in the motor was turning in the correct direction by giving the "up" button a momentary pulse. (It was.) It's a bit unnerving at first, because the air line is activated by the button and the retainer for the locking mechanism gives out quite a loud bang as it slams out of the way. At first the lift didn't rise, but I figured that was because of air in the line. I wasn't quite sure how I was going to bleed the system, but I didn't have to worry as the one connection I didn't make myself was loose, and hydraulic fluid started squirting out of it. My bad. I should have tightened all of them first. I tightened it down and tried again. Voila! (The sawdust on the floor is there to soak up what didn't wipe up from the leak. It also shows where the leaky connection was.)
As directed, I cycled the lift up and down a few times. It takes just over 40 seconds to reach its maximum height of about 40" and just over two minutes to go back down (with no weight on the lift).
The construction of the lift seems just fine. The welds look surprisingly good. The lift is beefy.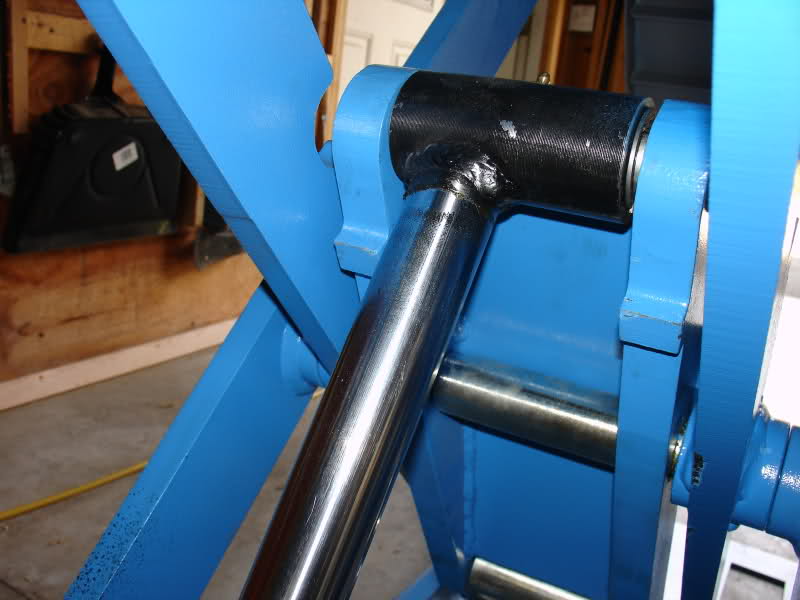
After cycling things up and down, I checked the fluid level again, adjusted it, and put the guard back on over the fittings at the base of the motor.
With my son helping to guide the car, I brought in the coupe. I had just the clearance needed to slide in some jack pads. (The picture shows the clearance at the front block, there's about a 1/4" more at the rear.)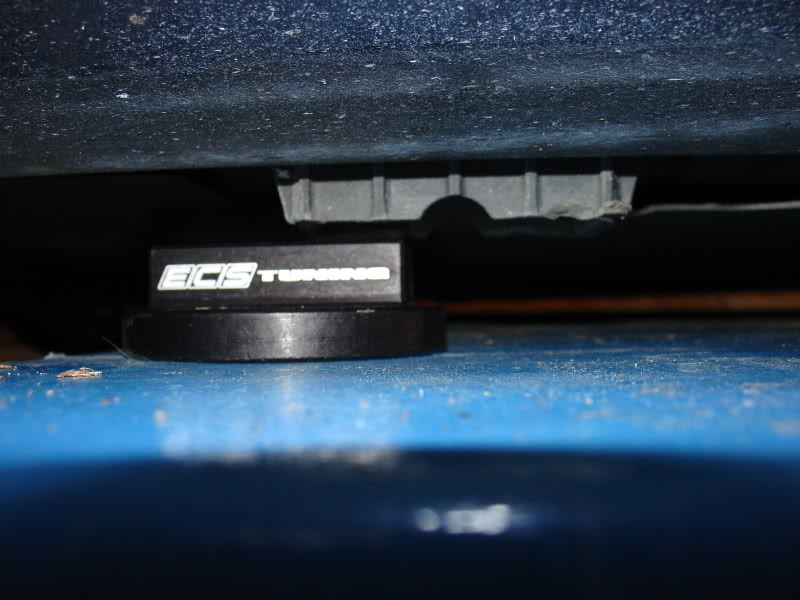
I put some two sided tape on the jack pads, pushed them up into the jack blocks so they couldn't be out of place when the platform came up, and lifted the car.
Excellent. Still about 40 seconds to go up and there was no indication of any strain or stress in the motor or the lift. With the car's weight, it only takes 40 seconds to lower.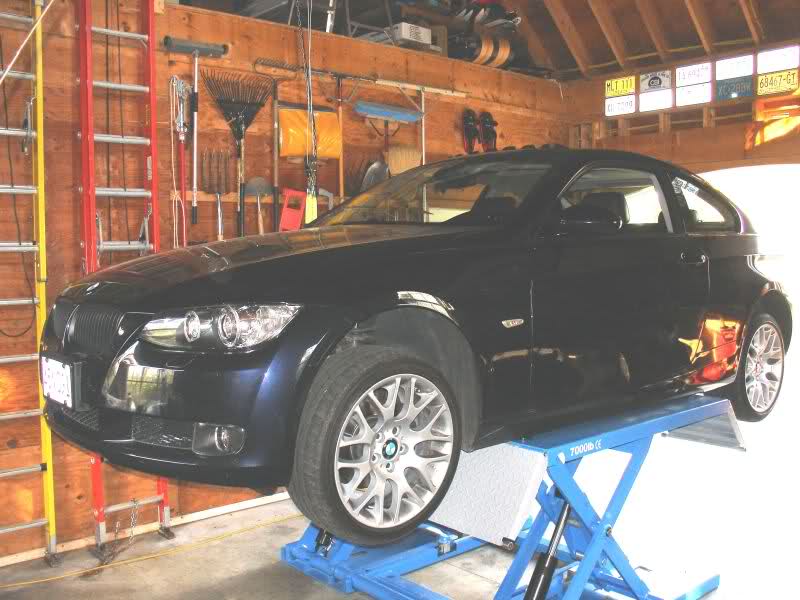
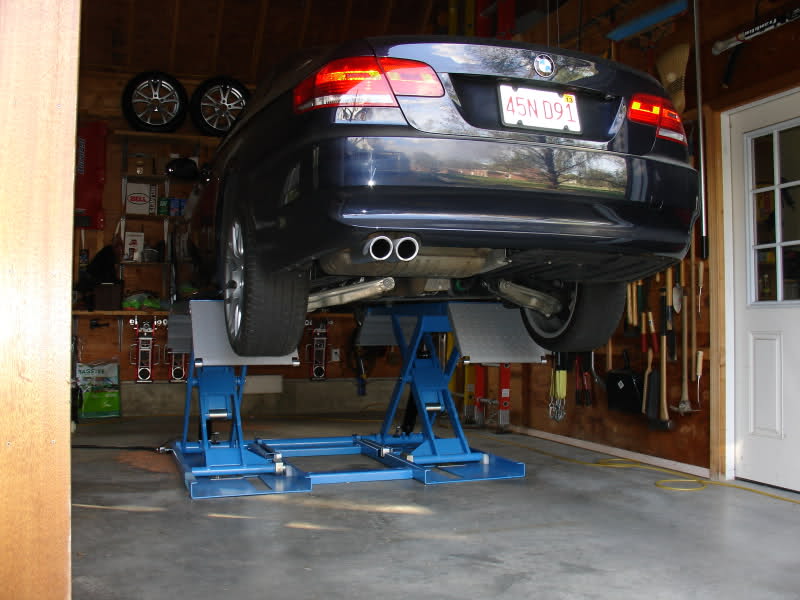
There's good access under the car and complete access to the exhaust and oil plug. The platforms are about 14" wide, so quite a bit of the underside of the car along both sides is not accessible.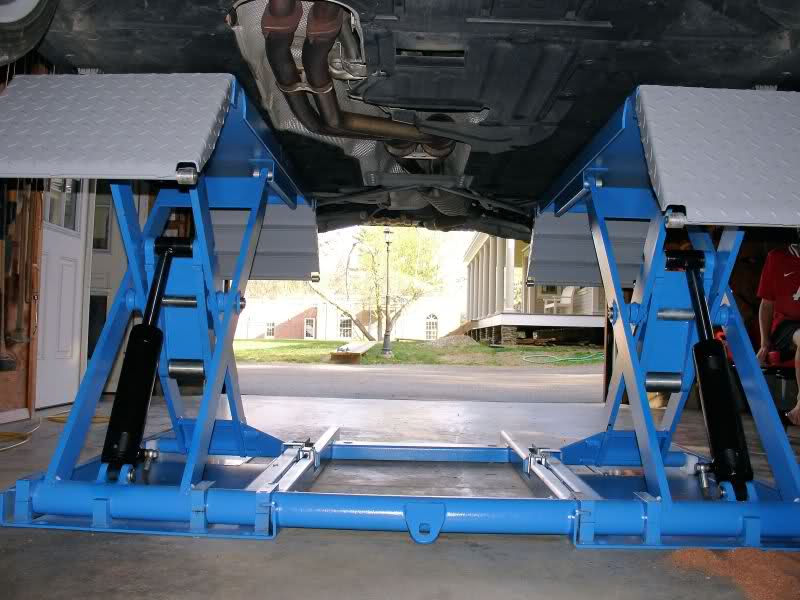
So... compared to other lifts, what do I think?
Pros:
No need to bolt this down to the floor or worry about floor thickness and strength.
Much less clutter in the bay than you'd have with two or four post lifts.
No posts in the way of opening the doors.
Nothing in the way when walking around the car.
Can lift the car to virtually any height between 0 and 40".
Can move the lift by hand and reposition it as desired.
Because I have the overhead hoist, I'll be able to move the lift to the attic when not in use.
Very stable.
Able to lift the wife's X5 with ease as well.
Cons:
Ramps block access to the underside of the car near the rocker panels.
40" lift makes working under the car awkward. (Much better than jack stands, but still.)
So that's it. I'm glad to have this now that the car's out of warranty. Oil changes, brake work, and cleaning the car should be much easier and safer now.