You must be logged in to rate content!
9 minute read
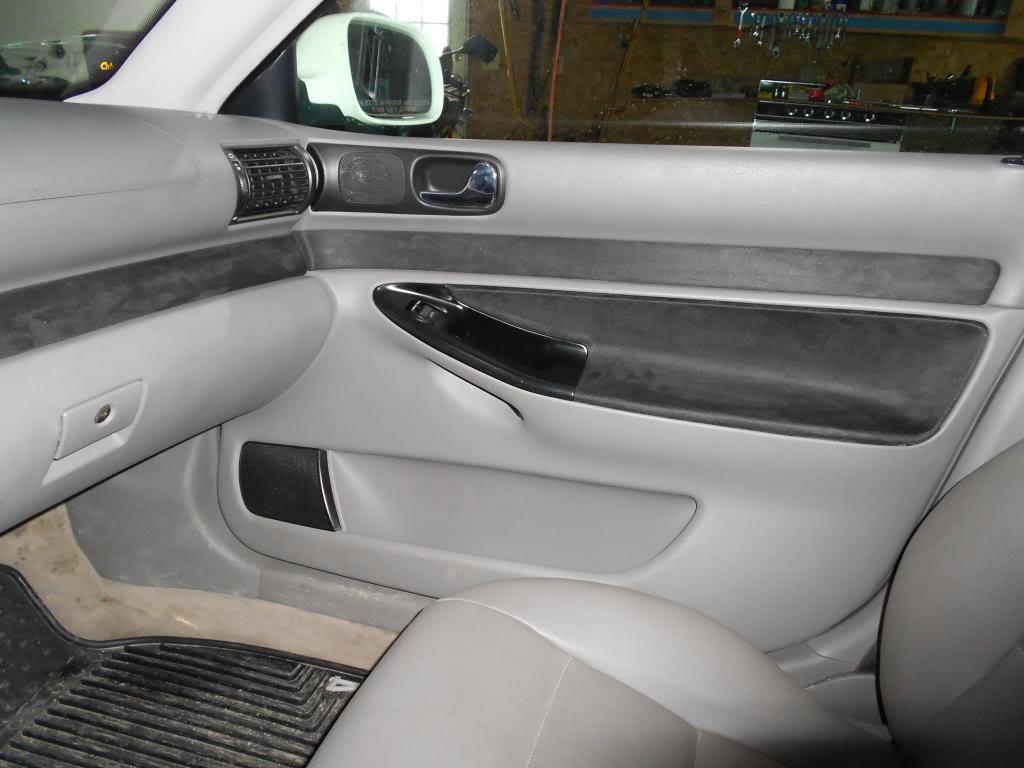
Audi A4 B5 interior door panel suede inserts
Compliments of MrSnickelsnizer @ www.audiforums.com
Allright so I am not very good at writing this stuff up for diy's or anything but here is a go at it anyways. So many people out there have taken the armrest sections out of their door cards/panels and simply relined them with suede and put them back into place. Simple right? Not once you actually see how those pieces are held onto the door. They are plastic welded into place and the only way to get them out is to be creative and waste quite a bit of your time. This about a 3-4 out of 10 in difficulty. It's the time it takes which blows but hopefully with this short synapses of how I did mine, you will end up saving yourself a lot of hair pulling
So here is the quick parts list you will need.
1. Hands. Not one but two. If you have one, I am sorry.
2. A material that you plan on laying down in place of the removed suede or alcantara inserts. (make sure you have enough)
3. 3M adhesive spray or some other suitable fabric glue. ( the stronger the better)
4. Plastic Weld. I only will recommend one brand. Permatex plastic weld. It is the best but you will need about two per door insert. 6-7$ a tube :/
5. Paint if you plan on spray painting your door grips and or speaker grilles (also plastic welded in.)
6. A solder gun with a tip you do not care about, and or a dremmel.
7. 80 or 100 grit sandpaper
1st off work one door at a time. Take one door off, work it till it is finished, then grab the next. I recommend starting on one of the rear doors till you get the hang of how to make the fabric adhere to those inserts. It is a lot of hand forming and careful laying of the fabric to make it fit on there smooth with no bubbles and creases. See slight bubble= bad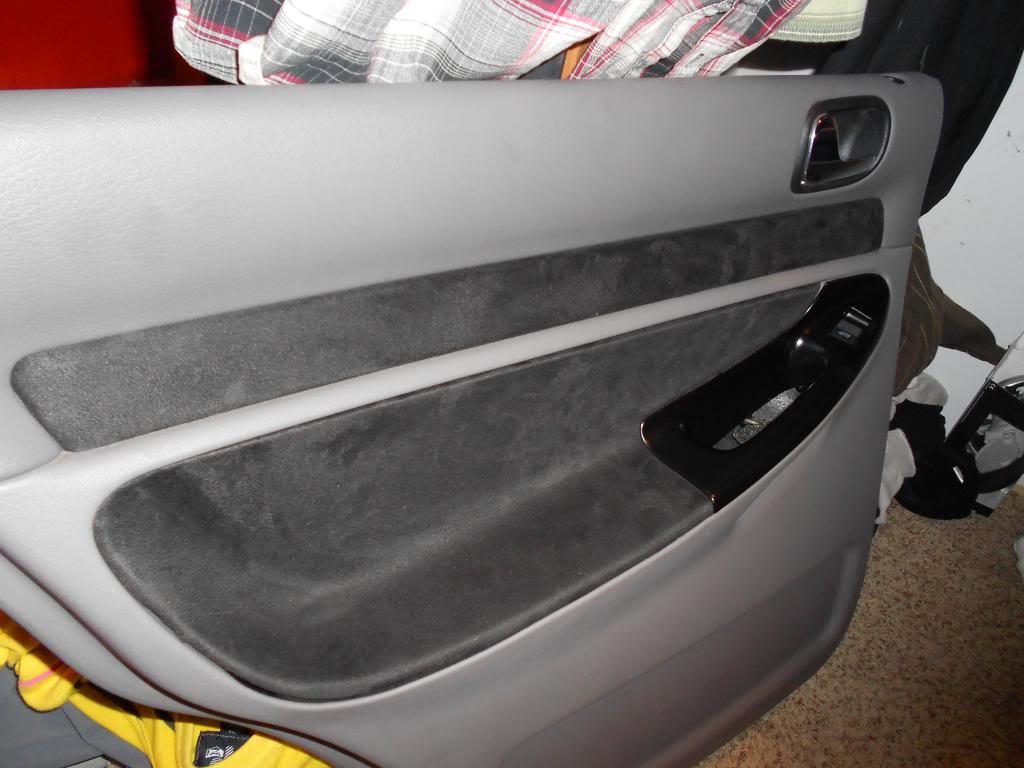
Okay so you chose which door you want to do. Now remove the door panel/card from the door itself. This is done by unscrewing one phillips head screw in the plastic hand grip, which then pulls off and reveales two more hidden screws which screw straight out. Plus the two tiny philips screws at each top corner of the door when the door is ajar. When all screws are removed pull up on the door card, you will feel the clips slide out and then pull it towards you slightly and pop off the metal clip holding the white door latch cable. Unhook the cable and all other wire connectors and the door is now free!!
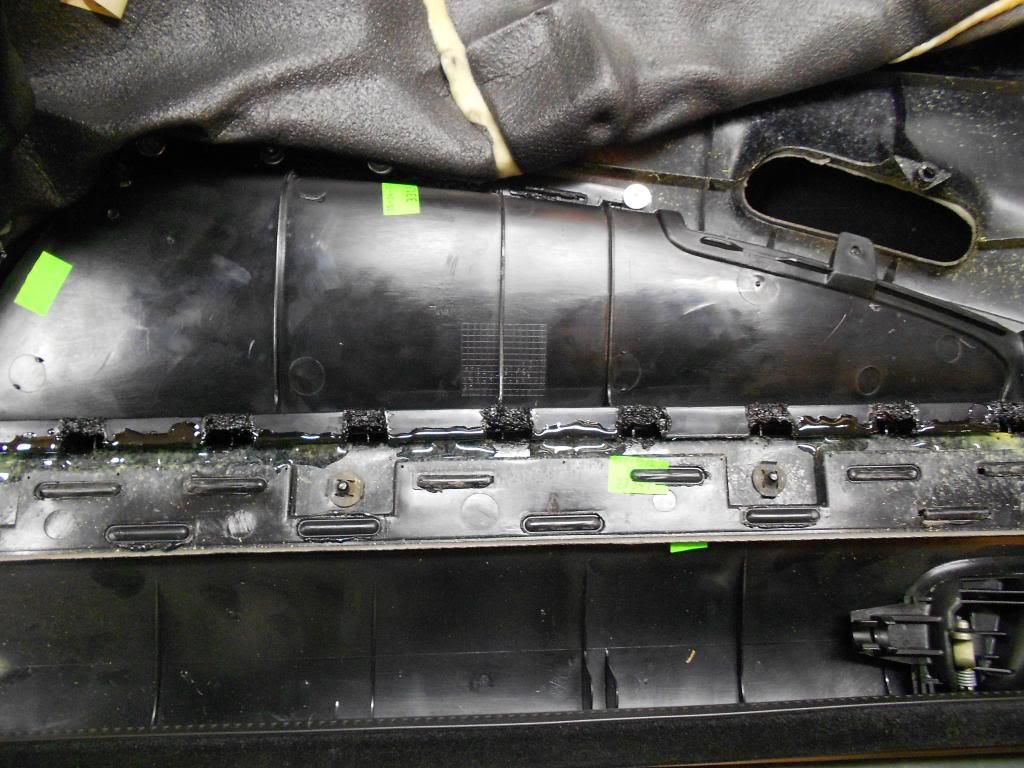
Set the door panel on a clean work table, (preferably in a garage or outside if you plan on using the soldering gun method to melt the tabs out, It stinks so bad). Pull back the foam cover on the back of the door about half way then duct tape it down so it doesn't flop around while cutting and melting. You can now visually see the tabs that hold the door insert on. There are a ton of them so be prepared to sit for a while. Hence have a beer or pepsi on hand.
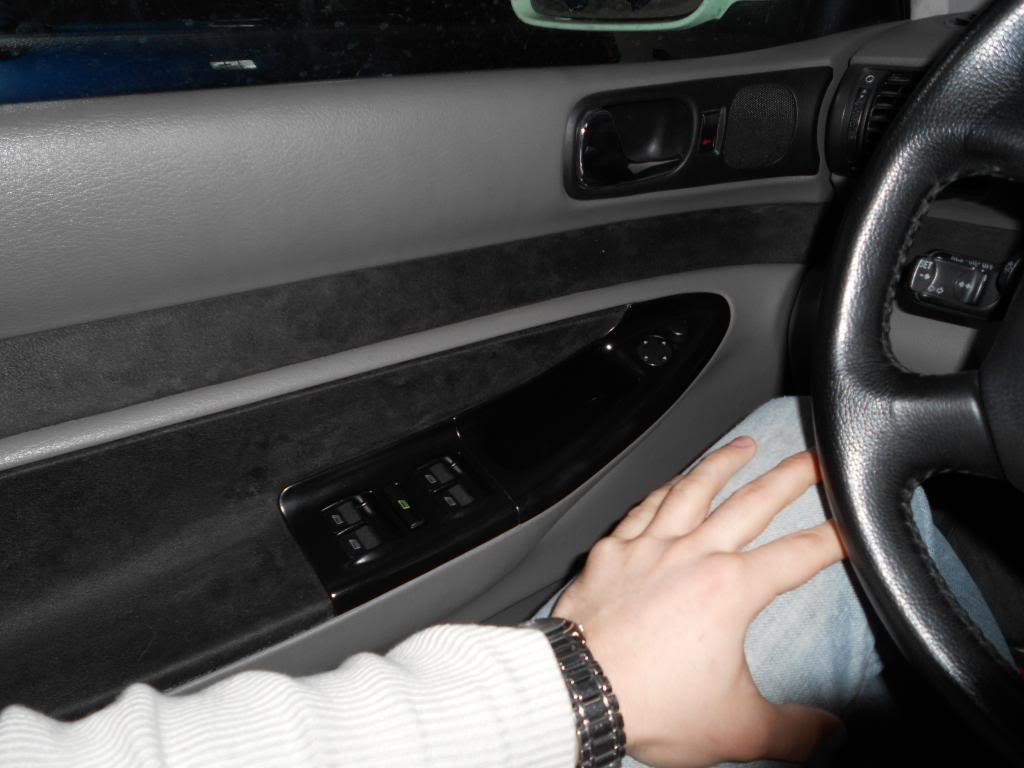
So this is the part I don't remember to well. I am not sure if the door handles need to be taken out for you to remove those inserts. Anyways you should take them out. Plus it helps if you wanted to paint them to have them already removed They are held in by 1-2 orange phillip head screws and then their side push down clips, which you just grab with your fingers and compress. Anyways when they are out paint away.
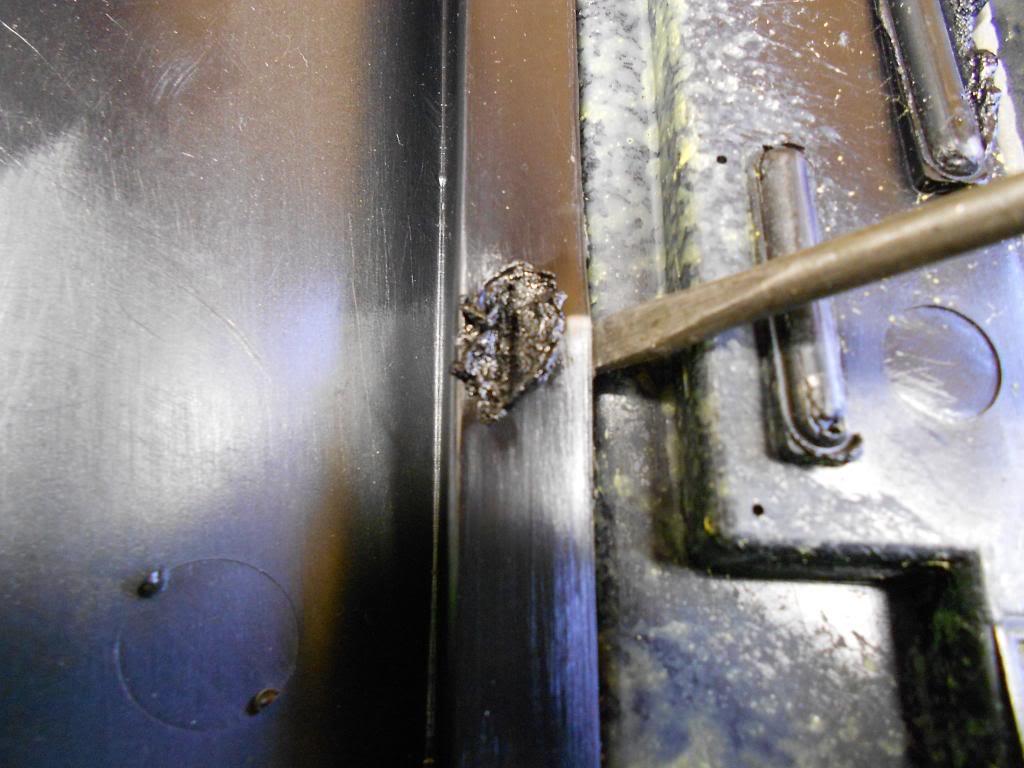
So back to the door card. Heat up your solder gun or get your dremmel out and melt/cut each one of those plastic tabs. I melted mine seems easier. Use a flat head screwdriver to pry up the newly melted tab area to prevent it from re-bonding to the surrounding plastic. Work your way all around the door insert till they are all melted and or cut. Gently pry out the piece.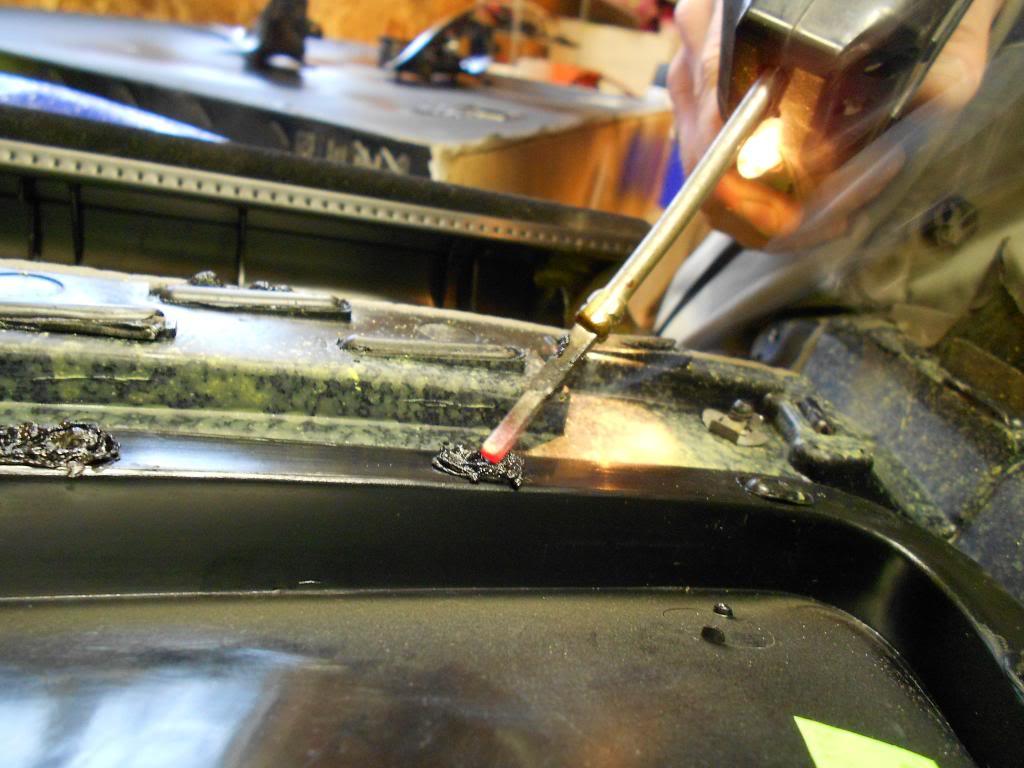

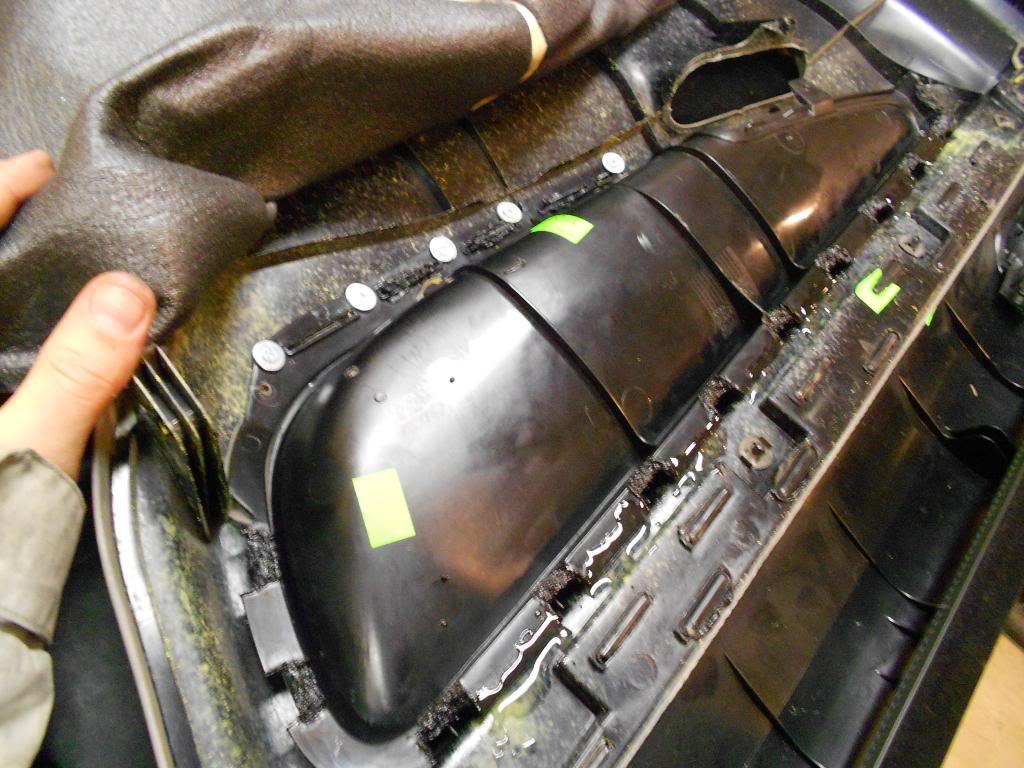
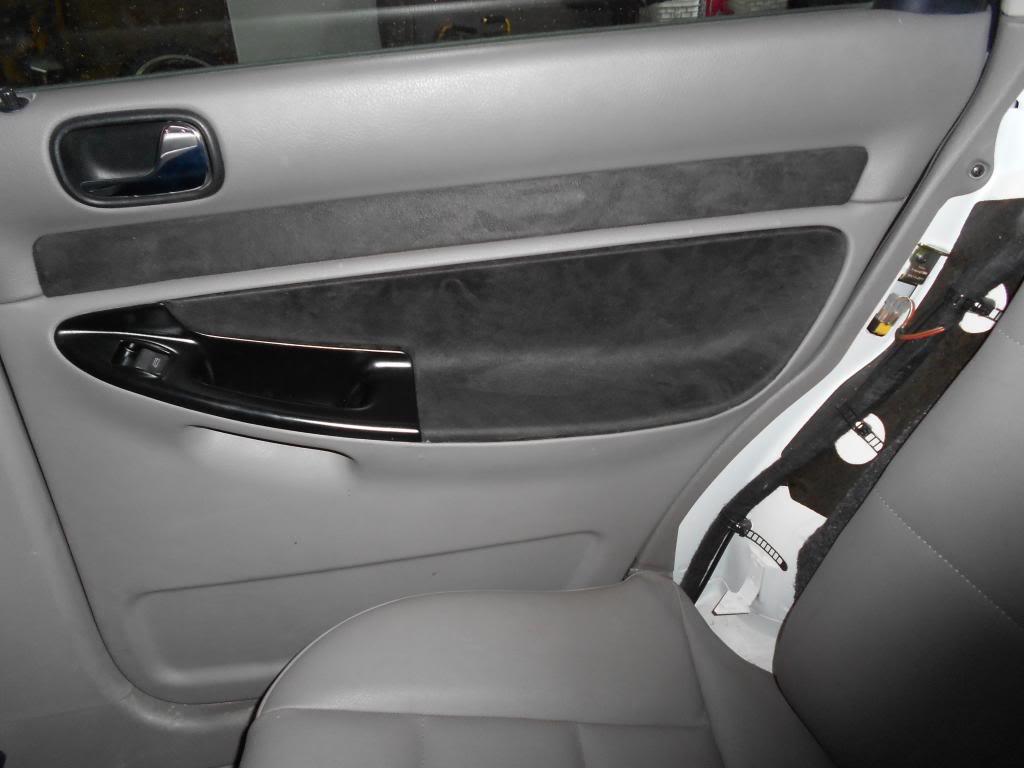
Okay so now you are holding your door insert and probably feel kinda weird. Grab a corner of the fabric and rip it all off. Lot of glue residue will be left so sand it down lightly with some 80 grit or 100 grit. That will promote glue adhesion as well. When it is all smooth and down to bare black plastic grab your material of choice and dry fit a piece to the approximate size. Now spray the insert with the spray and the back of the material with the spray and let dry to a nice tack. 2-3min's usually. Now the worst part. Try and piece by piece lay the fabric down on the insert. I found working my way down from the horn shaped piece to the giant spoon part was the easiest way. Use both hands. One to hold the fabric up while you press and mold the other side to the insert. It can be done hence the pictures. Try not to get any creases or bubbles right in the little pocket part of the insert. Make sure the material gets good adhesion there. Trust me.
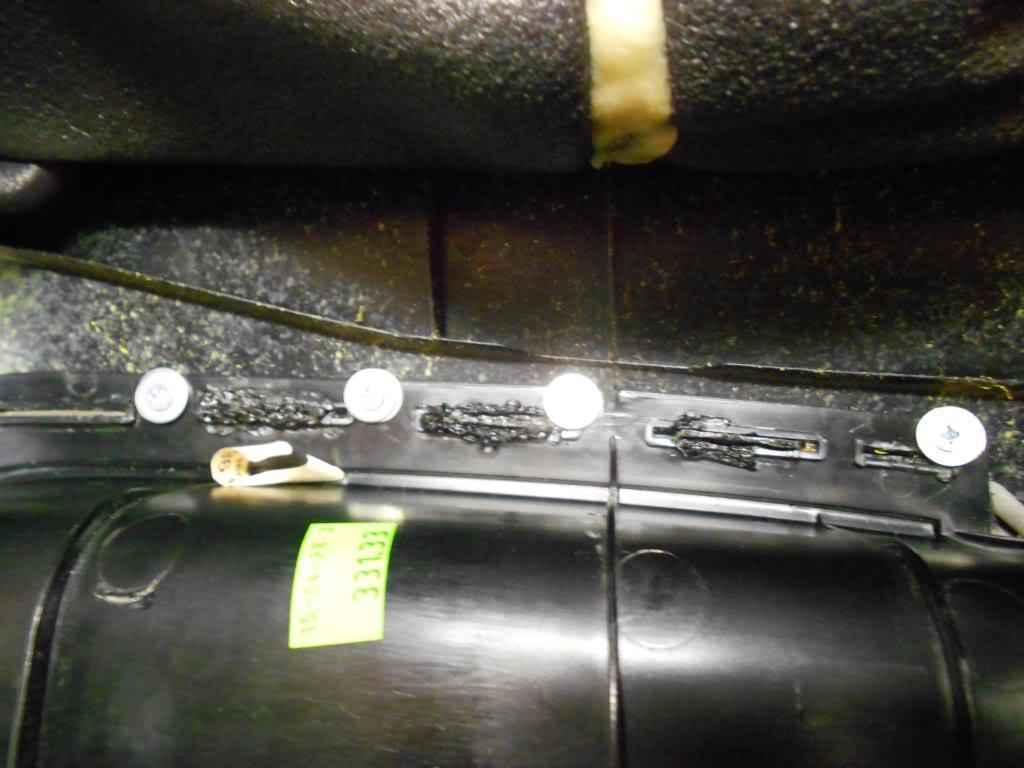
So God willing you have made it this far and have a perfectly retrimmed door insert. Good, now how do you get it back in? Simple. Lots of plastic weld and some melting of plastic if you choose. So now I will say this is where you need to make sure you buy the right stuff. Loctite and some homebrand plastic welds quite simply suck. They will not last. Do not try and use epoxy's. They are to runny and will drip and not work. Permatex plastic weld is the only kind I have found to work worth a s***. You will need two tubes at least per door. So drop the insert back into place and try to line it up as best as possible. Now if you wanted you can melt some of the plastic walls and the insert together to make an even stronger bond. I did. You can see in the pictures the big square sections one after another, I melted those to the insert. Then on the flaps left in between I mixed up some plastic weld and layed it on there. Roughing up the plastic with 80 grit sand paper is not a bad idea before plastic welding. In one of the pictures you can see a clear goo dripping in the middle of those square sections and that is loctite epoxy. It stinks and didn't work, but that is where you put the plastic weld. On the bottom you can see I tried screws with washers. Bad idea. I did not put holes in the door because the screws were the shortest i have ever seen but they put bumps on the inside of the door card. Not noticeable really, but don't use screws. It doesn't work out well.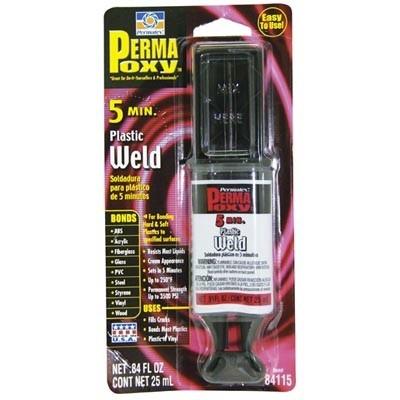
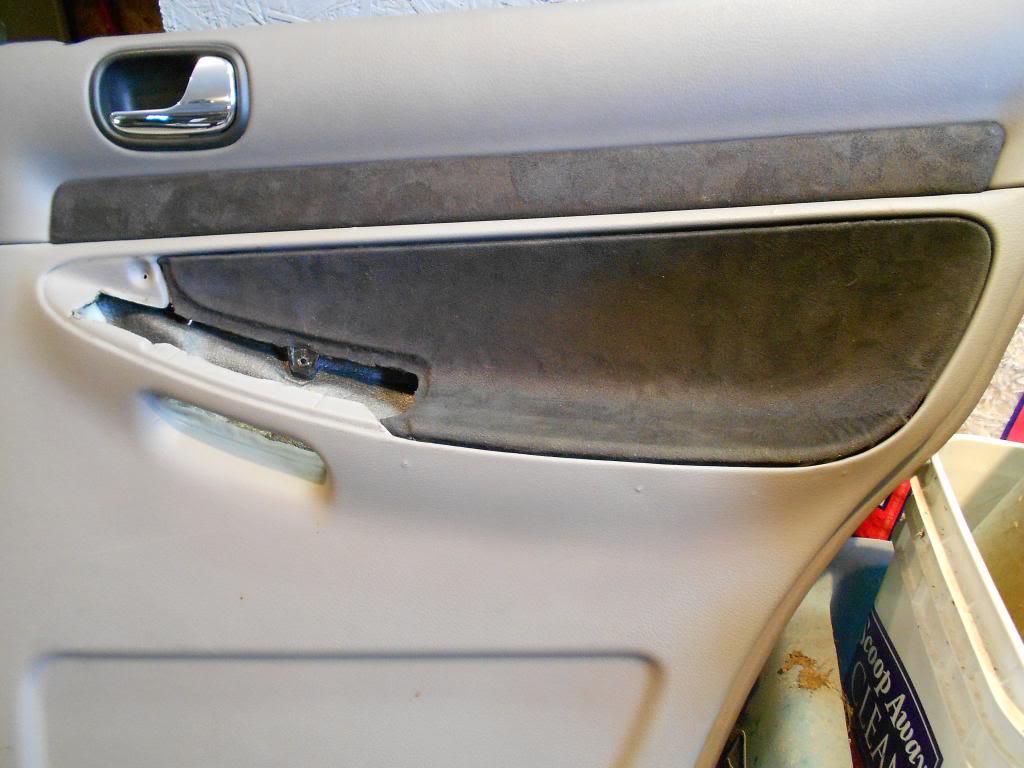
So now you wait 30 mins for the weld to set up and put the door handles back in. In my experience I had some issues with the door handles not sitting flush due to the missing bulk of leather that was once there, so they squeaked and moved. I globbed some plastic weld to the underside and pushed down on the handle and held for twenty min's. Let go and it was rock solid. So anyways your door card is solid again so put it back in and admire the uniqueness your car now has, and how big of a loser you are for putting that much time into making a place where your elbows sit look nice. I hope this helps some people judge how hard this will be and if it is worth their time. Someone had to jump in head first and I learned a bunch of things to do and not do. Thanks ^_^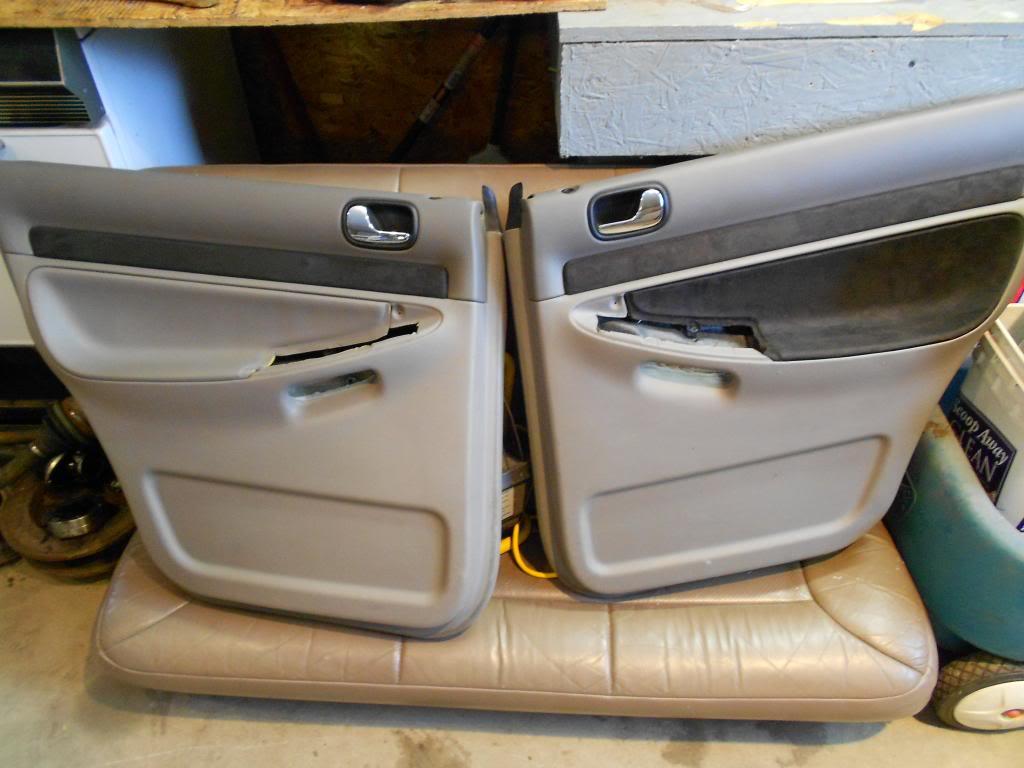
Great DIY
Posted by Diggymart on 4/22/20 @ 8:19:30 PM